Building patio steps comes down to three things: getting your measurements right before you cut anything, prepping a solid base so nothing shifts over time, and choosing materials that can handle years of weather and foot traffic. For most DIYers, pressure-treated lumber is the fastest and most forgiving way to build wood patio steps, while concrete block and natural stone are great alternatives if you want something more permanent. Get the rise and run dialed in first, prep your base properly, and the actual build goes faster than you'd expect.
Building Patio Steps: DIY Wood Stair Guide for Any Patio

Nolan Lennox
7 May 2026

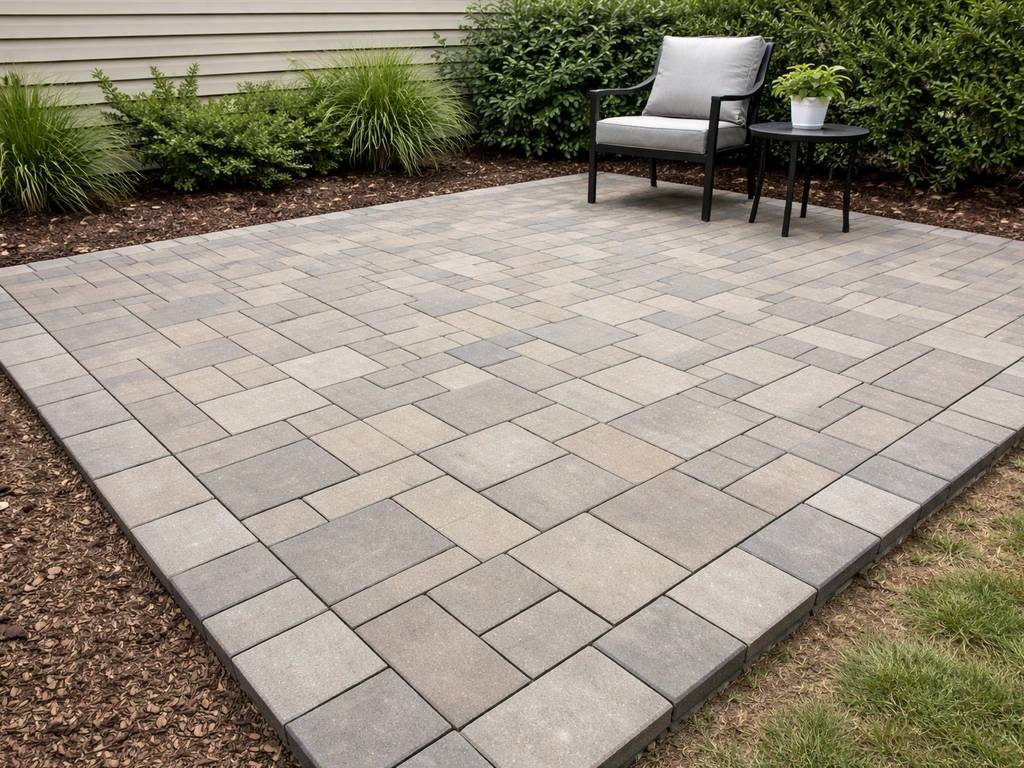
Plan the Patio Layout Before You Think About Steps
Steps aren't something you just tack on after the patio is done. Where they land, how wide they are, and which direction they face all affect how the whole patio functions. Before you pick up a shovel, figure out where people will naturally walk off the patio. Is it from a back door straight out to the yard? Off the side toward a garden? The traffic flow tells you where to put the steps.
Think about step width early too. Narrow steps (under 36 inches) feel cramped and awkward with groceries or a lawn chair in hand. Most residential patios work well with steps that are 48 to 60 inches wide, and going wider than that actually looks better and functions better for outdoor entertaining. Also decide if you want straight steps, a wraparound design, or something more dramatic like curved or semi-circle patio steps. Curved builds add visual impact but require more planning and cutting, so factor that into your skill level and timeline.
One thing people overlook: the steps need to land somewhere flat and stable. The bottom tread should sit on a landing pad, not bare soil or grass. A small concrete pad, compacted gravel base, or patio extension of at least 36 inches in both directions works. This keeps the base from washing out and gives you a clean transition from steps to yard.
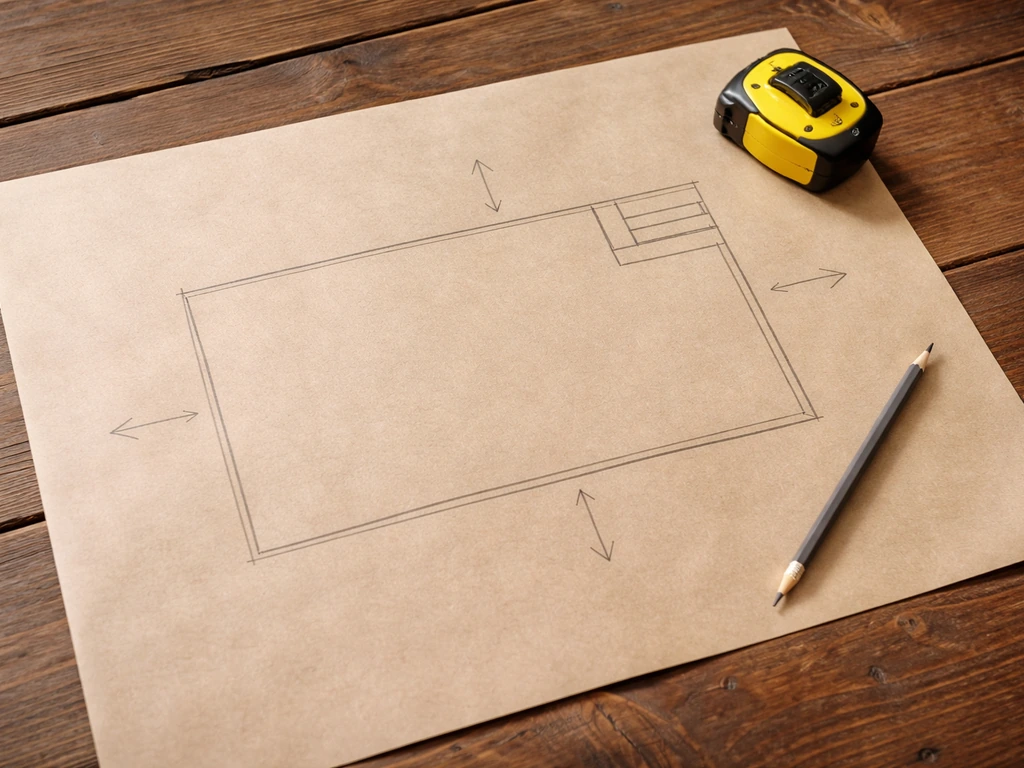
Measure Rise, Run, and Number of Steps
This is where most DIY stair builds go wrong. Spend an extra 20 minutes here and you'll save hours of rework. The two numbers that define every staircase are the rise (vertical height of each step) and the run (horizontal depth of each tread). Under the 2018 International Residential Code, the maximum riser height is 7¾ inches and the minimum tread depth is 10 inches. Under the 2018 IRC, blank" rel="noopener noreferrer">the maximum riser height is 7-3/4 inches, and within any flight the greatest riser height cannot exceed the smallest by more than 3/8 inch. Under the 2018 International Residential Code, the minimum tread depth is 10 inches and the riser height variation within a flight cannot exceed 3/8 inch blank" rel="noopener noreferrer">2018 International Residential Code minimum tread depth of 10 inches and 3/8-inch max riser variation. Those aren't just suggestions. Steps built outside those limits fail inspections and, more importantly, are genuinely harder and more dangerous to use.
Start by measuring the total rise: the vertical distance from the patio surface (or door threshold) down to the ground where the bottom of the steps will land. Use a level and a tape measure. If the ground isn't flat, measure to where your landing pad will be, not to the raw dirt. Once you have the total rise in inches, divide it by your target riser height to get the number of steps. For example, a 28-inch total rise divided by 7 inches gives you exactly 4 steps. If the math doesn't divide evenly, adjust the riser height slightly and recalculate until all risers are equal. The IRC requires that no riser in a flight varies from any other by more than 3/8 of an inch, so consistency matters.
A quick comfort check used by experienced stair builders is the 2R + T formula: two times the riser height plus the tread depth should fall between 24 and 25 inches. A 7-inch rise with an 11-inch tread gives you 25 inches, which is a very comfortable outdoor stair. Once you know your number of steps and tread depth, you can also calculate how far out from the patio the steps will extend (number of treads multiplied by tread depth), which affects your landing pad layout.
| Total Rise | Target Riser | Number of Steps | Tread Depth | Total Horizontal Run |
|---|---|---|---|---|
| 14 inches | 7 inches | 2 | 10 inches | 10 inches (1 tread) |
| 21 inches | 7 inches | 3 | 11 inches | 22 inches |
| 28 inches | 7 inches | 4 | 11 inches | 33 inches |
| 35 inches | 7 inches | 5 | 11 inches | 44 inches |
Base Prep and Leveling for Stair Support
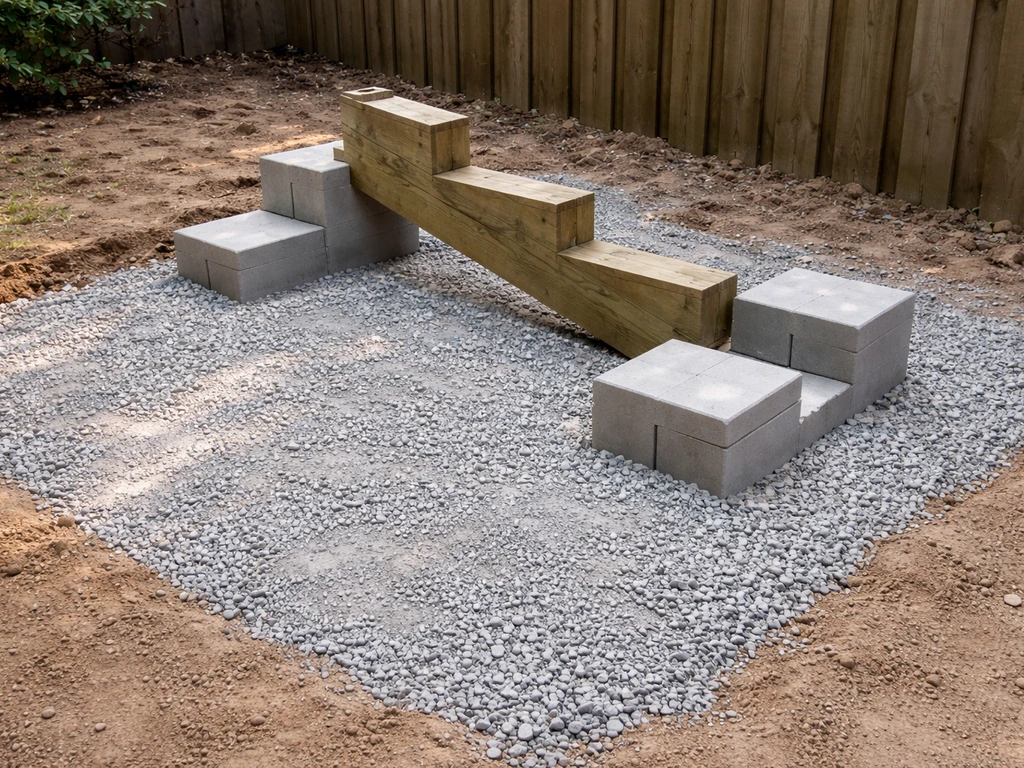
A great-looking set of steps will rock, crack, and pull away from your patio within a season if the base isn't solid. This is especially true in climates with freeze-thaw cycles, where poorly supported bases heave and shift every winter. The base work isn't glamorous but it's what makes the difference between steps that last 20 years and steps you're rebuilding in five.
For wood stair stringers, the bottom of the stringer or a post footing needs to sit on firm, compacted ground or ideally on a concrete pad. Dig out the top layer of organic soil (usually 4 to 6 inches) and replace it with compacted gravel. At minimum, pour a small concrete pad roughly 12 inches thick at the base landing area. In cold climates, that pad should extend below the frost line or be isolated from the ground with a gravel drainage layer to prevent frost heave.
The top of the steps needs solid attachment too. For wood steps attached to a house or ledger board, use structural lag screws or joist hangers rated for exterior use. If the steps attach to a freestanding patio, make sure the patio edge is reinforced and that the stringer connection point won't flex. Check everything with a level before fastening permanently. Any twist or out-of-level condition in the stringer gets amplified at the top tread, so fix it at the base.
Materials and Design Choices
What you build your steps from depends on your budget, the look you want, and how much maintenance you're willing to do. Each material has real trade-offs. Here's how the main options stack up:
| Material | Cost (DIY) | Durability | Maintenance | Best For |
|---|---|---|---|---|
| Pressure-treated lumber | Low ($15–$35/step) | 10–20 years with upkeep | Annual sealing or staining | Budget builds, flexibility, beginners |
| Composite decking | Medium ($40–$80/step) | 25+ years | Low, occasional cleaning | Low-maintenance wood look |
| Concrete block / CMU | Low–Medium | 30+ years | Very low | Permanent, heavy-duty structures |
| Natural stone (flagstone/bluestone) | High ($80–$150+/step) | Decades | Low to moderate | Premium look, natural patios |
| Brick | Medium | 30+ years | Low | Classic look, matches brick patios |
Building Patio Steps with Wood

Wood is where most first-time DIYers start, and for good reason: it's affordable, easy to cut, forgiving of minor measurement adjustments, and you can build a solid set of steps in a weekend. The non-negotiable rule for exterior wood steps is pressure-treated lumber. Use PT lumber rated for ground contact (UC4B or UC4C) at the base and anywhere the wood will sit close to soil or concrete. For stringers, 2x12 PT lumber is the standard. For treads, 5/4x6 or 2x6 PT boards work well and resist warping better than thinner stock.
Avoid using standard dimensional lumber that isn't rated for exterior use, even if it's cheaper or already on hand. Untreated wood in contact with moisture will rot within a few years. If you want the look of cedar or redwood for treads, use it on top of PT stringers and coat it with a penetrating exterior sealer annually. If you want more detail on wood-specific construction, the process for DIY wood patio steps deserves its own deep dive beyond what fits here. If you want more detail on wood-specific construction, the process for diy wood patio steps deserves its own deep dive beyond what fits here.
Shape and Style
Straight steps are the fastest to build and work for most situations. If your patio has a wider landing area or you want a more welcoming entry, a wraparound or semi-circle design adds a lot of visual appeal. Those shapes require more planning and custom cuts, so they're better tackled once you've got a basic straight build under your belt. If you're drawn to a curved or rounded design from the start, it's worth mapping out the full patio steps plans on paper before buying any materials.
How to Frame and Build Patio Steps
Here's the build sequence that works for a standard set of pressure-treated wood patio steps. The same logic applies to other materials, though the attachment and footing details change. Read through the whole sequence before you start cutting.
- Confirm your measurements: total rise, number of steps, riser height, and tread depth. Write them down and double-check before touching a saw.
- Mark your stringers: use a framing square and stair gauges to mark the rise and run on each 2x12 stringer. Mark at least two stringers (one for each side) and a center stringer if the steps are wider than 36 inches.
- Cut the stringers: cut carefully with a circular saw. Stop the blade at the corner of each notch and finish the cut with a handsaw or jigsaw to avoid over-cutting, which weakens the stringer.
- Cut a plumb cut at the top (where it attaches to the patio or ledger) and a level cut at the bottom (where it sits on the pad or footing).
- Install a ledger board or header flush to the patio edge at the correct height. This is what the top of the stringers attach to. Use structural lag screws rated for exterior use.
- Set the bottom of the stringers on the concrete pad or footing. Check that all stringers are plumb and parallel. Use a level and make adjustments now before fastening.
- Fasten the top of the stringers to the ledger with structural hangers or lag bolts. Fasten the bottom to a treated kickboard or anchor brackets on the concrete pad.
- Install riser boards (if using closed risers): attach 2x8 or 2x10 PT boards vertically between each stringer notch using exterior screws or structural nails.
- Install tread boards: lay 5/4x6 or 2x6 PT boards across each step, leaving a 1/8-inch gap between boards for drainage. Overhang the riser by about 1 inch for a standard nosing. Use two exterior deck screws per board per stringer, pre-drilling to prevent splitting.
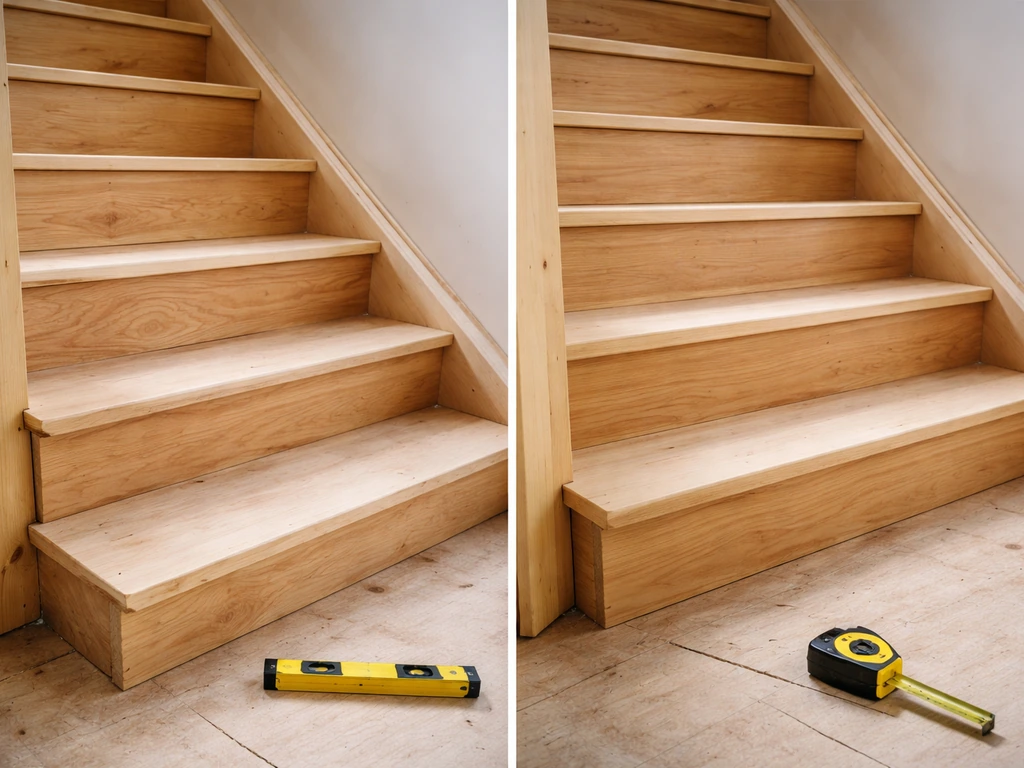
- Check every tread with a level. Sand or shim any high spots before moving on.
- Install a handrail if the steps have four or more risers or if required by your local code. Post height for handrails is typically 34 to 38 inches above the tread nosing.
Three stringers are required when treads are wider than 36 inches. For very wide steps (48 inches or more), add a center stringer every 16 inches across the width to prevent tread flex and bounce. Bounce in treads is annoying and it tells you the structure isn't stiff enough.
Weatherproofing, Safety Checks, and Finishing Touches
Once the frame and treads are in, don't just call it done. A few final steps protect your investment and make the stairs genuinely safe to use year-round. Start with the wood. Even pressure-treated lumber benefits from a water-repellent sealer applied after the wood has dried out (usually 4 to 6 weeks after install for newly treated lumber). Apply a quality penetrating exterior wood sealer or semi-transparent stain to treads and risers. This slows moisture absorption, reduces checking (surface cracks), and extends the life of the wood significantly.
Check drainage. Water should never pool on treads or at the base of the steps. Treads need a slight slope, about 1/8 inch per foot, pitched away from the house. If you notice water sitting after rain, add or regrade the landing pad to direct flow away from the stair base. Standing water is the number one cause of premature rot and frost damage.
For safety, pull on every railing post and check for movement. Any wobble needs to be fixed with additional blocking or better fasteners before anyone uses the steps regularly. Add non-slip tread strips or apply a grit additive to your sealer coat on the tread surface, especially if the steps are in a shaded area that stays damp or in a region that gets icy winters. Check all fasteners: look for any screws that didn't seat flush, any boards that have already started to cup or warp, and any gaps between stringers and treads that shouldn't be there.
- Apply exterior sealer or stain to all wood surfaces after the lumber has cured
- Confirm a 1/8-inch-per-foot drainage slope on every tread
- Test all railing posts and handrails for stability
- Add non-slip tread strips, especially in shaded or wet climates
- Inspect and re-tighten all fasteners after the first full season
- Reapply sealer every 1 to 2 years depending on exposure
Common DIY Mistakes (and How to Dodge Them)
I've seen and made most of these mistakes firsthand. The good news is that every single one of them is avoidable with a little upfront attention.
- Unequal risers: this is the most common mistake and the most dangerous. If one riser is noticeably taller than the others, people trip. Calculate every riser height before you cut and check each one after installation with a tape measure.
- Skipping the base prep: setting stringers directly on soil without a concrete pad or compacted gravel almost guarantees movement within a year or two, especially in cold climates. The extra hour spent on base prep pays back for decades.
- Using the wrong lumber: untreated wood for exterior steps will rot. Use ground-contact-rated pressure-treated lumber for stringers and any member close to moisture or soil.
- Over-cutting stringer notches: stopping your circular saw blade exactly at the corner of each notch is critical. Going past the corner weakens the stringer and can cause it to crack under load. Always finish the corner with a handsaw.
- Skipping the center stringer on wide steps: wide treads with only two stringers flex and bounce. Add center stringers every 16 inches for anything wider than 36 inches.
- Not accounting for tread thickness in rise calculations: your riser height measurement needs to account for the thickness of the tread board sitting on top. If your tread is 1.5 inches thick, your stringer notch rise needs to be 1.5 inches shorter on the bottom step than on the others, or every riser will be taller than planned.
- Ignoring local permit requirements: some municipalities require a permit for steps over a certain height or attached to a house. A quick call to your local building department before you start takes 10 minutes and can save a lot of headaches.
Building patio steps is one of those projects that looks complicated but becomes very manageable once you break it into phases. Get the measurements right, prep the base properly, use the right materials, and follow a logical build sequence. Whether you're doing a simple two-step drop from a ground-level patio or a full five-step flight from a raised deck, the fundamentals are the same. Once you've built one set of steps, the next one goes faster and turns out better. Start with your total rise measurement today and work forward from there.
FAQ
How do I measure total rise if my patio surface is not level (or the doorway threshold is uneven)?
Take measurements at the actual walking points, not just one spot. Measure from the patio tread where people step off down to the landing pad elevation, then verify with a level that the top of the steps will be consistent across the stair width. If one side is higher, adjust the landing pad elevation or plan slight grading so every riser line stays equal.
What should I do if my total rise does not divide evenly into equal risers?
Adjust the riser height in small increments so every riser is the same, and keep the riser within code limits. After recalculating, recheck the 2R + T comfort number (it should land between 24 and 25 inches). If adjusting pushes tread depth too shallow, revise your target tread depth and redo the rise math.
Can I use the same tread depth for all steps if I have a wraparound or curved design?
For curved or wraparound layouts, tread depth measured along the stringer line can vary by location. Use a consistent stringer geometry and templates for each tread, then confirm each tread lands square to the walking surface. If you cannot keep the walking depth consistent, simplify the curve radius or revert to a straight run for best comfort and inspection outcomes.
How much landing area do I need at the bottom, and how do I extend it correctly?
Plan a landing pad that provides a stable, flat surface where the bottom tread fully bears. The easiest approach is to extend the pad at least 36 inches in both directions from the bottom tread footprint, and keep it slightly pitched away from the house. Make sure your drainage path does not route water back toward the stair base.
What is the best way to prevent freeze-thaw heaving under patio steps in cold climates?
Go beyond a simple compacted base. Excavate out organic soil, replace with well-compacted gravel, and support the bottom area with a concrete pad that is isolated from the surrounding ground with drainage gravel. If you cannot go below the frost depth, increase insulation or improve drainage so water does not saturate and lift during freezes.
If my stringer connection point flexes, how can I tell before the final fasteners are installed?
Do a dry fit, then push and pull on the stringer at the top where it will connect, while watching for movement and twist. Use a level to confirm the stringer stays aligned under hand force. If it moves at all during the test, add blocking, reinforce the patio edge, or use different rated hardware before you commit with permanent fastening.
What fasteners should I use for attaching wood steps to a house, and why do they matter outdoors?
Use exterior-rated structural lag screws or joist hangers that are specifically rated for outdoor use. Interior-only screws or uncoated fasteners can corrode quickly in wet climates, which leads to loose treads and a loosening top attachment. If you are attaching to treated lumber, match the fastener compatibility and ensure heads seat flush to avoid water traps.
Do I need a center stringer for steps that are exactly 36 inches wide?
The article calls out extra stringers when width exceeds 36 inches. If you are right at 36 inches, choose based on tread thickness and expected loading. If your treads feel spongy during a dry run, add a center support to reduce bounce rather than waiting for noticeable movement.
What’s the right timing and type of sealer for pressure-treated wood patio steps?
Treat timing as a temperature and moisture window, not just a calendar. Wait until the wood is dry and surface moisture has dropped, then apply a penetrating exterior sealer or semi-transparent stain designed for treated lumber. If you seal too soon, the coating can trap moisture and reduce protection.
How should I handle non-level patios where the stair stringers won’t sit uniformly at the bottom?
Leveling should be done where it helps the base, not by forcing the stringers to twist. Regrade or add the landing pad so the stringer bottom bears flat, then verify each stringer side remains plumb. If you must shim, use treated, solid shims and keep them under load-bearing areas rather than at the tread edges.
What drainage checks should I perform after rain to confirm I won’t get standing water?
After a heavy rain or hose test, inspect three spots: the tread surface (look for puddling), the landing pad (water should exit toward your planned drainage path), and the base gap between steps and patio. If water sits longer than expected, regrade the landing pad and confirm the slight tread pitch is directed away from the house.
Are non-slip strips enough for shaded steps, or should I do something else?
Non-slip strips help, but shaded areas often stay damp and can build algae film. Use a sealer or stain with grit additive on the tread walking surface, then reapply grit or refresh the coating as the traction surface wears. If the treads have slick checking cracks, address them with proper sealing before they worsen.
Next Article
How to Transform a Patio: DIY Plan, Materials, Steps
Plan and DIY steps to transform your patio with the right materials, base, drainage, leveling, and finish for your budge