You can absolutely build a great patio on uneven ground, you just need to decide whether you're going to cut and fill to flatten things out, build up a compacted base to bridge the unevenness, or use a stepped/terraced layout that works with the slope instead of fighting it. Which approach is right depends on how uneven your ground is, what material you're using (pavers, slabs, or poured concrete), and how much digging you're willing to do.
How to Build a Patio on Uneven Ground: DIY Guide

Nolan Lennox
19 May 2026
With the right planning and grading, you can raise a patio area to get a consistent finished surface and proper drainage. Once you've made that call, the rest of the process is methodical: proper excavation, a solid compacted base, correct drainage slope, and careful installation of your surface material. If you want step-by-step guidance on the full process, see how to make a level patio for the right order of work and key measurements.
Planning and site assessment for uneven ground
Before you touch a shovel, walk the whole area and figure out exactly what you're dealing with. Is the ground gently sloping in one direction, or is it a lumpy mess with high and low spots scattered around? These are two very different problems. A consistent slope is actually easier to work with than random humps and depressions.
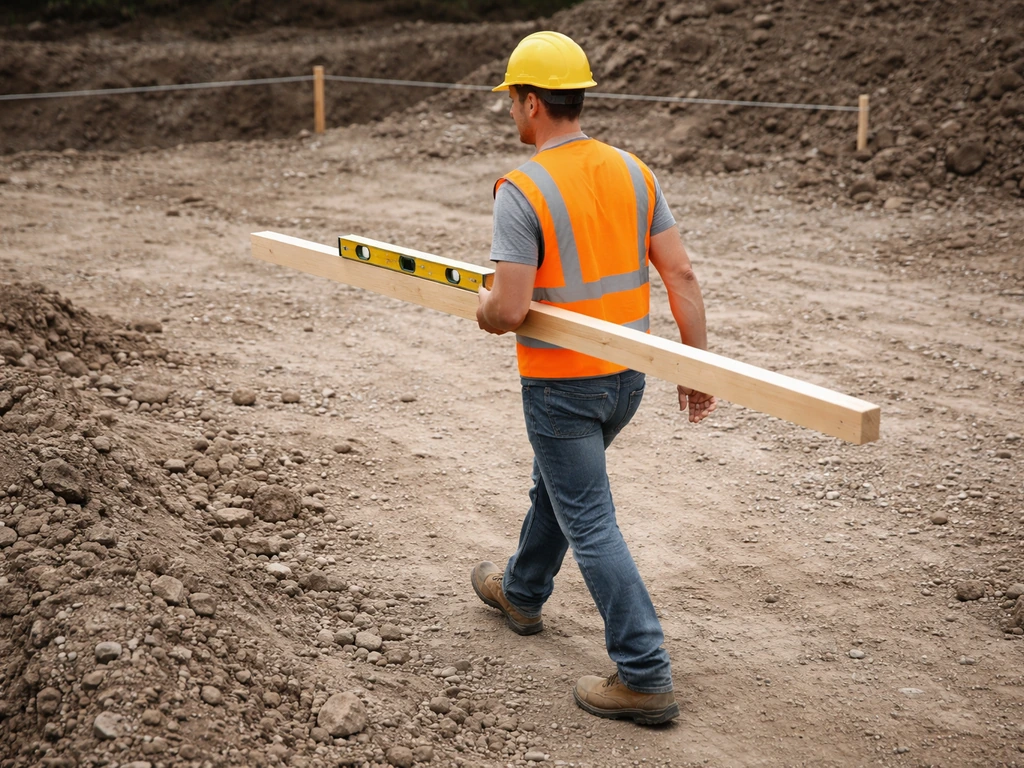
Use a long straight board and a spirit level, or a string line pulled tight between stakes, to map the high and low points. Measure the elevation difference across your planned patio area. A drop of a few inches over 10 feet is very manageable. A drop of 12 or more inches over a short distance is where you start thinking seriously about terracing or retaining walls rather than trying to build one flat surface.
While you're assessing, think hard about drainage. Water needs somewhere to go, and the worst thing you can build is a patio that funnels rainwater toward your house foundation. Plan for a slope away from the house of at least 1/8 inch per foot, with 1/4 inch per foot being the better target. That's not much, on a 12-foot-deep patio, 1/4-inch-per-foot means the far edge is just 3 inches lower than the house-side edge. Work this slope into your plan from the start, not as an afterthought.
Also check what's below the surface. Probe the soil with a steel rod in several spots. Soft, spongy areas mean poor subgrade that will need extra attention, either digging out and replacing with compactable fill, or going deeper with your base. Clay-heavy soils hold water and shift more with freeze-thaw cycles, which means you need a thicker base than you might expect. Sandy or gravelly soil drains well and is more forgiving.
Cut-and-fill, build up, or terrace: picking your strategy
Cut-and-fill means you remove soil from the high spots and move it to fill in the low spots, creating a roughly level subgrade. It's the most labor-intensive option but produces the most stable result because you're working with undisturbed or well-compacted native soil throughout. This works best when elevation differences are moderate, say, under 8 to 10 inches across the patio footprint.
Building up means you leave the existing ground mostly as-is and compensate with a thicker compacted base layer in the low spots. When your patio site needs height in low areas, learning how to build up ground correctly with a compacted base can prevent future settling Building up. This is faster but requires careful compaction in layers (lifts of about 2 to 3 inches at a time) so the base doesn't settle unevenly later. If one corner of your patio needs 3 inches of base and another corner needs 10 inches, you're going to have uneven compaction and potential settling problems unless you're very diligent.
Terracing means splitting a steeply sloping yard into two or more level platforms connected by steps or a retaining wall. It's more work upfront and usually requires some basic retaining wall construction, but it's the right call for slopes steeper than about 1 foot of drop per 4 feet of run. A well-built terraced patio also looks intentional and designed rather than like a compromise.
Choosing the right patio system and materials

Not every material handles uneven ground the same way. Your leveling strategy and the amount of slope you're working with should influence which surface you pick. Here's how the main options stack up for uneven-ground situations.
| Material | Best for | Uneven ground handling | DIY difficulty | Relative cost |
|---|---|---|---|---|
| Concrete pavers / patio stones | Moderate slopes, irregular shapes | Excellent — individual units can be set and re-leveled | Moderate | Mid-range |
| Large patio slabs (flagstone or concrete) | Gentle to moderate slopes | Good — each slab set individually in mortar or compacted sand | Moderate to high | Mid to high |
| Poured concrete | Gentle slopes with consistent grade | Requires precise forming and base work; harder on uneven ground | High | Mid-range (labor-heavy) |
| Gravel / decomposed granite | Steeply sloping or informal areas | Very flexible — conforms to grade easily | Low | Low |
For most DIYers dealing with genuinely uneven ground, interlocking concrete pavers or individual patio stones are the most forgiving choice. Because you're setting each unit independently, you can adjust height as you go. Poured concrete is the least forgiving, if your forms aren't right and your base isn't dead-on level, you end up with a slab that's permanently wrong. If you're set on concrete, the ground prep work needs to be especially thorough.
Base prep and leveling methods
This is where the real work happens, and it's the step most DIYers underestimate. A shaky, poorly compacted base is the root cause of almost every patio problem: rocking pavers, cracked slabs, water pooling in low spots. Get this right and the rest of the build is straightforward. A well-planned compacted base and correct slope are the key steps in how to make ground level for patio surfaces. If you already know the overall patio height and slope, focus next on how to even out the surface with proper base prep, compaction, and bedding sand how to even ground for patio.
Excavation depth
For a paver or patio stone installation, excavate to a depth that allows for 4 to 6 inches of compacted crushed stone base plus about 1 inch of bedding sand plus the thickness of your pavers. A standard concrete paver is about 2 3/8 inches (60mm) thick, so you're typically digging 7 to 9 inches below your desired finished surface level. On uneven ground, your excavation depth will vary across the site, that's normal. The goal is a consistent finished surface height, which means digging deeper in the high spots.
Excavate an extra 6 to 12 inches beyond your planned patio edge on all sides. This gives you working room for edge restraints and compaction equipment, and it makes it much easier to get solid compaction right to the edges rather than leaving a soft zone that'll cause edge pavers to shift later.
Subgrade prep
Once excavated, compact the exposed subgrade soil with a plate compactor. If you find soft or spongy spots, dig them out and fill with compactable gravel rather than just covering them with base material. Any soft zones in the subgrade will telegraph right through to the surface over time. On clay soils or areas with poor drainage, consider laying a geotextile fabric directly on the subgrade before adding your base, this separates the soil from the aggregate and prevents fine particles from migrating up into your base layer over time.
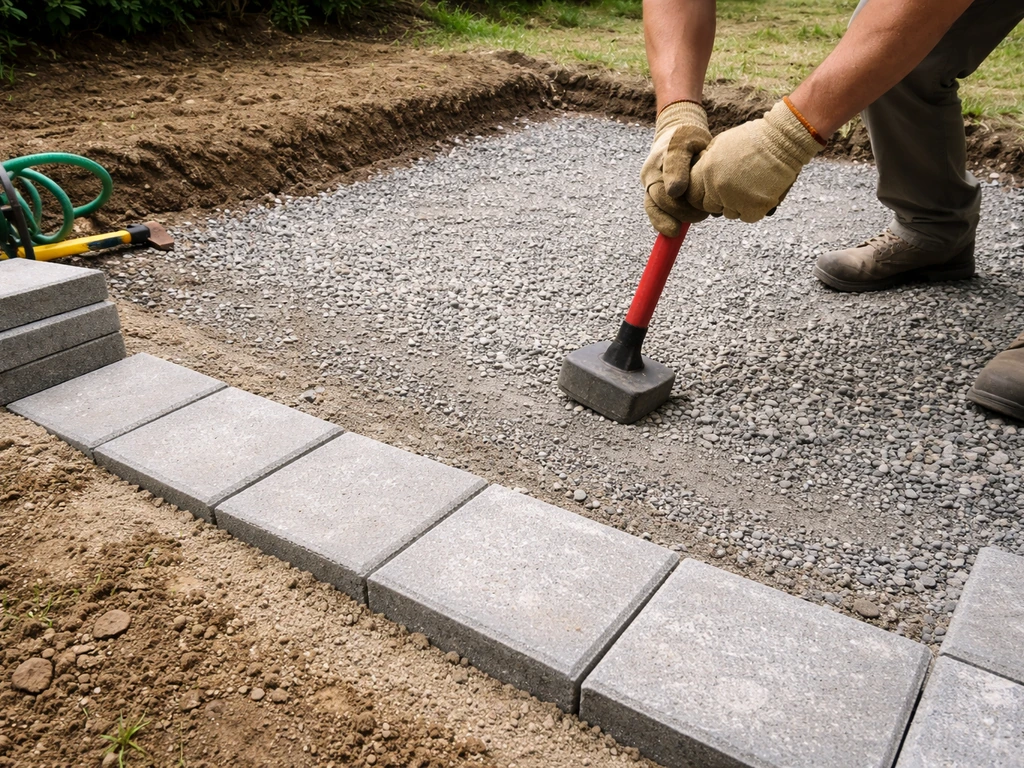
Building the compacted base
Use crushed stone (also called processed gravel or road base) for your sub-base, not rounded pea gravel. Crushed stone compacts into an interlocked, stable mass. Rounded stone doesn't. Spread and compact in lifts of about 2 to 3 inches at a time, don't dump the whole 6 inches in and try to compact it all at once. Each lift gets a pass with the plate compactor before you add the next one. This is tedious but it's the only way to get genuinely dense, stable base material. Where you have deeper low spots that need more base material to reach your target grade, be especially thorough with compaction in those areas.
Keep checking your base surface with a level and string lines as you build up each lift. You want the finished base to have that same 1/8 to 1/4-inch-per-foot drainage slope built in. If you get the base slope right, the finished surface slope takes care of itself.
Laying patio stones and pavers on uneven ground
Once your compacted base is solid and correctly sloped, add your bedding sand layer. Use coarse, washed concrete sand, not fine beach sand or polymeric sand at this stage. Spread it across the compacted base and screed it to a consistent 1 to 1.5 inches (25 to 40mm) thick. The key rule here: do not use thick bedding sand to correct low spots or level out a bad base. That's a common mistake and it causes uneven settling. If you have depressions in your compacted base, fix them with base material and compact again before you ever touch the sand.
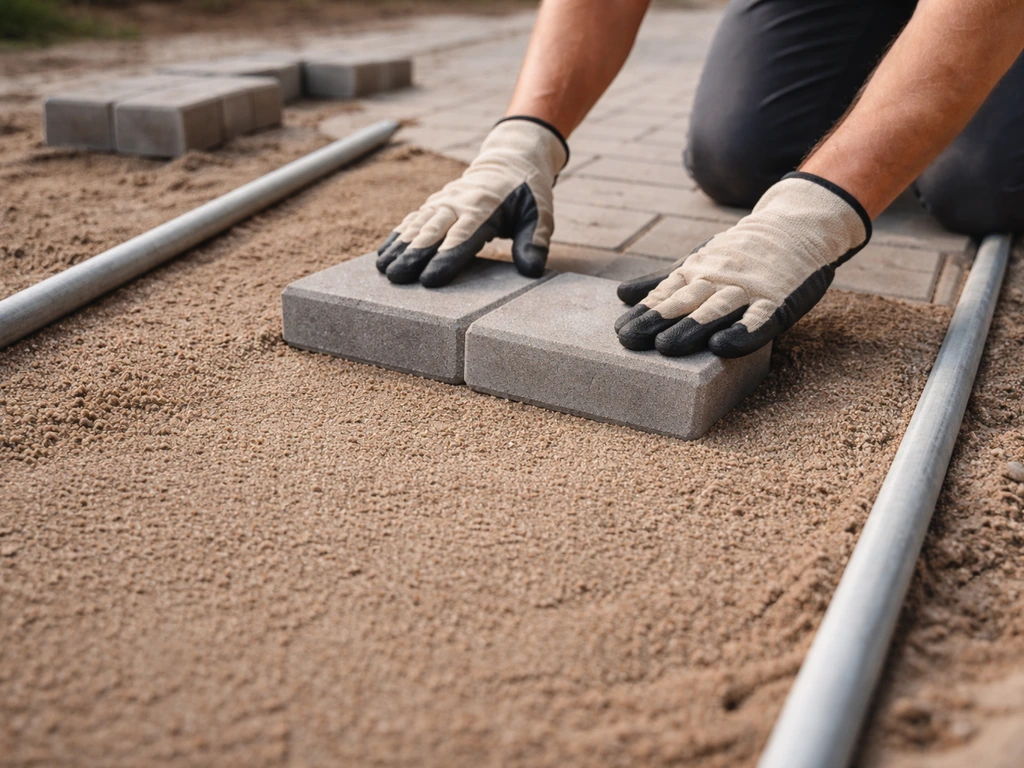
To screed the sand, set two metal pipes or screed rails on top of your base at the correct height (base depth plus 1 inch for the sand), parallel to each other about 5 to 6 feet apart. Drag a straight 2x4 or screed board across them to pull the sand to a consistent, smooth level. Then carefully remove the rails and fill those channels with sand by hand. Don't walk on screeded sand, work from the pavers you've already laid, moving backward as you go.
Setting the pavers
Start at a fixed edge, usually the house wall or a defined border, and work outward. Set each paver or patio stone by pressing it firmly into the sand with hand pressure or a rubber mallet. Check frequently with a level, both within individual units and across several at once. On a sloping patio, you're checking for consistent slope in the drainage direction and level (no tipping) in the perpendicular direction. Adjust individual stones by lifting them and adding or removing a small amount of sand beneath, but keep that bedding layer close to 1 inch, not wildly variable.
Once all pavers are down, install your edge restraints, plastic or metal paver edging pinned with spikes into the base. This is what keeps the whole system from spreading over time. Then run a plate compactor over the surface (use a rubber or foam pad on the compactor plate to protect the paver surface). This seats the pavers firmly into the bedding sand.
Jointing
Sweep polymeric joint sand across the surface and work it into the joints with a broom, then compact again. The same joint-sanding approach, where joint sand is swept into the joints with a broom and then compacted to help the sand settle, is used to reduce voids that can lead to movement sweep polymeric joint sand across the surface and work it into the joints with a broom. Repeat this a few times until the joints are full. Polymeric sand binds slightly when wet, which helps prevent ants, weeds, and joint sand washing out. After the final compaction pass, do one more sweep to fill any remaining voids, then lightly mist the surface to activate the polymeric binder.
Installing patio slabs on uneven ground
Large concrete or natural stone slabs, think 12x24-inch or larger pieces, are set a bit differently than interlocking pavers. Because of their size and weight, minor variations in the bedding layer cause visible rocking and an uneven surface. The base prep is the same (4 to 6 inches of compacted crushed stone), but the setting method needs more care.
Setting method: sand-set vs. mortar-set
For sand-set slabs, the process is similar to pavers, screed your bedding sand to 1 to 1.5 inches, set the slab, and check level in both directions. The challenge with large slabs is that any high point in the sand layer causes rocking. Use a straightedge under the slab to check for wobble before moving on. If a slab rocks, lift it, adjust the sand, and reset. Don't just pound it down, that creates a weak point.
Mortar-set slabs give you more control and a more stable result on uneven ground. Apply a full or five-spot mortar bed (one blob at each corner and one in the center) to the base, set the slab, and adjust with a rubber mallet while checking with a level. Mortar allows you to accommodate slight variations in slab thickness, which natural flagstone especially tends to have. Leave appropriate joint gaps, typically 3/8 to 1/2 inch for formal slabs or irregular gaps for natural flagstone.
Jointing slabs
For sand-set slabs, polymeric sand works well for joints under about 1 inch wide. For wider or more irregular joints (common with flagstone), a dry-mixed mortar swept into joints and misted, or a proper sanded mortar mix applied by hand, gives a more durable result. For mortar-set slabs, fill joints with a matching mortar mix and tool the joints smooth. Keep mortar off the slab faces and clean up smears before they cure.
Building a concrete patio on uneven ground
Poured concrete on uneven ground requires the most precise prep work of any patio type, because once it's poured you can't adjust anything. The base needs to be right, the forms need to be right, and the slope needs to be locked in before you mix a single bag. That said, concrete is very achievable as a DIY project if you take it step by step.
Excavation and base for concrete
Excavate to allow for 4 inches of compacted gravel base plus the slab thickness, typically 4 inches for a residential patio slab, or 6 inches if you expect heavy loads like vehicles. On uneven ground, use the cut-and-fill approach to create a consistent subgrade depth before you add your base material. Like with pavers, compact the subgrade first, then build up your crushed stone base in 2 to 3 inch lifts, compacting each one. The finished base surface should be smooth, firm, and already sloped at 1/4 inch per foot away from the house.
Building and setting forms
Forms are where you lock in your slope and finished height. Use 2x4 or 2x6 lumber (matching your slab thickness) staked firmly every 2 to 3 feet. Set the form board closest to the house at your desired finished height. Set your target finished height first, so you can work the patio down or up to the level you want how to raise patio level.
Set the outer form boards lower, using your level and a story pole to nail in exactly the right drop for your target slope. A 1/4-inch-per-foot slope on a 12-foot-deep patio means the outer form board sits 3 inches lower than the inner form board. Drive enough stakes that the forms don't flex when you're screeding the wet concrete.
Reinforcement and vapor barrier
For a residential patio, #3 or #4 rebar on 18-inch centers in both directions is standard. Alternatively, use 6x6 welded wire mesh. Support the rebar or mesh on small plastic chairs so it sits in the middle of the slab depth, not resting on the base. On ground that's been recently filled or where moisture is a concern, lay a 10-mil polyethylene vapor barrier directly on the compacted base before placing reinforcement. This reduces moisture migration through the slab and is a good practice even on patios.
Pouring, finishing, and slope
Pour concrete and screed it off the tops of your forms, working from the back toward the front in manageable sections. Screeding removes the slope problem from the equation because the form tops are already set at the right heights, you're just pulling the concrete flush with them. Float and finish the surface as you normally would, then cut control joints at intervals of roughly 1.5 times the slab thickness in feet, so about 6 feet apart for a 4-inch slab. This gives the inevitable shrinkage cracks somewhere to happen in a controlled way. Cure the slab by keeping it moist for at least 7 days, covered with plastic sheeting or wet burlap.
Finishing touches: edging, drainage, and troubleshooting
Edge restraints and borders
For paver and stone patios, permanent edge restraints are non-negotiable. Plastic paver edging pinned with 10-inch spikes every 12 inches is the standard approach. Without it, pavers at the edges gradually spread and the whole surface starts to fail from the outside in. On uneven or sloped sites, edge restraints on the downhill side are under more pressure, so spike them more frequently, every 8 inches rather than 12. For a more finished look, a soldier course of pavers set on end, or a concrete border poured around the perimeter, both make excellent permanent edges.
Drainage solutions
If your site has significant slope, you may need a channel drain or French drain at the low edge of the patio to collect and redirect water rather than letting it sheet off onto lawn or landscaping. A channel drain embedded in the patio surface at the outer edge, connected to a perforated drain pipe routed away from the house, handles a lot of runoff very effectively. For especially wet subgrade conditions, a perforated pipe wrapped in geotextile fabric and laid in gravel at the base of your excavation before you build up can also help keep the base dry and stable.
Common problems and how to fix them
- Rocking pavers: caused by uneven bedding sand or a soft spot in the base. Lift the affected pavers, check and fix the base, re-screed the sand to a consistent 1 to 1.5 inches, and reset.
- Water pooling on the surface: the drainage slope isn't adequate or a section of the patio has settled lower than the surrounding area. For pavers, lift and re-level the low section. For concrete, the fix is grinding a shallow channel or adding a surface drain — or living with it and addressing it with landscaping.
- Joint sand washing out: usually means the slope is too steep, joints are too wide, or you used the wrong sand type. Switch to polymeric sand and re-fill joints; it holds much better than plain masonry sand.
- Slab or paver settling unevenly: almost always points to inconsistent base compaction or a soft subgrade spot that wasn't caught earlier. Fix the underlying issue before resetting surface material, or it'll just happen again.
- Frost heave (in cold climates): pavers that lift and shift each spring mean your base doesn't extend below the frost line or your drainage is poor enough that water is freezing in the base layer. Improving drainage is usually the more practical fix for residential patios.
One honest word of advice: if your ground has more than about 18 inches of elevation change across the patio area, or if it slopes toward the house rather than away, seriously consider getting a grading contractor in to do the initial cut-and-fill before you start your patio build. If you need to create the right finished patio level on uneven ground, follow a cut-and-fill, build-up, or terracing plan based on your elevation differences. That one investment saves you enormous headaches and protects the much larger investment you're about to make in materials and time. On more manageable slopes, though, you've got everything you need to tackle this yourself, it's mostly about patience with the base prep and not rushing to get to the fun part of laying the surface material.
FAQ
Do I need to completely level the ground before building a patio on uneven ground, or can I rely on the base and bedding?
Not always. If your plan is to use pavers or sand-set slabs, the key is getting a firm, correctly sloped compacted base, then keeping the bedding sand thickness close to the target (about 1 to 1.5 inches). You can have small undulations in the final pavers as long as the base is dense and transitions smoothly. For poured concrete, however, even minor base irregularities can telegraph as visible high or low spots because you cannot adjust after pouring.
What’s the most common mistake when leveling a patio on uneven ground, and how do I avoid it?
One of the biggest red flags is a base that is uneven before you add sand. If you sweep in thick bedding sand to chase low areas, the sand can compress unevenly later, causing rocking or dips. The fix is to correct depressions in the compacted crushed stone/base first, compact again, then screed bedding sand to a consistent thickness.
How do I confirm I’m getting the right drainage slope while installing pavers or slabs?
For pavers, once you have compacted base and a properly sloped bedding layer, the drainage direction is set by that slope. But it still matters where you place the patio units, because you should maintain consistent slope in the drainage direction and keep the units level perpendicular to it. Use string lines or a level across multiple pavers as you go, not just unit-by-unit checks.
Does slope change how I should install edge restraints for pavers?
Yes, especially on sloped sites. If the ground is higher at one side and you skip extra edge attention there, that side experiences more lateral pressure and can shift first. A practical approach is to spike edge restraints closer together on the downhill edge (more frequent spikes than the other edges) and make sure the compacted base extends fully to the edge with no soft perimeter zone.
At what point should I switch from cut-and-fill to terracing or retaining walls when learning how to build a patio on uneven ground?
If you have a few inches of height difference, “cut-and-fill” can work well, but you need a stable plan for where the displaced soil goes and how it will be compacted. For rough rule-of-thumb planning, keep cut-and-fill in the moderate range (around under 8 to 10 inches across the patio footprint). Beyond that, terracing or retaining solutions are usually more stable and easier to build correctly.
What compaction method works best on uneven ground, and how thick should each fill layer be?
Use compaction in layers. For both crushed stone base and any build-up fill, compact in lifts around 2 to 3 inches. If you dump thicker layers and try to compact them at once, you can end up with a base that looks solid on top but settles later when traffic and water load it.
Can polymeric joint sand or extra bedding sand fix low spots on an uneven patio site?
You generally should not rely on polymeric sand to correct unevenness in bedding. Polymeric sand is for joint filling after the pavers are seated. If you find depressions after screeding, go back and fix the base, then rescreed bedding sand at the target thickness before setting any units.
When should I add geotextile fabric or a vapor barrier for a patio on uneven ground?
Yes. On very wet subgrade, a geotextile layer on clay-heavy or drainage-poor soils helps limit fine particles migrating up into the base. For poured concrete with moisture concerns or recently filled ground, consider a vapor barrier directly on the compacted base before placing reinforcement to reduce moisture migration through the slab.
What joint material should I use for slabs on uneven ground, and when does polymeric sand stop working well?
It depends on joint width and slab type. For sand-set slabs, polymeric joint sand is typically suitable for joints under about 1 inch wide. For wider or irregular joints like many flagstone layouts, dry-mixed mortar or a sanded mortar mix (plus proper joint tooling and cleanup) is usually more durable than polymeric sand alone.
How can I prevent rocking when setting large patio slabs on uneven ground?
For large-format slabs, the bedding sand thickness needs to be consistent enough that a slab does not “rock.” A practical check is to use a straightedge under the slab before final placement, if you can see wobble, lift, adjust sand, and reset. Also avoid pounding down, because that can create a localized weak spot under the slab.
How do I decide the correct finished height on a sloped patio so it still drains away from the house?
Don’t “freehand” the final patio height. Set your target finished height first (often tied to a doorway threshold or patio rail), then drive form boards (for concrete) or set a consistent reference line (for pavers) from that height. On sloped sites, using that reference early prevents you from accidentally creating too much drop or not enough drainage away from the house.
Do I need a drainage system for an uneven patio, and what signs indicate I do?
Yes, a drain can be the difference between a patio that stays stable and one that gradually fails. If water is likely to concentrate at the low edge (common on uneven ground), installing a channel drain or French drain connected to a routed discharge can manage runoff instead of letting it sheet onto lawn and landscaping.
When should I hire a grading contractor instead of doing the cut-and-fill myself for uneven ground patios?
A good way to decide is to measure elevation change across the whole patio footprint and check slope direction. If you’re dealing with roughly 18 inches or more of elevation difference across the patio area, or if the land slopes toward the house, professional cut-and-fill grading is often worth it. It reduces the risk of building on poorly compacted fill or creating drainage problems you cannot easily fix after the patio is installed.
Next Article
How to Upgrade Patio: DIY Diagnosis, Prep, Materials, Steps
Learn how to upgrade a patio with DIY diagnosis, drainage prep, material choices, and step-by-step refresh, replace, or