Building a raised patio means constructing a level outdoor surface that sits elevated above the natural ground, either as a deck-style platform on posts and beams, or as a paver/stone surface on a built-up compacted base. Either way, the core process is the same: plan the layout, prep the site, build a solid and level foundation, install your surface material, then finish the edges, drainage, and any stairs or railings. You can then decide whether you want to keep the look of a patio surface or add raised bed sections to grow plants right on the patio can you put a raised bed on a patio. It's a project most capable DIYers can tackle in a weekend or two, and the payoff, a flat, usable outdoor space on a sloped or uneven yard, is absolutely worth the effort.
How to Build a Raised Patio: Step-by-Step DIY Guide

Planning and measuring your raised patio layout
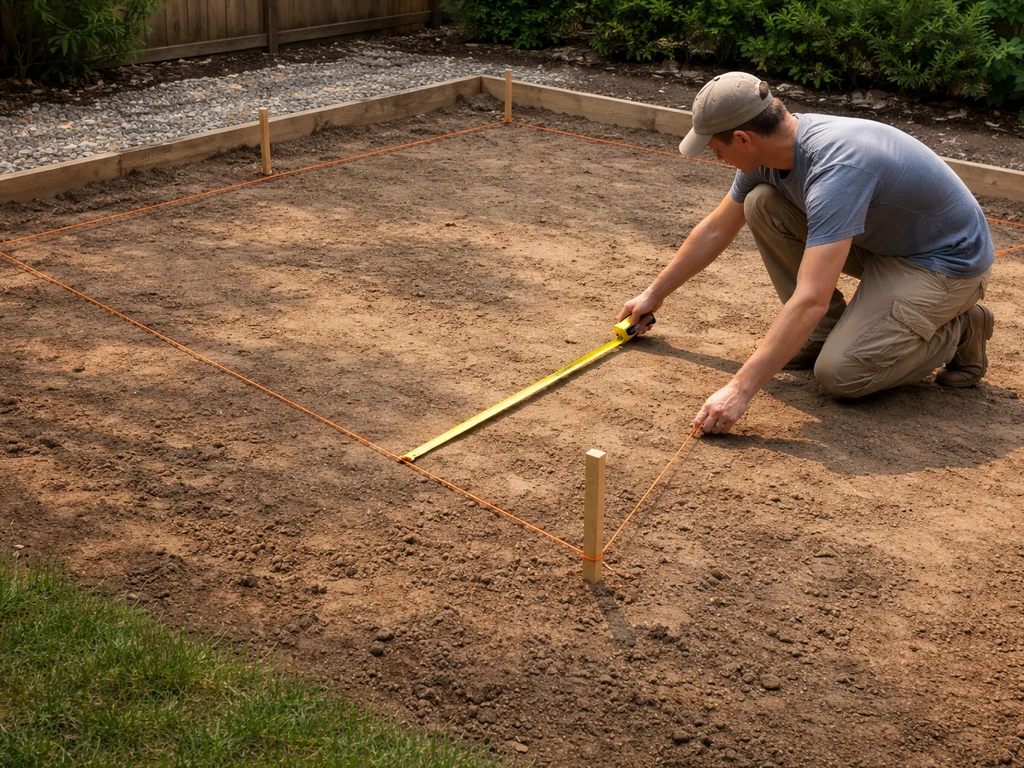
Good planning is where raised patios succeed or fail. If your goal is how to make a patio bed, the raised layout and base preparation steps here will set you up for a stable, long-lasting build raised patio. Before you buy a single bag of gravel or one board, spend real time on your layout. Start by deciding the footprint: how large does the space need to be? A comfortable seating area for four people typically needs at least 12 x 12 feet, while a full outdoor dining setup with room to move comfortably runs closer to 16 x 20 feet. Measure the area on your lawn with stakes and string lines first so you can physically walk around it and feel whether the scale works.
Next, figure out how high you need to go. Walk the perimeter of your planned patio area and measure the grade change from the highest corner to the lowest. That number tells you how much elevation you need to build up. If you're raising the surface more than 12 to 18 inches above grade, a framed deck-style platform on posts is almost always the smarter structural approach. how to build a floating patio. For smaller lifts, say, 4 to 12 inches, a compacted gravel base with a paver, brick, or stone surface is usually more cost-effective and simpler to build.
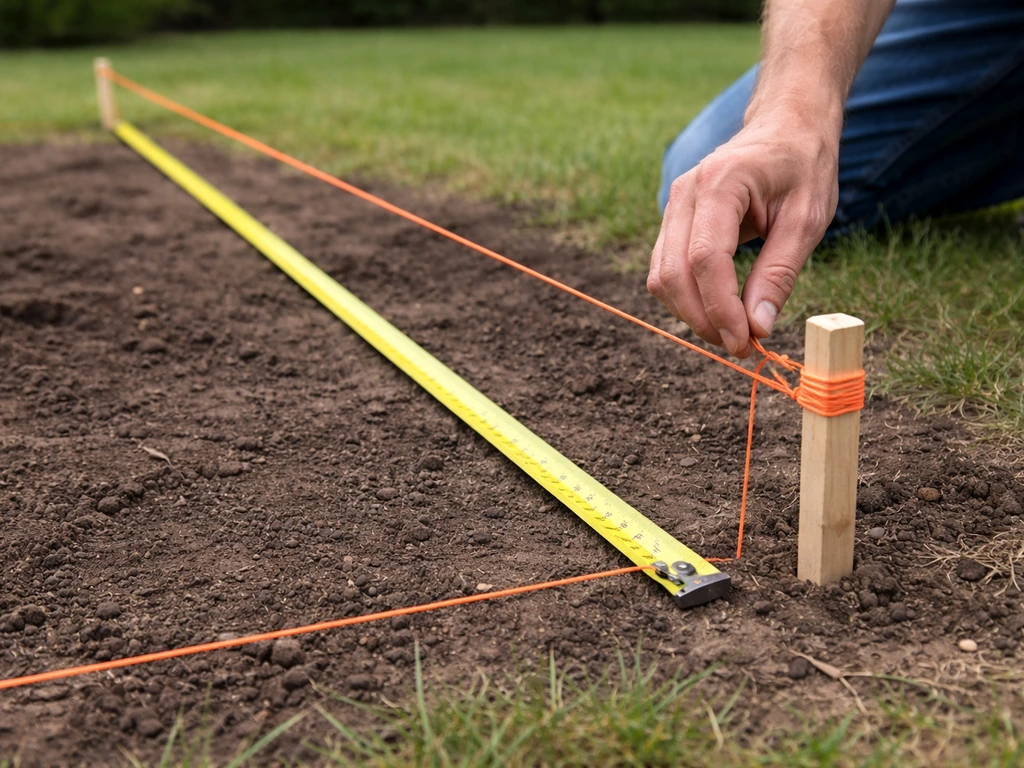
Use batter boards (pairs of stakes set back from each corner with horizontal boards and string lines) to establish your layout lines accurately. A 3-4-5 triangle check, measuring 3 feet along one string and 4 feet along the perpendicular string, and confirming the diagonal is exactly 5 feet, keeps your corners square. This step takes maybe an hour but saves enormous frustration later. Mark footing or edge restraint locations along these lines before you dig anything.
- Measure the total grade change across the patio footprint — this determines your build approach
- Decide on your patio size with stakes and string before committing to a design
- Use batter boards and string lines to establish a square, accurate layout
- Check for underground utilities (call 811 before you dig — seriously, every time)
- Check local permit requirements: most municipalities require permits for structures over a certain height or square footage
Choosing the right raised-patio design and materials
There are two fundamentally different ways to build a raised patio, and which one you pick changes almost everything downstream. The first is a framed platform, essentially a low deck built on posts, beams, and joists, then surfaced with decking boards (wood or composite). The second is a built-up base, compacting layers of gravel and sand to raise the grade, then laying pavers, brick, or stone on top. Both work well; the right choice depends on your elevation change, your budget, and the look you want.
| Approach | Best For | Elevation Range | Common Surfaces | Typical DIY Cost (materials) |
|---|---|---|---|---|
| Framed platform (deck-style) | Larger elevation changes, sloped yards, deck aesthetic | 18 inches to several feet | Composite or pressure-treated wood boards | $25–$45 per sq ft |
| Built-up compacted base | Moderate lifts, flat or gently sloped sites, paver/stone look | 4–12 inches | Pavers, brick, natural stone | $10–$25 per sq ft |
| Sleeper/timber base | Low lifts, rustic look, simpler build | 4–8 inches | Decking boards, pavers | $12–$30 per sq ft |
For most homeowners on a budget who want a paver or stone finish, the built-up base method wins on cost and simplicity. If you want the look of a traditional deck or you're dealing with a significant slope, the framed platform approach is more appropriate, and worth the extra complexity. There's also a hybrid option using landscape sleepers (timber or concrete) to frame a raised border and fill the interior, which is a great middle-ground method (the sleeper approach has its own detailed process worth exploring separately). If you want a raised border using sleepers, learn the full sleeper approach step by step, including how to size and anchor the timbers for a stable result landscape sleepers.
For surface materials, composite decking is my top recommendation for a framed platform, it handles moisture, doesn't rot, and needs almost no maintenance after install. Pressure-treated lumber is cheaper upfront but needs regular sealing. For a paver surface, concrete pavers offer the best combination of durability and cost. Natural stone looks incredible but costs more and requires more careful base work to prevent cracking.
Site prep and base foundation for a raised patio
This is the step most DIYers underestimate, and it's the one that causes the most problems down the road. A raised patio that settles, shifts, or tips almost always traces back to a rushed base. Spend the time here and everything else gets easier. A frost line is the depth at which soil freezes, and building codes use frost depth to reduce the risk of frost heave that can damage foundations blank" rel="noopener noreferrer">frost heave risks. A sunken patio follows a similar build logic, but you excavate below grade and manage water and drainage carefully so the lower level stays stable and dry raised patio.
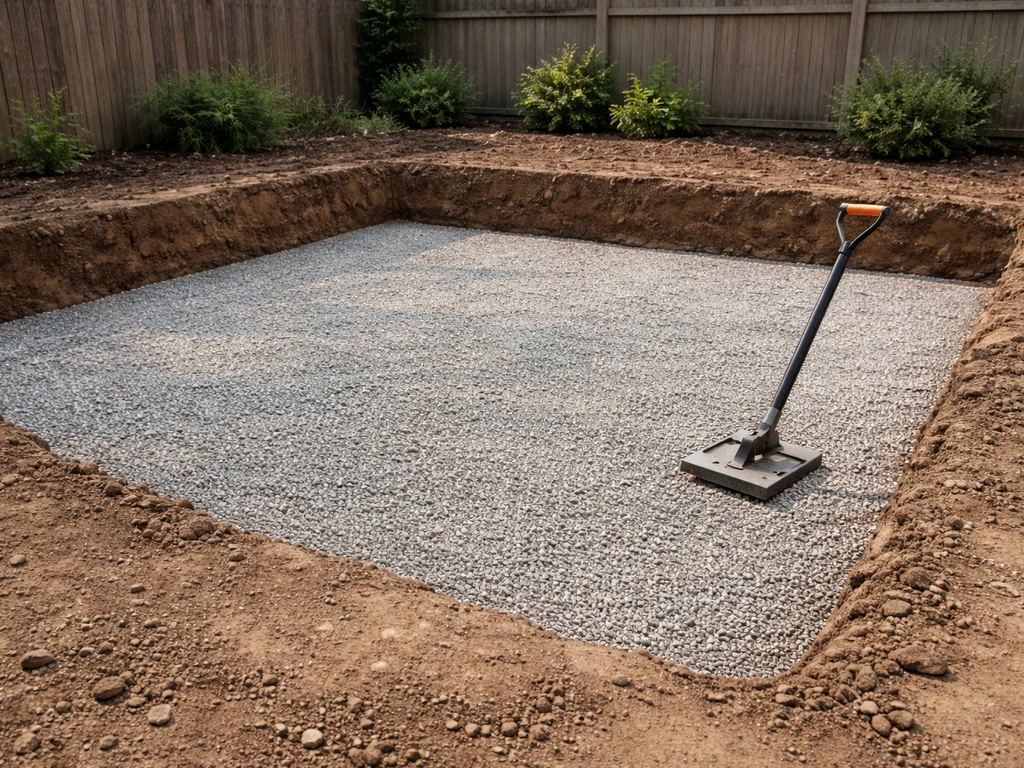
For a built-up base (paver or stone surface)
Start by removing all vegetation and topsoil from the patio footprint, typically 8 to 12 inches deep depending on how high you're building up. Topsoil is too soft and compressible to build on. Once you're down to subsoil, compact the native ground with a plate compactor (rent one, it's worth it). Then build up your gravel base in 2 to 3 inch lifts, compacting each layer thoroughly before adding the next. For most raised patio situations, you want 6 to 8 inches of compacted crushed gravel (also called road base or crusher run) as your foundation layer. In areas with poor or soft soil, go deeper, 10 to 12 inches is not overkill.
On top of the compacted gravel, add a 1-inch layer of coarse bedding sand (not play sand, use concrete sand or paver sand). This is your screed layer: you'll drag a straight board across it to create a perfectly flat, even surface for your pavers to sit on. The total depth you excavate should account for: the paver thickness, 1 inch of bedding sand, and your full gravel base depth. Do the math before you dig so you hit the right finished height.
For a framed platform (deck-style)
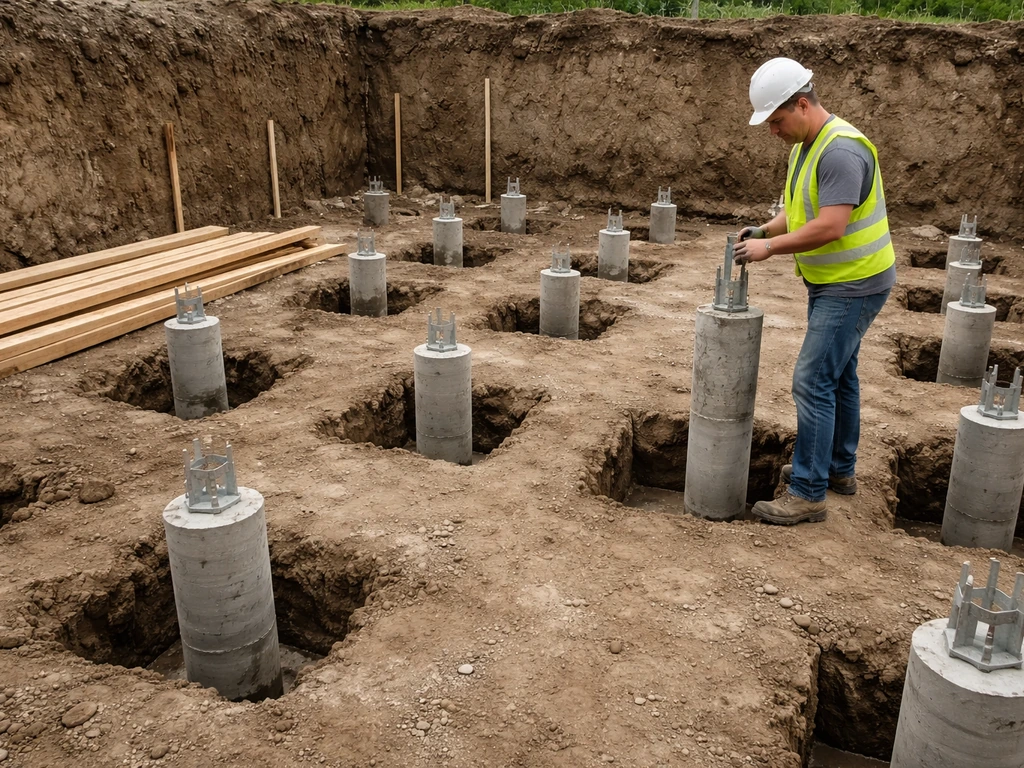
A framed platform needs footings, concrete piers sunk into the ground below the frost line to support your posts. Post spacing depends on your beam and joist span design, but 6 to 8 feet between posts is a common and manageable spacing for residential builds. Use layout string lines to mark footing centerlines accurately. In areas with poor or soft soil, use larger diameter footings to spread the load, a structural engineer or local building department can advise if you're unsure. Dig your footing holes with a hand or power auger, pour concrete, set your post bases (or embed posts directly, depending on your design), and let the concrete cure fully, typically 24 to 48 hours, before framing begins.
- Remove all topsoil and organic material from the build area — don't build on soft ground
- Compact the subgrade with a plate compactor before adding gravel
- Add gravel in layers and compact each layer — 6 to 8 inches total compacted gravel for a paver base
- For framed platforms, dig footings below the local frost line — check your local building code
- Let concrete footings cure fully before loading them with framing weight
- Install a permeable landscape fabric below your gravel base to suppress weeds without blocking drainage
Framing, leveling, and building the raised structure
For a paver-based raised patio, the "framing" is your edge restraints, the border that holds your entire base and paver system in place. Install plastic or metal paver edge restraints around the full perimeter after your gravel base is compacted but before you add your bedding sand layer. Stake them firmly into the gravel base. These restraints are non-negotiable: without them, pavers creep outward over time and your whole surface slowly falls apart.
For a framed platform, this is where you build your beam and joist structure on top of the footings. Set your beams first, then run your joists perpendicular to the beams at the spacing required by your decking material, typically 12 or 16 inches on center for composite boards, 16 inches on center for most wood. Use a long level and adjustable post bases to get everything exactly level before fastening anything permanently. I can't overstate this: getting your frame level is the whole game. Every board you lay later depends on it. Use exterior-grade structural screws or bolts throughout, no standard interior fasteners in an outdoor framed structure.
Add solid blocking between joists at the ends of the frame and at mid-span for longer runs. Blocking prevents joists from rolling or twisting under load and is required by most composite decking manufacturers for proper fastener performance. If you're using hidden fasteners (clips) for composite decking, you need consistent, precise joist spacing, measure twice before you commit to your joist layout.
Whether you're building a paver base or a framed platform, establishing a slight drainage slope is critical. Aim for a fall of about 1/8 inch per foot away from your house or toward a designated drainage direction. On a paver base, you build this slope into your screeded sand layer. On a framed platform, you can pitch the entire frame slightly or rely on the gaps between deck boards for drainage. Either way, water should never pool on a finished raised patio.
Surface installation: paving, brick, and stone vs deck boards
Laying pavers, brick, or stone
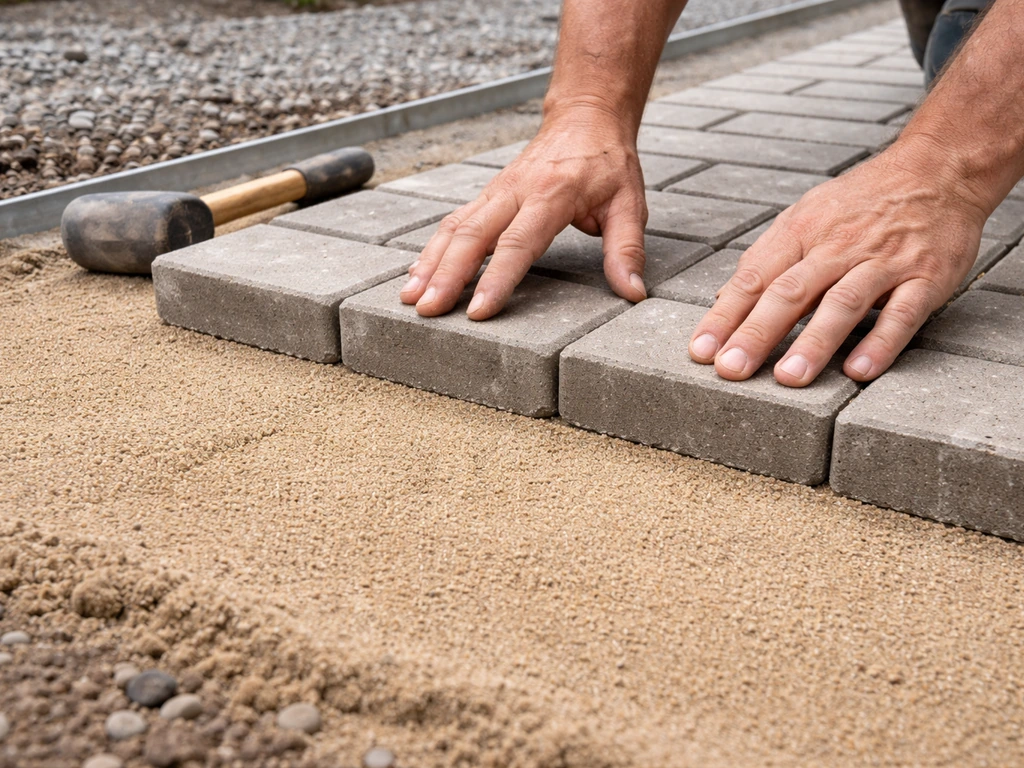
With your gravel base compacted and your edge restraints in place, spread and screed your 1-inch bedding sand layer to a smooth, even surface. Start laying pavers from a straight reference edge, usually the house wall or a chalk line, and work outward. Set each paver down without sliding it (sliding disturbs the screeded sand beneath). Tap each paver with a rubber mallet to seat it, and check your level and slope frequently as you go. Cut pavers with an angle grinder fitted with a diamond blade or rent a paver splitter for cleaner cuts on larger jobs.
Once all pavers are laid, compact the entire surface with a plate compactor fitted with a rubber pad (to protect the paver faces). Then sweep polymeric sand into all the joints. Polymeric sand is worth the extra cost over regular sand, it binds when activated with water and resists weeds and ant tunneling far better. Sweep it in, compact again to consolidate the sand into the joints, sweep off any excess from the paver surfaces, then activate by misting the surface with water using a shower-spray setting (never a jet, it blows the sand out of the joints). Let it cure for 24 hours before foot traffic.
Installing deck boards (wood or composite)
Start at one side of the frame and work across. For composite boards, follow the manufacturer's specified gap, typically 3/16 to 1/4 inch between boards for drainage and thermal expansion. Never butt composite boards tight together. Use the manufacturer's recommended hidden fastener system or face-screw pattern; composite decking has specific requirements about screw depth and spacing that affect both appearance and structural performance. For pressure-treated wood, leave a 1/8-inch gap (green wood will shrink as it dries, so the gap opens up over time naturally).
Snap chalk lines across your joists to keep board ends aligned, and plan your layout before you start so you don't end up with a tiny sliver of board at the far edge. Cut boards to overhang the frame edge by about an inch, then snap a chalk line and trim them all at once with a circular saw for a clean, consistent look. This is one of those finishing moves that separates a professional-looking build from an amateur one.
| Surface Type | Maintenance Level | Cost (materials) | Durability | Best Suited For |
|---|---|---|---|---|
| Concrete pavers | Low (seal every 2–3 years) | $2–$6 per sq ft | Excellent | Built-up base, classic patio look |
| Natural stone | Low-medium | $5–$15 per sq ft | Excellent (if properly based) | Premium finish, built-up base |
| Brick | Low | $3–$8 per sq ft | Very good | Traditional or cottage aesthetic |
| Composite decking | Very low | $4–$10 per sq ft | Excellent (25+ year lifespan) | Framed platform builds |
| Pressure-treated wood | Medium (seal yearly) | $2–$5 per sq ft | Good (10–15 years) | Budget framed platform builds |
Finishing details: stairs, railings, edges, drainage, and sealing
The finishing details are what make a raised patio safe, durable, and polished. Don't rush these just because the main surface is done, this is where the build goes from "mostly finished" to actually finished.
Stairs
If your raised patio is more than one step above grade, you need stairs. Per the IRC, residential stair risers max out at 7 3/4 inches in height, and treads must be at least 10 inches deep. Keep all risers within a flight consistent, variation of more than 3/8 inch between the tallest and shortest riser in a flight is a code violation and a tripping hazard. For a raised patio, a simple set of two or three landing steps built from the same material as your surface looks great and is structurally straightforward. Build stair stringers from pressure-treated 2x12 lumber, cut to your riser and tread dimensions, and attach them securely to the patio frame or base.
Railings and guards
If any part of your raised patio surface sits more than 30 inches above the ground below it, a guardrail is required by the 2021 IRC, not optional, not a suggestion. The minimum guard height for residential builds is 36 inches above the walking surface. This applies to deck-style framed platforms and can apply to a very high paver build on a steep slope. Attach railing posts to the rim joist or frame with through-bolts (not just screws) and make sure the whole assembly passes the "200-pound lateral load" wiggle test. Flimsy railings are dangerous. If your raised patio is lower than 30 inches at all points, you're technically in the clear on guardrails, though a low decorative border or privacy screen is often still a nice finish.
Edges and borders
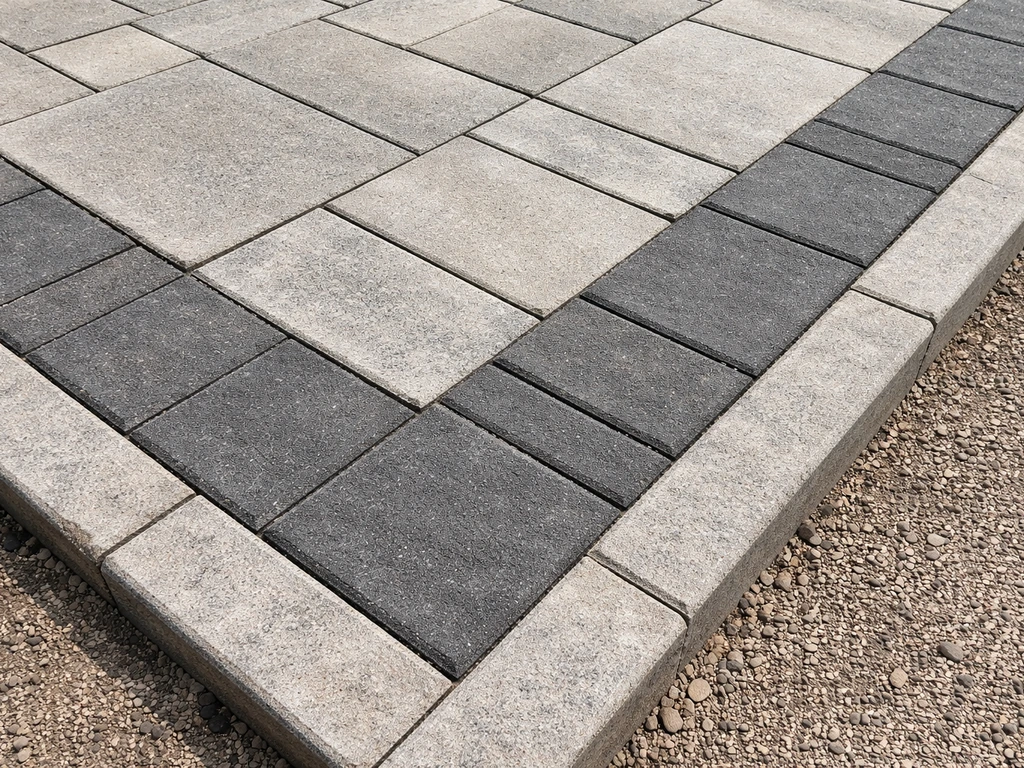
On a paver surface, your edge restraints are already in place structurally, but a decorative border of contrasting pavers or a soldier course (pavers set perpendicular to the field) adds a finished look and reinforces the perimeter. On a framed platform, install a fascia board along all exposed frame edges to hide the structural members and give the patio a clean, furniture-like appearance. Use the same material as your decking for a cohesive look, or contrast with a painted trim board.
Drainage
Drainage is one of those things you don't think about until there's a puddle sitting on your brand new patio after a rainstorm. Your 1/8-inch-per-foot slope should handle most situations. For paver patios, the permeable joints and well-draining gravel base do most of the work. If you're building against a house wall, make absolutely sure water drains away from the foundation, never toward it. In low spots or areas with heavy rainfall, consider adding a channel drain or perforated pipe along the low edge of the patio, running to daylight or a dry well.
Sealing
Concrete pavers and natural stone benefit from a penetrating sealer applied after the polymeric sand has fully cured, typically 24 to 48 hours after activation. Sealer enhances color, resists staining, and helps the polymeric sand joints hold up over time. Reapply every 2 to 3 years depending on wear and exposure. Pressure-treated wood decking should be sealed with a quality exterior wood sealer after it's fully dried out from the treating process, usually a few weeks after install for fresh lumber. Composite decking generally doesn't need sealing, but a light cleaning with composite deck wash once a year keeps it looking new.
Once the sealer is down, the stairs are solid, and the railings pass the shake test, you're done. Step back, look at what you built, and recognize that a project this involved, one that permanently transforms your yard, is genuinely something to be proud of. The planning and base work are the hard parts. If you want to turn that finished raised patio into a growing space, you can also build a raised garden bed on patio using similar leveling and drainage principles how to make a raised garden bed on patio. Everything after that is watching it come together exactly the way you laid it out.
FAQ
Can I build a raised patio on a sloped yard without it washing out?
Yes, but you need to verify how much lift you want. For small changes, a paver or stone surface on a compacted base is usually straightforward, and you build the grade change into the sand slope. If your patio ends up more than about 12 to 18 inches above the surrounding grade, a framed, post-supported platform is typically safer and more stable than trying to “stack” too much gravel.
What drainage problems cause raised patios to fail most often?
Plan the drainage first, not after the surface goes down. Use the 1/8-inch-per-foot fall and confirm water will move away from the house and off the patio edges. On paver builds, keep joints filled and compacted after sweeping in polymeric sand, because empty joints can create weak pathways for water to undermine the base.
How deep should the gravel base be for a raised patio?
Do not compact only the top layer. Success depends on compacting in lifts, usually 2 to 3 inches at a time, and using the right foundation depth for your soil. If the native ground is soft, go deeper with the crushed gravel (for example, closer to 10 to 12 inches) so settlement happens in the base you control, not under the finished patio.
What should I do if my deck-style raised patio frame is not perfectly level?
If you cannot get a straight, level frame for a deck-style patio, the deck will look wavy and fasteners can work loose over time. Use an adjustable post base or proper leveling devices, and re-check level after tightening. If you discover a low area after framing is up, correct it before decking or you will end up shimming uneven boards.
Can I use regular sand instead of polymeric sand for paver joints?
For pavers, avoid regular sand in the joints if you want weed and ant resistance. Polymer sand is designed to bind when activated, but it also needs correct setup: sweep it into joints, compact, remove excess from the paver faces, then mist lightly (not blast) and let it cure before traffic.
Is it safe to put a raised garden bed on a raised paver patio?
Yes, but you must keep the joints and edges stable where attachments meet. If you add a raised bed on top of or against a paver patio, treat it like a load area and ensure the base is well compacted and does not trap water against the patio surface. Consider isolating the bed liner and adding a drainage path so runoff does not saturate the paver joints.
When do I need to build stairs instead of a ramp for a raised patio?
You can add steps, but build them to match the code geometry and the finished height. Risers and treads should stay consistent within a flight, and the stringers must be securely connected to the patio frame or base. If your patio height changes noticeably because of settlement or an uneven base, stair dimensions can become unsafe.
Do I always need guardrails on a raised patio?
If your patio walking surface is more than 30 inches above the ground below at any point, plan on guardrails. Also treat rail posts like structural elements, not decoration, and confirm stability with the lateral “wiggle” check. Do not rely on trim boards or just small screws to support rail loads.
When is the right time to seal a paver or stone raised patio?
For concrete pavers and natural stone, seal after the polymeric sand has fully cured, typically after the cure window is complete, not immediately after misting. Sealer helps with staining and keeps color richer, and it also protects against repeated wetting and drying. Plan to reapply every few years depending on sun, foot traffic, and exposure.
Why should I leave expansion gaps when installing decking on a raised patio?
If you’re using deck boards on a framed platform, follow the specified expansion gap exactly and do not “lock them in tight.” Temperature swings can cause cupping or buckling if boards are butted, and hidden fasteners depend on consistent joist spacing. For wood, leave the recommended gap because boards shrink as they dry.
How to Replace a Patio: DIY Step-by-Step Guide
DIY guide to replace a patio end to end, from tear out and drainage to base prep, pavers or concrete, and finishing tips
