Yes, you can absolutely build a patio on a slope, and it doesn't have to be complicated. The key is choosing the right strategy for your grade before you break ground, then building a solid, compacted base that keeps everything locked in place. Whether you're working with a gentle 2% pitch or a yard that drops several feet across 10 feet, there's a proven approach that works. Most DIYers end up with one of three options: cut and level the ground, build a raised patio with retaining support, or install a patio with a controlled surface pitch for drainage. Get this decision right early and the rest of the build follows a familiar rhythm.
How to Build a Patio on a Slope Step by Step

Nolan Lennox
6 May 2026
Can you build a patio on a slope? (What actually changes)
Building on a slope isn't harder than building on flat ground, it just requires more planning upfront. On flat ground you mostly worry about drainage pitch and compaction. On a slope, you're also managing soil stability, potential erosion underneath your base, edge restraint integrity, and sometimes frost heave if you're in a cold climate. Ignore any of those and you'll be releveling pavers or patching cracked concrete in a few seasons.
The biggest practical difference is that one side of your patio sits higher than the other, which means your base depth varies across the build. On the uphill side you may be cutting into soil; on the downhill side you may be building up with compacted base material or constructing a retaining edge. Water also moves faster across sloped ground, so you have to be deliberate about where it goes once it hits your patio surface and what happens underneath the base during heavy rain or freeze-thaw cycles.
One more thing worth mentioning before you start digging: many municipalities require a permit even for a ground-level patio, especially if it involves grading changes, retaining walls, or attachment to a structure. Cities like Englewood, OH and Bend, OR both require permits for patios. Check with your local building department first. It's a quick call and it can save you a headache if you ever sell the house.
Pick the right approach for your slope

There are three main strategies for building a patio on sloped ground. Each works well in the right situation. Here's how to think about which one fits your yard.
Cut and level
This is the most common approach for gentle to moderate slopes. You excavate into the hillside on the high side and use that removed material (or add compacted gravel) to bring the low side up, creating a flat, level pad. It's the cleanest solution aesthetically and works well with pavers, stone, or concrete. The trade-off is that the cut creates a vertical face on the uphill side that needs to be retained, either with a retaining wall, large edging, or landscape timbers, so the soil doesn't slowly creep back onto your patio.
Raised patio with retaining or step-down sections
On steeper slopes, raising the patio surface up on one or more sides (using a retaining wall as the low edge and filling behind it) is often easier than a massive cut. You're essentially building a platform. This works beautifully for paver patios and natural stone, and it naturally invites a step or two down to the yard, which looks intentional rather than remediated. The downside is cost: retaining walls add materials and labor, and deeper fills need to be compacted in lifts to avoid long-term settlement.
Controlled-slope patio
Sometimes you don't need a perfectly flat patio, you just need a controlled, consistent slope across the surface so water drains predictably rather than pooling. This approach follows the natural grade to some degree but grades the surface intentionally, usually 1/8 to 1/4 inch per foot (roughly 1% to 2%). It's the lightest-touch option and suits situations where the slope is mild and you're not using the patio for furniture-heavy entertaining. The catch is you need to be consistent; an uneven slope looks and feels sloppy.
| Approach | Best for | Main advantage | Main challenge |
|---|---|---|---|
| Cut and level | Gentle to moderate slopes | Flat, clean finish | Uphill face needs retention |
| Raised with retaining | Moderate to steep slopes | Works with any slope depth | More materials and cost |
| Controlled slope patio | Mild slopes, casual use | Minimal excavation | Must be consistent throughout |
Planning essentials before you touch a shovel
Measure your slope accurately
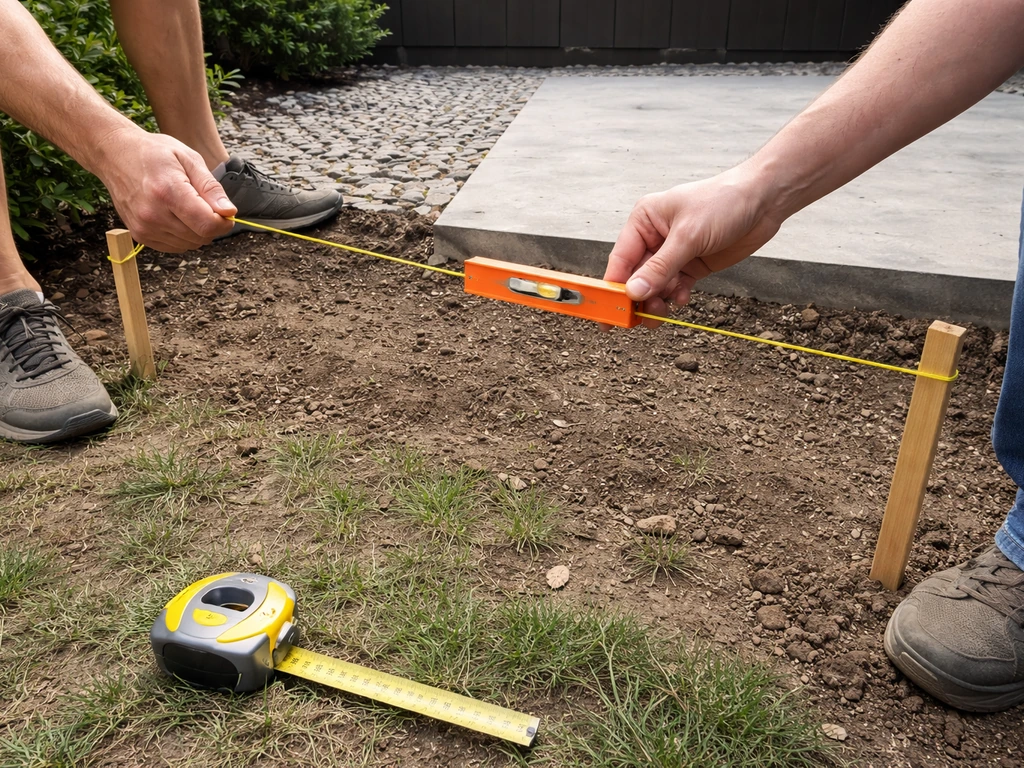
Grab a long level (or a line level and string), a tape measure, and a helper. Run a string line from the highest corner of your planned patio to the lowest, pull it level, then measure the vertical drop from the string to the ground at the low end. Divide that drop by the horizontal distance to get your slope as a ratio or percentage. For example, a 6-inch drop over 10 feet is a 5% grade, that's noticeable and will require the cut-and-level or raised approach. A 2-inch drop over 10 feet (2%) is manageable with a controlled-slope patio or a modest cut.
Lay out the patio and mark the perimeter
Use stakes and string lines to define the full footprint before you dig. This is the step people rush, but taking 20 minutes here saves hours of rework. Mark the corners, pull the strings tight, and check for square using the 3-4-5 triangle method (measure 3 feet along one string, 4 feet along the adjacent string, the diagonal should be exactly 5 feet if your corner is square). Also mark the full extent of your excavation, which needs to extend several inches beyond the patio edge to allow for edge restraints.
Plan your drainage
This is non-negotiable on a slope. The industry standard is a minimum surface slope of 1/8 inch per foot and a maximum of 1/4 inch per foot away from any adjacent structure.
This is why learning how to slope a patio properly matters, especially when you want water to drain reliably without pooling minimum surface slope of 1/8 inch per foot. If your patio is within 10 feet of your house, local codes (like Englewood, OH's guidance) may specifically require at least 1/4 inch per foot of slope away from the building for that first 10-foot stretch.
Even on a naturally sloping site, you need to think about where runoff goes at the low end, ideally onto lawn or into a planted area, not toward a neighbor's property or a foundation.
Account for freeze-thaw if you're in a cold climate
Frost heave is the hidden enemy of sloped patios in northern climates. Water gets into the soil or base material, freezes, expands, and lifts sections unevenly. On a slope this is worse because water naturally collects at the low side of the base. The fix is proper drainage under the base (a gravel base drains; soil doesn't) and, for any retaining walls or footings involved, placing concrete below your local frost depth.
The IRC and organizations like InterNACHI note that frost-protected shallow foundations can work at 12 to 16 inches depending on insulation and climate, but for a simple paver patio, a well-drained, 6-inch compacted gravel base usually handles freeze-thaw adequately in most zones.
InterNACHI also explains that frost-protected shallow foundations can work at about 12 to 16 inches depending on insulation and climate, which helps guide how to address frost at the foundation/footing level frost-protected shallow foundations can work at 12 to 16 inches depending on insulation and climate.
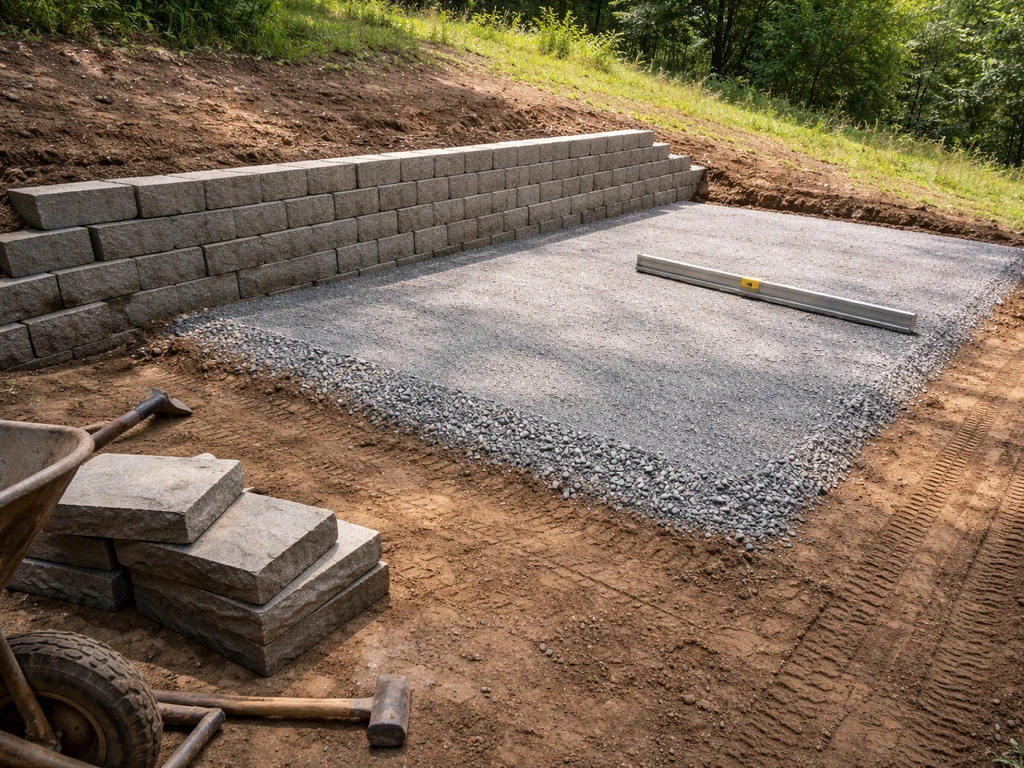
Site prep and excavation: getting the base right
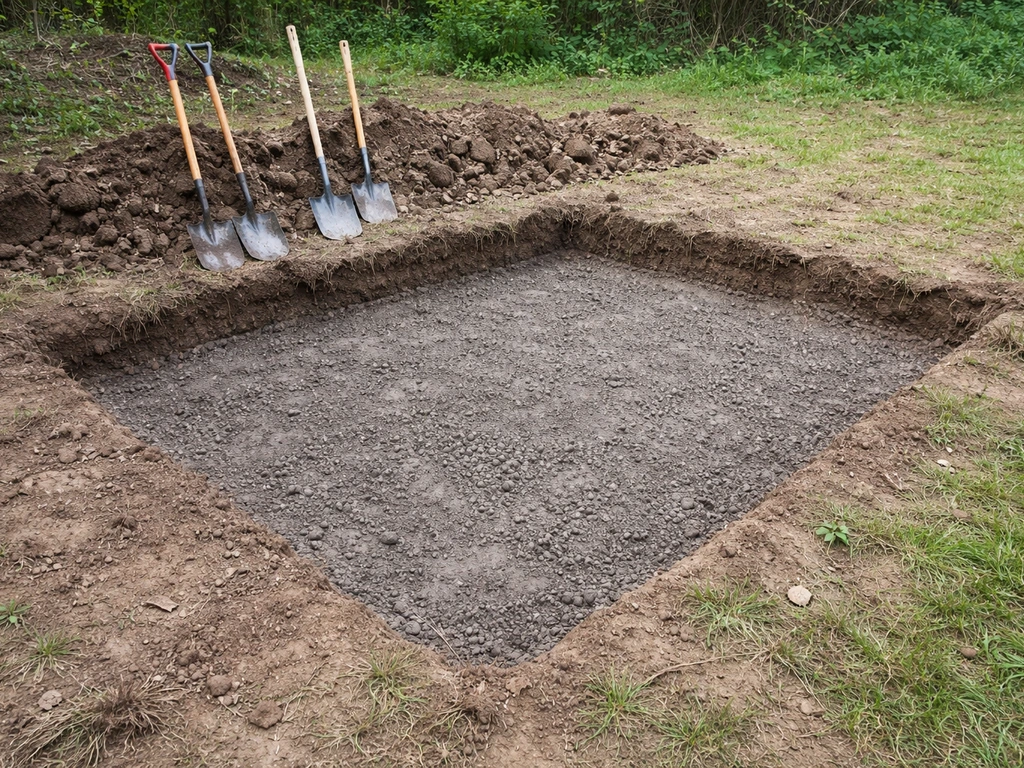
This is where the real work happens and where most DIY patio failures start. A weak base on flat ground eventually causes problems; a weak base on a slope causes problems faster and more dramatically.
- Remove all topsoil and organic material from the patio footprint. Topsoil compresses and decomposes — you don't want it under your patio. Dig down until you hit stable mineral soil (usually 6 to 10 inches depending on your topsoil depth).
- On the uphill side of a cut-and-level project, cut back into the slope at your target grade. Keep the cut face as vertical as possible and plan how you'll retain it.
- Establish your target grade across the excavated area using string lines and a level. The subgrade (the surface of the native soil after excavation) should mirror the final surface slope, so your base material stays at a consistent depth throughout.
- Add a geotextile fabric if your subgrade soil is soft, silty, or expansive. Lay it directly on the subgrade before adding base material. This prevents the gravel base from migrating into the soil over time without impeding drainage.
- Add your compacted aggregate base in layers (lifts) no thicker than 3 to 4 inches each. Compact each lift with a plate compactor before adding the next. For a paver patio, you're targeting a total base depth of 4 to 6 inches of compacted granular aggregate, as recommended by installers like Belgard. On a sloped site with more fill on the downhill side, you may need more.
- Check your grade across the compacted base with a level and tape measure before moving on. This is your last easy chance to correct any low or high spots.
One thing I've learned the hard way: on a slope, the downhill edge of your excavation tends to cave or slump as you work. Dig that edge a few inches wider than your planned patio perimeter so you have room for your edge restraints without fighting unstable soil right at the boundary.
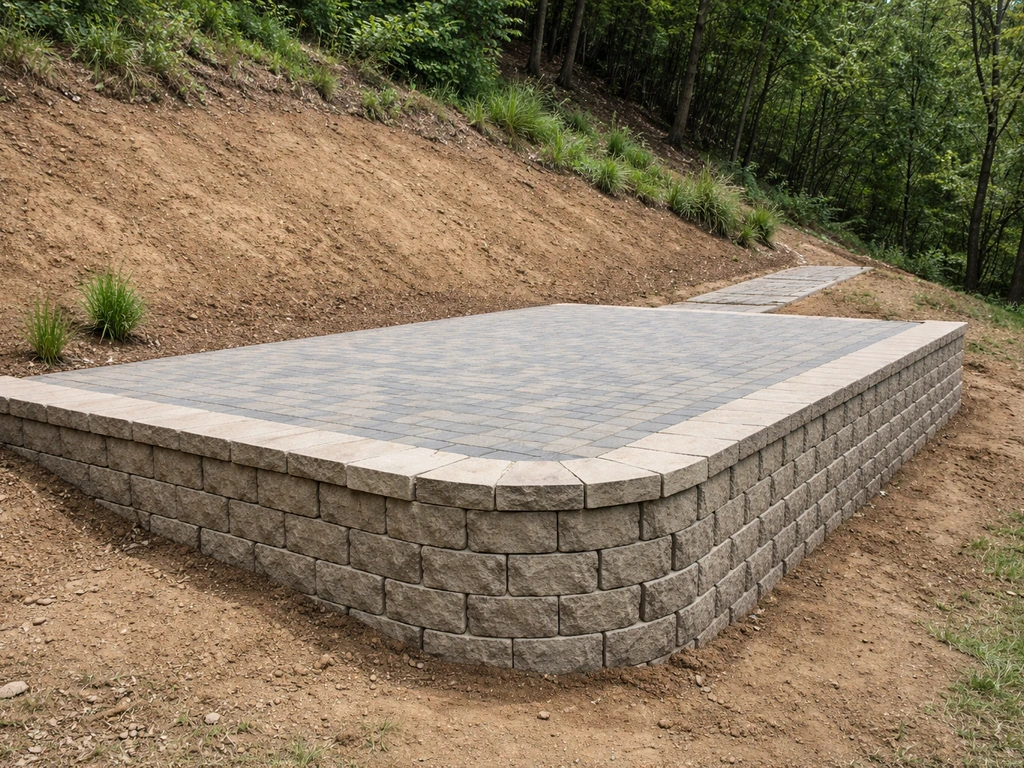
Building a raised patio on a slope: retaining edges and tiers
If you're going the raised route, your retaining wall or structural edge is the backbone of the whole project. Build it first, build it well, and everything else follows.
Retaining walls and edge support
For most residential patio projects, a segmental retaining wall (those interlocking concrete block systems you'll find at any home improvement store) works great up to about 3 to 4 feet of retained height. Beyond that, you're typically looking at engineered solutions. The wall goes on a compacted gravel footing below the frost line, runs along the downhill edge of your patio, and holds the base fill in place. Backfill behind the wall with gravel, not native soil, so water drains freely through and doesn't build up hydrostatic pressure against the wall.
On the uphill side, where you've cut into the slope, you also need a clean edge restraint. This can be a smaller retaining wall, a concrete curb, or heavy-duty plastic landscape edging pinned firmly into the base. The goal is to keep soil from slowly working its way back under your pavers or stone over time.
Designing steps and tiers
A multi-level or tiered patio is one of the best solutions for a steeper slope because you're distributing the grade change across two or more platforms rather than fighting it all in one. Each tier is essentially its own mini patio with its own level surface, connected by steps. Standard step dimensions (7-inch rise, 11-inch run) feel comfortable and look proportional. Use the same material for the steps as the patio surface to keep the whole thing cohesive.
If you're interested in going vertical with a covered structure on top, that opens up another set of considerations around slanted or flat patio roofs, but that's a separate project layered on top of what we're covering here. If you add a covered structure, you'll need a slanted patio roof design that works with your pitch, drainage, and structural edges.
If you also plan a roof over your deck or patio area, the same slope-aware base and drainage principles will help you build a rooftop patio that stays stable and comfortable.
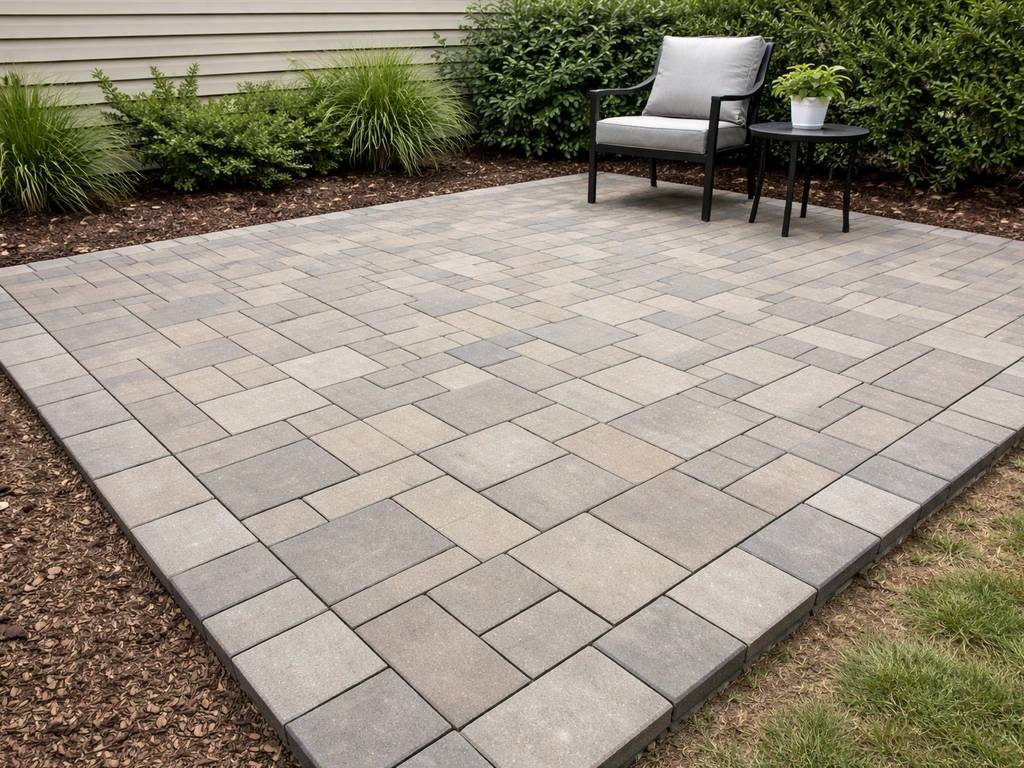
Installing stone, brick, or pavers on sloped ground
Bedding layer and leveling control
Once your compacted base is done and your edge restraints are in place, you add the bedding sand layer. This is a 1-inch (roughly) layer of coarse, uncompacted sand that you screed flat using pipe guides or a straight 2x4. On a level patio, the bedding is flat. On a patio with a controlled surface pitch, you tilt your screed pipes slightly to build in that 1/8 to 1/4 inch per foot drainage slope. The bedding layer should be consistent, Belgard specifies at least 1 inch of evenly spread bedding sand. Don't go thicker thinking it'll give you more adjustment room; a thick sand bed is a soft bed that shifts.
Laying pavers or stone on a slope
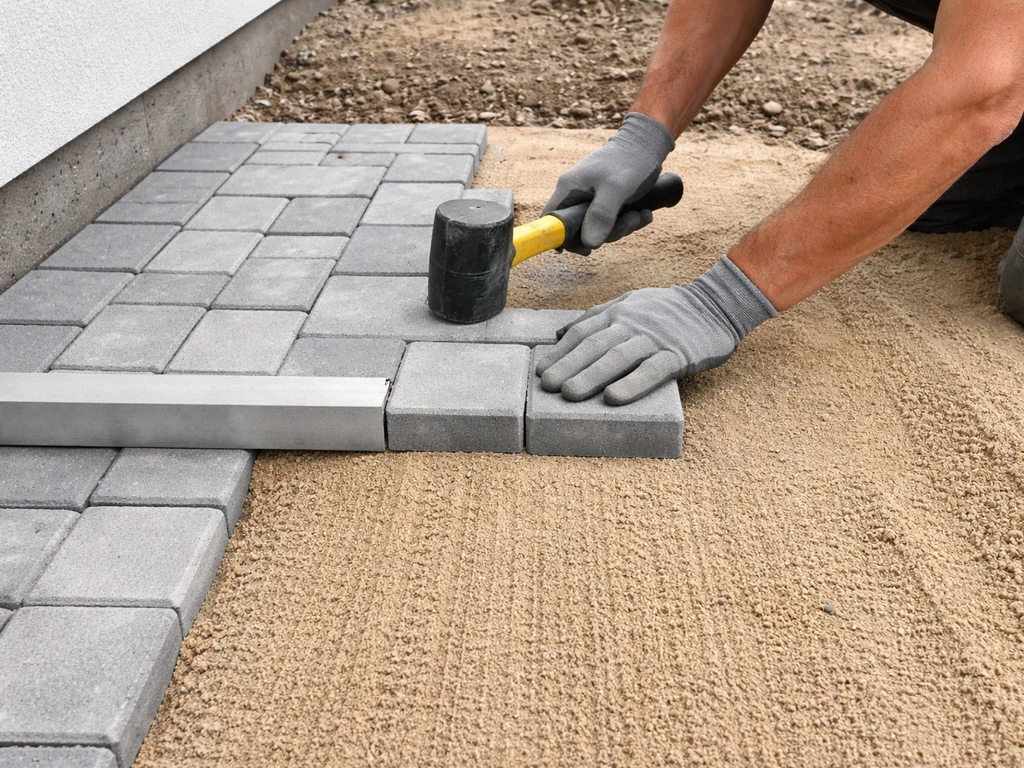
Start laying pavers from a fixed, straight reference edge (usually the house, a wall, or a string line). Work away from that reference point toward the downhill edge. On a slope, gravity is always trying to shift your pavers toward the low side as you work, this is where your edge restraints earn their keep. Install them before you lay a single paver and let them do their job.
Use a rubber mallet and a level (or a long straightedge) constantly as you lay. Check each paver both for its individual position and for how it sits relative to its neighbors. On a sloped patio, you're maintaining a consistent surface pitch rather than dead level, keep your reference string line handy and check against it every few rows. For natural stone, which varies in thickness, you'll be adjusting the bedding depth under each piece as you go, which takes more time but creates a beautiful result.
Edge restraints: don't skip these
I can't stress this enough on a slope: edge restraints are what keep everything from migrating downhill over time. Organizations like the Canadian Masonry (CMHA) and Unilock both identify edge restraints as a critical component of interlocking paver systems, especially on grades. Options include precast concrete, heavy plastic edging, aluminum, and cut stone. Spike them into the base (not just the sand) with 10-inch spikes at least every 12 inches. If there's any chance of sand loss at the restraint, add geotextile along the inside face of the restraint before backfilling.
Jointing with polymeric sand
Once all pavers are laid and any final adjustments made, sweep polymeric sand into the joints. The critical rule here: the pavers must be completely dry before you start and no rain can be forecast for at least 12 hours after activation (some manufacturers like SEK SUREBOND specify this explicitly). Sweep the sand into joints, compact the pavers with a plate compactor (with a protective pad), sweep again to fill, then activate with a fine mist of water per the manufacturer's instructions. Wet pavers cause the polymeric binder to activate prematurely on the surface, leaving a hazy residue that's a pain to remove.
Finishing up: drainage checks, sealing, and mistakes to avoid
Do a drainage check before you call it done
After the polymeric sand has cured (usually 24 hours), run a hose over the patio and watch what happens. Water should sheet off the surface toward the low end without pooling anywhere. If you see puddles forming, that's a sign of either an incorrect slope somewhere in the surface or a low spot caused by inadequate compaction in the base underneath. Catching this now is infinitely easier than dealing with it after the surface has settled further. Localized pooling after rain is one of the clearest indicators of a drainage or compaction problem, so take this test seriously.
To seal or not to seal
Sealing is optional for most paver and stone patios but worth doing on sloped installs. A good penetrating sealer helps lock the polymeric sand joints in place, enhances color, and makes the surface easier to clean. It doesn't fill drainage gaps or compensate for a bad slope, don't use it as a band-aid. If you do seal, wait at least 30 days after installation so the pavers have time to off-gas any efflorescence. Apply on a dry surface in mild temperatures.
Common mistakes to avoid
- Skipping the permit check. Local codes often govern grading, drainage direction, and retaining wall height. It's not optional.
- Underestimating the excavation. You need to dig wide enough to install edge restraints outside the paver field — not just deep enough for the pavers themselves.
- Rushing base compaction. Compact in lifts, not all at once. A poorly compacted base is the single biggest cause of paver failure on a slope.
- Ignoring the uphill face. Cutting into a slope creates a vertical soil face that will creep back without proper retention. Don't leave it bare.
- Laying pavers before edge restraints are locked in. On a slope, your pavers have nowhere to go if the downhill edge isn't already secure.
- Installing polymeric sand over damp pavers. This is a common and frustrating mistake — wait for a dry day and dry pavers.
- Building too steep a controlled slope. Above 1/4 inch per foot (2% grade) and furniture slides, water moves too aggressively, and the whole surface feels off.
- Not planning for where the water goes at the low end. Directing runoff toward a neighbor or a foundation is a problem waiting to happen.
What if the slope is steeper than expected?
If you get into your excavation and realize the grade is more dramatic than your initial measurements suggested, say you're looking at 8 to 10 inches of drop over 10 feet, don't try to force the original plan. Steeper slopes need more serious retention. That might mean a taller retaining wall (check local code; many require engineering review above 4 feet), a tiered two-level design, or bringing in a professional for at least the grading and retention portions. There's no shame in calling in help for the structural piece and handling the paver installation yourself. A well-built raised patio on a steep slope is a genuinely satisfying project, it just needs a solid foundation underneath it.
If you want to go deeper on specific subtopics, the drainage pitch question has its own set of nuances worth exploring, including how to slope a patio for drainage properly and how to think about surface slope on a patio that's already been built on a grade. Getting those details right separates a patio that looks great in year one from one that still looks great in year ten.
FAQ
How do I confirm my patio slope calculations before I dig?
Before excavating, build a simple “control plane” using a string level or line laser spanning between your intended high and low corners. Then mark the corresponding surface height every 2 to 3 feet along both edges (stakes with tape marks work). If any intermediate point requires a cut or fill beyond what your chosen strategy can handle, adjust the plan now rather than trying to correct it in the sand bed later.
What should I do if runoff will flow toward a foundation or neighbor’s property?
Plan the low end so water can discharge onto soil that can absorb it, a planted bed, or a designed drainage channel. Avoid letting water exit the patio directly at the foundation wall. If you must direct flow, consider adding a buried drain line or a surface swale, and keep the discharge location stable (not where it will erode).
Can I build a patio on slope with just leveling the pavers and skipping a retaining element?
Usually not if the retained height is more than minimal. Even with good compaction, gravity will encourage movement downhill, edge creep, and eventual settlement. If your uphill side requires a cut face or your downhill side needs a fill, you typically need edge restraint or a retaining wall, not just bedding sand and pavers.
How wide should I make the excavation beyond the patio footprint on a slope?
Extend the excavation several inches beyond the intended paver perimeter to fully seat and brace edge restraints. The exact amount depends on your restraint type (plastic edging, curb, or wall system), but if you only excavate to the final paver line, you often end up fighting soil slumping while you try to install restraints.
Do I need geotextile on a slope, and where does it go?
Geotextile is most useful when your base is separating from native soil that could pump fines under load, especially at the inside face of restraints or where you are building over disturbed soil. Use it to prevent sand or gravel contamination, not to “replace” drainage. On a paver patio base, it should not trap water, it should help keep layers stable.
What’s the correct way to compact a base on a slope?
Compact in lifts, typically in 2 to 3 inch layers, and compact each lift thoroughly before adding the next. On a slope, focus on fully compacting the downhill transition areas, because they are more prone to loosening while you work. If you skip lift-by-lift compaction, you’re more likely to get localized dips that show up as pooling after rain.
Can I use concrete instead of pavers on a slope patio?
Yes, but the risk profile changes. Concrete is less forgiving if the base settles, so the “solid, compacted base” requirement becomes even stricter. You also need a consistent drainage strategy, and you may need additional control joints and careful curing to reduce cracking in a freeze-thaw region.
How do I prevent frost heave if my patio sits on the downhill side where water collects?
Increase base drainage quality and prevent water retention under the slab or paver base. Use well-draining gravel and ensure water can move away rather than collect at the low edge. For retaining walls and any footings, place structural elements below local frost depth, or use frost-protected shallow footing methods if your climate and design support it.
What if my patio is within 10 feet of my house, and I’m not sure about local slope requirements?
Don’t guess. Measure where the runoff would land when the patio sheds water toward the low end. If codes require a steeper slope away from the structure, design your surface profile accordingly, or you may need a controlled discharge point. When in doubt, call your building department, especially if you are changing grading near the foundation.
How do I build a tiered patio so the transitions between levels do not create trip hazards or drainage problems?
Treat each tier as its own drainage and base system, with its own compacted base and edge restraint. Keep step rises and runs consistent, and detail the step edges so water doesn’t spill behind restraints. A common mistake is to rely on the surface material for the transition rather than fully preparing the underlayment and base at each tier.
What causes hazy residue after polymeric sand activation, and how can I avoid it?
Hazy residue often happens when pavers are damp during activation or when activation water is excessive or too soon after sweeping. Keep the surface completely dry before polymeric sand goes in, then apply fine mist only according to the product instructions. Also avoid walking on the surface during the initial curing window.
How can I tell whether pooling is a surface slope issue or a base compaction issue?
After a rain or hose test, observe whether water pools exactly at the same spots that later remain higher than the surrounding area. If it’s localized and repeatable, it often indicates a low spot from insufficient compaction or contamination in the base. If pooling occurs broadly and consistently in the same direction, it more likely indicates incorrect surface slope.
Is sealing worth it on a sloped paver patio, and what’s the best way to apply it?
Sealing can help stabilize polymeric sand joints and make cleaning easier, but it won’t correct a wrong slope or trapped-water problem. Apply only after the jointing sand has cured and pavers have dried fully, and do it in mild temperatures. If you want maximum benefit, choose a penetrating sealer rated for paver and stone systems rather than a coating that can alter slip resistance.
At what point should I stop DIYing the retention and hire a professional?
If your plan requires retaining more height than typical interlocking wall systems can handle, or if you’re unsure about drainage and footing depth, pause and get help for the retaining and grading portion. Many jurisdictions also require engineering review beyond certain retained heights. A practical trigger is when your recalculated cut or fill exceeds the original plan by several inches or more, because that usually means the structural forces and base profile changed.
Next Article
How to Transform a Patio: DIY Plan, Materials, Steps
Plan and DIY steps to transform your patio with the right materials, base, drainage, leveling, and finish for your budge