To build patio stairs, you need to measure your total rise (the height from the patio surface to the ground), divide it into equal riser heights between 6 and 7-3/4 inches, set your tread depth at 10 to 11 inches, cut your stringers to match, anchor everything on solid footings, and finish with weatherproof treads. If you are also planning building steps from house to patio, the same rise and tread measurement approach applies, but you'll want to pay extra attention to anchoring and weatherproofing where the stairs meet the structure. That's the whole job in one sentence. The rest is just making sure each of those steps is done accurately so nothing shifts, cracks, or trips someone up a year from now.
How to Build Patio Stairs: Step-by-Step DIY Guide

Nolan Lennox
3 May 2026
Planning and Measuring Your Patio Stairs
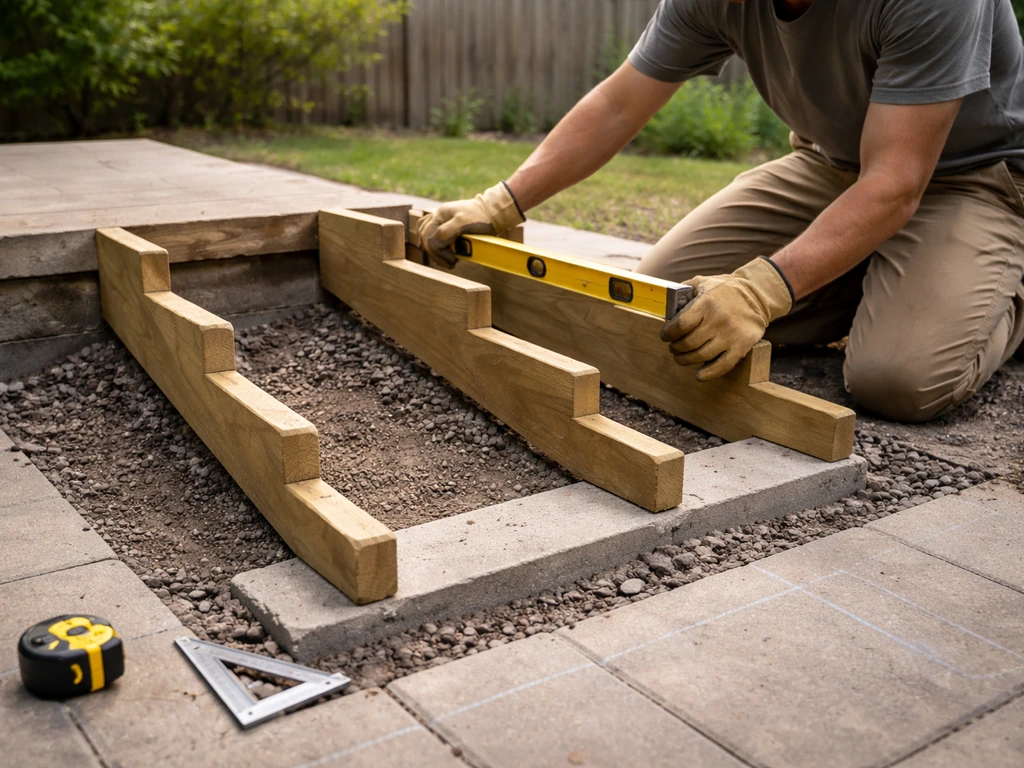
Before you cut a single board, you need two numbers: total rise and total run. Total rise is the vertical distance from the ground at the base of your stairs to the top of your patio surface. Measure this with a level and a tape measure. Hold a long level out from the patio edge horizontally, then measure straight down to the ground below. That measurement is your total rise, and everything else flows from it.
Total run is how much horizontal distance your stairs will cover. This matters because you need enough space in your yard or landing area. A rough rule: multiply your number of treads by your tread depth. If you have a 42-inch rise and want 7-inch risers, that's 6 steps, 6 treads at 10.5 inches each equals about 63 inches of horizontal run. Make sure that space is actually clear before you finalize your design.
Also think about where the stairs will land. If you're landing on grass or dirt, you'll need a concrete pad or gravel base there. If your patio is attached to the house, the stairs might also need to account for door swings, drainage slopes, and clearance from the foundation. Those scenarios get into territory similar to building steps from a house to a patio, but the core measurement process is identical.
If your patio cover is being attached to a stucco house, plan for the right mounting method and flashing so water cannot get behind the wall house to a patio. Those scenarios get into territory similar to building steps from a house to a patio, but the core measurement process is identical.
- Measure total rise from the top of the patio deck surface to the finish grade below
- Check your landing area is level or nearly level (max 2% slope per IRC)
- Note any obstructions: doors, downspouts, AC units, or landscaping
- Decide on stair width: 36 inches is the typical minimum for comfortable use
- Confirm local permit requirements before starting, especially if stairs are attached to a structure
Stair Design Basics: Rise, Run, and Stringer Layout
The rise/run relationship is what makes stairs feel comfortable or terrible. The 2021 International Residential Code sets the maximum riser height at 7-3/4 inches and the minimum tread depth at 10 inches. Those are the code limits, but most people find stairs feel best with a 7-inch rise and a 10.5 to 11-inch tread. There's also a classic comfort formula: two risers plus one tread should equal roughly 24 to 25 inches. So a 7-inch riser paired with a 10.5-inch tread (7+7+10.5 = 24.5) sits right in the sweet spot.
To find your riser count, divide your total rise by a target riser height. Say your patio is 35 inches above grade. Divide 35 by 7 and you get 5 risers exactly. If it doesn't divide cleanly, round to the nearest whole number and recalculate the actual riser height.
So if your rise is 37 inches and you divide by 7, you get 5. 28, which rounds to 5 risers. Your actual riser height would be 37 divided by 5, which equals 7. 4 inches.
That's under the 7-3/4 inch max, so you're good. One critical rule from IRC: every riser in a flight must be within 3/8 of an inch of every other riser. Same goes for tread depth. Inconsistency is both a trip hazard and a code violation.
Laying Out Stringers
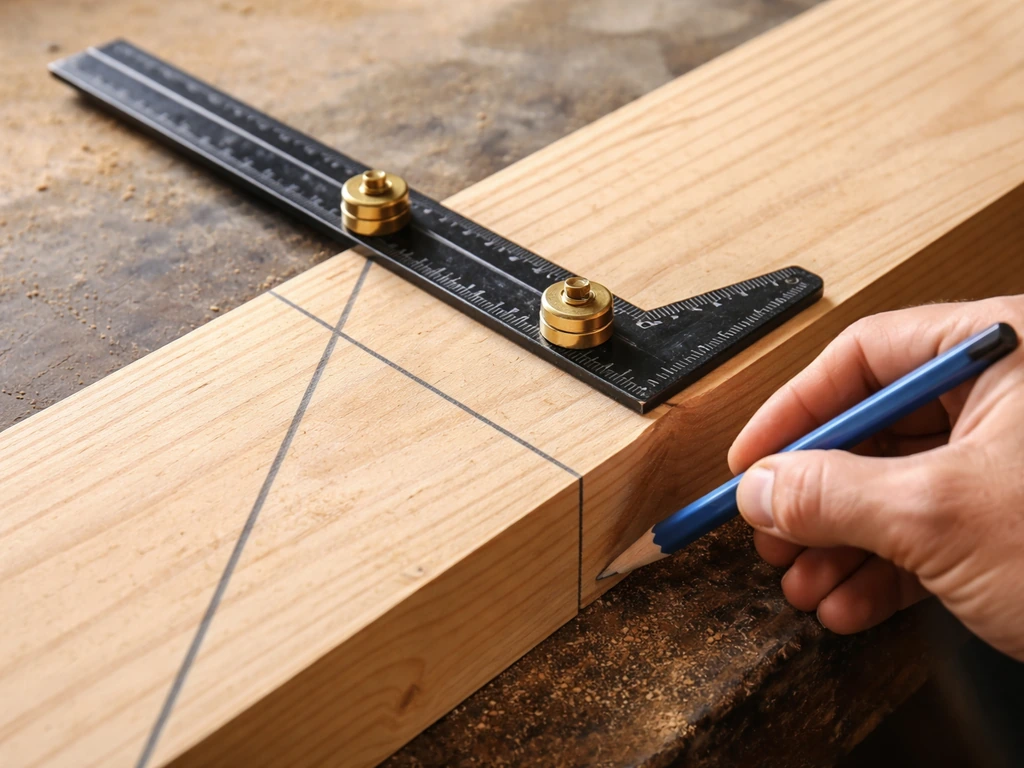
Stringers are the diagonal boards that support the treads and give the stairs their shape. You'll typically use 2x12 lumber for stringers. Use a framing square with stair gauges (small clamps that lock onto the square at your exact rise and run dimensions) to mark your cut lines. Set the gauges at your riser height on one leg of the square and your tread depth on the other. Walk the square up the stringer board from bottom to top, marking each step. At the top, you'll cut a plumb cut to fit against the patio framing. At the bottom, you'll cut a level cut to sit on the footing or concrete pad.
One thing that trips people up: once you cut the stringers, you need to account for tread thickness. If you're using 1.5-inch thick treads (standard 2x lumber), drop the bottom riser by 1.5 inches so the first step is the same height as all the others. Skip this and your bottom step will be noticeably taller than the rest. For a standard three-stringer setup on a 36-inch-wide staircase, place one stringer on each side and one in the middle. Wider stairs need more stringers at no more than 16 inches apart.
Materials and Tools You'll Need
Your material choice affects cost, maintenance, and how long the stairs last. Pressure-treated lumber is the most common and budget-friendly option for outdoor stairs. Composite decking for treads costs more upfront but requires almost no maintenance and holds up better in wet climates. Concrete block or brick stairs are extremely durable and require no annual sealing, but they're heavier, harder to build, and less forgiving if you make a measuring mistake.
| Material | Avg Cost (3-step stair) | Durability | Maintenance | DIY Difficulty |
|---|---|---|---|---|
| Pressure-treated lumber | $150–$300 | 15–25 years with sealing | Annual sealing | Beginner-friendly |
| Cedar or redwood | $250–$500 | 20–30 years | Periodic sealing | Beginner-friendly |
| Composite treads + PT stringers | $400–$800 | 25–30 years | Minimal | Moderate |
| Concrete block/masonry | $300–$700+ | 50+ years | Very low | Advanced |
| Poured concrete | $600–$1,200+ | 50+ years | Very low | Hire a pro or advanced DIY |
For most DIYers building wood patio stairs, pressure-treated 2x12s for stringers and 2x6 or 5/4x6 PT boards for treads is the practical, proven combination. If your patio uses composite decking, match the treads so everything looks consistent. Avoid using standard untreated lumber outdoors. It will rot within a few years, especially where it contacts concrete or soil.
Tools Checklist
- Tape measure and pencil
- Framing square with stair gauges
- Circular saw (and jigsaw for tight cuts)
- Drill/driver and bits
- Level (2-foot and 4-foot)
- Speed square
- Post hole digger or shovel (for footings)
- Mixing tub or mixer for concrete
- Clamps
- Safety glasses and hearing protection
- Exterior-grade screws or galvanized structural screws (no standard drywall screws outdoors)
Step-by-Step Construction: Footings Through Finished Treads
Step 1: Prepare the Footings
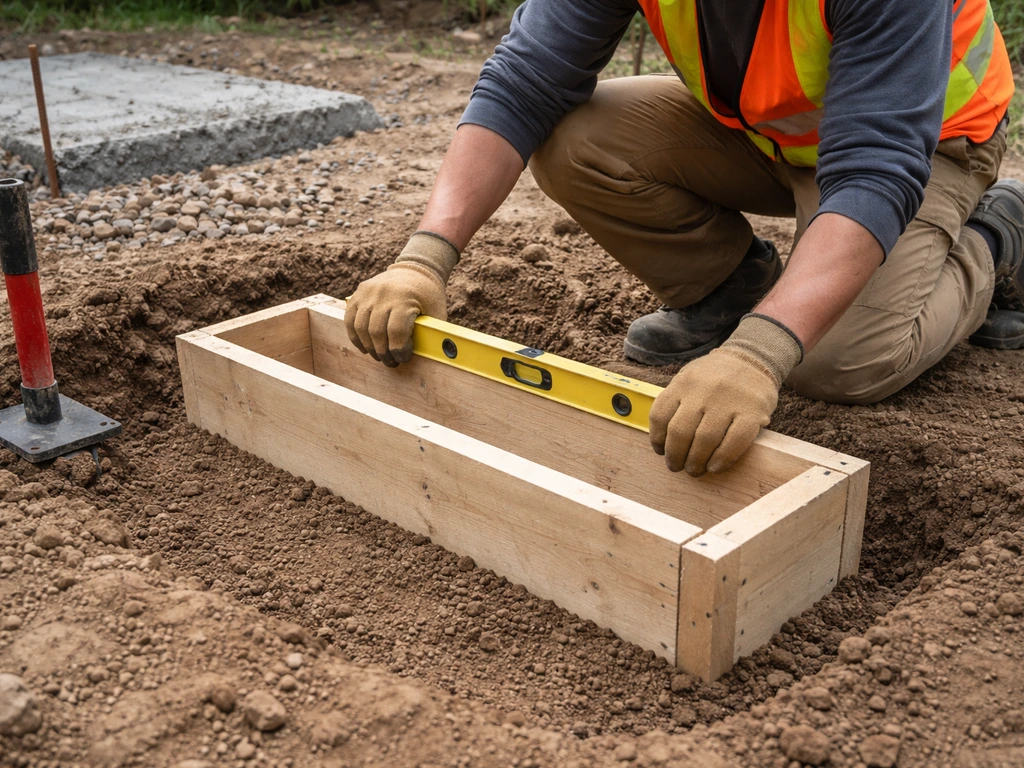
Don't skip footings. This is the most common corner-cutting mistake and it's what causes stairs to heave, sink, or pull away from the patio over time. For wood stairs, you have a few options. The simplest is a poured concrete pad at least 3.5 to 4 inches thick and extending a few inches beyond the stringer footprint. In frost-prone areas, you may need a footing that extends below the frost line, which varies by region. Check with your local building department. If the stairs are small (two or three steps) and your soil drains well, a compacted gravel base under a concrete pad can work. Let concrete cure at least 24 to 48 hours before building on it.
Step 2: Attach Stringers to the Patio
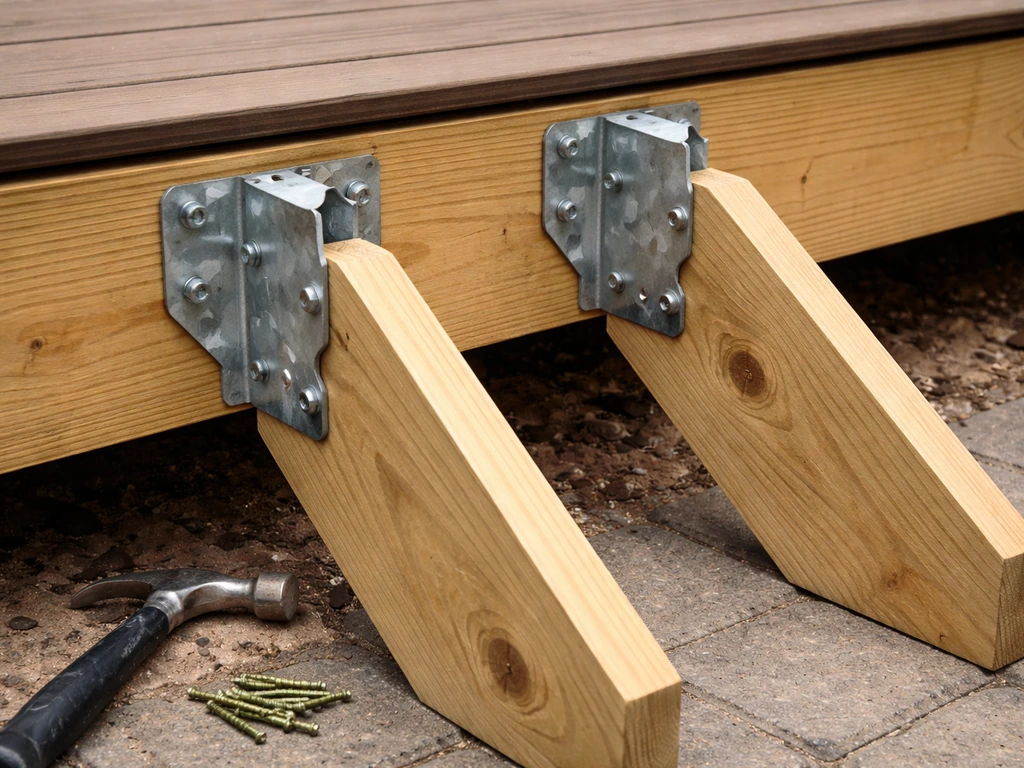
The top of your stringers need to be anchored to the patio structure, not just leaning against it. Use metal stair stringer hangers or a ledger board bolted to the rim joist or patio framing. If your patio is concrete, use concrete anchors and a treated ledger. Make sure the ledger is level. Set your stringers in place, check that they're plumb side-to-side and that the tread cuts are level front-to-back. Clamp them temporarily and double-check your measurements before fastening permanently.
Step 3: Secure Stringers at the Bottom
At the base, anchor the stringers to the concrete footing using metal standoffs or post bases rated for ground contact. These keep the wood off the concrete surface, which dramatically reduces rot. You can also embed a pressure-treated kickboard into the concrete and toe-screw the stringers into it. The key is preventing wood-to-concrete direct contact and keeping everything from sliding forward under load.
Step 4: Install Risers (If Using Them)
Open-riser stairs (no riser boards, just treads) are popular for decks and patios because they look cleaner and shed water better. But if you want closed risers for a more finished look, or if code requires it (some jurisdictions require risers to limit the open gap), cut your riser boards from 1x8 or 2x8 PT lumber and fasten them to the stringers before you put the treads on. Risers go vertical, flush with the front of each tread cut on the stringer.
Step 5: Install Treads
For 2x6 treads, you'll typically use two boards side by side to make a 10.5-inch tread depth (accounting for a small gap between boards for drainage). Leave 1/8 to 1/4 inch between tread boards so water doesn't pool. Let each tread overhang the riser or stringer front by about 1 to 1.5 inches for a nosing. Use two screws per tread-stringer connection, pre-drilling near board ends to prevent splitting. Exterior structural screws rated for PT lumber are worth the extra money here. Standard zinc screws will corrode and fail.
Safety, Code, and Weatherproofing
If your stair flight has four or more risers, the 2021 IRC requires a handrail on at least one side. That handrail must sit between 34 and 38 inches above the stair nosing line. Even if you're only at three risers and technically don't need one, adding a handrail on stairs that serve elderly family members or young kids is just smart. Use metal post anchors and 4x4 posts for solid construction. The rail itself can be wood, metal, or composite.
Non-slip tread surfaces are critical outdoors. Wet wood is genuinely dangerous. Options include applying non-slip tread tape, using composite treads with built-in texture, routing a groove pattern into wood treads, or attaching metal nosing strips with grip texture. For concrete stairs, brush the surface before it sets or apply anti-slip coating after curing.
Weatherproofing wood stairs means sealing all cut ends immediately after cutting (end-grain soaks up water fast), applying a penetrating exterior wood sealer or stain to all surfaces, and reapplying every one to three years depending on your climate. Pay special attention to where the stringers meet the patio framing. That joint traps water and is usually where rot starts first. Flashing tape or a bead of exterior caulk can help keep moisture out.
One last code note: if your stair flight is unusually tall, IRC limits the vertical rise between landings to 12 feet 7 inches. For typical patio stairs this isn't an issue, but if you're building stairs down a hillside or from a raised deck to a lower patio, keep this in mind. Also ensure any landing at the base has no more than a 2% slope (1/4 inch per foot) so water drains away without creating a slip hazard.
Common Mistakes and How to Fix Them
The single most common mistake is inconsistent riser heights. This usually happens when someone measures total rise incorrectly (forgetting to account for the finished patio surface thickness, or measuring on a slope) or cuts stringers without rechecking the math. Fix it before you build by dry-fitting one stringer and physically measuring each rise and run with a tape. If it's off by more than 3/8 inch anywhere, recut.
The second most common problem is skipping or underbuilding footings. If your stairs rock, pull away from the patio, or heave every spring, the footing is the culprit. If you're already in this situation, you may be able to pour a new concrete pad under the existing structure and shim it level, but it's much easier to do this right the first time.
Drainage problems show up as water pooling on treads or at the base of the stairs. Slope your treads very slightly forward (1/8 inch per foot is enough) so water runs off the front. Make sure your landing pad slopes away from the stairs. And if you're landing on grass, add a gravel apron to prevent erosion and mud splash.
Finally, using the wrong fasteners outdoors is a quiet mistake that shows up later as rust stains, popped screws, and failing connections. Use hot-dipped galvanized or stainless steel fasteners and hardware everywhere. All metal hangers, joist connectors, and anchors should be rated for use with pressure-treated lumber, since PT chemicals are corrosive to standard zinc-coated hardware.
Your DIY Next-Steps Checklist
Use this checklist to confirm you're ready to start building and to track your progress through the project.
- Measure total rise accurately with a level and tape measure
- Calculate riser count and exact riser height (max 7-3/4 in, all within 3/8 in of each other)
- Confirm tread depth (min 10 in) and total run fits your available space
- Check local permit requirements and order any inspections required
- Choose materials: pressure-treated lumber is the practical default for most DIYers
- Buy exterior-grade, PT-rated fasteners and metal hardware (no standard zinc or drywall screws)
- Dig and pour footings; let concrete cure before building
- Cut and dry-fit one stringer; verify every rise and run before cutting the rest
- Attach stringers to patio framing with proper metal hardware
- Anchor stringer bases to footing with standoffs or kickboard (no direct wood-to-concrete contact)
- Install risers if using them, then treads with proper spacing and nosing overhang
- Add handrail if four or more risers (34 to 38 in above nosing line)
- Apply non-slip surface treatment to all treads
- Seal all wood surfaces and cut ends with exterior penetrating sealer
- Check every riser height and tread depth one final time before declaring it done
Once your basic stairs are solid, you can think about next-level upgrades: lighting under the treads, a wider landing platform at the base, or decorative post caps on handrail posts. If your stairs connect directly to the house rather than a freestanding patio, there are some additional considerations around ledger attachment and flashing that are worth digging into separately. If you are planning how to build patio steps against house, focus on ledger attachment, flashing, and how water is managed where the stairs meet the home. But the fundamentals here will get your stairs built safely and correctly for the long haul.
FAQ
If my patio floor is sloped, how do I measure total rise so the risers will match?
Measure total rise from the finished patio surface height at the exact stair landing point (not the highest point nearby). Then recheck each stringer position by dry-fitting a test stringer or running a chalk line to confirm the riser heights stay within 3/8 inch across the flight.
How wide should patio stairs be for everyday use?
A common DIY target is 36 inches wide for comfortable two-person traffic. For narrower stairs, verify you can fit at least one tread board arrangement without awkward gaps, and add an extra stringer so the tread spans are supported at no more than 16 inches apart.
Can I build patio stairs without closed risers (open-riser style) outdoors?
Yes, but only if your jurisdiction allows it and the open gaps will not create a hazard. Closed risers can also help reduce mud and debris buildup. If you choose open risers, consider adding textured non-slip surfaces and ensure the gap sizes do not create a toe entrapment issue.
What do I do if my total rise does not divide evenly into risers within code limits?
Round the riser count to a whole number, then recalculate the actual riser height using total rise divided by that riser count. Stop if the recalculated riser height would exceed 7-3/4 inches, then adjust riser count again to find a valid combination.
How do I confirm the stringers are cut correctly before fastening anything?
Dry-fit one stringer (or clamp it in place) and physically measure each rise and tread run between the same reference points you used for the layout. If any rise or tread is more than 3/8 inch off, recut before you install the remaining stringers and treads.
What spacing should I leave between tread boards if I’m using two boards per tread?
Leave a small drainage gap (about 1/8 to 1/4 inch). Also stagger or align the tread seams so the gaps do not line up between stringer bays in a way that leaves a weak point under foot traffic.
Do treads need a slight slope for drainage, and how much is enough?
Yes, a slight forward slope helps water clear the tread surface. About 1/8 inch per foot is usually enough. Plan this when you cut or shim the stringers so the slope matches every tread, not just the top one.
How do I prevent screws from snapping or pulling out in pressure-treated lumber?
Pre-drill near the ends of tread boards and use exterior-rated structural screws made for PT lumber (hot-dipped galvanized or stainless steel hardware is safer). Avoid overdriving, and place screws where the tread contacts the stringer face, not near the very edge.
My stairs are on a concrete patio, can I anchor the bottom stringers directly to the concrete?
You can anchor, but avoid wood-to-concrete direct contact that traps moisture. Use proper concrete anchors plus standoffs or post bases rated for ground contact, and keep the stringer base set so it cannot slide under load.
What footing depth do I need if I live in a freeze-prone area?
You typically need footings that extend below the frost line, which varies by region. Check your local building department or frost-depth guidance, then design the pad or footing accordingly before you pour or set any base supports.
How far should the concrete pad extend past the stringers?
A practical rule is to extend the pad a few inches beyond the stringer footprint so there is solid bearing under edges and a stable base for load transfer. Make sure the pad is level, and let it cure fully before installation.
Where do rot and cracking most commonly start on patio stairs?
Pay special attention to joints where the stringers connect to the patio structure and where cut ends are exposed. Those areas trap moisture and accelerate end-grain soaking, so sealing cut ends right after cutting and adding flashing or caulk at the joint matters.
When should I add a handrail if my stairs have fewer than four risers?
Code may not require it on short flights, but adding a handrail is still recommended for stairs used by kids or older adults. A good trigger is if the route is a primary entry path or if the stairs are steeper than average.
What height should I set a handrail to, and how do I measure it correctly?
Measure from the stair nosing line up to the top of the handrail. Keep the result between 34 and 38 inches. If your patio landing or first tread has an odd slope, confirm the nosing line reference before you lock in posts.
How can I stop wet-wood slipping without replacing the whole tread?
Use non-slip tread tape or attach textured metal nosing strips, and roughen the surface with an appropriate grip pattern method for wood. Make sure the chosen product is rated for exterior weather exposure, then reapply or recoat as needed in your climate.
Can I build patio stairs in phases, like setting stringers first and adding treads later?
You can, but avoid leaving framed stringers loose for long periods. Exposed cut ends and unsealed wood start degrading quickly, and temporary misalignment can make later tread installation inconsistent. If you pause, fully anchor and weatherproof the parts you’ve installed.
What’s the best way to fix stairs that are already rocking or pulling away?
First identify whether the issue is footing movement or connection failure. In many cases, stabilizing or rebuilding the concrete pad, adding or correcting supports, and replacing any compromised anchors works better than shimming only at the top.
Next Article
How to Replace a Patio: DIY Step-by-Step Guide
DIY guide to replace a patio end to end, from tear out and drainage to base prep, pavers or concrete, and finishing tips
