You can build a solid, good-looking patio directly over existing grass for as little as $2–$4 per square foot in materials if you pick the right system and do the prep properly. The key is killing the grass, excavating 4–6 inches, laying a compacted gravel base with a weed barrier, and finishing with your chosen surface: pea gravel, pavers, or deck-block-supported wood. If you want a patio on top of grass, the most important move is to kill and excavate the grass first so you can build a compacted base and prevent shifting and weeds kill the grass. If you're starting from an existing lawn, learning how to patio over grass will help you choose the right base, drainage, and surface so it stays stable. If you're aiming specifically for a raised patio on grass, the key is still the same: kill the sod, build a stable base, and add proper drainage and a weed barrier how to build a raised patio on grass. Skip any one of those steps and the patio will shift, flood, or sprout weeds within a season. Do them right and it'll last a decade with almost no maintenance.
How to Make a Cheap Patio on Grass: DIY Steps

Quick reality check: when a patio over grass actually works
Building over grass is totally doable on most residential yards, but there are a few situations where you need to pump the brakes before you start digging. First, know what's underground. If your home uses a septic system, locate your leach field before you excavate anything. Dense materials like pavers and compacted gravel can crush drain-field pipes and compact the surrounding soil enough to seriously clog the system. Even a gravel patio directly over a leach field is a bad idea. If you are thinking about a patio over a leach field, treat it as a safety and permitting issue first, since dense patios can crush drain-field components and seriously clog the system. If you're not sure where your leach field is, call your local health department or pull old permits before you dig.
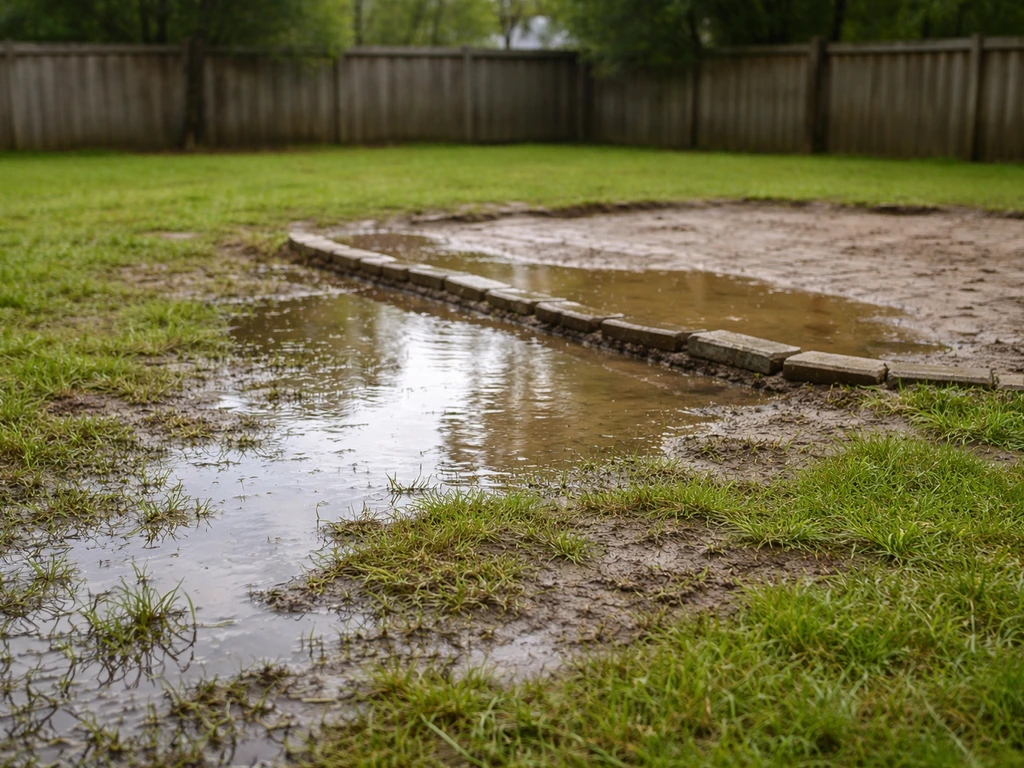
Outside of that, the main question is whether your yard drains reasonably well. A spot that turns into a puddle every time it rains is not a lost cause, but you'll need to think harder about slope and possibly route water away with a French drain before you build. A yard with decent natural drainage, relatively flat ground (or a gentle slope you can work with), and no underground utilities in the build zone is basically ideal for a cheap DIY patio. If you need something fully removable or you're renting, check out temporary patio options, which involve a different approach with less excavation. That same “less excavation” mindset is also the core idea behind how to make a temporary patio, using removable materials you can move or take up later temporary patio options. Temporary patio options like removable or low-excavation systems can help you create a workable outdoor space on grass without doing a full dig-in project.
Choose the cheapest patio material system for your situation
There are three budget-friendly systems that work well on grass with a proper base. Each has a different cost floor, a different feel underfoot, and a different amount of labor involved. Here's how they stack up honestly.
| System | Approx. Material Cost (per sq ft) | DIY Difficulty | Durability | Best For |
|---|---|---|---|---|
| Pea gravel / crushed stone | $1–$2 | Easy | Good (needs occasional top-up) | Casual seating areas, low-traffic zones |
| Concrete pavers or brick | $2–$4 | Moderate | Excellent (10–20+ years) | Main outdoor living/dining areas |
| Deck blocks + pressure-treated wood or composite | $3–$5 | Moderate | Good (7–15 years with maintenance) | Soft ground, uneven yards, raised feel preferred |
Gravel patios: the fastest and cheapest option
A gravel patio is the fastest path to an outdoor space. You excavate a few inches, lay a weed barrier, add a compacted base layer, and top it with pea gravel or crushed limestone. Total material cost for a 200-square-foot patio can easily stay under $300–$400 if you shop local landscape suppliers rather than big-box stores. The downside is that gravel moves underfoot, furniture legs sink into it, and you'll need to rake and top it up every year or two. Add a border of edging or stepping stones to corral it and it becomes much more livable.
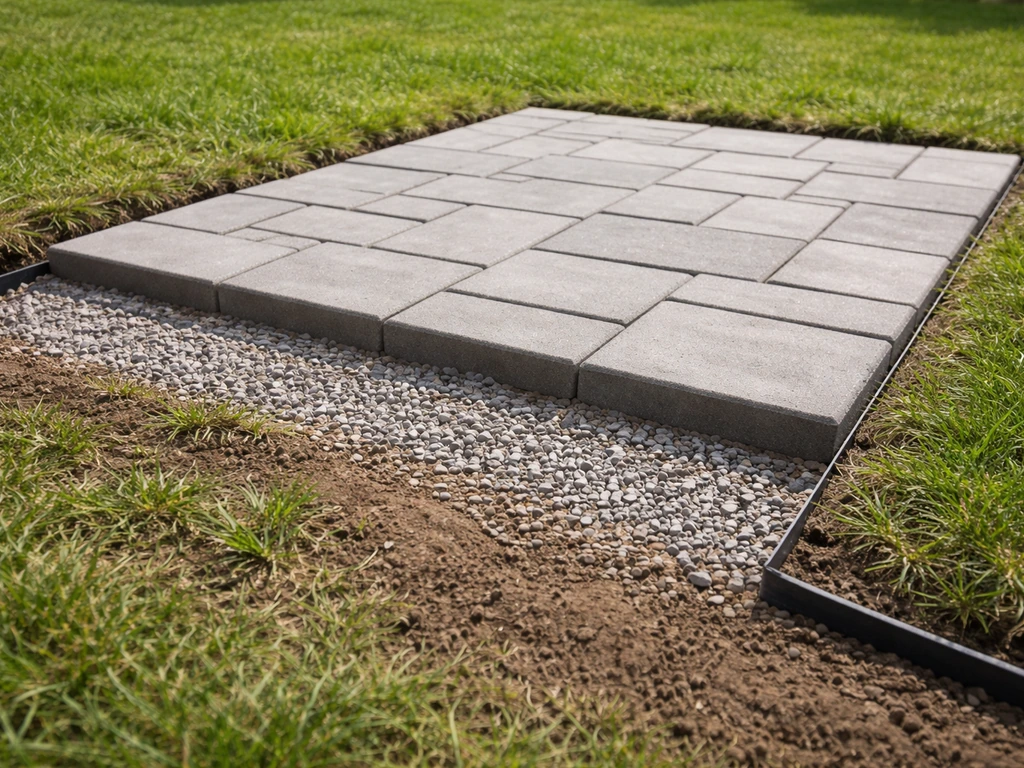
Paving stones and brick: the sweet spot for durability vs. cost
Concrete pavers are where most DIYers land, and for good reason. They're relatively affordable (basic 12x12 concrete pavers run $1–$2 each at home improvement stores), they look clean and finished, and when laid on a proper base they can last decades. For a 200-square-foot patio, expect total material costs in the $600–$1,200 range including pavers, gravel base, bedding sand, edging, and joint sand. The labor is more involved than gravel but very manageable over a weekend or two.
Deck blocks and wood: good for soft or uneven ground
If your yard is soft, slopes unevenly, or you just want the feel of a wood deck without full footings and framing, deck blocks (precast concrete pier blocks) are a clever budget option. You set them directly on compacted gravel pads, then frame 2x6 or 2x8 joists across them and install decking boards on top. It's more like building a low platform deck than a patio, but it hugs the ground closely and costs far less than a full elevated deck. This approach is also closely related to building a patio deck over grass, which involves a similar block-and-frame system.
Site prep on grass: how to clear, level, weed-proof, and drain
This is the part most people rush, and it's exactly where cheap patios fail. Spending an extra half-day on prep saves you from a lumpy, weedy mess six months later. Here's the process I follow every time.
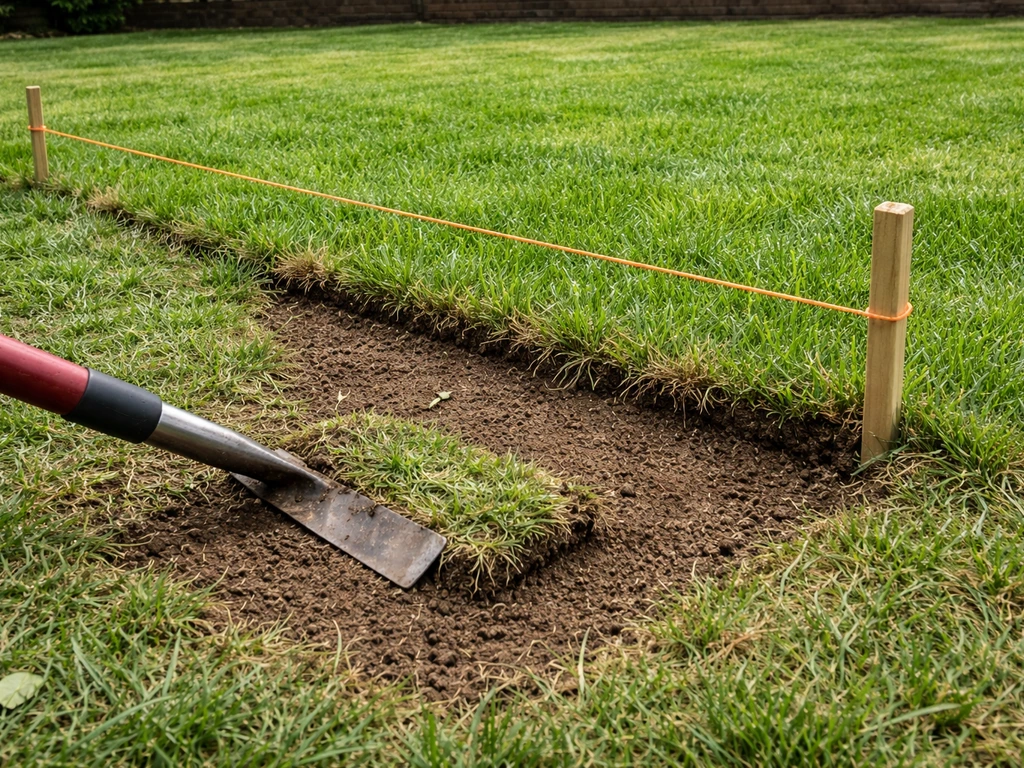
- Mark your patio boundary with spray paint or stakes and string. Add 6 inches on each side beyond your intended finished edge to give yourself working room.
- Kill the grass. You can strip sod with a flat spade or rent a sod cutter (about $70–$100/day), or smother the grass with cardboard and a tarp for 2–4 weeks if you're not in a hurry. Stripping is faster and more reliable.
- Excavate to depth. For a paver patio you need roughly 6–8 inches of excavation to fit a 4-inch gravel base, 1-inch bedding sand, and a 2-inch paver on top. For a gravel-only patio, 4–5 inches is usually enough. Rent a plate compactor if you don't own one.
- Check for slope. Use a long level and a tape measure to confirm the ground slopes away from your house at about 1/8 to 1/4 inch per foot. That 1–2% grade is what keeps water from pooling against your foundation.
- Compact the subgrade. Run a plate compactor over the bare soil at least twice before adding any base material. Loose soil is the number one cause of settling.
- Address drainage now. If the area doesn't drain naturally, dig a shallow trench along the low edge and route it away from the patio before you start building up layers.
Base layers on a budget: thickness, compaction, and weed barrier
The base is what separates a patio that lasts from one that looks like a disaster after the first winter. You don't need expensive materials here, just the right ones in the right order.
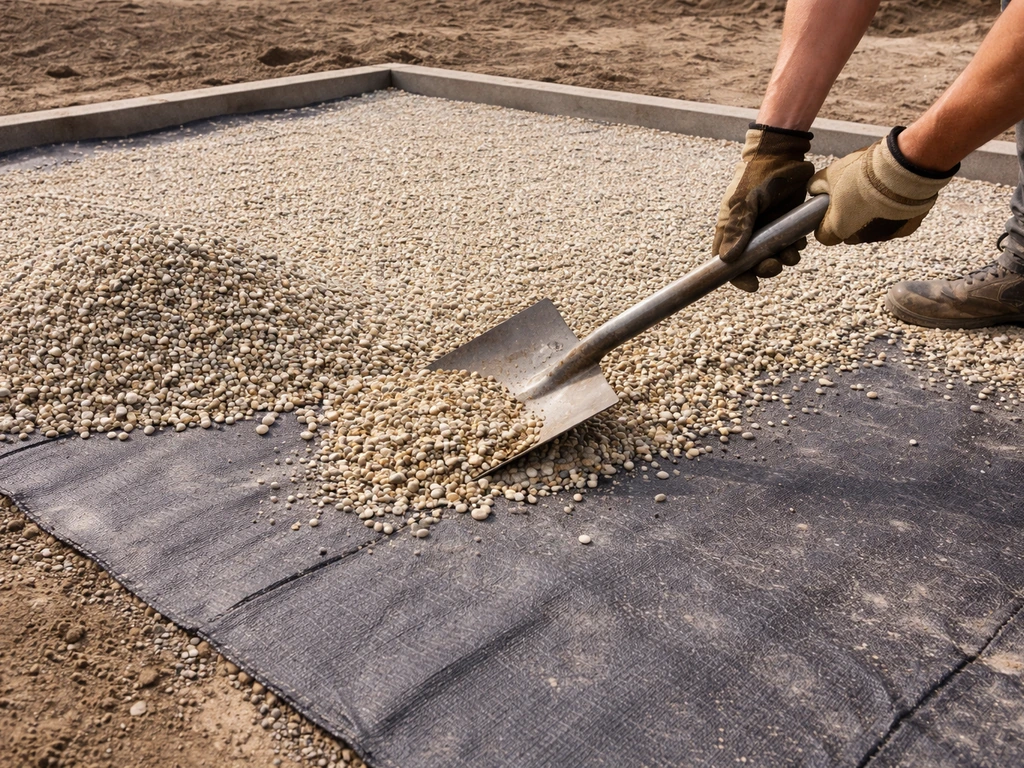
Start with a weed barrier fabric laid directly on the compacted subgrade. Overlap strips by at least 6 inches and run it up the sides of your excavation a bit. Don't use cheap plastic sheeting, it traps water and rots. Use a proper landscape fabric rated for hardscaping. Landscape fabric is described as a textile used to control weed growth by inhibiting weed exposure to sunlight blank" rel="noopener noreferrer">Use a proper landscape fabric rated for hardscaping.. Home Depot and similar stores carry it in rolls; extend it a few inches beyond your planned paver edge before trimming.
On top of the fabric, add 3/4-inch minus crushed gravel (also called road base or Class II base) in 2–3 inch lifts, compacting each layer with a plate compactor before adding the next. Your finished base should be 4 inches thick for a pedestrian patio on stable soil, or up to 6 inches if your soil is soft or clay-heavy. Do not skip compaction between layers. Compacting in thin lifts is what creates a stable, non-settling base.
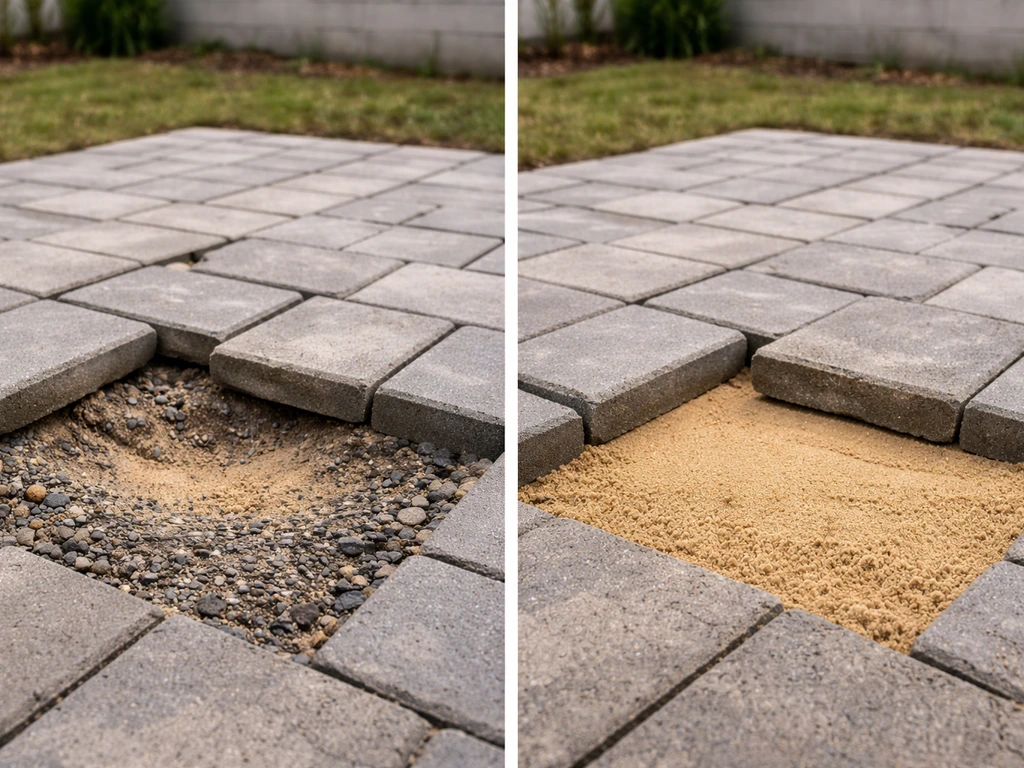
For a paver patio, finish with about 1 inch of coarse bedding sand (concrete sand works well) screeded level across the base. This is the setting layer that lets you fine-tune each paver's height individually. For a gravel-only patio, you can skip the sand and just top-dress with your decorative gravel directly on the compacted base.
Step-by-step: laying the patio floor from edging to finishing joints
Once your base is compacted, leveled, and sloped correctly, here's how to build the surface layer. I'll walk through the paver method since it's the most common and requires the most precision, but I'll note where the gravel and deck-block approaches differ.
- Install edge restraints first. Plastic paver edging (the kind with spikes) goes around the perimeter before you start laying pavers. Set it at the correct finished height. Soil backfill alone is never a reliable restraint; without proper edging, pavers migrate outward and the whole surface loosens over time.
- Start from the house and work outward. Set a chalk line or string as your first row guide. Working away from the house ensures your slope stays correct and your rows stay straight.
- Lay pavers in your chosen pattern. Running bond (like brickwork) and 90-degree herringbone are the easiest for beginners. Press each paver firmly into the bedding sand and check with a level frequently. Tap down any high spots with a rubber mallet.
- Cut pavers for edges and corners. A rented wet saw or angle grinder with a diamond blade handles this cleanly. Budget $40–$60 for a half-day wet saw rental if you don't own one.
- Compact the laid surface. Run a plate compactor (with a rubber pad or a piece of carpet under the plate to protect pavers) over the entire area once all pavers are set. This seats everything firmly into the bedding sand.
- Sweep joint sand into the gaps. For a cheap, low-maintenance approach, regular coarse sand works. For better weed resistance and joint stability, use polymeric sand (about $25–$35 per bag, covers 30–50 sq ft depending on joint width). Sweep it into joints dry, then compact again lightly, sweep again, and activate polymeric sand with a fine water mist. Keep pavers dry when applying polymeric sand, moisture before activation causes haze that's hard to remove.
- Final cleanup. Blow or brush off excess sand, rinse pavers lightly if needed, and inspect joints. Top off any shallow joints with a second pass of sand once the first application has settled.
For a gravel-only patio, steps 1 and 6 are the most important. Set your edging, fill with decorative gravel to about 2–3 inches deep, rake level, and you're done. For a deck-block platform, place blocks on individual compacted gravel pads at each corner and every 4–6 feet along your planned joist layout, level each block carefully, then frame and deck just as you would a standard low deck.
Costs, tools, and how long this actually takes
Let's put real numbers on this. A 200-square-foot patio is a useful benchmark, roughly 10x20 feet, enough for a table, chairs, and a grill.
| Item | Gravel Patio (200 sq ft) | Paver Patio (200 sq ft) |
|---|---|---|
| Crushed gravel base | $80–$120 | $80–$120 |
| Weed barrier fabric | $20–$40 | $20–$40 |
| Decorative gravel or pavers | $100–$200 | $300–$600 |
| Bedding sand | Not needed | $30–$60 |
| Polymeric joint sand | Not needed | $50–$100 |
| Plastic edging + spikes | $30–$50 | $40–$60 |
| Total materials (approx.) | $230–$410 | $520–$980 |
| Tool rentals (plate compactor, sod cutter) | $100–$150 | $130–$200 |
| Grand total DIY estimate | $330–$560 | $650–$1,180 |
For tools, you'll need a flat spade, a wheelbarrow, a long level (4-foot minimum), a tape measure, a rubber mallet, a screed board (a scrap 2x4 works), work gloves, and safety glasses. The plate compactor and sod cutter are both worth renting rather than buying for a one-time project. If you go the paver route and need cuts, add a diamond blade for an angle grinder ($20–$30) or rent a wet saw.
On time: a 200-square-foot gravel patio is a solid one-day project for two people. A 200-square-foot paver patio is realistically a full weekend, sometimes into a third day if you're new to it. Professionals might do 300 square feet in 35–40 hours; as a DIYer, budget 40–50 hours for that size and don't be surprised if your first project takes longer. Break it into phases: prep and excavation on day one, base compaction and edging on day two, laying and jointing on day three.
Maintenance and troubleshooting common problems
Settling and uneven pavers
If individual pavers start to dip or rock within the first year, the culprit is almost always inadequate base compaction or a thin bedding sand layer. Fix it by pulling the affected pavers, adding and leveling fresh bedding sand underneath, and resetting them. This is actually easy with pavers (unlike concrete), which is one of their biggest advantages. If a whole section settles uniformly, you may have soft soil underneath that wasn't adequately compacted at the start, and you'll need to excavate and rebuild that area with proper compaction in lifts.
Weeds pushing through
Weeds in a paver patio almost always come from seeds blowing in and germinating in the joints, not from roots pushing up through the base (assuming your weed barrier is intact). The best defense is polymeric sand, which hardens in joints and makes it very hard for seeds to take hold. Polymeric jointing sand from PermaSand lists coverage of about 30 to 45 square feet per 40 lb pail, with the exact coverage varying by joint size, depth, and conditions. If you used regular sand and weeds are already growing, spray with a targeted weed killer, let them die, pull them out, and repack the joints with polymeric sand on dry pavers. For a gravel patio, a second layer of weed barrier under the decorative gravel combined with proper edging is your best long-term protection.
Drainage problems and puddles
Standing water after rain means your slope is off or there's a low spot in the patio. Use a level to identify the problem area. If it's a small depression in a paver section, lift the affected pavers, regrade the bedding sand, and reset. If water is pooling against your house, your patio pitch is running the wrong direction, which means regrading a larger section. Catching this during the excavation phase is obviously much easier, which is why checking slope early and often during the build is so important.
Edging migration and spreading
If your patio edges are creeping outward or pavers near the perimeter are shifting, check your edging stakes. Plastic edging spikes should be driven fully into the subgrade outside the paver edge, not just tapped in halfway. Add extra spikes every 12 inches along any section that's moving. In climates with hard freeze-thaw cycles, edging takes a beating every winter; check and reseat spikes each spring.
Gravel scattering and thinning
A gravel patio naturally loses material over time from foot traffic and rain. Plan to top it up with a fresh inch of decorative gravel every year or two. Solid edging restraints do most of the work of keeping gravel contained; if yours keeps escaping, step up to a deeper or heavier edging profile. Raking the surface smooth before every outdoor gathering takes about five minutes and keeps it looking good between top-ups.
FAQ
Can I lay a patio on grass without fully removing the sod?
Yes, but only if the grass is truly dead and the base stays separated. Use a proper landscape fabric rated for hardscaping, overlap seams (about 6 inches), and extend the fabric up the excavation sides so roots cannot find gaps. If you skip the overlap or leave exposed soil at the perimeter, weeds usually show up in the first year.
Why shouldn't I use cheap plastic sheeting as a weed barrier under a patio?
Avoid it. Plastic sheeting can trap moisture and accelerate decomposition under the patio, which can lead to soft spots and uneven settlement. Use hardscaping landscape fabric instead, and keep it in contact with compacted soil, not lying loose over air gaps.
What slope should a cheap patio on grass have, and how do I make sure it drains right?
For most DIY projects, orient the patio so drainage flows away from the house, then verify the slope during excavation using a long level. If your yard is flat, add a subtle pitch (enough that water will not stay in one pocket), and consider adding a French drain only in the lowest area rather than across the whole yard.
My paver joints are washing out and weeds are coming through. What should I do first?
If you see weeds before joint fill has hardened or if joints wash out, re-compact the area and reset pavers only after correcting the base. If the base is solid, the quicker fix is to remove loose sand, clean the joints, and re-pack with polymeric sand on dry pavers, then avoid watering for the time recommended by the product.
What’s the correct fix when some pavers dip or rock after a year?
Don’t add more sand on top of an existing sunken area. Pull the affected pavers, address the underlying compaction problem, then add bedding sand in thin, controllable amounts to reach level. Proper compaction is the difference between a repair that lasts and a repeat issue the next season.
My gravel patio keeps spreading outward. How can I keep it from escaping?
Start with edging that is tall enough to resist lateral movement. For gravel, shallow edging often fails because the stones migrate with foot traffic and vibration, so consider a deeper edging profile or heavier metal/plastic edging and ensure it is well staked into firm subgrade.
How do I know if my compacted base is actually solid enough?
Typical “DIY plate compactor” rental works, but don’t rely on it without doing test checks. After compacting each 2 to 3 inch lift, walk the area and look for wave-like impressions. If you can visibly compress the surface with normal walking pressure, you need another pass or thinner lifts.
What repairs are easiest to do later for gravel, pavers, or deck-block patios?
It depends on the patio system. Gravel tops can often be repaired quickly with spot top-dressing, but pavers should be addressed after confirming the bedding layer and base are level. For a deck-block platform, check block leveling and joist line before fixing decking boards, because misalignment can cause fasteners to loosen.
How should I winterize or maintain a cheap patio on grass in freeze-thaw climates?
For freezing climates, prioritize edging integrity and joint stability. Check spikes and edging seating in spring, keep weeds out of joints early, and avoid heavy snow-melting salts directly on pavers because repeated freeze-thaw and surface damage can worsen joint gaps.
My yard puddles after rain. Can I still build a patio on grass without reworking drainage?
If your yard floods, treat it as a drainage design problem, not a construction detail. Identify the low spot, confirm where water goes during storms, and if needed install localized drainage (for example, a French drain) before building so the patio does not become a permanent pond.
What are practical temporary or low-excavation options if I’m renting or want the patio removable?
Yes, and in that case consider either a fully removable approach (like modular deck tiles) or a low-excavation system that you can lift later. The key decision is whether you can tolerate leaving fabric and base layers behind, because a “temporary” plan often still requires some leveling and partial ground prep.
How do I handle underground utility risk when I’m excavating over grass?
Call before you dig. Even if you know your yard well, locate underground utilities with your local “call before you dig” service, and avoid excavating deeper than needed. If utility locations are unclear, postpone until they are marked so you don’t risk hitting lines during the 4 to 6 inch excavation.
How to Replace a Patio: DIY Step-by-Step Guide
DIY guide to replace a patio end to end, from tear out and drainage to base prep, pavers or concrete, and finishing tips
