Yes, you can absolutely build a patio without gravel, and plenty of them last for decades. The key is replacing gravel's two main jobs (drainage and a stable, compactable base) with something else that does the same work. Whether that's compacted roadbase, a concrete slab, pedestal-mounted tiles, or a timber frame, you have real options. That said, gravel-free builds can fail fast if your soil is soft clay, your yard holds water, or you skip proper compaction. This guide walks you through exactly when it works, how to pick the right system, and how to build it correctly the first time.
Can You Build a Patio Without Gravel? DIY Guide

Nolan Lennox
22 May 2026
Yes, You Can, But Here's When You Can't
A gravel-free patio works well when your native soil is firm and well-draining, think sandy loam, decomposed granite, or compacted clay that doesn't turn to soup in the rain. If you dig down 6 inches and the soil feels solid and drains reasonably fast, you're in a great position to skip gravel entirely and use compacted roadbase, a concrete slab, or another system as your base.
Where gravel-free designs struggle is on expansive clay soils that swell when wet, low-lying yards that collect standing water, or any site with a high water table. In those situations, a gravel drainage layer isn't just a nice-to-have, it's doing real structural work. If you push ahead without it on bad soil, you'll deal with heaving, sinking, and cracked surfaces within a few years, especially in climates with hard freezes. If your soil is the problem, it's worth looking into how to excavate for a patio properly, including whether you need deeper digging or better grading before you commit to any base system.
- Good candidates for gravel-free: sandy or loamy soil, sites with natural slope away from the house, dry climates, small patios under 200 sq ft, pedestal/deck systems over any soil
- Poor candidates: heavy clay that holds water, flat yards with no drainage outlet, freeze-thaw climates without deep enough base prep, large slabs without proper sub-drainage
Pick Your Gravel-Free System First
Before you dig anything, you need to decide which system you're building. Each one has a different base approach, material cost, and skill level. Here's an honest breakdown of your main options.
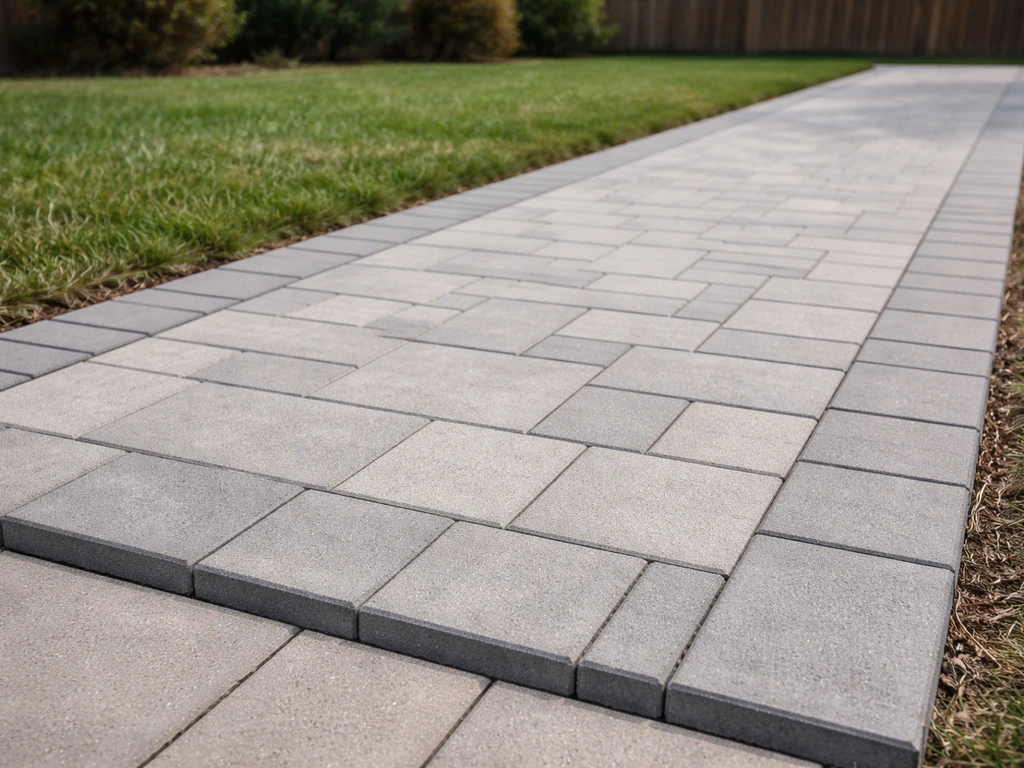
Pavers on Compacted Roadbase or Crusher Fines
This is the most popular gravel-free paver method. Instead of a layer of loose crushed stone or gravel, you use compacted crusher fines (also called decomposed granite or roadbase) as your subbase, topped with a thin bedding sand layer for the pavers to sit on. Crusher fines compact almost like concrete when tamped properly and drain well enough in most soils. This is what most professional hardscape installers actually use, and it works beautifully if you compact it correctly.
Concrete Slab

A poured concrete slab is the ultimate gravel-free option, you prep the subgrade, add reinforcement, pour, and you're done. It's the most durable surface you can build, especially for larger patios, and it handles foot traffic and heavy furniture without shifting. The tradeoff is that it's harder to DIY, more expensive for materials, and if it cracks (and it will eventually), repairs are more visible.
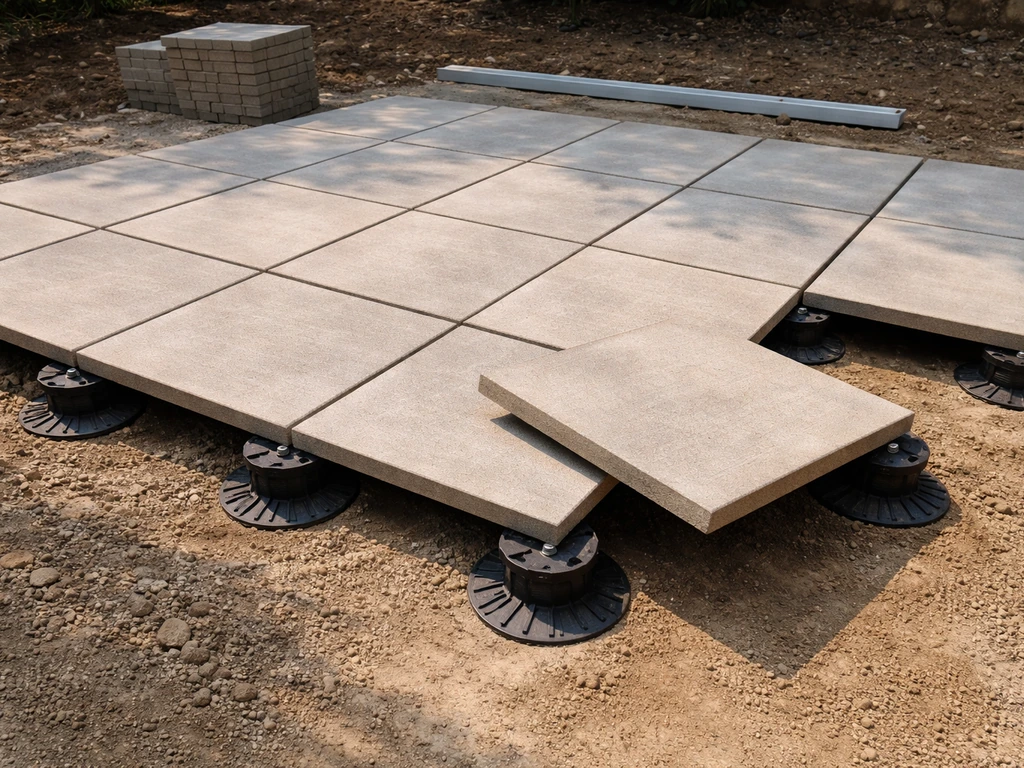
Pedestal-Mounted Pavers or Tiles
Pedestal systems are the true no-dig, no-gravel solution. You set adjustable plastic pedestals directly on the existing ground or a concrete surface, then lay large-format pavers or tiles on top. They're self-draining (water flows through the gaps), level-adjustable, and you can lift individual tiles for access to utilities. They cost more upfront but eliminate almost all the base prep work, which is a genuine time and labor savings.
Timber or Composite Decking (Ground-Level)
A ground-level deck built from pressure-treated lumber or composite decking is another fully gravel-free approach. You build a treated wood frame supported on concrete pier blocks or footings, and the decking surface sits above the ground with airflow underneath. Composite decking especially is low-maintenance and handles moisture well. This is worth considering if your yard is uneven, since you can level with the frame rather than moving earth.
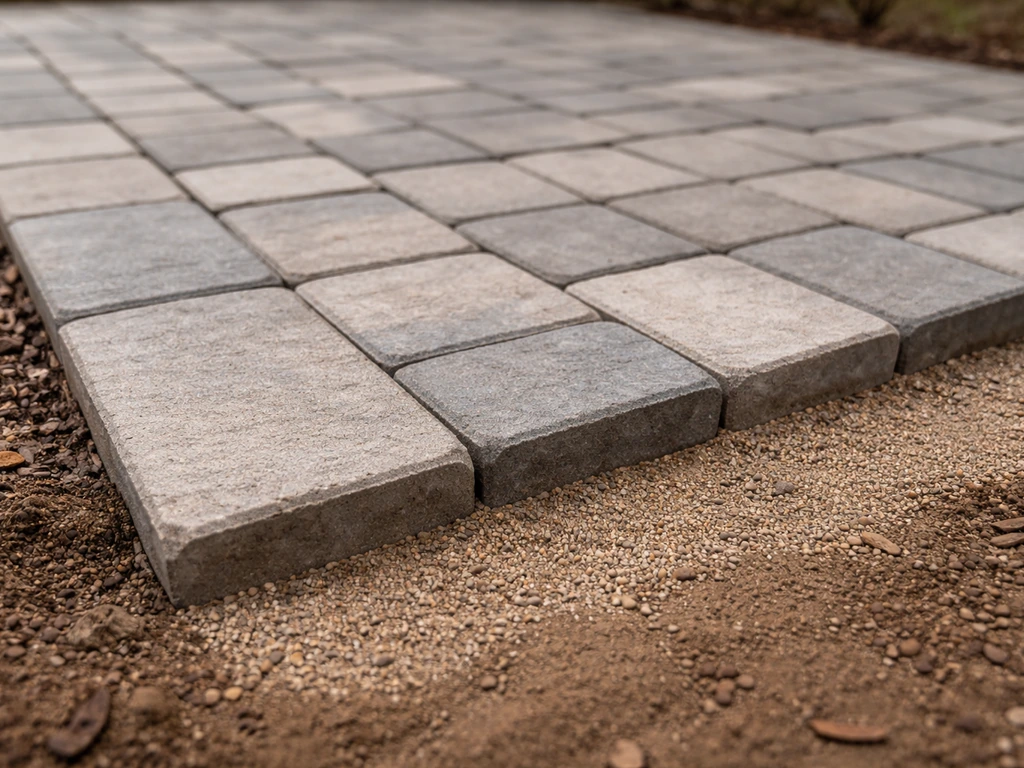
Brick or Natural Stone on Sand
Sand-set brick is one of the oldest patio methods and still works great for small to medium patios in stable soil. You compact the subgrade, add a 1-inch bedding sand layer, and set the bricks or stones by hand. It's forgiving, repairable, and genuinely beginner-friendly. The downside is that it needs well-draining soil underneath, otherwise you're back to needing that gravel drainage layer.
Base Prep Without Gravel: What You Actually Need to Do
Gravel's main jobs are drainage and providing a stable, compactable layer. When you skip it, you need to make sure your subgrade handles both. Here's how to prepare the base correctly regardless of which surface system you choose.
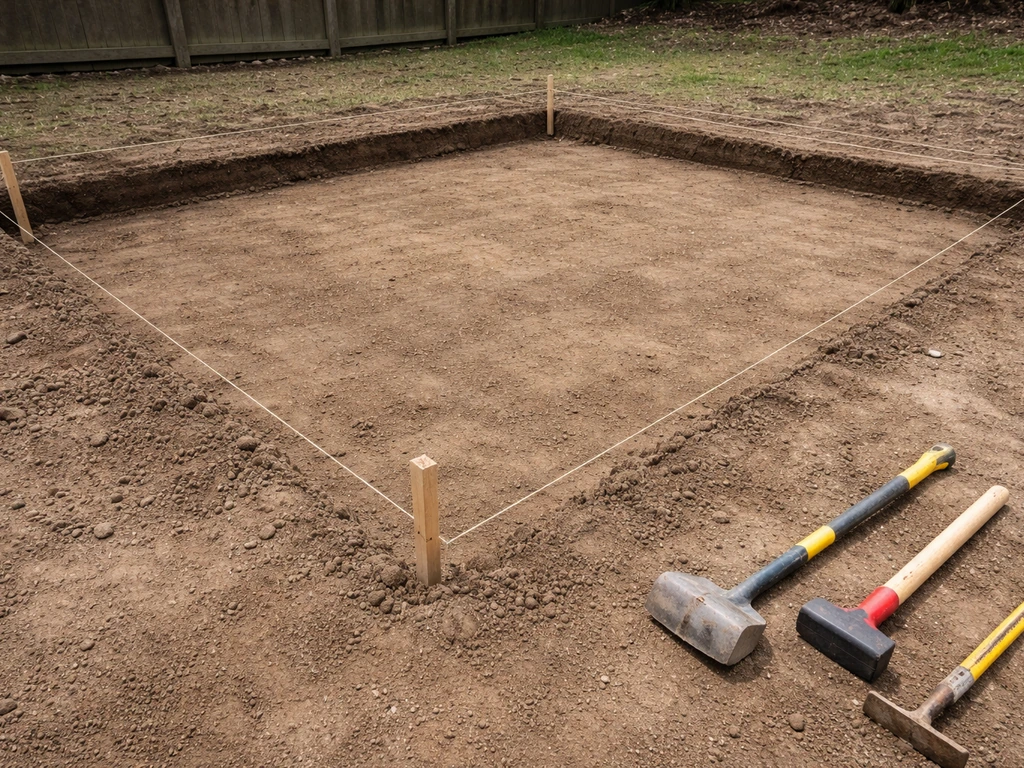
Excavation Depth

How deep you dig depends on your soil type, climate, and what you're building. For pavers or brick on compacted roadbase, plan to excavate 6 to 8 inches in most residential settings, deeper (up to 12 inches) in cold climates with deep frost lines. Concrete slabs need less base depth (typically 4 inches of compacted subgrade below a 4-inch slab), but they need a well-graded, undisturbed subgrade. Pedestal systems barely need any excavation at all.
Getting this depth right is worth the extra effort, if you want to go deeper on what's involved, learning how to dig a patio correctly saves you from leveling headaches later. If you’re wondering how to dig patio yourself, focus on proper excavation depth, slope, and compaction before you add any base material.
Grading and Slope
Every patio surface needs a slope of at least 1/8 inch per foot (about 1%) away from your house or toward a drainage outlet. This is non-negotiable, flat patios collect water and eventually heave, stain, or grow moss. Set this grade at the subgrade level before you add any base material, not after. Use a 4-foot level and a tape measure to check slope every few feet as you work.
Subgrade Compaction
This is the step most DIYers rush, and it's the reason patios sink. For interlocking concrete pavers, industry specs call for the subgrade to be compacted to at least 98% Standard Proctor density, in plain English, that means using a plate compactor (not just tamping by hand) until the ground stops moving. Rent a plate compactor for a day; it's usually under $100 and makes a real difference. Make multiple passes in different directions, especially in corners. If the soil is too dry, lightly misting it before compacting helps.
Geotextile Fabric: Use It or Skip It?
Geotextile (landscaping fabric) isn't always necessary, but it earns its place in specific situations. If your soil is sandy and might migrate up into your base material, or if you're worried about weeds coming up from below, lay a single layer of non-woven geotextile on the compacted subgrade before adding your base material. It's especially useful where edge restraints meet the soil, fine particles can wash out from underneath over time, causing edge slippage. Don't use it between your bedding sand and your pavers though; that can actually reduce interlock and cause settling.
Edge Restraints
Edge restraints hold everything together. Without them, pavers migrate outward over time, gaps open up, and the whole surface eventually looks like a mess. Use plastic or metal paver edging spiked into the subgrade, or pour a concrete edge beam on two sides. CMHA notes that when sand loss from beneath or under edge restraints is possible, using geotextile can help prevent migration and support long-term stability and drainage performance. Edge restraints matter even more in gravel-free builds because you don't have the weight and locking effect of a thick gravel layer to resist lateral movement.
Material Thickness Requirements by Option
Getting the layering right is where a lot of DIY patios go wrong. Here's what each system actually needs, in plain numbers.
| Patio System | Subbase Depth | Bedding/Setting Layer | Surface Thickness | Total Excavation Needed |
|---|---|---|---|---|
| Pavers on compacted roadbase | 4–6 in compacted roadbase | 1 in bedding sand | 2.375–3.125 in paver | 7.5–10 in |
| Concrete slab (4-in residential) | 4 in compacted subgrade | None (rebar/mesh) | 4 in concrete | 8 in |
| Pedestal pavers/tile | Minimal or none | Adjustable pedestals | 1.25–2 in tile/paver | 0–2 in (surface only) |
| Timber/composite deck | Pier footings only | Treated frame (varies) | 1–1.5 in decking boards | Below frost line for piers |
| Brick on sand (sand-set) | 4–6 in compacted soil | 1–1.5 in bedding sand | 2.25–2.5 in brick | 7–10 in |
One thing worth flagging on concrete: a standard 4-inch residential slab works fine for a patio with foot traffic and furniture, but if you're planning to drive a vehicle onto it or live in a heavy freeze-thaw climate, bump it to 6 inches and add rebar. Skimping on slab thickness is one of the most common, and most expensive, mistakes homeowners make.
How to Build Each Option: Step-by-Step
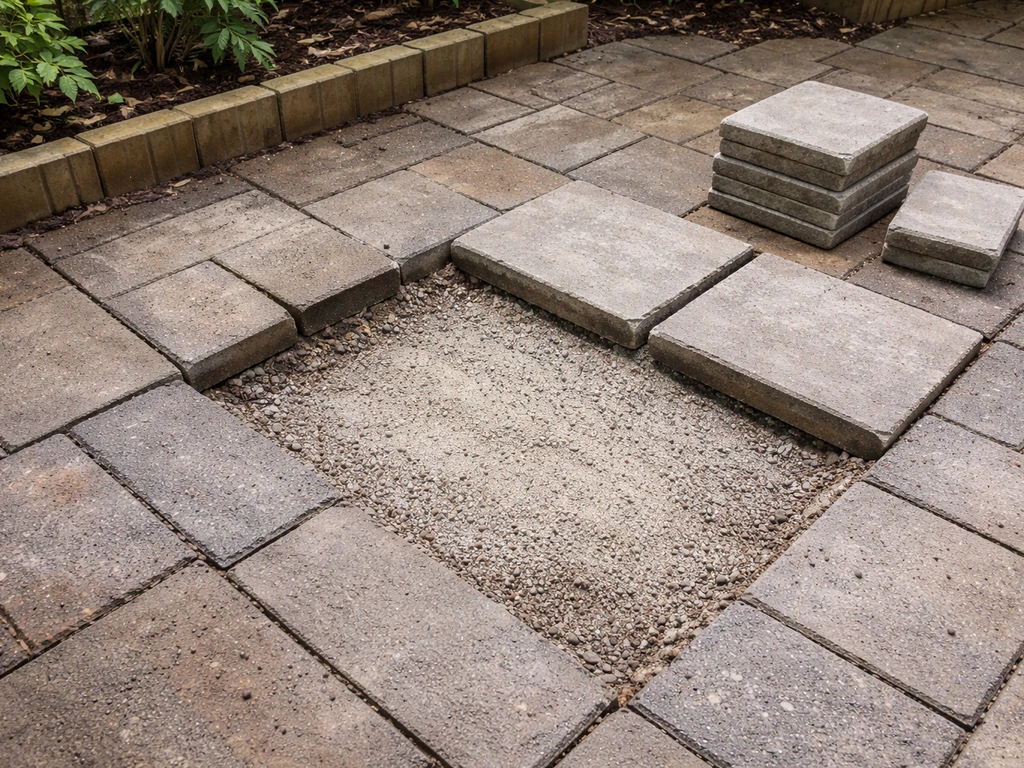
Option 1: Pavers on Compacted Roadbase
- Mark your patio area with stakes and string lines, maintaining that 1/8-inch-per-foot slope away from the house.
- Excavate to your target depth (typically 7–9 inches total for the base, sand, and paver combined). Remove all organic material and soft spots.
- If the soil is sandy or you want extra weed suppression, lay non-woven geotextile on the subgrade.
- Add 4–6 inches of compacted roadbase or crusher fines in 2-inch lifts, compacting each lift thoroughly with a plate compactor. Check slope at each lift.
- Install edge restraints on all four sides, staked or pinned into the compacted base.
- Screed 1 inch of coarse bedding sand (not play sand) smooth across the base using screed rails.
- Set pavers in your pattern, working from a corner outward. Don't walk on the screeded sand.
- Cut edge pavers to fit with a wet saw or chisel.
- Compact the finished surface with a plate compactor fitted with a rubber pad to avoid cracking.
- Spread polymeric joint sand over the surface, sweep into joints, then compact again and mist lightly to activate.
Option 2: Poured Concrete Slab
- Lay out the slab perimeter with batter boards and string lines. Account for a 1% slope minimum.
- Excavate 8 inches below your desired finished surface (4 in subgrade + 4 in slab).
- Compact the subgrade with a plate compactor. Remove any soft spots and fill with compacted material.
- Build wood forms from 2x4 or 2x6 lumber set to the finished slab height, checking for level and slope.
- Place wire mesh or rebar grid (typically #3 rebar at 18-inch spacing) supported 1.5 inches off the ground with chairs.
- Order or mix concrete at a minimum 3,000 psi mix. For a large patio, order ready-mix — it's worth it.
- Pour, screed, and float the surface. Tool the edges and cut control joints every 8–10 feet with a grooving tool.
- Cover with plastic sheeting and cure for at least 7 days before walking on it. Full strength takes 28 days.
- Seal the slab 30 days after pour with a penetrating concrete sealer.
Option 3: Pedestal-Mounted Pavers or Tiles
- Confirm your existing surface (ground, concrete, or roof deck) can support the load. For soil, lightly compact and grade for drainage.
- Lay out your pedestal grid based on your tile size — typically pedestals go at every corner where tiles meet.
- Set pedestals and adjust height using the threaded stacking system to create your desired finished height and slope.
- Lay tiles or pavers onto the pedestal tabs, working from one corner. Tabs automatically space joints.
- Check level and slope as you go; adjust individual pedestals as needed.
- No cutting needed at edges if you plan your layout — but a wet saw handles cuts for irregular edges.
- No grouting or sealing required for most pedestal systems.
Option 4: Ground-Level Timber or Composite Deck
- Lay out your deck footprint and mark pier locations — typically every 6–8 feet along the beam spans.
- Dig pier holes below your local frost line (check your local building code — typically 12 to 48 inches depending on climate). Pour concrete footings or use precast deck blocks for small patios in mild climates.
- Set 4x4 or 6x6 posts on footings, or use adjustable post bases to get height right.
- Install doubled 2x8 or 2x10 beams, then 2x8 joists on 16-inch centers across the beams.
- Lay composite or pressure-treated decking boards perpendicular to the joists, leaving a 1/8-inch gap between boards for drainage.
- Fasten with hidden clips (composite) or face screws (wood). Predrill wood to prevent splitting.
- Seal cut ends of pressure-treated lumber with end-cut preservative.
- Add fascia boards around the perimeter for a finished look.
Cost, Labor, and Maintenance: Honest Tradeoffs
Before you commit, know what you're getting into. Here's how the main gravel-free options stack up on real-world cost, effort, and what you'll need to do to keep them looking good.
| Option | Avg. DIY Material Cost (per sq ft) | Labor Difficulty | Key Maintenance | Lifespan (with care) |
|---|---|---|---|---|
| Pavers on roadbase | $8–$18 | Moderate — needs plate compactor, screed work | Re-sand joints every 3–5 yrs, occasional re-leveling | 25–50+ years |
| Concrete slab | $6–$12 | Hard — forming, rebar, pour timing | Seal every 2–3 yrs, monitor/fill cracks | 30–50 years |
| Pedestal pavers/tile | $15–$30 | Easy — mostly assembly | Clean tiles annually, re-adjust settled pedestals | 15–30 years |
| Timber deck (PT) | $10–$18 | Moderate — framing skills needed | Stain/seal every 2 yrs, inspect for rot annually | 15–25 years |
| Composite deck | $20–$35 | Moderate — same framing as wood | Occasional scrub with soap/water, no sealing needed | 25–30+ years |
| Brick sand-set | $6–$15 | Moderate — patience-intensive but forgiving | Re-sand joints, re-level settled bricks | 20–40 years |
The concrete slab wins on long-term durability and lowest annual maintenance cost, but it demands the most skill and has the highest labor cost if you hire out. Pedestal systems are the easiest build but cost the most per square foot. Pavers on roadbase hit the best balance of durability, DIY-friendliness, and cost, which is why they're the most popular choice. Composite decking costs more upfront than pressure-treated but saves you years of staining and sealing, so it's worth the premium if you hate maintenance.
Common Mistakes and How to Fix Them
Settling and Sinking
The number one cause of a sinking patio is insufficient compaction. If individual pavers or sections are dropping, lift them, add material underneath, compact, and reset. For sand-set systems, this is easy, you can pull a brick, add more sand, and re-set it in 20 minutes. For concrete, a sunken slab usually means either poor compaction or soil erosion underneath, and the fix is mudjacking (pumping slurry under the slab) or grinding down the high edge. Prevention is much cheaper than repair, so rent that plate compactor.
Poor Drainage and Standing Water
If water pools on your patio, you either didn't establish enough slope or your surrounding yard grade is directing water toward the surface. First, check the slope, if it's less than 1% away from the house, you need to re-grade. For an existing patio, adding a channel drain at the low edge can solve minor pooling without tearing things up. If the problem is water coming from the yard side, a small swale or French drain upslope of the patio intercepts it before it reaches the surface.
Frost Heave
In cold climates, water trapped in the base expands when it freezes and pushes your surface up. The solution is always depth, you need your base to extend below the frost line, and you need base material that drains well enough that water doesn't stay trapped. If you're in a freeze-thaw climate and didn't go deep enough, you'll likely see heaving every spring. The fix is to excavate deeper and start fresh with proper base depth. There's no shortcut here. If you're wondering how deep to dig for your specific climate and soil, that's worth researching before you break ground.
Shifting or Spreading Edges
If your paver or brick edges are slowly migrating outward, your edge restraints have failed or weren't installed. Add metal or plastic paver edging and spike it into the subgrade every 12 inches. If sand is washing out from under the edge restraints, lay a strip of geotextile along the perimeter under the base material, it lets water through but stops fine particles from migrating with it.
Weed Intrusion
Weeds in a gravel-free patio come from above (wind-blown seeds landing in joints) and occasionally from below. Polymeric joint sand is the best defense, it binds in the joints and leaves almost no gap for seeds to germinate. If you already have weeds, pull them by hand, treat with a targeted herbicide, and then re-apply polymeric sand. Don't use landscape fabric between your bedding sand and the pavers; it disrupts interlock and causes settling. The best long-term weed defense is tight joints and a surface with good drainage so the joints dry out quickly.
Cracking in Concrete
Concrete cracks, accept it now and plan for it. Control joints cut every 8–10 feet give the slab a place to crack in a straight, predictable line that you can seal. If you skip control joints, the slab will still crack, just randomly and across the surface. For existing random cracks, clean them out and fill with a flexible polyurethane or epoxy crack filler, then seal the whole surface. Hairline cracks under 1/8 inch wide are cosmetic; cracks wider than that with vertical displacement indicate a structural problem worth investigating.
If you're drawn to a truly no-dig approach, whether because your soil is too rocky to excavate easily or you just want to avoid the heavy work, a pedestal or ground-level deck system solves most of these problems from the start. Before you start any work, check whether your local rules require a building permit for a patio in your area building patio without permit.
Building a patio without digging is its own topic, but it feeds into the same core principle here: the right system for your site beats the most popular system every time. If you need a step-by-step plan for the full process, this guide on how to build a patio without cement can help you choose the right system and get the base right.
Pedestal-mounted pavers and ground-level decks are especially good if you want to build a patio without digging while keeping the base simple.
FAQ
Can you build a patio without gravel if your soil is just “okay” (not sandy, not clay-soup)?
Often, yes, but only if you can prove drainage and stability. Dig a test hole to the planned depth, fill it with water once, wait 24 hours, and look for standing water or soft spots. If it drains slowly or feels muddy when kneaded, switch to a thicker compacted roadbase or choose a pedestal system that reduces reliance on the native subgrade.
What’s the best gravel-free base for DIY that’s still forgiving if I’m new to compaction?
Compacted crusher fines (roadbase) topped with the right bedding sand is usually the most DIY-friendly. The key is using a plate compactor and compacting in lifts (add, compact, repeat) rather than dumping all material at once. If you cannot rent a plate compactor, a pedestal system is generally safer than sand-set bricks on marginal ground.
Do I need geotextile if I’m skipping gravel entirely?
Not automatically. Use non-woven geotextile only when you need separation or filtration, like sandy soils that can pump fine particles into the base, or where edge restraints meet vulnerable subgrade. Avoid placing fabric between bedding sand and pavers, since it can reduce interlock and lead to settlement over time.
Is a sand-set patio still considered “gravel-free,” and is it a bad idea for wet areas?
It can be gravel-free if you’re using bedding sand and compacted subgrade with no stone layer. It’s a bad idea in wet or seasonally saturated ground unless your underlying soil drains well, because the system depends on drying within the joints to stay stable. If your yard holds water after rain, choose pavers on roadbase or a pedestal option instead.
Can I install polymeric joint sand on a gravel-free paver patio?
Yes, and it’s often the best weed and joint-stability choice. Just avoid applying it while the patio is wet or when rain is expected soon, since polymeric sand needs dry joints to activate. In freeze-thaw climates, keep an eye on joint maintenance after heavy winters, because washing out joints can start weed problems.
How do I prevent the patio from moving if there’s no gravel “mass” to lock everything in?
Rely more on edge restraints and correct depth. Install edging that’s spiked into the subgrade at regular intervals (commonly every 12 inches) and ensure your base depth and slope are correct. Also, keep paver thickness consistent and avoid “thick-thin-thick” areas, since uneven edges encourage outward creep even with good compaction.
What slope should I aim for if the patio is near a basement or garage door?
Aim for at least about 1% slope away from the structure (roughly 1/8 inch per foot). Then check the grading around entrances specifically, because water can be redirected by door slabs, downspouts, or the garage apron. If the surrounding grade sends water toward the patio, you may need a small swale or drain upstream, not just a patio slope correction.
Can I pour a concrete slab without gravel underneath?
Yes in many cases, but the subgrade preparation is the whole job. A slab still needs properly graded, well-compacted soil below it, and you typically build with reinforcement and the correct thickness for your conditions. If you’re in a heavy freeze-thaw area or might drive on it, increase slab thickness and do not shortcut base quality, since the slab will crack or heave if the support is unstable.
What’s the fastest way to diagnose why a gravel-free patio is sinking?
Lift a sunken paver or section and inspect the base immediately under it. If you see voids, soft spots, or gaps where fines have washed out, it points to compaction issues or subgrade erosion. For sand-set systems, you can often rework by adding and compacting new material; for larger paver assemblies, you may need to remove a larger area and re-compact in lifts.
Do pedestal patios count as truly “no gravel,” and do they work on uneven yards?
Yes, pedestal systems can be entirely gravel-free because the pedestals support the surface above the ground. They work well on uneven sites since you adjust height rather than excavating to a uniform base. Make sure you have a stable footing beneath each pedestal, and verify local drainage so water can move away from the area below the patio.
Will building without gravel affect permits or inspection requirements?
It can. Some areas treat patio foundations, drainage modifications, or impermeable surface coverage differently even if you avoid excavation. Before you start, check local rules for permits or inspections, especially if you’re adding drains, changing grading near a foundation, or using a substantial slab.
Next Article
How to Excavate for a Patio Paver Base Step by Step
Step-by-step guide to excavate the right depth, grades, and subgrade for a paver patio base, ready to compact.