You can build a solid, long-lasting DIY patio by following this sequence: choose your material, plan the layout with proper slope, call 811 to check for buried utilities, excavate 8 to 12 inches deep depending on your material, compact a gravel sub-base, set your edging, install your surface, finish the joints, and seal if needed. Do each step right and your patio won't crack, shift, or turn into a puddle every time it rains. Skip one, especially the base or the slope, and you'll be tearing it up within a few years.
DIY Patio Step by Step: Build a Patio From Start to Finish

Nolan Lennox
4 May 2026

Choosing the right patio type for your goals and budget
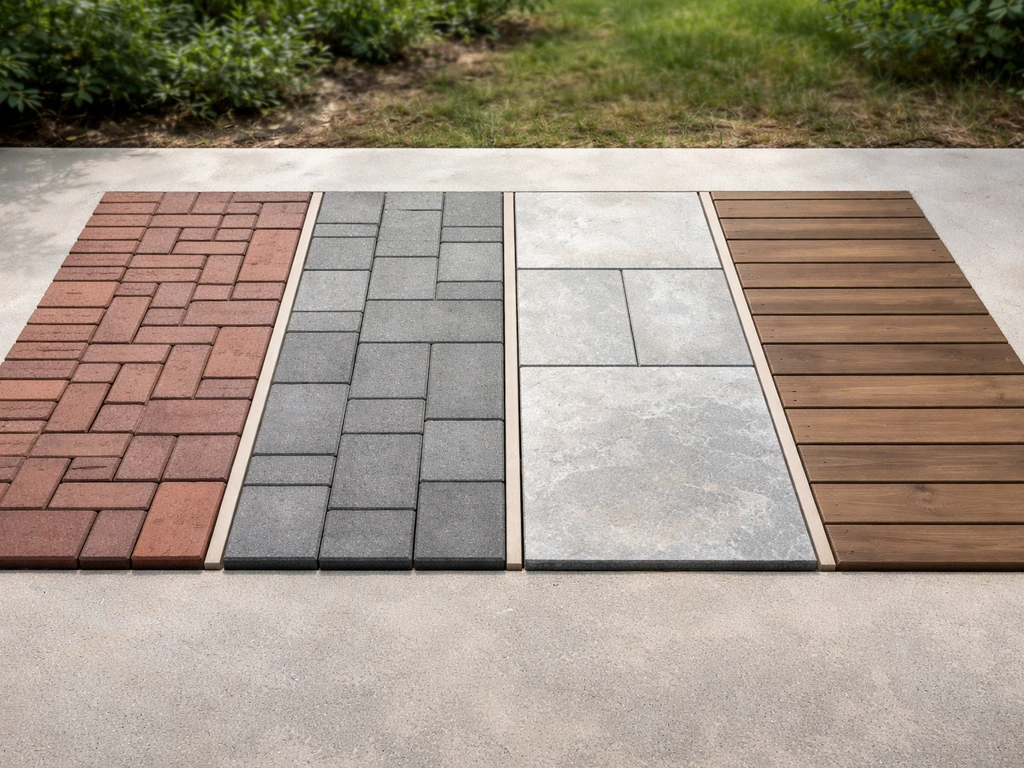
The material you pick shapes everything else: your budget, your weekend count, the tools you need, and how the finished patio holds up over time. There's no universally best option, each one makes sense in certain situations. Here's an honest breakdown.
| Material | Approx. Cost (installed DIY) | Durability | Skill Level | Best For |
|---|---|---|---|---|
| Concrete pavers | $8–$20/sq ft | Excellent — 30+ years | Beginner-friendly | Most homeowners; flexible, repairable |
| Brick | $10–$20/sq ft | Excellent — 50+ years | Beginner to intermediate | Classic look; durable in most climates |
| Poured concrete | $5–$10/sq ft | Very good — 25+ years | Intermediate to advanced | Large flat surfaces; low ongoing maintenance |
| Gravel/crushed stone | $2–$5/sq ft | Good — needs top-ups | Easiest | Budget builds; great drainage; informal spaces |
| Wood/composite decking | $15–$35/sq ft | Good to excellent | Intermediate | Uneven ground; raised patios; warm aesthetic |
Concrete pavers are my go-to recommendation for first-time builders. They're forgiving, if one area sinks or a paver cracks, you pull it up and fix just that section. Poured concrete is cheaper per square foot but less beginner-friendly: get the slope wrong, place control joints in the wrong spots, or pour in bad weather and you'll have cracks within a season. Gravel is the fastest and cheapest to install, but it needs edging to stay put and periodic topping up. Wood and composite work beautifully for sloped yards where a ground-level build would need too much excavation, but they sit in a different build category. If you're interested in steps connecting your patio to the house or yard, building a patio step is a closely related project worth planning at the same time.
Planning and measuring before you touch a shovel
Measure your intended patio area and mark it out with stakes and string lines. A standard comfortable patio for a table and four chairs is about 12 x 12 feet minimum; 16 x 16 feet gives you real breathing room. Use a tape measure and the 3-4-5 triangle method to get square corners: measure 3 feet along one string, 4 feet along the perpendicular, and adjust until the diagonal between those two points is exactly 5 feet.
Drainage is non-negotiable. Your patio surface needs to slope away from any structure at a minimum of 1/8 inch per foot, and 1/4 inch per foot is safer. If you want a path or walkway look, the same slope and drainage rules apply when you figure out how to make a patio walkway. For a 12-foot-wide patio running away from the house, that means the far edge sits 1.5 to 3 inches lower than the house-side edge. Use a long level and a tape measure to verify this during layout, not after you've set pavers.
Before you dig anything, blank" rel="noopener noreferrer">call 811. The NC811 Safe Digging Guide explains that North Carolina law requires a three working day notice to utility owners before digging begins. This is the national 'call before you dig' number in the US, and it's free. They'll send someone to mark buried gas, electric, water, and telecom lines in your yard. Most states require you to call at least three business days before digging, Colorado, for example, mandates this by law. Hitting a gas or electric line is a life-threatening situation, so this call isn't optional.
- Mark your full layout with stakes and string before any digging
- Calculate your slope: 1/4 inch drop per foot running away from the house
- Note where water currently flows in your yard — work with it, not against it
- Check local permit requirements — some municipalities require a permit for patios over a certain size
- Call 811 at least 3 business days before you dig
Everything you need: materials and tools checklist
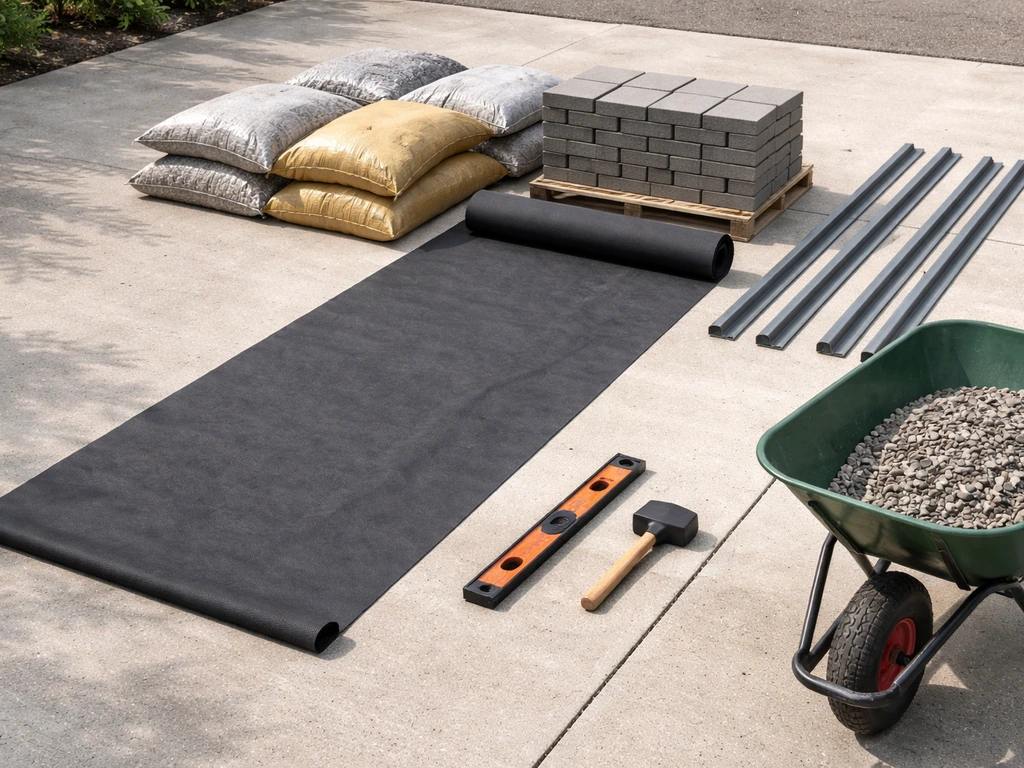
Getting your materials list right before you start saves multiple hardware store runs. These quantities vary by patio size, so calculate your square footage first and add 10% waste factor to surface materials.
Materials
- Your chosen surface material (pavers, bricks, concrete mix, gravel, or decking boards) — plus 10% extra
- Crushed gravel or road base aggregate for the sub-base (typically 4–6 inches depth)
- Coarse bedding sand, 1 inch deep (for paver and brick installations)
- Geotextile landscape fabric (weed barrier that also separates base layers)
- Plastic or metal paver edging with spikes
- Polymeric sand for paver/brick joints
- Concrete expansion joint material if pouring concrete
- Landscape stakes and string line for layout
- Marking spray paint or chalk
Tools
- Spade and flat-head shovels for excavation
- Wheelbarrow for moving material
- Plate compactor (rent this — don't skip it)
- Long level (4 feet minimum) and a hand level
- Rubber mallet for setting pavers/bricks
- Tape measure
- Stakes and string
- Circular saw with a diamond blade or an angle grinder for cutting pavers/brick/concrete
- Push broom for sweeping sand into joints
- Garden hose with a spray nozzle
- Safety glasses and work gloves
- Knee pads (your future self will thank you)
The step-by-step build process
Follow this sequence and you'll have a stable, professional-looking result. Rushing or reordering steps, especially skipping compaction, is how patios fail.
Step 1: Excavate
Remove all grass, plants, and topsoil within your marked area. For pavers or brick, excavate to a total depth of 9 to 11 inches: 4 to 6 inches for the gravel sub-base, 1 inch for bedding sand, plus the thickness of your surface material (typically 2.5 to 3.5 inches for pavers or brick). For poured concrete, excavate about 8 inches: 4 inches of sub-base plus 4 inches of slab. For gravel patios, 4 to 6 inches is often sufficient. Work to your slope as you excavate, the bottom of your hole should already reflect the 1/4 inch per foot drainage slope.
Step 2: Lay geotextile fabric
Roll geotextile landscape fabric across the entire excavated area. Overlap seams by at least 12 inches. This fabric does two things: it stops weeds from pushing up through your base, and it keeps your gravel sub-base from mixing into the native soil below. A lot of first-time builders skip this, and a lot of first-time builders end up with a sunken patio in five years.
Step 3: Build and compact the sub-base
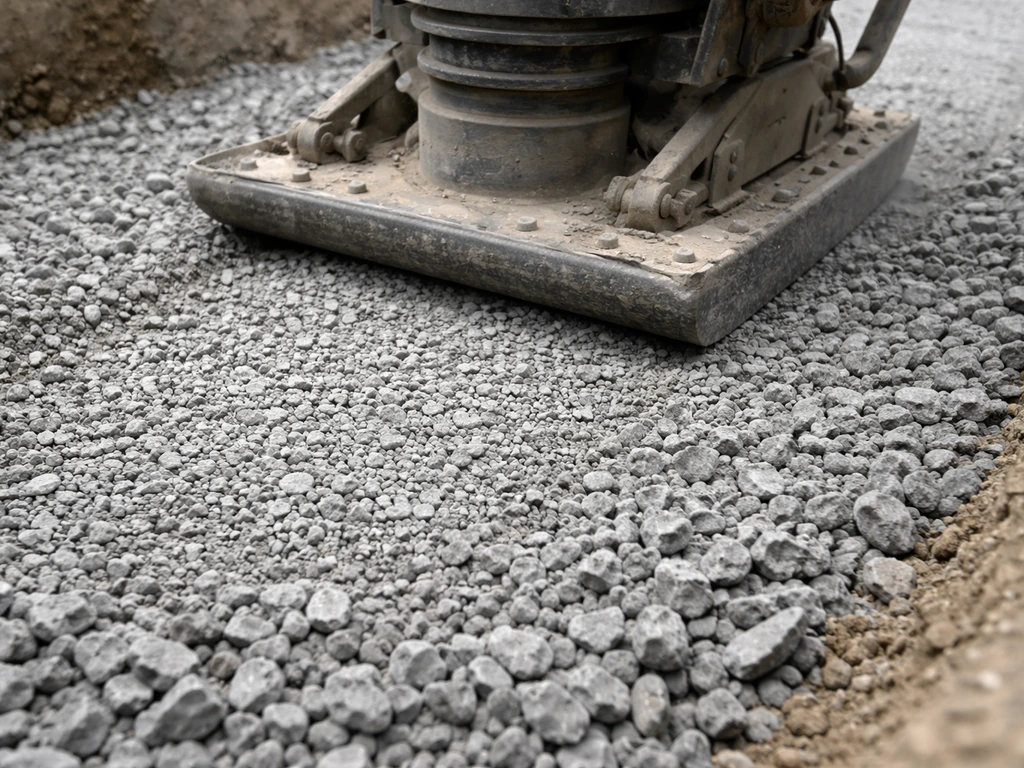
Add crushed gravel or road base aggregate in layers of 2 to 3 inches at a time, compacting each layer with a plate compactor before adding the next. Never dump the full sub-base depth in at once and compact it, you'll get a compressed top with loose material underneath. Continue building up layers until you reach your target sub-base depth. The compacted surface should feel rock solid underfoot with no give.
Step 4: Install edging
Set plastic or metal paver edging around the perimeter before any surface material goes down. Edging anchors your patio and keeps pavers or bricks from slowly migrating outward over time. Spike it into the compacted base every 12 inches. Make sure your edging follows the intended finished height of your surface.
Step 5: Add bedding sand (paver and brick installations)
For paver or brick surfaces, spread a 1-inch layer of coarse bedding sand across the compacted gravel base. Use screed rails and a straight board (a 2x4 works fine) to pull it smooth and level. This sand layer is what lets you make fine adjustments to paver height. Don't add more than 1 inch, thicker sand beds compress unevenly and cause settling.
Step 6: Lay your surface material

Start at a straight reference edge (usually the house) and work outward. Set each paver or brick down without sliding it, place it, tap it with a rubber mallet, and check it with a level before moving on. Maintain consistent spacing between units for your joint sand. For poured concrete, pour the slab, screed it flat, float the surface, add control joints (space them no more than 2 to 3 times the slab thickness in feet, so every 8 to 12 feet for a 4-inch slab), and let it cure covered for at least 7 days. For gravel, simply rake it level and compact it.
Sub-base, leveling, and drainage: what actually holds your patio up
The sub-base is the most important part of the entire project and the part most people underestimate. A properly compacted aggregate base distributes the weight of your patio surface and the people and furniture on it across a wide area, preventing sinking and cracking. Skimping on depth or compaction here is the single most common reason DIY patios fail.
Compaction is not optional. A hand tamper is acceptable for very small patios (under 50 square feet) or tight corners, but for anything bigger, rent a plate compactor. It costs around $60 to $100 per day and it's worth every cent. Each 2 to 3 inch lift of gravel needs its own compaction pass before the next layer goes on.
Drainage runs through every decision you make. The excavated base should slope, the sub-base should slope, and the finished surface should slope, all at that consistent 1/4 inch per foot away from the house. If your yard has a natural low spot, plan for where water will flow once it reaches the patio edge. French drains or channel drains at the patio perimeter solve this when needed. Ignoring drainage causes pooling, erosion under the base, frost heave in cold climates, and eventually a sunken, cracked surface.
Finishing details that separate a great patio from a rough one
Cutting pavers and bricks
Save all your cuts for last. Lay full units first across the whole patio, then measure and mark the edge pieces that need trimming. A circular saw with a diamond blade or an angle grinder with a segmented diamond disc does the job. Always wet-cut if your tool supports it, it keeps dust down and extends blade life. For brick, a masonry chisel and hammer is the old-school method that still works fine for straight cuts.
Filling joints with polymeric sand
Once all your pavers or bricks are set, sweep polymeric sand across the surface and work it into the joints with a push broom. Make multiple passes. Then run a plate compactor over the surface (place a piece of cardboard or plywood under it to protect paver faces) to vibrate the sand deeper into the joints. One key rule: only sweep polymeric sand over completely dry pavers. Damp pavers will cause the sand to bond to the surface and leave a haze that's very hard to remove. Finish the joints so the sand sits about 1/8 inch below the top of the paver or just below the chamfer edge, not flush, not overflowing. Once the joints look right, mist the surface lightly with water to activate the binding agents in the polymeric sand, then let it cure without foot traffic for at least 24 hours.
Concrete joints and sealing
For poured concrete patios, control joints cut into the slab give it a planned place to crack as it cures and expands seasonally, so you control where any cracking happens. Use a concrete expansion joint filler product between the slab and the house foundation to allow independent movement. Once the slab has fully cured (28 days for full strength), apply a penetrating concrete sealer to protect against staining and freeze-thaw damage.
Sealing pavers and brick
Sealing is optional but worth doing. A good paver sealer locks in the polymeric sand, prevents weed growth in joints, protects against staining, and enhances color. Wait at least 90 days after installation before sealing new pavers, they need time to off-gas efflorescence (those white mineral deposits). Clean the surface thoroughly first, let it dry completely, then apply sealer with a pump sprayer or roller in thin, even coats.
Final cleanup
Blow or sweep off any remaining sand or debris. Check your edging spikes and tap down any that have worked up. Walk the perimeter and look for any paver corners that are high or low, a rubber mallet fixes minor issues before they become trip hazards. Remove your string lines and stakes, and take a minute to actually enjoy what you built.
Common mistakes, troubleshooting, and how to save time and money
Mistakes that will cost you later
- Wrong slope or no slope: Water pools on the surface and under it, destroying your base over time. Fix it during excavation — not after the surface is set.
- Inadequate sub-base depth: 2 inches of gravel isn't a base. Most paver installations need 4 to 6 compacted inches minimum; more in cold climates with frost.
- Skipping geotextile: Without it, soil migrates into your gravel base and pavers begin to sink unevenly within a few years.
- Skipping compaction: Uncompacted gravel looks fine at first and fails within one or two winters.
- Too much bedding sand: More than 1 inch of sand under pavers compresses unevenly. Keep it to exactly 1 inch.
- Sweeping polymeric sand on damp pavers: It hazes and bonds to the surface. Only do this on bone-dry pavers on a dry day.
- Forgetting expansion joints in concrete: Without control joints, your slab will crack randomly — and not in pretty lines.
- Not calling 811: This one doesn't just damage your patio. It can be fatal.
Troubleshooting common problems
- Pavers rocking or uneven: Pull up the problem pavers, add or remove bedding sand, and reset them. This is why paver patios are repairable when poured concrete isn't.
- Polymeric sand haze on pavers: Use a dedicated paver cleaner (efflorescence remover) and a stiff brush — act on it before it fully cures.
- Water pooling on the surface: The slope is wrong. For minor cases, you may be able to pull up pavers and re-grade the sand layer. For poured concrete, a surface coating or channel drain is the fix.
- Weeds growing through joints: If you skipped geotextile and polymeric sand, this will happen. Pull them, re-fill joints with polymeric sand, and activate it properly.
- Edging pulling away from the patio: Add more spikes and reset it; in soft soil, use longer galvanized spikes.
Budget and efficiency tips
Rent a plate compactor and a masonry saw rather than buying them, you'll use both for a day or two and the rental cost is a fraction of the purchase price. Order your aggregate and sand delivered in bulk rather than buying bags; for any patio over 100 square feet, bulk delivery from a landscape supply yard is dramatically cheaper per ton. Buy pavers from a local supplier rather than big-box stores when possible, the quality is often better and you can see the actual color in person before committing. And always order 10% more surface material than your measured square footage. Running short and needing a second order often means the new batch is a slightly different color or dye lot.
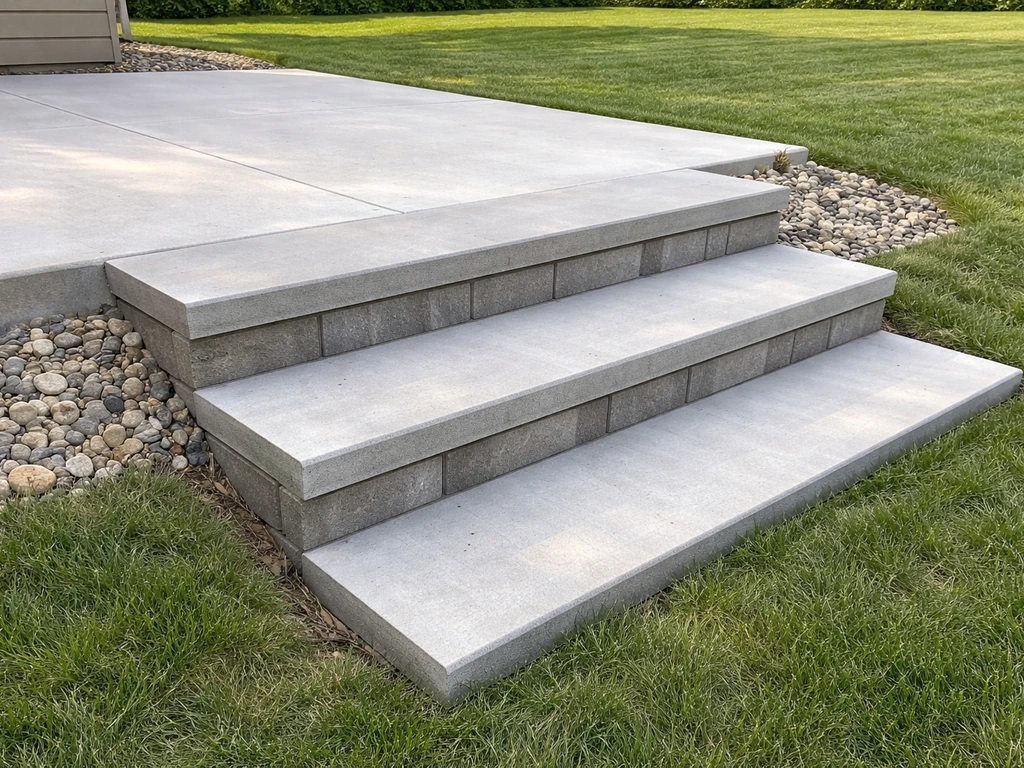
If you're also planning steps from your patio up to a door or deck, design them now and build them as part of this project. To build box steps for your patio, plan their width and slope early and tie them into the same compacted base as the rest of the project box steps for patio. Steps need the same compacted base as the patio itself, and it's far easier to tie them in during the original build than to add them later. Building box steps for a patio and figuring out how to put a step into an existing patio are related projects that share the same base prep logic, plan them together from the start. For a clear, step-by-step guide, see how to build a step on a patio and plan the base prep accordingly.
FAQ
Can I use the same diy patio step by step process on a yard with a natural slope?
Typically yes, if you keep the same 1/4 inch per foot drainage slope and your base prep matches the rest of the patio. The catch is that sloped areas can settle unevenly, so verify your slope with a long level during layout and use thicker bedding adjustments only where needed (avoid adding more than the recommended bedding sand depth).
What should I do if my patio slope is wrong after I excavate but before pavers go down?
For pavers and brick, the big mistake is trying to “fix” bad grades after the bedding sand is down. Once units are set, you need thin leveling by tapping, not by pulling and adding a lot of sand. If the slope is off, reset the affected area and recompact the base before reinstalling.
Why is perimeter edging so important, and what goes wrong if I skip it?
Install edging early and ensure it follows your finished height line. Without edging, pavers can creep outward, and joint sand gets washed away faster, especially on slopes or near downspouts. Also spike edging into the compacted base at regular intervals so it cannot flex.
Do I really need landscape fabric under a gravel or paver patio base?
Use geotextile under the entire excavated area, not just between gravel layers. It helps stop weeds and also prevents fine soil from migrating into the base, which is a common cause of soft spots and “rocky” areas that still feel unstable underfoot.
How can I tell if my gravel sub-base is compacted enough?
Yes, and it’s one of the most common failures: adding too much depth before compacting. Compact each 2 to 3 inch lift, then re-check firmness by stepping and checking for bounce or pumping. If it feels even slightly springy, keep compacting and correct the base before bedding sand.
What’s the right way to apply polymeric sand, and why does it sometimes haze or fail?
Polymeric sand should go down only when pavers are completely dry, and you should mist lightly after sweeping so it activates without over-wetting. If you smear it or trap moisture in the joints early, it can haze and stain the surface or fail to bind properly.
My patio pools water after rain. Should I seal it or fix the grading?
If you have standing water, the first thing to fix is drainage away from structures, then look for localized low spots caused by uneven base compaction. Correcting it later usually requires lifting some units, reworking the base, and resetting the pavers with proper bedding depth, so address it before sealing.
When is it safe to seal a paver patio, and what happens if I seal too early?
For polymeric-sand joints, do not seal immediately after installation. Wait at least the recommended cure window (the article mentions 90 days for new pavers) so efflorescence and moisture can dissipate. Sealing too soon can trap moisture and make staining or haze more noticeable.
How do I adapt this diy patio step by step plan for freeze-thaw climates?
In colder climates, you’re more at risk if your base is too shallow, drainage is weak, or you have water trapped near the patio edge. Make sure the slope is correct, the perimeter has an effective drainage path (like a channel or French drain when needed), and consider extra attention to frost-sensitive soils during base prep.
Can I add onto an existing patio without rebuilding the whole thing?
Yes, but plan it like an extension of the same base system rather than “cutting in later.” The safest approach is to excavate and compact for the whole footprint at once, then align control joints (for concrete) or bedding depth (for pavers) so edges do not become weak points.
What’s the most common cutting mistake DIYers make with paver or brick patios?
Cutting early usually creates mismatched edges and forces you to end with awkward sliver pieces at the perimeter. The article recommends saving cuts for last, and a practical add-on is to dry-lay a full course and re-check joint spacing against your intended edge so the pattern stays consistent.
Why is it risky to build patio steps as a separate project after the patio is finished?
Yes, box steps need the same level of base tie-in. If steps have a different compacted base depth or a gap at the interface, you can get differential movement that cracks joints or causes step rocking. Plan their width, slope, and base prep during the patio build, then finish surfaces to match the patio level line.
Next Article
How to Make a Patio Step: DIY Step-by-Step Guide
Step by step DIY how to make patio steps: plan dimensions, prep base, set stringers, lay pavers or brick, finish safely.