You can build solid, good-looking patio steps yourself in a weekend using brick, pavers, or concrete block. The process comes down to four things done right: measuring your total rise so you know how many steps you need, building a compacted gravel base that won't shift, setting each course level and square, and keeping your risers consistent so nobody trips. Get those four things right and everything else is just following a sequence.
How to Make a Patio Step: DIY Step-by-Step Guide

Nolan Lennox
1 May 2026
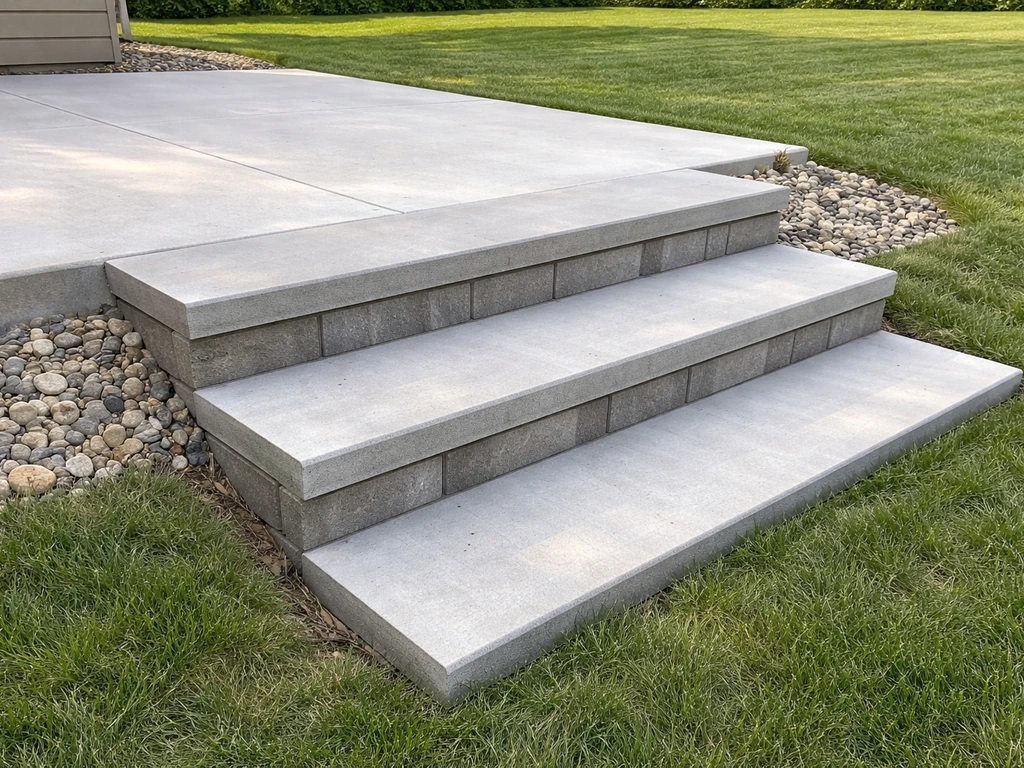
Figure out where the steps go and measure your rise
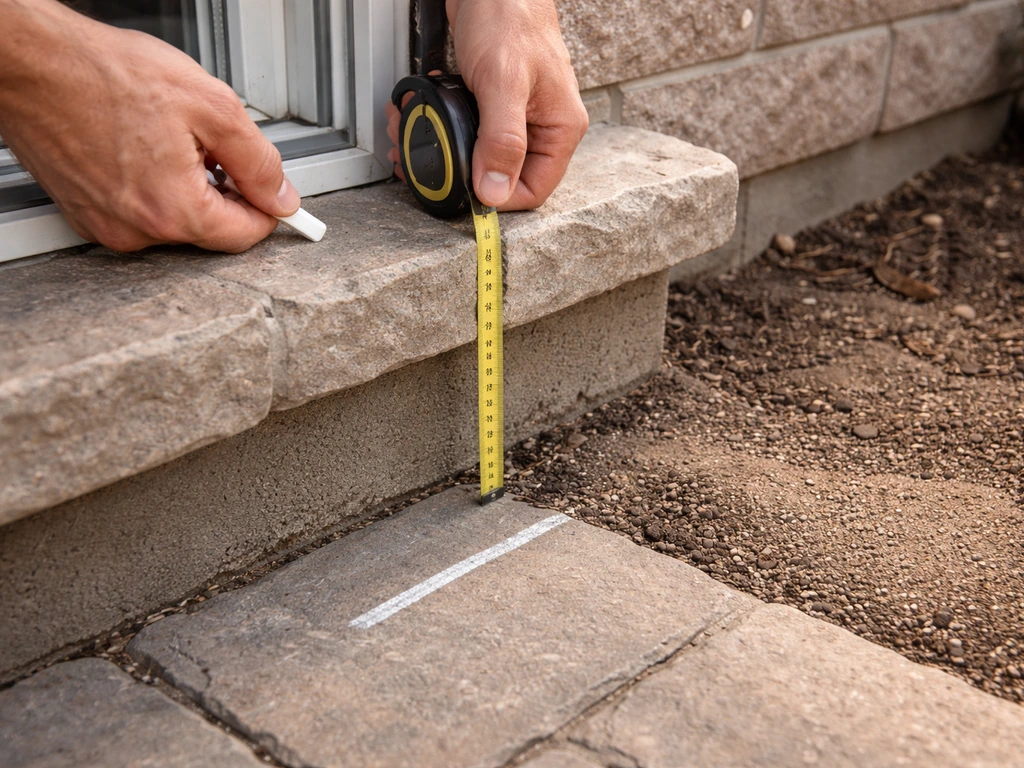
Start by standing at the spot where the steps will land and measuring the total vertical drop from the patio surface (or door threshold) down to the ground below. Follow the steps in order, and you will have a solid patio step project you can repeat confidently from start to finish patio how to step by step. That measurement is called the total rise, and it controls everything else. Use a level and a tape measure: hold the level out from the top surface until it reads true, then measure straight down to the ground at the far end. Be exact. Even a half-inch error here ripples through every step.
Also measure the horizontal space you have to work with. That's your total run. If you're tight on space, you'll use fewer, taller steps. If space is open, you can make them wider and more comfortable. Sketch this out on paper before you touch a shovel.
One thing worth doing right now: check whether your project needs a permit. Most municipalities follow the International Residential Code (IRC), which caps riser height at 7-3/4 inches and requires a minimum tread depth of 10 inches. If your steps connect to a permitted deck or structure, a permit is usually required. Even if it's freestanding, calling your local building department takes five minutes and can save you a headache later.
Plan your step count and lay out treads and risers
Once you know your total rise, divide it by your target riser height to get the number of steps. For comfort, I aim for a riser between 7 and 7-1/2 inches. That keeps you comfortably under the IRC's 7-3/4-inch maximum and feels natural to climb. Round to a whole number of steps, then divide the total rise by that number to get your exact riser height. For example: a 21-inch total rise divided by 3 steps equals a 7-inch riser. Perfect.
One rule the IRC is strict about: all the risers in a single flight can't vary by more than 3/8 inch from the shortest to the tallest. That sounds minor, but uneven risers are exactly what causes people to stumble. Build every course to the same height from the start and you won't have a problem.
For tread depth, 12 inches is a comfortable working target for outdoor patio steps, though 10 inches is the IRC minimum. Wider treads (14 to 16 inches) feel more like a landscape step and work well when you have the room. Each tread should also slope slightly forward, about 1/8 inch per foot, so water runs off the front edge rather than pooling on the step.
Before moving on, draw a simple side-view diagram showing the number of steps, the riser height, tread depth, and where the base will start. This becomes your reference when you're in the middle of the build and second-guessing yourself. If you're planning box-style steps or a multi-level layout, the same math applies, you're just stacking more courses.
Pick your materials and gather your tools

For most DIY patio steps, you're choosing between concrete pavers, natural stone, brick, or concrete block (sometimes called retaining wall block or Allan block). Each has real trade-offs. Here's how they compare:
| Material | Cost (approx.) | Durability | DIY Difficulty | Best For |
|---|---|---|---|---|
| Concrete pavers | $2–$6/sq ft | Very good | Easy to moderate | Matching an existing paver patio |
| Brick | $3–$7/sq ft | Excellent | Moderate | Classic look, dry-laid or mortared |
| Natural stone (bluestone, flagstone) | $5–$15/sq ft | Excellent | Moderate to hard | High-end, organic look |
| Retaining wall block / concrete block | $1.50–$4/sq ft | Excellent | Easy | Stacked step structures, rough terrain |
| Poured concrete (formed) | $4–$8/sq ft installed | Excellent | Hard (requires forming) | Permanent, seamless steps |
For most first-time builders, concrete pavers or retaining wall block are the easiest wins. They're modular, forgiving, and don't require mortar for a solid result. Brick looks great but demands more precision. Natural stone is beautiful but heavy and harder to cut cleanly. Save poured concrete for when you're comfortable with forming and finishing work.
Tools you'll need
- Tape measure and carpenter's level (4-foot and 2-foot)
- Line level and string line
- Rubber mallet
- Plate compactor (rent one — don't skip this)
- Shovel and hand tamper
- Circular saw with a diamond blade or angle grinder for cutting pavers
- Chisel and hammer for fine cuts on brick
- Stakes and batter boards for layout
- Wheelbarrow
- Safety glasses, gloves, and knee pads
Rent the plate compactor. I know it feels like an extra step but a hand tamper on a gravel base for steps will not give you the density you need. Steps carry a lot of concentrated foot traffic and a poorly compacted base will settle unevenly within one winter.
Prep the base: excavation, grading, drainage, and compaction
This is the part most beginners rush, and it's the reason steps shift, settle, and crack. A good base takes more time than the actual step-laying, but it's what makes everything last.
- Mark your footprint using stakes and string. The base needs to extend at least 6 inches beyond the step structure on all sides.
- Excavate to a depth of at least 6 to 8 inches below your finished step surface. In freeze-thaw climates (anything that regularly drops below 32°F), go 8 to 12 inches deep to get below the frost action zone.
- Slope the excavated base slightly (about 1 percent or 1/8 inch per foot) away from the house or patio edge to direct water away from the foundation.
- Add a 4-inch layer of clean crushed stone or Class II base aggregate (not pea gravel or sand — you want angular stone that locks together). Compact it with the plate compactor in passes until it doesn't move.
- Add a second 2-inch layer of the same material, compact again. You're looking for a solid, immovable base that doesn't give underfoot.
- Finish with 1 inch of coarse bedding sand (for pavers) or nothing (if setting block directly on compacted gravel). Screed the sand smooth using a straight board.
Drainage is the silent enemy of patio steps. If water has nowhere to go, it sits under your base, freezes in cold climates, and heaves everything out of position. If your site has a natural clay soil or a low spot that collects water, consider a layer of landscape fabric between the native soil and your aggregate, or even a small french drain running along one side. A little drainage prep now beats rebuilding in two years.
Set your forms and build the step structure
How you build the structure depends on the material you chose. For stacked block or brick, you're essentially building a tiered pyramid: the back course is the tallest and fullest, and each step forward is one course shorter. For paver steps over a compacted fill, you're building contained forms or using block as a retaining edge and filling behind with compacted gravel or concrete before laying the tread surface on top.
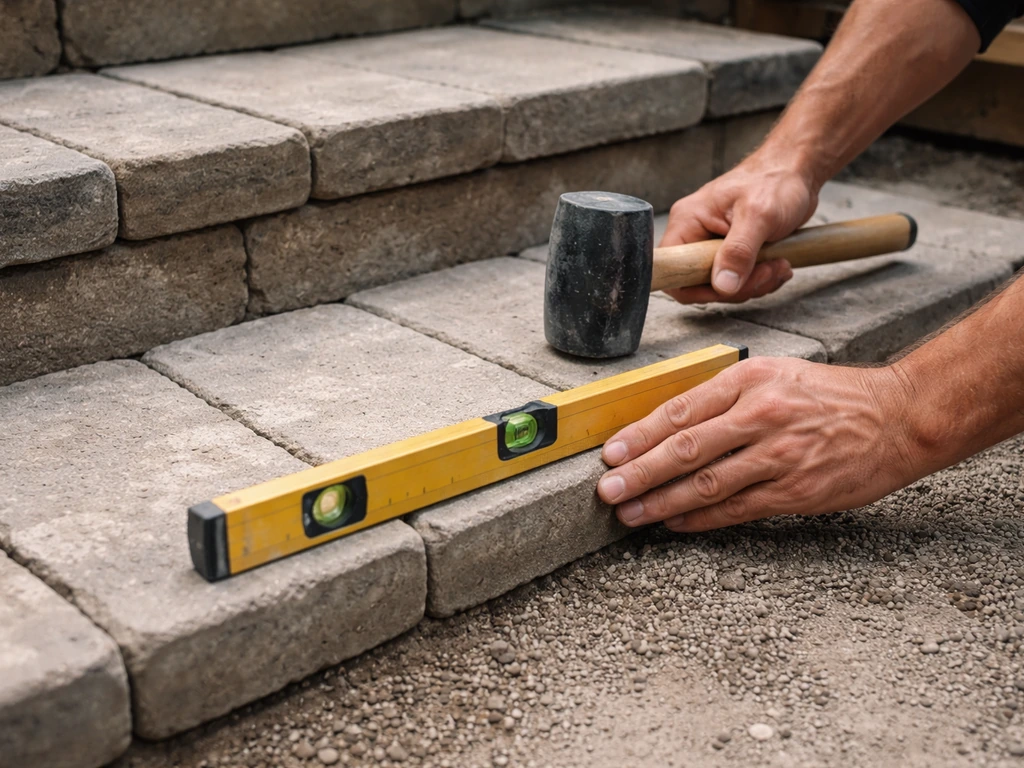
Start at the bottom. Set your first course of block or brick directly on the compacted base, checking that it's level side-to-side and that it's at the right elevation (your finished first riser height above grade). Use your string line to keep the face of each unit on the same plane. Pull it tight from corner stake to corner stake and work to it.
For a stacked block step structure, each riser course steps back by the depth of your tread. Stack the blocks in a running bond (offset joints by half a block from course to course) for structural strength. Check for level after every course. A 1/16-inch error per course becomes visible and structural by the time you're three courses high.
If you're using edging or metal forms to contain a gravel-and-paver step, set the riser edge first (a soldier course of pavers standing on end, or a concrete block face), backfill behind it with compacted gravel, then tamp it. That becomes the platform the tread pavers sit on. Repeat for each step going up.
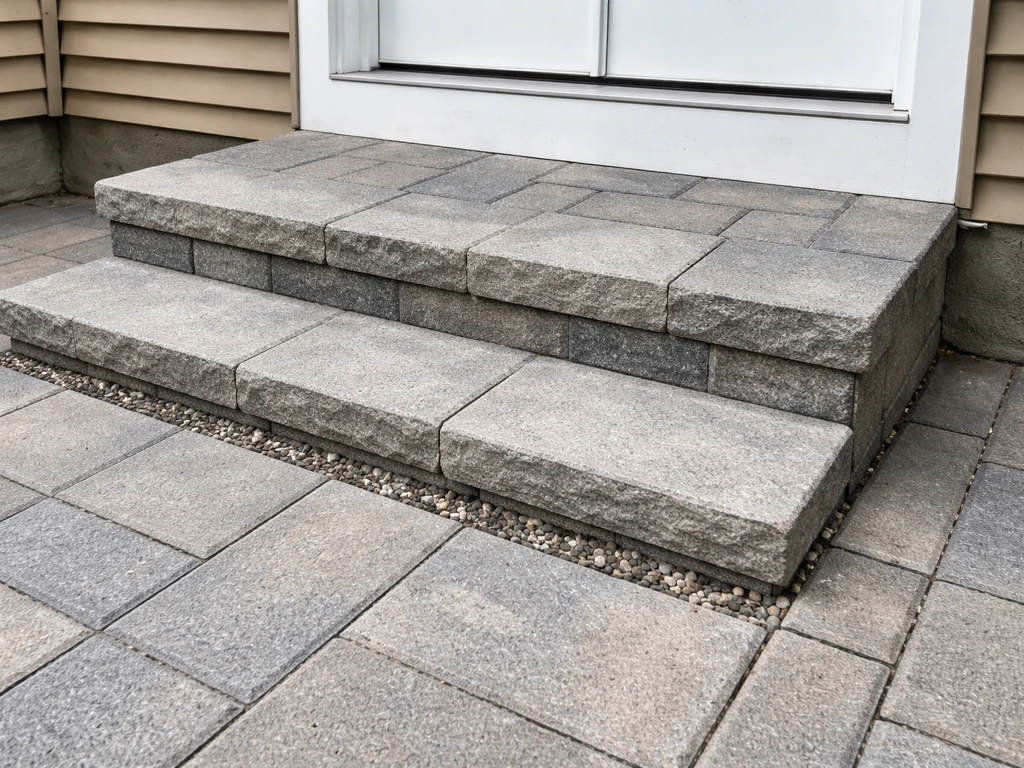
For box-style steps (the kind often used at patio doors), the structure is a framed box filled with compacted gravel or concrete, with the paver tread laid on top. If you are figuring out how to put a step in a patio, start by choosing the box-style setup that matches your entry height and available space. The build is similar to what's described above but often square on three sides with the front face exposed. This style is very solid and great for a single-step entry situation.
Lay and align the tread pavers or brick
With your structure built and base prepped, you're ready to lay the tread surfaces. Start at the bottom step and work up. For each tread, dry-lay the pavers first (no mortar, no adhesive) to check fit and figure out where cuts land. Always try to keep cut pieces toward the back of the tread where they're less visible.
Dry-laid vs. mortared: which to choose
Dry-laid steps (pavers or brick set on compacted sand with no mortar between joints) are easier to build, easier to repair, and more forgiving of minor base movement. They're the right choice for most DIY projects. Mortared steps look more finished, resist shifting better in high-traffic areas, and are often required when steps are connected to a mortared wall or structure. But mortar is less forgiving: if your base isn't perfectly stable, mortar joints crack and look worse than a dry joint that has shifted slightly.
For most homeowners building freestanding patio steps with a well-compacted base, dry-laid is the practical choice. If you're connecting to a brick or stone wall that's already mortared, match the method for a consistent look.
Laying the units cleanly
- Set the front (nosing) row of pavers or brick first. This is the edge that overhangs the riser face by about 1 inch and it defines the step's finished look. Get this row perfectly level and straight before you lay anything behind it.
- Work toward the back, setting each unit in the sand bed and tapping it level with a rubber mallet. Check level front-to-back and side-to-side after every few units.
- Maintain consistent joint spacing (typically 1/8 to 3/16 inch for pavers, up to 3/8 inch for natural stone). Plastic spacers help on a first build.
- When you reach a cut, score the paver with your angle grinder and diamond blade or use a rented paver splitter for clean straight cuts. Always wear safety glasses. Cut pavers snap more cleanly than you expect if the score line is deep.
- Once all units are in place, sweep fine polymeric sand into the joints, compact lightly with the plate compactor (use a rubber pad to protect the surface), then sweep more sand in and mist with water to activate the binder if using polymeric sand.
- Check each tread for the 1/8-inch-per-foot forward slope to shed water. Adjust any high or low units before the sand locks everything in place.
If you're building a patio walkway that leads up to or away from these steps, the same base prep and laying techniques apply. The steps and walkway should be planned together so the grades connect cleanly and the materials match.
Safety details, finishing touches, and mistakes to avoid
Steps are one of the most common places for outdoor falls. A few finishing details make a real difference in safety and longevity.
Finishing details worth doing
- Cap the top riser edge with a bullnose paver or coping stone if your pavers have a raw cut edge facing outward. It looks finished and protects the edge from chipping.
- Install edging restraints along the sides of the steps to lock the courses from spreading outward over time. Metal or plastic paver edging spiked into the ground works well.
- If steps are in a shaded or damp area prone to moss and algae, apply a penetrating sealer rated for exterior masonry. It reduces water absorption, which is the main cause of freeze-thaw damage.
- For steps with more than two risers, check your local code for handrail requirements. IRC R311.7.8 requires a handrail on stairs with four or more risers (total rise over 30 inches). Even if not required, a handrail makes steps safer for everyone.
- Check that your finished tread slope is consistent on every step. Inconsistent slope causes water to pond on some steps and not others, which accelerates deterioration.
Common mistakes that ruin patio steps
- Uneven riser heights: even 1/2-inch variation between steps is enough to cause a trip. Measure every single course before laying the next one.
- Skipping compaction: hand-tamping alone won't give you a stable base under steps. Rent the plate compactor.
- No drainage slope: a flat or back-sloping tread holds water, which freezes and pushes units apart. Every tread needs a slight forward pitch.
- Too-shallow excavation in freeze-thaw climates: if you don't get below the frost action zone, the base heaves every winter and your steps eventually lean or separate.
- Cutting corners on base depth: 2 or 3 inches of gravel under a step that carries years of foot traffic is not enough. Six to eight inches minimum.
- Laying the nosing row last: always set the front edge first — it defines everything else. Setting it last means you're fitting to an imprecise interior and the front edge often ends up unlevel.
- Ignoring the 3/8-inch riser variation rule: if you're sloppy with the riser heights and they vary by more than 3/8 inch across the flight, you've got a code issue and a tripping hazard.
Your next steps after finishing
blank" rel="noopener noreferrer">Once the polymeric sand has cured (usually 24 hours after wetting), walk the steps and check for any rocking or hollow-sounding units. Reset any that move. Give the whole structure a week before heavy use to let everything settle. After the first winter in a freeze-thaw climate, check joint sand levels and top up where needed. Hanover Pavers’ installation guidelines warn not to apply Poly Sand to damp pavers and note that proper activation and wetting are important for the polymeric sand to work as intended DO NOT apply Poly Sand to damp pavers. That's normal maintenance, not a sign of a failed build.
If this is your first patio project, building the steps often gives you the skills and confidence to tackle the full patio surface next. Once you know how to build a step on a patio, you can apply the same leveling, base prep, and layout basics to the rest of your hardscape. The base prep and paver-laying techniques are exactly the same, just on a larger scale. Take your time on the planning and base work and the laying part almost takes care of itself.
FAQ
Can I make patio steps when the patio surface isn’t level across the landing area?
Yes, but only if you keep the step-to-surface transition consistent. Set your finished first riser height so the bottom tread lands flush with the adjacent patio grade (or with the door threshold transition you measured). If you have to “gap” because the patio is high, it usually looks worse and creates a tripping edge, so adjust total rise and run rather than ignoring the height mismatch.
Should I mortar the brick or pavers, or keep the joints dry?
For most DIY builds, dry-laid treads with dry joints are preferred because they tolerate small base movement. If you use mortar, you typically need a perfectly stable base and careful matching to a mortared wall or structure. A good rule of thumb is, if your steps are freestanding on compacted aggregate, choose dry joints unless the design requires bonding to existing masonry.
How do I handle uneven tread sizes and where should I place cut paver pieces?
Use dry-lay fitting to decide where cuts fall, then cut with a tool sized for the material (wet saw for pavers/stone, appropriate masonry blade for brick or block). A common mistake is putting the smallest piece on the front edge of a tread. Keep cut or skinny pieces toward the back of the tread where your foot placement is less likely to catch on uneven edges.
What’s the best way to confirm the gravel base is solid enough before setting pavers?
Don’t stop at “tamping until it feels solid.” Steps are heavy-load areas, so you want density at the base, then verify elevation before you lay units. After compaction, re-check level side-to-side and elevation at multiple points, especially near the edges where material can run low and cause rocking.
My yard puddles in one spot. Do I still need a drainage plan for patio steps?
Add a small drainage break strategy if your site collects water. If you see standing water after rain, a landscape fabric layer alone may not be enough, consider a simple french drain on the low side and make sure the step system has a clear path for water to move away from the structure.
What winter problems should I watch for after the first freeze-thaw season?
If you’re in a freeze-thaw area, prioritize the riser variance rule and the slope for water runoff. Small errors become bigger after freezing cycles, and any pooled water will worsen heaving. After the first winter, inspect joint sand level and any units that sound hollow or shift, then top up sand and reset where needed.
How can I avoid steps that are crooked or uneven from side to side?
Use a level and string line at the planned faces, but also check each completed course for elevation and squareness before moving up. A practical approach is to measure riser height at multiple points along the width, not just one. If you discover a tilt or unevenness mid-build, correct it by reworking the course, not by “eyeballing” the next one.
What should I do if my math gives a riser height that doesn’t feel right?
If you’re between step heights, round using the target riser range you choose, then re-calculate riser height per step. Avoid making the last step a special case. The best outcomes come from a consistent run of risers in the same flight, with variation within the tight tolerance the code uses.
Can I adjust tread size for safety and comfort without changing the whole design?
Yes, there are safer “low-vision” modifications. Keep the tread surface consistent and avoid a sharp, raised front lip by ensuring the tread edge is properly seated on the base. If your design allows, wider treads and a consistent forward slope improve footing stability and reduce water pooling, which also helps prevent slippery surfaces.
When laying tread surfaces, do I need to re-check alignment for every step or can I set them like a template?
Start at the bottom and do dry fits for every tread, but don’t assume cut placement will stay the same as you go up. Each course may shift slightly if your base settles. Re-check fit on each tread before you finalize, and always keep the front edge clean and fully supported so you don’t create an overhang that can chip or rock later.
Next Article
How to Build a Step on a Patio: DIY Guide
Learn how to build patio steps safely with correct height, drainage base, solid materials, and a step-by-step DIY build