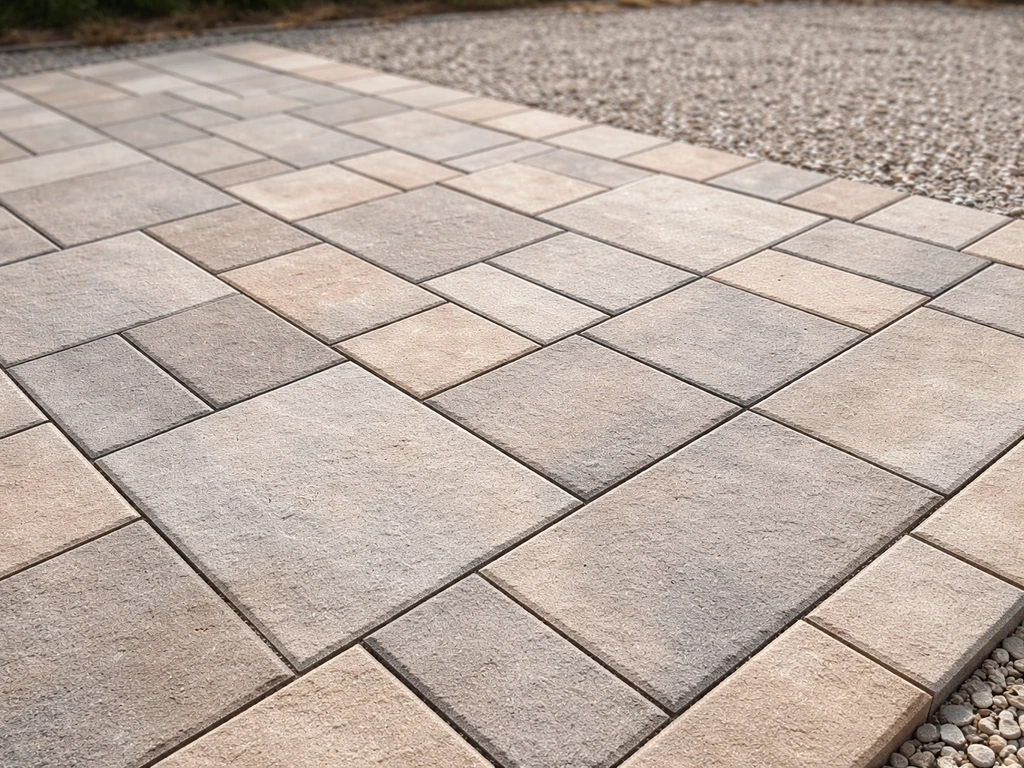
You can build a weatherproof DIY tile patio table top for roughly $80 to $200 in materials, and it will outlast any resin or glass-top table you'd buy at a big-box store. The key is treating it like a mini outdoor floor installation: rigid frame, waterproofed substrate, proper thinset coverage, and a sealed grout joint. A tile patio uses the same core principles as this DIY tile table top, including a rigid base, waterproofing, and proper thinset coverage. Skip any of those steps and you'll be re-doing it after the first hard winter. Do them right and this table becomes a permanent fixture on your patio.
DIY Tile Patio Table Top: Build a Weatherproof Table

Nolan Lennox
12 May 2026
Why build one instead of buying
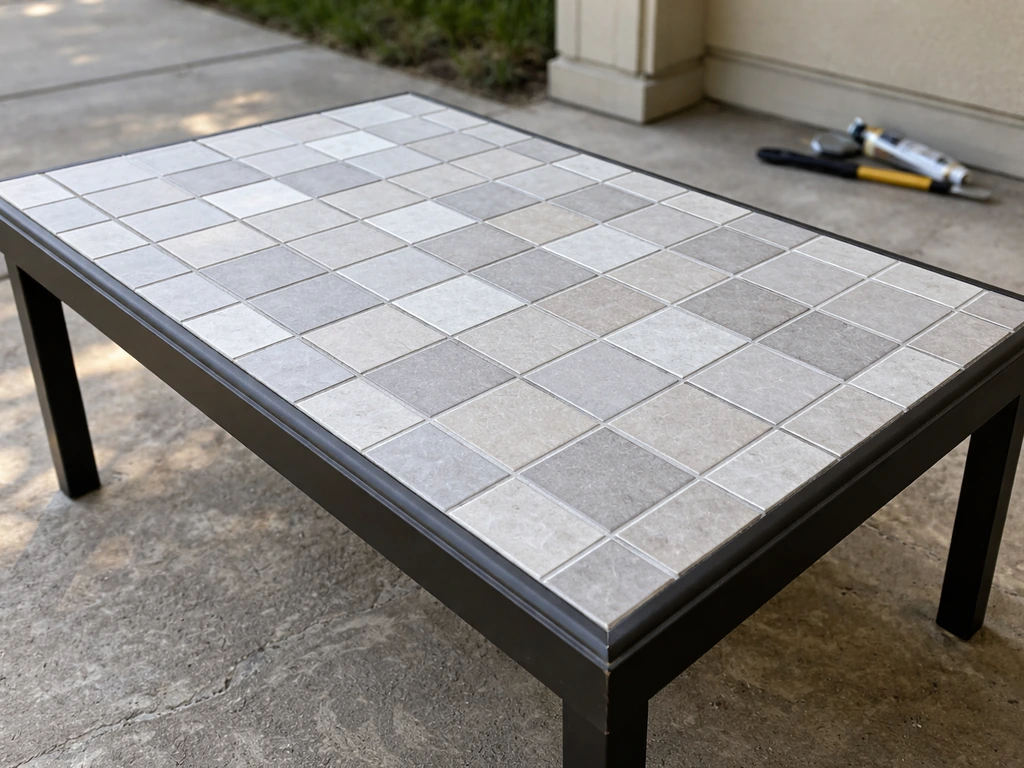
The honest reason most people go DIY on a tile table top is customization. Store-bought tile patio tables come in a handful of sizes and styles, often with cheap porcelain and grout that cracks within a season or two. When you build your own, you control the tile, the frame material, the table height, and the exact dimensions. You can match existing tile on your patio floor or create something totally different. If you've already tackled a tile patio floor or a tile patio surface elsewhere in your yard, this project uses the exact same materials and skills at a much smaller scale, which makes it a perfect confidence-builder for newer DIYers.
Cost-wise, a steel or cedar frame plus a bag of thinset, a sheet of backer board, a few square feet of tile, and a tube of grout caulk runs well under $200 for a standard 36" x 36" dining table. Premium large-format tile or a powder-coated steel frame will push you higher, but the structural approach stays the same. The satisfaction factor is real too. There's something genuinely great about eating dinner at a table you built from scratch.
Design planning and measurements before you cut anything
The most common mistake I see is jumping straight to tile selection without sorting out the design math first. The tile thickness and grout joint width affect your final tabletop height, and overhang affects where your substrate edges land. Plan these before you buy anything.
Table height and size
Standard dining table height is 28" to 30" from floor to finished tile surface. A coffee or bistro table typically runs 16" to 20". For seating four people comfortably, aim for at least 36" x 36" or 36" x 48". Round tables look great with tile, but cutting tile to radius edges takes more time and a wet saw. For your first build, a rectangle or square is much easier to tile cleanly.
How tile thickness changes your build
Most standard porcelain or ceramic tile runs 3/8" thick. Add 1/4" of thinset bed and a 1/2" backer board substrate and your tile assembly adds about 1-1/8" to the top of your frame. If you're building the frame from scratch, just factor that into your leg height. If you're tiling an existing table frame, measure carefully before committing. Large-format tiles (15" edge or longer) require a flatter substrate, no more than 1/8" variation in 10 feet per ANSI A108.02 guidance. Smaller tiles (up to 4" x 4") are more forgiving and a better choice if your frame isn't perfectly flat.
Overhang and edge treatment
A 1" to 1.5" tile overhang past the frame is comfortable and practical, it keeps drips off the frame and gives the table a finished look. More than 2" overhang on an unsupported substrate edge risks cracking, especially if someone leans on the table. If you want a bigger overhang, add a metal angle iron lip around the frame perimeter to support the substrate edge fully. Plan your tile layout centered on the table so any cut tiles land symmetrically at the edges, not at one end. A dry-layout run before any thinset gets mixed saves a lot of frustration.
Materials list for a DIY tile patio table
Here's everything you'll need for a standard 36" x 36" tile-top dining table. Scale quantities up or down for your actual size.
| Category | Recommended Option | Budget Alternative | Notes |
|---|---|---|---|
| Frame | 1.5" square steel tube (welded or bolted) | 2x4 cedar or pressure-treated lumber | Steel is more stable and won't rot; wood is easier for beginners |
| Substrate | Schluter KERDI-BOARD 1/2" or Mapeguard Board 1/2" | Cement backer board (HardieBacker) | KERDI-BOARD is waterproof itself; cement board needs a separate membrane |
| Waterproofing membrane | LATICRETE HYDRO BAN or Schluter KERDI-BAND at seams | RedGard liquid membrane | Coat the full substrate surface and all seams/edges |
| Tile | Porcelain 12"x12" or smaller (frost-rated) | Ceramic tile (check frost rating for cold climates) | Must be rated for outdoor/freeze-thaw use |
| Thinset | MAPEI Kerabond + Keralastic or polymer-modified exterior thinset | Standard gray polymer-modified thinset | Use unmodified thinset with DITRA/KERDI-BOARD per manufacturer |
| Grout | Epoxy grout or Mapei Ultracolor Plus FA (sanded for joints > 1/8") | Standard sanded grout + sealer | Epoxy resists staining and moisture far better outdoors |
| Edging/coping | Schluter JOLLY or RONDEC metal edge trim (aluminum or stainless) | Bullnose tile edge pieces | Metal trim is more durable; protects the raw tile edge |
| Sealer | Penetrating silicone or impregnator sealer | Grout sealer spray | Seal grout AND tile if tile is porous (travertine, slate) |
| Hardware/fasteners | Stainless steel screws or construction adhesive + screws | Galvanized screws | Avoid standard steel in outdoor wet environments |
Tools you'll need
- Wet tile saw (rent one for $50/day if you don't own one)
- Notched trowel: 1/4" x 1/4" square-notch for tiles up to 4"x4"; 3/8" or larger V-notch for bigger tiles
- Grout float
- Rubber mallet and tile spacers
- 4-foot level and straightedge
- Tape measure and pencil
- Angle grinder with diamond blade (for edge cuts)
- Drill/driver with bits
- Mixing paddle and bucket
- Caulk gun
Step-by-step: building the frame and setting the tile
Step 1: Build or prep the frame
Your frame needs to be rigid enough that it won't flex under load, because any substrate movement will crack your tile and grout. For a steel frame, weld or bolt the top perimeter with cross-supports no more than 12" apart. For wood, use 2x4s with the wide face up and add diagonal corner bracing. The top surface of the frame must be flat, no more than 1/4" variation across the whole surface. Check with a straightedge and shim or plane any high spots before attaching the substrate. This is your only chance to get this right without tearing everything apart later.
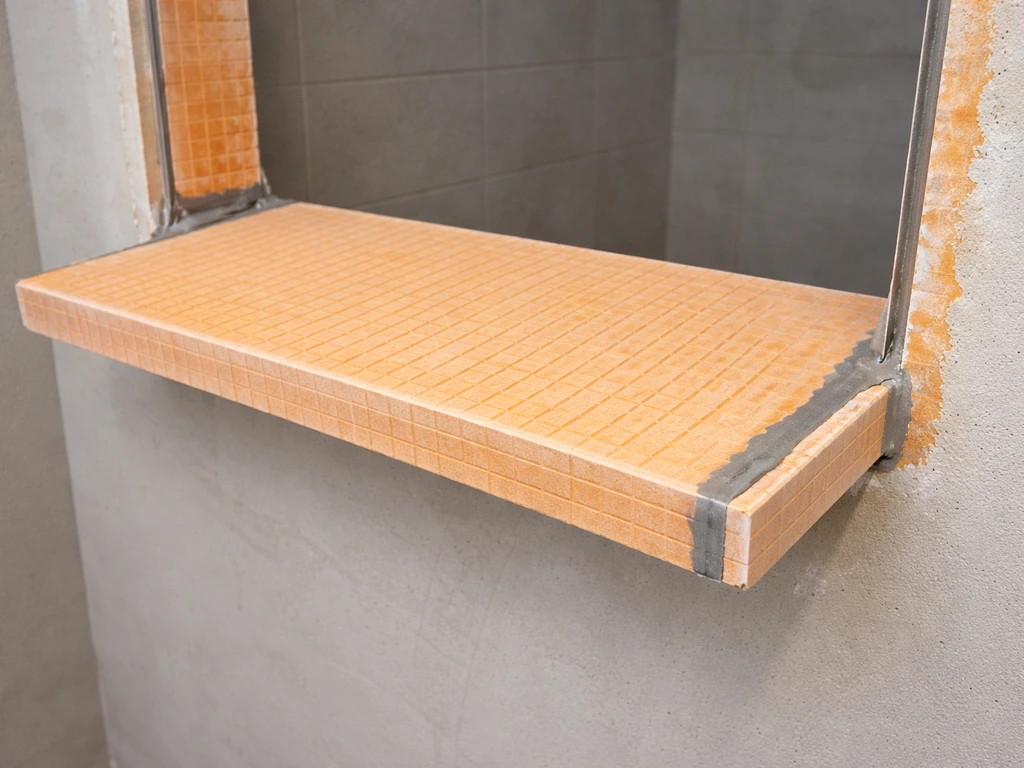
Step 2: Attach and waterproof the substrate
Cut your substrate panel (KERDI-BOARD, Mapeguard Board, or cement backer) to fit the frame top with a 1" to 1.5" overhang on each side. Fasten it to the frame using stainless screws every 8" around the perimeter and every 12" across the field. If you're using KERDI-BOARD, seal all joints, corners, and screw penetrations with blank" rel="noopener noreferrer">KERDI-BAND using a minimum 2" overlap, embedded in unmodified thinset. If you're using standard cement backer board, apply a liquid waterproofing membrane like HYDRO BAN or RedGard over the entire surface and let it cure fully. HYDRO BAN Quick Cure can be ready in as little as 2 hours at 70°F and 50% RH. The older LATICRETE 9235 membrane needs a full 7 days to cure at 70°F before you tile over it. Don't rush this step. A dry substrate that gets wet from underneath is how tiles pop off in year two.
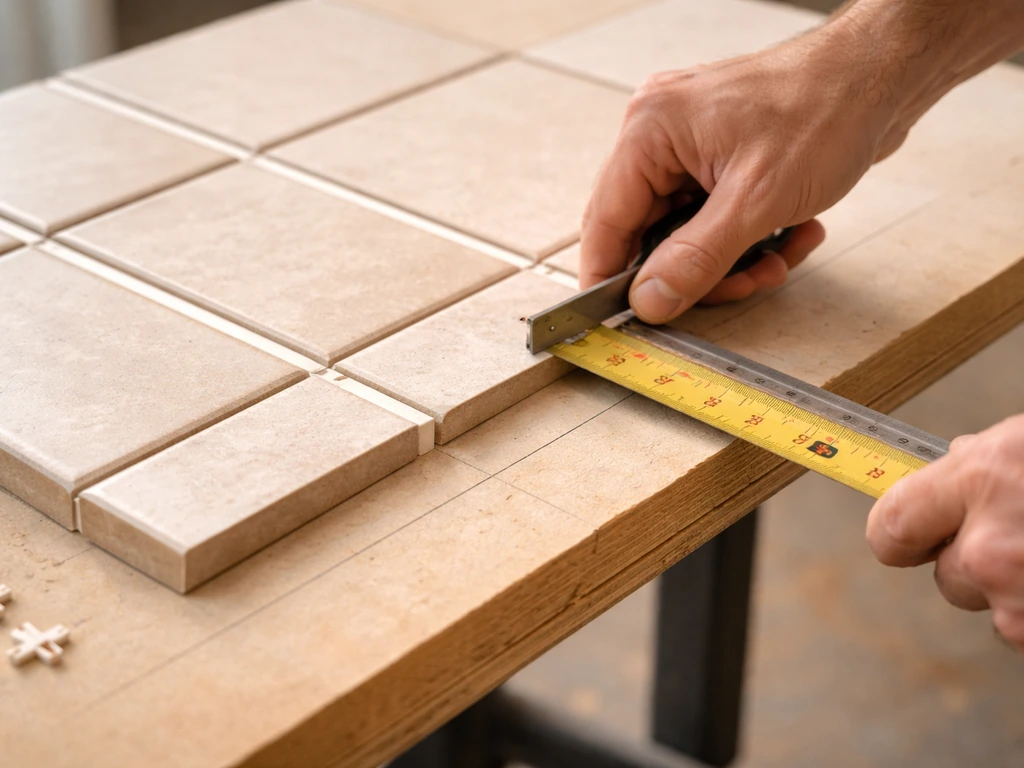
Step 3: Do a dry layout first
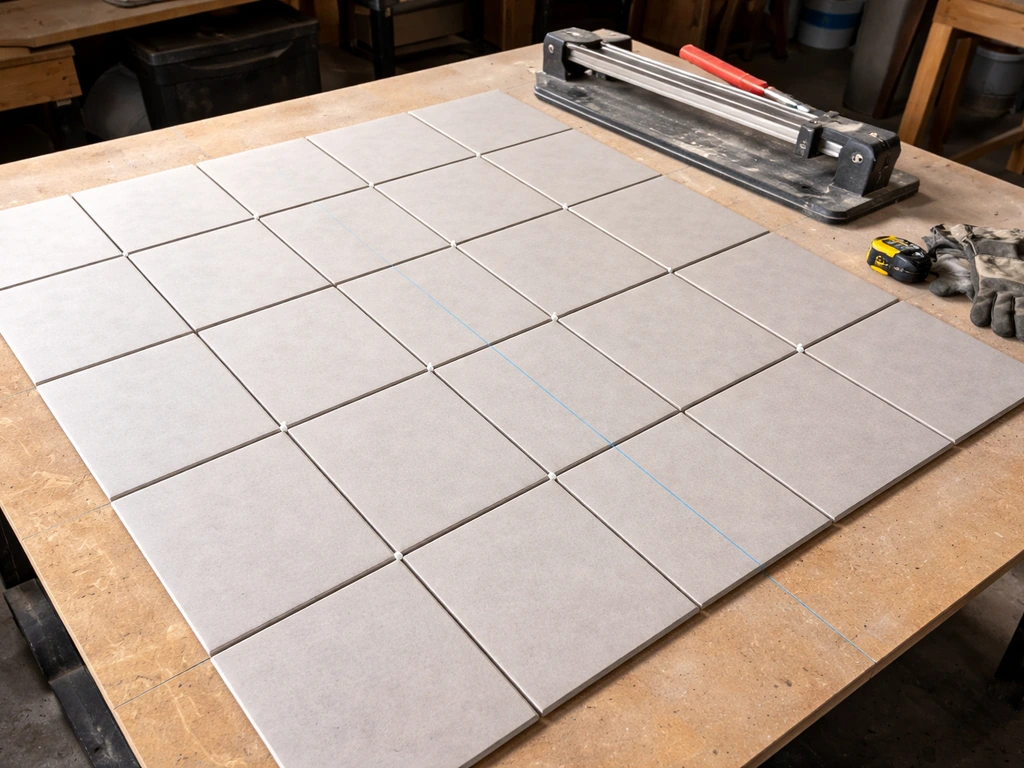
Before mixing any thinset, lay your tiles out dry across the entire surface. Find the center of the table, snap chalk lines, and work outward. Adjust so cut tiles at the edges are equal and at least half a tile wide. This is also when you confirm your tile spacers and grout joint width. I use 1/8" joints on most outdoor table tops. Wider joints are more forgiving if your tile isn't perfectly uniform, but they hold more debris and dirt over time.
Step 4: Mix and apply thinset
Mix thinset to a peanut-butter consistency that holds a ridge without slumping. Use the keying-in method: spread a thin scratch coat across the substrate first, then go back and comb on a full layer with your notched trowel. This technique dramatically improves contact and is especially important outdoors where moisture will find any void. For exterior wet installations, MAPEI requires 95% mortar contact coverage under the tile. That sounds fussy, but the key-in step plus back-buttering large tiles gets you there. For tiles up to 4"x4", a 1/4" x 1/4" square-notch trowel works. Larger tiles need a bigger notch to build coverage.
Step 5: Set the tile
Set tiles with a slight twisting motion as you press down, then tap gently with a rubber mallet and a beating block (a scrap piece of wood) across the surface to embed them. Check every third or fourth tile with a straightedge to catch lippage early. The acceptable installed lippage is no more than 1/32" between tiles according to ANSI guidelines. Any more than that and you'll feel it and see it. Use tile spacers consistently and don't walk on set tiles for at least 24 hours. After all field tiles are set, cut and set your edge pieces. If you're using metal edge trim like Schluter JOLLY or RONDEC, set those in thinset before the adjacent tile course so they're fully embedded.
Step 6: Let thinset cure before grouting
Wait at least 24 hours before grouting under normal conditions (70°F). In cooler weather or direct sun, wait 48 hours. If you're using modified thinset with KERDI-BOARD or DITRA, follow Schluter's guidance closely because modified mortars need longer open cure times before grouting, and covering them too early traps moisture and weakens the bond. Protect the fresh tile assembly from rain and frost for 7 days, which is standard guidance across MAPEI and other manufacturers for exterior installs.
Grouting, sealing, and finishing the edges
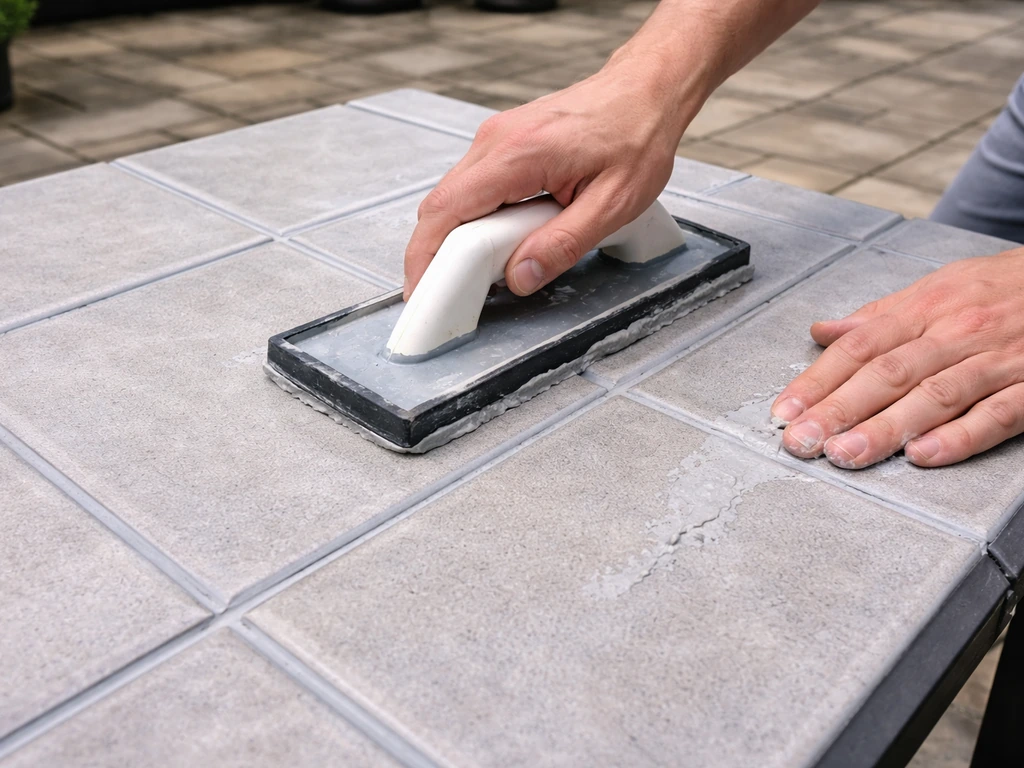
Grouting
For an outdoor table, epoxy grout is worth the extra cost and effort. It doesn't need sealing, resists staining and water infiltration far better than cement grout, and handles temperature swings better. The downside is that it sets faster and is stickier to work with. If you go with cement sanded grout, use a quality brand like Mapei Ultracolor Plus FA and plan to seal it within a week of install. Mix grout to a smooth, lump-free consistency and work it into joints with a grout float held at a 45-degree angle. Work in small sections and wipe haze with a barely damp sponge before it sets. Change your rinse water often.
Edge caulk instead of grout at the perimeter
Here's one thing a lot of first-timers miss: the joint between the tile field and any edge trim or the top edge where the tile meets vertical elements should be filled with a matching color caulk, not grout. Grout is rigid and cracks at these transition points because different materials move at slightly different rates with temperature changes. A flexible silicone or urethane caulk at the perimeter absorbs that movement. This one detail prevents a huge percentage of edge cracking in outdoor tile applications.
Sealing
Let grout cure for at least 72 hours before applying sealer. If you used cement grout, apply a penetrating impregnator sealer to both the grout lines and the tile surface (if the tile is porous like travertine, slate, or unglazed porcelain). Fully vitrified glazed porcelain doesn't absorb sealer but it won't hurt to apply it to the grout lines anyway. Buff off any excess sealer before it hazes. Reapply sealer every 1 to 2 years, or when water no longer beads on the surface.
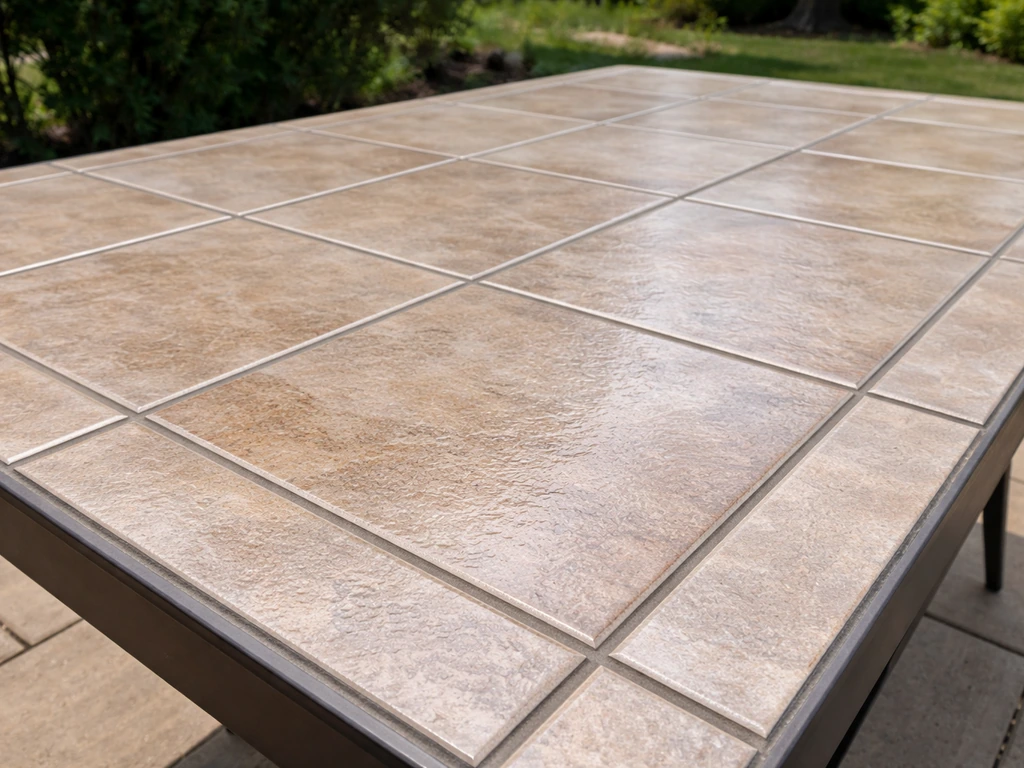
Final leveling check
Once grout is cured, run your hand and a straightedge across the entire surface. Any significant lippage that got past you during install is permanent at this point. Minor rough spots at grout lines can be smoothed with a diamond rubbing stone. This is also a good time to confirm that any metal edge trim is tight and has no gaps where water could get underneath the substrate edge.
Weatherproofing and keeping the table looking great long-term
Outdoor tile furniture takes a real beating: UV, freeze-thaw cycles, rain, bird droppings, and temperature swings from near freezing to 100°F+. If you want the full step-by-step, use this same approach when planning how to DIY patio floor tile layouts and waterproofing Outdoor tile furniture takes a real beating. The build decisions you made earlier do most of the heavy lifting here, but maintenance keeps everything intact. The same weatherproofing choices and materials are also the key to how to make a cheap patio floor that lasts through winter. If you are building a true mosaic patio, the same waterproofing and grout choices apply, and the tile layout matters just as much.
- Use only frost-rated porcelain or ceramic tile if you live anywhere temperatures dip below freezing. Non-frost-rated tile absorbs water and spalls or cracks when that water freezes.
- Reapply penetrating sealer every 1 to 2 years. This is the single highest-return maintenance task for cement-grouted tables.
- Inspect grout joints and perimeter caulk every spring. Re-caulk any cracked or shrinking perimeter joints immediately before water gets under the tile.
- Keep the table surface clear of standing water after heavy rain by tipping it slightly or ensuring the base allows drainage. Flat pool water on grout joints accelerates deterioration.
- Clean with a pH-neutral cleaner. Avoid anything acidic (vinegar, citrus cleaners) on cement grout as it etches the binder and accelerates crumbling.
- Store or cover the table during extreme winters if possible. A fitted outdoor furniture cover reduces freeze-thaw stress on grout significantly.
- Check the frame annually for any rust at welds or exposed metal edges on steel frames. Touch up with rust-inhibiting primer and paint before corrosion spreads.
Common mistakes and how to fix them mid-build
I've made most of these mistakes myself and seen the rest on projects I've consulted on. Knowing what to watch for at each stage saves a lot of tearout time.
| Problem | What Caused It | How to Fix or Prevent It |
|---|---|---|
| Tile lippage (tiles not flush) | Uneven substrate, inconsistent thinset thickness, inconsistent tile thickness | Check substrate flatness before tiling; use a beating block on every tile; back-butter large tiles |
| Tiles cracking after install | Frame flexing under load, substrate not fully supported, skipped waterproofing layer holding moisture | Add mid-span frame supports; ensure substrate is fully fastened; confirm 95% thinset coverage |
| Grout cracking at edges | Rigid grout used at perimeter movement joints | Remove cracked grout with oscillating tool; replace with flexible caulk in matching color |
| Grout crumbling or powdering | Grout mixed too wet, acid cleaners used, insufficient cure time before use | Remove and regrout with fresh material; switch to epoxy grout for long-term fix |
| Water infiltration at edges | No waterproofing membrane on substrate, perimeter grout instead of caulk | Apply liquid waterproofing to exposed substrate edges; replace perimeter grout with silicone caulk |
| Tiles popping off | Less than 95% mortar contact, thinset skinned over before tile set, moisture under substrate | Re-set tiles with fresh thinset using key-in method; back-butter each tile; don't let thinset dry before setting |
| White haze on tile surface (efflorescence) | Water moving through grout and substrate, carrying mineral salts to surface | Clean with efflorescence remover; improve waterproofing at edges and substrate underside; reseal grout |
If you're mid-build and something feels wrong
If you press a freshly set tile and hear a hollow sound after 24 hours, that tile has poor contact and will crack under use. Pop it off now, clean both surfaces, and re-set it while everything around it is still in fresh thinset. Tiles are much easier to remove before grout goes in. If your grout is already in and a tile is hollow, use a diamond-tipped grout saw to carefully remove grout around that tile, then pop it off with a putty knife and chisel. It's tedious but not the end of the project.
If you notice your substrate flexing when you press on it between frame supports, that's a problem to fix before you tile. Add additional cross-supports to the frame, or consider a thicker substrate panel. KERDI-BOARD and Mapeguard Board both come in thicknesses up to 2", and going from 1/2" to 3/4" or 1" significantly reduces deflection on wider spans. Getting this right before the tile goes down is a 20-minute fix. Getting it right after is a full tearout.
If you're new to tile work and want to build your skills before tackling furniture, a small tile patio floor project or a mosaic patio surface is a great way to get comfortable with layout, thinset consistency, and grouting on a forgiving horizontal surface before working on something you'll have to look at up close every day. The skills translate directly, and the stakes are lower when a square yard of floor tile is involved instead of a centerpiece outdoor table. The skills translate directly, and the stakes are lower when a square yard of floor tile is involved instead of a centerpiece outdoor table, which is also helpful if you're learning how to make an outdoor patio floor. These same waterproofing and mortar coverage steps are key when you’re learning how to cover a patio floor.
FAQ
Can I use regular plywood as the tabletop base if I waterproof it?
Not reliably for long-term outdoor use. Even with waterproofing, plywood can swell and flex with freeze-thaw and seasonal humidity changes, which leads to cracked grout and loose tiles. Use a purpose-built substrate like cement backer board or waterproof boards (for example, KERDI-BOARD or Mapeguard Board) over a rigid, properly braced frame, then seal seams and penetrations using the correct method for that board type.
How do I choose between epoxy grout and cement grout for an outdoor table top?
If you’re in a damp climate, see frequent spills, or want the easiest long-term cleanup, epoxy grout is a strong choice because it resists water penetration and staining better. The tradeoff is faster setting time and stickier mixing and cleanup, so you need a plan for how you’ll clean haze quickly and keep batches small. Cement grout can work well if you commit to thorough sealing and regular re-sealing, usually yearly at first depending on sun and moisture exposure.
What thinset should I use, unmodified or modified, and does it depend on the waterproof board?
Yes, it depends on the combination. Many waterproof boards are compatible with specific mortars, and the open time and cure expectations can differ for modified thinsets. Before buying, check the mortar compatibility chart on the board manufacturer’s instructions, because using the wrong type or grouting too early can weaken the bond.
How flat does the tabletop need to be before tiling, and what should I do if it is not?
You want the frame top flat within small tolerance across the whole surface. If you find high spots, fix them before attaching the substrate by shimming, planing, or otherwise leveling the frame. Once substrate is installed, you can still correct minor issues by adjusting how the substrate sits, but big unevenness usually turns into lippage or poor mortar contact and is much harder to fix after tile placement.
Is grout caulk still necessary if I’m using an edge trim system?
Usually, yes at movement points. Even when trim is installed correctly, perimeter transitions can still experience differential movement between the tile assembly and metal, wood, or any vertical surfaces. Use a color-matched flexible caulk at the tile-to-trim or tile-to-vertical element transitions, while grout is best kept for the tile field joints.
How much tile overhang is “safe,” and what if my table legs make the edges unsupported?
For typical rigid builds, about 1 to 1.5 inches of overhang is comfortable and helps keep drips off the frame. If you want more or your edge area has less support, add an angle-iron or similar support lip so the substrate edge is supported across its thickness. Without edge support, a larger unsupported span increases the chance of cracking, especially when someone leans on the tabletop.
How can I tell if my thinset coverage is good enough before I tile the whole surface?
Test coverage early. Pull up a tile from a small area after setting (before you proceed too far) and confirm mortar transfer across the back of the tile, not just at the ridges. Outdoors, voids matter because water can reach them, so if you see gaps or mostly ridge contact, adjust technique (key-in scratch coat, correct trowel notch size, and back-buttering large tiles).
What should I do if I hear a hollow sound from a tile after 24 hours?
Treat it as a reset-able bond problem before you grout. Remove the affected tile, clean thinset from both the substrate and tile, then re-set it using fresh mortar while surrounding tiles and mortar are still in an “open” work state. If you’re already grouted, carefully remove grout around the tile with a diamond grout saw so you can remove the tile without damaging neighbors.
How long should I protect the finished tabletop from rain, and what about frost?
Plan on protecting it for about a week for exterior installs, especially if your conditions include rain or frost. Even if tile and grout look cured on the surface, the bond and grout strength can lag inside. Covering the table during early curing also helps prevent washing grout pigments out of joints and reduces the chance of haze or weak joints.
Do I need to seal glazed porcelain tile, or only the grout?
For fully vitrified, non-porous glazed porcelain, sealing the tile face is generally unnecessary, but sealing the grout joints is still important if you used cement grout. If you used epoxy grout, sealing is typically not needed. For more porous natural stones, sealing needs to be applied to both grout lines and tile surfaces that absorb water.
When should I reapply sealer, and how do I know it has worn off?
A practical check is water beading. When water no longer beads and instead spreads or darkens the grout, it’s time to re-seal. Many outdoor tables need more frequent attention during the first year, then typically less over time depending on sun exposure and how often the tabletop gets wet.
What’s the best way to clean the table after grouting without damaging joints?
Use gentle, controlled cleaning in small sections so grout haze doesn’t dry hard. Keep rinse water clean and change it often, especially if you’re working with cement grout. Avoid aggressive scrubbing that can pull material out of joints, and wait the recommended cure window before heavy cleaning or exposing it to standing water.
How do I handle expansion and movement if the table is on a deck that shifts seasonally?
Build movement tolerance into the transitions. Keep rigid tile bonding confined to the tile assembly by using flexible caulk at perimeter transitions and avoid rigid grout at points where dissimilar materials move. Also keep the tabletop supported without flex in the frame, because tile assemblies do not tolerate flex well even when joints are caulked.
Next Article
How to Build a Patio Floor: Step by Step DIY Guide
Step-by-step DIY guide to build a patio floor with gravel, pavers, stone, composite, or wood, from base to sealing.