Building a patio floor comes down to six core steps: plan and measure the space, pick your material and base system, prep the site with proper grading, install and compact a gravel subbase with edging, lay your surface, then finish with leveling, jointing, and sealing. Once you know your patio floor material, the next step is learning how to cover and finish the surface for a long-lasting, well-drained result how to cover a patio floor. If you want the same sturdy base for a mosaic patio, the build process follows the same planning, excavation, and leveling principles how to make a mosaic patio. Do those six things in order and you'll end up with a patio that drains well, stays flat, and lasts for years. Skip one of them, especially the base prep, and you'll be pulling up pavers or fighting a sinking deck board within a season or two.
How to Build a Patio Floor: Step by Step DIY Guide

Planning and measuring the patio footprint
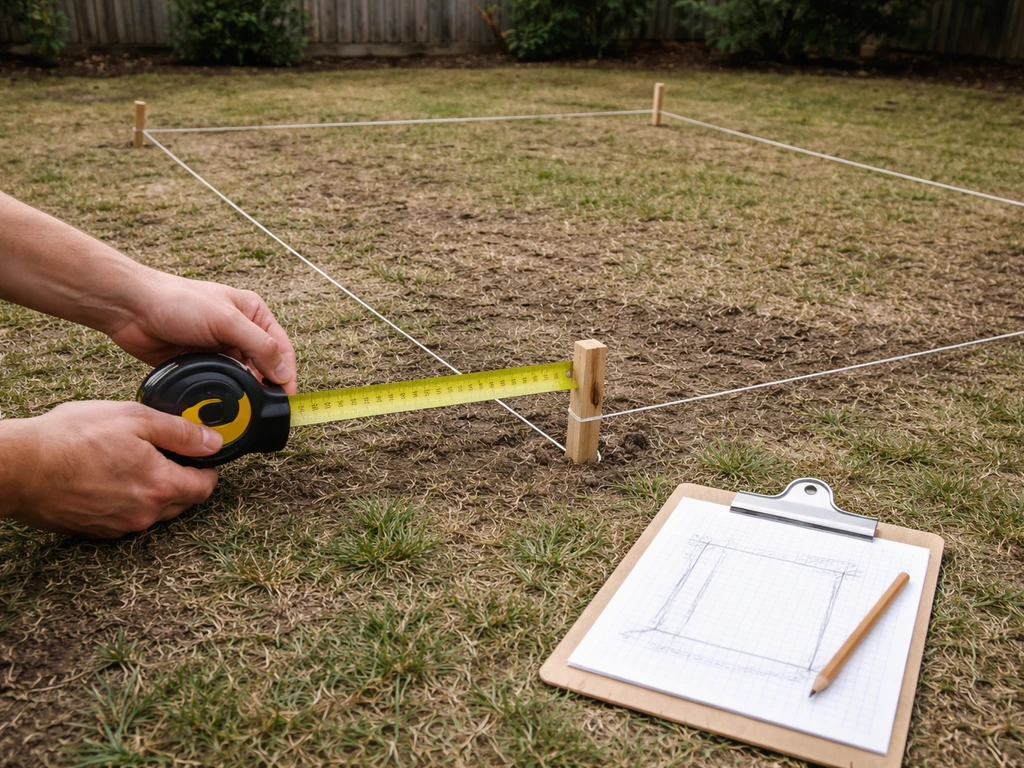
Start on paper before you touch a shovel. Sketch the rough shape you want, then walk the space and measure it with a tape measure. For a simple rectangle, that's straightforward. For an L-shape or freeform curve, break it into sections and measure each one separately. Write down your square footage because every material and base calculation depends on it.
Once you have dimensions, mark the perimeter on the ground using stakes and mason's line or a can of marking spray paint. This gives you a visible boundary to work within and helps you spot right away if the layout clashes with downspouts, utility covers, or grade changes. Check with your local utility locating service (call 811 in the US) before you dig anything.
Think about drainage from the very beginning. The finished patio surface needs to slope away from the house at between 1/8 and 1/4 inch per foot. That doesn't sound like much, but over a 10-foot-wide patio it means the far edge is 1.25 to 2.5 inches lower than the house end. Factor this into your layout measurements so you're not surprised during the build. Also check what the patio will drain toward. You don't want water running straight into a garden bed, a neighbor's fence, or a low corner of your yard.
A word on shape: rectangular and square patios are the easiest to build because cuts are minimal and layout is forgiving. Curves and angles look great but they require more cutting, more waste, and more patience. If this is your first patio build, keep the shape simple and save the organic curves for a future project.
Choosing the right patio floor material and base system
The material you choose drives everything downstream: how deep you need to dig, what kind of base you need, what tools you'll use, and what the maintenance looks like for the next decade. Here's an honest comparison of the most common DIY patio floor options. If you still need help choosing a patio floor, review the full steps for how to make an outdoor patio floor, from site prep to finishing touches DIY patio floor options.
| Material | Avg. DIY Cost (per sq ft) | Base Needed | Difficulty | Durability | Maintenance |
|---|---|---|---|---|---|
| Gravel/crushed stone | $1–$3 | Compacted gravel, edging | Beginner | Good (shifts over time) | Low (occasional raking, top-up) |
| Concrete pavers | $3–$8 | 4–6" compacted gravel + 1" bedding sand | Intermediate | Excellent | Low (reseal every 2–3 yrs) |
| Brick | $4–$9 | 4–6" compacted gravel + 1" bedding sand | Intermediate | Very good | Low–moderate |
| Natural stone (flagstone) | $5–$15 | 4–6" compacted gravel + 1" bedding sand or mortar | Intermediate–Advanced | Excellent | Low (check joints yearly) |
| Composite decking panels | $6–$14 | Gravel base or existing concrete slab | Intermediate | Very good | Low (annual rinse) |
| Pressure-treated wood | $4–$10 | Post/beam frame or gravel base with sleepers | Intermediate | Moderate (needs sealing) | Moderate (seal every 1–2 yrs) |
For most first-time DIYers, concrete pavers or brick on a sand-set base hit the sweet spot. They're forgiving because you can pull up and reset individual units if something is off. Natural stone flagging is beautiful but irregular thicknesses make leveling harder. Composite panels are great over an existing slab or well-drained gravel base and can dramatically cut build time. Wood and composite are worth a look if you're covering an awkward slope or want a raised-platform look, though that's more of a deck build. If budget is the main driver, a well-edged gravel patio done right is genuinely durable and cheap. For more detail on keeping costs down without sacrificing quality, the guide on how to make a cheap patio floor covers that angle specifically.
Matching base depth to your material
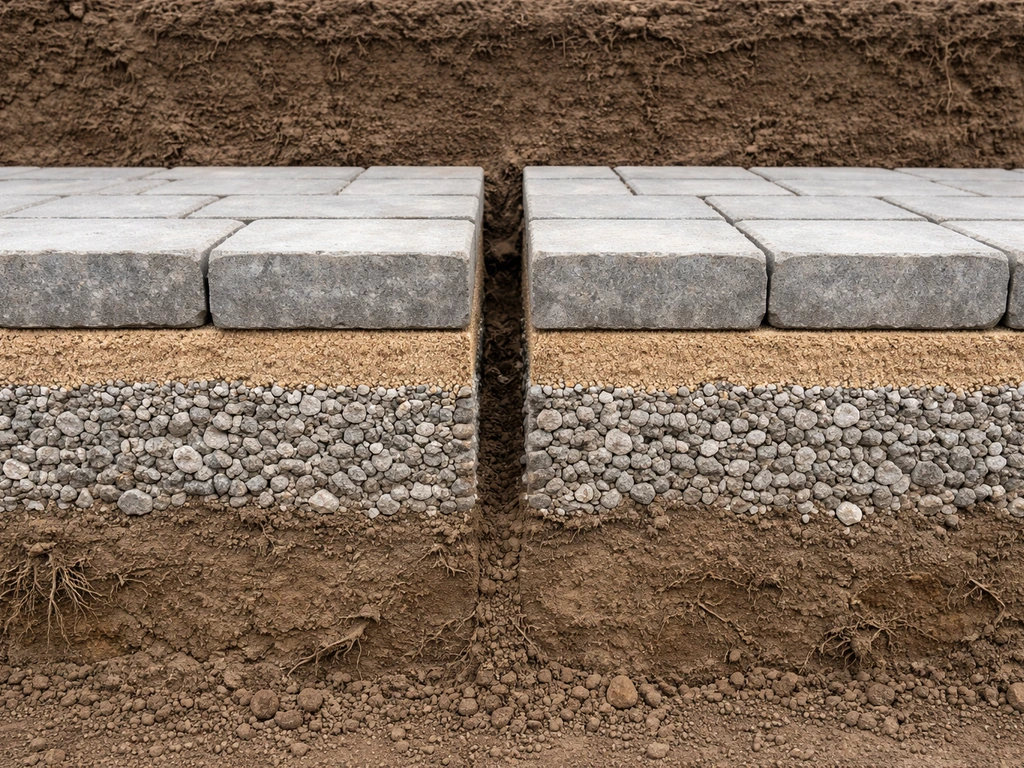
A sand-set paver patio in a non-freeze climate typically needs 4 inches of compacted gravel base plus 1 inch of bedding sand. If you're in a freeze-thaw region, go 6 inches of gravel base minimum. Gravel patios just need 3 to 4 inches of compacted gravel with solid edging. Composite panels on gravel need about 3 to 4 inches of compacted base for drainage and stability. Wood-frame builds are engineered differently and base requirements depend on your specific design.
Site prep: grading, drainage, and removing topsoil
This is the phase most people underestimate, and skipping it properly is the number one reason patios fail. You're not just digging a hole. You're creating a stable, draining platform that won't shift, sink, or flood.
Start by removing all topsoil and organic material from inside your marked perimeter. Topsoil compresses, holds moisture, and hosts roots and organisms that will continue breaking down under your patio, causing settling. Get it all out. For a sand-set paver patio, that usually means excavating 7 to 9 inches below your desired finished surface height (6 inches of base + 1 inch bedding sand + roughly 2.5 inches of paver thickness, minus paver height above grade).
Once you've excavated, check your grade. Use a long level or a line level strung across stakes to verify the slope is moving away from the house at 1/8 to 1/4 inch per foot. Adjust the soil subgrade itself to match this slope before you add any base material. It's much easier to shape things now than after gravel is in. If the area has poor natural drainage, this is also when you'd install a French drain or route a perforated pipe to carry water away from the footprint.
Compact the exposed subgrade. A plate compactor (rentable for about $50 to $90 per day) is worth every penny. A tamper works for very small areas but for anything over 50 square feet, get the compactor. A solid, compacted subgrade is your foundation's foundation.
Building the subbase and base: gravel, compacting, and edging
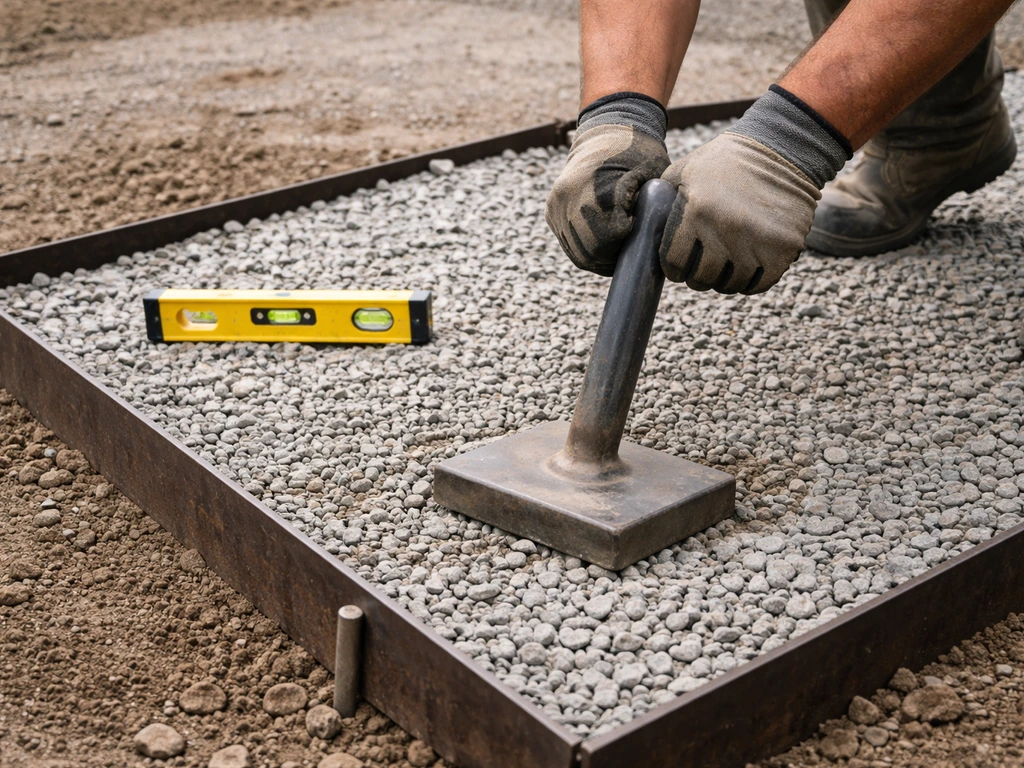
Add your crushed gravel (typically Class II base rock, road base, or crushed limestone) in 2- to 3-inch lifts, compacting each layer before adding the next. Don't dump in all 6 inches at once. Compacting in layers is how you achieve uniform density throughout the base. If you're uncertain whether the base is compacting adequately, a simple field test is the boot test: walk on the compacted surface. You should leave no visible footprints.
After each lift, check your slope again with a level. It's easy for the base surface to drift slightly flat or develop a low spot during compaction. Catching it now is a five-minute fix; catching it after the pavers are down is a full redo.
Edge restraints go in before or alongside your final bedding layer, not on top of the sand. This matters. The ICPI's guidance on edge restraints makes clear they're a structural component of the pavement system, not a decorative border. blank" rel="noopener noreferrer">Plastic snap-edge restraints spiked into the compacted base with 10-inch spikes are the most common DIY choice. They're inexpensive, flexible enough to follow curves, and hold pavers from spreading outward over time. Without them, your paver field will slowly creep and gaps will open up in the joints.
For gravel patios, solid steel or aluminum edging does the same job and keeps the gravel from migrating into your lawn. For wood or composite builds, the framing structure itself acts as the edge restraint, so this step looks different but the principle is the same: contain the material laterally.
Bedding sand layer for pavers
Once the compacted gravel base is done and edge restraints are in place, spread a 1-inch layer of coarse bedding sand (concrete sand or washed coarse sand, not fine play sand) across the entire area. Screed it flat using two 1-inch diameter pipes as rails and a long board dragged across them. This gives you a perfectly flat, consistent depth. Pull the pipes out after screeding and fill those channels with sand by hand. Do not compact the bedding sand and do not walk on it after screeding. Lay pavers directly onto the undisturbed sand surface.
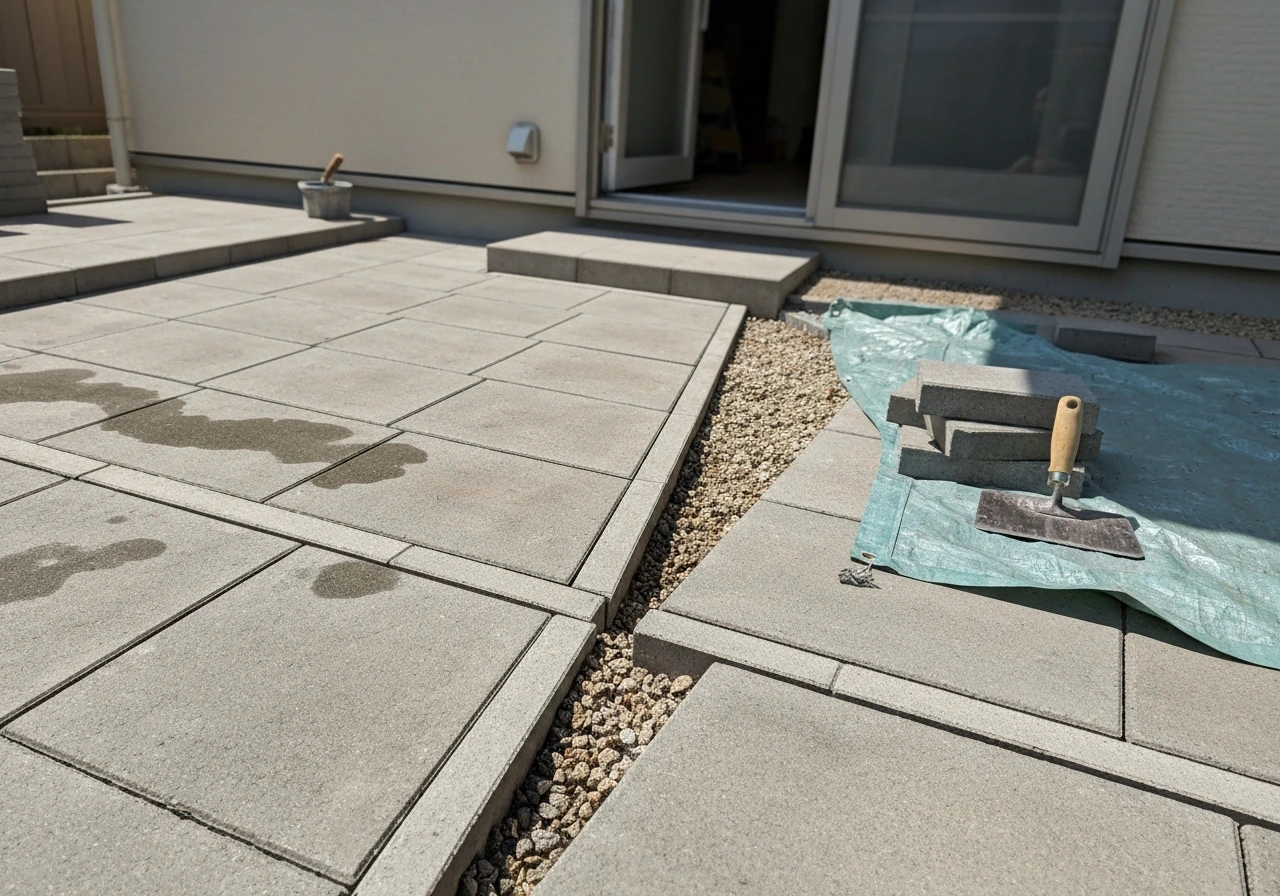
Setting the surface: pavers, stone, composite, and wood
Concrete pavers and brick
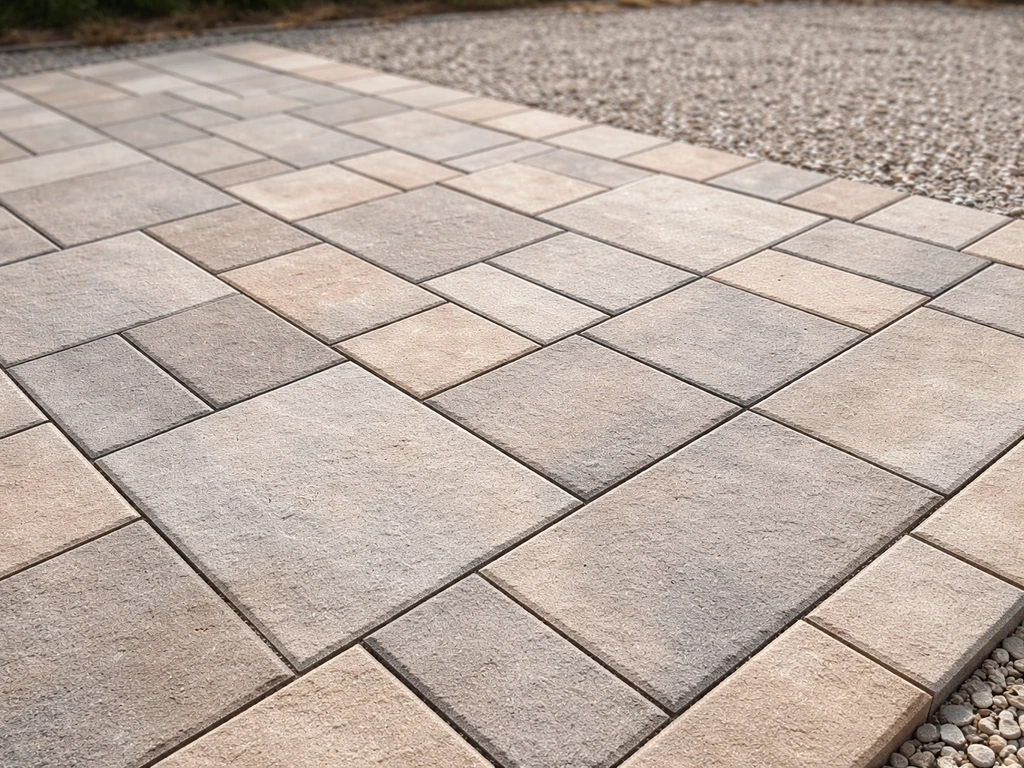
Start laying from a corner or a straight reference edge, working outward in the pattern you've chosen. Running bond, herringbone, and basketweave are all good DIY-friendly patterns. Keep a consistent joint spacing by using paver spacers or by eye if the pavers have built-in lugs. Use a rubber mallet to tap each paver into the sand. After every few rows, lay a long straightedge or level across the surface. The gap between the straightedge and the paver surface should never exceed 3/8 inch. If a paver sits high, tap it down. If it's low, lift it, add a small pinch of sand, and reset it.
Cut pavers to fit the perimeter using a circular saw with a diamond blade or a rented wet saw. Score first, cut on a stable surface, and wear eye protection. Plan your cuts before you start laying so you minimize waste and keep the pattern balanced.
Natural stone (flagstone)
Flagstone is laid similarly but the irregular thickness of individual pieces means you're constantly adjusting the amount of sand beneath each one to keep the top surface flush. A diy mosaic patio table top uses a similar approach for dry-laying pieces first, then setting them in place and keeping everything level. Dry-lay the entire area first (without sand) to plan your puzzle arrangement, then set each piece into sand one at a time. Use a level on every piece and go slow. Flagstone is stunning but it rewards patience.
Composite panels and wood
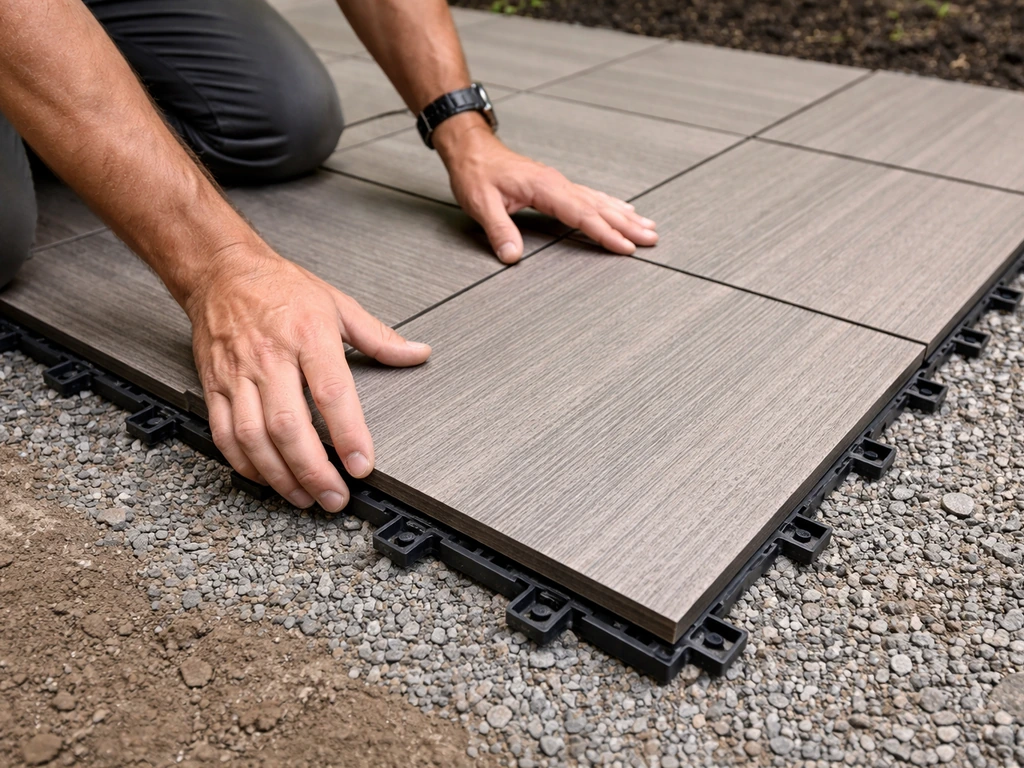
Composite deck tiles or panels typically click or lock together on a plastic grid system that sits directly on a compacted gravel base or flat concrete slab. These are some of the fastest installations: clean the base, lay the grid, click tiles together. Always check manufacturer spacing requirements and make sure the base surface is flat within 1/4 inch before you start. For wood on sleepers, pressure-treated 4x4 sleepers are laid across the compacted gravel base on 16-inch centers, shimmed to level, and decking boards are screwed down across them. Leave 1/8-inch gaps between boards for drainage and expansion.
Finishing touches: leveling, joints, sealing, and care
Once all pavers or stone are set, rent the plate compactor again and run it over the entire surface to seat the pavers firmly into the bedding sand. Use a rubber pad or piece of carpet under the compactor plate to protect the paver surface. One or two passes is all you need.
Now fill the joints. Polymeric sand is the right choice for sand-set paver patios because it activates with water and locks the joint sand in place, resisting washout, ants, and weed germination. Pour dry polymeric sand over the surface and sweep it into the joints using a push broom. Make multiple passes from different directions until the joints are filled to just below the paver surface chamfer. Then blow off any sand dust from the paver faces with a leaf blower before activating.
To activate polymeric sand, mist the entire surface with a very fine water spray. The goal is to wet the sand in the joints without displacing it or washing it out. A gentle mist nozzle on a garden hose works well. Do this in two applications about 15 minutes apart, then let it cure for 24 hours before walking on it. Avoid activating if rain is forecast within that window.
For natural stone and some pavers, applying a penetrating sealer protects against staining and moisture absorption. Most sealers need to be applied to a clean, dry surface and can be rolled on with a paint roller. Read the label for reapplication intervals, but plan on resealing paver and stone patios every two to three years. Grout or mortar joints on mortared flagstone should be inspected each spring and any cracked sections repointed before water works deeper.
Ongoing maintenance by material
- Pavers and brick: Sweep off debris regularly, top up polymeric sand if joints become shallow (typically every 3 to 5 years), reseal every 2 to 3 years if you want stain protection.
- Natural stone: Inspect mortar or sand joints annually, repoint or top up as needed, reseal as the manufacturer recommends.
- Gravel: Rake periodically to redistribute, add fresh gravel every year or two to maintain depth, check edging for any movement.
- Composite panels: Rinse with a garden hose once or twice a year. Check locking connections after a harsh winter. Most composites don't require sealing.
- Pressure-treated wood: Sand and reseal or restain every one to two years to prevent cracking and graying. Replace any boards that show significant rot or cracking.
If at any point after the first year you notice individual pavers rocking or a section that has settled, don't ignore it. Pull up the affected units, add sand to bring the level back, and reset them. Sand-set systems are designed to be repaired this way and a small fix done promptly prevents a larger issue later. If you want to go further with surface options, the guides on how to make a tile patio or how to cover a patio floor are good next reads depending on what you're working with. A DIY tile patio table top uses the same mindset as a patio floor: strong substrate, level surfaces, and the right tile setting and sealing steps.
FAQ
How do I choose the right patio floor slope if my yard already drains well or poorly?
Start by checking where runoff goes during a hard rain, note low spots and existing downspout directions, then choose the 1/8 to 1/4 inch per foot fall direction so water moves away from the house and away from problem areas. If the patio is adjacent to a lawn that naturally holds water, plan for the slope to drain toward a dry well, swale, or pipe outlet rather than toward the garden bed or fence line.
Can I build a patio floor over existing concrete or an old slab?
Yes for certain surface types, but you must avoid trapping water. For composite tiles/panels, the base needs to be flat within about 1/4 inch and you should clean, repair cracks, and remove loose material first. For pavers on sand, installing over slab is usually not recommended unless you have a designed elevated system because you still need lateral drainage and the ability to maintain levels as the structure ages.
What’s the most common mistake with base prep, and how can I prevent it?
The biggest failure point is skipping proper removal of topsoil/organics or not compacting in lifts. Remove all organic material within the footprint, verify depth before you add base, then compact each gravel lift and recheck slope after compaction. If you see footprints or the base feels spongy during the “boot test,” add another compaction pass before moving on.
How do I deal with utility covers, tree roots, or other obstructions inside the patio area?
Plan layout around them on paper first, and keep excavation clearance so you are not undermining utility housings. For tree roots, do not cut major roots without local guidance, instead adjust the patio shape to maintain root zones or use a raised, framed approach. For any access panels, keep them reachable by designing a removable section or a specific paver cutout that doesn’t seal access shut.
Do I need a French drain even if I have correct patio slope?
Not always. Use a French drain when water naturally collects in the area, the patio footprint sits below surrounding grade, or the soil drains slowly. If you only have a small wet edge after rain, sometimes rerouting a perforated pipe outlet at the downhill end is enough. The key is matching the drainage solution to where water actually accumulates, not only the patio slope number.
How much excavation depth should I use if I’m using thicker pavers or a different surface material?
Use the finished surface height as your reference, then subtract the required base, bedding, and paver thicknesses. The article’s example depths assume specific thicknesses, so measure your actual paver thickness and adjust excavation accordingly. Leave room for edge restraint height too, so the paver face lands at the intended grade.
How do I know if my bedding sand depth is correct before laying pavers?
After screeding, the sand should be a consistent, loose 1-inch depth (or the depth recommended by your system) and you should be able to set pavers without digging through. If you compress the sand while walking or if you disturb it while leveling, expect localized low spots. Once laid, avoid stepping on the bedding surface and only stand on placed pavers or a temporary board if needed.
What should I do if my pavers aren’t level after the first few rows?
Stop and correct early. Check slope and level across a straightedge, then lift the high pavers or remove sand under low sections and re-screed locally. Do not try to “force” level by pounding only the surface higher, because that creates rocking points later. Recheck alignment every few rows so the error does not compound at the far edge.
How do I cut pavers safely and cleanly at the perimeter?
Dry-fit pieces before cutting, then mark on the face and cut on a stable surface. Use a diamond blade, wear eye protection, and consider making a test cut on a spare paver to confirm the kerf and line accuracy. Keep a small gap or consistent reveal at walls or fixed objects so you are not wedging the field tight and stressing the restraints.
Should I use polymeric sand for every patio type?
No, polymeric sand is designed for sand-set paver joints where water activation is acceptable. If you have surfaces that require mortar/grout joints, follow that mortar or grout system instead, because polymeric sand can behave differently under frequent washing or in conditions where activation cannot complete properly. Also confirm the paver and base system are intended for polymeric sand before purchase.
What’s the safest way to activate polymeric sand if my area is windy or the ground is dusty?
Use a very fine mist and focus on getting moisture into the joints rather than soaking the paver faces. If it’s windy, mist in shorter passes and avoid overwatering that can flush sand out. If the surface is very dusty, sweep gently first so the polymeric sand is not contaminated, then activate in two applications about 15 minutes apart and keep traffic off for 24 hours.
How often should I reseal, and how do I choose between penetrating sealer and other options?
Plan on resealing paver and stone patios every two to three years, but base the schedule on how quickly water stops beading and whether staining appears. Choose penetrating sealer when your goal is stain and moisture resistance without changing the surface look dramatically. If you want a different aesthetic finish, confirm that the specific product is compatible with your stone type and joint system.
What are good repair steps if a few pavers rock or a spot settles after the first winter?
Treat it as a localized base issue. Remove only the affected units, clean out disturbed joint and bedding sand, add fresh bedding sand to restore the correct level, and reset the pavers so they sit firm without rocking. Then refill joints as needed (using the correct joint material) and mist polymeric sand again only if the original joint system was polymeric and remains intact.
How to Upgrade Patio: DIY Diagnosis, Prep, Materials, Steps
Learn how to upgrade a patio with DIY diagnosis, drainage prep, material choices, and step-by-step refresh, replace, or