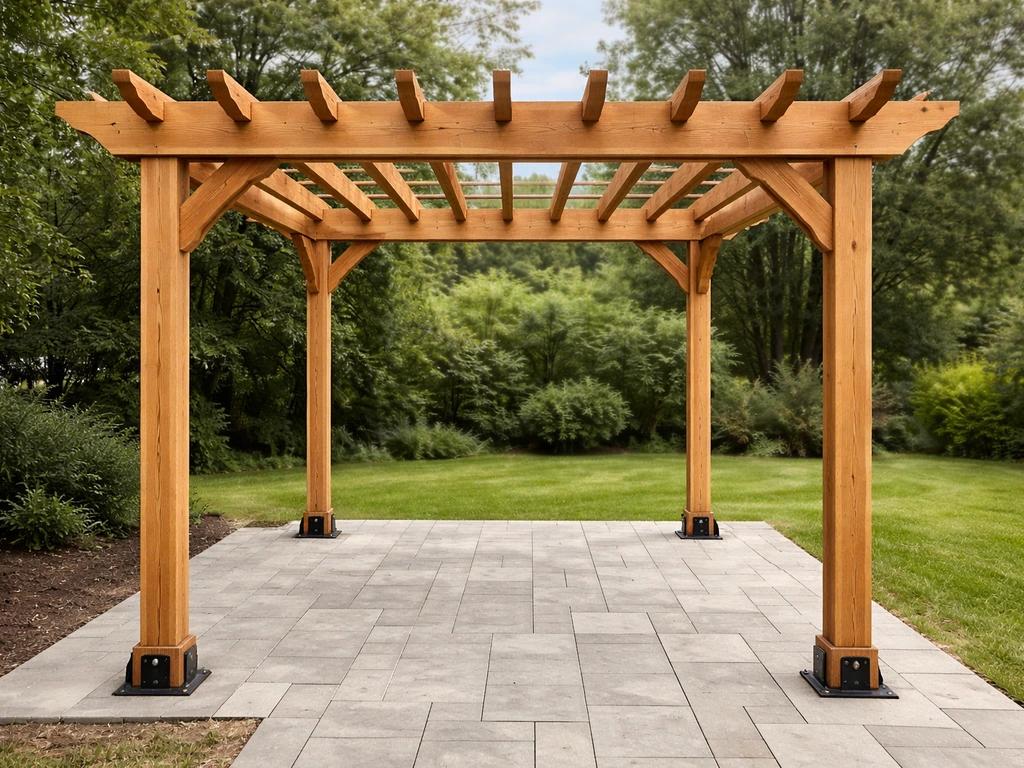
You can build a solid, weather-resistant arbor over an existing patio in a weekend or two, even as a first-timer. The basic process is: plan your layout and size, pick your materials, anchor posts correctly to your patio surface, frame the top structure with beams and rafters, and finish with weatherproofing and any trellis or shade elements. To get a patio around a large tree that stays stable, use the same post, spacing, and anchoring principles while planning around the tree’s trunk and root zone. The trickiest part isn't the carpentry, it's getting the post anchoring right for whatever surface you're working on, whether that's concrete, pavers, or a wood deck.
How to Build an Arbor Over a Patio: DIY Step-by-Step

Nolan Lennox
14 May 2026
Plan Your Arbor Before You Buy Anything
The most common planning mistake is sizing the arbor to fit the lumber rather than fitting the space. Start by walking your patio and deciding what the arbor actually needs to do. Are you blocking afternoon sun? Creating a sheltered dining nook? Supporting climbing plants? The answer shapes everything from height to rafter spacing.
A comfortable minimum interior height is 7 feet, but 8 feet is better, especially if you plan to hang lights, a ceiling fan, or let vines drape down from the rafters. For footprint, a 10x12 or 12x12 arbor works well for a patio table and chairs. Go bigger if the patio can take it, but keep in mind each extra foot adds posts, hardware, and lumber costs.
Decide early whether the arbor is freestanding or attached to the house. Attached designs (where one beam bolts directly to the house's ledger or rim joist) give you a cleaner look and save two posts, but they require flashing, a structural connection to the house, and sometimes a permit. Freestanding arbors are simpler, more flexible on placement, and rarely need a permit unless they exceed certain square footage. Check your local codes before you commit, many municipalities require a permit for any permanent structure over 200 square feet or with a roof.
Mark your post locations on the patio using chalk or tape before anything else. Posts typically sit 6 to 12 inches in from the patio's outer edge so beams can overhang naturally and the structure looks proportional. For a 12x12 arbor, four corner posts is standard. Spans wider than 12 feet benefit from an intermediate post or a beefier beam to prevent sag.
Picking Your Materials: Wood, Vinyl, or Metal
Each material has a real-world case for it. Here's how they stack up honestly:
| Material | Cost (approx.) | Durability | Maintenance | Best For |
|---|---|---|---|---|
| Pressure-treated pine | Low ($300–$700 lumber) | High if properly finished | Stain/seal every 2–3 years | Budget builds, structural posts |
| Cedar | Medium ($500–$1,000 lumber) | Very good naturally | Seal every 2–3 years | Visible decorative elements, natural look |
| Redwood | High ($800–$1,500+) | Excellent naturally | Minimal if left natural | Premium builds, low-maintenance priorities |
| Vinyl/PVC | Medium-high ($600–$1,200 kit) | Excellent (no rot) | Wash occasionally | Low-maintenance, clean aesthetic |
| Aluminum/steel | High ($1,000–$2,500+ kit) | Excellent | Minimal | Modern style, maximum longevity |
My go-to recommendation for most DIY patio arbors is pressure-treated 4x4 or 6x6 posts combined with cedar or redwood for the visible beams and rafters. You get structural integrity where it matters most (the posts are in contact with hardware and concrete) and a clean, attractive finish on the parts you actually see. Pressure-treated lumber has become more corrosive to standard hardware over the years because of copper-based preservatives like ACQ and CA, so don't just grab whatever galvanized screws are on the shelf. For ACQ or CA treated wood, use stainless steel fasteners throughout. Hot-dipped galvanized hardware is the minimum acceptable, but stainless steel is the worry-free choice.
Vinyl arbor kits are genuinely low-maintenance and look great for modern or painted-house aesthetics, but they're harder to customize, the posts can flex under wind load, and repairs mean ordering proprietary parts. Metal kits are premium in every sense, cost included. Stick with wood for your first build unless your budget and aesthetic point strongly elsewhere.
Measure and Prep Your Patio Surface
The patio surface determines how you anchor the posts, and getting this wrong is the most common structural mistake. Measure twice, mark every post location, and then assess what you're working with underneath each mark. Also, if there are tree roots under or near the patio, plan your post locations around them or adjust the anchoring method so you do not damage the root system.
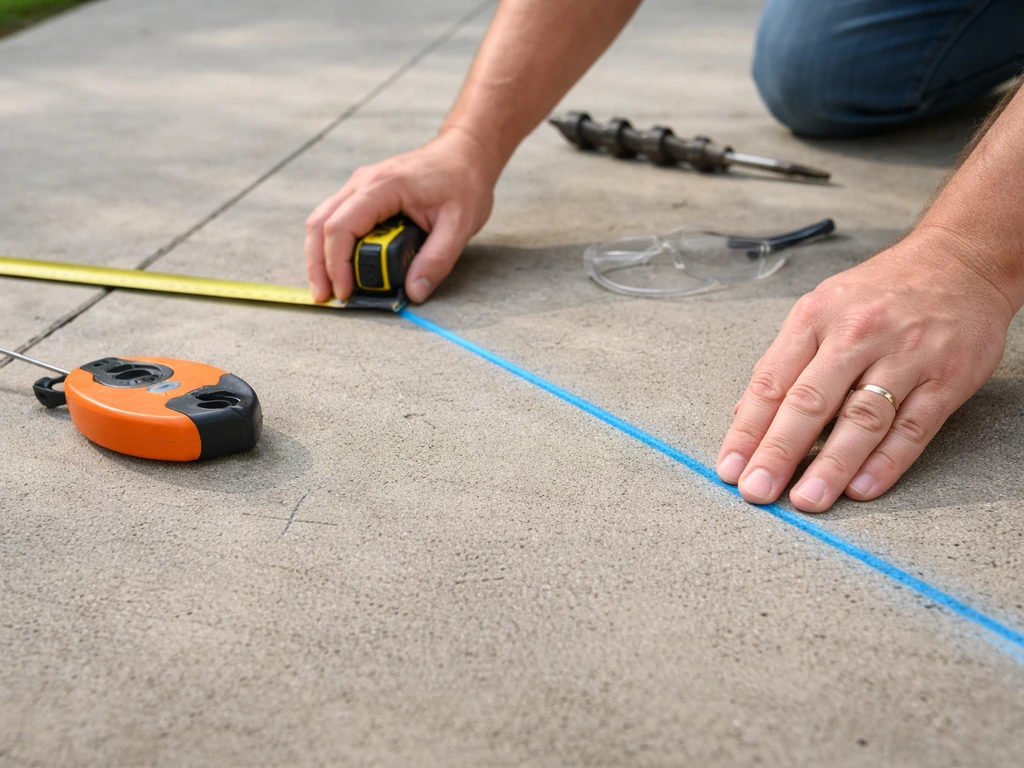
Concrete Patios
Concrete is the most straightforward surface for anchoring. You'll drill into the slab with a hammer drill and masonry bit, then set wedge anchors or sleeve anchors to secure your post base brackets. The critical measurement is edge distance, anchor bolts need to sit at least 6 inches from any edge of the slab to avoid cracking it. Mark all four post locations, check that none are too close to the slab edge, and adjust the layout if needed before you drill anything.
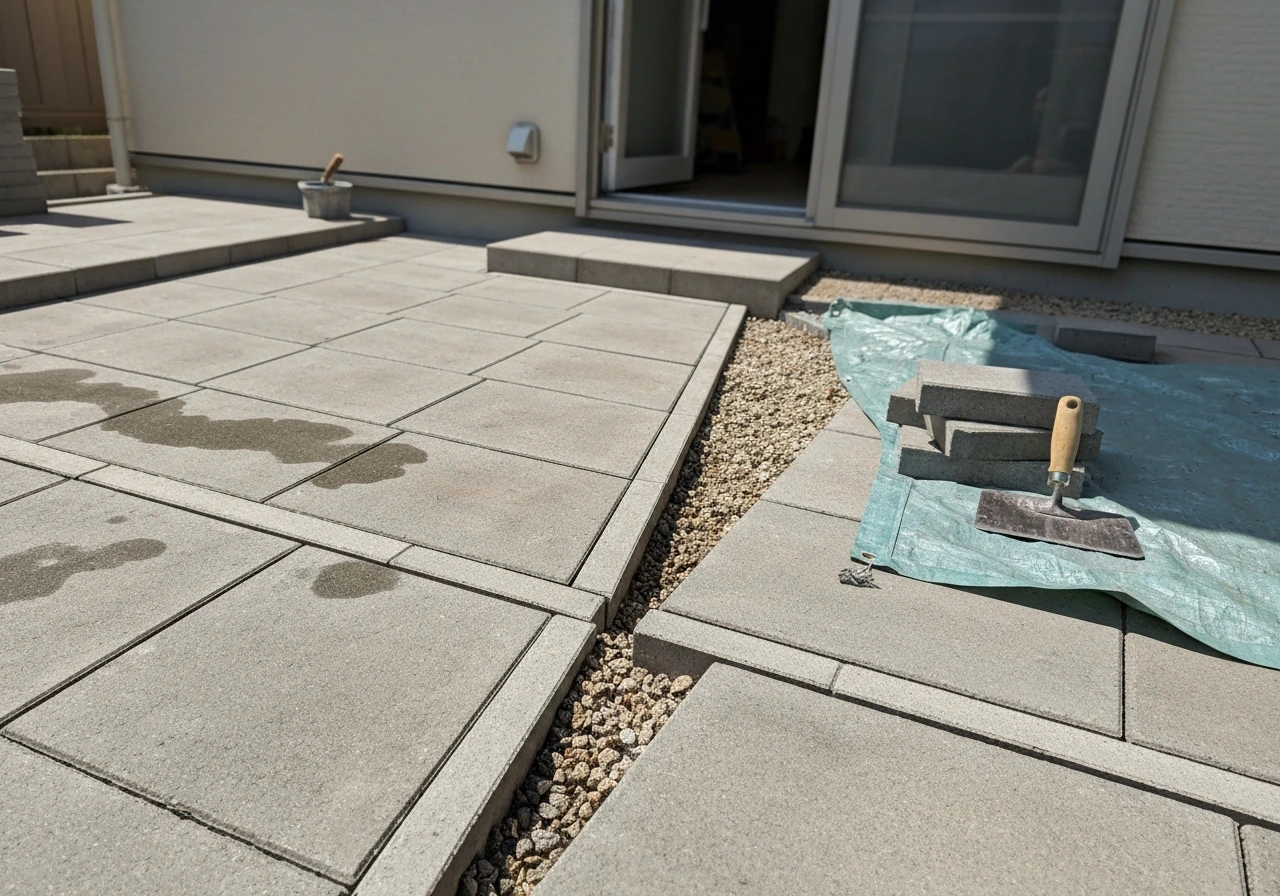
Paver Patios
Pavers present a challenge because the base material under them (usually compacted gravel and sand) isn't a structural footing. You have two good options: remove pavers at each post location and dig down to pour a small concrete footing, or use a surface-mount post base that distributes load across several pavers with a large baseplate. The footing approach is stronger and what I'd recommend for a permanent structure. Remove a 12-inch square of pavers, dig 12 to 18 inches down, pour a tube form with concrete, and let it cure for at least 48 hours before setting post bases.
Wood Deck Surfaces
If your patio is actually a wood deck, you need to anchor posts through the decking into the structural framing below, never just into the decking boards themselves. Locate the deck joists or beams, position your post bases directly over them, and use through-bolts or structural lag screws that penetrate into the framing. This is where having a deck plan or doing some detective work underneath pays off.
Footings, Anchoring, and Keeping Moisture Out
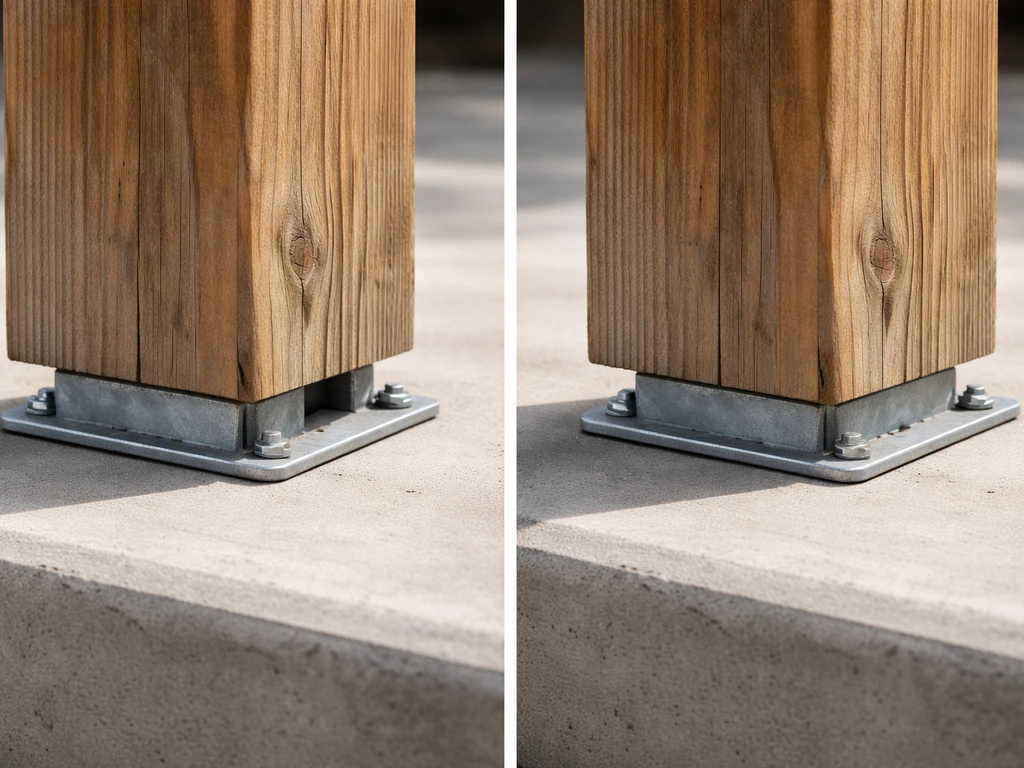
Moisture is the silent killer of arbor posts. A post sitting directly on concrete will trap water at the end grain, and that trapped moisture causes rot even in pressure-treated lumber within 5 to 10 years. The fix is simple: use a standoff post base that elevates the bottom of the post about 1 inch above the concrete surface. This small gap lets water drain away and air circulate around the end of the post. Brands like Simpson Strong-Tie and QuickTie both make code-approved standoff bases specifically designed for this.
For arbors over concrete patios where the slab is already thick enough (typically 4 inches or more), surface-mounted post bases work well. If your slab is thin or cracked, or if you're on pavers, pour separate concrete footings as described above. Footing depth depends on your local frost line, in cold climates, footings often need to go 30 to 42 inches deep. In mild climates, 18 to 24 inches may be sufficient. Check local building codes for the exact requirement in your area.
Wherever wood meets metal hardware or concrete, use flashing tape or a self-adhering membrane to prevent water from wicking into those interfaces. DeckWise's ledger tape is one option, but any quality self-stick flashing tape works. This is especially important if you're attaching an arbor to your house, the ledger connection is a notorious water intrusion point.
For the anchor bolts themselves, wedge anchors set into concrete are strong and permanent. Expansion sleeve anchors also work. Follow the manufacturer's minimum embedment depth (usually 2.5 to 3.5 inches into concrete) and the edge distance requirements. Use a template or the post base itself as a drilling guide so your holes land exactly where the bracket needs them.
Step-by-Step: Building the Arbor Frame
Here's the build sequence I follow. Do it in this order and you'll avoid most of the alignment headaches people run into.
- Lay out and mark all post locations on your patio surface using a chalk line and square. Confirm the layout is square by measuring diagonally corner to corner—both diagonals should match within 1/4 inch.
- Drill anchor bolt holes at each post location (concrete) or excavate and pour footings (pavers or thin slab). Let concrete footings cure a minimum of 48 hours, ideally 72.
- Set and bolt down all post base hardware before touching any lumber. Torque the anchor bolts to the hardware manufacturer's spec.
- Cut all posts to the same length. For an 8-foot finished height with a 6-inch post base and a 2x10 beam sitting on top, your posts are typically around 7 feet 2 inches—measure for your specific setup.
- Set the first post in its base and brace it plumb in two directions using temporary 2x4 braces staked into the ground or clamped to nearby structure. Do this for each post before installing any beams.
- Snap a level chalk line or use a laser level across the tops of all posts to confirm they're all at the same height. Trim any posts that are proud, or shim bases as needed.
- Install the main beams (typically 2x8 or 2x10 doubled up) across the tops of the posts on the long axis of the arbor. Use a beam-to-post connector hardware (post caps) and check for level before final fastening. A long 4-foot level or string line works well here.
- Install rafters across the beams on the short axis, spaced 16 to 24 inches on center. Use joist hanger hardware or notch the rafters to sit on top of the beams. Let the rafters overhang the beams by 12 to 18 inches on each side for proportion and shade.
- Add decorative end cuts to rafter tails if desired—a 45-degree angle or curved cut makes a big visual difference and only takes a few minutes with a jigsaw.
- Install cross-slats or purlins on top of the rafters if you want more shade or a surface for plants to climb. 1x4 or 2x2 lumber spaced 12 inches apart is common.
- Remove all temporary bracing once the frame is fully bolted together and the structure is self-supporting.
Finishing, Weatherproofing, and Safety Checks
Before you call the build done, work through these finishing steps. They're the difference between an arbor that lasts 20 years and one that starts looking rough in five.
Weatherproofing the Wood
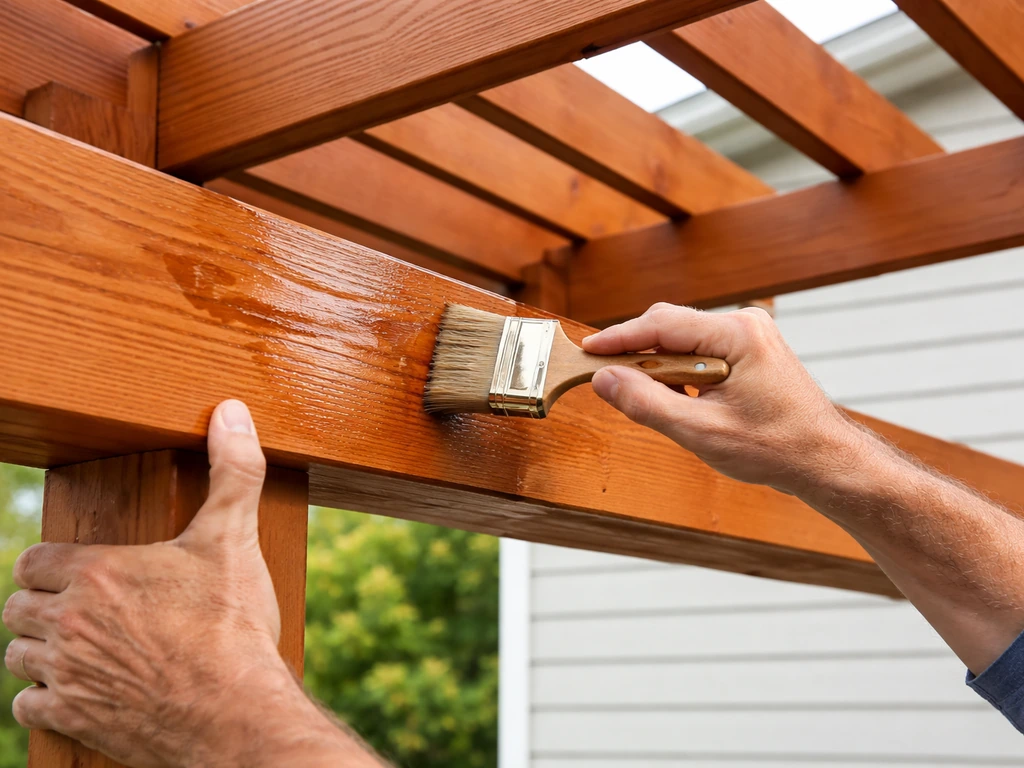
If you used cedar or redwood for visible members, apply a penetrating wood sealer or semi-transparent stain within a few weeks of the build. Wait until any surface moisture from pressure treatment has dried out first, usually two to four weeks for kiln-dried treated lumber. For pressure-treated posts, a solid-color stain or paint gives the longest protection. Reapply every two to three years or when water stops beading on the surface.
Electrical and Clearance
If you're running lights or a ceiling fan, plan the wiring conduit during the build, not after. A ceiling fan needs at least 7 feet of clearance below the blades, so factor that into your finished height. Any electrical work on a permanent outdoor structure typically requires a permit and should follow local codes, including outdoor-rated wiring and weatherproof boxes.
Stability and Safety
Shake each post after the build is complete. There should be zero play. If a post rocks, check that the anchor bolts are fully torqued and that the post is fully seated in the base. Diagonal knee braces between posts and beams add significant rack resistance, a 45-degree 2x4 brace at each inside corner makes the whole structure dramatically stiffer, especially for taller arbors or those in windy areas. Use carriage bolts with washers and nuts through the brace for solid connections.
Check that all rafters are evenly spaced and that none are twisted or crowned upward. Fine Homebuilding’s pergola beam-install guide also recommends striking reference lines at a consistent height and then checking each beam is level before securing it in place. A crowned rafter will create a low spot where water pools. If you find one, flip it or replace it before putting anything on top.
Adding Plants, Trellis, and Shade
An arbor without something growing on it or shading it is just a frame, the plants and shade elements are what make it feel like an outdoor room. To complete the look, plan how to landscape around your patio so the arbor, plants, and pathways all work together outdoor room. The good news is you have a lot of options and most of them are inexpensive.
Trellis Panels and Lattice
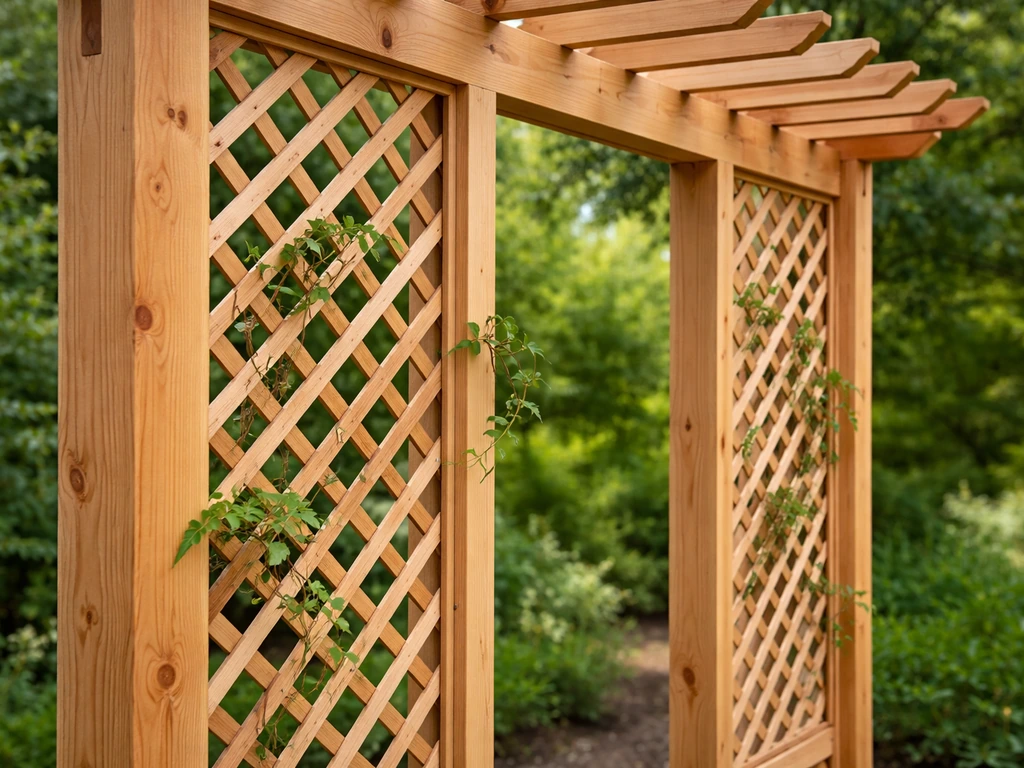
Attach trellis panels or lattice to the sides of the arbor between posts for privacy and a surface for climbing plants to grip. Cedar lattice panels are easy to find at any home center and can be trimmed to fit with a circular saw. Use lag screws and standoff spacers to mount them slightly away from the post faces so air can circulate, this reduces moisture trapping and keeps the lattice from staining the posts.
Climbing Plants
Fast-growing vines like clematis, wisteria, climbing roses, or jasmine are the classic arbor choices. Wisteria is stunning but gets very heavy, make sure your arbor is built solidly if you go that route, because a mature wisteria can weigh hundreds of pounds. Clematis is a lighter option that's easier to manage. For quicker coverage in the first season, annual vines like morning glory or black-eyed Susan vine fill in fast while perennials establish. Plant at the base of each post for the fullest coverage.
Shade Sails and Fabric
If you want shade without waiting for plants, a fabric shade sail or outdoor shade cloth attached to the top of the rafters works immediately. You can attach shade cloth directly to the rafter tops with zip ties or staples and roll it back in winter. Pre-made shade sails with corner grommets are easy to rig and can handle most wind if they're taut. This is a great interim solution while your plants grow in.
Ongoing Maintenance
Check the structure every spring. Look for any post bases showing rust, wood showing signs of checking or cracking around fasteners, and any soft spots in the wood near metal contact points. Trim back vines that are working their way under shingles or into roof intersections if the arbor is attached to the house. Touch up stain or sealant wherever the finish looks dull or worn.
Thinking about the broader yard picture, how the arbor integrates with surrounding plantings and landscaping, can also inform what you plant nearby and how you frame the space visually. To nail the look of how to plant around a patio, choose plants by light level and keep them spaced so they do not compete with the arbor posts.
Common Mistakes, Troubleshooting, and What It'll Cost You
Mistakes to Avoid
- Skipping the standoff post base: posts resting directly on concrete will rot at the base, often within 5 years. Always use a code-approved elevated base.
- Using the wrong fasteners with treated lumber: standard galvanized screws corrode quickly in ACQ/CA treated wood. Use stainless steel or hot-dipped galvanized hardware specifically rated for treated lumber.
- Not checking for square before the concrete sets: a layout that's even 1 inch out of square makes every subsequent step frustrating and can make the finished structure look crooked.
- Undersizing beams: a doubled 2x8 will sag over a 12-foot span under vine load and wind. Use doubled 2x10 for spans over 10 feet.
- No diagonal bracing: an arbor without knee braces or diagonal members will rack (lean) over time under wind load. Add at least one brace per corner.
- Attaching to the house without proper flashing: water will eventually find its way behind the ledger connection and cause rot in the house structure. Flash every ledger connection.
- Anchoring into pavers directly: pavers aren't structural. Either pour footings under paver locations or use a heavy surface-mount baseplate that spans multiple pavers.
Troubleshooting
- Posts feel wobbly after install: check anchor bolt torque first, then confirm the post is fully seated in the base. Add knee braces if the post itself is solid but the frame racks.
- Beams aren't level across all posts: shim under the post base or trim post tops. Use a long level or laser level to identify which post is high or low before trimming.
- Water pools on top of rafters: the rafters may be crowned or the whole structure may be tilting slightly. Recheck level and add a slight slope (1/8 inch per foot) toward one end if possible.
- Rafter tails cracking: this is usually a sign they're too narrow for the span or the wood dried out after install. Fill cracks with exterior wood filler, seal, and monitor for worsening.
Realistic Cost and Time Estimates
For a basic 10x12 freestanding wood arbor over a concrete patio, expect to spend $400 to $900 in materials if you're building from scratch with pressure-treated lumber and cedar accents. That includes posts, beams, rafters, post bases, anchor hardware, fasteners, and one coat of stain or sealer. A vinyl kit for the same footprint runs $700 to $1,500. If you're hiring help for the post setting or anchoring, budget an additional $200 to $500 for a few hours of skilled labor.
On time: plan for one full day to layout, drill, set hardware, and get posts plumb and braced. Day two covers beam and rafter installation, bracing, and cleanup. Finishing (staining, trellis, plants) can happen over subsequent weekends. If you're doing footings for a paver patio, add a day for excavation and a mandatory 48-hour cure wait before continuing. The build itself is very manageable as a solo project, but having a second person for lifting beams into place makes day two much easier and safer.
FAQ
My patio is not level. How do I keep the arbor beams level and the structure from twisting?
If your patio has any slope, you can still keep the arbor looking level by leveling the posts during install (set the post bases so the top plane of beams is even), then shim only under the post base hardware, not between wood and the metal bracket. After everything is plumb, torque anchor bolts, then re-check diagonals so the frame is square before adding rafters.
Can I build an arbor that attaches to my roof or overhang instead of staying freestanding?
Yes, but only if you can anchor into structural framing, and the roof connection is handled correctly. For a freestanding arbor, water shedding is mostly managed with proper rafter spacing and flashing at any house tie-in. If you plan to connect the arbor to a house, confirm the house side can take the load, and use proper flashing and weatherproofing at the ledger connection to prevent wicking into the wall.
Can I change the footprint, like making one side open wider, without redesigning everything?
Corner posts are not the only option. If you want a narrower opening for a path or a wider view, you can keep the same beam depth but move post locations inward, as long as you still provide intermediate support for spans over 12 feet and you keep rafter spacing consistent so the top doesn’t rack.
How can I tell if rafters are really straight, or if I should replace a piece before finishing?
Rafters that are even but crowned upward can create low channels where water sits. Before you cover anything, dry-fit rafters and run a straightedge across their top surfaces. If they flex or you notice twists, replace the piece rather than forcing it, because a “fixed later” rafter will shorten the lifespan of the deck-style mounting and fastener holes.
What’s the best anchoring approach on paver patios if I want the arbor to feel solid for years?
If your patio is on pavers, don’t rely on sand or compacted gravel for structural stability. Use either a poured concrete footing at each post location or a purpose-built surface-mount post base with a large baseplate that spreads load. Also, avoid drilling or cutting into paver bedding without removing down to undisturbed base, because small settlement over time can make the arbor feel loose.
What should I do if my concrete patio is thin or has cracks near where the anchors would go?
If the slab is thin, cracked, or you can’t achieve proper edge distance (for example, you need anchors too close to slab edges), switch to separate footings instead of squeezing wedge anchors into weak concrete. A quick check is to look for spalling, visible cracks radiating from the proposed anchor points, and any areas that sound hollow when tapped.
Can I build the arbor now and add heavier vines later, like wisteria, or do I need to overbuild from the start?
Yes, but treat it like a structural upgrade. Heavier plants (mature wisteria, large climbing roses) add dynamic loads through wind and vine weight, so reinforce with diagonal bracing and consider a beefier beam size or an intermediate post. Also, plan a maintenance-friendly training system so you don’t pull load unevenly on one rafter.
I want to add lights and maybe a ceiling fan. What electrical planning mistakes should I avoid?
Use weather-rated outdoor wiring methods, and plan for drip loops, service clearances, and a weatherproof junction box at every transition. If you install a ceiling fan, verify blade clearance and make sure the electrical box is rated for ceiling fans and outdoor damp locations, not just “outdoor lights.” Permit requirements are common for permanent outdoor electrical work.
What causes rust or staining around hardware, and how do I fix it early before the wood deteriorates?
If you see fasteners start to rust or stain around the hardware, it often means incompatible wood treatment and metal, or moisture trapped at the interface. Switch to stainless fasteners for any ACQ or CA treated lumber, and add flashing or membrane where wood meets metal. Then reapply sealer to the specific member area, not just the obvious surface, because water can travel under the grain.
What should I inspect each spring to catch problems before they get expensive?
Do a simple seasonal checklist: tug each post lightly (no wobble should develop), inspect diagonal braces for loosened connections, and check for soft spots near metal contact points. If vines are covering the hardware, clear a small section each spring so you can actually see fasteners and base gaps.
Next Article
How to Upgrade Patio: DIY Diagnosis, Prep, Materials, Steps
Learn how to upgrade a patio with DIY diagnosis, drainage prep, material choices, and step-by-step refresh, replace, or