You can build a solid gravel patio in a weekend for $3–$8 per square foot by excavating 4–6 inches of soil, laying a compacted gravel sub-base, rolling out landscape fabric, installing edge restraints, and topping it off with 2–3 inches of your chosen decorative gravel. The whole process is beginner-friendly as long as you nail the prep work, which is what most first-timers skip and later regret. If you want a close alternative to this gravel approach, you can also follow the steps for how to build pebble patio using similar base prep and drainage planning.
How to Build a Gravel Patio Step by Step

Nolan Lennox
30 Apr 2026
Planning and measuring your gravel patio area
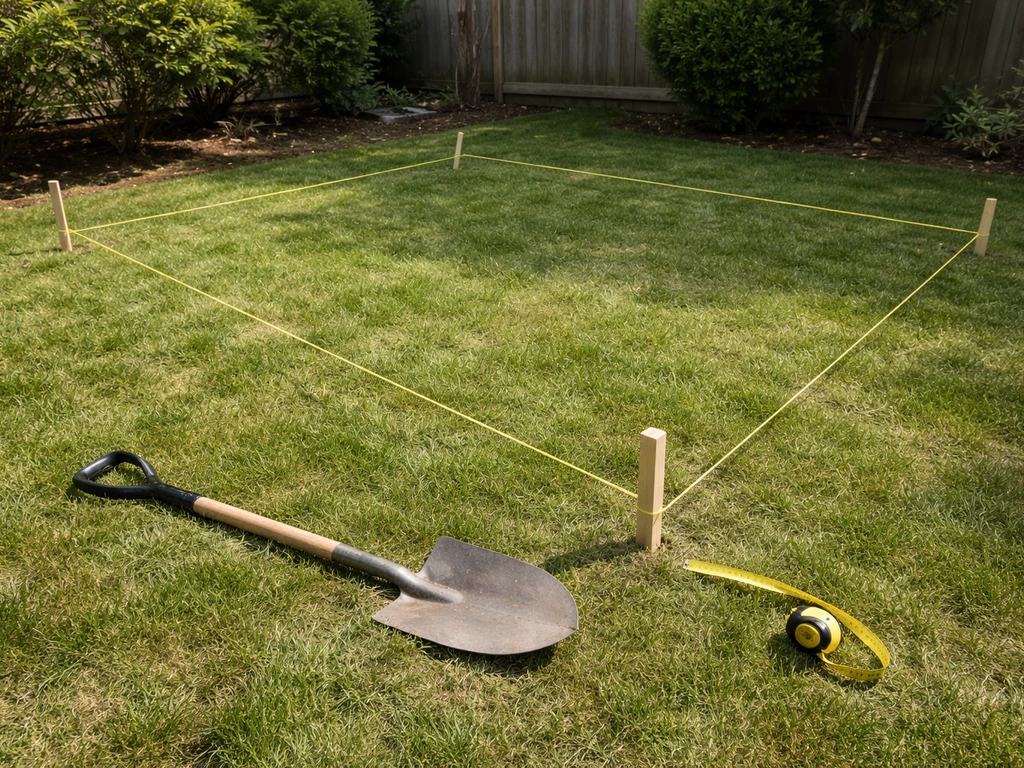
Before you buy a single bag of gravel, get your footprint locked down. Walk out to your yard and think about how you actually use the space. A dining area for four people needs at least 10x12 feet. A lounging area with a couple of chairs and a fire pit works in 12x12 feet. Bigger is almost always better with gravel because the material is cheap and easy to add later, but the labor of expanding excavation is a pain.
Use stakes and string line to mark your rectangle, or a garden hose for curved edges. Measure the area in square feet (length x width), and note it down because you'll need it to calculate every layer of material. For odd shapes, break the area into simpler rectangles, calculate each separately, and add them together. Once you have the string up, walk around inside the marked area and look for anything that will complicate your dig: tree roots, utility lines, drainage slopes, or low spots that pool water. Call 811 before you dig if you're in the US. It's free and takes two minutes.
Think about drainage now, not after. Gravel is naturally permeable, which is a huge advantage over concrete or pavers, but water still needs somewhere to go. A slight slope away from your house of about 1 inch per 8 feet is ideal. If your yard naturally drains away from the structure, you're in good shape. If water tends to pool in your chosen spot, you may want to consider a different location or plan for a drainage channel at the patio's edge.
Choosing the right gravel type and thickness (and estimating quantities)
Not all gravel is the same, and picking the wrong type is one of the most common mistakes I see. For the sub-base (your structural layer), you want crushed stone, typically what's sold as #57 stone, crusher run, or road base. It's angular, it compacts tightly, and it locks together under pressure. For the top, decorative layer, you have more options. Pea gravel is smooth and comfortable underfoot but shifts and migrates easily. Decomposed granite (DG) compacts almost like a firm surface. Crushed limestone is stable and widely available. River rock looks beautiful but rolls underfoot and is better as a border than a walking surface.
| Gravel Type | Best Use | Stability | Barefoot Comfort | Approx. Cost per Ton |
|---|---|---|---|---|
| Crusher Run / Road Base | Sub-base layer | Excellent | Poor (sharp) | $20–$35 |
| #57 Crushed Stone | Sub-base or base layer | Very Good | Poor (sharp) | $25–$45 |
| Pea Gravel | Top/decorative layer | Fair (shifts) | Excellent | $35–$55 |
| Decomposed Granite | Top layer, firm surface | Very Good | Good | $30–$50 |
| Crushed Limestone | Sub-base or top layer | Good | Fair | $25–$40 |
| River Rock | Decorative border | Poor (rolls) | Fair | $45–$75 |
My personal recommendation for most DIYers: use 4 inches of compacted crusher run as your base, then 2 inches of pea gravel or decomposed granite on top. That combination gives you stability below and a pleasant finish on top. If you're building on a softer soil or a high-traffic area, bump the sub-base to 6 inches.
Calculating how much gravel you need
Here's the formula: multiply your square footage by the depth in feet (so 4 inches = 0.33 feet), then divide by 27 to convert cubic feet to cubic yards. One cubic yard of gravel weighs roughly 1.3 to 1.5 tons. For example, a 12x16 foot patio (192 sq ft) with a 4-inch sub-base needs about 192 x 0.33 / 27 = 2.35 cubic yards of crusher run, plus another 1.2 cubic yards of decorative gravel at 2 inches. Always order 10–15% extra. Gravel compacts, shifts, and you'll inevitably need a little more than the math suggests.
Preparing the base: removing grass, leveling, and building the sub-base
Good prep is 80% of the job. A gravel patio that sinks, grows weeds through the middle, or develops soft spots almost always traces back to shortcuts in this stage. Plan for a solid half-day to full day just on excavation and leveling for a medium-sized patio.
Removing the grass and soil
Mark your perimeter, then strip off the grass. A flat spade works, but renting a sod cutter for $60–$90 per day will save your back on anything over 100 square feet. Cut and roll the sod in strips, and haul it away or compost it. Then excavate down to your total depth: add up your sub-base depth plus your decorative gravel depth plus about a half inch of wiggle room. For a 4-inch sub-base plus 2-inch top layer, you're digging down roughly 6.5 inches from finished grade. Use a string line across your stakes to check your depth as you go.
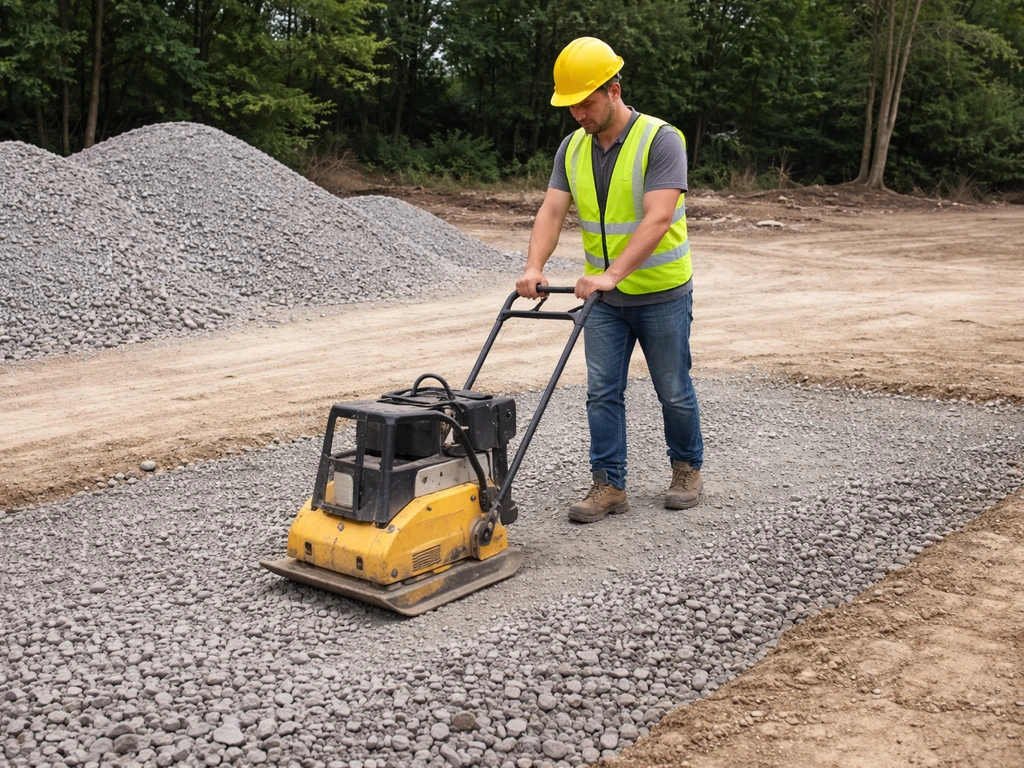
Leveling and compacting the soil
Once you've hit your target depth, rake the exposed soil smooth and remove any large rocks, roots, or debris. Then compact it. blank" rel="noopener noreferrer">Rent a plate compactor for this, a hand tamper works in a pinch for small areas, but a plate compactor makes a real difference on anything over 50 square feet. Run it over the soil twice in perpendicular directions. If your soil is very soft or clay-heavy, add a thin layer of coarse sand (about an inch) to help stabilize things before you put down gravel. A sand patio is a different finish to plan for, but the same base prep and compaction approach makes it much more stable.
Building the sub-base in lifts
Don't dump all your crusher run in at once and compact it. Thick fills compact unevenly, and you'll end up with soft spots. The right method is to add and compact in lifts of 3–4 inches at a time (generally staying in the 4–6 inch range per lift for gravel). Compacted aggregate base installation instructions from Pro-Tech Surface & Surfacing specify installing the base in lifts no thicker than 4 inches [lifts of 3–4 inches at a time](https://pro-techssurfacing.
com/site/wp-content/uploads/Compacted-Stone-Base-Installation-Instructions. pdf). Each lift gets a pass with the plate compactor before the next one goes in. For most residential patios, you're doing one lift of sub-base gravel at 4 inches, which is straightforward.
If you're building a deeper base for soft ground, add a second lift only after the first is fully compacted. This is the same compaction-in-lifts principle used in road and site construction, and it genuinely matters even at the backyard scale.
Weed control and edge restraints: keeping gravel in place and the surface clean
Gravel patios have two enemies: weeds pushing up from below and gravel migrating into your lawn. Both are easy to prevent if you do it right the first time, and both are a nightmare to deal with after the fact.
Landscape fabric the right way
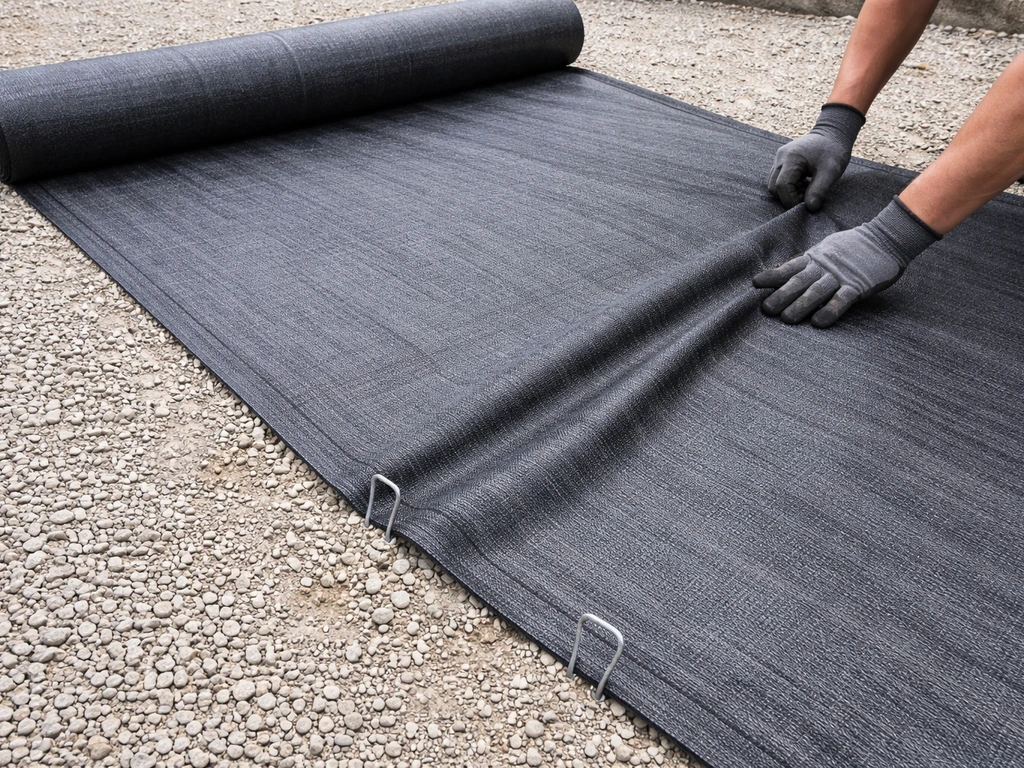
Use a woven geotextile landscape fabric, not the cheap flimsy stuff. The woven type allows water to drain through while blocking weed growth, and it won't shred when you rake the surface. Lay it over your compacted sub-base with at least 6–12 inches of overlap at seams.
Pin the fabric down with landscape staples every 2 feet along the edges and at seams. Here's the key: the fabric goes between your sub-base and your decorative top layer, not under the sub-base. Placing it under the sub-base causes separation issues and can actually impede drainage in your compacted layer. The fabric's job is to prevent the decorative gravel from filtering down into the base, and to stop weed seeds from germinating in the top layer.
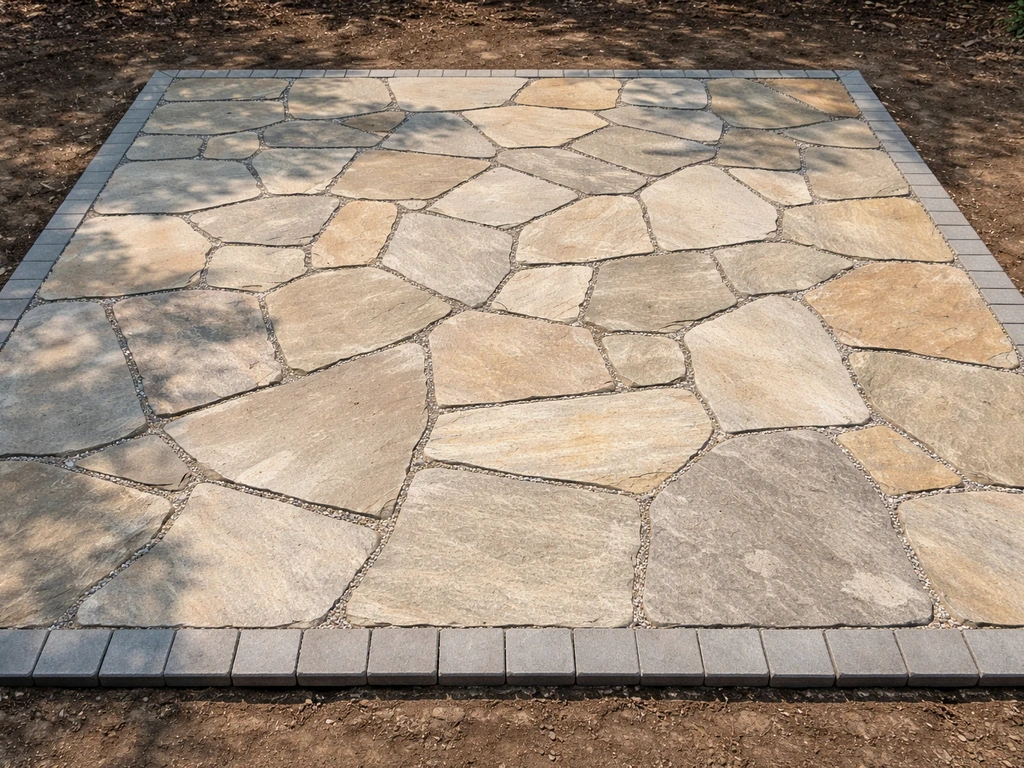
Edge restraints
Without edge restraints, your gravel will spread into the lawn within one season. Your options are plastic paver edging (cheap, flexible, great for curves), metal landscape edging (cleaner look, lasts longer, about $1–$3 per linear foot), pressure-treated lumber (sturdy, good for rectangular patios), concrete edging blocks, or natural stone border. For most DIY gravel patios, I'd go with steel or aluminum edging. It's easy to install, holds up well, and looks sharp. Drive the stakes every 12 inches for a firm hold. For a pea gravel patio or any loose decorative surface, also consider a slightly raised edge so material doesn't escape when people walk near the border. Pea gravel patios in particular benefit from this.
DIY construction steps: installing fabric, adding gravel, and leveling/compacting
Here's the full sequence from a cleared, excavated site to a finished patio.
- Install edge restraints first. Set your edging along the perimeter at the correct height (accounting for all your layers). Stake it firmly before any gravel goes in. Trying to install edging after gravel is already spread is frustrating and messy.
- Add and compact your sub-base gravel. Pour in your crusher run or road base, rake it to an even 3–4 inch depth, and compact it with a plate compactor. Run the compactor in overlapping passes, working the full area twice. Check your slope as you go using a level on a long straight board.
- Lay the landscape fabric. Unroll the woven geotextile over the compacted sub-base. Overlap seams by at least 6–12 inches. Trim around the edges with scissors and pin everything down with landscape staples. Pull the fabric taut to avoid wrinkles, which create low spots under the gravel.
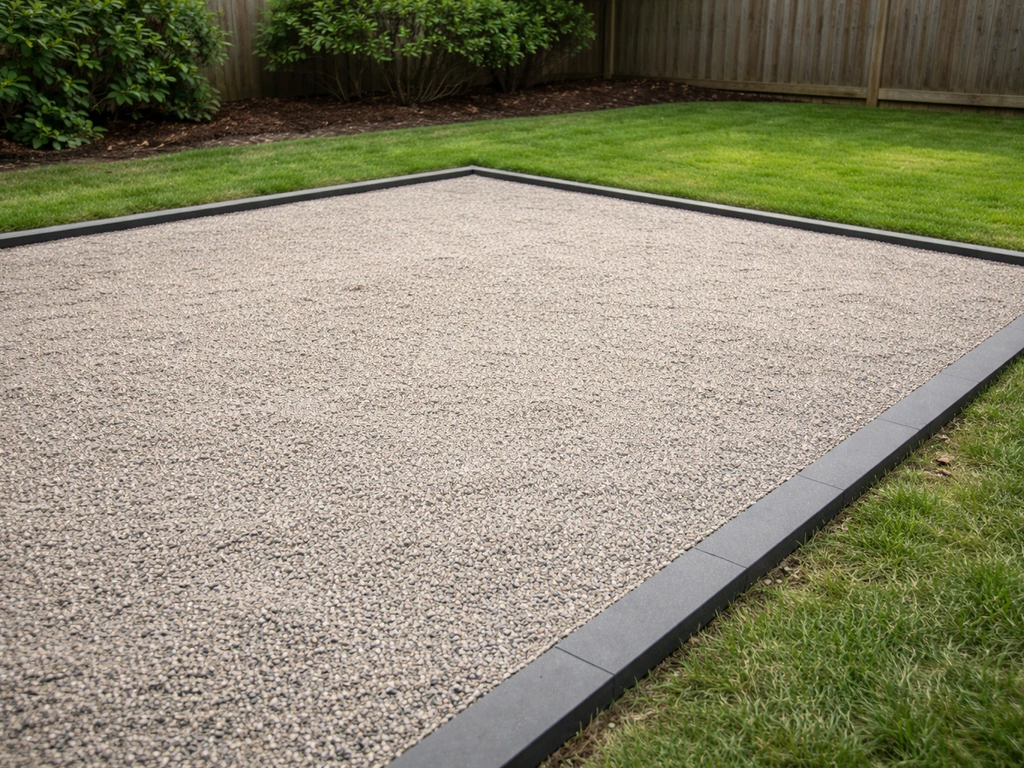
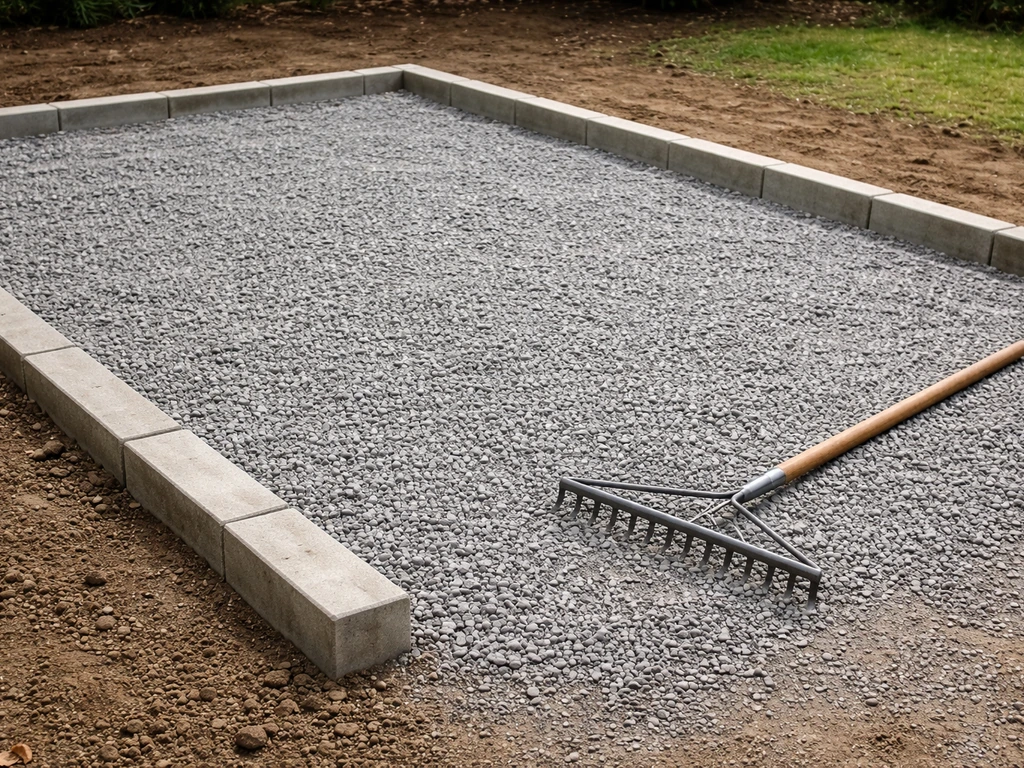
- Spread your decorative gravel. Dump or shovel the top-layer gravel onto the fabric and rake it out to an even 2-inch depth. Work from one side to the other so you're not walking on freshly spread areas. Use a landscape rake for best control.
- Level the surface. Use a long straight board or screed rail dragged across the top to identify high and low spots. Add gravel to lows and pull from highs. A 2-inch depth is your target across the whole surface.
- Compact the top layer (optional but recommended for DG or crusher run tops). If you're using decomposed granite or a compactable material as your finish layer, run the plate compactor over it lightly. For pea gravel, skip this step as it won't compact and you risk pushing material into uneven patterns.
- Final check and touch-up. Walk the entire patio looking for thin spots, edges that need tucking, or areas where the fabric is visible. Add gravel where needed, and press the edging flush against the gravel border.
Total time for a 12x16 patio with two people: roughly 6–8 hours including all prep. Solo, plan for a full day. The plate compactor rental is worth every penny, and most home improvement stores rent them for $60–$80 for a half day.
Building on grass vs on bare ground: special prep considerations and common mistakes
Building on grass is the most common starting point for backyard gravel patios, and it does require some extra steps compared to building on bare dirt or an already-excavated area.
If you're starting on grass
The biggest mistake people make is simply laying landscape fabric and gravel right on top of their grass and calling it done. The grass and roots underneath will decompose, causing the ground to sink unevenly, and any grass that doesn't die will push up through the fabric eventually. You need to remove the sod. Once the sod is gone, don't skip compacting the exposed topsoil before you add any gravel.
Topsoil is loose and organic-rich, meaning it compresses over time. Compact it first, then build your base on top. If the subsoil underneath the topsoil is very soft (common in clay-heavy yards after rain), let it dry out a couple of days before compacting. If it stays soft, lay down a geotextile separator directly on the soil before your sub-base gravel, which prevents the gravel from mixing into the soil over time.
If you're building on bare ground or existing gravel
Bare ground that's already settled and firm is the easiest starting point. Excavate to depth, compact, and build up your layers. If you're refreshing an old gravel area, rake out any weeds, check for soft or sunken spots and fill them with new sub-base material, compact, then add fresh top-layer gravel over new fabric.
Common mistakes to avoid
- Skipping excavation and laying gravel directly on grass or soil: leads to sinking, weeds, and an uneven surface within one season.
- Using too little base depth on soft or clay soil: clay holds moisture and shifts. Go 6 inches of sub-base minimum if your soil stays wet.
- Buying smooth decorative gravel for the whole patio including the base: smooth stones don't lock together and your base will shift.
- Not overlapping fabric seams enough: a narrow overlap means weeds find the gap within a year.
- Forgetting to account for slope: water needs somewhere to go. Even a 1-inch drop over 8 feet makes a huge difference in how the patio drains.
- Placing edge restraints after spreading gravel: it's much harder and you'll knock gravel everywhere.
- Skipping the plate compactor and using just a hand tamper on a large area: under-compacted base leads to ruts and sunken spots under furniture.
If you find yourself interested in variations on this build, the approach for a pea gravel patio specifically has a few quirks worth knowing since pea gravel behaves differently than angular crushed stone. Similarly, if you like the look of larger flat stones combined with gravel fill, exploring a flat rock patio build gives you a hybrid option that uses the same base-layer method but adds a more structured walking surface. If you want something sturdier than loose gravel, follow a similar workflow for a flat rock patio build. Both are manageable weekend projects once you've got the gravel patio fundamentals down.
Gravel is honestly one of the most forgiving patio materials you can work with. If something is slightly off, you rake it out and try again. That flexibility is why I always recommend it as a starting point for first-time DIY patio builders. Get your base right, keep the gravel contained, and you'll have a patio that looks good and drains perfectly for years with minimal upkeep. If you want a patio that lasts, focus on solid prep, smart drainage, and the right gravel layers how to rock patio.
FAQ
How do I keep gravel from getting tracked into my house or yard by foot traffic?
Beyond edge restraints, add a short, firm transition area at any door or walkway connection. A 2 to 3 foot long strip of tightly compacted crusher run under paving sand, or a bordered zone with smaller-stone aggregate, reduces tracking because the particles lock together instead of rolling onto shoes.
Should I use sand under the decorative gravel to level it out?
Usually avoid putting sand between the geotextile and the top gravel. Sand can migrate and clog drainage paths over time, especially in wet climates. If you need surface leveling, do it by adjusting the sub-base (compacted crusher run) so the top layer stays on top of the fabric as a clean, separated decorative bed.
What’s the best way to handle an area that dips or pools water?
If water pools now, it will pool through the patio later unless you correct the site grade. Re-slope during excavation to achieve the roughly 1 inch per 8 feet fall away from the house, or install a shallow edge drain channel at the lowest side, then route that runoff to a safe discharge point.
Do I need geotextile fabric if I’m using crusher run and crushed stone as both layers?
If you use angular, compactable material in both layers, you can sometimes reduce fabric use, but it still helps most DIY builds. Fabric primarily prevents top material from filtering down and helps suppress weeds. If you skip it entirely, expect more mixing and more weed pressure, especially when the patio is adjacent to lawn or beds.
How thick should the gravel be if I’m building a patio for a grill, hot tub, or stored items?
For point loads or heavy equipment, lean toward the thicker sub-base approach. A common rule is 6 inches of compacted crusher run before the top decorative layer, then consider keeping the top layer on the thicker side (still typically 2 to 3 inches) so you do not end up exposing the base under repeated pressure.
Can I build over old gravel instead of excavating everything?
Sometimes, if the old surface is stable. Rake out weeds, remove any loose or contaminated fines, check for soft or sunken spots, and then compact the existing base. If the old base has migrated, is uneven, or drains poorly, it is safer to excavate back to firm subsoil and rebuild to your target depth.
What’s the easiest method to measure material accurately for irregular patio shapes?
Use the rectangle breakup method, but also verify with a quick sanity check by marking stakes and measuring each segment’s length times width. After you calculate area for each rectangle, add them, then compute each layer separately using the same depth-to-feet conversion. This avoids the common mistake of applying one total depth to all layers.
How do I prevent weeds if I already have some growth in the patio area?
Remove existing vegetation and the sod first, then dig to your full depth. After excavation, clear roots and large debris from the sub-base. Even if the fabric stops future germination, weed survivors from missed roots can regrow by using gaps at seams or tears, so inspect and overlap seams (and repair holes) before adding gravel.
Why does my patio get soft in spots even after compaction?
Soft spots usually come from uneven excavation depth, skipping lift-by-lift compaction for thicker fills, or placing gravel over damp clay topsoil without letting it dry. If the sub-base is thicker than about 4 inches, compact in lifts of roughly 3 to 4 inches each, and only proceed when the soil feels firm, not muddy.
Is pea gravel actually a bad choice for patios?
Not necessarily, but it requires better containment. Pea gravel is more mobile under foot traffic, so use a stronger edge restraint system, consider a slightly raised border, and plan on periodic top-offs. For maximum comfort and stability, many DIYers choose decomposed granite or use pea gravel only for low-traffic zones.
How much extra gravel should I buy, and does it depend on weather or compaction equipment?
Order 10 to 15% extra as a baseline, because compaction and placement shift material. If you plan to move gravel farther than expected, or you are compacting with a smaller hand tamper on a larger area, lean toward the higher end because losses and uneven settlement tend to be greater.
Do I need to slope the patio if it’s not close to my house foundation?
Yes, still slope it. The slope does not just protect the foundation, it prevents water from sitting in the patio. Aim for the same gentle fall away from the house or toward a planned drainage edge so the patio sheds water instead of soaking and softening the sub-base.
When is it best to build a gravel patio, and can I do it in rainy weather?
Best results come when the excavated soil can be compacted dry or near-dry. If your yard is clay-heavy, wait until it is not slick or muddy, then compact promptly. If you must pause, keep the excavation free of standing water so you are not rebuilding a muddy, weakened base.
Next Article
How to Build a Rock Patio: Step-by-Step DIY Guide
Step-by-step guide to plan, prep, grade, build and level a stable rock patio with proper base, drainage and edging.