Measure the total height from your door threshold down to the patio surface, divide by your target riser height (somewhere between 6 and 7-3/4 inches), and round to the nearest whole number to get your step count. That calculation drives everything else: how many steps you need, how far the staircase will project out from the house, and how much base material to order. Get that number right first, and the rest of the build follows a clear sequence of excavation, base prep, forming or setting your step structure, and finishing with drainage in mind.
How to Build Patio Steps Against a House: DIY Guide

Nolan Lennox
21 May 2026
Assess the height difference and choose your step geometry
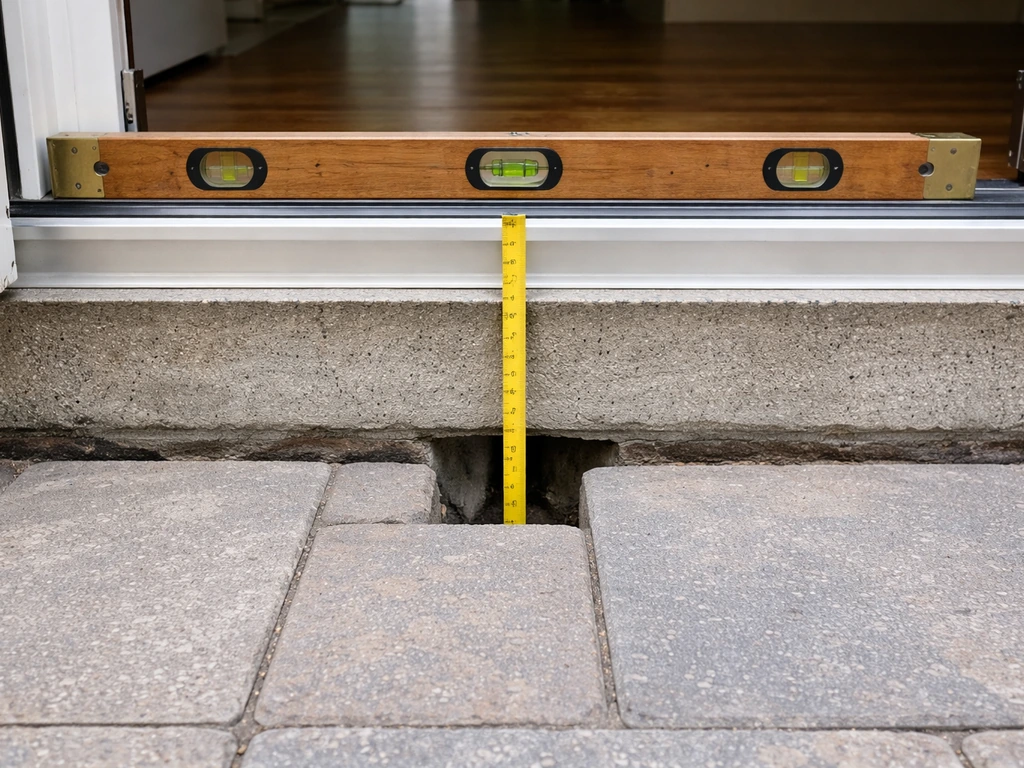
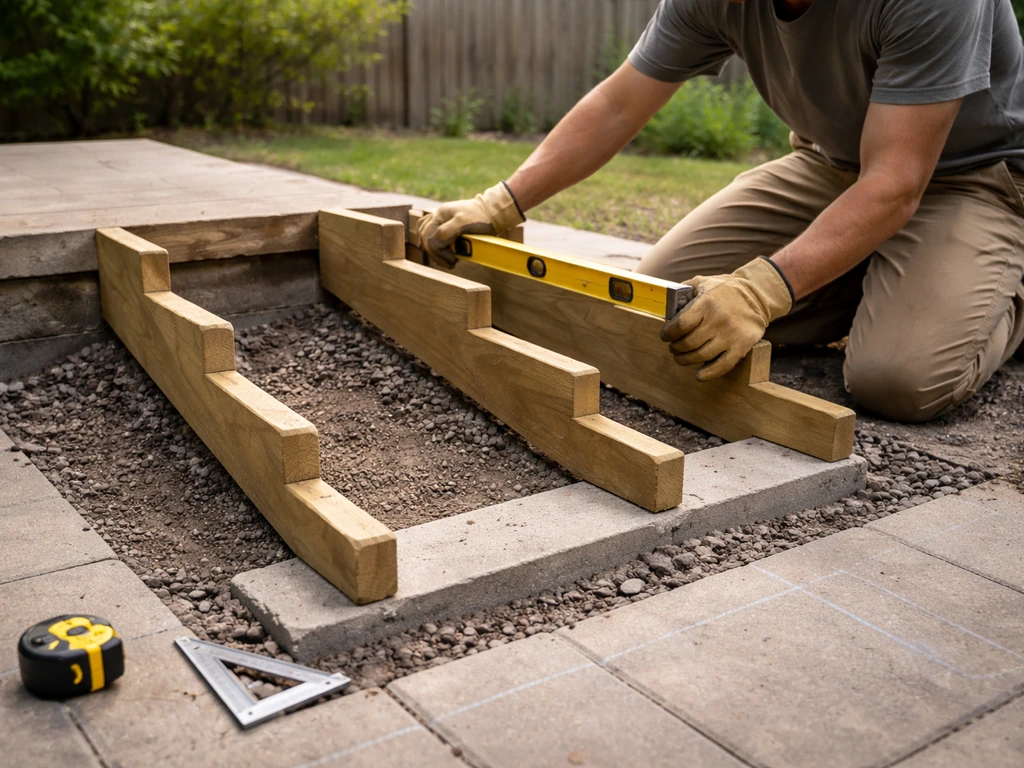
The first thing to do is measure the total rise. Hold a long level or straight board out from your door threshold, level it, and measure straight down to the finished patio surface. That number is your total rise. Now divide it by a comfortable riser height. The IRC caps residential risers at 7-3/4 inches (196 mm) and requires a minimum tread depth of 10 inches (254 mm), so work within those bounds. I usually aim for 6-1/2 to 7-inch risers because they feel natural to walk on, and it makes the math cleaner too.
Here is a quick example: if your door threshold sits 21 inches above the patio, you divide 21 by 3 steps and get exactly 7-inch risers. Each tread should be at least 10 inches deep, so three steps means your staircase projects roughly 30 inches out from the house before it meets the patio. If your total rise comes out to something awkward like 22 inches, adjust slightly: four risers at 5.5 inches each works and keeps every step identical, which matters more than most people realize. The IRC requires that the tallest riser in any flight must not exceed the shortest by more than 3/8 inch (9.5 mm). That is not a suggestion. An uneven riser is a trip hazard and a code failure.
If you have three or more steps, you will also need to think about a landing at the top where the steps meet the house. The IRC specifies a minimum landing depth of 36 inches in the direction of travel (IRC R311.7.6), which is important if a door swings outward. A storm door that opens over your top step creates a real hazard if the landing is undersized. Size the landing before you finalize anything else.
Plan layout, landing location, and alignment to the house
Once you know your step count and geometry, stake out the footprint on the ground. The centerline of the steps should align with the door, not offset to one side. It sounds obvious, but I have seen plenty of installs where the stairs drift left or right of the opening because someone measured from the wrong edge of the door frame. Snap a chalk line out from the center of the door across the patio to anchor your layout.
Think about how the steps tie into the existing patio surface. If you are building the patio and the steps at the same time, this is easier to coordinate. If the patio already exists, you need to decide whether the bottom step lands flush with the patio surface (the cleanest look) or sits on top of it. If you are tying a patio cover into a stucco exterior, plan the mounting and flashing details so water does not get behind the wall patio cover on a stucco house. Landing on top is simpler but raises the overall height slightly, which changes your riser math. Landing flush means cutting into or removing some existing patio, which is extra work but looks more intentional.
Check the grade alongside the steps too. Ground that slopes away from the house is actually helpful because it encourages water to drain away, but you still need to make sure the step base sits on stable, level ground, not on a sloped surface that could shift. Mark the full excavation zone with spray paint before you pick up a shovel.
Materials and tools for DIY patio steps
You have three main material paths for house-to-patio steps: poured concrete, concrete block or brick masonry, and stacked pavers or natural stone. Building steps from house to patio is all about matching your rise and tread layout to a solid base that drains well house-to-patio steps. Each has real tradeoffs in cost, difficulty, and longevity.
| Material | DIY Difficulty | Durability | Typical Cost Range | Best For |
|---|---|---|---|---|
| Poured concrete | High (forming, rebar, mixing/pour) | Excellent (30+ years) | $15–$30 per sq ft | Permanent, seamless steps on a stable base |
| Concrete block / CMU | Medium (stacking, mortar optional) | Very good (20+ years) | $10–$20 per sq ft | Taller rises, clean geometric look |
| Brick / mortared masonry | Medium-high (requires mortar skill) | Very good (20+ years) | $15–$25 per sq ft | Matching an existing brick patio or house facade |
| Stacked pavers / natural stone | Low-medium (dry-stack, no mortar) | Good (10–20 years with good base) | $8–$18 per sq ft | Matching a paver patio, DIY-friendly, repairable |
For most DIYers building steps to connect to an existing paver patio, stacked pavers or concrete block with paver caps is the most approachable option. You can dry-stack or use construction adhesive, no forms required, and if a step ever shifts slightly you can lift and re-level it. Poured concrete is the most durable and seamless, but it demands proper forming, rebar placement, and a continuous pour. If you have never worked with concrete forms before, that is a significant jump in complexity. If you want to match your house facade or a brick patio, mortared brick is the right call aesthetically, though you will need patience and some practice with a trowel.
Tools you will need
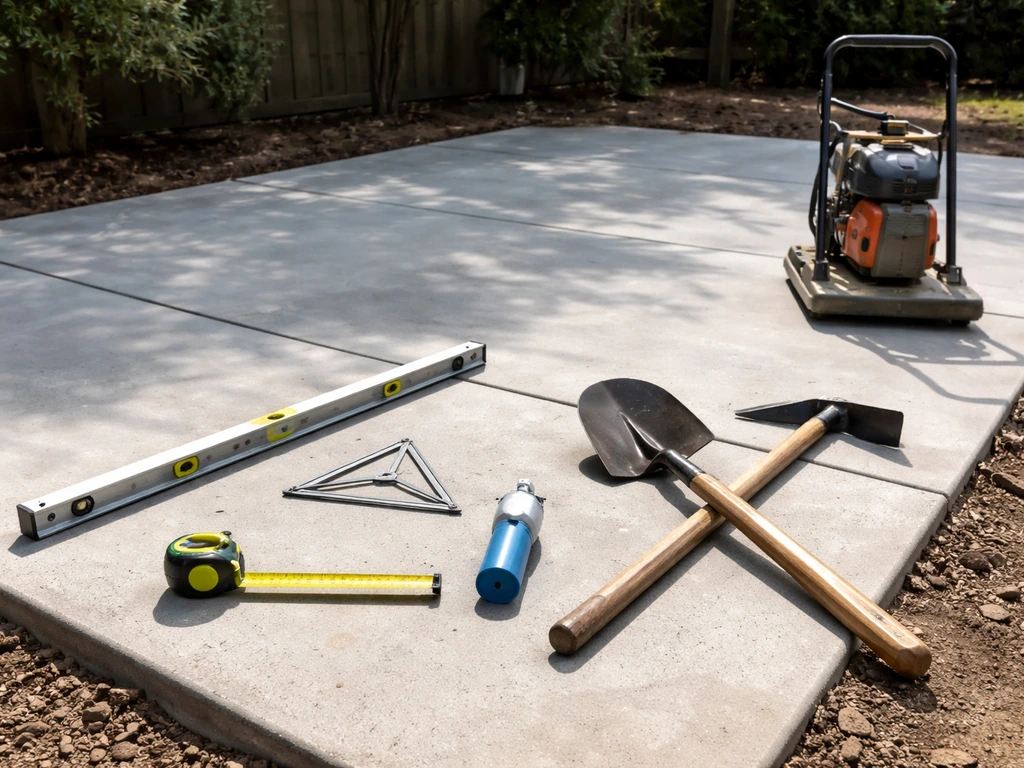
- Tape measure, level (4-foot minimum), and speed square
- Shovel, mattock, and hand tamper or plate compactor (rent the compactor for anything over a small job)
- Chalk line and spray paint for layout
- Circular saw with a masonry blade (for cutting pavers or block) or a wet saw for clean cuts
- Rubber mallet and screed board
- Mixing tub or rented mixer if using mortar or concrete
- Margin trowel and jointing tool for mortar or polymeric sand work
- Safety glasses, gloves, and knee pads
Excavation and base prep that will not settle on you
This is the step most people rush, and it is the reason steps crack, tip, or separate from the house over time. Dig out the entire footprint of the step structure plus at least 6 inches on each side. You are aiming for a flat, compacted excavation that goes deep enough to accommodate your base and subbase. For most exterior step applications, that means digging down at least 8 to 12 inches below your finished grade, depending on local frost depth. In freeze-thaw climates, a deeper base is not optional; frost heave will destroy an undersized base in a couple of winters.
Once you have excavated, lay a geotextile fabric separator over the native soil before adding base material. This fabric keeps the base aggregate and the native soil from mixing together over time, which is what causes gradual settlement. On soft or sandy subgrades it is especially important. Compact the native soil first with a plate compactor or hand tamper, then lay the fabric and fold the edges up the sides of the excavation.
Now add your compactable aggregate base in layers. The standard recommendation for pedestrian hardscape is 4 inches of compacted gravel base (3/4-inch crushed stone or road base gravel). For steps, which carry concentrated point loads, I go 6 inches minimum and compact each 2-inch lift separately. Do not dump all 6 inches in and hit it once. Compact in lifts, check level, add more, compact again. The base should extend at least 6 inches beyond your step structure on all sides to prevent edge rotation or base failure.
Before you set anything structural, confirm that the finished top of your base is at the right elevation to produce your target riser heights. Mark that on a stake and double-check it against the threshold measurement you took at the start.
Build the step structure: framing, forming, and edges
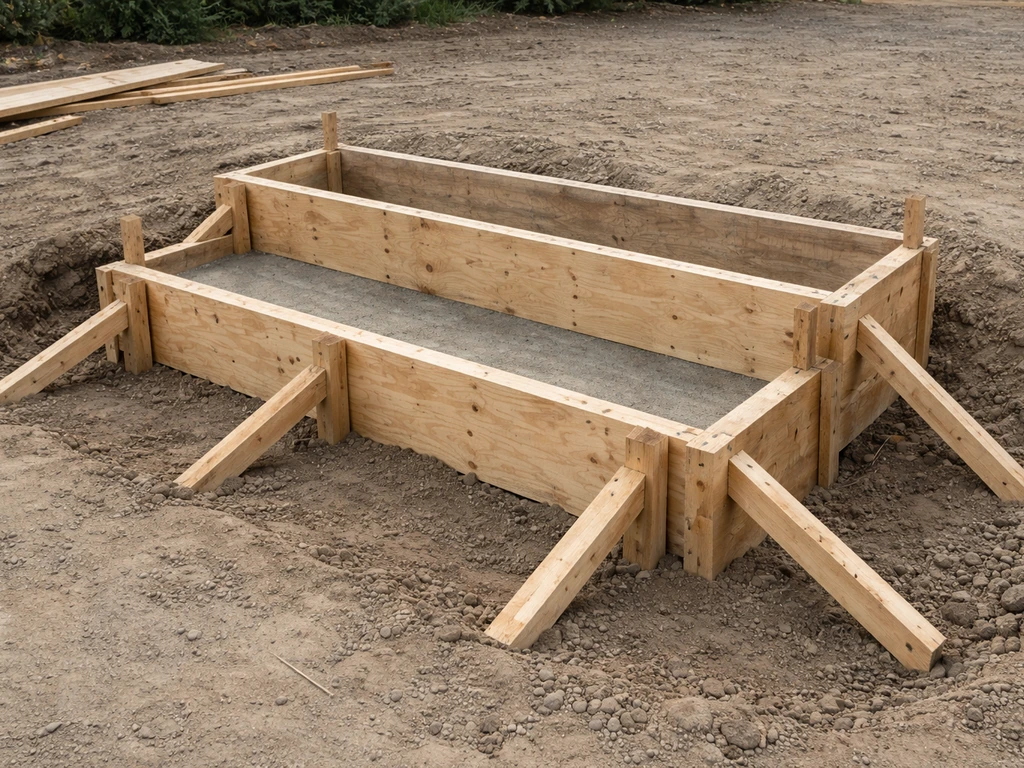
Poured concrete steps
Build your forms from 3/4-inch plywood supported by 2x4 stakes driven firmly into the ground. The form has to hold the weight of wet concrete without flexing, so brace it well. Cut your riser boards to the exact tread-to-tread dimensions and nail them to the side forms. Place rebar horizontally in each step tread (two runs of #3 rebar per tread, sitting about 1-1/2 inches off the base on rebar chairs) and vertically through the structure to tie the steps together. Pour from the bottom up, consolidate with a rod or vibrator if you have one, and use a float to smooth each tread. Leave the forms in place for at least 24 to 48 hours before stripping, and keep the concrete damp for several days during curing.
Block, brick, or stacked paver steps
For block or brick, you are building a stepped pyramid from the compacted base up. Start with the bottom course, check that it is level in all directions, then work upward one course at a time. Each course steps back by one tread depth. Use construction adhesive between dry-stacked block courses, or mortar if you want a traditional finish. For paver steps, you can stack full-depth pavers (some manufacturers make 3-inch or 4-inch thick step units specifically for this application) and glue them in place, then cap with a single paver layer as the tread surface. Edge restraints should go around the entire perimeter to prevent lateral spread, especially at the base course.
At the point where the steps meet the house foundation or slab, do not bond the steps rigidly to the house structure. Keeping a small separation (even 1/4 to 1/2 inch filled with a flexible backer rod and caulk) allows independent movement between the two structures and prevents cracking as they settle independently.
Install step surfaces and nail your riser/tread consistency
This is where precision really shows. Before you set any surface material, dry-lay the whole staircase and measure every riser height and every tread depth. Write the numbers down. Adjust your bedding (for pavers) or tread thickness (for block caps) to make every riser identical. Remember: the largest and smallest riser in the flight cannot differ by more than 3/8 inch. If you are off by more than that, you will notice every time you use the stairs and so will a home inspector.
For paver or stone treads, spread about 1 inch of bedding sand over the prepared step surface, screed it flat, and set the tread units. Tap them level with a rubber mallet. Use a 4-foot level to check each tread surface and also to check that risers are plumb. A slight forward pitch on each tread (about 1/8 inch over 12 inches, or roughly 1%) helps water shed off the tread surface rather than pooling.
Once treads are set, fill the joints. For paver-on-paver or stone installations, polymeric sand is the best choice. Sweep it into the joints dry, run a plate compactor over the pavers (with a protective pad to avoid scratching) to vibrate the sand down, re-sweep, and then activate it by gently showering water over the surface per the manufacturer's instructions. Avoid soaking it so hard that you wash the polymer out of the joints. Let it cure fully before heavy foot traffic.
Nosing details
If your step design includes a nosing (the front edge of the tread projecting over the riser), keep all nosing projections consistent. The IRC requires that the largest nosing projection in a flight does not exceed the smallest by more than 3/8 inch. A uniform, slight nosing (3/4 to 1-1/4 inches is typical) also gives each step a finished, intentional look versus a blunt slab edge.
Drainage, waterproofing, and the finishing safety checks
Water is the number one enemy of steps built against a house. If water pools at the base of the steps or migrates toward the foundation, you will have problems: erosion under the base, efflorescence on the face of the block or brick, and potential foundation moisture issues over time. Every decision you make at this stage should be about moving water away from the house.
- Slope treads forward: each tread should pitch slightly away from the house (about 1/8 inch per 12 inches) so rain runs off the front rather than toward the wall.
- Check the grade around the sides: backfill the sides of the step structure and slope the surrounding grade away from the foundation at a minimum 6-inch drop over 10 feet.
- Keep the gap at the house: do not caulk the joint between the steps and the house foundation with a rigid sealant. Use a flexible polyurethane or silicone caulk over a backer rod so the joint can flex without cracking open and becoming a water channel.
- Seal exposed concrete or porous masonry: if you have poured concrete steps or natural stone treads, a penetrating concrete/masonry sealer (silane-siloxane type) repels water and reduces freeze-thaw spalling. Apply it after the concrete has cured fully (at least 28 days for fresh concrete).
- Inspect the base edges: confirm your edge restraints are still flush and tight after compaction and paver installation. Any gap at the base edge is where water infiltrates and undermines the base.
Once you think the job is done, do a full safety walkthrough. Walk up and down the steps multiple times with fresh eyes. Feel for any rocking or movement in individual tread units. Look at the riser heights from the side and eyeball whether they all look the same. Bring a 4-foot level and check that no tread is crowned or dipping in the middle. Check the alignment of the steps from 20 feet away: they should look straight, centered on the door, and proportional. If you spot an issue now, fixing it takes an hour. Finding it after a season of freeze-thaw takes a saw and a lot more work.
A few finishing details worth noting: if your staircase has three or more risers, most jurisdictions require a graspable handrail on at least one side, even for exterior stairs. Check your local code before calling the job done. Also, if you are building the steps at the same time as the attached patio itself, coordinating the two builds from the start saves rework, and you can read more about how that patio attachment affects planning in the context of building a patio directly against the house. If your goal is a smooth, weatherproof connection between the house and the patio, plan that patio build alongside your stairs so both elevation and drainage line up building a patio directly against the house. If you are planning a complete set of patio stairs, you will also want to verify riser and tread dimensions before you start building the step structure. If the stairs themselves are freestanding and not attached to an existing patio, the sequencing for how the stairs and the patio surface relate to each other is worth thinking through before you pour or set anything.
Take your time on the geometry and the base. Those two things account for 90% of whether this project looks great and lasts, or becomes a cracked, uneven eyesore in three winters. Get those right and the rest is just following the sequence.
FAQ
What should I do if I cannot fit the required tread depth for how to build patio steps against a house?
If you are short on space, you can reduce the footprint by lowering the target tread depth only to the extent your plan still meets the required minimum tread depth, but do not “cheat” riser height across steps. The safer approach is to adjust the overall riser count using the total rise measurement, then re-check that each riser stays within the maximum spread requirement so you do not create an uneven run.
Can I anchor the steps firmly to the house foundation, or should I leave a gap?
Yes. A common approach is a small isolation gap at the house contact zone, with a flexible backer rod and exterior-rated caulk, while keeping the step base and structural body independent. Avoid rigidly tying the formwork or rebar directly into the foundation or slab, because that removes the ability for the two structures to move differently.
When is the right time to decide the patio height or thickness relative to the steps?
Do it after the finished riser layout is finalized, not before. Measure from the door threshold down to your intended finished patio surface, then set base elevation to match that. If you change the patio thickness later (pavers bedding, mortar bed, or cap thickness), your riser heights drift and you can accidentally break the allowable maximum difference.
How do I prevent one riser from ending up different when building with pavers or block?
Dry-fitting is not optional if you care about uniformity. Dry-lay or dry-stack the full stair run and physically measure each riser and tread, then adjust bedding or cap thickness before you glue or pour. This is especially important when using paver caps or step units, because small thickness differences add up quickly over 3 or more risers.
My yard slopes. Should I slope the step base too, or keep it level?
If the base is on compacted aggregate, it generally needs to be level at the top surface even if the surrounding ground slopes. Use your excavation and compacted base to create a stable, level bearing surface for the step structure, then slope the surrounding grading away so water drains outward.
How can I make patio steps safer when they get wet?
For exterior steps, “non-slip” is not just about tread texture, it is about how water leaves the surface. Consider a slight forward pitch on each tread (around 1 percent) and use a finish surface rated for wet conditions, especially for stone or pavers that can get slick with algae.
What are common mistakes with polymeric sand on patio step treads?
Do not rely on the joint sand alone as waterproofing. The goal is drainage away from the base, and proper joint infill that does not wash out. For polymeric sand, use the correct amount, do not over-soak, and allow full cure before heavy foot traffic, otherwise polymer can weaken in the joints.
How do I handle the top landing if a storm door or exterior door swings over the steps?
If a top landing is too small and the door swings over the first tread zone, you can create a fall risk when someone opens the door. Size the landing so door movement does not intrude into the stair path, and if you are close to the required minimum landing depth, consider changing the stair run length or riser count to move the top break.
How deep should the base be in areas with frost, and what if the soil is sandy?
In freeze-thaw climates, do not treat the base depth as optional. Use deeper excavation than a simple “above frost line” guess, then compact in lifts and verify the base reaches stable, undisturbed soil. If you find soft or sandy subgrade, increase base thickness or improve the subgrade before placing aggregate to prevent future movement.
Do I need expansion joints for steps against a house, especially if I use masonry or poured concrete?
A lot of people assume expansion joints are only for large slabs. For steps against a house, the critical movement zone is where the stair structure meets the house, keep a small separation there. For long runs or masonry construction, you may also want to consider movement joints or controlled separation in the step masonry depending on material and length, but prioritize the isolation gap at the house first.
What’s the safest handrail and width setup for how to build patio steps against a house?
If the steps will be accessed by kids or elderly users, code compliance is only the starting point. Plan for a graspable handrail height and placement on at least one side (as required locally), and confirm the stair width gives comfortable clearance. Also check that the first and last steps are not dramatically different in projection because nosing inconsistencies can cause missteps.
Next Article
How to Build Patio Stairs: Step-by-Step DIY Guide
Step-by-step DIY on building patio stairs: layout, stringers, rise/run sizing, support, waterproofing, and safety tips.