To level a patio for a pool, you need to slope the surface away from the pool at between 1/8 inch and 1/4 inch per foot (roughly 1% to 2% grade). Residential pool deck slope is typically recommended at about 1/8 inch to 1/4 inch per foot sloping away from the pool toward drain locations 1/8 inch to 1/4 inch per foot toward drain locations. To build a multi level patio, you plan each “step” so every tier drains correctly, then repeat the base and surface setup for each level. That range keeps water draining off the deck without creating a trip hazard or sending runoff back into the pool. Whether you're fixing pavers that have sunk, a concrete slab that's tilted the wrong way, or a gravel base that's shifted over winter, the process comes down to three things: measure what you have, figure out what needs to move, and fix the base first before you touch the surface.
How to Level a Patio for a Pool: Step by Step DIY Guide


Why your pool patio isn't level (and why drainage matters)
Most pool patios that are out of grade didn't start that way. They shifted. The most common culprits are soil settlement under the base, frost heave in colder climates, water erosion washing out the subbase, and tree roots pushing material around. Sometimes the original installer just didn't get the slope right from the start, which is more common than you'd think on DIY builds.
The drainage problem is a real safety and maintenance issue, not just an aesthetic one. If your deck slopes toward the pool instead of away from it, every rain event and every splash pushes dirty runoff back into the water, throwing off your chemistry and adding sediment. Deck drainage must be conducted away from the pool so runoff does not enter the pool or create objectionable or hazardous conditions. Standing water on the deck itself creates a slip hazard, encourages algae growth on the surface, and accelerates paver joint erosion or concrete spalling. State and county pool codes in places like South Carolina, Arizona, and Idaho all require deck slopes that direct water away from the pool, not toward it, precisely because of these risks.
The sweet spot for pool deck slope is 1/4 inch per foot away from the pool. That's the most commonly cited minimum in pool codes, it's effective at draining without being noticeable underfoot, and it's achievable in both new builds and re-level jobs. Going above 2% (1/4 inch per foot) starts to feel noticeably tilted and can create its own tripping hazard, especially for kids running around a pool. Stay in the 1/8 to 1/4 inch per foot range and you're in good shape.
How to measure and plan the right grade and slope near the pool
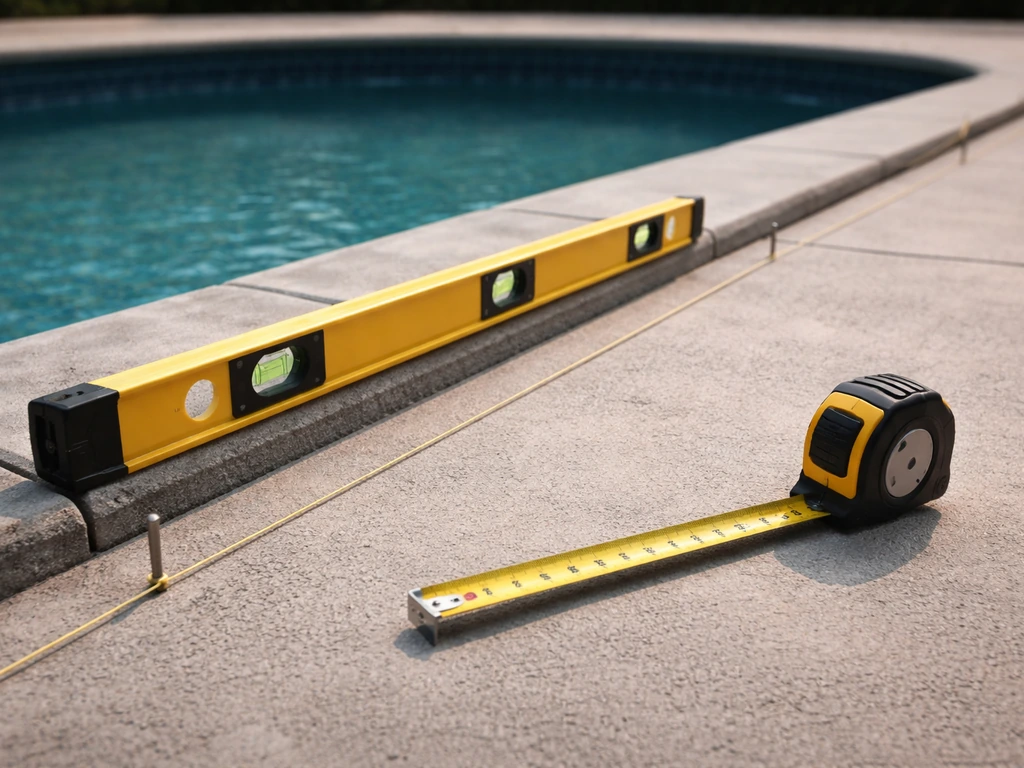
Before you touch anything, spend 30 minutes measuring what you actually have. You can't fix grade problems you haven't mapped. Grab a long level (4-foot or longer), a tape measure, and some stakes and string. A laser level makes this much easier and faster, especially on larger decks. If you don't own one, they rent for around $40 to $60 per day at most equipment rental shops.
Set a string line at pool coping height at the edge of the pool. Run it out to the far edge of your patio. Use the level or a line level to establish a true horizontal reference. Then measure the drop at 1-foot intervals. You're looking for a consistent 1/4 inch drop per foot away from the pool. If your deck is 10 feet wide, the outer edge should be 2.5 inches lower than the pool edge. Mark every spot where the current surface is high or low relative to that target line. Low spots are where water is pooling now. High spots are either places that need material removed or areas where the outer edge needs to come up.
Pay special attention to the zone within 3 feet of the pool coping. This area sees the most foot traffic, the most water splashing, and the most chemical exposure. It's also where a reversed slope does the most damage. If you're working on a pool surrounded on multiple sides by deck, each side should drain outward from the pool, and you may need to locate a channel drain or perimeter drain at the outer edges to handle the collected water.
Prep work: clearing, protecting the pool area, and mapping what needs fixing
Protect the pool before you start demo or excavation. Cover it with a solid pool cover or tarps secured at the edges. If you're working close to the coping, use painter's tape and plastic sheeting along the pool edge to keep dust, sand, and base material out of the water. Even small amounts of base material or compaction dust in the pool can clog filters fast.
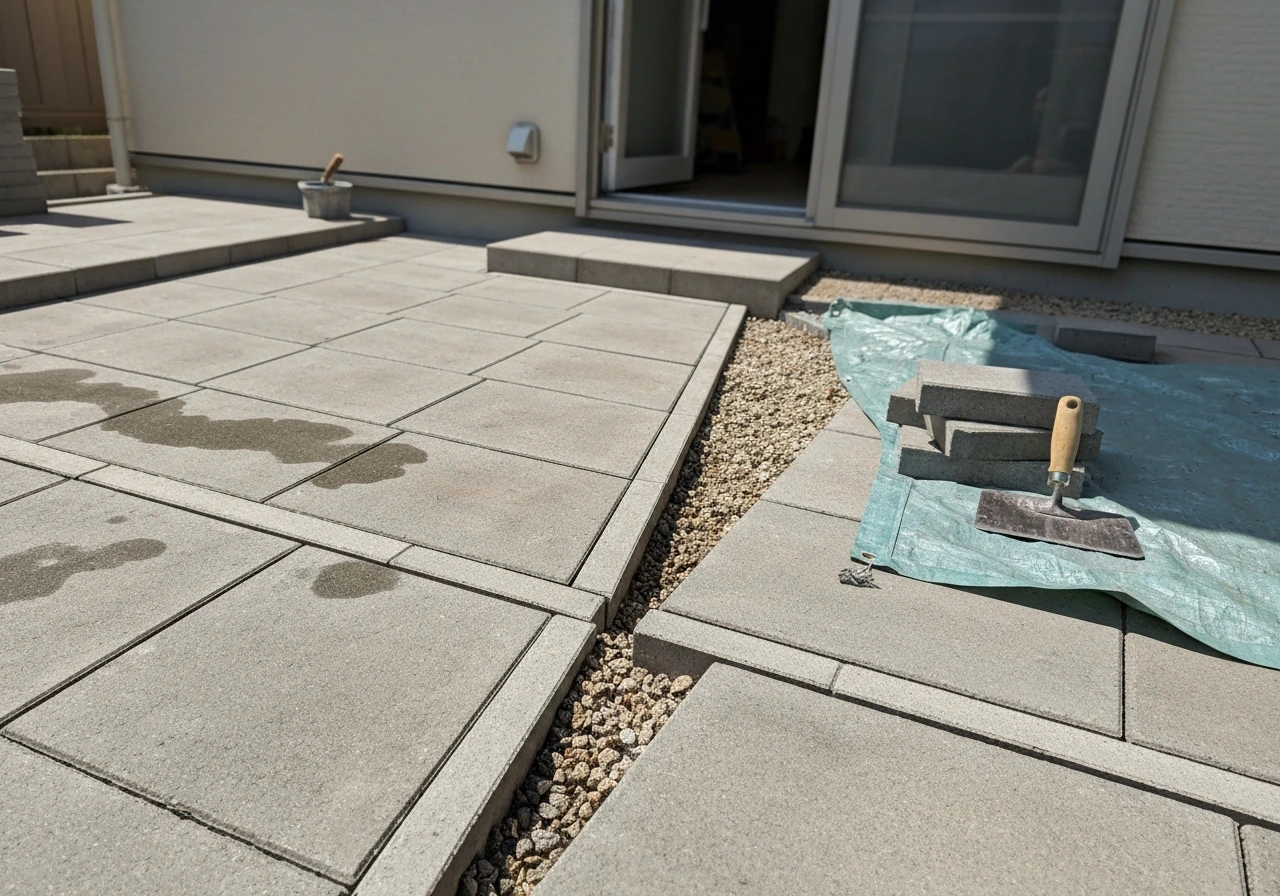
Clear the patio completely. Move all furniture, potted plants, and anything else on the surface. If you have pavers, you'll likely be pulling up sections, so have a spot ready to stack them without cracking them. Use a pry bar and rubber mallet, not a metal hammer directly on the paver face. Number or photograph the layout if your pattern is complex so you can replicate it.
Mark up your grade map on paper or take photos with measurements noted. Identify three zones: areas that need the base lowered (high spots), areas that need base material added and compacted (low spots), and areas that just need bedding sand adjusted (where the base is already close to correct). This map drives everything that comes next and keeps you from guessing mid-project.
Leveling approach by patio type
The fix looks different depending on what your patio is built from. Here's what works, what to avoid, and what realistic results look like for the most common pool patio materials.
Concrete slabs
Concrete is the hardest to re-level without a full demo. If a slab section has sunk more than 1 inch, you're looking at either mudjacking (pumping a grout slurry under the slab to lift it), slab leveling foam (similar process, faster and lighter), or demo and repour. Mudjacking costs $3 to $8 per square foot and is worth calling a pro for. For minor slope correction on an intact slab, self-leveling concrete overlay can add up to 1 inch of buildup to low areas, but it won't fix a fundamentally wrong base. For high spots on concrete, a diamond cup grinder can bring down raised edges or control joints that are creating tripping hazards. Avoid just skim-coating over a bad slope with thin mortar. It won't bond well and will crack within a season.
Pavers (concrete or brick)
Pavers are the most DIY-friendly to re-level because you can pull up individual sections, adjust the base, and relay. This is where most DIYers can handle the full job themselves. The paver surface itself is fine to reuse as long as it isn't cracked or stained beyond recovery. The key is adjusting both the compacted base and the bedding sand layer, not just scraping sand around on top. More on that in the base and bedding sections below.
Natural stone and brick
Natural stone and brick set in sand behave like pavers and can be pulled and reset. Mortared stone or brick is closer to concrete in terms of repair difficulty. You'll need to chisel out mortar joints carefully to pull stones without cracking them, reset the base, then re-mortar. Budget more time and patience here. Don't try to grout over a wrong-grade mortared installation to build up low areas. The overlay won't hold long-term near a pool where it's getting constant wet/dry cycles.
Gravel and decomposed granite
Gravel patio areas are actually the easiest to regrade. Rake out the surface material, add or remove base material to correct grade, compact, and re-spread the gravel. The challenge near a pool is keeping gravel out of the water and off the pool deck surfaces where it becomes a slip hazard. Use edge restraints at any gravel-to-pool-deck transition. A solid border of pavers, concrete curbing, or metal edging keeps gravel where it belongs.
Composite and wood decking
Wood and composite decks near pools are framed structures rather than ground-set surfaces. Leveling them means shimming or sistering joists and adjusting post heights, not moving base material. Check that the decking boards have a gap of at least 1/8 inch between them for drainage. If the frame itself has sagged or posts have sunk, you need to jack the frame, add post base hardware, and repack or re-pour footings. This is a structural fix, not a surface fix, and is worth a consultation with a deck contractor if you're unsure.
Regrading the base: the part most DIYers skip
Here's the honest truth: most patio leveling problems come back in two or three years because people fixed the surface without fixing the base. If the subbase is wrong, the surface will follow it back down. Do the base right and the surface stays put.
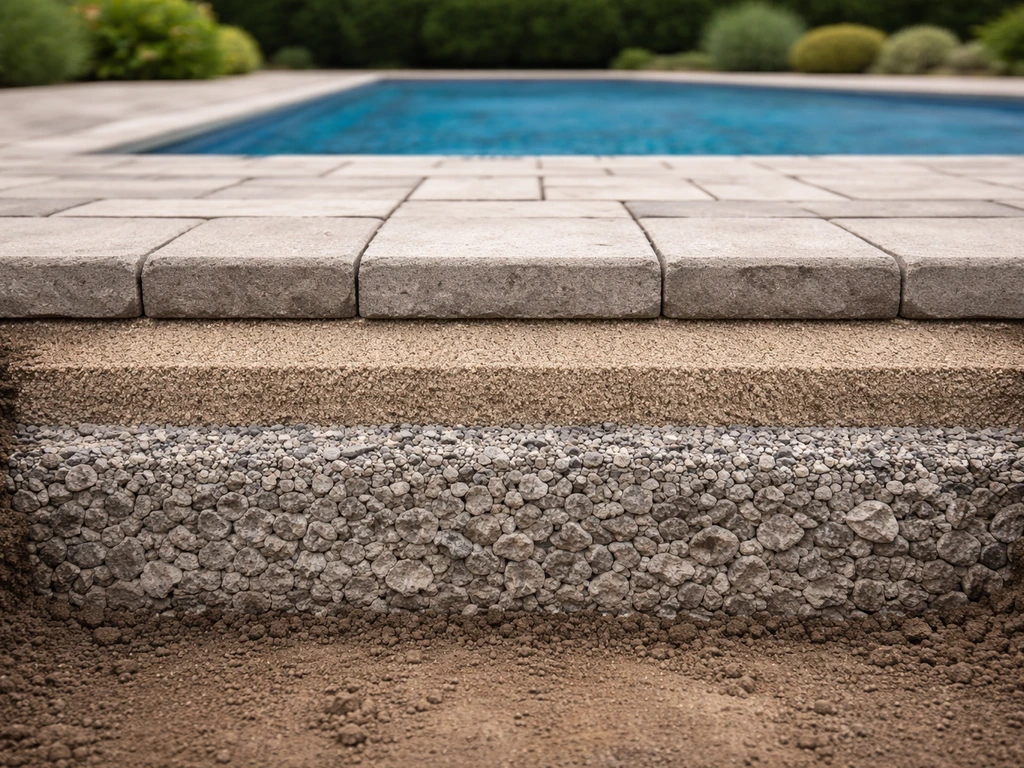
For a pool patio, a proper base is 4 to 6 inches of compacted crushed stone (Class II road base or 3/4-inch crusher run). In areas with heavy clay soil or significant freeze-thaw cycles, go to 6 to 8 inches. On top of that goes 1 inch of coarse bedding sand for pavers, or the slab itself for concrete. The crushed stone base is what provides stable drainage and structural support. Soil alone, even compacted, will shift with moisture changes.
To regrade the base, pull up the surface material in the problem areas and excavate down to the soil. Check if the existing base material is degraded, contaminated with soil, or just insufficiently thick. In most cases you'll be adding material to low spots rather than removing it from high spots. When adding base material, add it in 2-inch lifts and compact each lift with a plate compactor before adding the next. You can rent a plate compactor for $60 to $90 per day. Don't skip compaction or use a hand tamper on areas larger than a couple of square feet. An undercompacted base is a future settling problem waiting to happen.
For high spots where you're removing material, excavate carefully and check grade frequently with your string line. It's easy to overshoot and create a new low. Take it slow, remove material in thin passes, and check grade after every pass.
Adjusting the surface: sand bedding for pavers vs patching for concrete
Bedding sand for pavers and brick
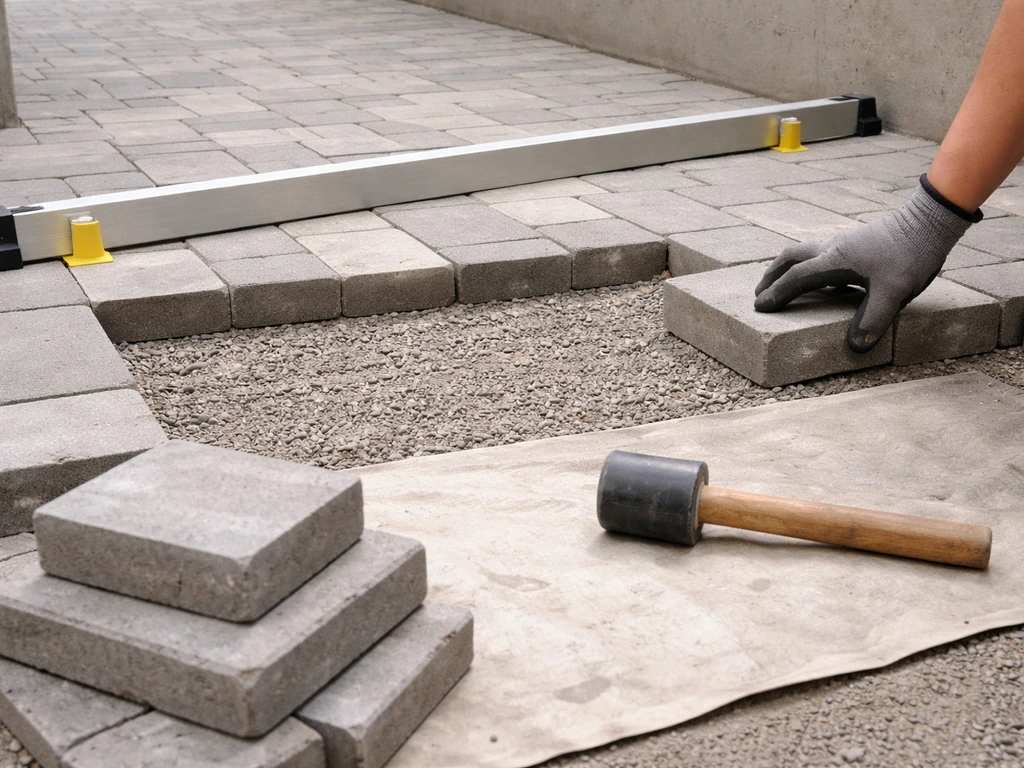
Once your base is compacted and graded correctly, the bedding sand layer is your final fine-tuning tool. Spread coarse concrete sand (not play sand, not polymeric sand at this stage) to a consistent 1-inch depth and screed it flat using your grade string as a reference. Use a screed board set on top of your grade guides to pull the sand to the exact target elevation. This is the satisfying part of the job. When done right, you lay pavers and they drop almost perfectly into place.
Don't use the sand layer to make up for base problems. If you're putting down more than 1.5 inches of sand to compensate for a low base, dig it out and fix the base instead. Thick sand beds compress unevenly and will cause pavers to rock and settle within a season or two, especially under foot traffic.
After laying pavers, fill joints with polymeric sand, sweep it in thoroughly, and compact the entire finished surface one more time with the plate compactor (use a rubber pad between the compactor and the pavers to prevent surface damage). This seats the pavers firmly, closes the joints, and locks the surface together. Wet the polymeric sand per the manufacturer's instructions to activate the binding agent.
Surface patching and leveling for concrete
For concrete, surface correction is limited by how much height you can realistically add or remove. Self-leveling underlayment works well for building up low areas that are 1/4 inch to 1 inch deep. Clean the slab thoroughly, apply a bonding primer, then pour and spread the self-leveler. It finds its own flat plane, which is great for overall flatness but not automatically for slope. You need to set your drain point lower than the pool edge side and let the product flow toward it, checking with a level as you go.
For raised sections or lips between slab panels, a concrete grinder or diamond cup wheel removes material cleanly. Feather the edges so you're not creating a new tripping hazard. For cracks combined with slope issues, fill cracks with flexible polyurethane caulk after leveling, not before, so the filler doesn't get disturbed during your work.
Edge restraints, finishing details, and preventing future settling
Edge restraints are one of those details that make the difference between a patio that holds its grade for a decade and one that creeps out of alignment in two years. For pavers and brick, plastic or aluminum edge restraint spiked down every 12 inches keeps the perimeter locked. Without it, the outer pavers migrate outward over time, leaving gaps and low spots near the pool where they're most visible and most dangerous.
At the pool coping edge, the transition between deck and coping needs to be clean and well-supported. Don't leave a gap there. If pavers butt up to pool coping, use a non-rigid sealant in that joint rather than rigid grout. Pools shift slightly with water weight and soil movement. A flexible joint prevents cracking and keeps water from getting under the deck at that critical edge.
To prevent future settling, address the soil directly if you had significant settlement. In high-clay areas, adding a layer of geotextile fabric between the soil and your crushed stone base prevents fines from migrating up into the base over time (a process called pumping, which softens the base from below). In frost-prone areas, your 6 to 8 inch base depth is your best protection. Deeper bases below the frost line are ideal for concrete, which has no flexibility to accommodate frost heave.
Make sure drainage has somewhere to go. If you're sloping the deck away from the pool at the correct grade, the water needs to exit somewhere that isn't your neighbor's yard, a foundation, or a low spot that creates a new problem. Install a perimeter channel drain, a French drain along the outer edge, or slope toward a permeable gravel strip if local code allows. Don't just slope to nowhere and hope for the best.
Tools and materials you'll need
| Item | Purpose | Approximate Cost |
|---|---|---|
| 4-foot level or laser level | Measuring existing grade and setting target grade | $30–$60 rental or $120–$200 to buy |
| String line and stakes | Setting grade reference lines | $5–$15 |
| Plate compactor | Compacting base layers | $60–$90/day rental |
| Tape measure | Measuring slope increments | Already own |
| Pry bar and rubber mallet | Pulling existing pavers without damage | $20–$40 |
| Crushed stone / Class II road base | Subbase material | $30–$50 per ton |
| Coarse concrete sand | Bedding layer for pavers | $25–$40 per ton |
| Polymeric sand | Paver joint fill and locking | $25–$35 per bag |
| Plastic or aluminum edge restraint | Perimeter containment for pavers | $1–$2 per linear foot |
| Self-leveling concrete (for slabs) | Surface correction on concrete | $40–$60 per bag |
| Geotextile fabric | Base separation layer in problem soils | $0.20–$0.50 per sq ft |
| Safety glasses, gloves, dust mask | Personal protection during demo and compaction | $20–$40 total |
How long this takes and what it costs
A minor re-leveling job on a 100 to 200 square foot paver patio (adjusting bedding sand, pulling and resetting a few sections) takes one experienced DIYer a full day. A full base regrade on the same area adds a day or two depending on how much material needs to move. Concrete patching with self-leveler is a half-day job if the slab is intact. A full demo and rebuild of a concrete slab is a multiday job and typically costs $6 to $12 per square foot in materials alone, not counting your time.
The decision between minor fix and full rebuild comes down to how bad the base is. If the base material is still solid and well-compacted but the bedding or surface has drifted, a surface-level fix will hold. If the base has washed out, settled unevenly, or was never installed properly to begin with, fixing the surface without rebuilding the base is just buying yourself 18 months before the same problem comes back.
Your next steps based on what you find
- Measure your existing slope before touching anything. Use a string line and 4-foot level to check grade every 2 feet across the deck. Mark high and low spots.
- Determine whether the problem is in the surface, the bedding layer, or the base. Pull up a paver or probe the edge of a concrete slab to check base depth and condition.
- If base is intact and well-compacted: pull surface material, correct bedding or surface, relay and compact. One to two days of work.
- If base is degraded or too shallow: excavate to soil, add and compact crushed stone in 2-inch lifts, install geotextile fabric if needed, then rebuild from there.
- Set and confirm your target grade before finishing. The pool edge should be the high point. Outer edge should be 1/4 inch per foot lower than the pool edge.
- Install edge restraints at the perimeter, fill paver joints with polymeric sand, and confirm drainage exits the patio area cleanly.
- If you're dealing with a large concrete slab that has shifted significantly, get quotes for mudjacking or slab leveling foam before committing to a full demo. It can save significant cost and time.
If you're setting up the grade from scratch or want to get your elevation measurements dialed in precisely before you start moving material, it's worth reading up on how to use a laser level for patio work. It makes the grade-setting process much faster and more accurate than string lines alone, especially on larger pool decks where small measurement errors add up over distance.
FAQ
How do I confirm the slope is correct if I cannot see a consistent tilt across the whole patio?
You can usually measure for slope by marking the pool edge as your reference height and then checking the deck elevation at 1-foot intervals outward, using a long level or a laser. If you already know the overall width, calculate the target drop (feet of width times 1/8 to 1/4 inch per foot). If the “drop” is coming from one corner only, you likely have localized base failure (washed out or settled) rather than a consistent slope issue, which changes where you excavate or add base.
Where should I pay the most attention when leveling so I do not repeat the problem later?
A common mistake is treating edge changes as “just cosmetic.” For pool decks, the critical transition zones are within about 3 feet of the coping and along any perimeter where water collects. If water is already pooling near those edges, focus on correcting the base grade and adding or resetting edge restraint and a flexible joint at the coping, rather than rebalancing only the middle of the patio.
What should I do if the patio slopes away from the pool but still holds water?
If the deck slopes away from the pool but still shows puddles, the likely issue is that you are sloping toward an area with nowhere effective to drain (a low spot, a closed-off subgrade, or an impermeable perimeter). Fix by ensuring the lowest point has an outlet, such as a perimeter channel/French drain or a designed permeable strip where local conditions allow. If you cannot create a proper outlet, you may need to rework the drainage layout before re-leveling.
Can I fix low areas by adding more bedding sand under pavers?
For pavers, the sand layer is for final fine-tuning, so if you need more than roughly 1.5 inches of sand to reach grade, you should dig out and correct the base instead. Thick sand beds compress unevenly under foot traffic and around pool splashes, causing rocking pavers and returning settlement within a season or two.
Why does concrete self-leveler sometimes not solve pool-deck drainage issues?
For concrete, many DIYers underestimate the difference between adding height and restoring the correct slope. Self-leveling underlayment can build up low areas, but it will not automatically create the required direction of flow unless you set a drain point side lower and guide the product toward it. Also, check whether your slab has significant base movement, since if the slab itself is moving, leveling the surface only postpones failure.
What is the safest way to finish the joint where the patio meets the pool coping?
Yes, but the coping-edge joint should be handled differently than regular deck joints. Pools and decks shift slightly, so use a non-rigid sealant at the interface (instead of rigid grout) where pavers or finishes meet the coping. Also verify there is a well-supported transition and no gap that can let water migrate underneath.
How do tree roots affect patio leveling and what should I check before I rebuild the base?
Tree root issues can be subtle, you might only see lifting or cracking near the base but the root can be actively growing under the patio. Before re-grading, identify and address roots that are pushing the base. Otherwise, even a perfectly built slope can be undone as roots continue to force movement.
What are common measurement errors when using a laser level for patio slope?
If you are using a laser level, confirm the device’s reference is stable and that you are reading elevations, not just “level.” Check your laser against a known baseline once near the start, then re-check at the far end of the deck. Small measurement errors can create a noticeable ponding effect near a pool because grading over distance magnifies even minor mistakes.
Should I always remove from high spots, or can I raise low spots instead when correcting pool patio grade?
The “remove high, add low” approach depends on what your base can tolerate. If high spots are created by raised edges or compacted ridges, grinding or controlled removal can be correct, but overshooting can create a new low. For low spots, add base only in lifts, compact each lift, and re-check grade frequently rather than trying to correct everything in one thicker layer.
How can I tell whether my paver patio problem is bedding drift or a base failure?
If you see joint separation, rocking pavers, or repeated sinking after prior repairs, treat that as a sign the base is either underbuilt, contaminated, or undercompacted. In that situation, you will often get better long-term results by correcting the base material and compaction depth rather than only adjusting bedding sand or swapping surface units.
Does the deck slope requirement change based on where the water must drain?
Local code can also affect what “away from the pool” means in terms of acceptable discharge paths. Even if your deck slope is correct, sending runoff into a neighbor’s low area, toward a foundation, or into an area that pools elsewhere can still be problematic. Plan an outlet (drain line, channel drain, or approved permeable strip) that matches your local requirements and site drainage behavior.
When building a multi-level patio, how do I keep drainage correct on each tier?
For multi-level or tiered patios, the key is that each tier must have its own planned fall, and water must have a controlled path at each transition. If you set the top tier correctly but the intermediate landing has a different grade or no outlet, water can accumulate and then flow in unexpected directions. Mark and verify slope at every tier boundary, not only the outer edges.
What if meeting the slope target would make the patio feel too steep or create a tripping hazard?
You should stop and re-evaluate if you cannot achieve the target range without creating a noticeably steep feel or a tripping risk. As a rule of thumb from your target range, going beyond about 1/4 inch per foot can create a visible tilt and can be risky around a pool. If you are forced outside the range, it is usually better to correct the underlying base or drainage outlet rather than “accepting” an extreme slope.
How to Upgrade Patio: DIY Diagnosis, Prep, Materials, Steps
Learn how to upgrade a patio with DIY diagnosis, drainage prep, material choices, and step-by-step refresh, replace, or