The right upgrade path depends entirely on what your patio is actually doing wrong right now. If you've got surface cracks and weeds pushing through joints, you might just need resurfacing and fresh polymeric sand. If pavers are sinking and water pools after every rain, the base is the real problem and you need to address drainage before touching the surface. And if the whole layout is cramped, awkward, or built from a material that's just worn out, a partial or full rebuild is probably the honest answer. This guide walks you through diagnosing your specific situation, choosing the right materials, and executing the upgrade in a way that actually lasts.
How to Upgrade Patio: DIY Diagnosis, Prep, Materials, Steps

Nolan Lennox
23 Jun 2026
First, figure out what your patio is actually telling you
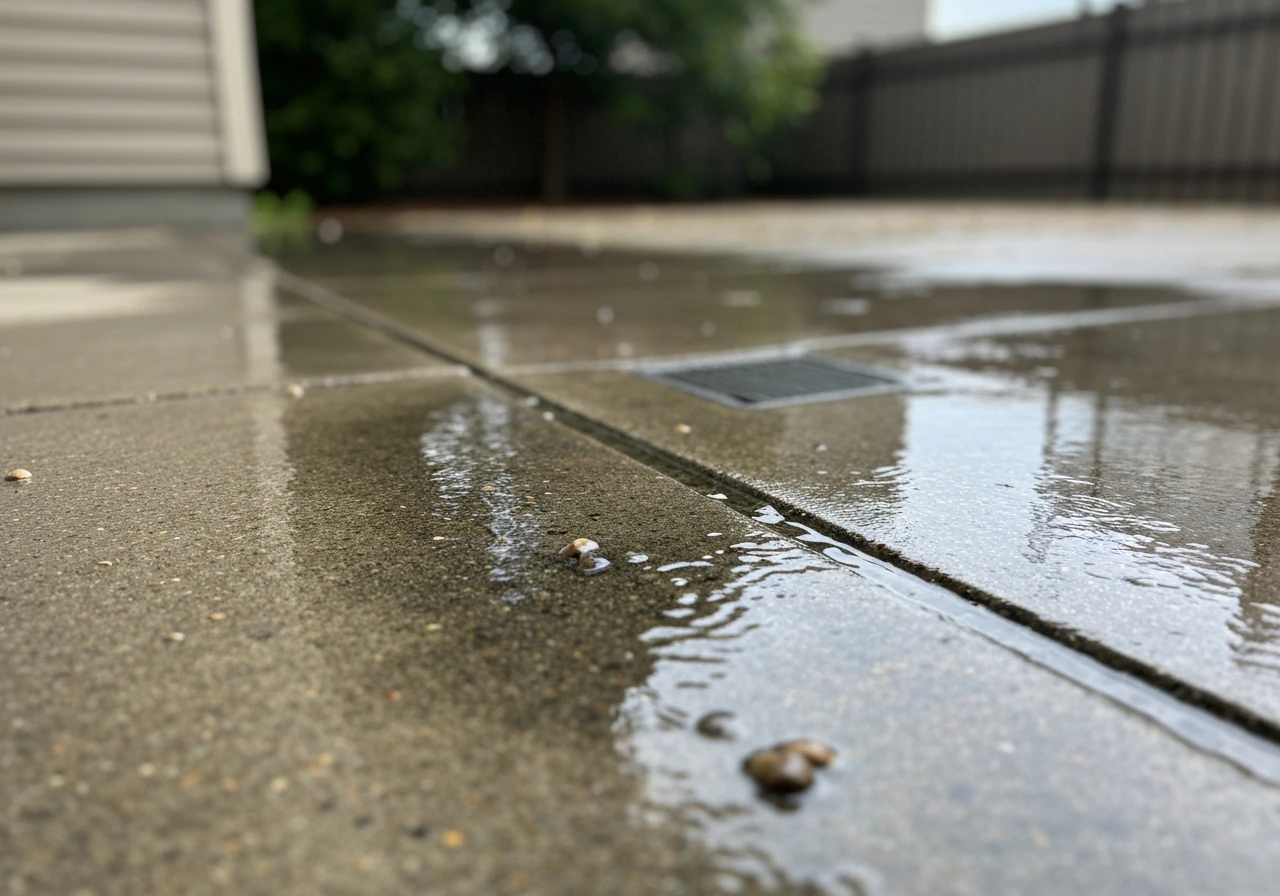
Before you buy anything or rent a plate compactor, spend 20 minutes walking your patio after a rainstorm. That single exercise reveals more than any checklist. Where does water sit? Are there low spots, and are they pulling away from the house or toward it? Standing water, weeds erupting between joints, and pavers that rock when you step on them are almost always drainage and base problems, not surface problems. Fixing only the surface without addressing the base is the most common patio upgrade mistake, and it guarantees you'll be redoing the work in a few years.
Here's how to read the common symptoms and match them to the right fix:
| Symptom | Likely Cause | Upgrade Path |
|---|---|---|
| Surface cracks (shallow, top 1/4 inch) | Freeze-thaw cycling, age, or deicing salt damage | Resurfacing or overlay product |
| Deep spalling or crumbling sections | Structural concrete failure | Patch or full section replacement |
| Pavers rocking, uneven, or sinking | Base erosion or drainage failure | Re-set pavers, fix base and drainage |
| Standing water or pooling | Wrong slope or blocked drainage | Regrade, improve base, add drainage channel |
| Weeds growing through joints | Joint sand failure, possibly drainage issues too | Re-sand with polymeric sand, address base if settling |
| Surface looks worn, faded, or dated | Normal aging, wrong material for the use | Resurface, restain, or replace surface layer |
| Layout is awkward or too small | Original design problem | Extend, rebuild, or add features |
Once you've matched your symptom to a cause, you'll know whether you're doing a refresh (clean and reseal, add edging, swap out joint sand), a resurfacing job (apply overlay or lay new material over a sound base), a targeted repair (pull up and re-set settled sections with proper base work), or a fuller rebuild. If you determine you need a fuller rebuild, you'll want to focus on proper excavation, base work, and surface installation so the patio holds up for years. Those are meaningfully different projects in terms of cost, time, and skill. The related topics of how to redo, renovate, revamp, or even fully rebuild a patio live along this same spectrum, so knowing where your situation falls saves a lot of wasted effort.
Planning basics before you touch anything
Measure and map the space
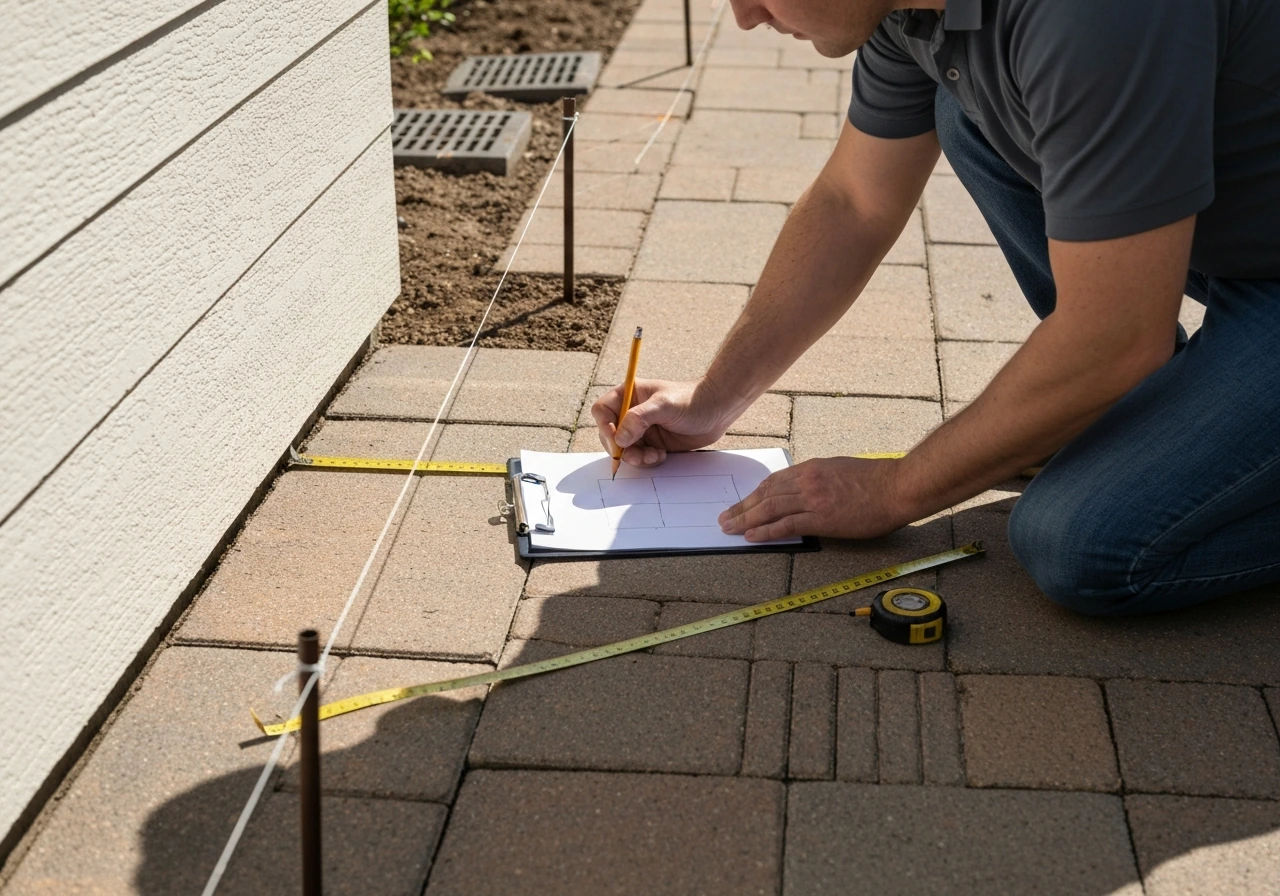
Measure the full footprint of your existing patio and sketch it on paper. Note the location of doors, steps, any existing drainage features, utility access points, and the direction the patio slopes. If you're planning to expand or reconfigure, measure the total area you want to end up with, not just the existing space. This matters immediately for material estimates and for understanding how much excavation or base work you're signing up for.
Drainage and slope: the non-negotiable part
A patio needs to slope away from your house at between 1/8 inch and 1/4 inch per foot, which works out to roughly a 1% to 2% grade. That minimum [1/8 inch per foot](https://www. stormwaterdrainage.
com/applications/residential/patios-walkways) drop (about 1 inch every 8 feet) is the floor, and in wetter climates or on clay soils, erring toward the 1/4 inch per foot end is smarter. Use a long level and a tape measure to check your current slope before committing to any surface upgrade. If your patio currently slopes toward the house or sits dead flat, fixing that slope is not optional.
If you're planning to update your patio surface, start by checking drainage and slope so your new materials perform well for years update patio. It has to happen before anything else.
Ground prep and base requirements

For any paver or surface upgrade that involves digging, the standard excavation math works like this: paver thickness plus 1 inch of bedding sand plus 4 to 6 inches of compacted gravel base. That gets you your total dig depth. For most residential pedestrian patios, 4 to 6 inches of compacted base is the accepted standard. Lay a geotextile fabric between the native soil and the gravel base to prevent the base from migrating into soft soil over time, especially on clay or sandy ground. Compact the base in layers using a plate compactor, and check your slope with string lines before screeding the bedding sand. This step is where most DIY patio failures are born, so don't rush it.
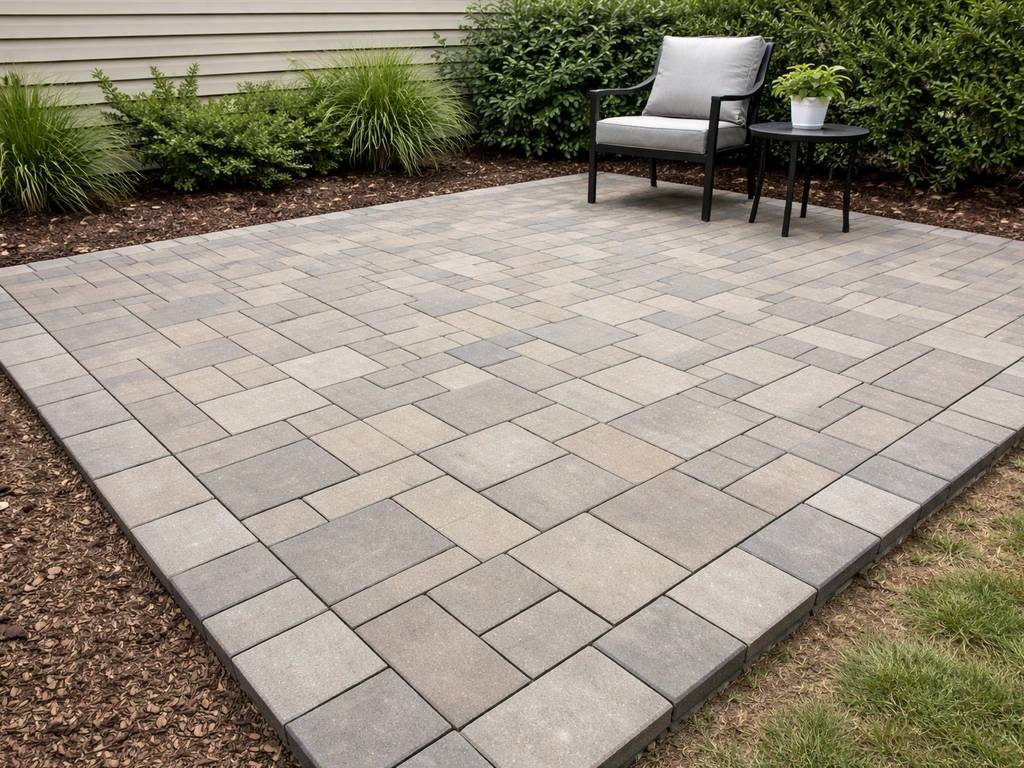
Choosing your upgrade material
The material choice drives everything: cost per square foot, how much base work is required, long-term maintenance, and how the patio feels underfoot on a hot July afternoon. Here's a practical breakdown of what each option actually delivers for a DIY upgrader.
| Material | Approx. DIY Cost (materials) | Durability | Maintenance | Best For | Watch Out For |
|---|---|---|---|---|---|
| Gravel / decomposed granite | $1–$3/sq ft | Moderate (needs topping up) | Low but recurring | Casual patios, quick upgrades, budget builds | Migrates underfoot, needs edging to stay put |
| Brick pavers | $4–$8/sq ft | High (50+ years if base is right) | Low once set | Classic look, DIY-friendly to install | Freeze-thaw can crack individual bricks over time |
| Concrete pavers | $3–$6/sq ft | Very high | Very low | Versatile, wide style range, strong | Can look plain without texture; needs base prep |
| Natural stone / flagstone | $8–$20/sq ft | Very high | Moderate (sealing recommended) | Premium look, irregular or formal layouts | Heavy, harder to cut, costlier to install |
| Composite decking | $5–$12/sq ft (materials) | 25–50 years | Very low | Elevated patios, wood-look without rot | Requires proper framing, not a ground-contact product |
| Pressure-treated wood | $3–$6/sq ft | 10–15 years | Moderate (stain/seal every 2–3 yrs) | Budget-friendly elevated platforms | Shorter lifespan, splinters, maintenance-heavy |
My honest recommendation for most DIYers upgrading a worn patio on a moderate budget: concrete pavers or brick pavers on a properly prepared base. They're forgiving to install, replaceable if one cracks, and can last decades when the base is done right. Composite is the top pick if you're building or upgrading an elevated patio platform, because the lifespan gap between composite (25 to 50 years) and pressure-treated wood (10 to 15 years) almost always justifies the extra upfront cost over time.
Laying pavers over an existing concrete slab
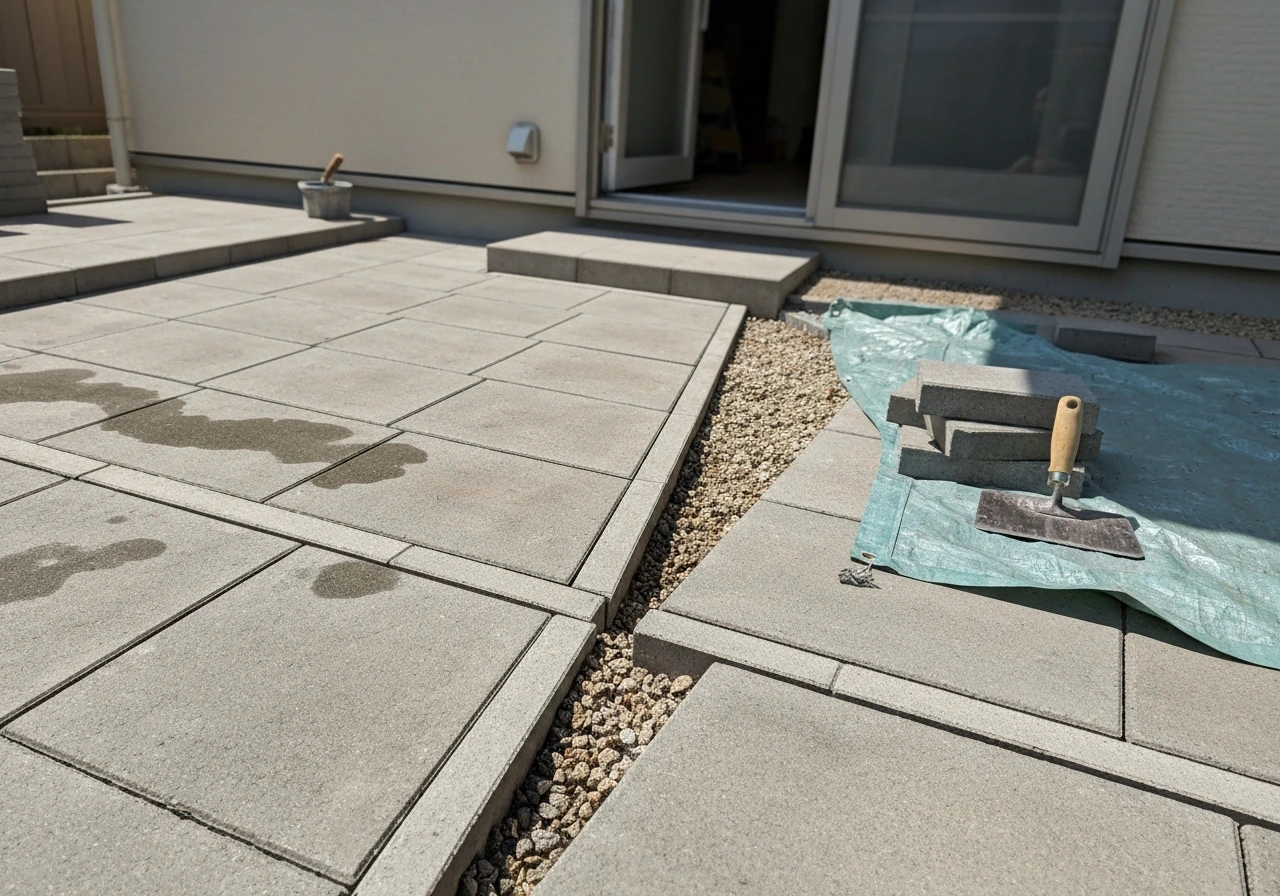
If your existing concrete slab is structurally sound (no deep spalling, no significant heaving), you can often lay pavers or stone directly over it using a sand-set approach. The slab needs to be clean, free of grease, and have at least a 2% slope built in. This is one of the faster upgrade paths because it skips full excavation, but it does raise your finished surface height by the thickness of the new material plus the bedding layer, so check clearance at doors before committing.
Step-by-step upgrade pathways
Path 1: Resurface a cracked or worn concrete patio
Resurfacing works when the substrate is sound but the surface is ugly, stained, or has shallow cracks (roughly the top 1/4 inch). If your patio is mostly fine but looks worn out or cracked, learning how to replace a patio section can help you choose the right repair path resurfacing. Surface spalling from freeze-thaw or deicing salt is a classic candidate.
The prep work here is the majority of the job, and cutting corners on it is what causes overlays to peel. Clean thoroughly with a pressure washer, degrease any stained areas, and fill cracks with a concrete crack filler before applying any overlay product. Follow the product's instructions for temperature and humidity ranges because most resurfacers need conditions above 50°F to cure properly.
- Pressure wash the entire slab and let it dry completely
- Fill cracks deeper than surface level with concrete crack filler; let cure
- Etch or profile the surface if the product requires it (follow manufacturer directions)
- Apply resurfacing product in thin, consistent coats using a squeegee or trowel
- Texture the surface while wet if you want slip resistance (broom finish works well)
- Allow full cure time before foot traffic, typically 24–48 hours minimum
Path 2: Re-set settled or uneven pavers and fix the base
This is the right move when individual pavers have sunk, rocked, or shifted. Pull up the affected pavers and the surrounding area. Dig down to check the base material. If it's washed out, compacted poorly, or mixed with soil, that's your problem. Remove it, add fresh compactable base gravel, compact it in layers, check and correct the slope, add 1 inch of bedding sand screeded level, then re-set the pavers. Finish by sweeping polymeric sand into the joints. When you use polymeric sand, blow off any excess from the paver faces before activating with water, because residue left on the surface causes a white haze that's very hard to remove after the fact.
Path 3: Lay a new paver surface from scratch (or over sound concrete)
- Mark the perimeter with stakes and string lines; establish your slope (1/8 to 1/4 inch per foot away from the house)
- Excavate to the correct total depth: paver thickness + 1 inch sand + 4–6 inches compacted base
- Lay geotextile fabric over the compacted subgrade before adding base gravel
- Add base gravel in 2–3 inch lifts, compacting each layer with a plate compactor
- Screed 1 inch of coarse bedding sand to your finished grade, using screed rails and a straight board
- Lay pavers from a corner outward, keeping joints consistent (use spacers if needed)
- Compact the finished paver surface with a plate compactor fitted with a rubber pad to protect the surface
- Sweep polymeric sand into joints, blow off excess, then mist with water to activate
Path 4: Upgrade or build a wood or composite elevated patio surface
If your upgrade involves an elevated platform, either replacing rotted wood decking or building a new raised patio surface, the framing is as important as the surface boards. Joists typically run 12 to 16 inches on center for most deck builds, though some composite board manufacturers have specific requirements, so always check the product's installation guide first. Composite deck boards need a gap of about 1/8 to 1/4 inch between boards for drainage and to accommodate thermal expansion. Stair risers, if you're adding or replacing steps, must not exceed 7-3/4 inches in height per the IRC, which is the model building code used across most of the U.S.
Path 5: Add features to improve an existing patio
Sometimes the upgrade isn't the surface at all. Adding or replacing edging to stop material migration, installing a drainage channel at the low end of the patio, adding landscape lighting, building a pergola or shade structure, or extending the patio in one direction are all meaningful upgrades that don't require touching the existing surface. If your goal is a deeper refresh, revisit the overall approach in how to revamp patio before you commit to one material path. These add-on projects often deliver the most visible impact for the least disruption, and they're a great first phase if you're not yet ready for a full redo.
Tools, materials checklist, and matching the work to your skill level
Here's a realistic look at what each tier of upgrade actually requires in terms of tools and experience:
| Upgrade Type | Core Tools Needed | Skill Level | Rent vs. Buy |
|---|---|---|---|
| Resurfacing / overlay | Pressure washer, squeegee or trowel, concrete crack filler | Beginner | Rent pressure washer if you don't own one |
| Polymeric sand refresh | Leaf blower, push broom, garden hose | Beginner | No rentals needed |
| Re-setting pavers | Pry bar, rubber mallet, hand tamper, level, sand | Beginner–Intermediate | Hand tamper is cheap to buy |
| Full paver installation | Plate compactor, screed rails, level, string lines, wet saw or angle grinder for cuts | Intermediate | Rent plate compactor ($80–$120/day) |
| Wood/composite platform | Circular saw, drill/driver, framing square, post level, joist hanger nails | Intermediate–Advanced | Most tools can be bought; rent a post-hole digger if needed |
A plate compactor is the one tool that makes the biggest difference for paver and base work, and it's worth every dollar to rent it rather than try to hand-tamp a large area. For cuts on pavers or brick, a wet saw rental is much cleaner than an angle grinder and reduces cracking. If you're doing wood or composite framing for the first time, take the time to understand joist hanger installation and proper fastener requirements before you start, because those structural connections are what keep an elevated platform safe.
Be honest about scope. A full excavation, base installation, and paver layout for a 300+ square foot patio is a serious physical and logistical project. It's absolutely doable as a DIY project, but it typically takes a weekend or more even for experienced builders. A smaller resurfacing or paver re-set job is genuinely beginner-friendly and can be done in a single day.
What it costs, how long it takes, and what needs a permit
Realistic cost ranges
DIY patio upgrades vary enormously based on material choice and how much base work is involved. A basic resurfacing job on an existing sound slab might run $200 to $600 in materials for a typical 200 to 300 square foot patio. Laying new concrete pavers including base materials, bedding sand, and polymeric sand typically runs $800 to $2,500 in materials for the same area.
Natural stone at the higher end of material pricing can push $3,000 to $6,000 in materials alone before labor. Wood or composite platform projects depend heavily on the framing cost, but budget at minimum $1,500 to $4,000 in materials for a modest elevated platform. The biggest cost-saving lever in any of these projects is doing your own labor, which typically saves 40% to 60% compared to contractor pricing.
Timeline expectations
- Resurfacing an existing slab: 1 day of work, plus 1–2 days cure time before use
- Polymeric sand refresh or minor paver re-set: 1 day
- Full paver installation (200–300 sq ft): 2–3 days for an experienced DIYer, 3–5 days for a first-timer
- Wood or composite platform build: 3–7 days depending on size, complexity, and whether footings are required
- Drainage improvements or feature add-ons: 1–2 days
Permits: when you need one and when you probably don't
Ground-level paver and gravel patios typically don't require a permit in most jurisdictions, but you should always check with your local building department before assuming. Elevated platforms (decks or raised patios), structures over a certain size threshold (commonly 200 square feet), anything that attaches to the house structure, or any work that involves adding stairs and railings almost always requires a permit and an inspection. Stair and railing code requirements (like the 7-3/4 inch maximum riser height under the IRC) exist for safety reasons, and permitted work protects you at resale. Don't skip the permit call when there's any doubt.
Keeping your upgraded patio in good shape for the long run
Weed control
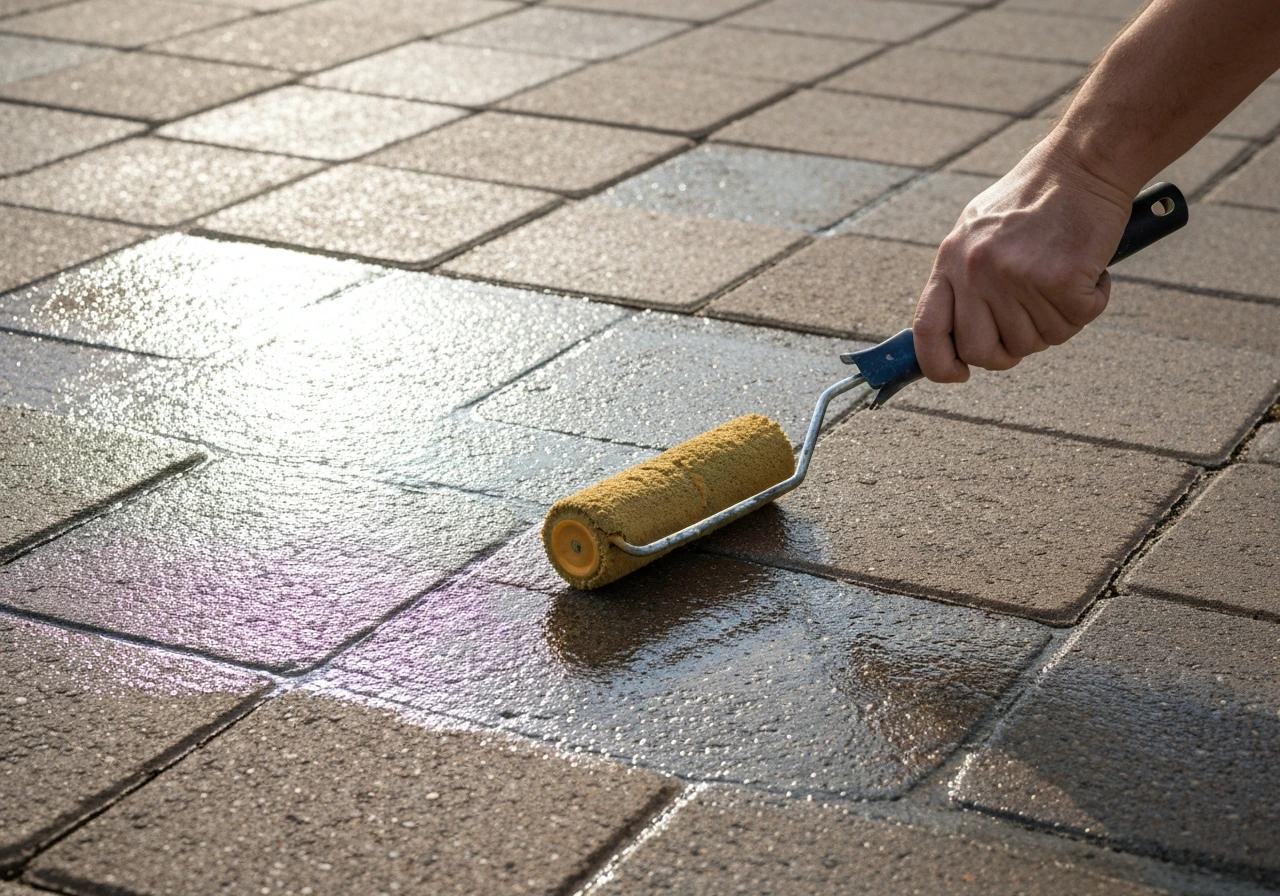
Polymeric sand is the most effective long-term weed barrier in paver joints because it hardens when activated and resists both weeds and insects. It does need to be applied correctly: sweep it in, blow off all surface residue with a leaf blower before activating (any sand left on the paver faces creates a white haze that's very difficult to remove), then mist with water per the product instructions. Expect to reapply polymeric sand every 5 to 10 years as it gradually breaks down. Geotextile fabric under the base also prevents weed pressure from below.
Sealing and surface protection
Concrete and brick pavers benefit from a penetrating sealer applied after installation and every 3 to 5 years thereafter. Sealer reduces water absorption, which directly reduces freeze-thaw damage and the salt damage that causes surface spalling. Natural stone should be sealed as well, using a stone-appropriate product. Composite decking generally doesn't need sealing, but cleaning it annually with a composite-specific cleaner keeps it looking good and prevents mold and mildew from developing. Wood platforms need staining or sealing every 2 to 3 years to maintain their lifespan.
Repairing common problems early
The single best maintenance habit for a paver patio is addressing small problems before they become big ones. A single rocking paver, if left alone, creates a void that collects water, which erodes the base further and causes neighboring pavers to sink. Pulling it up and re-setting it takes 20 minutes. Ignoring it for two winters means re-setting a dozen pavers and possibly regrading the base underneath. For concrete surfaces, filling hairline cracks with a concrete crack filler before winter keeps water from getting in, freezing, and expanding the crack into something structural. A little seasonal attention extends the life of any patio surface by years.
FAQ
Can I upgrade a patio by laying pavers over an existing concrete slab without digging it up?
Yes, but only after confirming the slab is sound and draining correctly. If water still ponds on the slab or the slab slopes toward the house, laying pavers on top will trap the problem under the new surface. You also need to account for the added height (paver thickness plus bedding plus jointing), then check door swing clearance and any step-up transitions before you start.
Will polymeric sand fix weeds and rocking pavers even if my base is failing?
Do not use polymeric sand as a substitute for base and slope correction. If the base is unstable or water is pooling, polymeric sand can lock joints in place but it cannot stop movement caused by drainage and voids underneath. Use it only after the area is excavated or repaired so the slope and base compaction are correct.
When is the best time to apply polymeric sand, and what if it rains soon after?
For most projects, aim to install polymeric sand when you will have dry weather for the activation window, because premature rain can interfere with curing. If you get unexpected showers, follow the product guidance and avoid re-wetting until the sand is ready, since repeated wetting can cause uneven haze or weak joint hardness.
What should I do if polymeric sand leaves a white haze on the paver surface?
If you see a white haze on the paver faces after activation, wait until the next day so it fully sets, then try the manufacturer-recommended cleaner or a dedicated polymeric-sand residue remover. Scraping while it is still fresh often makes it worse by smearing residue deeper into the surface texture.
Should I seal concrete or brick pavers immediately after installation, or prep first?
Sealing helps, but it does not replace crack filling and good drainage. You should fill hairline cracks and address spalling spots first, then let the concrete cure fully before sealing (and only seal when temperatures and humidity match the product directions). If you seal over wet or contaminated concrete, you can trap moisture and accelerate damage underneath.
How do I decide whether resurfacing or a full paver reset will create clearance problems at doors and steps?
Roughly, pavers should be set so the finished surface ends up at the right step height relative to thresholds, door bottoms, and adjacent ground. Because overlays and sand-set installations raise the surface, measure from the lowest point of the patio to key reference points (door thresholds, garage floors, lawn grade) before choosing resurfacing versus full excavation.
Is geotextile fabric worth it for every patio upgrade, or only for certain soils?
Yes, but only with the right kind of geotextile and a compatible drainage plan. Geotextile helps prevent soil migration into the base, but it cannot correct a bad slope or a blocked drainage outlet. If your patio is near downspouts or shows repeated pooling, prioritize fixing the discharge path and slope first.
What are common reasons a re-set paver section sinks again after a year?
If pavers start settling again, the most likely causes are insufficient compaction, base washout from poor drainage, or voids created by disturbed ground after installation. Confirm the patio slope with a level and check for standing water after rain, then re-lift the affected area and rebuild base layers, compacting in thin lifts instead of trying to “top up” with sand alone.
Do I need a permit to upgrade a patio with new pavers, and what usually changes the permit requirement?
Typically not. Many jurisdictions consider a basic ground-level paver refresh similar to landscaping, but elevated platforms, work attached to the house, new railings, and additions crossing certain size thresholds often trigger permits. When uncertain, call your local building department with a sketch that includes dimensions, height, and whether stairs or attachments are involved.
How do I choose between a refresh, resurfacing, targeted repairs, and a full rebuild for my situation?
Start by matching the symptom to the cause, then decide scope based on how widespread it is. If one corner is rocking, plan a targeted re-set. If water is pooling across multiple sections or weeds are recurring everywhere, expect a broader base or drainage intervention. If the entire layout feels cramped or is built from a worn material, budget for partial or full rebuild rather than repeatedly patching.
What’s the most important step to get right before laying pavers or overlays?
Avoid doing your first pass without slope verification. Use a long level and string lines to check the finished plane before bedding sand and again after the bedding is screeded. Even small slope errors can cause standing water, which then drives weeds, joint failure, and freeze-thaw spalling over time.
Next Article
How to Transform a Patio: DIY Plan, Materials, Steps
Plan and DIY steps to transform your patio with the right materials, base, drainage, leveling, and finish for your budge