You can transform a patio yourself by working through four stages: assessing what you have, planning the layout and drainage, choosing the right materials for your budget and skill level, and doing the build in a logical order (prep first, surface last). Whether you're covering cracked concrete with pavers, building a gravel lounge area from scratch, or laying composite decking over an existing slab, the process is more manageable than most people expect. I've done versions of all of these, and the biggest lesson every time is the same: don't rush the prep. The surface you put down is only as good as the base underneath it.
How to Transform a Patio: DIY Plan, Materials, Steps

Nolan Lennox
20 Jun 2026
Start with your goals and a quick patio assessment
Before you buy a single bag of sand or a single paver, spend 20 minutes walking your space and being honest about two things: what you want from the patio, and what condition it's currently in. These two answers drive every decision that follows.
For your goals, think beyond aesthetics. Are you trying to create a dedicated dining area? A low-maintenance surface that doesn't crack every winter? A space that feels like an outdoor room? Do you need to handle more foot traffic, add seating, or just make the thing look less depressing? Get specific, because 'make it nicer' leads to scope creep and wasted money.
For the assessment, look hard at what you already have. If you are figuring out how to rebuild a patio, the assessment and drainage checks in this section are the same starting points that keep new work from failing again. If it's concrete, check for cracks: hairline cracks are cosmetic, but wide or heaving cracks mean the base has shifted, and you'll need to address that before overlaying anything.
If it's existing pavers, see if they're sunken, rocking, or have weeds pushing up through every joint. Sunken pavers usually mean the base washed out or was never compacted properly. If it's bare dirt or gravel, note where puddles form after rain, because that tells you exactly where your drainage work needs to happen. Take photos with your phone as you go.
You'll reference them constantly during planning.
- Cracks in concrete: hairline is cosmetic, wide or raised means base failure
- Rocking or sunken pavers: base compaction or drainage problem
- Puddles after rain: marks where you need slope correction or a drain
- Soft or spongy ground: poor soil bearing capacity, may need extra base depth
- Existing edging that's shifted: a sign the whole perimeter needs resetting
This assessment also tells you whether you're doing a true transformation (new materials, new layout) or more of a renovation (same footprint, refreshed surface). Related scopes like completely rebuilding the structure or simply updating finishes are worth thinking through separately, but for a full transformation, assume you're starting from the base up, even if you're keeping some existing material.
Plan layout, measurements, and drainage/ground issues
Measure your space accurately: length, width, and any irregular angles. Sketch it on paper at a rough scale. Note where the house wall sits, where doors open, and where any existing downspouts or utility lines are. This sketch becomes your material calculator, your cut diagram, and your drainage plan all in one.
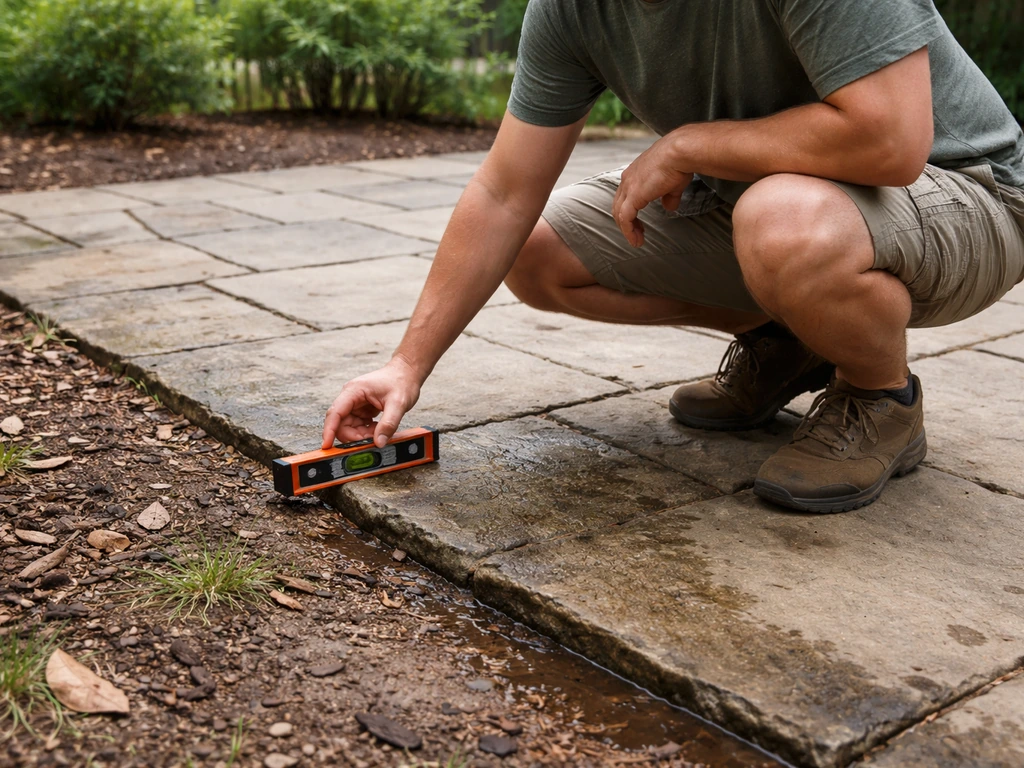
Getting the slope right
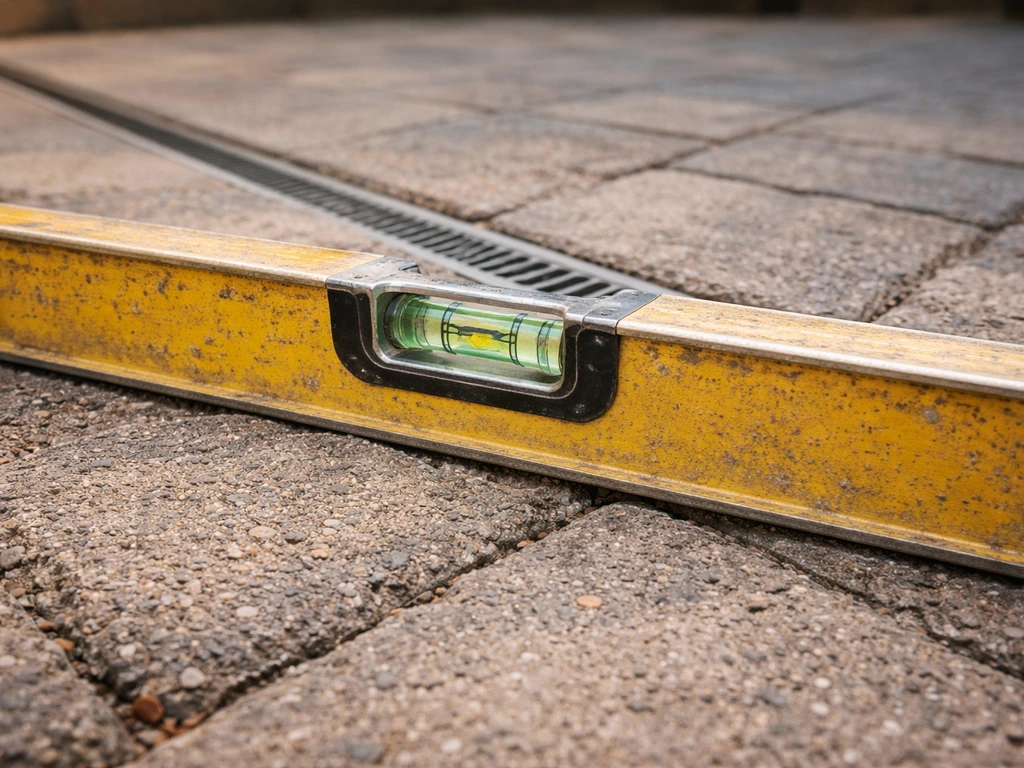
Slope is the single most important number in patio planning, and it's the one most DIYers skip. Every patio surface needs to drain water away from your house. The standard guidance from ICPI-referenced installation specs is a minimum 2% slope, which works out to about 1/4 inch of drop per foot of patio. So a 12-foot-wide patio should drop 3 inches from the house wall to the outer edge. Brock's installation documentation gives a practical example: 2.5 inches of drop over a 10-foot run. Either way, the math is simple. Use a long level and a tape measure to check your existing grade, and mark where you need to cut down or build up during base prep.
For patios that back up against the house, 1/8 to 1/4 inch per foot is the commonly used homeowner rule of thumb, with 1/4 inch being more reliable in wet climates. If you're in an area that gets heavy seasonal rain, go with the higher number. Getting this wrong means water pools against your foundation, which is the kind of problem that costs thousands to fix later.
Handling serious drainage problems
If your yard naturally drains toward the patio (common on sloped lots), slope alone won't cut it. You'll need a French drain: a gravel-filled trench with a perforated pipe that intercepts water before it reaches the patio surface. A typical residential French drain runs 18 to 24 inches deep and wide enough to accommodate pipe plus gravel backfill. Run it along the uphill edge of the patio and pipe it to a daylight outlet away from the house. Check with your local building department before digging, because some areas require permits for drainage work.
Layout and use zones
Once drainage is planned, think about how you'll actually use the space. A 10x10-foot area is tight for a dining table and four chairs. A 12x16-foot space gives you room to move. If you're adding a grill zone, allow at least 3 feet of clearance around it. Mark the layout on the ground with spray paint or string lines before committing to anything. Standing in the marked space at actual scale is very different from imagining it on paper, and it's free to adjust at this stage.
Choose a patio transformation style and materials
The material you choose shapes everything: cost, install difficulty, long-term maintenance, and how the finished patio feels underfoot. If you want a full makeover, these steps are a practical way to revamp patio surfaces, layout, and drainage so the result looks great and lasts The material you choose shapes everything. Here's an honest breakdown of the four main DIY-friendly options.
| Material | Avg. Cost (installed DIY) | Difficulty | Durability | Maintenance | Best For |
|---|---|---|---|---|---|
| Gravel | $1–$3/sq ft | Easy | Good if edged well | Low (periodic raking/top-up) | Budget builds, quick installs, naturalistic styles |
| Brick/Pavers | $5–$15/sq ft | Moderate | Excellent (25+ years) | Low (occasional re-sanding) | Classic looks, long-term investment, DIY-friendly pattern work |
| Wood (pressure-treated) | $8–$15/sq ft | Moderate–Hard | Good (10–15 years) | Medium (annual sealing) | Warm look, raised or grade-level decks |
| Composite | $15–$30/sq ft | Moderate–Hard | Excellent (25+ years) | Very Low | Low-maintenance priority, budget for higher upfront cost |
Gravel
Gravel is the fastest and cheapest transformation you can make. Pea gravel and decomposed granite are the most popular choices. Pea gravel is comfortable underfoot but can scatter; decomposed granite compacts more firmly and works well under outdoor furniture. The main limitation is that gravel requires solid edging or it migrates constantly into your lawn. It's an excellent choice for budget-first projects or as a filler between larger pavers and stepping stones.
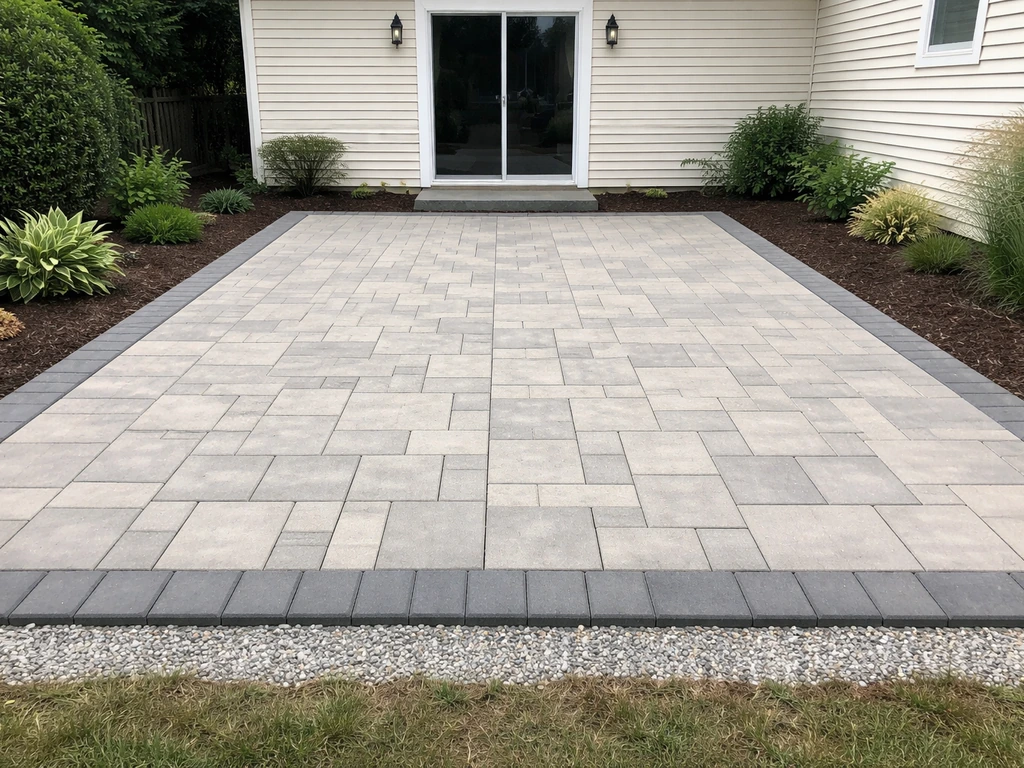
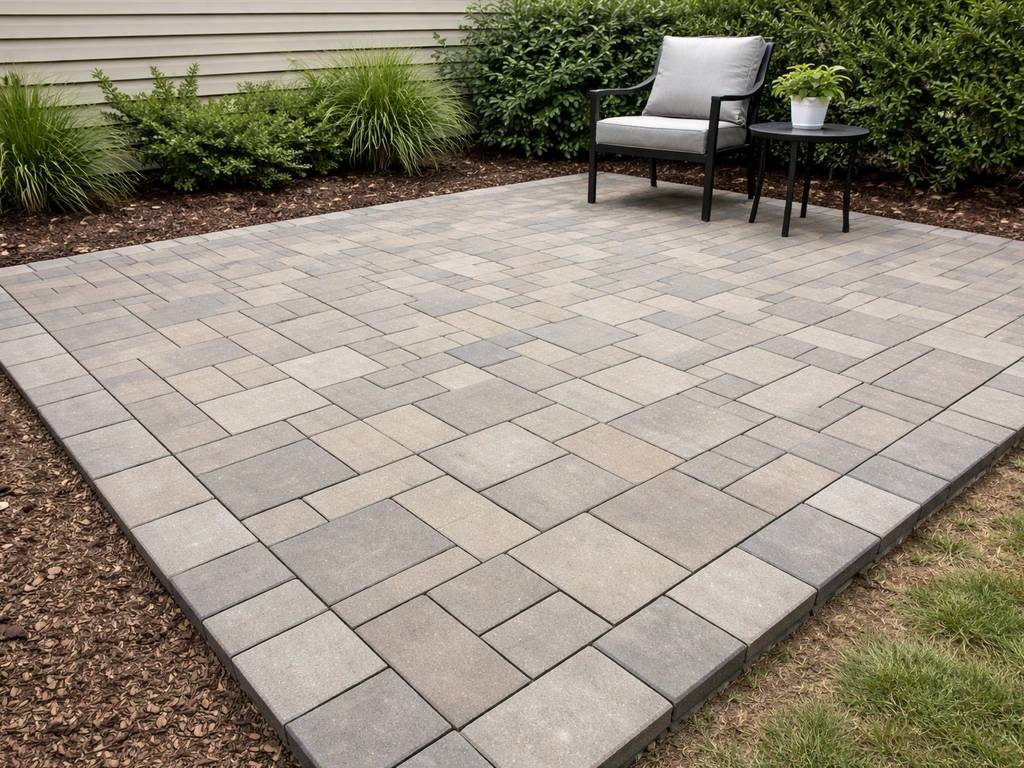
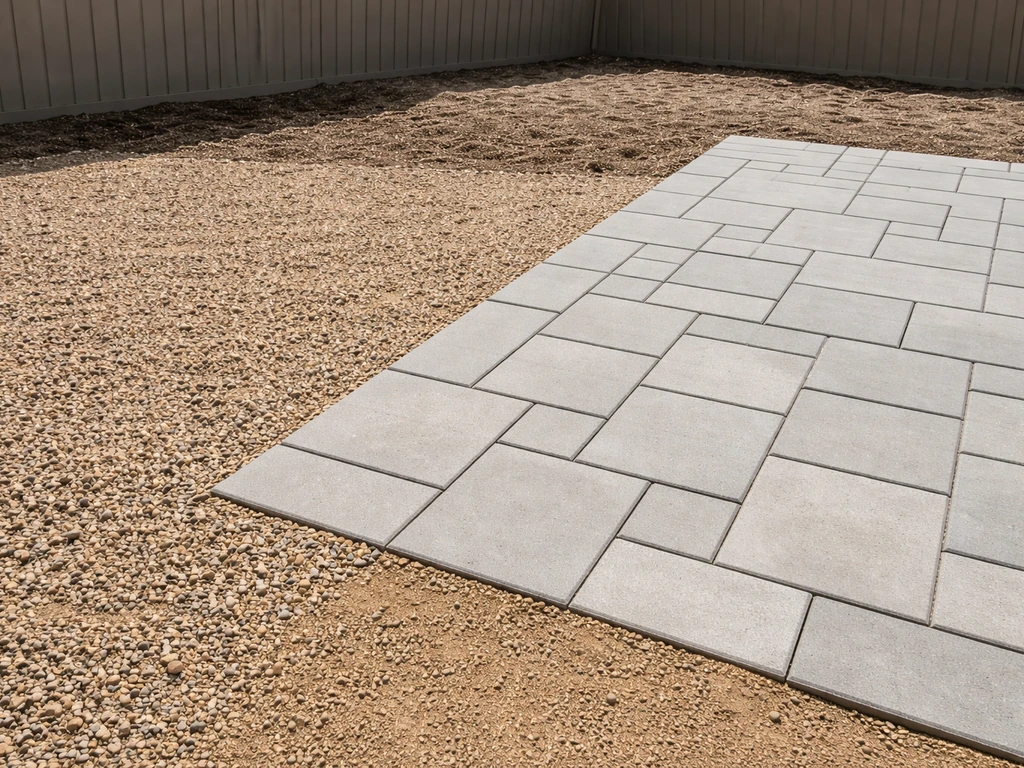
Brick and concrete pavers
This is the most popular DIY transformation for a reason. Concrete pavers are forgiving: if one cracks or settles, you pull it up and reset it without touching the rest of the surface. Brick gives a more classic look and is similarly repairable. Both need a compacted aggregate base and a bedding sand layer, but once that's done right, the surface installation is genuinely satisfying work. Pattern variety (running bond, herringbone, basket weave) lets you customize the look without changing the cost significantly.
Pressure-treated wood
Wood brings warmth that concrete and stone can't match. Pressure-treated lumber is the budget-conscious path for a deck-style patio, but it requires annual or biennial sealing and will eventually gray out or warp if not maintained. It's better suited to raised structures than ground-level builds where moisture contact is constant. If you like the wood look but don't want the maintenance, composite is worth the extra upfront investment.
Composite decking
Composite is the highest upfront cost but the lowest lifetime hassle. It doesn't rot, splinter, or need sealing, and it holds up well in both hot and cold climates. The structural rules matter: for standard composite applications, joists should be spaced no more than 16 inches on center. Going wider causes flex and voids most manufacturer warranties. This means your subframe needs to be built right before a single board goes down. Composite is my recommendation for anyone who wants a 20-plus-year surface and hates maintenance weekends.
Prep work and base building: leveling, edging, and support
No matter which material you choose, prep is where the project is won or lost. I can't say this enough: a beautiful surface on a bad base looks great for one season and terrible for the next five. Budget at least 40% of your project time here.
Clearing and excavating
For ground-level builds over bare earth or removing old material, excavate to the depth required for your base plus your surface material. A typical paver installation needs 6 to 8 inches of excavation: 4 to 6 inches for compacted gravel base, 1 inch of bedding sand, plus paver thickness (usually 2 to 3 inches). In areas with clay-heavy or expansive soil, go deeper on the base because clay holds water and heaves. Mark your dig depth with spray paint on a stake at every corner so you're consistent across the whole area.
Building the base
The layer sequence for pavers and brick follows a consistent pattern: compacted aggregate base first, then bedding sand, then the paver units themselves, then jointing material. The aggregate base is typically crushed stone (also called road base or crusher run). Add it in 2-inch lifts and compact each lift with a plate compactor before adding the next. Don't try to compact 6 inches all at once. It won't work, and you'll find out next spring when things start sinking.
For wood or composite structures, the 'base' is your post-and-joist subframe. Posts need to sit on concrete footings or deck blocks at a depth that keeps them below the frost line in cold climates. Check your local frost depth, because it varies widely from 12 inches in mild areas to 48 inches or more in northern regions. Skipping this step causes structures to heave, which is both ugly and potentially unsafe.
Edging and containment
Edging keeps everything in place. For gravel and pavers, use metal or plastic landscape edging staked into the ground every 12 inches. For a more finished look, soldier-course bricks or pavers set vertically work well as a permanent border. For wood and composite structures, the framing itself provides containment. Whatever you use, set edging before you lay the surface, not after.
Step-by-step installation by material
Gravel patio
- Mark and excavate the area 4 to 6 inches deep.
- Install edging along all borders and stake it securely.
- Lay landscape fabric over the excavated area (cut around any edging stakes).
- Add 3 to 4 inches of crushed stone base and compact it.
- Top with 2 inches of your chosen gravel (pea gravel, decomposed granite, or similar).
- Rake level and check drainage slope with a level — aim for 1/4 inch drop per foot away from the house.
- Add more gravel as it settles over the first few weeks.
Brick or concrete paver patio
- Excavate to full depth (base + sand + paver thickness, typically 7 to 10 inches total).
- Install edging on all sides before adding base material.
- Add crushed stone base in 2-inch lifts, compacting each lift with a plate compactor.
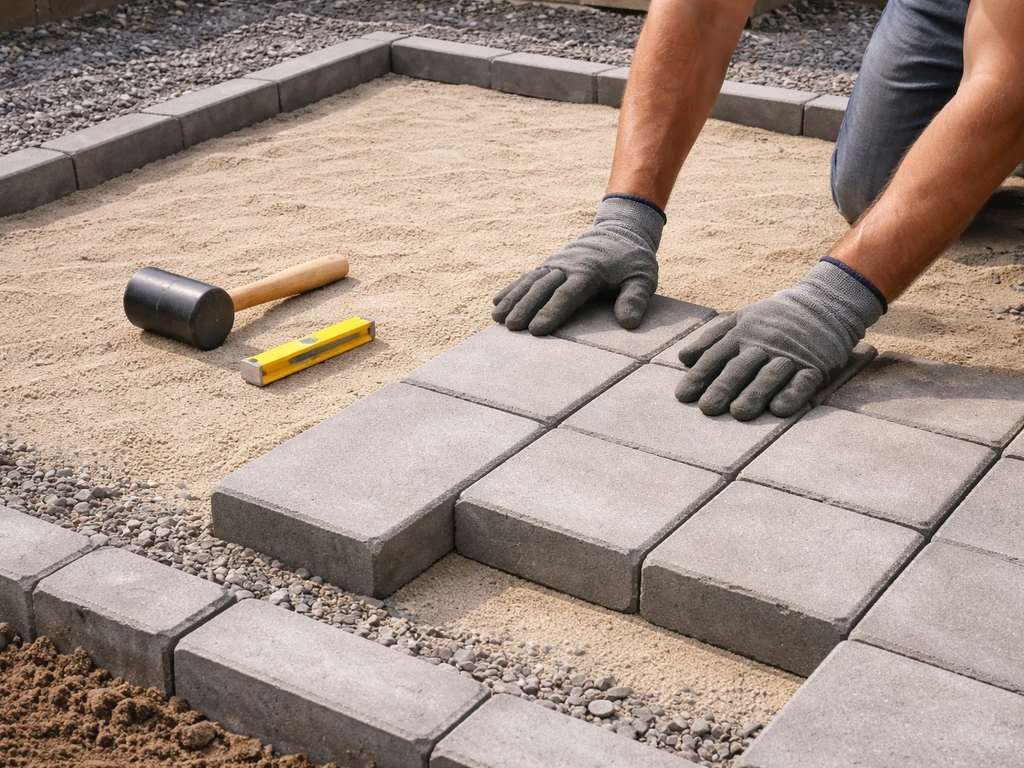
- Screed 1 inch of coarse bedding sand over the compacted base using guide pipes and a long screed board.
- Lay pavers from one corner, working outward in your chosen pattern. Do not walk on the screeded sand.
- Use a rubber mallet to seat each paver and check with a level constantly — adjust by adding or removing sand under individual units.
- Cut border pavers to fit using a wet saw or angle grinder with a diamond blade.
- Run the plate compactor over the finished surface to seat the pavers firmly.
- Sweep polymeric sand into all joints, mist lightly with water, let dry, and repeat.
Pressure-treated wood platform
- Set concrete deck blocks or footings at corners and every 4 to 6 feet along beam runs.
- Install perimeter beams on blocks, checking level across all points.
- Add joists at 16 inches on center (or 12 inches for extra rigidity) and secure with joist hangers.
- Install decking boards perpendicular to joists with 1/8-inch gaps between boards for drainage.
- Fasten with exterior-grade screws — two per board per joist.
- Trim overhang to a clean line with a circular saw after full installation.
- Apply a penetrating wood sealer within two to four weeks of installation.
Composite decking
- Build the subframe the same as pressure-treated wood, but keep joists at exactly 16 inches on center — composite manufacturers require this for warranty and structural performance.
- Use stainless steel or composite-approved hidden fasteners instead of face screws for a clean look.
- Leave a 3/16-inch gap between boards for drainage and expansion (check your specific brand's guidance — some composite expands more than others in heat).
- Start from the house wall and work outward.
- Use a jigsaw for notches around posts and trim to the finished line after full installation.
- Cap all cut ends with matching trim pieces or composite fascia to prevent moisture absorption at cut surfaces.
Finishing touches, maintenance, and cost/time checkpoints
Finishing the space
The surface is done, but the transformation isn't complete until the details are in. Edge the patio with border planting, decorative rock, or a clean lawn line to define it visually. Add outdoor lighting along the perimeter or in planters for nighttime use. If you're over pavers or concrete, an outdoor rug anchors a seating area immediately. These finishing layers take one Saturday and make the whole project feel intentional rather than just 'we put down some pavers.'
Basic maintenance by material
| Material | Annual Maintenance | Watch For |
|---|---|---|
| Gravel | Rake and top up as needed, check edging | Migration into lawn, weed breakthrough |
| Brick/Pavers | Re-sweep polymeric sand every 2–3 years, pull weeds | Sunken or rocking units after freeze-thaw cycles |
| Pressure-treated wood | Clean and reseal every 1–2 years | Checking, graying, warping at board edges |
| Composite | Wash with soap and water annually | Mold in shaded spots, fastener loosening |
Realistic cost and time expectations
A 200-square-foot patio is a reasonable DIY project size to estimate against. Gravel runs $200 to $600 in materials. Pavers land in the $1,000 to $3,000 range depending on the paver type and base material costs in your region. Wood platforms come in around $1,600 to $3,000. Composite starts around $3,000 and can go higher with premium boards. These are material costs only. Add tool rental (plate compactor: around $75 to $150 per day, wet saw: $50 to $100 per day) if you don't own them.
Time-wise: a gravel patio can go in over a weekend. A paver patio at 200 square feet typically takes two to three weekends for a first-timer, with the base prep taking the longest. A wood or composite platform with proper footings is a three to four weekend project minimum if you're working solo. If you want to update an existing patio, start by checking drainage, base stability, and the current surface condition before choosing new materials how to update patio. Build in time for concrete to cure (24 to 48 hours for footings before loading them) and for the base to settle before laying the surface.
Know when to call for help
Most of this work is genuinely within reach for a motivated DIYer. But a few situations warrant a call to a pro or at least an experienced friend. If you’re wondering how to upgrade patio surfaces, start with the assessment and base checks first so your new materials last. If you find underground utilities when you dig (always call 811 before you excavate in the US), stop and verify.
If your soil is severely unstable or you're dealing with significant slope changes, a drainage contractor can save you from a much more expensive fix later. And if the structural scope starts looking more like a deck attached to the house than a freestanding platform, check your local permit requirements, because attached structures almost always need a permit and sometimes an engineer's sign-off.
The goal of any patio transformation is to end up with a space that works better, looks better, and lasts. If you put the time into the assessment, get the slope right, and don't cut corners on the base, the surface layer is honestly the fun part. That's the version of this project that rewards you for years, not the one that starts sinking by spring. If you’re learning how to redo a patio, this same prep-first approach will help you avoid sinking, cracking, and drainage issues later.
FAQ
Can I transform a patio without changing the footprint (overlay only), and when does that backfire?
Yes, but only if the existing base is stable and properly draining. If you have heaving concrete cracks, sunken pavers, or repeated puddling, an overlay usually hides the failure long enough for it to return. In those cases, plan a base-up transformation (excavate, rebuild base, then reinstall).
How do I tell whether my patio drainage problem is slope versus a clog or failure in existing drains?
Run a “site test” by sprinkling water from a hose at the uphill edge and watch where it goes over 10 to 20 minutes. If water still pools in the same spot after you correct grading, you may be dealing with a buried drain issue or blocked outlet. That’s when you should consider exposing and checking downspout discharge points or yard drainage lines before installing a new French drain.
What’s the safest way to check for frost depth and whether my deck-style patio needs footings?
Use your local frost depth guidance from your building department or planning office, then measure the typical climate conditions for your address. If your region has deep frost and you plan a freestanding platform, footings that sit below frost are what prevent heave. If you skip this, the patio can lift unevenly even if the surface materials look fine.
If my patio is mostly level, do I still need the 2% slope recommendation?
Often yes. “Level” can still trap water because minor surface imperfections and low spots form under load. Use a long level and measure drop over the patio run, then correct low areas during base prep. If you truly cannot achieve slope without major grading, you may need a different drainage strategy (for example, point drainage plus a properly sloped base).
How do I prevent pavers or gravel from moving after installation?
Edge restraint is the key. Install edging before the surface, stake it about every 12 inches, and make sure the edge is buried deep enough to lock the base in place. For pavers, also ensure the base is compacted in 2-inch lifts, because a weak base will still allow lateral movement even with good edging.
Do I need a geotextile fabric under gravel or pavers?
It’s not always required, but it helps in many yards where soil mixes with the base. Use geotextile if you have clay-rich soil, heavy weed pressure, or you want to reduce base contamination. Avoid using it in a way that traps water against a drainable base; the fabric should separate soil from aggregate, not create a barrier that prevents runoff.
What’s the most common mistake DIYers make with base compaction?
Compacting too thick a lift. The project fails when base layers are added in large handfuls, then only the top layer gets real density. Follow the “2-inch lift then compact” approach, and if you can, re-check with a slightly different compaction pass pattern to avoid leaving soft pockets.
Can I build a patio over existing concrete?
Sometimes, but only with a clear drainage and bond plan. If the slab has cracks with movement, water intrusion, or evidence of lifting, installing a new surface on top can repeat the problem. If you do an overlay, verify slope, correct drainage paths, and consider whether you need removal in problem zones rather than covering everything.
How long should I wait before using the patio after building?
For paver or gravel builds, the main concern is settling of the base and proper compaction, which is best done immediately and checked during installation. For wood or composite footings, allow concrete to cure before placing heavy loads. If you’ve added new concrete footings or pads, plan around typical curing times (commonly 24 to 48 hours for light handling, longer for full strength) and follow your local conditions.
When should I hire a pro instead of proceeding myself?
Get help if you discover underground utilities beyond what you expected, your slope changes dramatically across the patio footprint, or your soil is visibly unstable (soft, pumping, or washed out after rain). Also consider professional drainage design if you need a French drain sized for a large catchment area, because undersized drains often lead to recurring puddles.
What should I do if I want a grill zone but also want easy drainage?
Plan the grill pad with the same slope logic as the rest of the patio so grease and wash water do not pool. Leave the clearance space you plan for use, then ensure the grill area is still aligned with your drainage direction. For areas that need extra protection, add a thicker base section rather than trying to “fix” drainage by creating a flat pocket.
How can I estimate materials more accurately than just multiplying length times width?
Account for waste and cutting by adding 10% to 15% to quantities for pavers and edging, and more if your layout has many diagonals or irregular angles. Also measure and plan for bedding sand and base depth variations in low spots where you need to build up grading.
Next Article
How to Renovate a Patio: DIY Steps, Materials, and Costs
DIY patio renovation steps, materials, costs, and tool plan for fixing drainage, leveling, and rebuilding base or surfac