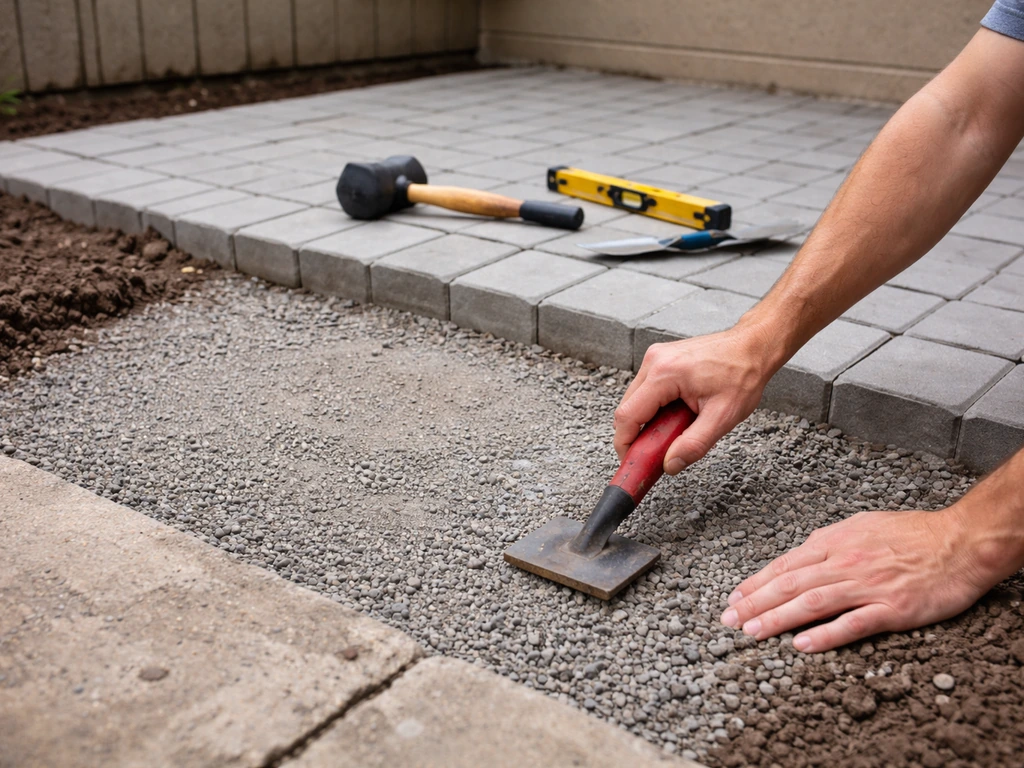
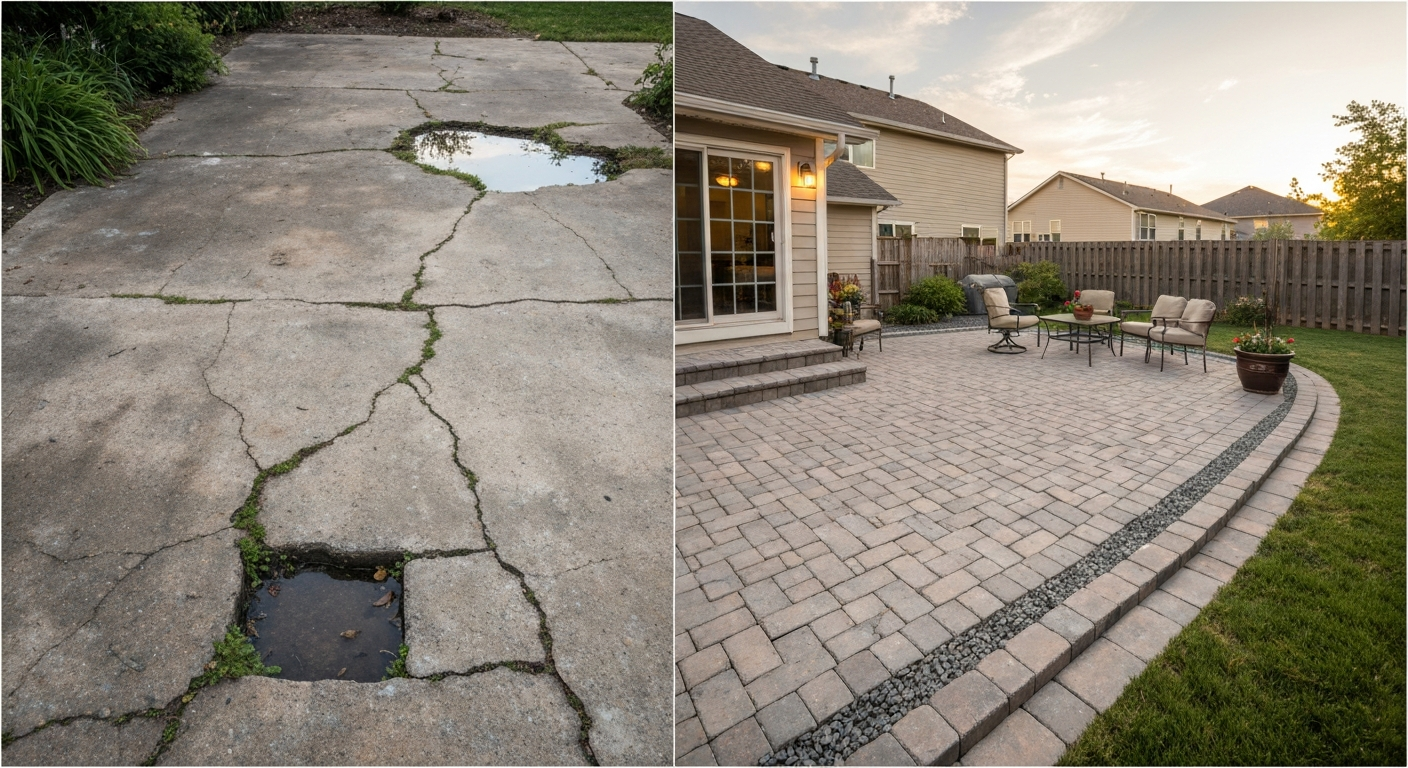
Updating a patio almost always starts the same way: you walk outside one morning, look down, and decide you can't ignore the cracked concrete, sunken pavers, or washed-out gravel anymore. The good news is that most patio problems are fixable without a contractor, and choosing the right level of work, a simple refresh, a targeted repair, or a full rebuild, saves you both money and weekends. This guide walks you through every step, from assessing what you've got to picking materials, pulling permits, and swinging the first tool. For a step-by-step checklist on how to upgrade patio, see our detailed guide. For detailed, step-by-step instructions on how to transform a patio, see the linked guide on how to transform a patio (internal resource). For a concise, step-by-step plan on how to revamp patio, see our full guide. For a step-by-step walkthrough on how to renovate a patio, see this detailed guide.
How to Update Patio: Complete DIY Guide to Repair or Rebuild

Who this guide is for
Whether you've never laid a paver in your life or you've already tackled a few outdoor projects, this guide meets you where you are. It's written for homeowners who'd rather spend a weekend doing the work than spend twice as much hiring it out. I've broken everything into beginner, moderate, and full-rebuild tiers so you can self-select the scope that fits your skills, budget, and schedule. If you're weighing whether to redo, renovate, revamp, replace, or rebuild your patio entirely, you'll find the decision tools here to make that call confidently before you spend a dollar.
Quick inspection checklist: know what you're dealing with first
Before you choose a project path, spend 20–30 minutes doing a systematic walkover. I always bring a notepad, a tape measure, a flat pry bar, and a garden hose. Here's what to check:
- Surface condition: Count cracks and measure their width. Cracks under 1/4 in. wide with no vertical displacement are usually resurfaceable. Cracks wider than 1/4 in., step cracks with one side lifted more than 1/2 in., or widespread spalling covering more than 15–30% of the surface area typically mean the surface layer is gone and replacement is the smarter call.
- Structural integrity: Push a flat bar under any loose pavers or check for hollow spots on a concrete slab by tapping with a rubber mallet — a dull thud rather than a solid knock means the surface has separated from the base below. Widespread hollow areas signal base failure.
- Drainage: Run the hose on the surface for two minutes and watch where water flows. IRC Section R401.3 requires impervious surfaces within 10 ft of your foundation to slope at least 2% away from the house (about 1/4 in. per foot), and the first 10 ft of grade should drop 6 in. Any ponding near the foundation is a serious problem to solve before you resurface anything.
- Soil and base: Dig a small test hole at the edge of the slab or lift a corner paver. Measure how much base material is under the surface. Wet, soft, or muddy base means drainage failure — no overlay will fix that. If you're in a frost-prone zone, the USDA NRCS Web Soil Survey can tell you whether your soil has high frost-action or expansion potential.
- Frost heave: In cold climates, uneven sections that shift seasonally are a frost-heave symptom, not just settling. Check NOAA frost-depth maps for your region — if local frost depth exceeds your base thickness, long-term stability will remain a problem unless you address base depth.
- Tree roots: Look for lifted sections near trees. Roots thicker than 1 in. will keep coming back. You'll need to either reroute the edge away from root zones or plan for ongoing maintenance.
- Utilities: Before any digging, call 811 (the national Dig Safe line in the US) to locate buried gas, electric, water, and cable lines. This is not optional — it's a legal requirement and a safety one.
Decision framework: refresh, repair, overlay, or replace?
The biggest mistake DIYers make is choosing a solution before they've diagnosed the problem. I've done it myself, slapped a resurfacer over a heaving slab and watched it crack within two winters. Use these questions to guide your decision:
- Is the base solid? If water pools under the surface, the base is soft, or frost heave is active, no cosmetic fix will last. You need at minimum a partial rebuild, and possibly a full one.
- How wide and how many cracks? Under 1/4 in. wide, isolated, no vertical displacement — you're a good overlay/repair candidate. Over 1/4 in., multiple cracks, vertical step cracking, or widespread spalling — replacement is likely more cost-effective long term.
- Is the surface sloping toward the house? If drainage is wrong, fix the slope first. That may require a full rebuild or at least a significant partial repair.
- How much area is affected? If less than 25–30% of your patio surface has problems, targeted repairs and an overlay are worth exploring. If more than half the surface is compromised, a full rebuild typically costs similar money with a much better result.
- What's your end goal? A simple refresh (clean, re-seal, replace a few pavers) is a weekend job. A complete transformation — new material, new layout, expanded footprint — is a multi-weekend rebuild. Be honest about your goal so you don't undersell the scope.
- What's your budget ceiling? Overlays and repairs run $2–$10 per sq ft DIY depending on materials. A full new paver or concrete patio runs $3–$15 per sq ft in materials alone. If budget is tight, a phased approach (stabilize now, upgrade later) is a valid strategy.
If your answers point toward a full tear-out and new build, projects like a full rebuild or a complete replacement are genuinely within DIY reach, they just require more planning, time, and the right tool rentals. For step-by-step instructions on removing and rebuilding a patio, see how to replace a patio. The sections below cover all three levels.
Permits, utilities, and site rules: check these before you dig
I'll be straight with you: most simple patio refreshes and paver re-leveling jobs don't require a permit. But once you're adding new impervious surface, changing drainage patterns, building a structure over the patio (like a pergola), or expanding the footprint near a setback line, permits become relevant. Skipping this step can create problems when you sell the house.
- Call your local building department first. Many jurisdictions permit patios under a certain size (often 200 sq ft) without a permit, but rules vary widely. A five-minute phone call is worth it.
- Check setback requirements. Most local zoning codes require hardscape to be set back a minimum distance from property lines — commonly 3–5 ft, but this varies. Build within the setback and you may have to remove it.
- HOA rules: If you live in an HOA, get written approval for any material change or new construction before you start. Some HOAs restrict materials, colors, and even the percentage of your yard that can be hardscaped.
- Impervious surface limits: Some municipalities cap the percentage of a lot that can be covered with impervious hardscape (often 30–50%). Permeable paver systems — accepted as stormwater best-management practices by the EPA — can sometimes satisfy these requirements while still giving you a solid surface.
- Call 811 before any digging. This locates buried utilities and is required by law. It's free and takes a couple of business days. Don't skip it even for a shallow base excavation.
- Storm drain and wetland buffers: If your yard drains toward a wetland, creek, or designated buffer zone, your project may need additional stormwater review. Permeable pavement options may be required or strongly recommended.
Materials at a glance: what works for your project
Choosing the right material is where most of the long-term outcome is decided. I've worked with most of these materials personally and the table below gives you an honest comparison. The right choice depends on your soil type, climate, budget, and how much maintenance you're willing to do over time.
| Material | Best for | Pros | Cons | DIY difficulty |
|---|---|---|---|---|
| Gravel / decomposed granite | Low-budget refreshes, informal patios, good drainage | Cheapest option, excellent drainage, easy to install, permeable | Shifts underfoot, needs edging to stay in place, not comfortable for furniture, requires periodic top-up | Easy |
| Concrete pavers (interlocking) | Most DIY patios, repairs, overlays | Durable, replaceable individually, wide style range, handles frost well if base is right | Base prep is critical; too much bedding sand causes instability; needs edge restraints | Moderate |
| Brick pavers | Classic looks, historic homes, renovation projects | Beautiful, very durable, replaceable, ages well | More expensive than concrete pavers, limited size/pattern options, harder to find matching replacements | Moderate |
| Poured concrete slab | Clean modern look, low maintenance surface | Strong, low material cost, smooth surface for furniture | Cracks over time without proper joint spacing; repairs are visible; full replacement is labor-intensive | Hard |
| Stamped / stained concrete | Upgraded look on a new slab | High visual impact, durable when sealed | No DIY margin for error on stamping; sealer maintenance required every 2–3 years | Hard |
| Pressure-treated wood deck / patio | Elevated patios, sloped yards, budget decks | Workable with basic carpentry skills, lower material cost than composite | Requires annual or biannual sealing/staining; splinters; shorter lifespan than composite or masonry | Moderate |
| Composite decking | Low-maintenance elevated or ground-level deck patios | Fade and stain resistant, no sealing required, long warranties (25–30 yr common) | Higher upfront material cost ($5–$15/sq ft materials only); requires proper substructure | Moderate to Hard |
A note on permeable options
Permeable interlocking pavers and porous concrete are EPA-recognized stormwater best-management practices. If you're in a neighborhood with impervious surface limits, or your drainage situation makes adding more solid hardscape complicated, a permeable system lets water pass through into a gravel reservoir below, reducing runoff. The tradeoff: they need a properly designed stone reservoir base, an optional underdrain, and periodic vacuuming to prevent clogging. They're not a set-it-and-forget-it solution, but they're a legitimate and increasingly popular DIY option.
Budget and lifespan: what each material actually costs you
These ranges are based on national cost guide data from 2025–2026 and reflect real-world installed costs (materials plus labor if hired) alongside DIY material-only estimates. Your actual costs will vary by region, site complexity, and whether you do the work yourself.
| Material | DIY material cost (per sq ft) | Installed cost / pro (per sq ft) | Expected lifespan | Maintenance load |
|---|---|---|---|---|
| Gravel / decomposed granite | $0.50–$2 | $2–$5 | Ongoing (top up every 1–3 yrs) | Low-moderate (raking, edging, top-up) |
| Concrete pavers | $2–$6 (plain); higher for premium | $8–$28 | 30–50+ years with good base | Low (re-sand joints every few years, occasional re-leveling) |
| Brick pavers | $3–$8 | $10–$25 | 50–100 years | Low (occasional re-sand, sealing optional) |
| Poured concrete slab | $1.50–$4 (materials) | $5–$15 basic; $15–$30 stamped | 25–40 years | Low-moderate (seal every 2–3 yrs, crack repairs) |
| Pressure-treated wood | $2–$5 (decking boards) | $15–$35 | 15–25 years | High (seal/stain every 1–2 yrs, board replacement) |
| Composite decking | $5–$15 (boards only) | $45–$70 (full deck installed) | 25–30+ years (warranty-backed) | Very low (occasional washing) |
Demolition of an existing patio, if needed, typically adds $2–$6 per sq ft to total project cost when hired out, less if you do it yourself with rented equipment. A basic concrete patio install runs $5–$50 per sq ft depending on complexity and region, per 2026 national cost data, the wide range reflects everything from a plain broom-finish slab to an elaborately stamped and stained surface.
Project types: difficulty, timelines, and sample budgets
Here's how different update scopes stack up in terms of effort, time, and realistic cost for a typical 200–300 sq ft patio. These estimates assume you're doing the labor yourself.
Level 1: Easy refresh (1–2 weekends, $50–$500)
This covers cleaning, sealing, re-sanding paver joints, replacing a handful of individual pavers, or adding gravel to a worn surface. No demolition, no base work, no permits in almost every case. If your patio structure is sound and you're dealing with a dull, dirty, or slightly worn surface, this is your starting point. A pressure wash plus concrete sealer alone can transform a flat, faded slab for under $100 in materials. Re-sanding and sealing a paver patio runs $50–$200 in materials for most residential sizes. Difficulty: Easy. Timeline: 1–2 days for most.
Level 2: Moderate repair or partial replacement (2–4 weekends, $500–$3,000)
This is the most common DIY patio update scenario: re-leveling a section of sunken pavers, repairing isolated cracks and resurfacing a concrete slab, adding a concrete overlay, or replacing a damaged section of an existing patio. It involves some excavation, base correction, and material work but doesn't require full demolition. Resurfacing a 300 sq ft concrete slab with a concrete overlay product runs $200–$600 in materials. Re-leveling and re-sanding a 150 sq ft section of pavers costs $100–$400 in materials. Difficulty: Moderate. Timeline: 2–4 weekends depending on scope and curing time.
Level 3: Full rebuild (4–8+ weekends, $1,500–$8,000+)
Full demolition, proper base installation, and laying an entirely new surface. This is the most rewarding project when done right, and it's where you get to choose your material, fix drainage for good, and start from scratch. For a complete, step-by-step walkthrough on how to rebuild a patio, including demolition, base preparation, and laying the new surface, see our detailed guide on how to rebuild a patio. A 300 sq ft DIY paver patio using standard concrete interlocking pavers costs roughly $1,500–$2,500 in materials (pavers, base aggregate, sand, edge restraint, polymeric joint sand). ICPI technical guidance specifies a typical pedestrian patio paver section of about 4 in. compacted dense-graded aggregate base, a 1 in. screeded bedding layer of coarse (ASTM C33) sand, pavers, and a positive edge restraint, with vehicular areas requiring thicker bases (6–12 in.) blank" rel="noopener noreferrer">INTERLOCKING CONCRETE PAVEMENT — Guide/Construction Specification (ICPI tech guidance mirror). A poured concrete slab of the same size, DIY-managed but with a concrete delivery truck, runs $1,200–$2,500 depending on slab thickness and finish. ACI 302.1R Guide for Concrete Floor and Slab Construction (PCA/ACI joint spacing guidance cited): control (contraction) joint spacing for unreinforced slabs is commonly 24–36 times the slab thickness (in inches), so a 4 in. slab typically has joints about 8–12 ft apart, and control joint depth is commonly about one quarter of slab thickness (T/4). Difficulty: Hard. Timeline: 4–8 weekends for most homeowners doing it solo.
Step-by-step: how to execute each level
Level 1 refresh: clean, seal, re-sand
- Clear all furniture and debris from the patio.
- Pressure wash the surface at 1,500–3,000 PSI. For concrete, use a fan tip. For pavers, keep the nozzle at least 6–8 in. from the surface to avoid dislodging joint sand.
- Let the surface dry fully — 24–48 hours minimum before applying any sealer or sand.
- For pavers with depleted joints: sweep polymeric jointing sand into all joints, compact lightly with a plate compactor (or hand tamp), sweep again, then lightly mist with water per manufacturer instructions to activate the binder.
- For concrete: apply a concrete penetrating sealer or film-forming sealer with a roller or pump sprayer per product directions. Two thin coats beat one thick coat every time.
- For a few cracked or chipped pavers: use a flatbar to pry them out, check the sand bed, re-level with additional bedding sand if needed, drop in replacement units, re-sand and compact.
Level 2 repair: re-leveling pavers and resurfacing concrete
- Mark the affected area and remove all pavers or mark the concrete section to be resurfaced.
- For sunken pavers: excavate the bedding sand and check the base. If the base aggregate is solid and dry, simply add bedding sand (coarse ASTM C33 concrete sand only — not stone dust or play sand) to bring the screed level back up. Screed to a consistent 1 in. depth.
- Re-lay pavers with consistent spacing. Tap each unit down with a rubber mallet.
- Run a plate compactor over the re-laid section two passes minimum, then re-sand joints with polymeric sand.
- For concrete resurfacing: grind or chip away any loose, spalling material. Clean thoroughly. Fill cracks under 1/4 in. with a concrete crack filler and let cure.
- Apply a bonding agent to the existing slab, then apply a polymer-modified concrete overlay product per manufacturer specs (most require a minimum 1/4 in. application). Trowel or broom to finish.
- Cut control joints in the overlay to match the existing slab joint pattern to prevent random cracking.
- Cure per product directions (usually 24–72 hours before foot traffic), then apply sealer.
Level 3 full rebuild: demo, base, and new surface
- Mark your layout with stakes and string lines. Confirm dimensions, check for square using the 3-4-5 triangle method, and verify your planned finished height relative to the house threshold and drainage slope.
- Call 811 and wait for utility marking before any digging.
- Demo the existing surface: break up concrete with a rented electric jackhammer or rotary hammer; pry up and stack existing pavers if reusing them. Load debris into a dumpster or rented trailer.
- Excavate to the required depth: 6–8 in. for a pedestrian paver patio (4 in. compacted base + 1 in. bedding sand + paver thickness); 4–6 in. for a 4 in. concrete slab plus any sub-base. In frost-prone areas, deeper base material may be needed — check your local frost depth via NOAA maps.
- Grade the subgrade to slope away from the house (minimum 1/4 in. per foot, or about 2%) and compact it firmly.
- Install edge restraints (plastic or steel paver edging staked at 12 in. intervals) around the perimeter before adding base material.
- Add dense-graded crushed aggregate base (ASTM D2940 gradation) in 2–3 in. lifts, compacting each lift to at least 95% Proctor density with a plate compactor. For a typical pedestrian patio, 4 in. total compacted base is the standard minimum per ICPI guidance; vehicular areas need 6–12 in.
- For pavers: screed 1 in. of coarse ASTM C33 concrete sand. Do not use stone dust or play sand. Lay pavers in your chosen pattern, maintaining consistent joint gaps (typically 1/16–3/16 in.).
- Run a plate compactor over the laid pavers two to three passes, then sweep polymeric joint sand into all joints and compact again. Mist to activate.
- For a concrete slab: set forms to your layout, confirm slope, pour and screed the concrete (4 in. minimum slab thickness for pedestrian patios), and broom or trowel finish. Cut control joints to 1/4 the slab depth (1 in. for a 4 in. slab) spaced 8–12 ft apart. Cure with a curing compound or wet burlap for a minimum of 7 days.
Drainage, soil, and frost: the stuff that makes or breaks a patio
More DIY patios fail because of ignored drainage and soil conditions than because of poor laying technique. Before you finalize your design, check your soil type using the USDA NRCS Web Soil Survey, expansive clay soils and soils with high frost-action potential require more aggressive base depth and drainage solutions. In cold climates, find your local frost depth from NOAA maps and size your base accordingly so freeze-thaw cycles don't heave the surface every winter. If you're dealing with a drainage problem near the house foundation, fix the slope during the base grading step, it's genuinely hard to correct after the surface is down.
Tools, supplies, and rental checklist
The right tools make the difference between a clean result and a frustrating one. Here's what you'll actually need across project types:
Every project (basics)
- Tape measure, stakes, and string line (layout and slope checking)
- Level (4 ft minimum) and line level
- Rubber mallet
- Stiff-bristle broom
- Garden hose with adjustable nozzle
- Safety glasses, work gloves, knee pads, and steel-toed boots
- Wheelbarrow and flat shovel
- Pump sprayer (for sealer application)
Demolition and excavation (Level 2–3)
- Rented electric jackhammer or rotary hammer with chisel bit (concrete demo)
- Flat pry bar (paver removal)
- Rented dumpster or haul trailer (debris removal — figure 1–2 tons per 100 sq ft of 4 in. slab)
- Long-handle spade and mattock (excavation)
- Hearing protection (required for jackhammer work)
- Dust mask or N95 respirator (concrete dust is a silica hazard)
Base and paver installation (Level 2–3)
- Rented plate compactor (essential — hand tamping a paver base is not adequate)
- Screed pipes (1 in. diameter electrical conduit works well for screeding bedding sand)
- Straight screed board (2x4 or aluminum screed)
- Paver splitter or rented wet-cut tile saw (for cutting pavers to fit edges)
- Angle grinder with diamond blade (tight cuts)
- Polymeric jointing sand
- Plastic or steel edge restraint and 10–12 in. galvanized spikes
Concrete work (Level 3 slab pours)
- Rented concrete mixer or order a ready-mix truck (for anything over 1 yard, ready-mix is almost always the better call)
- Bull float and hand float
- Concrete screed (2x4 or aluminum screed board)
- Concrete edger and groover
- Circular saw with diamond blade or rented concrete saw (control joints)
- Concrete sealer and roller
- Plastic sheeting or burlap (curing cover)
Decking and composite work
- Circular saw or miter saw
- Drill/driver with appropriate bit set
- Post hole digger or rented power auger (for footings)
- Framing square and speed square
- Composite-specific hidden fastener clips (for gapless installs)
- Joist hanger hardware and structural screws
- Pencil, chalk line, and marking gauge
Finishing touches that complete the space
Once the surface is down, finishing touches are where the patio really becomes a usable outdoor room. String lights or low-voltage path lighting transform a patio at night for relatively little cost. A pergola or shade sail handles the sun problem that makes a lot of patios uncomfortable in summer afternoons. Raised planters along the edges add greenery without competing with the surface. If you're interested in building a pergola or adding an overhead structure, that's technically a separate permit question in most jurisdictions, check before you build. For furniture, measure the patio and leave at least 3 ft of clearance around dining sets for comfortable movement.
Maintenance: what keeps each surface looking good
The patio you built deserves a maintenance plan, even if it's a minimal one. Pavers need joint sand topped up every 2–4 years and occasional re-leveling if a section settles. Concrete slabs should be sealed every 2–3 years; re-seal stamped or stained concrete more frequently if it sees heavy weather. Wood decking needs cleaning and re-sealing or staining every 1–2 years, skip this and you'll be replacing boards within a decade. Composite decking earns its higher price tag by needing very little: an annual wash with soap and water is usually all it needs. Gravel patios need edging maintained and fresh material added every year or two as it migrates or compacts.
Common problems and how to troubleshoot them
- Pavers sinking in one spot repeatedly: The bedding sand layer is too thick (over 1–1.5 in.) or the base aggregate wasn't compacted properly. Lift the affected area, re-compact the base, re-screed to exactly 1 in. of coarse sand, and re-lay.
- Concrete slab cracking randomly: Control joints were spaced too far apart or weren't cut deep enough. The rule of thumb is joints every 8–12 ft for a 4 in. slab, cut to 1 in. depth. Isolated random cracks under 1/4 in. can be filled with polyurethane caulk or crack filler and the surface resealed.
- Water pooling near the house after a new patio: The surface wasn't graded at 2% minimum away from the foundation. This is a serious issue — it can cause foundation water intrusion. Fix it by breaking up and re-grading the affected section, or by adding a channel drain at the appropriate point.
- Polymeric sand washing out: Usually caused by applying it on a wet surface or misting too heavily during activation. Remove the loose sand, ensure the surface is dry, re-apply, and follow the manufacturer's misting instructions exactly.
- Frost heave every spring: Your base wasn't deep enough for your local frost depth, or you used poorly draining base material. In severe cases, full reconstruction with a deeper base is the only permanent fix.
- Composite decking discoloring or growing mold: Usually an airflow problem under the boards. Check that the joist spacing and end gap requirements from the manufacturer are met. Clean with a composite deck cleaner.
When to stop DIYing and call a pro
I'm a big advocate for doing your own work, but I'm also honest about the limits. If your soil inspection reveals severely expansive clay or fill soil with poor bearing capacity, a structural engineer or soils consultant is worth the consult fee before you build. If your drainage problem is connected to a grading issue that affects the entire yard or a neighboring property, that's beyond a solo DIY fix. If your project requires building footings that need to meet frost-line depth per local code and you've never poured footings before, a one-time consult or subcontract for that specific step can save the whole project. Electrical work for outdoor lighting always needs to meet local electrical code, some jurisdictions require a licensed electrician for any outdoor circuit. Know your limits, protect your investment, and be willing to bring in help on the specific piece that's outside your experience.
FAQ
How do I assess my existing patio to decide between a cosmetic refresh, partial repair/overlay, or full replacement?
Walk the patio and check for (1) surface cracks: hairline to 1/4 in. usually cosmetic; >1/4 in. suggests deeper issues. (2) Settlement/heave: measure vertical displacement — >1/2 in. across joints or slabs usually means subbase failure. (3) Widespread scaling/spalling: if >15–30% of area affected, replacement is likely. (4) Drainage: verify slope away from foundation (IRC recommends 6 in. fall in first 10 ft / ~5% or at least 2% within 10 ft); ponding indicates drainage problems. (5) Frost/soil indicators: heaving, repeated cracking, or nearby expansive-clay signs. (6) Edge restraint, joint stability, and vegetation intrusion. Use these thresholds plus photos, a tape measure, and a straightedge to decide: cosmetic refresh for surface stains/coat and small cracks; partial repair/overlay for limited localized settlement or isolated slabs/pavers; full rebuild for structural failure, large displacement, pervasive cracking, or when changing material/layout.
What decision framework should I use to choose the scope of work?
1) Define goals (appearance, function, load — pedestrian vs vehicle). 2) Inspect and classify condition (sound, limited defects, structural failure). 3) Match remedy to condition: cosmetic refresh (clean, reseal/stain, joint sand) for sound structure with surface issues; spot repair/leveling/overlay for localized depressions or a few uneven pavers; full replacement when subbase, drainage, frost action or widespread damage exists or when changing material/function. 4) Check budget/time/difficulty constraints and permit/regulation triggers (drainage changes, impervious-area increases, structural footings). 5) If uncertain, remove a 2–3 ft sample area to inspect base.
Which permits or inspections might I need before updating my patio?
Local requirements vary, but common triggers: enlarging patio footprint, changing drainage that affects foundations or stormwater, adding structures (pergolas, covered roofs, significant electrical lighting), or building attached slabs with footings. Check local building department for permit thresholds and impervious-surface/stormwater rules. Use IRC guidance for drainage (slope away from foundation) and local frost-depth rules for slab/footing depth. For permeable installations, municipal stormwater programs often have specific design/inspection requirements.
How do drainage and frost depth affect my patio update design?
Ensure patio surface slopes away from structures: at least 6 in. fall in first 10 ft (~5%) or minimum 2% within 10 ft per IRC. For regions with frost, design to avoid frost heave: either provide a frost-protected depth for footings/slabs (local code/frost depth map) or use a flexible paving system with a well-draining, non-frost-susceptible base and proper edge restraint. For permeable pavements, include a stone reservoir and optional underdrain per EPA guidance and plan for vacuum maintenance to prevent clogging.
What are the material options, pros/cons, and rough installed cost ranges?
- Concrete slab: pros—economical, durable, low maintenance; cons—can crack, needs control joints; cost ~$5–$30/ft2 installed. - Concrete pavers: pros—repairable, aesthetic variety, permeable options; cons—requires good base, can shift if base fails; cost ~$8–$28/ft2 installed. - Brick pavers: pros—classic look, durable; cons—higher material cost, can stain; cost varies upward of pavers range. - Natural stone: pros—premium look, durable; cons—high cost, irregular installation; cost varies widely. - Gravel: pros—cheap, good drainage; cons—shifts, weed control, not furniture-friendly; material-only low cost, installed moderately cheap. - Wood deck: pros—elevated/higher seating, warm feel; cons—maintenance, rot/termite risk; composite decks cost much higher. - Composite decking: pros—low maintenance; cons—higher material cost, requires framing. For accurate budgets, check local suppliers and factor in demo, base, drainage, and labor; national installed ranges vary widely by region and complexity.
What are realistic time, difficulty, and cost estimates for common update scopes?
- Cosmetic refresh (clean, seal/stain, joint sand): Skill—easy; time—1–3 days for typical patio; cost—$50–$800 (cleaners, sealers, joint sand). - Re-level pavers / spot base repair: Skill—moderate; time—1–3 days per affected area; cost—$200–$1,200 depending on extent. - Overlay (thin concrete overlay or paver overlay): Skill—moderate to advanced; time—2–5 days; cost—$10–$25/ft2 material + labor. - Full demolition and rebuild (basic concrete or pavers): Skill—advanced (DIY capable but labor intensive); time—3–10+ days depending on size and curing; cost—$5–$50/ft2 installed depending on material and region. Adjust for complexity, drainage work, retaining walls, and permitting.
How to Rebuild a Patio Step by Step DIY Guide
Step-by-step DIY guide to rebuild a cracked or uneven patio, including base prep, drainage, finishes, costs, and pro cal