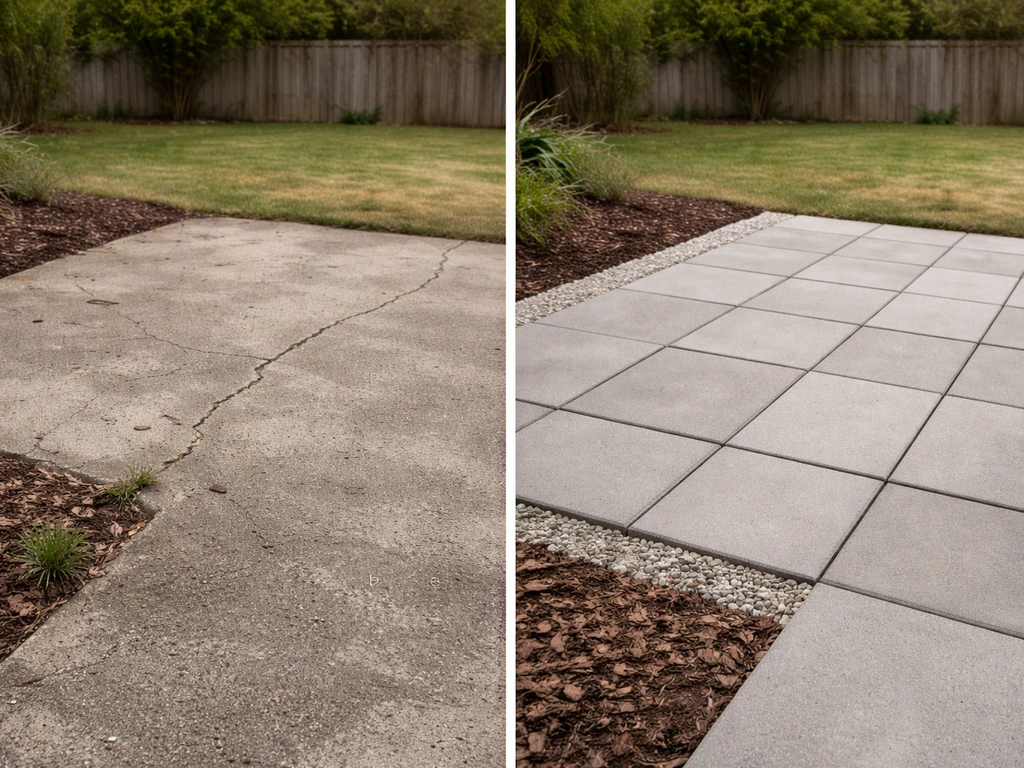
Rebuilding a patio means tearing out the old surface, fixing whatever went wrong underneath (usually a bad base or poor drainage), and starting fresh with properly compacted gravel, correct pitch, and a new surface material. Whether you're dealing with cracked concrete, rocking pavers, or a sunken mess that pools water every time it rains, the process follows the same core sequence: diagnose the problem, demo the old patio, rebuild the base correctly, and install your chosen surface with the right finishing details. Most DIYers can handle this over a long weekend to a couple of weekends depending on size and material.
How to Rebuild a Patio Step by Step DIY Guide

Nolan Lennox
8 Jul 2026
Is it actually a rebuild, or can you get away with repairs?
This is the first question worth answering honestly, because a full rebuild is real work and real money. The difference usually comes down to whether your base is failing or just your surface. If you're wondering how to update a patio instead of fully rebuilding it, start by deciding what needs fixing versus what you can upgrade how to update patio.
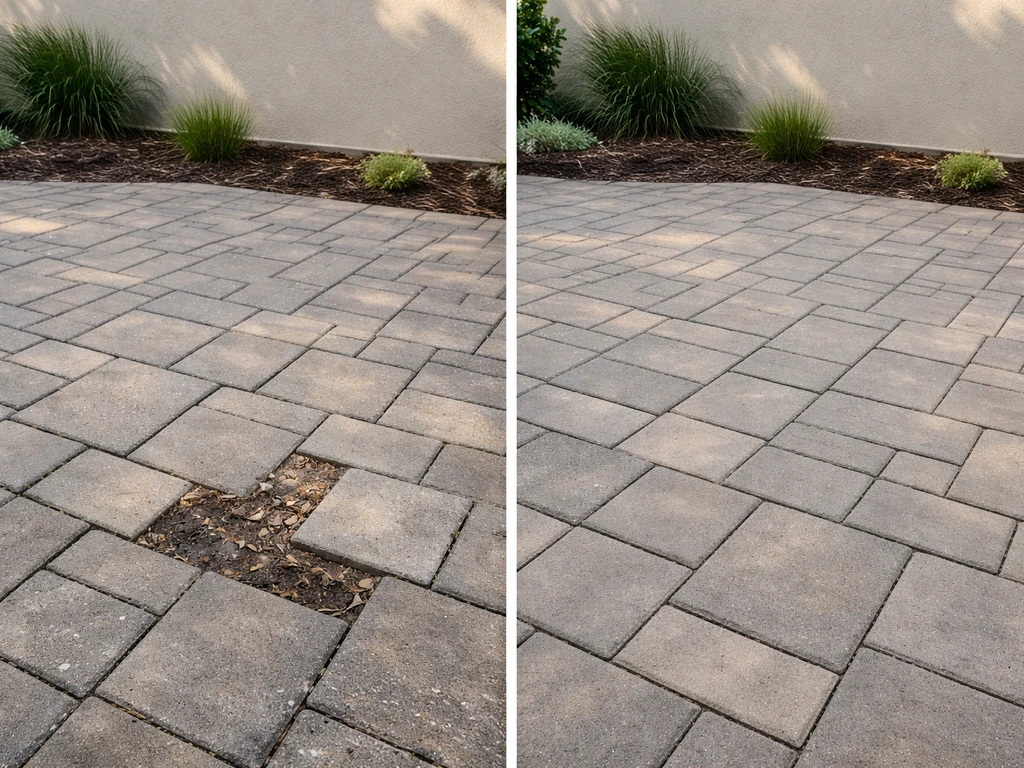
If you have a few cracked or chipped pavers, a small section of lifted brick, or a single crack running across a concrete slab that hasn't shifted vertically, you're probably looking at a surface repair. Pull the bad pieces, reset them, fill the crack, done.
But when you see multiple blank" rel="noopener noreferrer">pavers rocking or loose, sections of the patio that have settled or heaved at different levels, water pooling against the house, or the same problem keeps coming back after you fix it, the base is telling you something. If you're planning how to revamp patio, use these sections to decide whether you actually need repairs, then follow the rebuild steps that prevent the same failure from coming back.
Poor drainage and improperly compacted crushed stone leave voids underneath that grow with every freeze-thaw cycle. Each winter, water enters those voids, freezes, expands, and pushes things around a little more. [Spalling on a concrete slab is another freeze-thaw warning sign](https://www. cptechcenter.
org/wp-content/uploads/2019/01/concretepvmtdistressassessmentsandsolutionsguidewcvr. pdf) that water is already working its way through.
The honest test: if you pull up a few pavers and the sand or stone underneath looks disturbed, washed out, or soft, you need to rebuild the base, not just the surface. If the base looks solid and uniform and the problem is isolated, targeted repairs may hold. When the whole patio repeatedly loses levelness or holds water no matter how many times you patch it, you're throwing good money after bad without a full rebuild.
If your patio repeatedly loses levelness or holds water after patching, that points to deeper base and drainage problems that make replacement more likely. If you want to go beyond repairs and truly improve how your outdoor space works, this guide walks through how to transform a patio from the base up.
| Symptom | Likely cause | What it needs |
|---|---|---|
| One or two cracked pavers, no shifting | Surface wear or impact | Surface repair or replacement |
| Multiple rocking or sunken pavers | Base/bedding failure | Full or partial rebuild |
| Water pools on the patio surface | Drainage pitch issue (base or design) | Re-grade or full rebuild |
| Concrete slab cracked and heaved | Freeze-thaw + poor base | Full slab removal and rebuild |
| Persistent weed growth through joints | Bedding sand washing out | Base rebuild + better joint fill |
| Soft or spongy feel underfoot | Compaction failure | Full rebuild |
Plan before you dig: measurements, layout, drainage, and materials
Spend real time here. The planning stage is where most DIY patio rebuilds either set up for success or repeat the original mistake.
Measure and lay out the new footprint
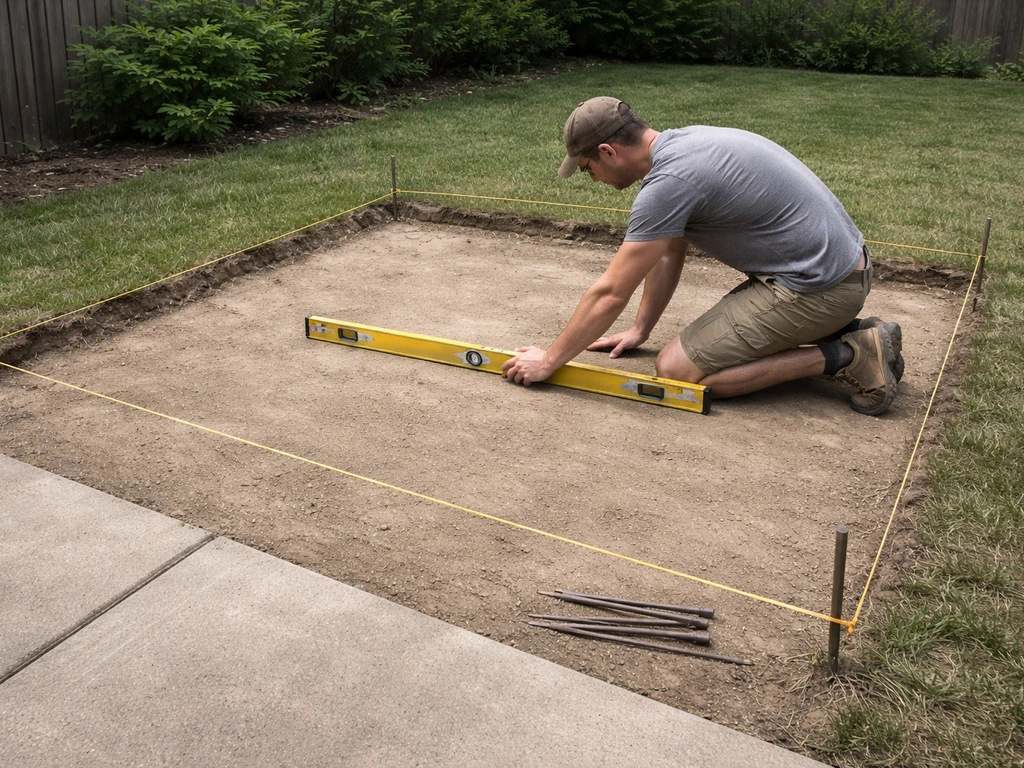
Measure your existing patio and decide if you're rebuilding it at the same size or changing the shape. If you are wondering how to upgrade patio results without repeating the same problems, use these same layout and grade checks as your upgrade plan. Use stakes and mason's line to mark the perimeter. A square or rectangular patio is easier to build and calculate materials for. Use the 3-4-5 triangle method to check your corners are square: measure 3 feet along one side, 4 feet along the adjacent side, and the diagonal should be exactly 5 feet. If it isn't, adjust your layout lines.
Drainage pitch is non-negotiable
This is the single thing most failed patios got wrong. Every patio surface needs to slope away from the house at a minimum of 1/8 inch per foot, with 1/4 inch per foot being more reliable in areas with heavy rainfall or clay soil. That means a 10-foot-deep patio should drop between 1.25 and 2.5 inches from the house edge to the far edge. You set this pitch in your base layer, not as an afterthought at the surface. If you're rebuilding on a slope, you may need to step the base or add a channel drain. Mark your target grade on your stakes before you ever break ground.
Permits
Most municipalities don't require a permit for a ground-level patio replacement on a residential property, especially if you're staying within the same footprint. But if you're expanding the footprint significantly, building close to a property line, adding a roof or pergola, or live in a historic district or HOA-governed neighborhood, check with your local building department first. The call takes 10 minutes and is worth it.
Choose your surface material
Your material choice affects how deep you excavate, what base layers you need, and the finishing steps. Here's how the common options stack up:
| Material | Base depth (total excavation) | Typical cost (installed DIY) | Durability | Skill level |
|---|---|---|---|---|
| Concrete (poured slab) | 4 in. gravel + 4 in. concrete (8 in. total) | $4–$8 per sq ft | High, but cracks are permanent | Intermediate–Advanced |
| Pavers or brick | 4–6 in. compacted gravel + 1 in. bedding sand | $6–$15 per sq ft | Very high; individual pieces replaceable | Beginner–Intermediate |
| Gravel or crushed stone | 4 in. compacted base + 2–3 in. surface stone | $1–$3 per sq ft | Moderate; needs occasional raking | Beginner |
| Natural stone (flagstone) | 4–6 in. gravel + 1 in. sand or mortar | $10–$25 per sq ft | Very high with proper base | Intermediate |
| Composite or wood decking | Concrete footings or post frame | $15–$35 per sq ft | High (composite) / Moderate (wood) | Intermediate–Advanced |
For most DIYers doing a ground-level rebuild, pavers or brick are the sweet spot: forgiving to install, easy to level and adjust, and you can pull and replace individual pieces later if something shifts. Gravel is the easiest and cheapest, but not ideal for a primary entertaining space. Poured concrete is the most permanent but least forgiving: if your base has any remaining issues, the slab will crack. Wood and composite decks require a framed structure and are really a different project, but included here because some homeowners transition from a slab to a low deck during a rebuild.
Demolition and site prep
Before swinging a sledgehammer, call 811 (in the US) to have underground utilities marked. Water lines, gas, and electrical conduit can all run under or near a patio. This is free and takes a couple of days to schedule, so do it early.
Tear out the old surface
For pavers or brick, start at an edge and use a pry bar or flat spade to pop pieces up. Work systematically and stack usable pieces if you plan to reuse them. A concrete slab requires a rented electric demolition hammer (jackhammer) or a rented concrete saw to score it into manageable chunks first, then the jackhammer to break them apart. Don't use a regular rotary hammer for full slab demo: you need a proper demolition hammer with a chisel bit. Budget for this rental, roughly $70–$120 per day depending on your area.
Haul the debris
Concrete and broken pavers are heavy. A typical 200-square-foot concrete slab at 4 inches thick weighs roughly 2 tons. You have a few options: rent a dumpster (usually $300–$500 for a small residential bin), haul to a local transfer station yourself with a truck and trailer, or hire a junk removal company. Some areas have concrete recycling facilities that take it for free or low cost if you haul it yourself. Figure out your disposal plan before demo day so you're not sitting on a pile of rubble.
Ground conditioning after removal
Once the old surface and base are out, look at what you're working with. If you see soft, spongy, or organic-rich soil (lots of roots, black organic matter), excavate until you hit stable mineral soil. Cut out any remaining roots. If you have clay soil that holds water, you may want to add a layer of landscape fabric before your gravel base to separate the clay from the drainage stone (this helps prevent migration over time). In extreme cases with very wet or soft ground, a French drain or perforated pipe along the downhill perimeter edge can redirect water before it ever gets under the patio.
Build the base the right way this time
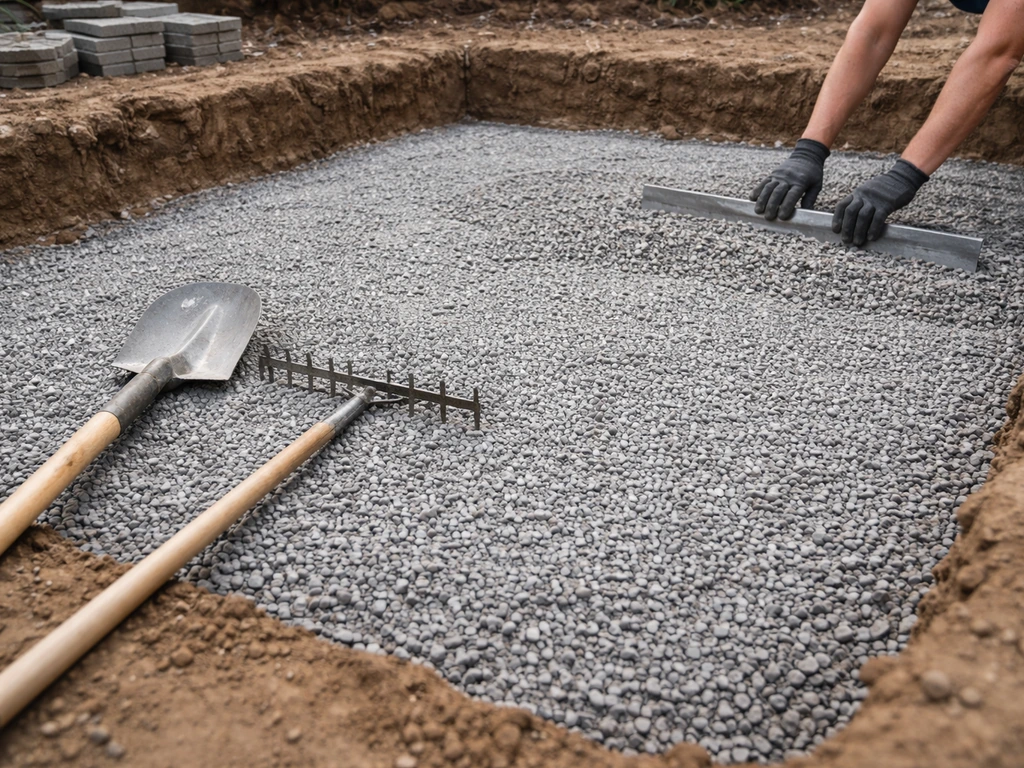
This is the section where the old patio went wrong, and where you're going to fix it. The base is not optional prep, it is the patio. Everything above it only stays level and stable if the base is right.
Excavation depth
Your total excavation depth depends on your surface material. For pavers on a typical residential patio with moderate traffic, you need 4–6 inches of compacted gravel base plus 1 inch of bedding sand plus the paver thickness (typically 2.375 inches for standard concrete pavers). That puts your total dig at roughly 8–10 inches below finished grade. For a concrete slab, you need 4 inches of compacted gravel plus 4 inches of concrete, so 8 inches total. For a gravel patio, 4 inches of compacted base plus 2–3 inches of surface material works well in most climates. In cold climates with deep frost lines, some builders go deeper on the base (6–8 inches of compacted gravel) to reduce heave risk.
Compact in lifts, not all at once
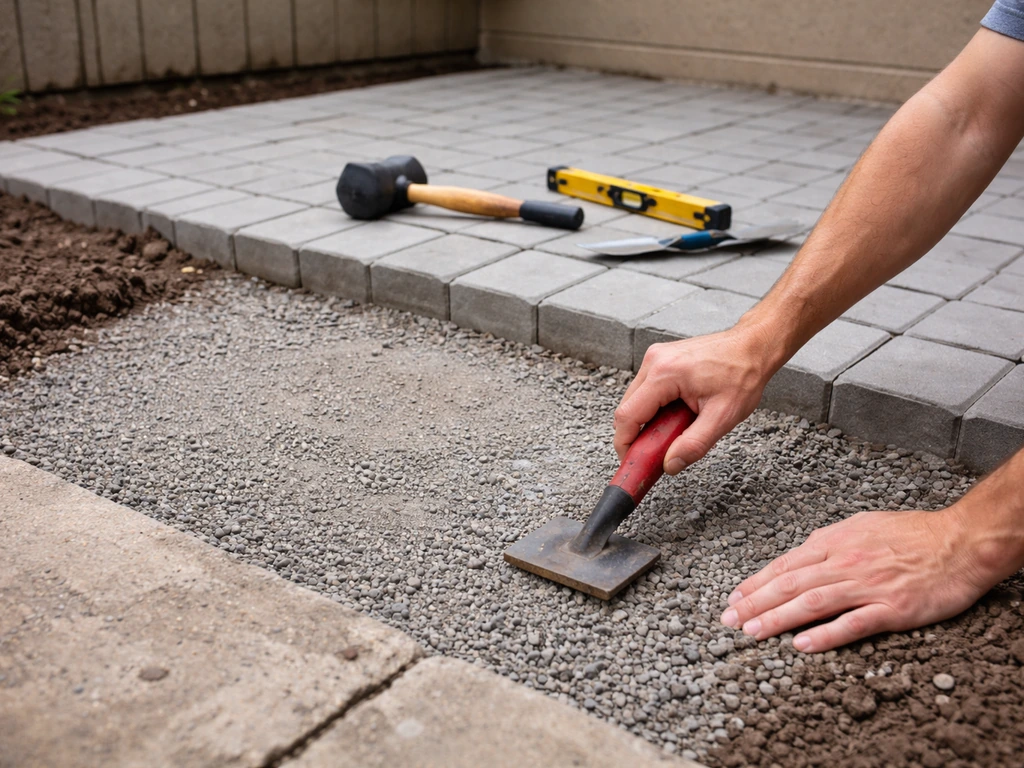
The single biggest base mistake is dumping all your gravel in and compacting it once. Plate compactors (rent for about $60–$90 per day) only compact effectively 2–3 inches deep per pass. Fill and compact in lifts: add 2–3 inches, compact thoroughly in two perpendicular directions, then add the next lift. Use crushed stone (also called crusher run or compacted gravel) with fines rather than round pea gravel, because angular crushed stone locks together under compaction. Round stone never truly compacts and stays loose.
Check your pitch as you build
Don't wait until the surface is going in to check drainage slope. After each compacted lift, check pitch with a long level and measure from your reference stakes. It's easy to fine-tune base grade; it's frustrating to redo screeded sand or reinstall a hundred pavers. Run your pitch strings again as a final check before laying bedding sand.
Edge restraints
For paver and brick installations, plastic edge restraints (sometimes called paver edging) spike into the compacted base around the perimeter and hold the pavers from spreading outward. Without them, pavers at the edges migrate over time and the whole field loosens. Install your edge restraints after the base is compacted and before you add bedding sand. For concrete, your forms serve as the restraint. For gravel patios, metal or composite landscape edging or a row of larger boulders/bricks can define the border and keep stone from escaping onto the lawn.
Screeding the bedding sand
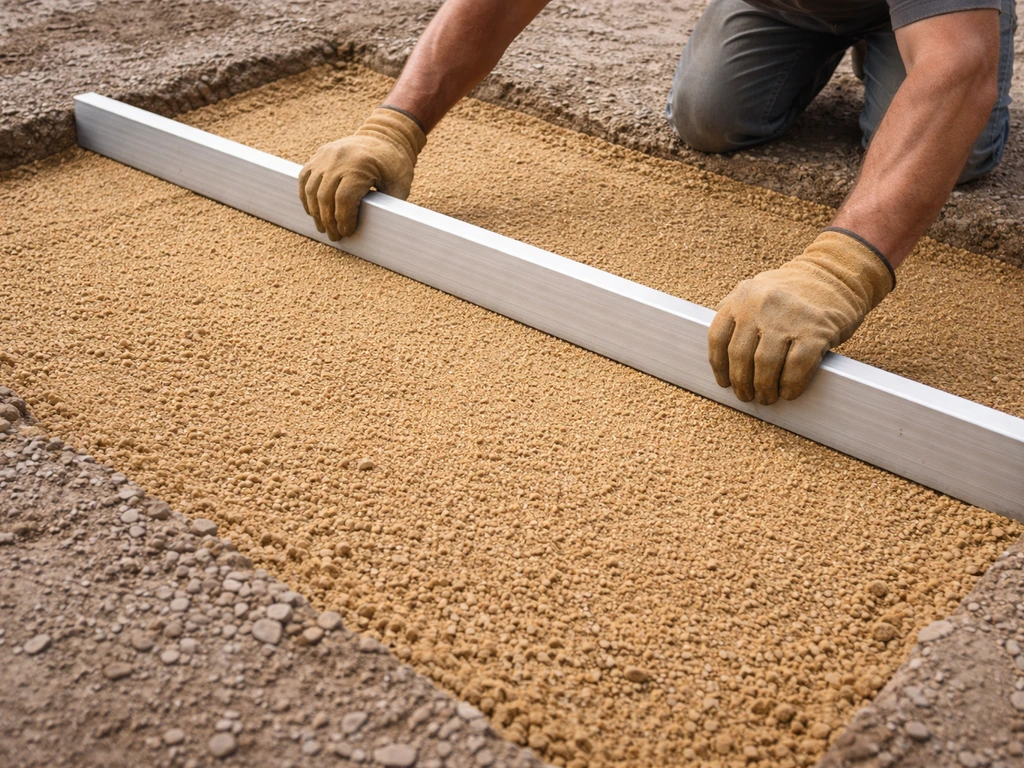
For paver installations, the final layer before setting pavers is 1 inch of coarse bedding sand (also called concrete sand or sharp sand, not mason's sand or play sand, which are too fine). Set two 1-inch-diameter pipes or conduit across the base as screed rails, pour sand over the area, and drag a straight 2x4 across the pipes to create a perfectly flat, consistent 1-inch bed. Remove the screed rails and fill those channels with sand by hand. Don't walk on screeded sand or disturb it before laying pavers.
Installing your chosen surface
Pavers and brick
Start at a fixed, straight edge (usually the house wall or a chalk line) and work outward. Lay pavers with consistent joint spacing using plastic spacers or by eye (most contractors aim for 1/16 to 1/8 inch joints). Set each paver down straight, don't slide it, as sliding disturbs the sand bed. Use a rubber mallet and a small level to tap pavers flush to neighbors. Every 10–15 square feet, check across the field with your long level both for flat and for maintaining your drainage pitch. Run a plate compactor over the finished paver field (with a rubber or foam pad on the plate to avoid scratching) to seat everything firmly into the sand.
Poured concrete
Set your forms to your finished grade and pitch. For residential patios, 4-inch slab thickness is standard. If you're parking a vehicle on it, go 5–6 inches. Add a layer of wire mesh or rebar on chairs (small plastic spacers that hold the reinforcement centered in the slab) before pouring. Place your concrete and screed to the form edges, then float smooth. Expansion joints every 10 feet in each direction are critical: use a groover tool to score control joints while the concrete is still workable, or place foam expansion joint strips between sections before pouring. These joints give the slab a planned place to crack rather than cracking randomly.
Gravel and crushed stone
Once your compacted base is in and edging is installed, spread your surface gravel to a 2–3 inch depth and rake level. Pea gravel (3/8 inch), decomposed granite, or crushed limestone are popular surface choices. A layer of landscape fabric under the surface material (over the compacted base) reduces weed pressure. Gravel patios need occasional raking to redistribute displaced stone and a top-off every few years as material compacts down or migrates.
Wood and composite decking
If you're transitioning from a ground-level slab to a low deck, the approach changes significantly. You'll need concrete footings (either poured tube footings or precast deck blocks for very low structures) to support the frame. Rim joists and field joists are typically pressure-treated lumber at 16 inches on center for composite, or 12 inches on center for heavier hardwoods. Leave 1/8 inch gaps between composite boards for expansion (manufacturers vary, so read the specific product spec). Composite decking expands and contracts with temperature, and boards installed tight will buckle in summer. Use hidden fastener clips for a clean surface and follow the manufacturer's minimum joist spacing requirements because not all products are rated for the same spans.
Finishing details that actually matter
Joint filling for pavers
After the pavers are seated and compacted, spread polymeric sand over the surface and sweep it into the joints with a push broom. Polymeric sand contains a binder that activates with water and sets firm, resisting erosion and weed growth much better than plain sand. Blow off or carefully sweep excess sand off the paver faces before wetting.
Wet the surface gently with a fine mist spray (don't blast it or you'll wash sand out of the joints) in two passes about 15 minutes apart. Let it cure for 24 hours before foot traffic. This is one finishing step that's really worth doing right, as plain sand washes out and becomes one of the causes of the bedding failures you're rebuilding to fix.
Sealing
Sealing is optional for most paver and concrete patios, but it does extend life and simplify cleaning. For concrete, a penetrating silane or siloxane sealer applied within the first few weeks after curing helps reduce water infiltration and slows freeze-thaw damage. For pavers, a paver sealer can enhance color and help hold polymeric sand in place. Wait at least 90 days after installation before sealing pavers to allow efflorescence (white mineral bloom) to work out naturally. Apply sealer only to a clean, dry surface.
Final cleanup and inspection
Remove all excess sand and debris from the patio surface and the surrounding lawn. Check that all edge restraint spikes are fully driven and the edging is flush or just below surface. Walk the entire patio and step firmly on each section: nothing should rock, click, or feel soft. Lay your 4-foot or 6-foot level across multiple directions and confirm you're holding that 1/4-inch-per-foot drainage slope. Run water from a garden hose at the house wall and watch where it goes: it should sheet off cleanly toward the yard, not pool anywhere on the surface.
Costs, tools, timeline, and when to bring in a pro
Realistic cost ranges for a DIY rebuild
For a typical 200-square-foot patio rebuild, here's a rough budget breakdown depending on material:
| Material | Materials cost | Tool/equipment rental | Disposal | Total DIY estimate |
|---|---|---|---|---|
| Pavers/brick | $600–$1,800 | $150–$250 | $300–$500 | $1,050–$2,550 |
| Concrete slab | $400–$900 | $200–$350 | $300–$500 | $900–$1,750 |
| Gravel/crushed stone | $200–$500 | $100–$180 | $300–$500 | $600–$1,180 |
| Composite deck (low) | $1,500–$4,000 | $100–$200 | $300–$500 | $1,900–$4,700 |
These figures assume you're doing all the labor yourself and renting equipment locally. Professional installation typically runs 2–4x the DIY material cost depending on region and complexity, so the savings from a solid DIY rebuild are real.
Tools checklist
- Measuring tape, stakes, and mason's line
- 4-foot or 6-foot level (longer is better for checking pitch over distance)
- Plate compactor (rent)
- Demolition hammer / jackhammer for concrete (rent)
- Flat spade and round-point shovel
- Wheelbarrow
- Hand tamper (for tight spots the plate compactor can't reach)
- Screed rails (1-inch conduit works well) and a straight 2x4 for screeding
- Rubber mallet
- Paver saw or angle grinder with diamond blade for cuts
- Push broom and leaf blower (for polymeric sand cleanup)
- Safety glasses, hearing protection, work gloves, knee pads
Timeline expectations
A 200-square-foot paver rebuild with one helper typically takes two full weekend days: half a day for demo and disposal logistics, a full day for excavation and base work, and a day for paver installation and finishing. If you want a deeper walkthrough, see our full guide on how to replace a patio from start to finish. A concrete pour adds a curing window of at least 7 days before furniture goes on (28 days for full strength). Gravel is the fastest: you can feasibly finish a gravel patio in a single long day once demo is done. Don't rush the base compaction phase to save time. That's where every shortcut eventually shows up as a failure.
When to stop and call a professional
There are a few situations where the honest move is to bring in help. If you start excavating and find buried utilities that weren't marked (stop immediately and call 811 again), very unstable soil or an old septic structure, significant slope that would require retaining walls or engineered drainage, or a patio attached to the house foundation that may be affecting drainage into the crawlspace or basement, you're beyond straightforward DIY territory. Similarly, a full concrete pour on a large or irregularly shaped patio is genuinely hard to execute well without experience: finishing concrete before it sets requires speed, the right tools, and practice. If the rebuild is part of a broader renovation that includes structural changes, those changes almost always need permits and inspections.
For everything else, a standard ground-level patio rebuild is well within reach for a patient, methodical DIYer. The key is not rushing the base work, checking pitch at every layer, and choosing a surface material that matches your skill level and how you want to use the space. If you're also thinking about partially refreshing or updating an existing patio rather than a full tear-out and start-over, some of those targeted approaches can save significant time and money where the base is still fundamentally solid. If you’re wondering how to redo a patio without repeating the same drainage problems, focus on base prep first, then rebuild the pitch before you choose your surface refreshing or updating an existing patio.
FAQ
How do I tell if my patio problem is bad drainage versus a failing base?
After you remove a small section of surface, pour a slow trickle of water at the excavation area. If water quickly sinks unevenly, puddles in specific spots, or you see channels cut through the base, the drainage path or subgrade is compromised. If the water drains but the area later settles or rocks, the base may not have been compacted in lifts or may be made with the wrong stone.
Can I rebuild a patio without fully removing the old base?
Usually no, if the old base is soft, disturbed, or has voids from washed-out stone. You can sometimes keep stable, uniformly compacted base only when it stays firm after removal of the surface layer and when you can still achieve the required total depth and pitch. If you cannot remove and rebuild to the correct grade, you risk locking in the old failure.
What pitch should I target if my patio is near a driveway or garage slab?
Keep the slope consistent away from structures, but avoid draining onto slopes that already direct water toward foundations. In practice, you may need a slightly steeper pitch in the first few feet closest to the building, then a gentler pitch further out, as long as the overall fall still meets the minimum away-from-house requirement.
Do I need landscape fabric under the gravel base?
Fabric can help when you have clay subsoil because it reduces migration of fines into drainage stone, which can keep the base from pumping and turning soft over time. However, it is not a substitute for correct excavation to stable mineral soil or for proper compaction in lifts. If you use it, keep fabric seams overlapped and avoid wrinkles that create weak spots.
How deep should I excavate if I’m unsure of my existing patio build-up?
Use finished height and pitch as your starting point. Dry-fit a test section by marking your target finished surface elevation and then calculate backward: excavation depth must allow for base thickness, bedding sand where required, and the final surface thickness, plus room for edge restraints. If you end up short by even an inch or two, you often cannot correct grade without re-excavation.
Should I compact with a plate compactor or a roller, and how do I know it’s enough?
A plate compactor is effective for typical residential patio lifts, but only if you compact in 2 to 3 inch layers. You can confirm readiness by checking that the surface of the compacted lift is firm and does not show tire or boot impressions after repeated stepping, and by ensuring the base top stays at the planned grade when you re-check with a long level.
What’s the safest way to reuse pavers during a rebuild?
Only reuse pavers if they are intact, not spalling, and not significantly out of plane. Before reinstalling, sort them by thickness and replace any pieces that wobble when placed on a flat surface. Also, clean out old bedding sand fully, because residual fines can create high spots and force rework.
How do I avoid washed-out sand joints after installing pavers?
Use polymeric sand, broom it fully into joints, and wet lightly with a fine mist rather than blasting. Wet in multiple passes and let it cure for the full recommended time before foot traffic. Also, make sure edges are restrained and the patio slope is correct, because water that flows over the surface instead of through joints will quickly erode bedding.
When should I seal a concrete patio or paver patio?
Concrete generally needs time to cure before sealing, and you should avoid sealing while moisture issues or efflorescence are still present. For pavers, wait until installation dust and mineral bloom have cleared before applying sealer. If you seal too early, trapped moisture can worsen staining and reduce long-term performance.
Can I install a patio over existing concrete slab or old pavers?
A rebuild typically requires removal unless the existing base is proven stable, level, and thick enough to achieve the needed drainage slope and surface build-up. If you tile or overlay over a slab without correcting pitch, you can end up with the same pooling and cracking patterns. If you see movement or spalling, assume the underlying problem remains.
What are common mistakes that cause pavers to rock or settle again?
Most failures trace back to not compacting the base in lifts, using the wrong stone (round rock instead of angular crusher run), skipping edge restraints, or disturbing screeded bedding sand before setting. Another frequent issue is inconsistent thickness from mixed pavers or uneven sand depth, which creates localized rocking even if the field looks straight initially.
Is a permit required if I’m replacing the patio in the same footprint?
Often it is not for simple ground-level replacements, but exceptions are common if you change impervious area calculations, expand the footprint, alter drainage patterns, build close to property lines, or are in an HOA or historic district. A quick call to your building department can also confirm setback rules for any new edging, steps, or drainage devices.
When should I stop DIY and bring in a pro for a patio rebuild?
Get help if you encounter buried utilities during excavation, if the subgrade is extremely wet or unstable, if you need engineered retaining walls or a complex drainage system, or if the patio is tied into a foundation where crawlspace or basement water is involved. Also consider a pro for large concrete slabs, because correct formwork, finishing, and joint placement require experience to prevent early cracking.
Next Article
How to Revamp a Patio: DIY Steps, Materials, Costs
DIY guide to revamp a patio: diagnose issues, plan drainage and layout, choose materials, prep subbase, level, finish, c