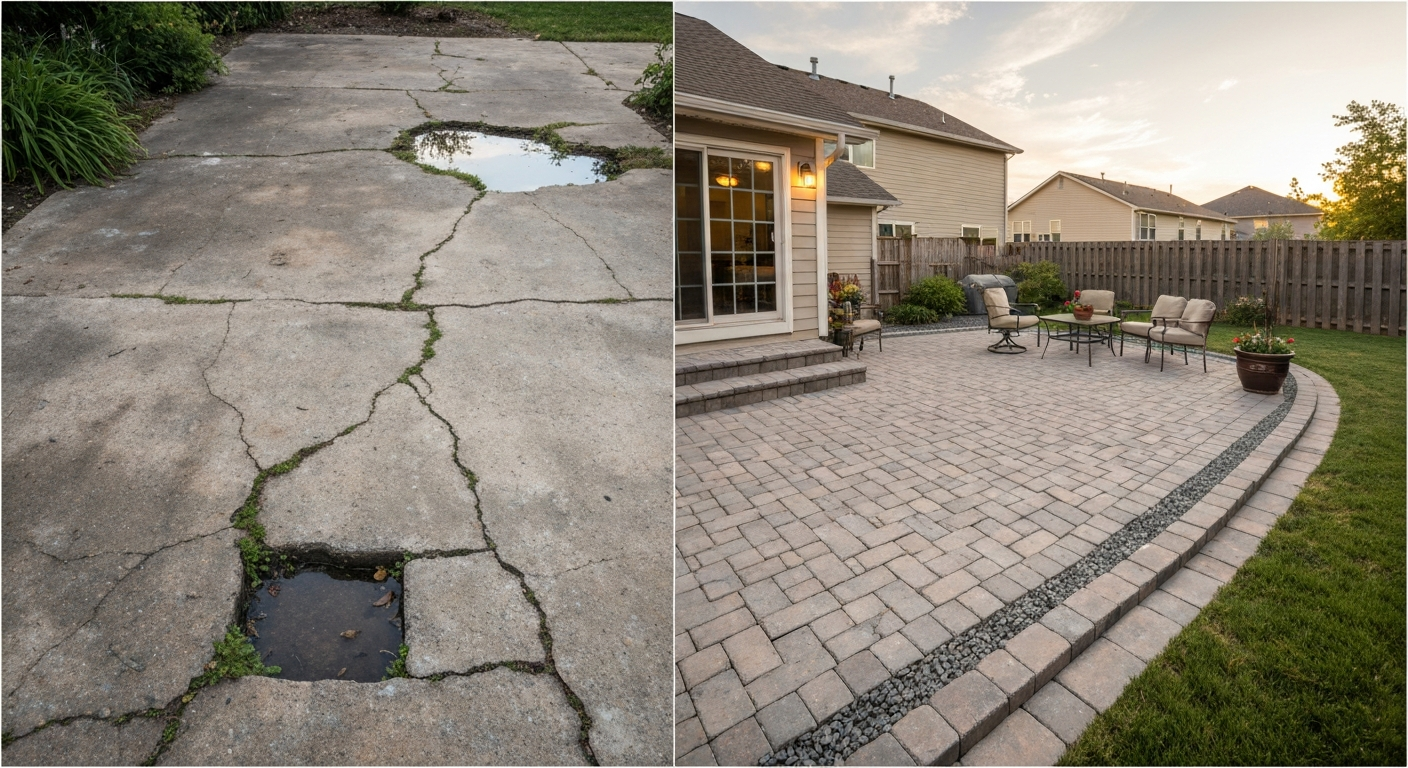
Making a patio stencil comes down to choosing the right material for your job, transferring your design accurately onto it, cutting it cleanly, and locking it in place before you paint or mark. For a decorative painted pattern on a concrete or wood deck, you're cutting thin Mylar or adhesive film with a utility knife. For a paver layout template, you're routing or jigsawing a rigid sheet of HDPE or plywood. Both are genuinely doable in a weekend with tools you likely already own, and the results hold up far better than freehand work.
How to Make a Patio Stencil: DIY Designs, Cutting & Use

Nolan Lennox
16 Jul 2026
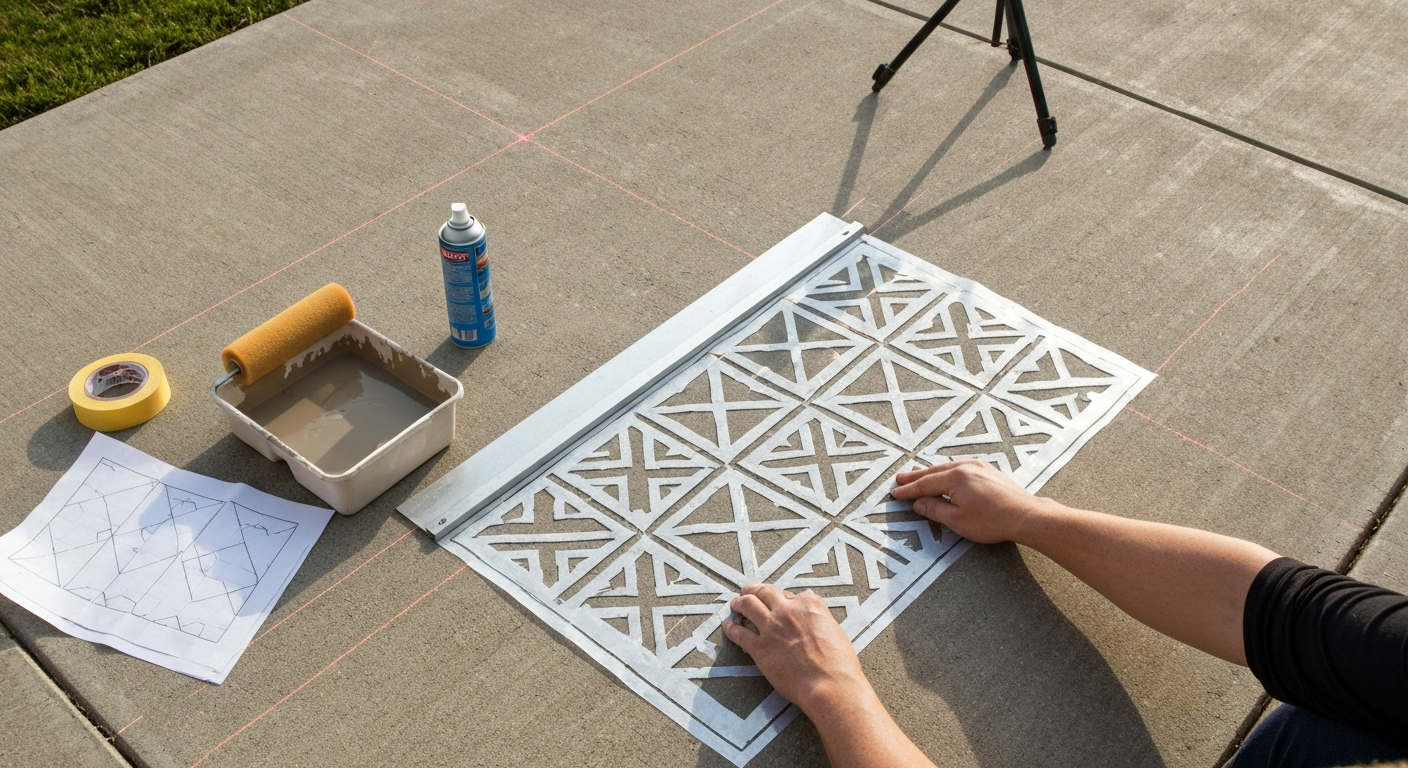
What patio stencils actually do (and which type you need)
Patio stencils fall into two completely different categories, and mixing them up wastes materials. The first is the decorative stencil: a thin, flexible sheet you lay flat on an existing concrete slab or wood deck and paint or stain through to create patterns, faux tile, medallions, or borders. The second is the layout template: a rigid or semi-rigid board cut to the exact shape and size of a paver, slab, or joint grid, used to mark cutting lines, position pavers consistently, or scribe joint locations before pointing.
Choose a decorative stencil when your concrete or wood surface is structurally sound but visually tired, or when you want a budget alternative to relaying with new pavers. Choose a layout template when you're installing or relaying pavers and need a repeatable gauge for joint widths, a cutting guide for irregular shapes, or a way to mark out a complex pattern before committing each stone to its final position. If you're relaying pavers from scratch, the template workflow ties directly into staking out your patio and establishing accurate reference lines from the beginning, which makes both tasks easier when you treat them as one process.
Stencil materials: what to buy and what to skip
I've tried most of these options on actual patios and the material choice really does make or break the result. Here's an honest breakdown.
| Material | Best for | Typical thickness | Durability / reuse | Cost (approx.) | Main drawback |
|---|---|---|---|---|---|
| Cardboard / card stock | Single-use test cuts and mockups | 1–3 mm | 1–3 uses before warping | Free / under $2 | Absorbs moisture, swells, bleeds paint |
| Mylar / PET film (standard) | Decorative paint/stain stencils | 100–250 μm (0.004–0.010 in) | 50–200+ uses indoors | ~$0.50–$1.50/sq ft | Thinner grades tear on rough texture |
| Mylar / PET film (UV-stable grade) | Outdoor decorative stencils | 150–330 μm | 100+ outdoor uses | ~$1–$2/sq ft | Slightly stiffer; harder to press into texture |
| Adhesive stencil film (e.g., Cricut Stencil Film) | Curved surfaces, textured concrete, one-room jobs | ~80–100 μm | Single-use to a few uses | ~$12–$20 per 12×48 in roll | Limited sheet size; fiddly on large areas |
| HDPE sheet (3–6 mm) | Rigid paver layout templates, outdoor use | 3–6 mm (1/8–1/4 in) | Hundreds of uses, weathers well | ~$2–$5/sq ft cut to size | Heavier; needs jigsaw or router to cut |
| Plywood (CDX / MDO / marine) | Large layout templates, temporary form work | 6–12 mm (1/4–1/2 in) | Good (MDO/marine) to limited (CDX) | ~$1–$3/sq ft | CDX degrades outdoors; splinters at cut edges |
For decorative work on outdoor concrete, UV-stable Mylar is the sweet spot: it handles moisture and concrete texture better than standard film, and a single well-cut stencil can cover an entire patio if you register it carefully between repeats. For paver layout templates, HDPE wins on longevity. It won't warp in rain the way CDX plywood will, and it cleans up with a hose. CDX is fine for a single-day layout job, but if you're templating a large patio over multiple sessions, budget up to MDO or HDPE. CDX (C-grade face/D-grade back with exterior glue 'X') is commonly sold at big‑box retailers and suitable for short‑term exterior formwork or templating, but for long‑term outdoor reusable stencils use pressure‑treated, MDO, or marine/film‑faced plywood per manufacturer guidance blank" rel="noopener noreferrer">Plywood grade and bond matter for outdoor templating.. Adhesive film (the Cricut-style roll product) is genuinely useful for textured concrete where a loose stencil would bleed under the edges, but the sheet size limits you to smaller accent patterns unless you tile multiple pieces. HEXIS lists HEX901 as a low‑tack transfer tape (~110 μm) and advises choosing low tack for large graphics and medium/high tack for small, detailed work blank" rel="noopener noreferrer">HEXIS lists HEX901 as a low‑tack transfer tape (~110 μm) and advises choosing low tack for large graphics and medium/high tack for small, detailed work..
Tools you'll need before you start cutting
You don't need all of these. I've organized them by task so you can shop just for what your project actually requires.
For decorative Mylar / film stencils
- Utility knife with snap-off or precision blades (OLFA-style 9mm or 18mm): replace blades constantly, a dull blade drags and tears Mylar
- Self-healing cutting mat (at least 18×24 in) to protect your work surface and keep cuts straight
- Metal straight edge or quilting ruler for geometric lines
- Fine-tip permanent marker or ballpoint pen to trace your design onto the film
- Spray adhesive (repositionable/low-tack, like 3M Repositionable Spray Adhesive 75) for tacking the stencil to the surface
- Low-tack masking tape or painter's tape for border control and hinge registration
- Dense foam roller (3/8 in nap or less) for applying paint without flooding the edges
- Stencil brush or small stippling brush for tight corners and textured surfaces
- Airless sprayer or spray can for large fills (with extra masking around the stencil perimeter)
For rigid HDPE or plywood layout templates
- Jigsaw with a fine-tooth or plastic-specific blade (Bosch T-series plastic blades for HDPE; fine-tooth wood blade for plywood)
- Circular saw or table saw for straight rips on plywood
- Router with a flush-trim or straight bit for cleaning cut edges
- Clamps (4–6 medium bar clamps) to hold the template material while cutting
- Tape measure, combination square, and marking knife or scriber
- Straightedge or chalk line for scribing long layout lines onto the template
- Stakes and mason's line for establishing reference lines across the patio area
- Laser level (line laser) for transferring elevations and grids over longer runs
If you're going the CNC route
A hobby CNC router (Shapeoko class or similar) can cut both Mylar and HDPE with excellent repeatability, typically in the 0.002–0.005 in positional range under good hold-down conditions. The catch is hold-down: Mylar sheets want to curl, and HDPE can shift without a vacuum table or aggressive tape-down. Use double-sided tape and corner clamps, run a shallow test pass before the full cut, and verify machine spec before expecting tight tolerances on pieces larger than your machine's travel envelope. Many makerspaces and local sign shops can CNC-cut a design file for $20–$60, which is often faster than DIY if you only need one stencil.
Design basics: scale, repeat, slope, and joint widths
Pattern scale is where most beginners go wrong. A tile pattern that looks great on your phone screen can feel microscopic on a 15-foot concrete slab. A good rule of thumb: stencil repeat blocks for a patio floor should be at least 12×12 in, and 18×18 in reads much better at normal viewing distance. Larger repeats also mean fewer repositioning steps, which reduces misalignment risk. Sketch your patio dimensions on graph paper first, divide by the repeat size, and confirm you get a whole or half-tile at each edge before you cut anything.
If your patio has a drainage slope (typically 1/8 to 1/4 in per foot for concrete, sloped away from the house), your stencil grid lines will drift out of square relative to the house wall if you use the wall as your only reference. Instead, establish a level baseline across the patio using batter boards and mason's line, then orient the stencil grid to that line rather than to the structure. This also keeps joint lines consistent with the paver layout if you're doing both decorative and templating work.
For paver templates, joint width is not optional to get right. ICPI guidance requires following paver manufacturer specs rather than eyeballing gaps. Most standard concrete pavers call for 2–4 mm joints filled with polymeric sand. Build your layout template to reflect the actual paver dimension plus the specified joint, so when you step the template across the bedding sand, the accumulated gap stays consistent rather than drifting. Even a 1 mm error per joint adds up to nearly an inch over 20 pavers.
Include alignment marks on every stencil: a crosshair at the center, tick marks at each edge midpoint, and corner registration notches. These let you align each repeat to a chalk line on the surface without measuring from scratch every time. On decorative stencils, I also add a small arrow indicating the direction of repeat, which sounds obvious until you accidentally rotate the stencil 90 degrees on a herringbone pattern at 6am.
Measuring and laying out your patio before placing a single stencil
Good stencil work starts on the ground, not on the cutting mat. Before you touch paint or position a template, your patio area needs reference lines. If you've already staked out your patio using batter boards and mason's line (the standard approach involving temporary H-shaped boards set outside the finished footprint and the 3-4-5 triangle method to square corners), those same lines become your stencil grid baseline. For step-by-step instructions on how to stake out a patio with batter boards, mason's line, and squaring methods, see our guide on how to stake out a patio. Run a chalk line across the longest dimension of the slab, centered or offset to create equal borders at both ends, and a perpendicular chalk line across the width. These two lines are your registration axes for the entire job.
For large patios, a line laser level speeds this up considerably. Set the laser on a tripod, level it, and project a reference line along the length of the patio. Snap a chalk line over it, then rotate 90 degrees for the cross axis. The laser is especially useful when the surface has a slope because the projected line gives you a true level reference independent of the surface grade, while your chalk line on the slab gives you the physical mark to follow when placing stencils.
Once you have your two chalk reference lines, dry-run the stencil placement by walking the entire patio with the stencil and checking how the last repeat falls at each edge. If the cut-off at the edge is less than half a tile or pattern unit, shift your centerline by half a repeat so the borders are equal and at least half-unit wide. This is much easier to fix at the planning stage than after you've painted six rows.
Designing small repeatable tile stencils
A repeatable tile stencil is a single sheet that you lift, shift, and re-register over and over across the patio. The key to making it work is a registration system that doesn't rely on measurement every move. Here's how I design mine.
- Decide the finished tile size including joint allowance. For example, a 12×12 in tile with a 3/16 in (5 mm) gap on each side means the stencil block is 12-3/8 in square.
- Draw the full repeat on paper at 1: 1 scale. Include the pattern, plus the border zone that overlaps with adjacent repeats (a 1/2 in overlap flap lets you align each shift without gaps).
- Transfer the design to your Mylar or film using a fine marker. For geometric patterns, use a metal ruler and a scriber. For curves, print the design from a computer at full scale and tape it under the film on a light box or glass pane.
- Mark crosshair registration lines on all four edges with a permanent marker before cutting. These are your alignment marks for matching to the chalk grid on the patio surface.
- Plan your cut layout on the film sheet to minimize waste. Nest repeats edge-to-edge with a small margin between, and cut all like shapes in a single pass before moving to the next shape type.
- Cut the interior openings first, then the outer edge of the stencil. This keeps the sheet stable while you're working the fine interior cuts.
- Test the stencil on a scrap board before taking it to the patio. Check for thin bridges (the uncut connectors between openings) and reinforce any that feel fragile with a thin strip of tape on the non-paint face.
Edge repeats deserve extra attention. At the border of your patio, you'll often have a partial tile. Cut a separate half-tile stencil at the start rather than trying to mask the full stencil. This gives a cleaner edge and saves you from awkward tape-masking sessions on every border tile.
Designing large single-piece templates for paver layouts
A full-area template is a different animal. Instead of a small repeatable tile, you're scribing the actual layout of an entire section or a complex paver shape directly into a rigid sheet. I use these most often for marking cut lines on natural stone pavers, templating irregular-shaped patios to confirm fit before excavation, and scribing joint lines on a screeded sand bed before placing pavers.
Start by cutting the template material (HDPE or MDO plywood) to the approximate dimensions of the section you're templating. For a standard 4×8 ft section, a half-sheet of plywood works well and is manageable by one person. Lay the template material on a flat work surface and mark the paver grid on it at full 1:1 scale: each paver outline, plus the joint width lines. Use a marking knife for plywood (cleaner line than pencil) and a scriber or sharp marker for HDPE.
Transfer your reference lines from the patio layout (the chalk lines from your batter board setup) onto the template using measurements from the reference corner. Drill a small registration hole at each layout intersection so you can push a pencil or marker through to transfer the grid point directly onto the paver surface or sand bed without measuring again. This is slower to build than a simple stencil but dramatically faster when you're actually placing 200 pavers.
For joint-line templates used before pointing, I cut shallow router grooves along the joint lines on the plywood face and drag a pencil or chalk line scribing tool along them. This takes about an hour to set up but lets me scribe an entire 8×8 ft section in under 10 minutes, which is the kind of time saving that makes a long day manageable.
Cutting your stencil: three methods from easy to precise
Hand cutting with a utility knife
This is the right method for Mylar, adhesive film, and thin cardboard mockups. The single most important habit is changing blades often: with OLFA snap-off blades, snap a fresh segment every 15–20 minutes of cutting. A dull blade doesn't just make ragged cuts on Mylar, it also grabs and pulls the film, distorting the shape. Use a metal ruler for straight lines and a French curve or circle template for arcs. Always cut into corners from both directions and let the blade meet in the middle rather than trying to pivot around a tight corner in a single pass.
Apply light, consistent pressure. Three light passes cut cleaner than one heavy pass, especially on 200+ micron Mylar. Keep your non-cutting hand flat on the film to prevent it from lifting, and work on a self-healing mat for consistent resistance under the blade.
Jigsaw or router on plywood and HDPE
For plywood, use a fine-tooth blade (10–12 TPI) and cut with the good face up if using a top-cutting jigsaw blade, or face down if the blade cuts on the upstroke. Clamp the sheet securely to sawhorses with at least four clamps before cutting. Feed the saw steadily without forcing it: forcing causes blade deflection and wavy cuts. Clean up the edges with a router and a flush-trim bit against a straight fence for any lines that need to be dead straight.
For HDPE, switch to a plastic-specific or metal-cutting blade (fine tooth, around 14–18 TPI). HDPE melts and re-fuses if you go too fast, gumming up the blade. A light feed rate and occasional pauses to let the cut cool prevent this. HDPE cuts cleaner than plywood on curves because there's no grain direction to fight. Lightly sand the cut edges with 120-grit to remove any burrs that could catch on pavers or drag on the surface.
CNC workflow for precision stencils
If you have access to a CNC router through a makerspace or friend, it's worth using for any design with repeating curves, fine lettering, or complex interlocking shapes that would take hours to cut by hand. Design your stencil in a vector program (Inkscape is free, Adobe Illustrator works well), export as SVG or DXF, and run it through your CAM software with a straight upcut spiral bit for Mylar and a downcut or compression bit for plywood. For HDPE, a single-flute upcut bit reduces heat buildup.
Hold-down is the CNC's biggest challenge with thin film materials. Double-sided carpet tape works for Mylar on a spoilboard, but lay it flat and smooth out all bubbles before running. For plywood and HDPE, use clamps at the corners and a screw at the center of any large waste area. Always run a test pass at 10% feed rate on a small corner to check depth-of-cut before committing to the full file. Even small hobby CNCs can hit 0.002–0.005 in repeatability under good conditions, which is more than accurate enough for patio stencil work.
Applying decorative stencils to concrete and wood decks
Surface prep and priming
Porous concrete will soak paint up unevenly and cause color variation through the stencil unless you prime first. A concrete bonding primer (Behr No. 880 is a common pick at big-box stores) seals the surface and gives the stain or paint a consistent base to bond to. Etch new concrete (anything under 28 days old or smooth-troweled) lightly with muriatic acid or a commercial etcher, rinse fully, and let it dry completely before priming. Sherwin-Williams's technical guidance for concrete surfaces makes the same point: outgassing from unsealed concrete pushes bubbles through decorative coatings, which shows up as pinholes right through your stencil work. Prime the whole surface, not just the pattern area, to keep sheen consistent.
Tacking down and painting
For loose Mylar stencils on smooth concrete, a light mist of repositionable spray adhesive on the back of the stencil tacks it down without leaving residue. Test on an inconspicuous area first. On textured concrete, press the stencil firmly into the texture with a rubber roller or brayer before painting: any gap between stencil and surface is where paint bleeds. For rough or highly textured surfaces, adhesive stencil film is a better choice than loose Mylar because it conforms to the texture rather than bridging over it.
Apply paint or stain with a dense foam roller in thin coats, rolling from the center of each opening toward the stencil edge (not away from it). This presses the paint inward rather than pushing it under the stencil edge. Two thin coats beat one thick coat every time for edge sharpness. Peel the stencil while the last coat is still tacky, not fully dry: pulling a fully dried stencil can lift the paint underneath along the edges.
Covering large areas and seaming repeats
Work in sections, completing one row at a time rather than jumping around. Register each new position to the chalk grid lines using your alignment tick marks. Butt adjacent repeats to each other and confirm the pattern matches before painting. If your stencil has a half-repeat overlap border, lay the overlap onto the previously painted section and verify alignment before tacking down. Small misalignments compound fast: check every three repeats against the chalk grid line rather than trusting the previous repeat alone.
Using layout templates for paver work
Paver layout templates work differently from decorative stencils: you're not painting through them, you're using them to transfer positions and mark cut lines. Lay the template on the screeded sand bed (or on the existing paved surface if you're relaying pavers), align it to your reference lines, and use a pencil, chalk, or scriber to mark each paver position and joint line. For detailed, step-by-step instructions on how to relay patio refer to the guide with ID d5d56581-831a-434f-add8-5f53eb893a78. For projects that combine paving and pet needs, see our guide on how to make a patio dog potty for tips on drainage and durable surface choices. If you're cutting pavers, trace the cut line directly from the template onto each paver before sending it to the angle grinder or wet saw.
For relaying pavers, the template is especially useful for maintaining consistent joint widths as per ICPI guidance: build the joint dimension into the template itself so that when pavers are placed to the template marks, the joints are automatically correct. This removes the guesswork from pointing later, since joints that are consistent in width are much easier to fill and compact evenly with polymeric sand. If you're thinking about joint widths and pointing at the same time, consistent stencil-based layout is one of the better ways to set yourself up for a clean finish. For the best way to point a patio, see our guide on best way to point a patio for step-by-step techniques and tips.
Weatherproofing, cleaning, and storing your stencils
Mylar stencils used outdoors should be stored flat or rolled around a wide-diameter tube (4 in minimum) to avoid sharp crease lines. Rinse them with water immediately after use and wipe clean with a damp cloth. Dried paint on a Mylar stencil still usually peels off with a gentle flex, but acrylic paint left overnight can stick permanently to the film. If you used spray adhesive on the back, clean the residue with rubbing alcohol or a spray adhesive remover before storing, otherwise the stencil will pick up dust and dirt in storage and stick unevenly on the next use.
HDPE and plywood templates need almost no maintenance beyond rinsing and drying. HDPE can be left outdoors without protection. CDX plywood templates should be stored off the ground and kept dry between uses or they'll swell and distort. Seal cut edges of any plywood template with exterior PVA or a quick coat of oil-based primer to extend life significantly. Stack flat with spacers if storing multiple sheets.
Troubleshooting the most common stencil problems
| Problem | Likely cause | Fix |
|---|---|---|
| Paint bleeding under stencil edges | Stencil not pressed flat, too much paint applied, overly thin paint | Press stencil firmly with brayer, use thick paint in thin coats, switch to adhesive film on texture |
| Pattern misalignment between repeats | Registration marks not used or chalk grid not checked frequently | Reset to chalk grid line every 3 repeats, use a longer straight edge to check alignment |
| Stencil deforming in heat or moisture | Wrong material (cardboard or thin standard Mylar outdoors) | Switch to UV-stable Mylar or HDPE for outdoor use, store in shade between uses |
| Torn or frayed cut edges on Mylar | Dull utility blade, too much force | Replace blade every 15–20 min of cutting, use multiple light passes |
| HDPE melting during jigsaw cutting | Too-fast feed rate or wrong blade | Use plastic-specific fine-tooth blade, slow feed, pause frequently to let cut cool |
| Template shifting during paver marking | Not staked or clamped to surface | Use corner stakes or clamps to hold template to sand bed before scribing |
| Uneven paint color showing through stencil | Unprimed porous concrete | Apply concrete bonding primer to full surface, allow full dry time before stenciling |
Realistic cost and time estimates
A single 18×18 in repeatable Mylar tile stencil costs around $2–$5 in material (one sheet of UV-stable Mylar film) and takes about 1–2 hours to design and cut by hand for a simple geometric pattern. A complex hand-cut design with interior curves can take 3–4 hours. CNC cutting at a makerspace adds $15–$40 in machine time but drops hand-cutting time to under 30 minutes of prep and setup.
A rigid HDPE paver layout template for a 4×8 ft section costs $12–$20 in material and 1–2 hours to mark and cut with a jigsaw. One template can be used for the entire patio by stepping it across sections. For a 200 sq ft patio, plan on 1 full day of stencil-based layout work to mark positions and scribe joint lines, and a second day for paver placement and compaction. Compare that to freehand layout with a tape measure, which takes about the same time but with much higher error rate.
Decorative stenciling a 200 sq ft concrete patio takes one person 6–10 hours of actual application time (not counting prep and priming), spread over two days to allow primer and first-coat dry time. Material cost for paint or stain runs $40–$80 depending on product, and stencil material is $15–$30 for enough UV-stable Mylar to cover the project with repeats.
Safety notes worth reading before you start
- Utility knives cause more workshop injuries than almost any other hand tool: always cut away from your body, keep fingers behind the blade, and retract or cap the blade when not actively cutting
- Jigsaw and CNC operations require eye protection and hearing protection; HDPE chips are sharp and travel far
- Spray adhesives and concrete stain products contain VOCs: work outdoors or in well-ventilated spaces, wear a respirator (not just a dust mask) rated for organic vapors, and review the SDS for each product before use
- Concrete etching products (muriatic acid) are corrosive: wear acid-resistant gloves, eye protection, and old clothing; neutralize and rinse thoroughly before any coating goes down
- On a sloped patio surface, paints and stains can run and puddle: block drain outlets with rags during application to prevent stain runoff into storm drains or landscaping
FAQ
What are the main uses for a patio stencil and when should I choose one?
Patio stencils serve two primary roles: 1) decorative surface patterns — applying paint/stain onto concrete or wood decks; 2) layout/templates — guiding placement, cutting, and joint lines when laying or relaying pavers. Choose decorative stencils when you want repeatable, crisp patterns (floors, borders, medallions). Choose rigid templates (large single-piece or tile‑grid templates) when you need accurate, repeatable layout for paver spacing, joint alignment, or complex cut patterns across large areas.
Which stencil materials are best for outdoor patio work and how do they compare?
Common materials: - Mylar/PET (thin films): excellent dimensional stability, moisture and chemical resistance; good for paint stencils and medium‑detail work; choose UV‑stable grades for outdoor use. - HDPE sheet: very weather‑resistant and rigid in thicker gauges; excellent for large outdoor templates and paver guides. - Plywood (CDX, MDO, marine): inexpensive and rigid — use exterior/film‑faced grades for longer reuse; vulnerable to swelling unless sealed. - Adhesive/transfer stencil film (removable vinyl): great for tight registration on textured surfaces; low‑tack options reduce residue. - Cardboard: cheapest for one‑off tests and disposable templates; not recommended for repeated outdoor use. Pick film/HDPE for durability, plywood for heavy‑duty rigid templates, and adhesive film for fine edges on irregular surfaces.
What tools do I need to cut small repeatable stencils and large single‑piece templates?
Small stencils: sharp utility/precision knives (snap‑off blades, X‑Acto) and cutting mats; straight edges and small hole punches. Large templates: jigsaw with fine‑tooth or plastic blade for plywood/HDPE, circular saw for straight edges, or CNC/router for precision/complex repeatability. Other useful tools: clamps, spray adhesive or transfer tape, router or file for smoothing edges, and bench or work‑table with hold‑downs. Replace blades often for clean cuts (especially with Mylar/vinyl).
How do I design a stencil pattern for repeatability (tile approach) vs a large single template?
Tile approach: design small repeat units (4–24 in typical) that tessellate with clear registration marks (pin holes, tabs, or overlap edges). Benefits: easier cutting, smaller storage, less deformation, and scalable to irregular areas. Large single template: design as full footprint or a large border piece; include reference edges, alignment holes for stakes, and registration marks for matching multiple passes. Use CAD/vector files for CNC or plotted patterns; test layout on cardboard first to verify scale and fit.
Step‑by‑step: how to cut and test a stencil from Mylar or adhesive film?
1) Print or draw pattern to scale. 2) Secure Mylar/film over pattern with low‑tack tape. 3) Use a sharp utility/precision blade and straightedge; cut slowly in multiple light passes. 4) Remove cut pieces and weed negative spaces carefully. 5) Test on a scrap surface with the same paint/roller to check edge crispness and fit. 6) If edges feather, re‑sharpen blade or increase material thickness/adhesive. Replace film if warping or lost registration.
Step‑by‑step: how to make and cut a large HDPE or plywood template?
1) Transfer the scaled pattern to the sheet material (full‑size print, grid transfer, or CNC). 2) Mark registration points and any stake/hold‑down holes. 3) Clamp material to a stable surface. 4) For HDPE use a fine‑tooth blade and slow feed on a jigsaw; for plywood use a fine‑tooth wood blade. 5) Sand or route edges to remove burrs and add chamfers where needed. 6) Test‑fit in the actual patio footprint; tack down or stake through registration holes to validate alignment before final use.
Next Article
How to Update Patio: Complete DIY Guide to Repair or Rebuild
How to update patio: DIY guide to assess, choose materials, and follow step-by-step repairs or full rebuilds with costs.