Aim for a slope of 1/4 inch per foot, falling away from the house. That single measurement is the standard most contractors and paver manufacturers agree on, and it works for concrete, pavers, gravel, and just about any other patio surface. At that rate, a 20-foot-wide patio drops 5 inches from the house edge to the outer edge. That's enough to move water reliably without making chairs feel like they're sliding downhill.
How to Slope a Patio for Drainage: Step-by-Step Guide

Nolan Lennox
11 May 2026
How much slope does a patio actually need for drainage

The industry-standard minimum is 2%, which works out to 1/4 inch of drop for every foot of horizontal run. The Wisconsin Ready Mixed Concrete Association spells it out plainly in their flatwork guidance: slope the surface 1/4 inch per lineal foot. Most paver installation guides, including those from major manufacturers, land in the same range of 1/8 to 1/4 inch per foot (roughly 1 to 2 percent). If you're trying to decide where to land in that range, go with 1/4 inch per foot. It gives you a reliable margin, and slight settling over time can eat into a slope that starts at the bare minimum.
Here's what that looks like as real numbers on your job site. Every foot of patio run needs to drop 1/4 inch. A 12-foot patio drops 3 inches. A 16-foot patio drops 4 inches. A 20-foot patio drops 5 inches. That 5-inch total fall over 20 feet is barely noticeable when you're sitting on the patio, but it's the difference between dry pavers after a storm and a puddle you're stepping around every morning.
| Patio Run (ft) | Drop at 1/8 in/ft (min) | Drop at 1/4 in/ft (recommended) |
|---|---|---|
| 8 ft | 1 in | 2 in |
| 10 ft | 1.25 in | 2.5 in |
| 12 ft | 1.5 in | 3 in |
| 16 ft | 2 in | 4 in |
| 20 ft | 2.5 in | 5 in |
| 24 ft | 3 in | 6 in |
Choosing where the water goes
Before you dig anything, figure out where the runoff is actually going to end up. The non-negotiable rule is that slope always runs away from the house, never toward the foundation. Beyond that, you have real choices to make, and getting this wrong means water pools in your yard, floods a neighbor's property, or soaks into a planting bed where you don't want it.
The best drainage destinations, in rough order of preference: a lawn area that can absorb water, a garden bed with good permeability, a driveway or street gutter designed to handle runoff, or a dedicated drainage channel or dry creek bed you build into the landscape. What you want to avoid is directing water toward a fence line, a low-lying corner of the yard that already stays wet, or anywhere near an adjacent structure's foundation.
If your patio sits between the house and a fence with no good exit point on the far side, you'll need to slope the patio laterally toward one end and channel water out there. If you want a slanted patio roof, you can use the same runoff logic to choose the right pitch direction and make sure water exits cleanly how to build a slanted patio roof. You can also slope from the center outward in both directions, which works well for wider patios where a single-direction fall would create too steep a grade on one side. Think through the runoff path as a complete system before you set a single stake.
Tools and measurements for setting your grade
You don't need expensive equipment to set a patio grade accurately. Here's what actually gets the job done on a typical DIY build.
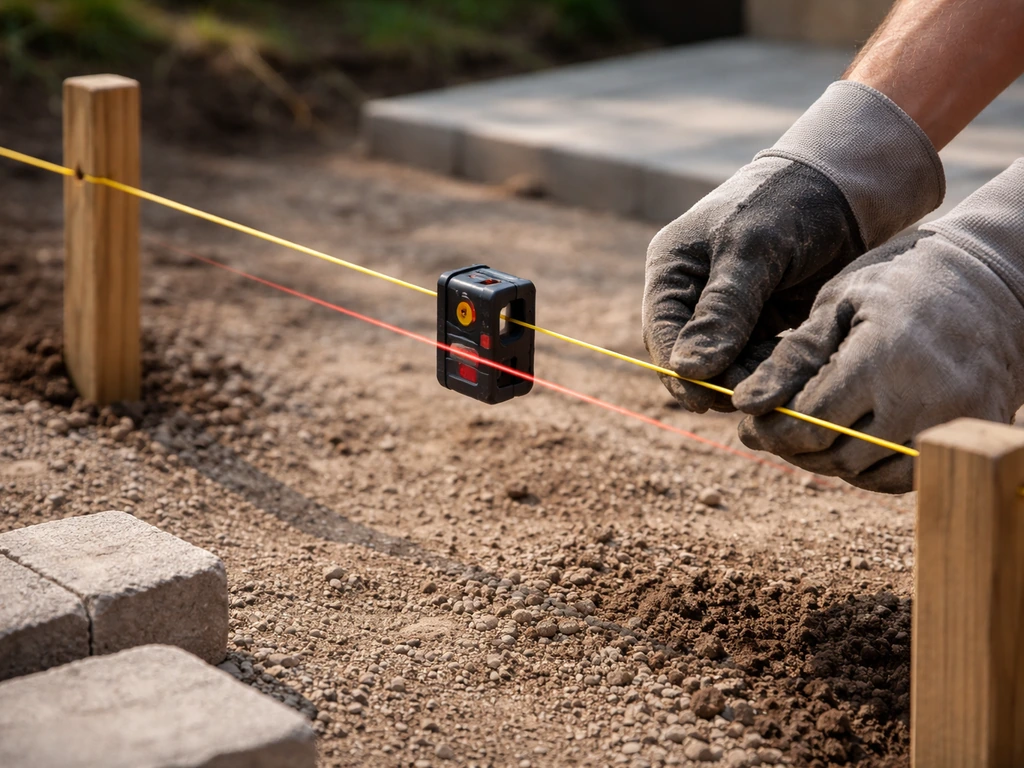
- Mason's string line and line level: the core tool for establishing grade over longer runs. Stretch the string taut between two stakes, use the line level to confirm it's level, then lower the far end by the calculated drop amount.
- 4-foot or 6-foot spirit level with a shim: good for checking shorter spans and verifying cross-slope. Tape a shim of the right thickness under one end to simulate a slope check rather than checking for pure level.
- Tape measure: essential. Measure your run distance and your drop consistently.
- Grade stakes or rebar: mark your elevation control points in the ground so you can reference them throughout the build.
- A long straightedge (8 to 10 ft): useful for screeding base material to grade on paver and gravel builds.
- Digital level or slope finder app: a nice-to-have for a quick sanity check, but not a replacement for string lines on a full patio.
The shim trick deserves a bit more explanation because it's one of those things that makes checking slope dead simple. If you have a 4-foot level and you want to verify a 1/4-inch-per-foot slope, tape a 1-inch shim (1/4 in x 4 ft = 1 in) under the uphill end of the level. When the bubble reads level with the shim in place, the surface you're resting it on has exactly that slope. This is faster and more intuitive than trying to read a slight bubble deflection.
Step-by-step: building the slope during construction
- Mark your patio boundary with stakes at each corner. Measure the total run in the drainage direction (usually perpendicular to the house) and calculate your total drop: run in feet multiplied by 0.25 gives you the drop in inches.
- Set your high-point elevation first. The edge of the patio closest to the house is your reference. Drive a stake here and mark your finished surface height on it, accounting for whatever materials you're building up (base, sand bed, pavers or concrete thickness).
- Run a string line from the high-point stake to a stake at the far edge of the patio. Use a line level to get the string perfectly level, then lower the far stake by the calculated total drop. Lock it off. This string represents your finished surface slope.
- Set intermediate grade stakes across the patio field at 4 to 6-foot intervals, all referencing the same string line. Check each stake height with a tape measure down from the string. These stakes guide your base compaction and screeding.
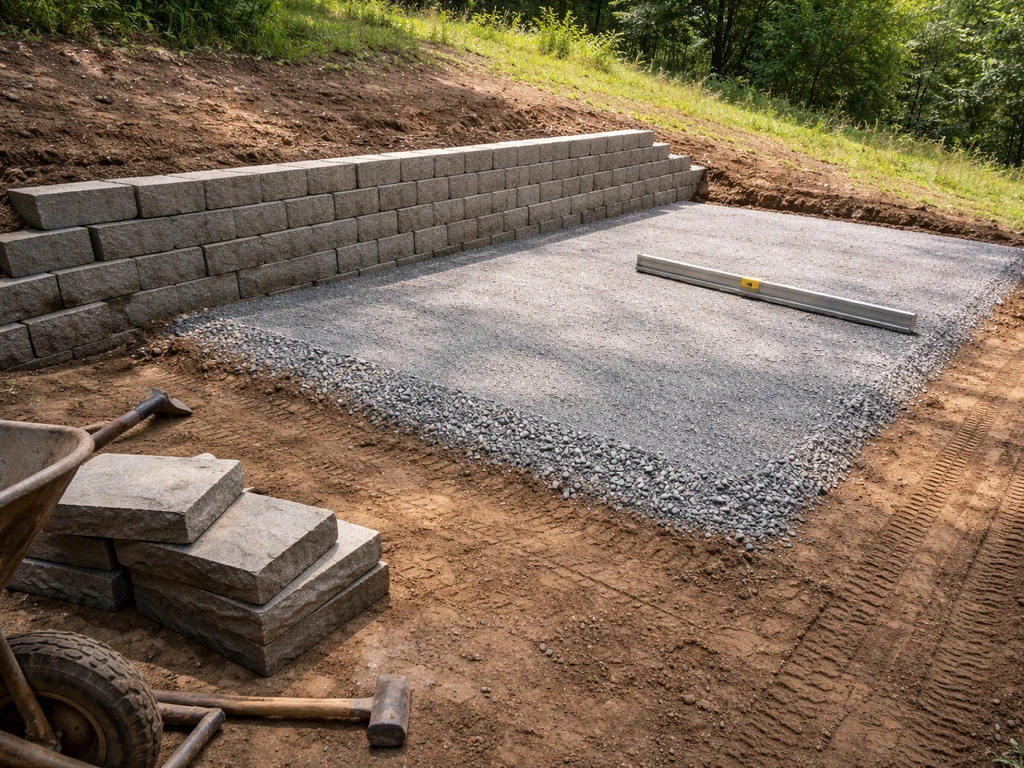
- Excavate and compact your subbase to match this slope. The subgrade should mirror the finished surface slope so your base layers are consistent thickness throughout.
- Install and compact your base material (typically compacted gravel) to the same slope. Check frequently with your shimmed level or by measuring down from the string line.
- For pavers: screed the bedding sand layer to grade using your slope stakes as guides. For concrete: set your form boards to the calculated slope and confirm with a level and shim before any pour. For gravel: rake and compact to grade.
- After the surface is in place, walk the entire patio with your shimmed level and verify slope in multiple spots and directions. Check both the primary drainage direction and any cross-slope you intended to be neutral.
How slope works differently by material and base

The 1/4-inch-per-foot target applies to the finished surface of every patio type, but how you build to that grade differs depending on what you're working with.
Concrete patios
With poured concrete, the slope is built into your form boards before the pour. Once concrete is placed, adjusting it is not really an option. Set your forms precisely, check them twice with a shimmed level, and confirm with a string line before you call for the truck. Your subbase should also be sloped to match so the slab is a consistent 4 inches thick throughout. A 4-inch slab on a flat sub-grade that's been built up on one side to create slope is not the same thing, and it creates weak spots.
Paver patios
Pavers give you the most control and the most forgiveness. The standard approach is a compacted gravel base (typically 4 to 6 inches for residential patios), a 1-inch bedding sand layer, then pavers. All three layers should be sloped consistently. For standard sand-set paver applications, Mutual Materials advises allowing 1/8 inch to 1/4 inch per foot of slope for correct water runoff [All three layers should be sloped consistently.
](https://www. mutualmaterials. com/installation-guides/paver-installation-instructions/). Stonewood Products' ideal paver installation guide specifies a minimum slope of 1/4 inch per foot [minimum 1/4 inch per foot](https://www.
stonewoodproducts. com/wp-content/uploads/2016/06/Ideal-paver-installation-guide. pdf). If only the sand layer is sloped, you'll end up with uneven sand depth that compacts differently over time and leads to settling.
The good news is that if you do find a grading error after installation, individual pavers can be pulled up and reset, which is something concrete can't offer.
Gravel and decomposed granite patios
Gravel patios are the most forgiving of all. The material is inherently permeable, so some drainage happens through the surface itself. That said, you still want a sloped subgrade because if the ground underneath is flat or bowled, water will sit at the base of the gravel layer and soften it. Build the subgrade slope the same way, but you can often get away with the lower end of the range (1/8 inch per foot) because surface permeability does some of the work.
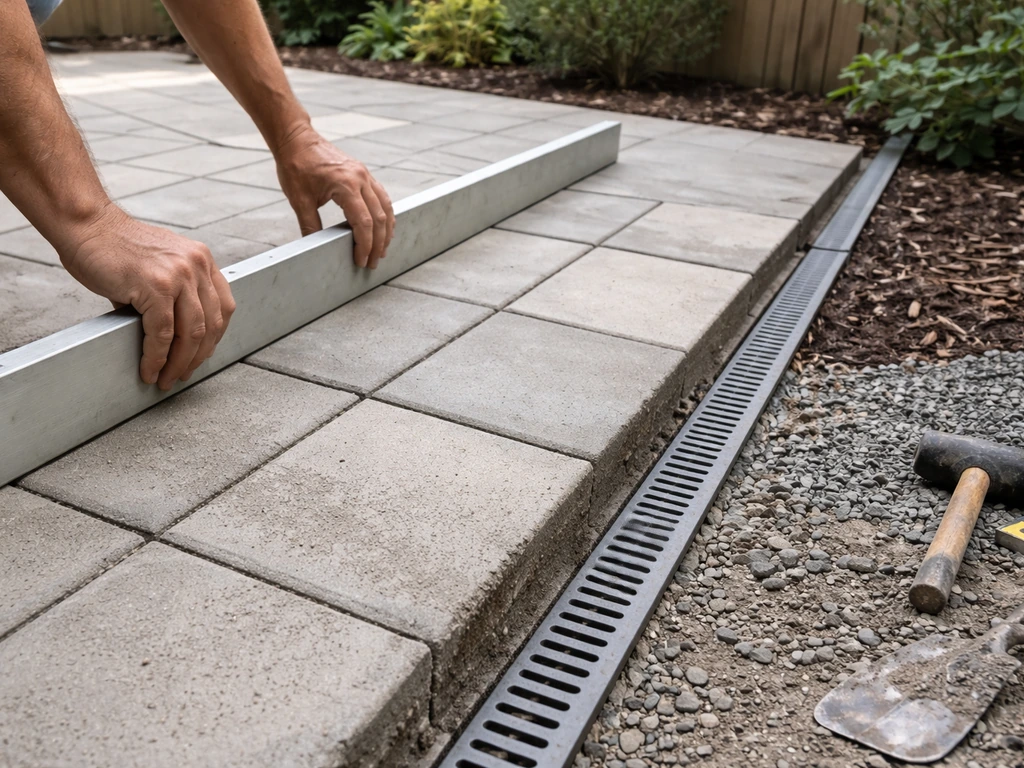
Edging and borders
Edging can accidentally trap water if it's installed level when the patio surface isn't. Make sure any solid edging (aluminum, steel, or concrete mow border) follows the slope or has gaps at the low end to let water escape. A patio that slopes correctly but is ringed by a level border is essentially a bathtub. Check that the outflow path is unobstructed at the downhill edge.
Verifying your slope and catching pooling issues

The simplest verification is also the most satisfying: run a garden hose on the finished surface and watch what happens. Water should move steadily toward the intended drain edge within a few seconds, not sit and spread. Do this test across multiple spots, not just the middle of the patio.
For a more precise check before or during construction, use your shimmed level method across a grid of the patio. Check slope in the primary drainage direction and also side-to-side to make sure you haven't accidentally created a cross-slope that directs water toward the house along one edge. Any reading that shows less than 1/8 inch per foot in the drainage direction is a spot to flag and address before the surface is locked in.
Common pooling problem spots include low areas near door thresholds (especially if the concrete or base settled after the door threshold was set), dips along the centerline of the patio where the screed board sagged during installation, and the inner corners of L-shaped or wrap-around patios where two drainage directions meet. Pay extra attention to these zones during your verification checks.
Fixing grading mistakes and what to do next
If you've got an existing patio with pooling problems, your fix depends on the material. If you're dealing with an existing patio, focus on how to slope a patio properly so water runs to the right drainage outlet instead of pooling existing patio with pooling problems. For paver patios, the repair is straightforward: pull up the pavers in the low area, add or remove bedding sand, recheck grade with your shimmed level, and relay the pavers. This is genuinely a one-afternoon fix for a small section. For gravel patios, you can regrade and compact the surface relatively easily.
Concrete is harder. Small depressions can sometimes be filled with a patching compound or a self-leveling overlay, but these aren't permanent fixes and can crack or delaminate over time. A serious grading problem in an existing concrete slab usually means either adding a drainage channel (a linear drain set into the surface that directs water to an exit point) or, in the worst case, breaking out the problem section and reporing. It's worth being honest with yourself about which category your problem falls into before spending money on a patch that won't hold.
For new construction, the most important thing you can do right now is set your grade stakes before you start excavating. Measure twice. Run your hose test as soon as the surface is finished and while the build is still fresh enough to make corrections.
If you're also thinking about whether your yard's terrain requires building the whole patio on a slope rather than just sloping it for drainage, that's a related challenge with its own set of considerations worth digging into separately. If you want a rooftop patio, planning the grade and runoff path early is just as important as the surface build set your grade stakes.
If your yard terrain requires building the whole patio on a slope, plan the grading, base thickness, and drainage path together so the finished surface stays true build patio on slope.
One final practical tip: take photos of your grade stakes and string line measurements before you cover them up. If you ever need to troubleshoot settling or drainage issues a few years from now, having a record of your original design grades is genuinely useful. It takes thirty seconds and costs nothing.
FAQ
How do I tell if my patio has a “cross-slope” problem, not just a slope away from the house?
Verify slope in two directions: your main runoff direction and the perpendicular direction. Use the shimmed level on both axes, because a patio can fall away in one line but still “tilt sideways” so water tracks toward the house along an edge.
What’s the best way to choose where the water should exit if my yard is already wet or low?
Pick an outflow point that can accept water without creating a new problem, for example a lawn area designed to absorb runoff or a planted area with permeable soil. Avoid sending water to existing low spots, tight corners, or areas near a neighbor’s foundation unless you plan a controlled outlet like a dry creek or linear drain.
Is 1/4 inch per foot still appropriate if my patio is only 6 to 8 feet deep?
Yes, as a target for the finished surface. For shorter patios the absolute drop is small (1/4 inch per foot means 1.5 to 2 inches total on a 6 to 8 foot run), so you must be consistent with measurements, otherwise minor base movement can erase the effective slope.
Can I slope only the top layer of material, like just the bedding sand on pavers?
No. All layers that support the finish need to share the same grade, especially the gravel base and bedding sand for pavers. If only the sand layer is sloped, you can end up with uneven compaction and sand thickness, which increases the chance of later settling and low spots.
How should I handle slope when there’s a door threshold, especially for a patio close to the house?
Treat the threshold as a critical check point. After the base is set and again after pavers or concrete are finished, verify that water does not creep toward the doorway area. If the slab or threshold was set after part of the base, you can get localized pooling that needs regrading rather than surface patching.
Do I need to leave gaps or openings in edging to make drainage work?
If your edging is solid and installed perfectly level at the bottom, it can block the low-edge outflow and trap water. Follow the patio’s slope, or use edging styles that allow escape at the downhill edge (or provide intentional openings) so water can actually exit.
What garden hose test details should I look for, beyond “water moves”?
Watch whether water flows in a tight sheet toward the intended outlet or spreads and lingers in specific bands. Repeat the test at multiple locations, including near corners, inner angles, and door-side areas, because pooling often shows up only when water arrives from different starting points.
If my patio is already installed and puddles show up, when is a simple reset possible versus a major repair?
For pavers, you can usually lift and reset a localized low area by adjusting bedding sand and rechecking grade. For concrete, small depressions may be patchable but often crack later, and persistent slab grade problems typically require a drainage channel or removal and repour to restore true direction of flow.
How can I avoid making the slope “too steep” and causing other issues?
Staying within the recommended band helps. Use 1/4 inch per foot as your target, but if the design forces a very short run with a big drop, consider a two-direction slope (center outward) for wide patios so one side does not become excessively steep and create uncomfortable footing while still directing runoff correctly.
How important is subbase slope for gravel patios if gravel is permeable?
Very. Permeability helps, but it does not fix a flat or bowed base where water collects at the gravel layer’s bottom. Ensure the subgrade has slope, compacted support, and a clear downhill exit so water does not sit at the interface that can soften and destabilize the surface.
Should I worry about frost or water freezing under the patio when I slope for drainage?
Yes, water management affects freeze risk. Proper drainage reduces standing water and how long it stays wet, but you also need a stable, compacted base and correct material selection for your climate so the slope does not get “undone” by heaving or settlement over time.
Next Article
How to Build a Patio on a Slope Step by Step
Step-by-step DIY guide to build a patio on a slope, from leveling and drainage to stone pavers and raised retaining wall