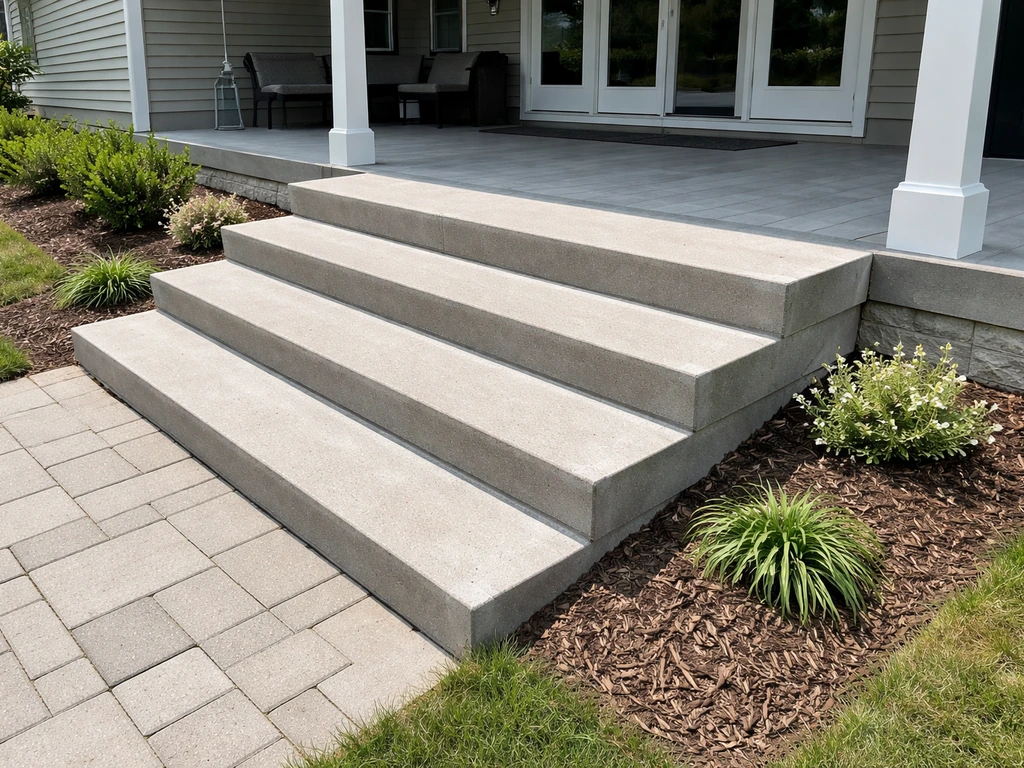
You can build solid, good-looking wood patio steps in a weekend using pressure-treated lumber for the stringers and either pressure-treated or composite boards for the treads. The basic process is: measure your total rise, divide it into equal riser heights between 6 and 7.75 inches, cut your stringers, anchor them to a level base, and attach your treads with proper spacing for drainage. That's the whole job. The rest is just getting the details right so your steps stay safe, level, and rot-free for years.
DIY Wood Patio Steps: How to Build Safe, Durable Steps

Nolan Lennox
20 May 2026
Planning and measuring for wood patio steps
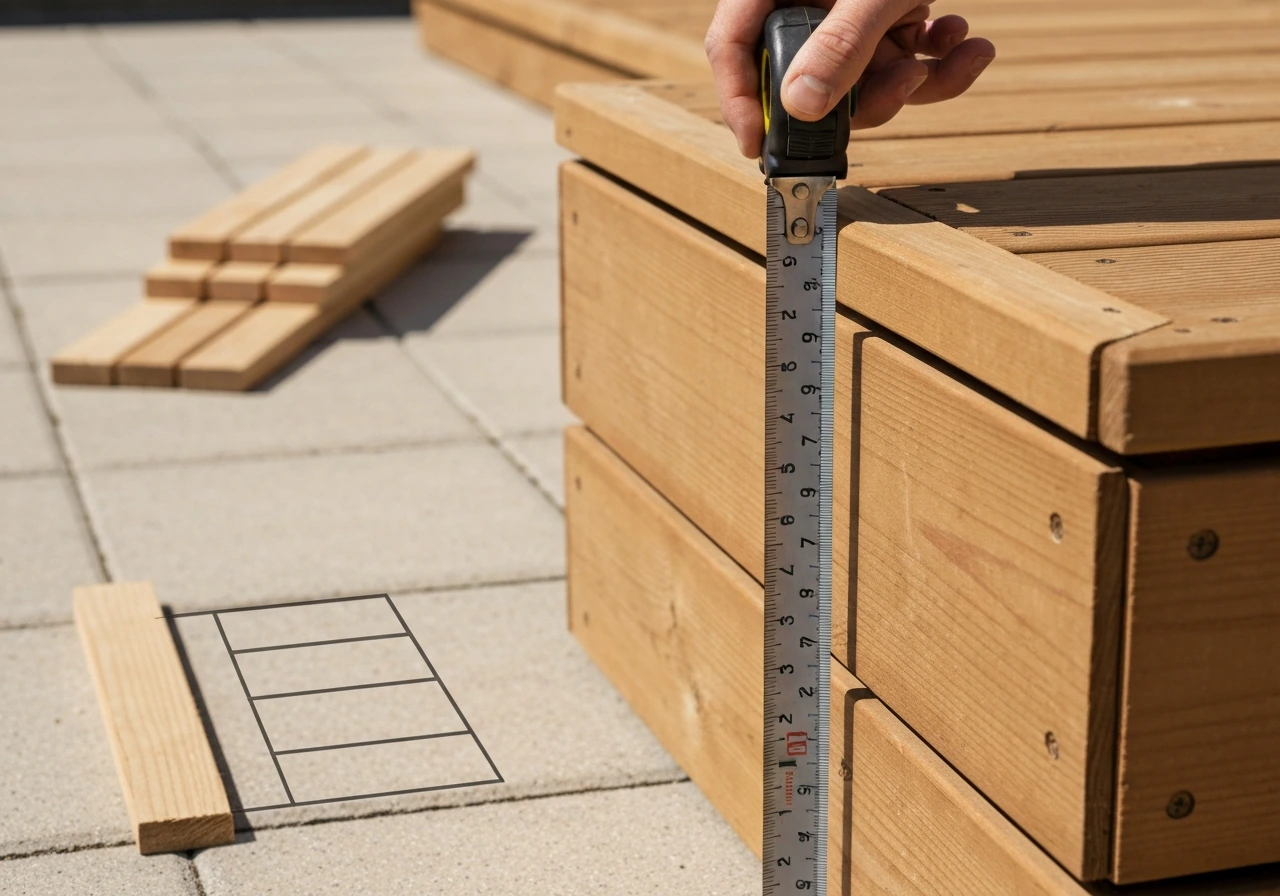
Before you buy a single board, grab a tape measure and figure out your total rise, that's the vertical distance from the ground (or lower landing) to the top of your patio or deck surface. Measure this carefully because every other calculation depends on it. If your total rise is 21 inches, for example, you'll want three risers at exactly 7 inches each, which keeps you comfortably under the IRC maximum of 7. The IRC also specifies that residential stairs have a maximum riser height of 7-3/4 inches when measured vertically between nosings of adjacent treads, or between the top tread nosing and the landing under the IRC maximum of 7. 75 inches per riser.
Once you know your total rise, divide it by the number of steps you want to try. Aim for risers between 6 and 7.75 inches. Comfortable outdoor steps are usually around 6.5 to 7 inches of rise with at least 10 inches of tread depth (run). The IRC sets a minimum tread depth of 10 inches measured nosing to nosing, and that's a real minimum, 11 or 12 inches feels much better for patio steps where people are moving casually, carrying drinks or garden tools. Sketch it out on paper: total rise divided by riser height gives you your step count, and step count multiplied by tread depth gives you your total horizontal run, which tells you how far your steps will project out from the patio.
One rule that catches a lot of DIYers off guard: the IRC requires that riser heights within a single flight vary by no more than 3/8 inch from the tallest to the shortest. That sounds fussy, but it matters because uneven risers are a genuine trip hazard. Cut your stringers carefully and double-check the rise at every step after they're installed, before you attach treads.
If you're planning something beyond a straightforward straight staircase, curved steps, semi-circle layouts, or steps that wrap around a corner, the planning phase gets considerably more involved. Semi-circle patio steps can follow a curved layout, but you still need the same rise and tread planning to keep them safe and comfortable. For curved patio steps, you will need a more involved layout than a straight run so the stringers and treads follow the curve correctly. Those designs deserve their own approach. This guide focuses on the standard straight run, which handles the vast majority of residential patio step projects.
Choosing materials and building details
Stringers

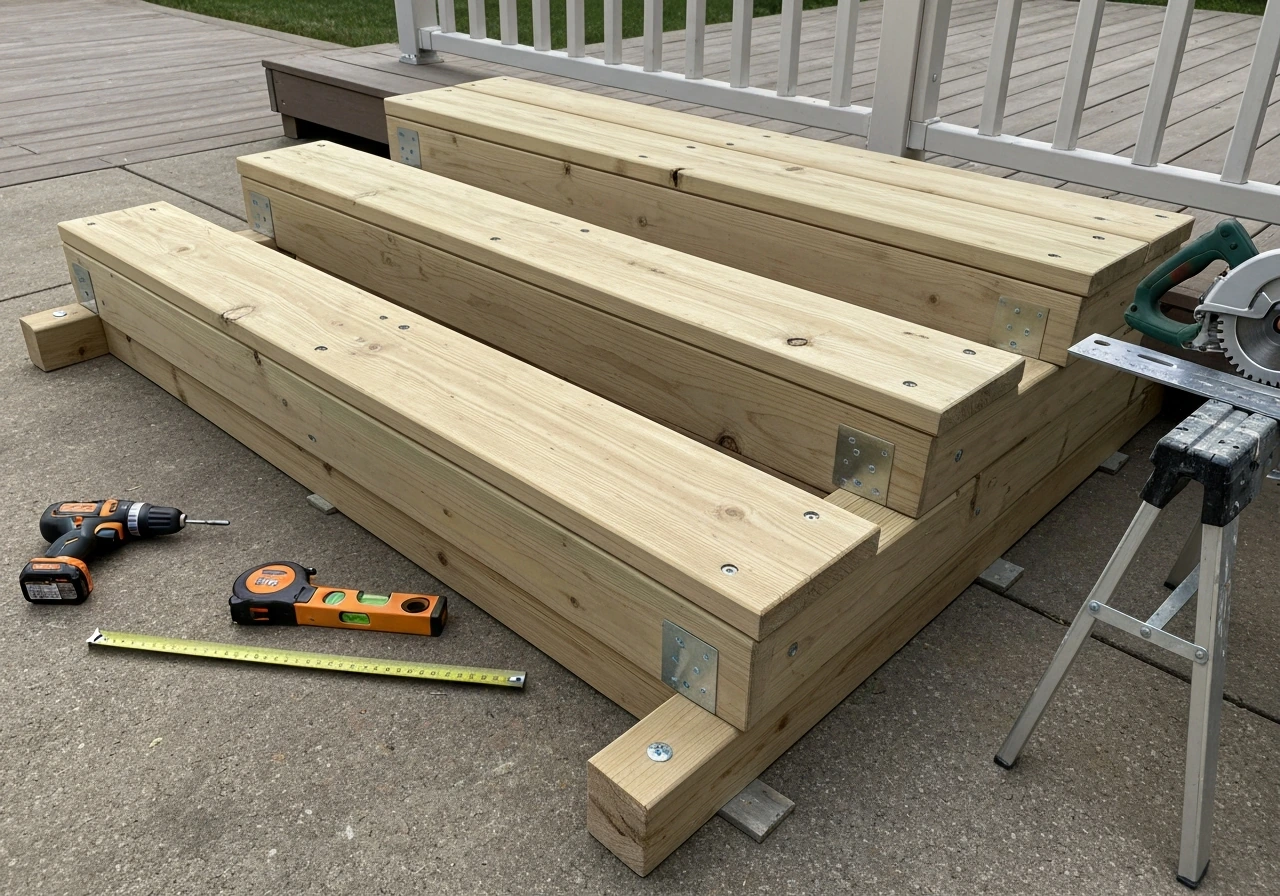
Stringers are the angled structural members that support the treads, they're the backbone of your steps. Use 2x12 pressure-treated lumber rated for ground contact (look for UC4B or UC3B treatment). A 2x12 gives you enough material to cut the rise and run notches while keeping at least 3.5 inches of solid wood below the deepest notch, which is the minimum you want for structural integrity. Don't use anything narrower. For a standard 3- to 4-step set, three stringers (two outer, one center) spaced no more than 16 inches apart on-center is the standard setup.
Treads
For treads, you've got a few good options. Two 2x6 boards side by side give you about 11 inches of tread depth with a small drainage gap between them, which is ideal for outdoor use. A single 2x12 works too, but a solid plank traps water and dirt more easily. Composite decking boards are worth considering for treads if you want lower maintenance, they won't rot, they're slip-resistant when textured, and they hold up well. The downside is cost: composite runs roughly 2 to 4 times more per linear foot than pressure-treated pine. For most DIYers on a budget, pressure-treated 2x6 treads do the job well if you seal them and leave drainage gaps.
Fasteners and hardware
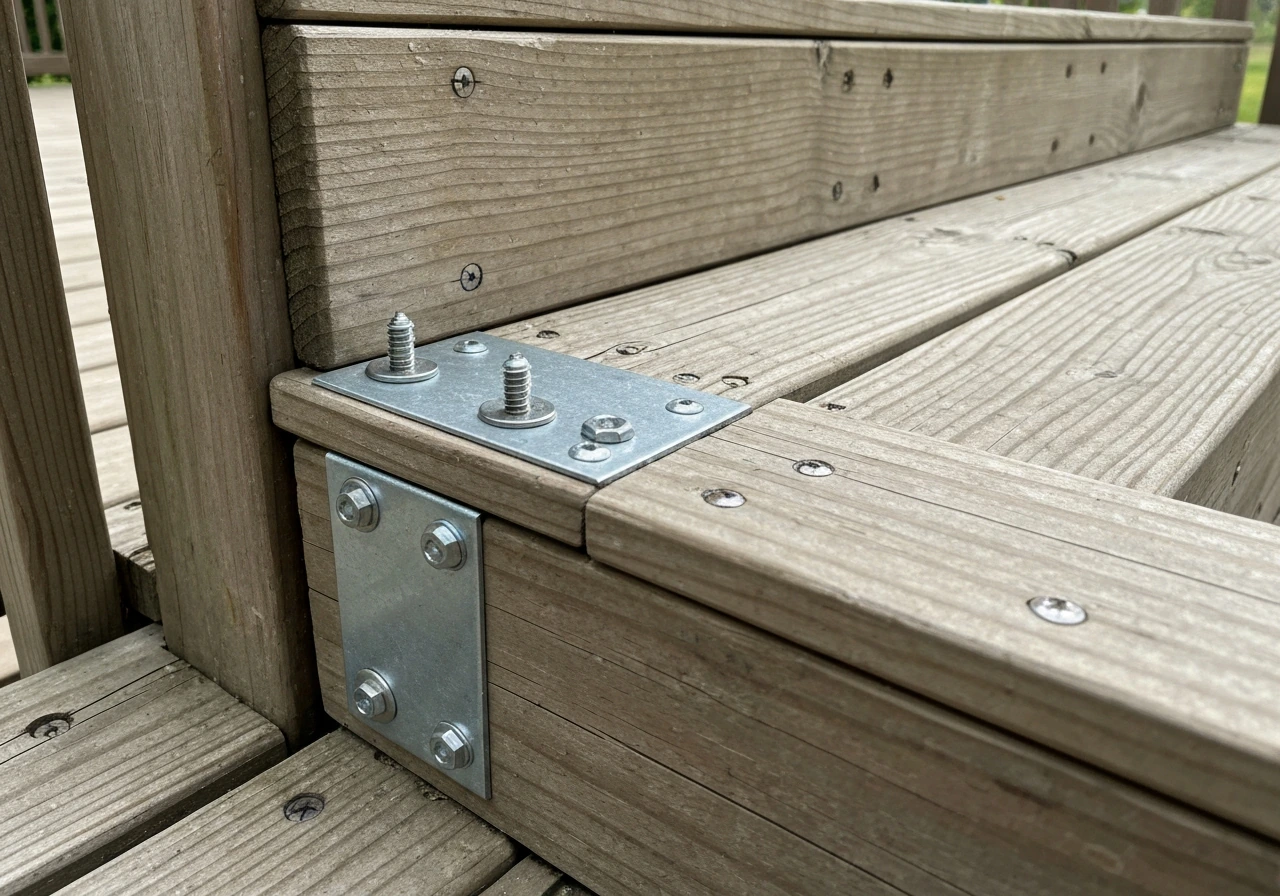
Use hot-dipped galvanized or stainless steel screws and hardware throughout, regular screws corrode fast when they're in contact with pressure-treated lumber and outdoor moisture. For attaching treads, 3-inch structural screws work well. For connecting stringers to the house rim joist or ledger, use approved structural hangers or through-bolts, not just toe-nails.
Railings
Most building codes require a railing when you have more than four risers, or when the top of the steps is more than 30 inches off the ground. Even if your steps are below that threshold, a railing makes steps safer and looks finished. You can match your patio railing style, wood posts with horizontal or vertical balusters, cable railing, or metal, whatever fits your project. Anchor post bases directly to the stringers or the outer framing with structural hardware, not just surface screws.
| Material | Cost (rough per linear ft) | Durability | Maintenance | Best For |
|---|---|---|---|---|
| Pressure-treated pine | $1.50–$3.50 | Good (10–15+ yrs with care) | Seal every 2–3 years | Budget builds, structural components |
| Cedar | $4–$8 | Good (naturally rot-resistant) | Seal every 2–3 years | Appearance-focused projects |
| Redwood | $6–$12 | Excellent (naturally rot-resistant) | Seal periodically | Premium wood look |
| Composite decking | $5–$15 | Excellent (25+ yr warranties) | Very low | Low-maintenance treads |
Site prep and leveling for a stable step base
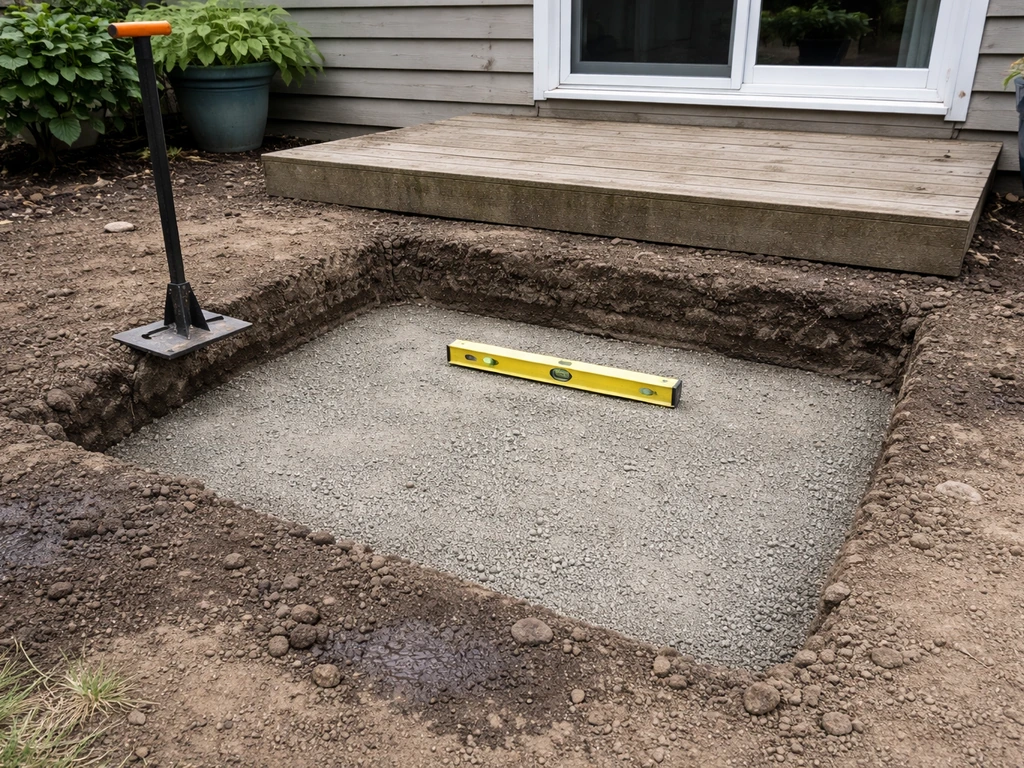
The most common reason wood patio steps fail early is a bad base. If your stringers land on soft soil, they'll shift and sink over time, and your steps will become uneven and unsafe. Don't skip this part.
Start by marking out where the base of your steps will sit. Dig down 4 to 6 inches and remove any organic material, grass, roots, loose topsoil. Fill the area with compacted gravel (crushed stone, not pea gravel) to create a firm, draining base. Compact it in 2-inch lifts with a hand tamper or plate compactor if you have access to one. The surface should be level side to side and slightly sloped away from the house, about 1/8 inch per foot, so water doesn't pool under the base of your stringers.
For permanent steps or anything more than 3 or 4 rises, consider setting concrete footings. Dig below the frost line for your area, pour tube-form footings, and use post-base hardware to anchor the bottom of your stringers. This prevents frost heave from slowly rocking your steps out of alignment. For shorter, less permanent steps, a thick concrete pad or heavy concrete pavers sitting on the compacted gravel base will do the job. Either way, the stringer bases should never rest directly on bare soil.
At the top, your stringers need to be anchored to the patio or deck structure. If you're tying into a house rim joist, use a structural hanger or a ledger board. If the steps land against a concrete patio edge, use tapcon-style concrete screws or an expansion anchor to fasten a treated wood ledger, then hang your stringers from that. Never rely on friction or stacking alone, the top connection is what keeps your steps from shifting away from the house over time.
Step-by-step build process for DIY wood patio steps
- Measure your total rise precisely, from the ground (or landing) level to the top of your patio surface. Write it down.
- Divide the total rise by your desired riser height (shoot for 6.5–7.5 inches) to get your step count. Round to a whole number and recalculate the exact riser height. For example: 21 inches total rise divided by 3 steps = exactly 7-inch risers.
- Determine your tread depth (run). A comfortable outdoor step is 10–12 inches. Multiply run by the number of steps to get your total horizontal projection.
- Mark your stringer layout on a 2x12 using a framing square. Set the square to your exact rise on one leg and your run on the other. Use stair gauges (small clamps that clip to the square) to keep your marks consistent. Trace the rise and run for every step, plus the top horizontal cut and the bottom plumb cut.
- Cut the stringers with a circular saw. Stop the cut just before the corner of each notch and finish with a handsaw or jigsaw — never let the circular saw blade overcut past the corner, as that weakens the stringer.
- Cut all three stringers from the same layout to ensure they're identical, then hold them up side by side to confirm they match.
- Attach the top of the stringers to your patio ledger or rim board using joist hangers, structural screws, or through-bolts. Space outer stringers to match your desired step width (typically 36–48 inches) and place the center stringer at the midpoint.
- Set the bottom of the stringers onto your prepared base (footing, concrete pad, or treated wood plate). Check that all three stringer bottoms are at the same height and that the structure is plumb side-to-side.
- Cut treads to length. For two 2x6 treads per step, rip them if needed so you get the right total depth with about a 1/4-inch gap between boards for drainage.
- Attach treads from the bottom step up. Pre-drill to prevent splitting, then drive two screws per tread board per stringer (six screws per tread for a three-stringer setup). Leave the front edge of each tread with a 3/4-inch to 1-inch nosing overhang past the riser line.
- Once all treads are on, measure each riser height and confirm the variation between the largest and smallest is no more than 3/8 inch. Adjust if needed before moving on.
- Install any railings, then do a full safety check (see the next section).
Safety checks, drainage, and weatherproofing considerations
Safety checks after the build
Before anyone uses the steps, do a physical inspection. Stand on each tread and check for any flex, wobble, or creaking. Push on the structure from the side, it should feel completely solid. Walk up and down a few times and pay attention to whether any tread rocks even slightly. A rocking tread almost always means a screw missed the stringer or a stringer isn't sitting flat; fix it now. Check riser consistency one more time with a tape measure. And if you installed a railing, grab it and pull hard, posts should not budge.
Slip resistance
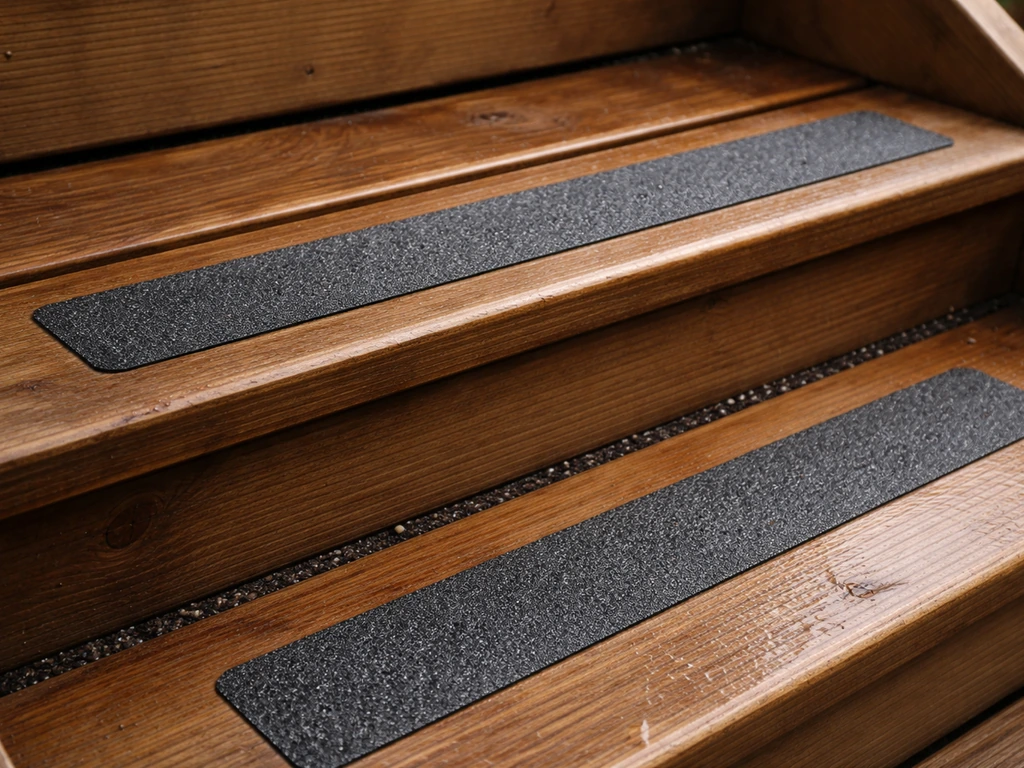
Smooth wood treads get slippery when wet. Add texture by applying anti-slip strips (the peel-and-stick type works fine for wood), or use a brush-applied anti-slip additive mixed into your deck sealer. Another option: run a router along the front edge of each tread to create a shallow groove pattern, which helps water sheet off and adds grip. This is especially important in climates with frequent rain or frost.
Drainage and water management
Water is the number one enemy of wood patio steps. Leave 1/4-inch gaps between tread boards so water drains straight through instead of pooling. Avoid riser boards (boards nailed vertically between treads) if possible, they trap debris and moisture between the tread and the riser, which accelerates rot. Open-riser steps drain better and last longer. Make sure the gravel base under the stringer feet drains freely and isn't sloped back toward the house.
Weatherproofing and sealing
Seal all cut ends of pressure-treated lumber with an end-cut preservative immediately after cutting, the treatment doesn't penetrate as deeply at fresh cuts, so this step is important. After the steps are built, apply a quality exterior wood sealer or stain-sealer to all exposed surfaces. Let new pressure-treated lumber dry for a few weeks if it feels wet to the touch before applying sealer, it won't absorb properly when the wood is still saturated from the treatment process. Plan to reseal every 2 to 3 years depending on your climate and sun exposure.
Cost, tools, and common mistakes to avoid
Realistic cost for DIY wood patio steps
A basic 3-step set in pressure-treated pine typically runs $150 to $350 in materials, depending on width and your local lumber prices. That covers three 2x12 stringers, six to eight 2x6 tread boards, hardware, screws, and sealer. If you add a simple wood railing, budget another $100 to $200. Composite treads on PT stringers will push material costs to $400 to $700 for a similar configuration. Hiring this out often runs $800 to $2,000 or more for labor plus materials, so the DIY savings are real.
Tools you'll need
- Circular saw (for stringers and tread cuts)
- Handsaw or jigsaw (for finishing stringer notch corners)
- Framing square with stair gauges
- Tape measure and pencil
- Level (2-foot and 4-foot)
- Drill/driver with bits
- Speed square
- Clamps (for holding parts in position during install)
- Safety glasses and hearing protection
- Hand tamper (for compacting the gravel base)
- Post hole digger or power auger (if you're setting footings)
Common mistakes that cause problems down the road
- Not measuring total rise before buying materials — your stringer length and board quantities depend entirely on it
- Overcutting stringer notch corners with the circular saw, which creates a stress crack point and weakens the stringer over time
- Using only two stringers on wide steps — anything over 30 inches wide needs a center stringer to prevent tread flex and bounce
- Skipping the gravel base and setting stringers directly on soil, which leads to settling and uneven risers within a year or two
- Using regular steel fasteners instead of hot-dipped galvanized or stainless — they rust and stain the wood within one season
- Installing solid riser boards, which trap moisture and speed up rot
- Not leaving drainage gaps between tread boards
- Forgetting to seal cut ends of treated lumber right after cutting
- Measuring riser height inconsistently — always measure from the top of one tread to the top of the next, not to the raw stringer notch
- Building steps that are too narrow — a minimum of 36 inches wide is standard, and 48 inches feels much more comfortable for outdoor use
Building wood patio steps is genuinely one of the more approachable DIY carpentry projects once you understand the stringer layout. The math seems intimidating at first, but once you've done it once with a framing square, it clicks fast. Take your time on the measurements, don't rush the base prep, and use the right hardware throughout. Your steps will be solid, safe, and something you'll actually be proud of every time you walk out the door.
FAQ
What should I do if my measured total rise gives me riser heights near the code maximum?
If your total rise calculation lands you near a code limit, adjust by changing the number of steps first, then re-calculate riser height. Use risers you can keep between about 6 and 7.75 inches, and confirm all risers in the flight stay within that 3/8 inch variation rule before you cut stringers.
How much spacing should I use between tread boards, and can too much drainage gap be unsafe?
Leave a small reveal at the sides and between boards, but do not create so much gap that a foot can catch. For tread board pairs, keep drainage gaps consistent and align the pattern on every step so tread edges feel even underfoot, especially if you are using two narrower boards to form one tread depth.
How can I prevent one step from ending up slightly taller or shorter after the stringers are built?
Treat the first tread like a calibration point. Measure from the landing surface to the top of the first tread, dry-fit a stringer if possible, then verify every riser height after the stringers are anchored but before you screw down treads. After treads go on, correcting a bad riser usually means partial disassembly.
Can I build DIY wood patio steps from a deck instead of a patio, and are the anchoring points different?
Yes, but you need a firm landing. If you are building steps down from a deck, the bottom must still rest on a properly compacted gravel base or footings, and the top must be mechanically anchored to the deck structure, not just to the deck boards. Also confirm the deck surface has adequate structural support where the ledger or hangers attach.
Do I always need concrete footings, or is a concrete pad on gravel enough for some diy wood patio steps?
For less permanent sets, a thick concrete pad or heavy pavers can work, but they still must be on compacted gravel and level. Avoid setting stringers directly on sand, loose fill, or bare soil, because shifting undermines the entire geometry and makes the steps rock over time.
Which anti-slip method works best for wood patio steps in rain or freezing climates?
Choose anti-slip texture based on maintenance. Peel-and-stick strips are quick, but they can loosen if the surface gets wet and the sealer is incompatible, so roughen and clean the wood thoroughly before applying. A sealed-and-textured surface, like grooves or treated anti-slip additives, usually holds grip longer but takes more preparation.
What if I already have plans for riser boards, can I still make open-riser-like drainage?
If you cannot avoid an open-riser design, at minimum keep the area between the tread and riser free of debris. Avoid trapping leaves and standing water by using consistent drainage gaps, keep the base draining, and consider trimming or shaping the riser edges so water sheds off the front rather than wicking into the joint.
How often should I inspect and re-tighten screws or hardware on diy wood patio steps?
For longer runs of steps, you should plan on periodic re-securing. Outdoor vibration, seasonal movement, and shrink-swell can loosen fasteners in wood over time, so after the first heavy rain or freeze-thaw cycle, check for any wobble and re-tighten accessible hardware.
What are the best in-place checks to diagnose a rocking or creaking tread before it becomes a bigger problem?
The safest quick check is a straightedge test across several treads and a side-to-side push test on each tread. If one board lifts or rocks, suspect a missed stringer contact, a high spot on the stringer notch, or a screw that pulled the tread off line. Fixing it early prevents compound movement that loosens neighboring fasteners.
How should I time sealing and re-sealing, especially right after cutting stringers and treads?
Treat it as a durability issue, not just appearance. Seal cut ends immediately after cutting, let pressure-treated lumber dry if it feels wet, and use a sealer rated for exterior horizontal surfaces. Reapply on a schedule, because end grains and tread tops take the most sun and moisture exposure.
Next Article
Patio Steps Plans: Layout, Dimensions, and DIY Build Guide
Get patio steps plans with dimensions, layout math, and DIY build steps for safe, durable concrete or paver stairs.