To border a patio, you excavate a narrow perimeter trench, compact a granular base, set your chosen edging material (brick, pavers, metal, timber, or plastic restraint) to a string line, anchor it into the compacted base, backfill behind it, and finish the joints so the whole thing locks together. Done right, a border stops your patio surface from creeping outward, sheds water away from the house, and gives the whole space a clean, intentional look. It's one of the most satisfying DIY upgrades you can do in a weekend.
How to Border a Patio: Step-by-Step DIY Edging Guide
Nolan Lennox
23 May 2026
Why bother adding a border to your patio
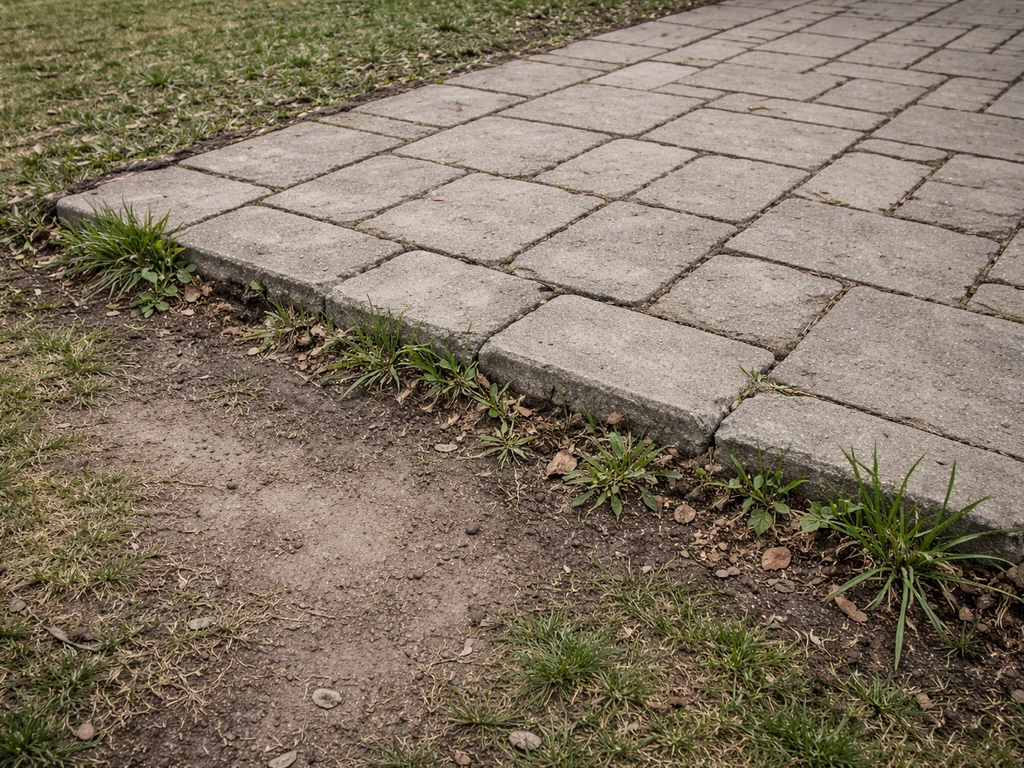
The practical reason comes first: without a solid edge restraint, paver bedding sand migrates outward under foot traffic and freeze-thaw cycles. Pavers wobble, gaps open up, weeds move in, and within a couple of seasons your tidy patio looks like a jigsaw puzzle someone kicked. A border locks the perimeter so the whole surface stays tight. It also defines drainage by giving you a consistent outer edge to slope away from, which matters because water needs at least a 1 to 2 percent fall (roughly 1/8 inch per foot) away from your house to avoid pooling at the foundation.
Beyond function, a border is the detail that makes a patio look intentional rather than just plopped in the yard. A contrasting material, a slightly raised soldier course, or a simple row of brick in a running bond can frame the space the way a mat frames a picture. It's also a cost-smart upgrade: installing edging at the same time as your patio is far cheaper than retrofitting it after the surface has already started to shift.
Choose the right border style and materials
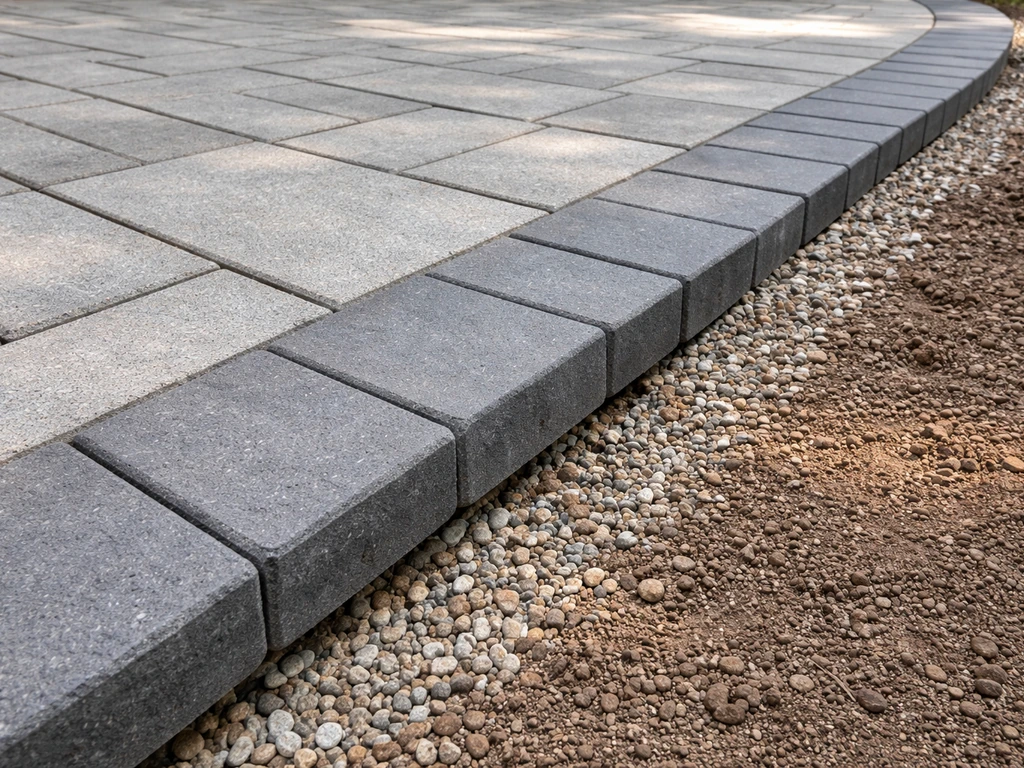
The first decision is whether you want a decorative border (a visible course of brick, stone, or contrasting pavers set at the perimeter) or a structural edge restraint that sits mostly hidden at grade and just holds everything in place. For most DIYers, the sweet spot is a decorative border that also functions as edge restraint, meaning the aesthetic choice does the structural job at the same time.
Material choice depends on your existing patio surface, your climate, and what you want the finished look to be. Here is a quick breakdown of the most common options:
| Material | Best For | Pros | Cons | Approx. DIY Cost |
|---|---|---|---|---|
| Concrete or brick pavers | Paver, gravel, or bare ground patios | Durable, great edge restraint, lots of styles | Heavier to work with, needs proper base | $2–$6/linear ft material |
| Natural stone | Stone or paver patios, upscale looks | Beautiful, very durable | Irregular sizes, slower to set | $4–$10/linear ft material |
| Aluminum/metal edging | Paver patios, curves | Strong restraint, freeze-thaw resistant, low profile | Visible if above grade, sharp edges | $2–$5/linear ft material |
| Plastic/HDPE edging | Budget builds, simple shapes | Lightweight, cheap, easy to cut | Less rigid, frost heave risk if base is unstable | $0.50–$2/linear ft material |
| Timber/wood (ground-contact rated) | Gravel or informal patios | Cheap, easy DIY, warm look | Rots if not rated, may shift over time | $1–$4/linear ft material |
| Composite edging | Decking perimeters | Rot-proof, matches deck boards | Limited availability, not ideal for hardscape | $3–$7/linear ft material |
| Poured concrete curb | Permanent borders, modern look | Rock solid, zero movement | Hard to DIY, calls for forms and finishing skill | $6–$15/linear ft installed |
For cold climates, aluminum or rigid concrete borders outperform lightweight plastic edging. Plastic HDPE edging can lift or bow if it is sitting on an unstable or saturated base when the ground freezes. Timber is a good budget choice on gravel patios, but use only ground-contact-rated lumber and expect to replace it in 10 to 15 years even so. Brick or concrete paver borders are the most versatile option for most DIYers: they look great, provide solid lateral restraint, and the installation skills transfer to the patio surface itself.
Matching your border to the patio surface
- Paver patio: a soldier course of matching or contrasting pavers is classic and provides excellent restraint; aluminum edging works too for a hidden look
- Poured concrete patio: the slab itself is rigid, so the border is mostly decorative; brick or stone set alongside the slab edge frames it nicely
- Gravel or decomposed granite patio: timber, brick, or landscape pavers are essential to hold the loose fill in place
- Composite or wood decking: the deck frame acts as your structural edge; a visible fascia board or composite trim board gives the finished border look
Tools, materials, and measuring your layout
Getting the layout right before you dig saves you from chasing corrections the whole way through. Pull out a tape measure, some wooden stakes, and a roll of mason's line (string line). For a rectangular patio, set stakes at all four corners and run string lines between them, using the 3-4-5 triangle method to confirm square corners. For curves, use a garden hose to lay out the shape on the ground, then mark it with marking paint or a line of sand.
Mark the slope while you are at it. Tie a line level or use a torpedo level on your string line and adjust one end down at roughly 1/8 inch per foot away from the house. Over a 10-foot run that is only about 1.25 inches of drop, which is enough to drain water without making the patio feel tilted. Mark that reference on your stakes so you can carry it through excavation and into your base compaction.
Tool checklist
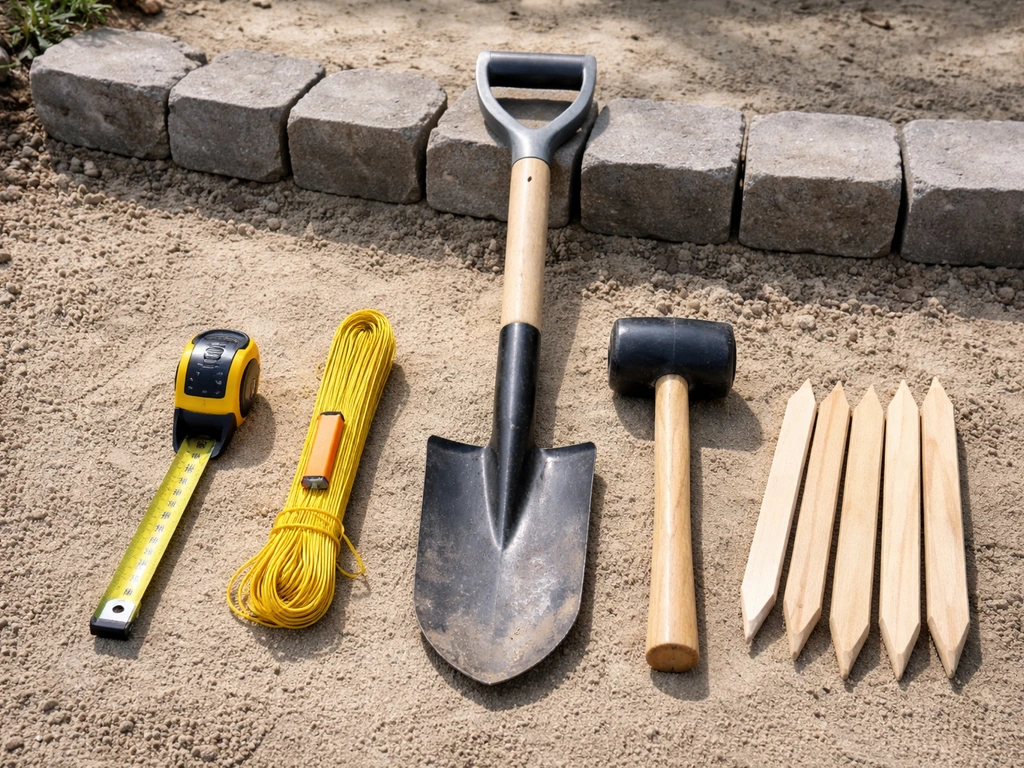
- Tape measure, marking paint or sand, wooden stakes
- Mason's line and line level or a 4-foot spirit level
- Spade or flat shovel, edging spade for precise cuts
- Rubber mallet and dead blow hammer
- Hand tamper or plate compactor (rent one for anything over 50 square feet)
- Screed board or straight 2x4 for leveling sand
- Hammer drill or heavy hammer for driving landscape spikes
- Wheelbarrow, stiff broom, and garden hose
Material checklist (paver border example)
- Border pavers, brick, or edging units (measure perimeter, add 10% for cuts and waste)
- Crushed stone or crusher run for the base (4 inches depth for pedestrian use, 6–8 inches for vehicular)
- Coarse bedding sand (about 1 inch depth)
- Geotextile landscape fabric (optional but helpful in poorly drained or sandy soils)
- Landscape spikes or rebar stakes for plastic or metal edging
- Polymeric joint sand or regular jointing sand
- Concrete adhesive or mortar (if setting rigid units permanently)
Prep and excavation: base, slope, and drainage
This is the part most beginners rush, and it is the part that determines whether your border looks great in five years or starts heaving and gapping in two. Take your time here.
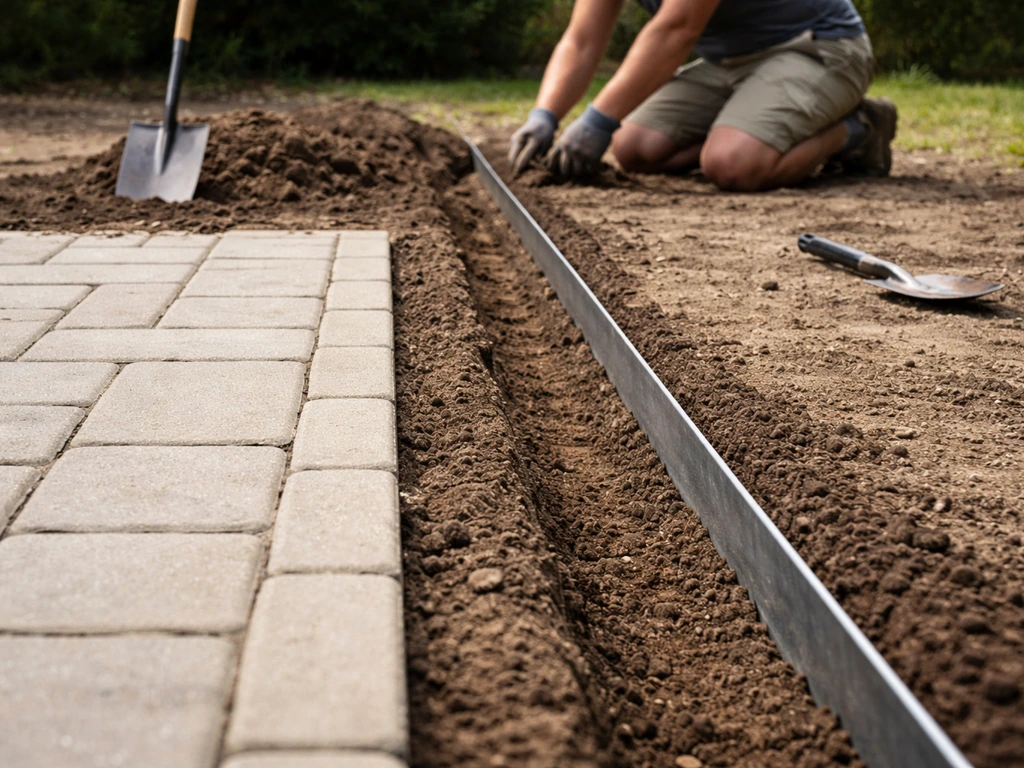
Excavate the perimeter trench to the correct depth. For a standard decorative paver border on a pedestrian patio, you need room for about 4 inches of compacted crusher run base, 1 inch of bedding sand, plus the thickness of your border unit. If your paver or brick is 2.375 inches thick, total excavation depth is roughly 7.5 inches. Excavate a trench that is about 2 to 3 inches wider than your border unit on each side to give you room to work and to backfill properly.
Once dug, rake the trench bottom smooth and compact it with a hand tamper or plate compactor. If you are working in an area with poor drainage, clay soil, or soft spots, lay a sheet of geotextile fabric at the bottom of the trench before adding base material. This keeps fines from migrating up into your base aggregate, which is one of the quieter causes of long-term settling.
Fill the trench with crusher run or compacted granular base in 2-inch lifts, compacting each layer before adding the next. Do not dump in 4 inches and compact once. Each compacted lift transfers load better and drains more predictably. As you compact, check your slope reference line. The top of the compacted base should mirror the drainage slope you marked earlier.
Once the base is compacted and sloped, spread about 1 inch of coarse bedding sand and screed it level with a straight board. Once you have the base and slope dialed in, you can follow the border-install steps for your patio type to edge cleanly and reduce future shifting how to edge a patio. This is the setting bed for your border units. Some edge restraint systems (particularly aluminum edging) specify that the restraint itself should be anchored directly to the compacted base, not set on top of the bedding sand, so the sand sits behind and around it rather than under it.
Install techniques by patio type
Bordering a paver patio
For an existing paver patio, work around the outer edge. If pavers are already in place, carefully remove the outer row, prep the trench as described above, and reset or replace those pavers as your border course. If you are trying to finish a patio edge after the pavers or slab are already down, focus on rebuilding the base, resetting the border course, and locking in the correct drainage slope. Set border pavers tight against your string line, tapping them down with a rubber mallet until they sit at the correct height and slope. Check frequently with a level. If you are using aluminum or plastic edge restraint instead of a paver course, press it against the outside face of the last row of pavers, spike it into the compacted base every 12 inches, and bend it around curves gradually to avoid kinking.
Bordering a gravel patio
Gravel patios absolutely need a border to contain the fill, so this is one of the most practical applications. Excavate your perimeter trench, compact the base, then set your border material (timber, brick, or landscape pavers work great here) against the inner wall of the trench. For timber, cut to length, pre-drill, and pin with 12-inch landscape spikes driven through the wood into the compacted base at 2-foot intervals. For brick or paver borders, set them in the bedding sand along your string line. Once the border is in, fill the gravel patio area to just below the top of the border.
Bordering a poured concrete patio
Here the slab itself is your structure, so you are mostly adding a visual frame. The easiest approach is to excavate a narrow trench alongside the slab edge, compact a base in it, and set brick or flat stone units so their top face sits flush with or just slightly above the concrete surface. Use a concrete adhesive on units that sit directly against the slab edge, and add mortar bedding if you want something fully permanent. Focus on drainage: make sure the finished border surface continues the slope away from the house and does not create a dam that holds water against the slab edge.
Bordering a composite or wood deck
Decking edges are handled differently because you are working within a framed system rather than a loose-laid surface. The structural border is your rim joist or perimeter framing. What you are typically adding is a fascia board (a trim piece that covers the rim joist and gives a clean vertical face) or a composite edge trim board that snaps or clips into place. Composite decking manufacturers usually provide matching fascia products for exactly this purpose. Keep a 1/8-inch gap at the bottom of the fascia for water drainage, and make sure your deck framing already has the proper slope built in, typically 1/8 inch per foot away from the house.
Handling corners and curves
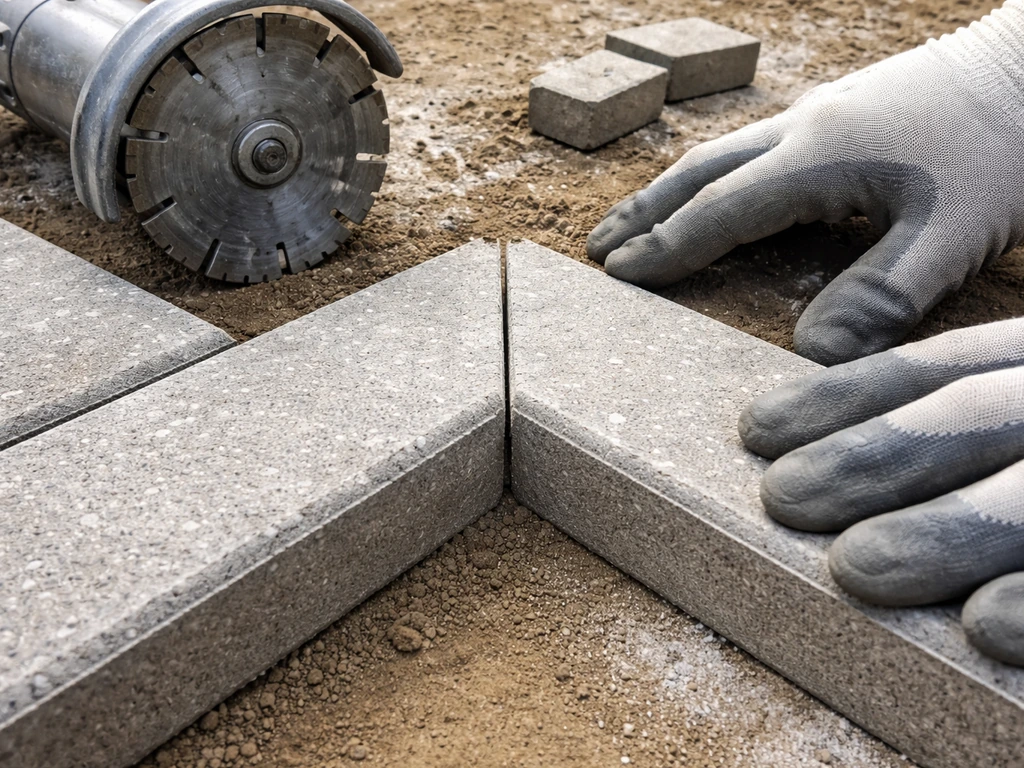
Square corners with paver or brick borders are easiest: miter cut the units at 45 degrees using a wet saw or angle grinder with a diamond blade, and dry-fit the corner before committing to the bedding sand. For curves, use a flexible plastic or aluminum edging product and make small relief cuts on the inner flange of metal edging if needed to allow it to bend without buckling. For brick or paver curves, cut the units progressively to follow the arc, keeping joint lines radiating outward like spokes from the center of the curve.
Finishing, backfilling, and mistakes to avoid
Once your border units are set and level, fill the joints. For brick or paver borders, sweep dry jointing sand or polymeric joint sand into the gaps with a stiff broom, working diagonally to the joints. Make multiple passes until joints are filled to within 1/8 inch of the surface. If you are using polymeric sand, follow the manufacturer's sequence carefully: sweep in the sand, run a plate compactor over the surface to pack it into the joints, blow off the excess dust, then lightly mist with water to activate the polymer binder. Do not soak it; a light mist is enough. Oversaturation is a common mistake that causes a whitish haze on the surface.
Backfill behind the border with compacted soil or crushed stone, bringing it up to within about an inch of the top of the border unit on the outside. This supports the border from behind, reduces lateral movement, and creates a clean transition to your lawn or garden bed. Tamp the backfill in layers rather than all at once.
Common mistakes that cost people a redo
- Anchoring spikes or stakes into loose soil instead of compacted base: the border walks outward over one winter
- Skipping the drainage slope or building a flat perimeter: water pools at the edge or against the house
- Bedding sand that is too thick or uneven: border units rock, tip, or settle unevenly
- Using standard lumber (not ground-contact rated) for timber borders: it rots in 3 to 5 years
- Rushing polymeric sand activation: adding too much water washes binder out of the joints
- Not backfilling behind the border: units tip outward once there is lateral pressure from adjacent soil
- Setting border too high above the adjacent lawn grade: creates a mowing obstacle and looks awkward
It is also worth noting that if you are finishing a raised patio edge or finishing the raw edge of an elevated surface, the approach is meaningfully different from a flat-grade border install. If you are finishing a raised patio edge, you can follow the same ridge-and-drainage logic, and for a step-by-step specifically on how to edge a raised patio, use the raised-patio edging guide as a related option. Those situations involve exposed faces, structural drop-offs, and sometimes step transitions that need their own handling.
Maintenance, costs, and when to call for help
Keeping your border in good shape
A well-installed border needs very little attention. Once a year, check for any units that have shifted or settled, and tap them back with a rubber mallet while adding fresh bedding sand underneath if needed. Re-sweep jointing sand into gaps that have washed out, especially after the first hard winter. For timber borders, inspect annually for rot or soft spots and replace individual sections as needed. For metal edging, check that spikes have not backed out and re-drive any that have. The main enemy of any border is water that is not draining properly, so if you notice pooling along the perimeter, re-check your slope and adjust the grade behind the border before it undermines the base.
Quick cost and material estimates
To estimate materials for a border, measure the total perimeter in linear feet and add 10 percent for waste and cuts. Then calculate base material: multiply your trench length by width (in feet) by base depth (in feet) to get cubic feet, then divide by 27 to convert to cubic yards. For a typical 40-linear-foot border trench that is 8 inches wide and 4 inches of base depth, you need roughly 0.4 cubic yards of crusher run, which is well under a pickup-truck load.
| Border Type | DIY Material Cost (per linear foot) | Durability | Skill Level |
|---|---|---|---|
| Plastic edging | $0.50–$2 | 5–10 years | Beginner |
| Aluminum/metal edging | $2–$5 | 15–25 years | Beginner |
| Brick or concrete paver course | $3–$8 | 20–30+ years | Intermediate |
| Natural stone | $5–$12 | 30+ years | Intermediate |
| Ground-contact timber | $1–$4 | 10–15 years | Beginner |
| Poured concrete curb (hired out) | $6–$15 installed | 25–40 years | Professional |
When to bring in a professional
Most patio borders are well within DIY territory, but a few situations genuinely call for professional help. If your site has major drainage problems, like ground that stays soggy for days after rain or a high water table, you need a drainage engineer before you pour any energy into edging. Soft, unstable subgrade (ground that compresses noticeably when you walk on it) requires geotechnical assessment rather than just more base material. If you are bordering a patio that sits at the top of a slope or retaining wall, the lateral forces involved go beyond what landscape spikes and bedding sand can handle on their own. For everything else, a paver border or metal edging install is a genuinely achievable weekend project that pays off every time you look at your finished patio.
FAQ
How thick should the bedding sand be for a patio border?
A common approach is about 1 inch of coarse bedding sand above the compacted base, then screed it level. The key is that your border units should be bedded at a consistent height that matches your drainage slope, not just “flat” in one spot. If you change the bedding thickness to correct height later, you can end up with uneven support and wobbly units.
Can I install patio edging without removing existing pavers or doing full excavation?
Sometimes, but it depends on how much movement you already have. If the outer row has shifted or the base has become unstable, skipping excavation usually leads to short-term looks with long-term gaps. If you only need a cosmetic frame and the pavers are still tight and level, you might be able to reset the border row with spot base rebuild and correct slope, but plan on at least rebuilding the outer edge base section.
What is the best way to deal with soft or clay soil under the border trench?
Use geotextile at the trench bottom (when drainage is poor or clay fines are likely to migrate), then build the base in compacted lifts. Also be strict about compaction, because clay that is not properly stabilized can pump fines upward, undermining the bedding sand and causing edging to heave or separate. If the ground visibly stays wet for days, consider professional drainage assessment rather than adding more base.
Should my border units sit flush with the patio surface, or slightly higher?
For most decorative borders, aim for flush or very slightly raised so the edge doesn’t create a trip hazard and doesn’t act like a dam. If you raise the border too much, you can trap water and increase pooling. If you need a higher visual “frame,” keep the overall system draining away from the house and verify the slope along the entire run, not just at the nearest point.
How do I keep aluminum edging from kinking on curves?
Use a continuous gentle curve where possible, and bend gradually rather than forcing a sharp radius. For metal edging, small relief cuts on the inner flange can help it flex without buckling. Also anchor more frequently near curves, because the edge wants to “spring” back if only spiked at wide intervals.
What spacing should I use when anchoring metal edging into the base?
A typical target is about 12 inches between spikes for many edging systems, but follow the specific manufacturer instructions for your product thickness and design. If your patio border line includes curves or corners, reduce spacing there. Under-anchoring is a common reason for edge lift after seasonal freeze-thaw.
Is polymeric joint sand safe to use on patio borders?
Yes, but only when you can meet the product’s requirements and your joints are properly sized and not overfilled. After sweeping it in, compacting with a plate compactor is important to lock it into the gaps, then a light mist activates it. Do not soak, oversaturating can cause whitish haze and can weaken the joint performance.
How can I prevent jointing sand from washing out between pavers?
Two things matter most: correct slope and a well-compacted base that drains. If water flows faster than it can infiltrate, it can carry fines away through the joints. After hard rain or freeze-thaw cycles, re-sweep jointing sand into gaps that have opened, and correct any areas where pooling suggests your drainage line behind the border is off.
Do I need to use geotextile fabric every time, or only in certain soils?
Only in situations where fines migration is likely or drainage is problematic, such as clay soil, a saturated area, or a site with poor permeability. In well-draining base conditions, geotextile may not be necessary. Using it incorrectly or on top of the wrong material layer can also complicate drainage behavior, so place it at the bottom of the trench as intended.
Can I border a patio if my yard has a slope or a retaining wall nearby?
Be cautious. When the patio edge is near a retaining wall or sits at the top of a slope, lateral forces can exceed what simple edging spikes and bedding sand can handle. In these cases, plan a system that manages lateral load and drainage, and consult a pro if you see existing movement or if the subgrade is unstable.
How do I estimate how much edging and base material I need without overbuying?
Measure total perimeter in linear feet and add roughly 10 percent for cuts and waste. For base material, calculate cubic feet as (trench length) × (trench width) × (base depth in feet), then convert to cubic yards by dividing by 27. If you’re working around curves, add extra because cuts increase waste and trench width often varies slightly during excavation.
What routine maintenance should I do after the border is installed?
At least once per year, check for shifted units, re-sweep jointing sand if gaps appear, and top up bedding or joint materials where necessary. In timber borders, inspect for rot and replace only the affected sections instead of waiting for multiple boards to fail. If you ever notice pooling right at the perimeter, stop and re-check slope behind the border, water problems usually mean the base or drainage grade needs adjustment.
Next Article
How to Edge a Patio: Step-by-Step DIY Guide
Step-by-step DIY on how to edge a patio: tools, digging depth, base prep, alignment, fixing gaps, and maintenance.