Building a patio for a hot tub is not the same as building a regular patio. blank" rel="noopener noreferrer">A filled hot tub with people in it can weigh anywhere from 3,000 to 8,000 pounds depending on the size, and that weight sits in one spot, permanently. Aquatica’s guidance also notes that water contributes the majority of a hot tub’s total mass, which is why blank" rel="noopener noreferrer">filled weights vary so much with seat count. Your base needs to be reinforced, properly drained, and dead-level before the tub ever arrives. If you want a broader walkthrough that includes pool-and-patio considerations, follow the 6 steps to pool and patio success approach, then apply the same base and drainage principles to your hot tub patio. Get those three things right, and the rest of the project falls into place. Get them wrong, and you're looking at a cracked slab, a tilted tub, or a voided warranty within a season or two.
How to Build a Patio for a Hot Tub: DIY Guide

Planning your hot tub patio location and design
Before you dig or buy a single paver, spend real time on location. Walk the yard and think about four things: drainage, access, utilities, and how the space connects to your house. The best spot drains water away naturally, is close enough to the house that running electrical conduit isn't a nightmare, and gives you room to get around the tub for maintenance.
Hot tubs need at least 2 to 3 feet of clear working room on the side panels that house the equipment cabinet and any access doors. Some models have all service panels on one or two sides; others have them on all four. Check your specific model's manual before you finalize the footprint. That clearance is not optional: if you box the tub in too tightly, you won't be able to remove a panel when the pump fails at midnight in February.
Measure the hot tub's actual footprint and then add at least 12 inches on all sides when you're laying out the patio. That overhang gives you a dry, stable surface to step onto when getting in or out, and it protects the tub's base from soil contact and frost heaving. Sketch a simple plan that shows where the tub sits, where the electrical disconnect will go, and where the conduit trench will run back to the house.
Also think about sun, privacy, and load path. If your site is sloped, you'll either need to cut and fill to create a level pad or build a short retaining structure on the low side. A significantly sloped yard can complicate drainage and base construction considerably. If that's your situation, the sibling topic on how to level a hot tub on a sloped patio goes deeper on that specific challenge.
Ground prep and base construction

This is where most DIY hot tub patio projects succeed or fail. A hot tub sits in the same spot for years, so any weakness in the base will show up eventually, usually as cracking, settling, or water pooling under the shell.
Excavate and remove organic material
Strip all sod and organic topsoil from the patio footprint. Organic material compresses over time and will cause settling. Depending on your soil type, you'll typically excavate 8 to 12 inches below finished grade to make room for your base layers. In cold climates, footings need to extend to or below the frost line to prevent heaving (the 2024 IRC addresses this directly), so check your local frost depth before finalizing excavation depth.
Soil prep and drainage slope
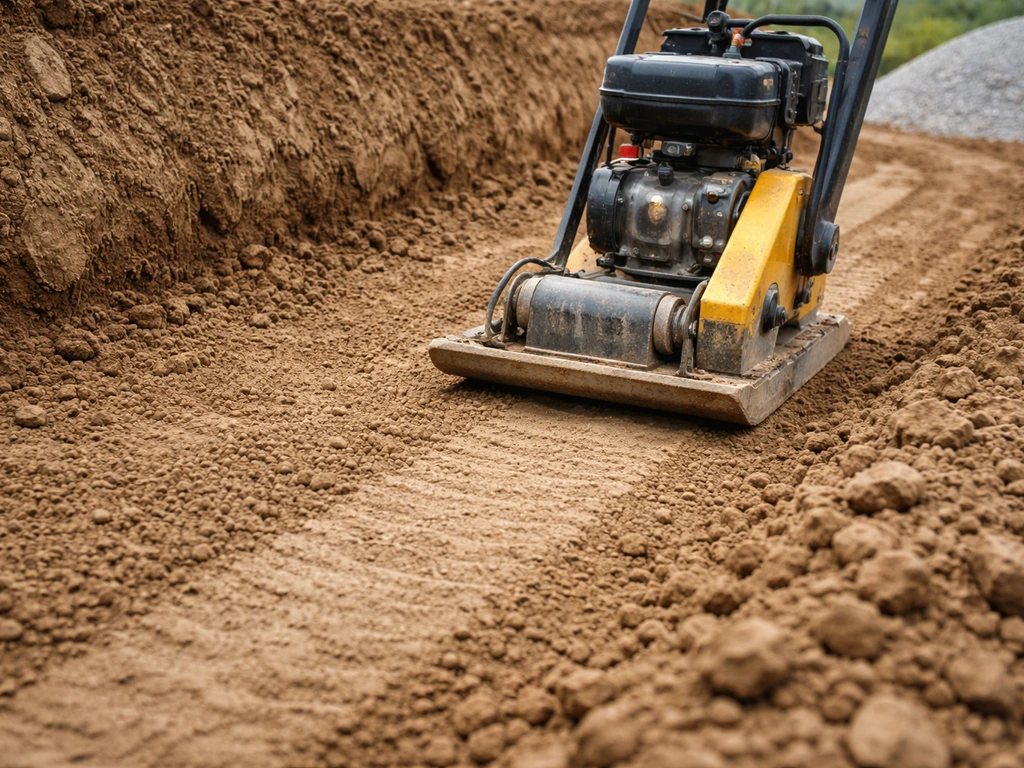
After excavation, compact the native subgrade with a plate compactor. If you have soft, sandy, or clay-heavy soil, consider laying a geotextile fabric before your base gravel to prevent the layers from mixing over time. Grade the subgrade with a slight slope away from the house, targeting about a quarter inch of drop per foot of run. That slope carries rain and groundwater away from under the tub rather than letting it pool and erode the base.
Gravel base layer
Lay a base of angular crushed stone (not rounded river rock, which won't compact properly) to a compacted depth of at least 4 to 6 inches for a standard patio. Under the hot tub zone itself, I'd go 6 inches minimum, and some builders go deeper in weak or wet soils. Angular three-quarter-inch clean crushed stone is the standard choice: it compacts tightly, drains freely, and locks into itself under load. Compact in 2-inch lifts with a plate compactor, checking level as you go.
Concrete footing requirements
If you're pouring a concrete slab, the IRC specifies concrete footings at minimum 12 inches wide and 6 inches deep, sized up from there based on soil load-bearing capacity and the actual structural load. For a hot tub, you're designing for a concentrated load that can exceed 100 pounds per square foot across the tub's footprint. A standard 4-inch residential slab is often borderline; for most hot tubs, a 4- to 6-inch slab reinforced with rebar or wire mesh over your compacted gravel base is the right call.
Choosing the right patio material
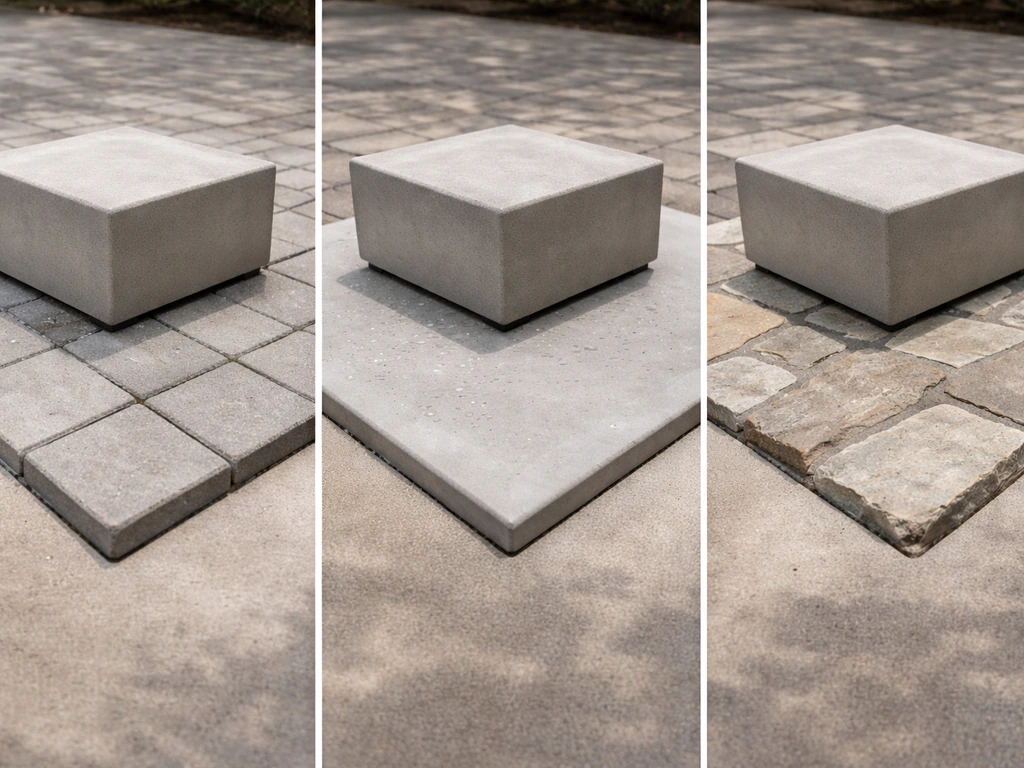
Not every patio surface that looks great on a poolside magazine cover is a smart choice under a hot tub. You need something that can handle the load, sheds water, and won't get dangerously slippery when wet. Here's how the most common DIY options stack up.
| Material | Load Capacity | Slip Resistance | Moisture Resistance | DIY Difficulty | Relative Cost |
|---|---|---|---|---|---|
| Poured concrete (reinforced) | Excellent | Good (textured finish) | Excellent | Moderate | $$ |
| Concrete pavers | Very good (with engineered base) | Good (textured surface) | Good | Moderate | $$–$$$ |
| Compacted gravel pad | Good (hot tub zone only) | Moderate | Excellent (drains freely) | Easy | $ |
| Natural stone/flagstone | Good (with proper base) | Variable (sealing helps) | Good | Moderate–Hard | $$$ |
| Composite/wood-style decking | Depends on framing | Good (grooved surface) | Good (composite) | Hard | $$$–$$$$ |
| Ceramic/porcelain tile | Good (on correct substrate) | Variable (rated anti-slip needed) | Excellent (sealed) | Hard | $$$ |
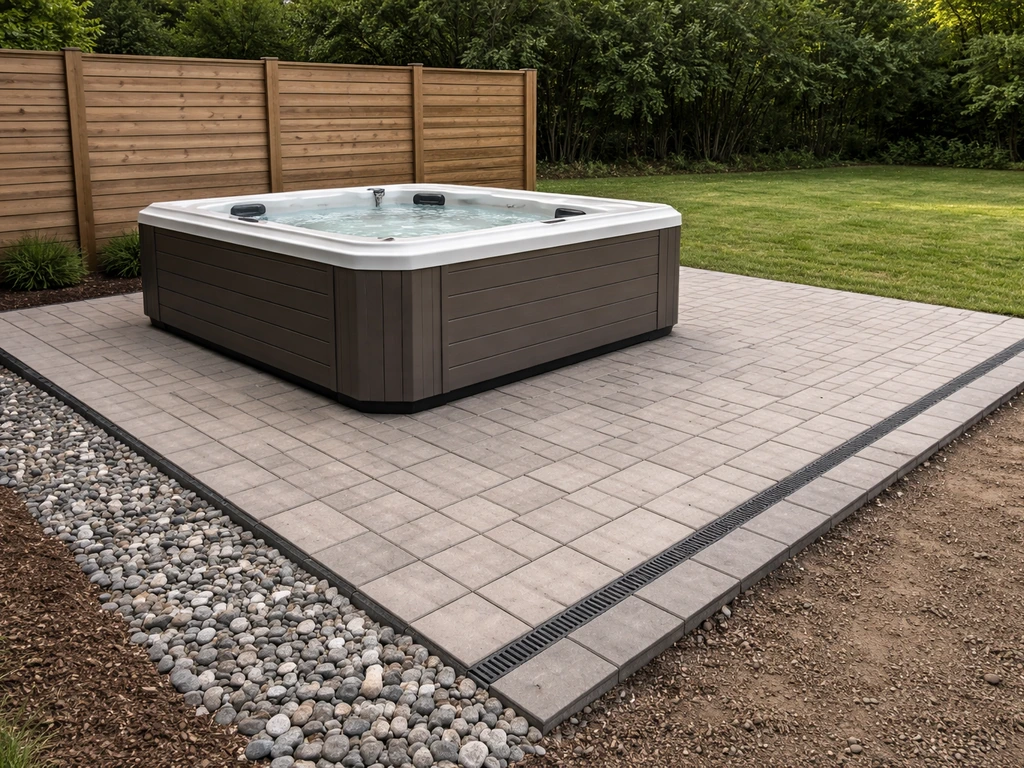
Reinforced poured concrete is the most common choice for a hot tub base, and honestly for good reason. It's strong, flat, durable, and relatively forgiving to build. Pavers work well too, but only if the base underneath is properly engineered: a paver zone that flexes under concentrated load will shift and tip the tub over time. Compacted gravel is fine as a standalone base for the hot tub itself (many manufacturers approve it), but it's not a great walking surface and it won't give you the clean finished look most homeowners want. If you want a more polished patio with a gravel base under the tub, pour a concrete surround with a gravel hot tub pad as the tub's direct support zone.
Prefabricated engineered pad systems (like EZ Pads or similar plastic interlocking panels) are worth considering if you want a faster install. Some products are rated for very high loads and can be installed over compacted gravel in a few hours. They're not as visually impressive as stone or concrete, but they're level, stable, and drain freely. Check your manufacturer's approval list before buying.
If you're planning a wood or composite deck to house the hot tub rather than a ground-level patio, the framing requirements are significantly more involved. That project overlaps more with hot tub deck builds than a patio build, and the structural engineering for a raised platform under that kind of load is its own topic.
Framing and reinforcement for hot tub loads
If you're pouring a concrete slab, reinforcement is non-negotiable for the hot tub zone. Use half-inch (#4) rebar on a 12-inch grid, or at minimum 6x6 welded wire mesh, set on chairs so it sits in the middle third of the slab thickness. The goal is to prevent the slab from cracking and settling differentially under the tub's weight. A crack that runs under the hot tub is expensive to fix and can void the manufacturer's base requirement.
For the rest of the patio (the walking area around the tub), a 4-inch slab with wire mesh over 4 inches of compacted gravel is standard. But the hot tub footprint itself should be treated as a structural zone: 5 to 6 inches thick, rebar-reinforced, and poured monolithically with the rest of the slab if possible. If you're adding the hot tub pad to an existing patio, cut a clean control joint and pour the tub pad as a separate section with its own reinforcement.
Also plan for equipment access during the framing/design phase. Know exactly which sides of your hot tub have service panels and make sure the patio layout (including any retaining walls, planters, or fencing you add later) keeps those sides accessible. Blocking a service panel after the fact means breaking up concrete or tearing out landscaping.
Step-by-step build from layout to finished surface
- Mark the patio footprint with stakes and string lines, including the hot tub zone, any steps, and the electrical trench path. Double-check all measurements and verify the layout is square using the 3-4-5 triangle method.
- Excavate to the required depth (typically 8 to 12 inches below finished grade), removing all organic material. Dig your electrical conduit trench at the same time to avoid cutting through finished work later.
- Compact the native subgrade with a plate compactor. Lay geotextile fabric if your soil is soft, silty, or prone to frost heaving.
- Install your electrical conduit run through the trench before filling. Use rigid PVC or metal conduit rated for direct burial, and leave plenty of pull wire for the electrician. Backfill and compact the trench in lifts.
- Add angular crushed stone base in 2-inch lifts, compacting each layer. Build up to your target depth (6 inches minimum under the hot tub zone, 4 inches under the surrounding patio).
- For a concrete slab: set your forms, install rebar or wire mesh on chairs, check the reinforcement is centered in the slab depth, then pour and screed to grade. Finish with a broom texture for slip resistance. Use control joints every 8 to 10 feet to manage cracking.
- For pavers: add a 1-inch bedding layer of coarse sand over the compacted gravel, screed it flat, then set pavers in your pattern. Compact pavers with a plate compactor and a rubber pad, then sweep polymeric sand into the joints.
- Allow concrete to cure a minimum of 7 days before placing the hot tub. Full strength takes 28 days, but a week is sufficient for initial load if you're working on a schedule.
- Finish edges with bullnose pavers, poured concrete edging, or a bevel cut to prevent trip hazards and protect the slab edge from chipping.
- Final grade the surrounding soil so it slopes away from the patio on all sides. This is easy to overlook but critical for long-term drainage.
Hot tub placement: clearances, leveling, vibration, and utilities
Clearances
Plan for a minimum of 2 to 3 feet on service-panel sides, more if your model has large or awkward panel doors. On non-service sides, 12 to 18 inches is workable for aesthetics, but check your local code: some jurisdictions have setback requirements from property lines and structures. The NEC also requires the disconnect to be located at least 5 feet horizontally from the water's edge and within sight of the tub, so factor that into your patio layout before you pour.
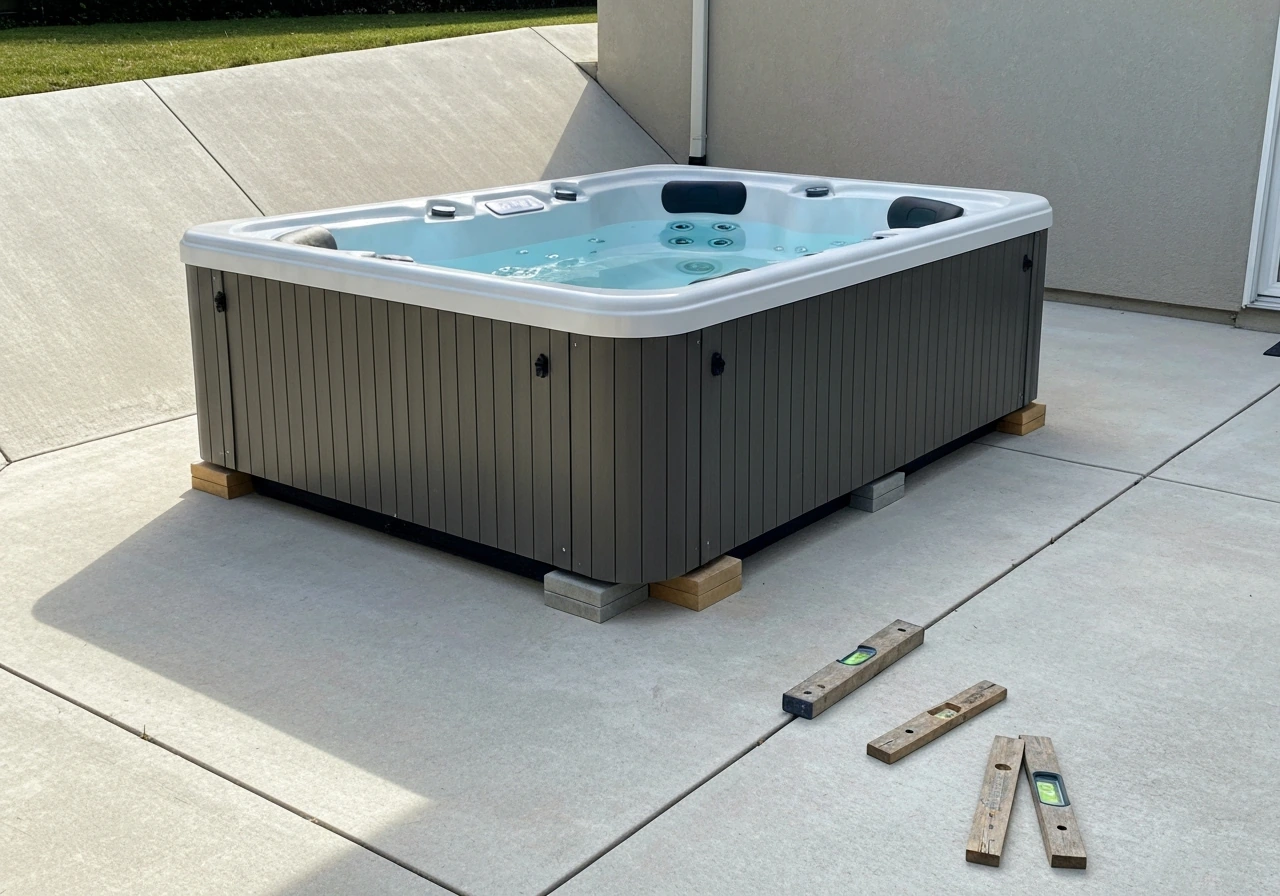
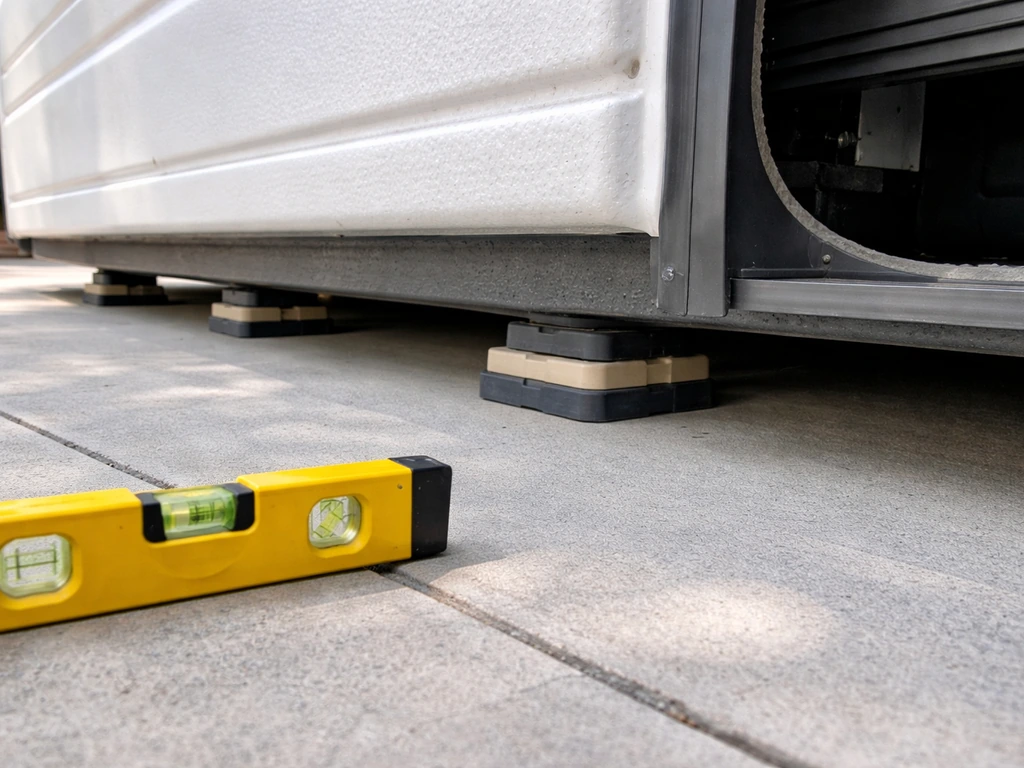
Leveling
A hot tub must sit on a flat, level surface. 'Close enough' isn't good enough here: an unlevel base stresses the shell and cabinet, causes pumps to run inefficiently, and will void most manufacturers' warranties. Verify the surface is level in both directions with a 4- or 6-foot level before the tub arrives. If your slab came out slightly off, correct it with a self-leveling concrete compound before delivery day. Some manufacturers specifically prohibit shimming the tub itself (the Hot Spring manual, for example, includes model-specific shimming restrictions), so don't count on shimming under the cabinet base to compensate for an uneven slab.
Vibration and noise control
Hot tub pumps and motors create low-frequency vibration that transmits through a rigid concrete slab and into the house foundation if the tub is close to the building. A simple fix is to place a rubber anti-vibration mat (or purpose-made spa pad material) between the tub base and the concrete. This also protects the underside of the cabinet from direct moisture contact. The mat should cover the full tub footprint, not just the pump area.
Electrical and utility routing
Most full-size hot tubs require a dedicated 240V, 50-amp circuit with GFCI protection and 6 AWG copper wiring run in conduit. The circuit runs from your main panel, through buried conduit, to a weatherproof disconnect box mounted at least 5 feet from the water's edge, then from the disconnect to the tub's equipment compartment. This work must be permitted and inspected in most jurisdictions, and I'd strongly recommend having a licensed electrician pull the wire and make the connections even if you did all the groundwork yourself. Wiring errors near water are not the kind of mistake you want to find out about the hard way.
If your hot tub has a water fill connection or drain line, route those in the trench alongside the conduit before backfilling. It's far easier to add a garden hose bib or a dedicated drain pipe stub during construction than to trench back through finished concrete later.
Costs, tools checklist, and mistakes to avoid
Realistic cost ranges
A basic compacted gravel hot tub pad (12x12 feet, DIY labor) can cost as little as $200 to $400 in materials. If you are wondering how to install a hot tub on a patio, your base choice is a big part of the total cost and the final stability compacted gravel hot tub pad. A reinforced poured concrete slab in the same footprint typically runs $800 to $2,000 in materials depending on your region and whether you rent a mixer or buy ready-mix. A paver patio with a reinforced concrete or compacted base in a larger footprint (say 16x20) can run $2,000 to $5,000 or more in materials. Electrical work adds $500 to $1,500 or more depending on the run length and your local labor rates. Permits are typically $50 to $300 but vary widely by municipality.
Tools and materials checklist
- Stakes, string line, and line level for layout
- Spade and square-edge shovel for excavation
- Plate compactor (rent from a tool rental shop)
- Wheelbarrow and tamping rod
- Angular 3/4-inch crushed stone (gravel base layer)
- Coarse sand (for paver bedding if using pavers)
- Concrete forms (2x4 or 2x6 lumber) and screws
- Rebar (#4, 1/2 inch) and rebar chairs, or 6x6 welded wire mesh
- Concrete mix or ready-mix delivery for larger pours
- Bull float, screed board, and broom for concrete finishing
- 4-foot level and long straightedge
- Rubber anti-vibration mat (cut to tub footprint)
- PVC or metal rigid conduit and pull wire for electrical trench
- Geotextile fabric (optional but recommended for weak or silty soils)
- Polymeric sand (if using pavers)
- Safety gear: gloves, eye protection, knee pads
Common mistakes that cause real problems
- Skipping reinforcement in the hot tub zone: a 4-inch unreinforced slab under 6,000 pounds of hot tub will crack, usually within the first winter.
- Wrong drainage slope or no slope at all: water pooling under or around the base causes freeze-thaw damage and accelerates slab deterioration.
- Not excavating deep enough: leaving organic topsoil under the base leads to differential settling that tilts the tub over time.
- Undersizing the electrical circuit: a 30-amp circuit on a 50-amp tub will trip breakers constantly and can overheat wiring.
- Forgetting conduit before pouring: having to core-drill through a finished slab to add conduit later is painful and expensive.
- Blocking service panel access with landscaping, fencing, or planters: you will regret this the first time a pump needs replacement.
- Placing the tub too close to the house without checking NEC clearances for the disconnect location.
- Assuming shimming will fix a bad base: many manufacturers prohibit shimming under the shell; the base has to be right before the tub arrives.
- Not pulling a permit: unpermitted hot tub electrical work is a liability issue and can affect homeowners insurance and resale.
The project is very doable as a DIY build if you take the base work seriously. Once the pad is poured, cured, and level, getting the hot tub installed and wired is relatively straightforward. If you're planning a more elaborate setup with the tub integrated into a larger deck or pool patio, those builds share a lot of the same foundational principles but add framing complexity worth exploring separately. You can use many of the same excavation, base, drainage, and patio-material principles when you need to know how to build a pool patio.
FAQ
Do I need to excavate 8 to 12 inches even if I’m building with pavers instead of pouring concrete?
Yes, for a hot tub you should still remove all topsoil and organic material across the full footprint, then build a compacted granular base to a depth that matches your system design. Pavers only perform well if the base is compacted and drains, otherwise the localized load causes rocking and uneven seating over time. If you plan to use pavers, choose a thickness and edge restraint system that locks the pavers, and keep the hot tub support zone reinforced separately from the walking area.
Can I set a hot tub directly on compacted gravel to save money?
Many manufacturers allow gravel beneath the tub, but you still need dead-level, proper compaction, and a drainable slope away from the house. Also account for access and maintenance, because gravel does not provide a finished walking surface. If you want a cleaner look or want to reduce uneven settling risk, use gravel as the granular base under a concrete surround or an engineered pad that locks the grade.
What happens if my yard slope is small, can I just shim the tub to make it level?
A small slope is often handled by cutting and fill or adjusting the subbase grade, not by shimming the tub. Many manufacturers prohibit or limit shimming under the cabinet base, because it can stress the shell and void warranty. If the slab is slightly off, correct it with leveling compound or remove and rework the support zone before delivery.
How do I verify levelness correctly before the tub arrives?
Use a 4- or 6-foot level and check level in both directions at multiple points across the footprint, not just one measurement. Then re-check after final grading and before pouring or installing the support materials, because minor shifts can occur while forming or compacting. For a slab, confirm that the top surface is within the manufacturer’s tolerance and that the tub footprint area is one continuous plane.
Should I slope the pad for drainage if the slab is already level at the tub location?
Yes, but do it at the patio grade level, not by tilting the tub support surface. You want water to shed away from the tub area and away from the house, so create drainage slope in the surrounding grades and base layers while keeping the hot tub footprint dead-level. A common mistake is to “fix” drainage by introducing a tilt under the tub, which leads to stress on the shell and equipment.
Is a concrete surround necessary if I’m using pavers for the rest of the patio?
It depends on your base design, but it is often a good way to separate the structural hot tub support zone from the decorative walking area. A concrete surround or dedicated reinforced pad under the tub reduces the risk of differential movement that can tip or settle pavers. If you mix materials, keep a clear boundary, use proper reinforcement in the tub zone, and ensure the hot tub area drains without pooling at the edges.
How close can the hot tub be to the house, especially for vibration and access?
Electrical setback rules vary by location, but vibration is a practical limitation even when code allows proximity. When the tub is near the foundation, low-frequency vibration can transmit into the structure, so plan for an anti-vibration mat covering the full footprint and consider additional isolation at the tub base. Also maintain access clearance for service panels, because you may need several feet of unobstructed working space to remove panels and reach plumbing connections.
Do I need anti-vibration mats if I’m not pouring a new slab?
If the tub base is rigid, like concrete or engineered panels over compacted stone, vibration control is still important. A rubber anti-vibration mat helps reduce stress from pump and motor vibration and protects the cabinet underside from direct moisture. If you are on a framed deck (different than a ground patio), the approach is more involved, and you may need a structural vibration strategy rather than only a mat.
What’s the safest way to handle wiring and the disconnect box during construction?
Plan the trench and disconnect location before you pour or lock in pavers, then keep conduit routing along a straight, protected path. The disconnect must be within sight of the tub and located at least 5 feet horizontally from the water’s edge, so measure this early against fences, planters, and any retaining walls. Use schedule-appropriate conduit and weatherproof fittings, and verify the circuit requirements with a licensed electrician and the hot tub manual.
Can I add the water fill line and drain line later if I forget during the build?
You can, but it is usually much harder and more expensive after concrete or pavers are installed. It is best to stub or route the lines during construction, alongside the electrical conduit trench, so you can add a hose bib or a dedicated drain with minimal demo. If you must retrofit, plan for core drilling or cutting and be careful to avoid compromising reinforcement or creating unplanned water pathways that can undermine the base.
How do I prevent voids under the hot tub after the pad is built?
Prevent voids by compacting in lifts, checking level often, and keeping the surface clean and continuous before delivery. Avoid over-wetting base gravel during compaction and do not top-fill with fines that can shift under load. After installation materials are complete, inspect for low spots and ensure the full footprint support area is uniform, then re-check level right before the tub is lowered in place.
How to Level a Hot Tub on a Sloped Patio
Step-by-step DIY to level a hot tub on a sloped concrete patio using shims, pads, or feet, ensuring stability and safety