You can level a hot tub on a sloped patio by measuring the exact drop across the surface, then choosing a method that provides full, continuous support under the entire base: a compacted pea gravel or sand-cement bed for significant slopes, adjustable leveling feet on tubs that allow them, or a built-up paver pad for minor corrections. Whatever you do, avoid shimming just the corners and leaving voids underneath. A hot tub filled with water can weigh 4,000 to 6,000 pounds, and point loading on an unlevel base is how cabinets crack, frames warp, and warranties get voided.
How to Level a Hot Tub on a Sloped Patio

Nolan Lennox
8 Jun 2026
How to confirm the slope and measure your patio surface
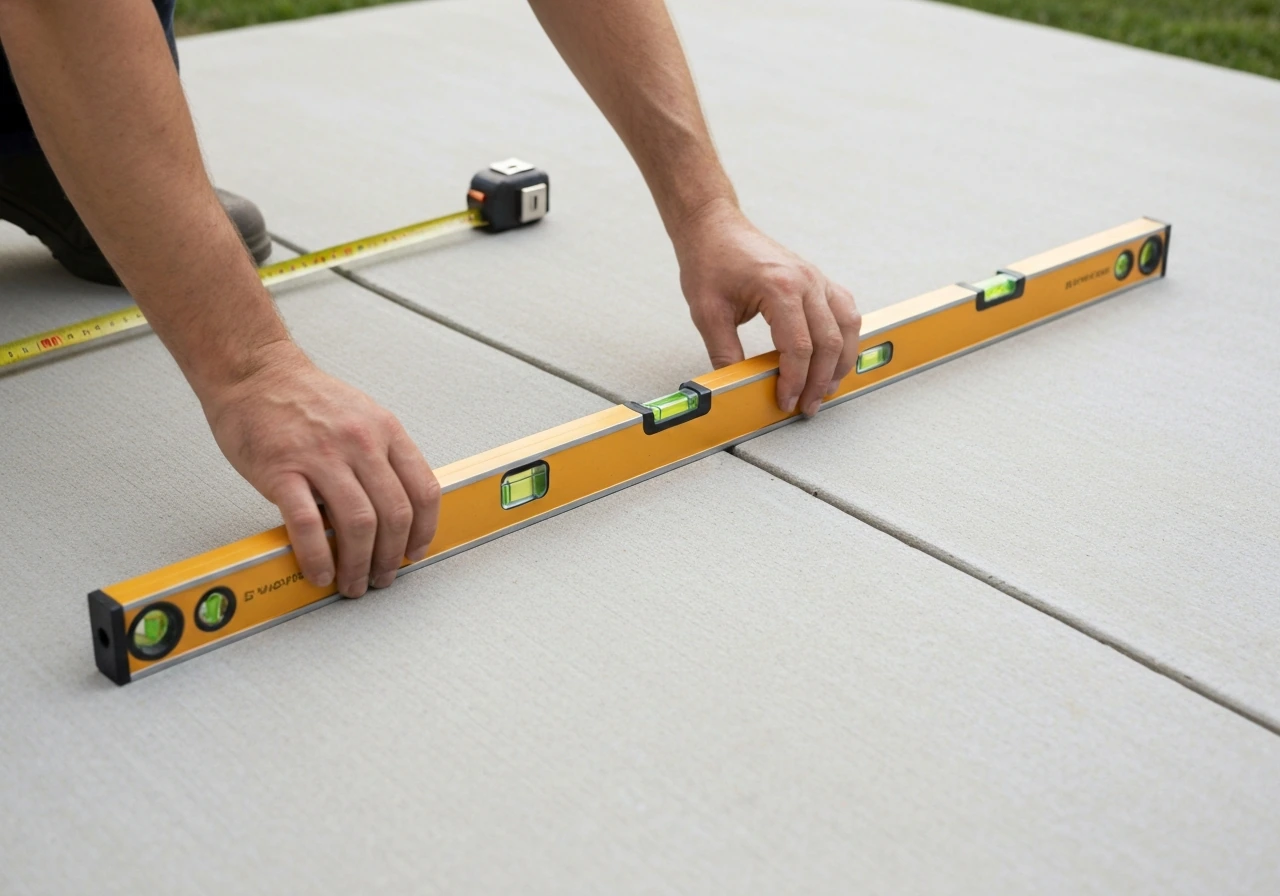
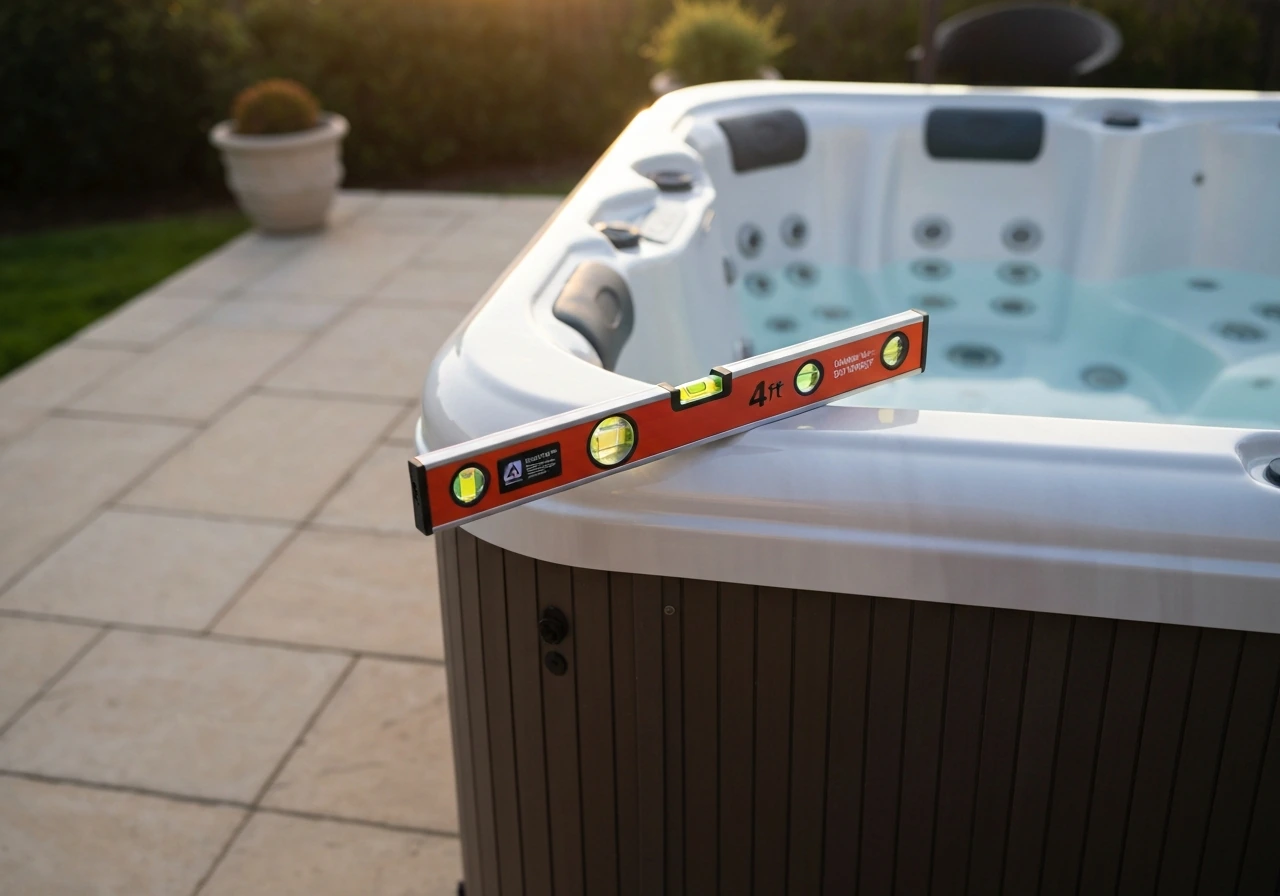
Before you move anything or buy any materials, you need to know exactly what you're dealing with. Grab a 4-foot or 6-foot level and a tape measure. Lay the level flat on the concrete and note the bubble. If the bubble is off center, slide a thin shim under the low end of the level until it reads perfectly level, then measure the height of that shim. That gives you the drop over the length of the level.
A smarter approach that Sundance Spas recommends is using a long 2x4 and a builder's level (or a laser level if you have one) laid across the full footprint of where the hot tub will sit. Measure the slope in both directions: side to side and front to back. Write those numbers down. You want to know the total drop across the longest dimension of the tub, not just a spot check in one corner.
Here's how to interpret what you find. Caldera Spas actually specifies a preferred slope of 1/2 inch per 10 feet on a concrete pad so that rainwater and water spillover drain away naturally. So a very slight slope is not a problem and is arguably ideal. The trouble starts when your slope is steeper than that or when there are dips, sags, or high spots scattered across the surface rather than a clean, consistent grade.
| Measured Drop | Slope Classification | What It Means for Your Hot Tub |
|---|---|---|
| Up to 1/2" per 10 ft | Ideal | Acceptable as-is; good drainage without rocking |
| 1/2" to 1" per 10 ft | Minor slope | May need leveling feet, base pads, or a corrected bed |
| 1" to 2" per 10 ft | Moderate slope | Needs a built-up compacted base or full paver platform |
| Over 2" per 10 ft | Significant slope | May require concrete grinding, a poured leveling layer, or structural regrading |
Check for dips and sags too, not just the overall slope. Press down on the surface across the footprint. If any section flexes, cracks, or sounds hollow, the concrete underneath is compromised and needs to be repaired before you put a 5,000-pound tub on top of it.
Prepping your concrete patio before anything goes on top of it
Even if your concrete looks solid, it needs a once-over before you set a hot tub on it. Start by pressure washing the entire area where the tub will sit. You're not just cleaning for aesthetics: you're removing algae, moss, and any debris sitting in cracks that could hide a deeper problem. Once it dries, get down and look closely at the surface.
- Fill any cracks wider than 1/4 inch with a concrete crack filler or hydraulic cement. Let it cure fully before adding load.
- Look for spalling (flaking surface concrete). Light spalling is cosmetic, but deep spalling that exposes aggregate means the surface layer is failing.
- Check that water drains away from the pad, not toward the house or toward areas where it could pool under the tub base.
- Confirm the slab is at least 4 inches thick. Caldera Spas recommends a reinforced concrete pad at minimum 4 inches thick as the foundation for a spa. If your patio is an older, thinner pour, it may still work, but inspect it very carefully for cracking under load.
- Make sure no tree roots are running under the slab. Roots keep growing and can slowly push sections of concrete up over time, which will re-level your tub for you, and not in a good way.
Drainage matters more than most people realize. When you use the hot tub, you'll splash water. When it rains, water will run across the patio. If that water collects under or around the tub base and then freezes in winter, it can shift the base enough to throw the tub noticeably out of level within a single season. Make sure your surface drains cleanly before you commit to placement.
Choosing the right leveling method for your situation
This is where most DIYers get tripped up, because there's no single universal answer. The right method depends on how much slope you have, what your hot tub's base looks like, and what your manufacturer allows. Read your owner's manual before you pick anything. Some brands, like Bullfrog Spas, explicitly say do not use shims to level the spa. Others, like Watkins (Hot Spring), describe a shim-based approach using 1/4 to 1/2 inch shims cut to 2x4-inch rectangles as part of their own process. The brand matters.
| Leveling Method | Best For | Slope Range | DIY Difficulty | Manufacturer Compatibility |
|---|---|---|---|---|
| Adjustable leveling feet | Tubs with factory-installed or optional feet | Up to ~1.5" | Easy | Check manual; works where shimming is allowed |
| Pea gravel compacted bed | Minor to moderate slopes; tubs needing continuous base support | Up to ~2" | Moderate | Good for brands requiring no voids (Bullfrog-style) |
| Paver base platform | Moderate slopes; improving an uneven patio surface | 1/2" to 2" | Moderate | Works across most brands if level and stable |
| Sand-cement (dry pack) bed | Moderate to significant slopes; permanent installs | 1" to 3" | Moderate-Hard | Good continuous support; solid for all brands |
| Shimming (wood or composite) | Minor gaps; brands that allow it | Up to 1/2" | Easy | Brand-specific; NOT for Bullfrog, check your manual |
| Concrete grinding or self-leveler pour | Significant slope or major surface unevenness | 2"+ or uneven surface | Hard / Pro recommended | Universal; creates the ideal base for any tub |
Adjustable leveling feet
Some hot tubs come with adjustable feet, and some manufacturers sell them as add-ons. These work like appliance leveling legs: you thread them up or down to compensate for a slope. They're convenient but only work within a small correction range, typically an inch or less, and they can create point loading if the tub's base frame isn't designed to transfer load through those feet evenly. Only use these if your manual explicitly supports it.
Pea gravel or compacted base bed
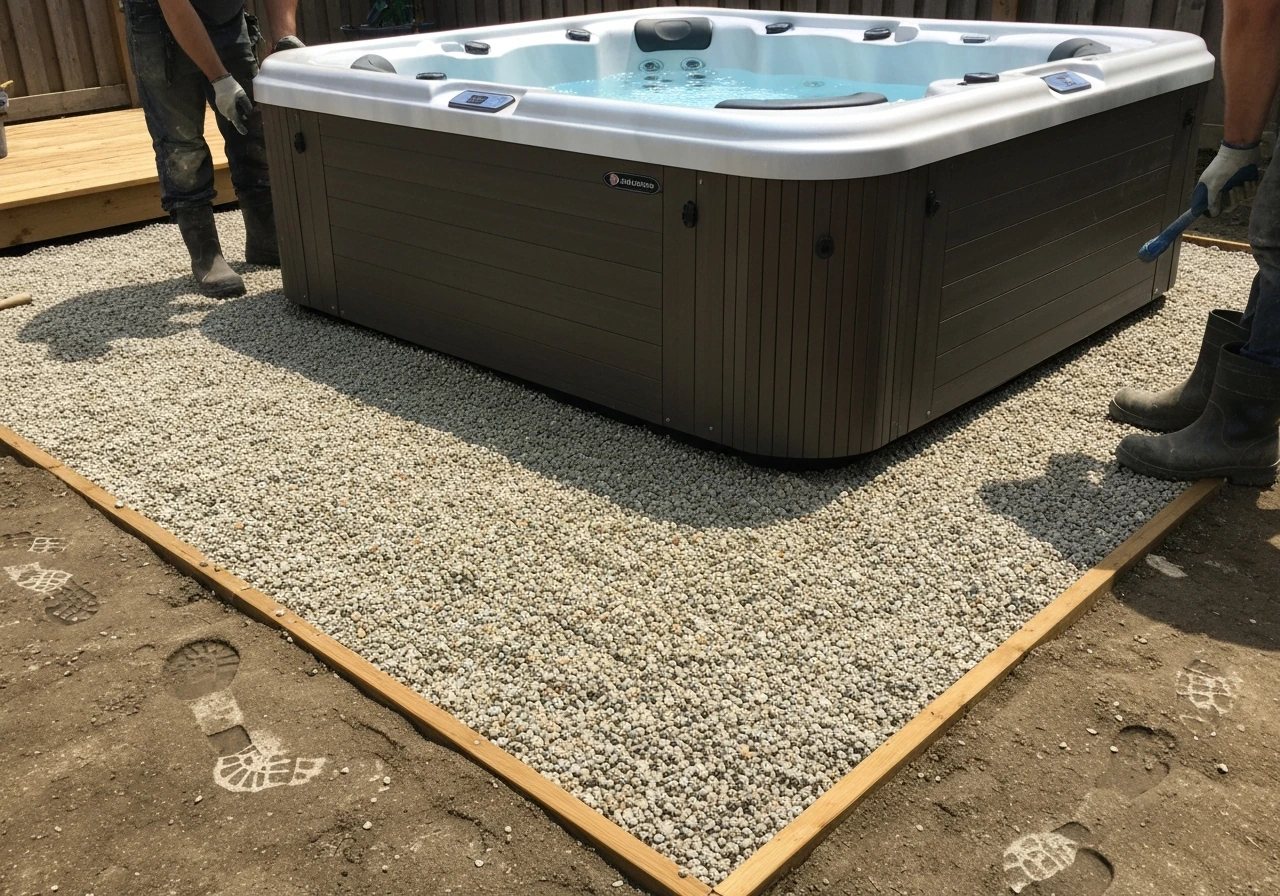
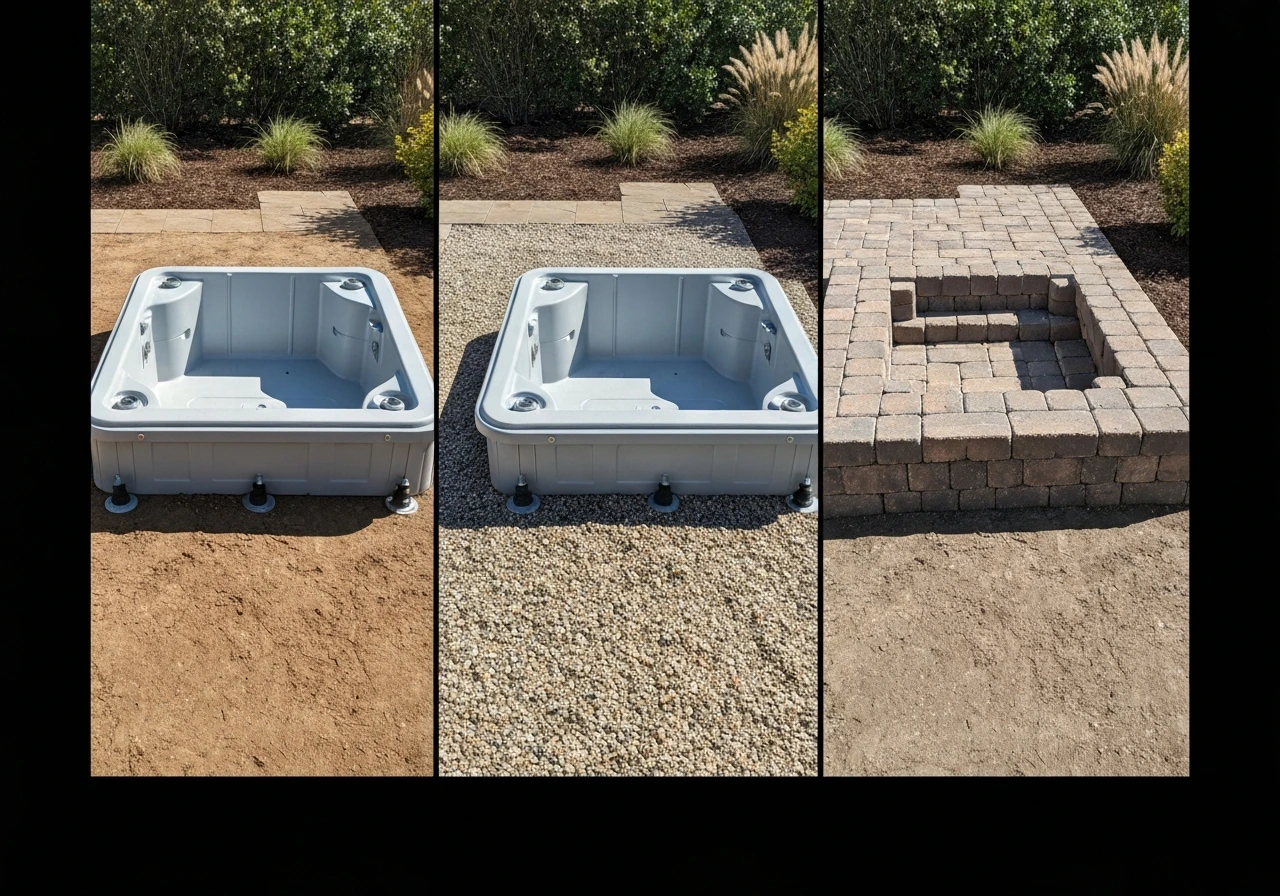
This is actually the approach a Bullfrog-certified leveling service uses: after disconnecting and moving the tub, they install leveling materials (typically pea gravel) between the spa and substrate, then reset the tub. A pea gravel bed provides continuous support across the entire base, eliminates voids, and allows minor drainage. On a concrete patio, you'd use this by building a contained frame (pressure-treated 2x4 or 2x6 boards around the perimeter), filling it with clean pea gravel or compacted crushed stone, grading it to level, and setting the tub on top.
Paver platform
If your concrete patio has a modest slope, laying a level paver platform directly on top can be an elegant solution. For a full guide on planning layout, drainage, and materials, see how to build a pool patio patio building. You set the pavers on a thin layer of leveling sand, building up the low side to create a perfectly flat surface at the hot tub footprint. This is a project that fits naturally into the broader scope of patio building, and if you've already done any patio paver work, the skills transfer directly.
Dry-pack sand-cement bed
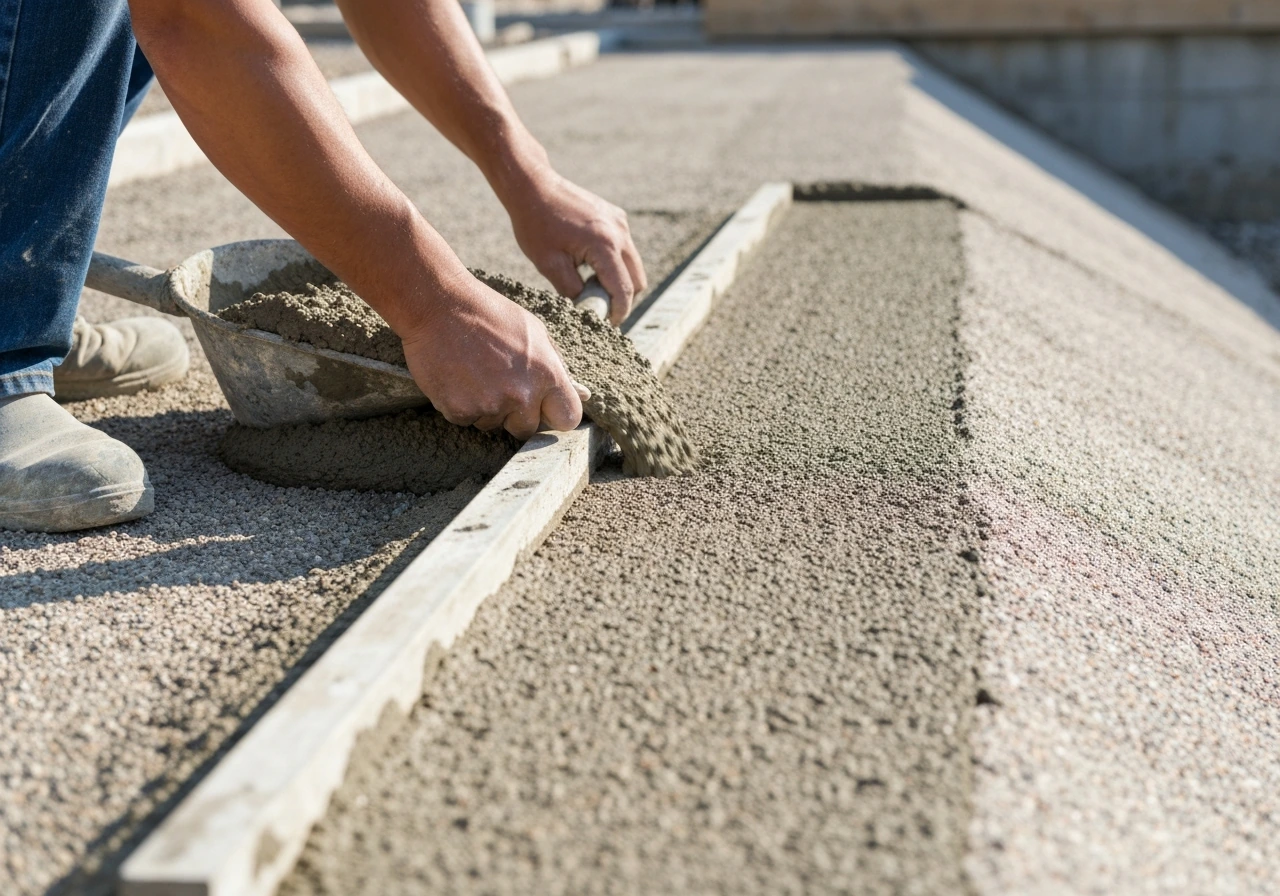
For more significant slopes, a dry-pack mortar bed (4 parts sand to 1 part Portland cement, mixed dry) is one of the most durable options. You pour and screed it to a level surface, let it cure, and it becomes a permanent, solid, void-free base. This is time-intensive but it gives you an essentially perfect foundation with continuous support across the whole footprint.
Step-by-step: how to level a hot tub on a sloped concrete patio
This process assumes a moderate slope (up to about 2 inches) and a pea gravel or compacted base bed approach, which works for most hot tubs and satisfies the continuous support requirement. Adjust based on your chosen method, but the sequence stays largely the same. This guide walks you through the key steps for how to install a hot tub on a patio, including measuring slope, preparing the base, and setting the tub safely how to level a hot tub on a sloped concrete patio.
- Mark out the hot tub footprint on your patio using chalk lines or tape. Add 6 inches on each side so you have a stable perimeter to work with.
- Measure the slope across the full footprint in both directions using your level and 2x4. Record the high point and the low point. This is your target correction height.
- Build a simple perimeter frame using pressure-treated 2x4 or 2x6 lumber, staked or weighted to hold position on the concrete. The frame height at the low end equals your needed correction.
- If using pea gravel: fill the frame with clean pea gravel and rake it roughly level. Then use a long screed board or your 2x4 set on the frame edges to drag across and flatten the surface. Check with your level. Add or remove gravel until the screed surface reads flat in all directions.
- If using a dry-pack mortar bed: mix 4 parts masonry sand to 1 part Portland cement (dry, no water yet). Pour into the frame to the low-side height, screed level, then mist lightly with water. Allow 24 to 48 hours to firm up before placing the tub.
- Before placing the tub, do a final level check across the entire prepared surface. You want to hit within 1/4 inch across the full footprint.
- Position the hot tub directly onto the prepared base. Have enough people to place it carefully: rushing this step is how corners get dropped and bases get point-loaded. Bullfrog Spas' guidance on this is clear: the entire base must make contact with the support surface, no voids.
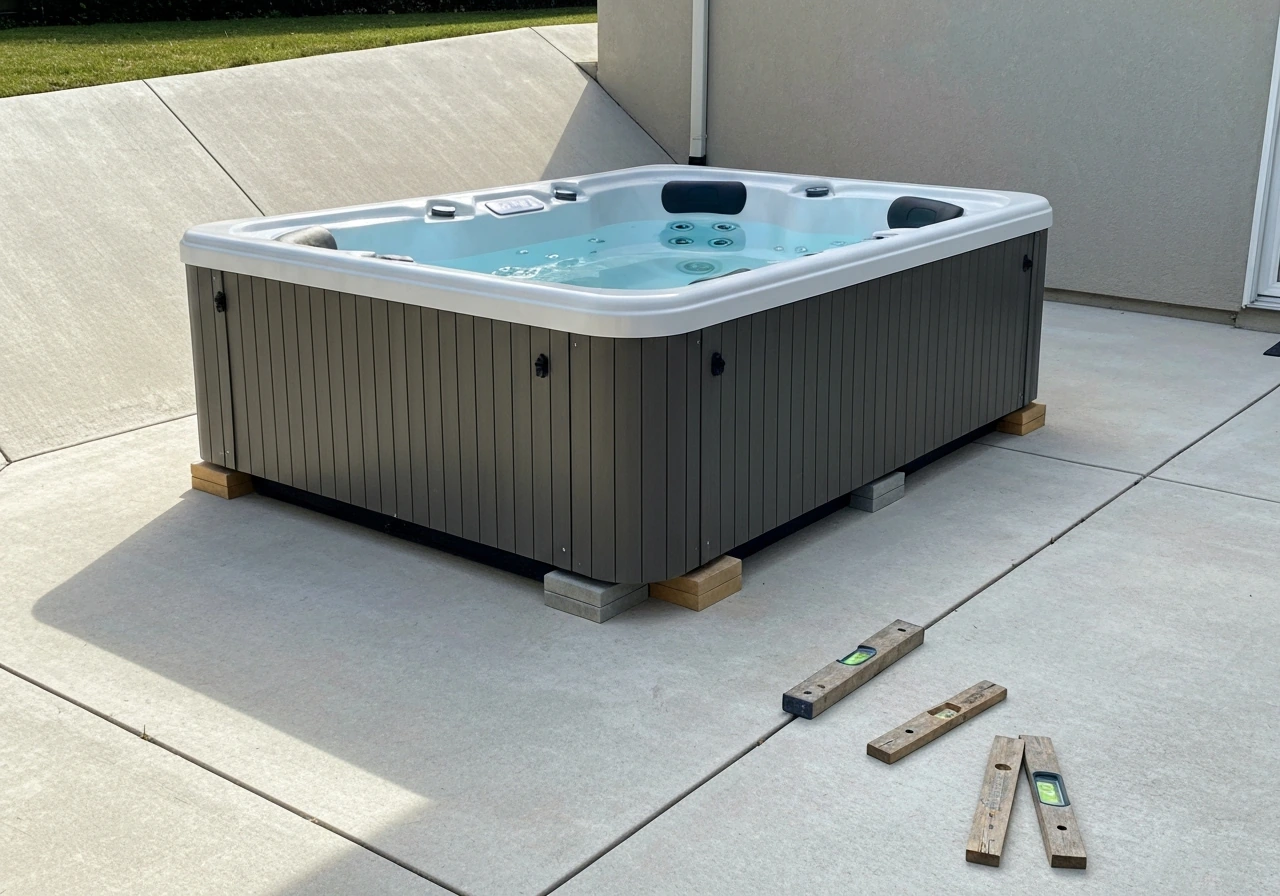
- Once set, check the tub itself with a level on the top edge or cabinet rim, in both directions. Don't just trust the base surface check: confirm the tub reads level once it's sitting on it.
- If you need minor final adjustments and your brand allows shimming: use composite shims (not wood, which rots) in 1/4 to 1/2 inch thicknesses, placed in pairs, slid in from opposite sides. Spread shims along the entire low side, not just at the corners, to maintain full contact.
- Connect electrical and plumbing only after the tub is confirmed level and stable.
Hot tub safety: weight, stability, and not voiding your warranty
A full hot tub is genuinely heavy. A typical 6-person spa filled with water and holding 4 to 6 adults can weigh anywhere from 4,000 to over 6,000 pounds. That weight needs to be distributed evenly across the entire base. When you allow point loading at the corners or edges, you're concentrating that load at a few small contact points, which stresses the frame, cracks the cabinet, and can compromise the internal plumbing over time.
Jacuzzi's guidance is blunt on this: the hot tub should be elevated on a 100% level foundation on solid ground. Caldera Spas puts the responsibility directly on you as the homeowner: it's your job to provide a suitable, level foundation. That's not just liability language. It means that if you place the tub on a bad base and something fails, the warranty claim won't go anywhere.
Bullfrog Spas is one of the strictest on this point. Their manual requires continuous support for the entire base with no voids, explicitly prohibits shimming, and states that inadequate foundation or improper leveling will void the spa warranty. Even their own service notes say that after leveling and filling the tub, settling of up to 3/4 inch over a 6-foot run is acceptable, but anything beyond that is a problem. If you're leveling a Bullfrog, skip the shims entirely and go with a continuous-support base.
Before you finalize your approach, pull out your owner's manual and look for the installation or site preparation section. Every brand has slightly different requirements. What works fine for a Hot Spring spa may void a Bullfrog warranty. Spending 20 minutes reading the manual now saves you an expensive argument with the warranty department later.
Final checks before you fire it up
Once the tub is positioned and you believe it's level, do these checks in order before connecting power or filling fully.
- Level tool check: place a 4-foot level on the top rail or cabinet edge of the tub in multiple spots, rotating around all four sides. You're looking for consistent level readings, not just one side.
- Partial fill test: add about 6 to 8 inches of water and watch the waterline across the shell interior. A level tub will show an even waterline all the way around. If the water is visibly higher on one side, the tub is still off and needs adjustment before full fill.
- Rock check: push gently on each corner of the tub. It should not rock or shift at all. Any movement means there's a void or soft spot underneath that needs to be addressed.
- Plumbing and electrical placement: confirm all lines and conduit have proper slack and routing now that the tub is in its final position. Leveling sometimes shifts the tub a few inches from where you originally planned, and tight plumbing connections can develop stress cracks if the tub moves slightly after full fill.
- Full fill and recheck: fill the tub completely and let it sit for 24 hours. Recheck the level. A small amount of settling is normal on a gravel bed, especially during the first fill. Bullfrog's service guidance notes up to 3/4 inch over 6 feet after settling as the acceptable limit. If it settles beyond that, drain, adjust the base, and refill.
- Drainage recheck: walk around the tub and look at how water drains across your patio. You want water moving away from the tub, not pooling at the base. If the patio grade is now directing water toward your new base, install a simple channel drain or adjust the patio drainage before you close everything in.
One thing I always tell people: don't skip the 24-hour post-fill check. It feels like an unnecessary delay when you want to get in the water, but a gravel or sand base that reads perfectly level when empty can settle slightly once 5,000 pounds hits it. Catching that early, while the tub is new and easy to adjust, is far better than dealing with it after the patio landscaping is finished around it.
Preventing future settling and keeping it level long-term
If you've done this right, you shouldn't need to revisit leveling more than once a year for a quick check. But a few things can knock a hot tub out of level over time: freeze-thaw cycles heaving a gravel base, tree roots slowly lifting the concrete underneath, or erosion carrying away material from under the slab edge.
- Check the level every spring after the first freeze-thaw cycle. This is when most settling happens.
- Keep vegetation back from the base. Roots and organic material under or near the tub base are a slow but steady leveling problem.
- Make sure the patio surface still drains properly after each season. Shifting concrete can change the drainage slope enough that water starts collecting where it didn't before.
- Inspect the base perimeter for erosion or gaps opening up between the tub base and the support surface.
- If you're on a pea gravel bed and the tub shifts noticeably (more than 3/4 inch over a 6-foot run), drain it, reset it, and replenish the gravel base before refilling.
The good news is that a properly built base on a sound concrete patio is genuinely stable for years. If you're thinking about going further than leveling and actually want to build a dedicated, purpose-built patio just for the hot tub, that's a project worth planning carefully from scratch, which changes a few things about how you approach the foundation, the surrounding surface, and access for service. If you want to go beyond leveling and learn the full patio build process, follow this guide on how to build a patio for a hot tub. Either way, getting the leveling right is the most important step in the whole install, and now you have what you need to do it properly. Follow these 6 steps to pool and patio success to plan the surface, leveling method, and drainage so your hot tub setup stays stable.
FAQ
How do I confirm the hot tub is level after installation if the patio isn’t perfectly uniform?
Use a stiff, long straightedge (at least the tub’s longest footprint dimension) placed directly on the tub base frame areas, then check both side-to-side and front-to-back at the same time. If you only check with a short level on a single corner, you can miss a low spot in the middle that will cause wobble under load.
Do I just measure the overall slope, or should I check for dips and high spots too?
Yes, and it matters. Take slope measurements at the exact installation footprint, not the surrounding patio, and measure the drop in both directions (front-to-back and left-to-right). Also look for “micro” issues like small sags or high ridges, because a consistent slope can still be uneven at the scale the tub’s base needs.
Can I level by adjusting the hot tub’s leveling feet even if my patio slope is more than an inch?
If you’re using leveling feet, you must verify the base still has full, continuous support as required by your brand. If the tub frame ends up carrying load mostly through adjusted legs at corners, that’s effectively point loading. When in doubt, stop and switch to a continuous-support base method (pea gravel or mortar bed) per the manual.
What’s wrong with using shims under only the low corners?
Typically no. Loose shims often create voids under the tub base, which defeats continuous support and can worsen settling as the heavy tub compresses materials unevenly. If your manual allows shims, it usually specifies the shim material, size, and placement method (for example, under defined base points) rather than improvised corner blocks.
When exactly should I re-check level, and how soon after filling?
Do the check after the tub is filled, but keep it conservative. A full post-fill check is usually done about 24 hours after filling, then again after the first full day of normal use if the manual recommends it. If your base is sand or gravel, expect minor settling and be prepared to re-level while adjustments are still possible.
What base materials should I avoid on a sloped patio because of freeze-thaw or shifting?
Avoid placing the tub on materials that can wash out or freeze under load, especially uncontained sand. If you use a gravel bed, contain it with a perimeter frame and compact it so it stays graded. If you use mortar, make sure it cures fully before you place the tub, and never treat it as a temporary patch under a weight of 5,000+ pounds.
If my tub is level, do I still need to worry about drainage under and around it?
Yes. Measure the drain and splash zone, then plan the surrounding grading so water flows away from where the tub sits. Even if the tub is perfectly level, trapped water under the base can freeze, expand, and lift one side, undoing your leveling work.
What can make a correctly leveled hot tub become unlevel over time?
Tree roots are a common “slow failure” that shows up as the tub gradually becoming unlevel. Before installation, inspect for roots near or under the patio slab and consider root barrier measures if roots are active and close to the hot tub footprint. If roots are already causing lift or cracking, fix the underlying concrete issue first.
If I discover it’s not level after I fill it, what are my options to correct it?
If the tub ends up slightly off, the right fix depends on your base method. On a contained pea gravel bed, you can disconnect and adjust by removing material and re-grading. On mortar, the base is permanent, so you would need to correct by rebuilding the mortar surface. Before choosing a fix, confirm what your manufacturer allows so you do not void warranty during rework.
Can I level a hot tub on cracked or slightly flexing patio concrete?
You should not place a new hot tub on compromised concrete, even if the top looks fine. Look for cracking, hollow sounds, flexing, or evidence of spalling, then repair before leveling the spa. Leveling over weak substrate can mask damage and accelerate failure once the tub is loaded.
Next Article
How to Build a Pool Patio: DIY Steps, Materials, and Tips
DIY guide to build a slip-safe pool patio: planning, materials, grading drainage, paver or concrete install, upkeep.