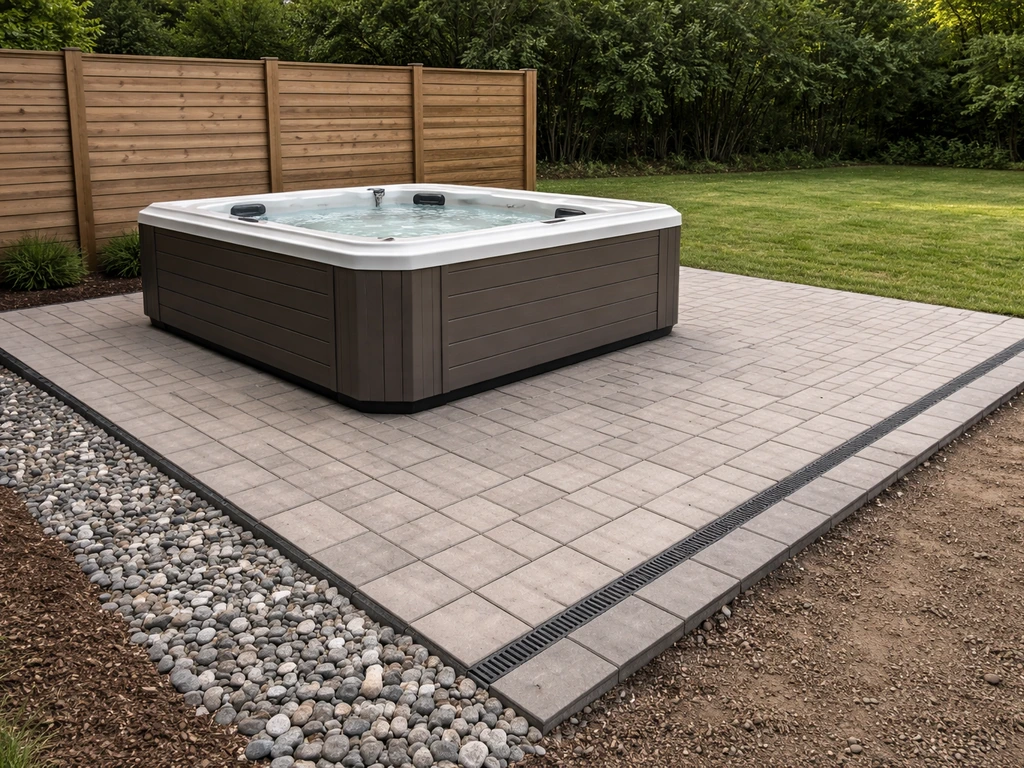
You can safely install a hot tub on an existing patio by confirming the surface can handle the total filled weight (often 3,000 to 6,000+ lbs depending on the model), getting the base perfectly level, running a dedicated 240V/50A GFCI-protected circuit, and pulling the right permits before you fire it up. That's the whole job in one sentence. The rest of this guide walks you through each step so you don't skip anything that matters. If you want the complete checklist, follow the six steps to pool and patio success from planning to startup.
How to Install a Hot Tub on a Patio: DIY Steps

Nolan Lennox
6 Jul 2026
Plan your site before anything else
Before you move a single thing, walk your patio and think through four questions: Can this surface handle the weight? Is there a clear path to get the tub into position? Where is the power coming from? And how will water drain away from the base? Answering those up front saves you from backing yourself into a corner mid-project.
For access, measure the narrowest point between your house, fencing, and any gates the tub needs to pass through. Most full-size hot tubs are 7 to 8 feet wide. Delivery crews usually tip the tub on its side to squeeze through tight spots, but they need at least 3 feet of clearance to do that safely. If you don't have it, plan the route now, not when a 500-lb shell is blocking your side yard.
Think about how you'll use the space too. You want the control panel facing somewhere convenient, not buried against a wall. The equipment compartment (usually on one or two sides of the tub) needs open access for filter changes and servicing. Cover removal is the thing people forget most often. If you're using a cover lifter, you'll need 18 to 24 inches of unobstructed clearance on the side where the cover swings up. Some lifter mechanisms require as little as 7 inches at the rear, but check your specific model's instructions because they vary a lot.
Drainage is the other sleeper issue. Plan your drainage slope so water runs away from the tub's base, not toward your house foundation. A slope of about 1/8 inch per foot in the concrete or grading around the pad is the standard recommendation. If you're placing on an existing patio that drains toward the house, you may need to regrade the surrounding area or add a channel drain before the tub goes in.
How much does a hot tub actually weigh? (More than you think)
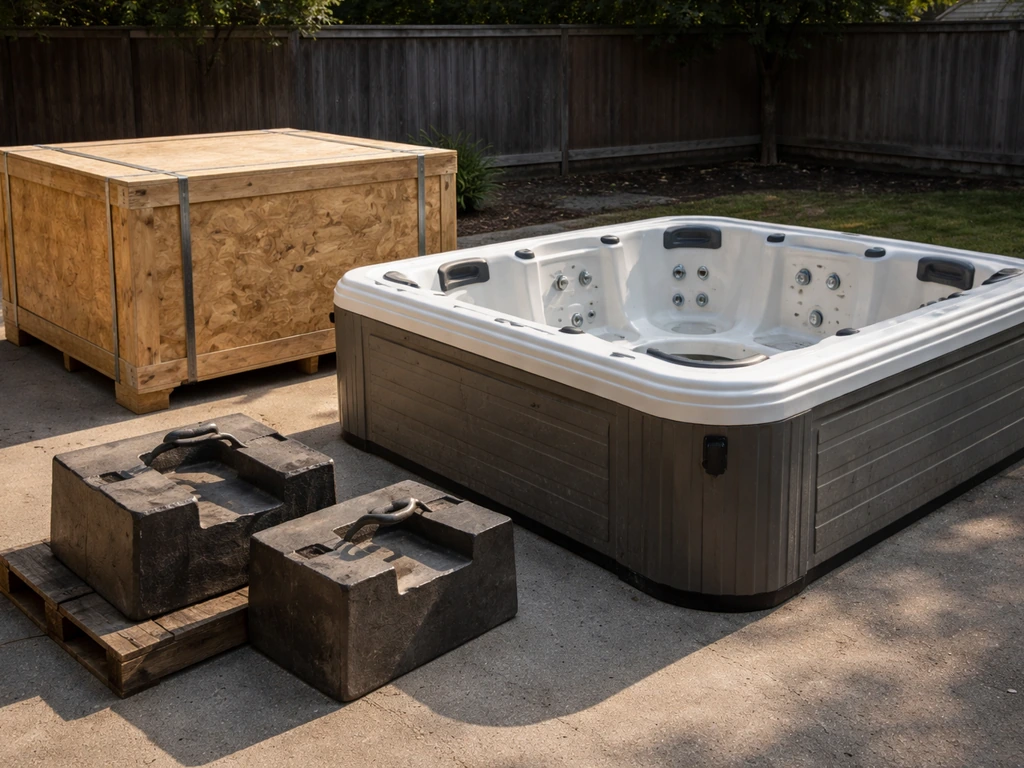
This is the part most people underestimate, and it's the one that can cause real structural damage or injury if you get it wrong. The formula to use is: total operational weight = empty tub weight + (water capacity in gallons × 8. 34 lb/gallon) + occupants at max capacity (roughly 175 lbs per person is a common modeling figure).
Dimension One’s spa spec literature uses total load that includes both filled spa weight and combined occupant weight at maximum seating capacity occupants at max capacity. A Hot Spring Flair 6-person tub, for example, has a filled weight of 4,720 lbs before you even add bathers.
Across typical models, filled weight with people ranges from around 3,000 lbs for a small 2-person tub to well over 6,000 lbs for a large 8-person model with options.
Why does this matter structurally? Because when you spread that load across the tub's footprint, you're often looking at 80 to 100+ pounds per square foot. Standard residential decks are designed for 40 psf live load plus 10 psf dead load, so 50 psf total. A hot tub can deliver 2 to 3 times that. Concrete patios can handle more, but only if the slab is thick enough, reinforced, and sitting on adequately compacted soil. Never assume your patio is fine without checking.
Concrete slab requirements
A poured concrete slab is the most reliable hot tub base. You want a minimum of 4 inches of concrete (6 inches is better for larger, heavier tubs), reinforced with rebar or wire mesh, poured over 4 to 6 inches of compacted gravel. If you're pouring new concrete specifically for the tub, design it to the tub's filled weight specs. If your existing patio slab is older, thin, or cracked, have it assessed by a contractor or structural engineer before you load it up. Guessing wrong here means a cracked slab, a tilted tub, and potentially a voided warranty.
Paver patio base requirements
Pavers are trickier. A standard paver patio is designed for foot traffic, not a 5,000-lb point load. Individual pavers can shift, settle unevenly, and crack under that kind of concentrated weight. If you want to use your paver patio, the safest approach is to pour a dedicated concrete pad within or adjacent to the paver field sized to the tub's footprint.
If you are planning a pool patio, the same idea applies: you can build a dedicated concrete pad to support heavy loads safely before finishing the surrounding surface. Alternatively, some homeowners use a prefabricated composite spa pad (like an EZ Pad) over a well-prepared base. But if the base layer underneath the pavers wasn't compacted properly, no surface product will save you from settling over time.
Deck and wood surface requirements
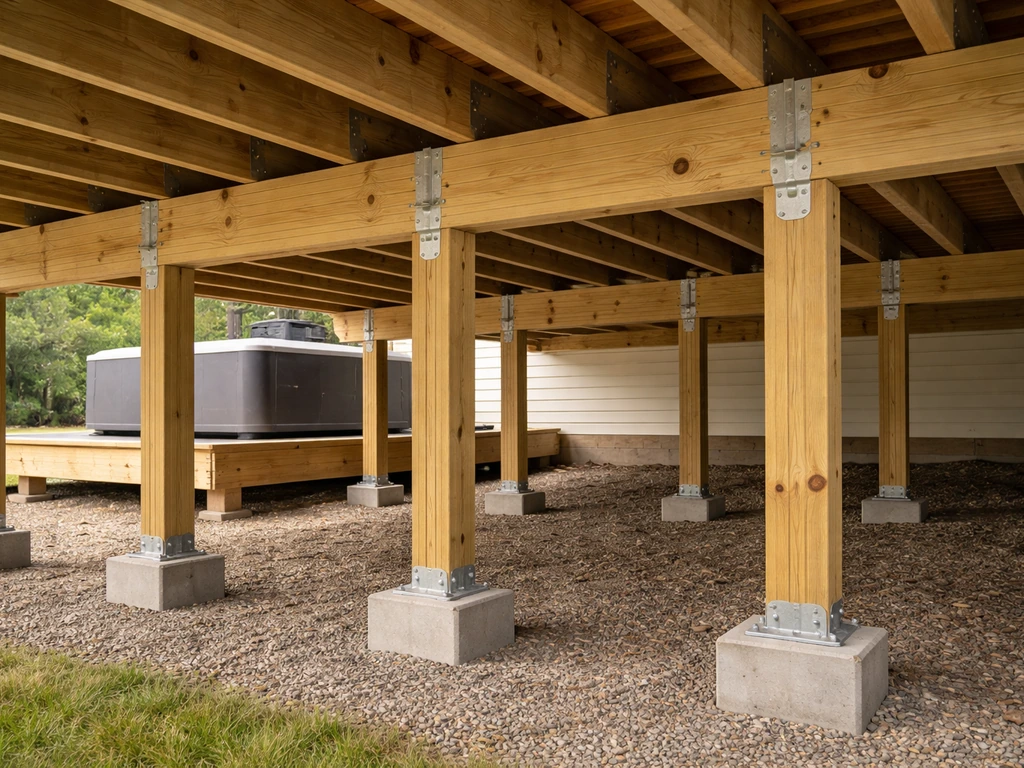
Wood or composite decks require an engineer's sign-off before you put a hot tub on them, full stop. The math just doesn't work out for standard residential deck framing at hot tub loads. That said, plenty of people do it successfully with a properly reinforced structure: doubled or tripled joists, additional posts and footings directly under the tub, and beams designed for the specific load. If you're going this route, a structural engineer assessment isn't optional, it's the smart move. Check out the companion guide on how to build a patio specifically for a hot tub if you're starting from scratch, because building new is actually easier than retrofitting.
Picking the right spot: clearance, access, and routing
Here's a practical checklist for choosing exact placement on your patio. You're balancing privacy, safety clearances, electrical routing distance, and serviceability all at once.
- Keep at least 18 to 24 inches of open space on the cover-lift side for the cover to swing clear
- Leave at least 12 to 18 inches on all other sides for basic service access to the equipment compartment
- Position the tub so the electrical disconnect box can be mounted between 5 and 15 feet from the tub's edge, within line of sight, and at least 5 feet horizontally from the inside wall of the spa
- Orient the control panel toward the main entry point or seating area so it's intuitive to use
- Keep the tub far enough from property lines to satisfy your local zoning setback (check this early, it varies by municipality)
- If you have a safety barrier requirement (many jurisdictions require fencing or locking covers for spas), plan the fence line before finalizing tub placement
Short electrical runs save money. Every additional foot of conduit between your main panel and the tub adds cost and voltage drop risk, so placing the tub closer to the house's electrical service (within reason) is smarter than a remote corner placement if you have a choice.
Step-by-step installation on different patio bases
Installing on an existing concrete slab
- Inspect the slab for cracks, settlement, or hollow spots (tap with a rubber mallet). If you find significant cracking or soft spots, stop and get a professional assessment.
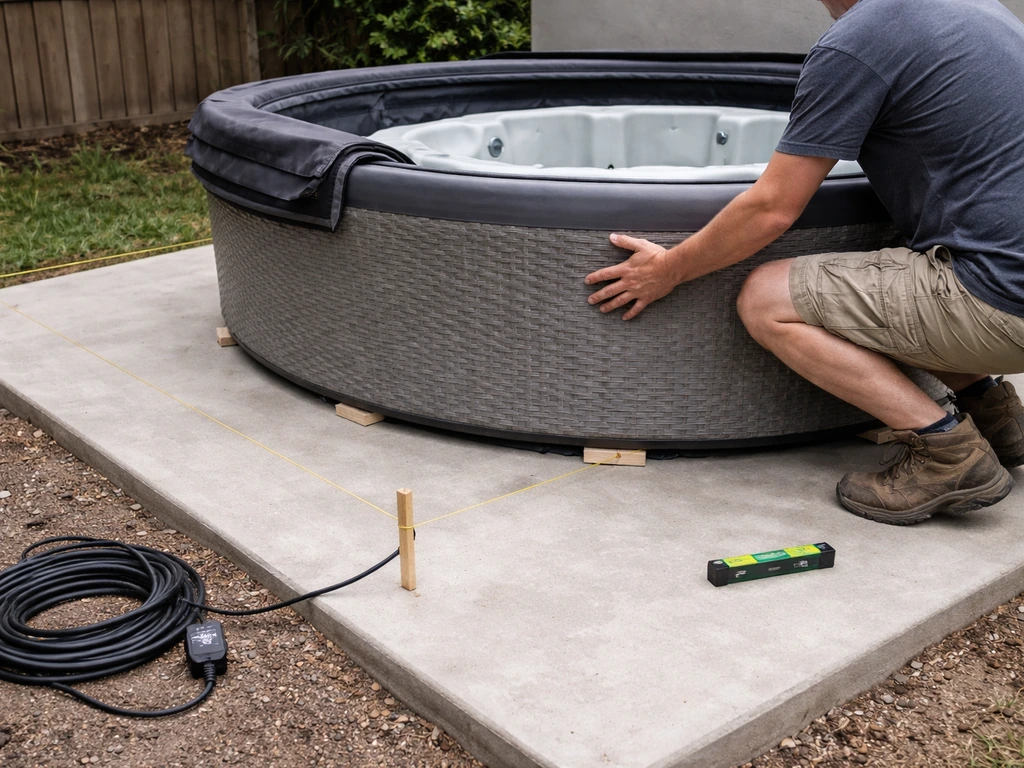
- Check the slab for level with a long spirit level or laser level. It should be within 1/4 inch across the tub's footprint.
- Clean the surface thoroughly and mark the tub's footprint with chalk.
- Have the tub delivered and positioned by the delivery crew. Most deliveries include a crew who will move the tub to its final spot using furniture dollies or rollers.
- Once the tub is roughly in position, use a level on the tub's rim or base rail to confirm it's sitting flat. Shim under the base rail gussets if needed using composite or plastic shims (not wood, which rots).
- Run your electrical conduit from the panel to the disconnect location, then to the tub's junction box. Do this before the tub is fully in its final position if conduit runs under the tub.
- Connect the electrical (see electrical section below) and hook up any fill lines or plumbing.
- Fill the tub, check for level again, and run startup checks.
Installing on a paver patio
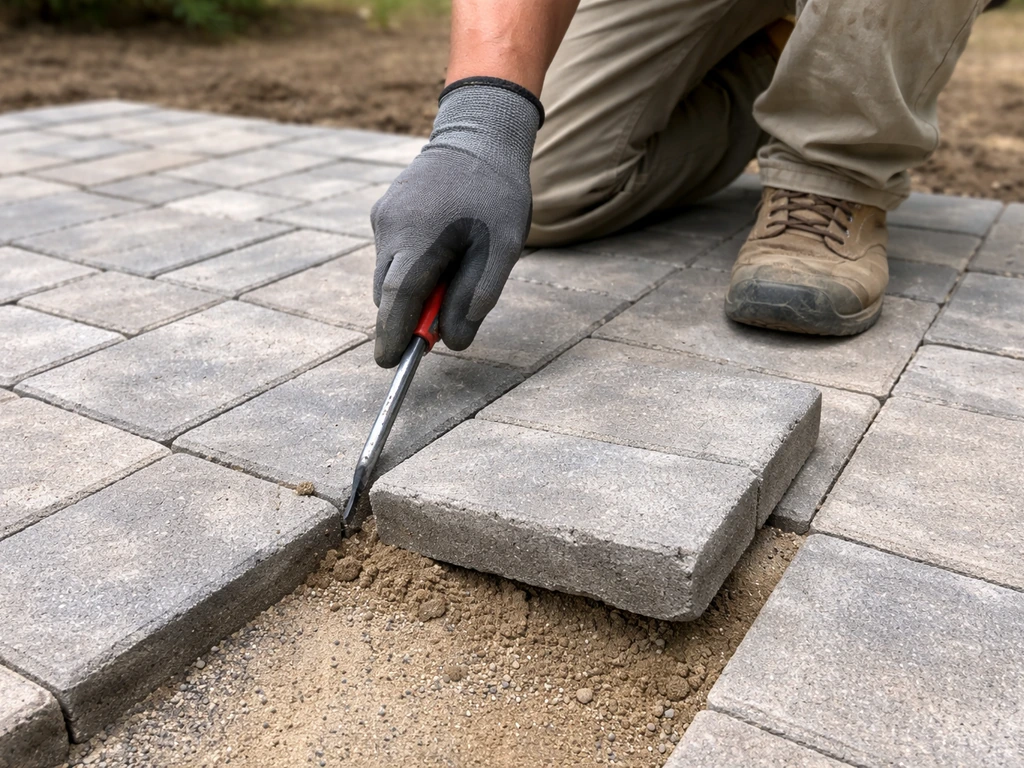
- Assess whether the pavers are sitting on a compacted, stable base or a soft/sandy bed. Probe around the edges and check for any rocking pavers.
- If the base is questionable, remove the pavers in the tub's footprint area, excavate 6 to 8 inches, fill with compacted gravel, and pour a dedicated concrete pad sized to the tub's footprint.
- If the paver base is solid and the overall system has been reviewed, use a prefabricated spa base pad to distribute load and provide a consistent level surface.
- Re-check level at all four corners and center after positioning the tub. Pavers can shift slightly under load, so re-check after the first fill.
- Plan drainage so water from rain or tub overflow routes away from the tub and away from your home's foundation.
- Proceed with electrical and plumbing as described below.
Installing on a reinforced deck
- Get structural engineer sign-off on the reinforced framing plan before any work begins.
- Complete all structural reinforcement (additional posts, footings, doubled joists) before the tub is delivered.
- Confirm the decking surface itself can handle point loads without flex at the tub's base contact points.
- Position the tub per the engineer's placement guidance, typically centered over the reinforced zone.
- Use composite shims under base gussets as needed to take up any minor irregularities in the decking surface.
- Proceed with electrical (conduit runs may need to be routed through the deck framing before closing it up).
Electrical, plumbing, and safety basics
Electrical requirements
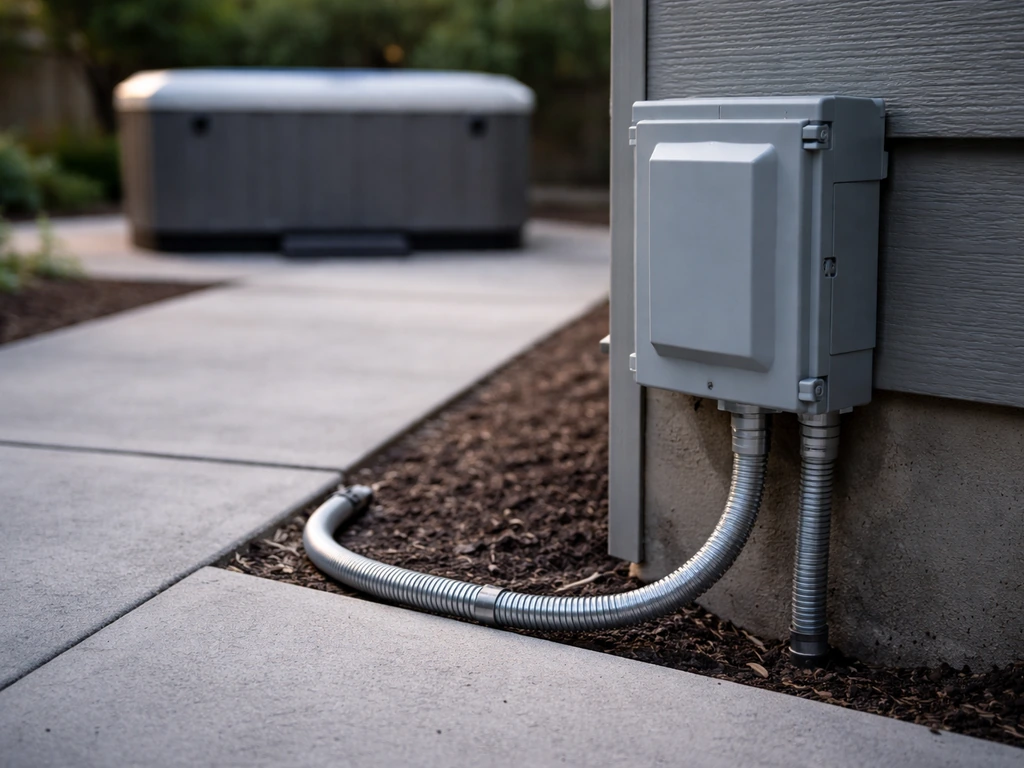
Almost every full-size hot tub runs on 240V and requires a dedicated 50-amp GFCI-protected circuit. A typical wiring spec from a manufacturer like Marquis or Jacuzzi calls for #6 copper conductors plus a #8 AWG or larger ground wire, connected to a Class A GFCI breaker at the main panel. This is not a job for an extension cord or a shared circuit. You need a dedicated homerun from the panel.
The GFCI disconnect box goes outside, mounted at least 5 feet horizontally from the inside wall of the spa, within line of sight, and between 5 and 15 feet away per standard NEC Article 680 guidance. All metal surfaces within 5 feet of the tub (handrails, equipment, metal fittings) must be bonded together with #8 AWG copper or larger. This bonding requirement is an inspection item, not optional.
Hire a licensed electrician for this. I know that's not what a DIY site usually says, but the combination of water, high amperage, and code compliance requirements makes this one area where the risk of getting it wrong is too high. Most jurisdictions require an electrical permit and inspection for hot tub wiring anyway, and inspectors will look for every detail.
Plumbing considerations
Most plug-and-play portable hot tubs don't need any hard plumbing connections. You fill them with a garden hose and drain them via a drain valve to a hose routed to an approved waste receptor (a laundry drain, floor drain, or utility sink). For larger in-ground or semi-permanent installs, you may need dedicated fill and drain lines. Check your tub's installation manual: it will specify whether any hard plumbing connections are required or whether gravity drain via a hose is acceptable. If you're adding a floor drain under the tub area for emergency leak drainage (highly recommended), do that before the tub is placed.
Safety barriers
Many jurisdictions require a lockable barrier around a hot tub, especially if children are in the household. The CPSC recommends physical barriers and locking covers for residential spas and hot tubs. A locking hot tub cover counts as a barrier in some codes, but not all. Check your local requirements early, because adding a fence after the fact can be expensive and awkward if the tub is already positioned near walls or structures.
Getting it level, shimming correctly, and handling slopes
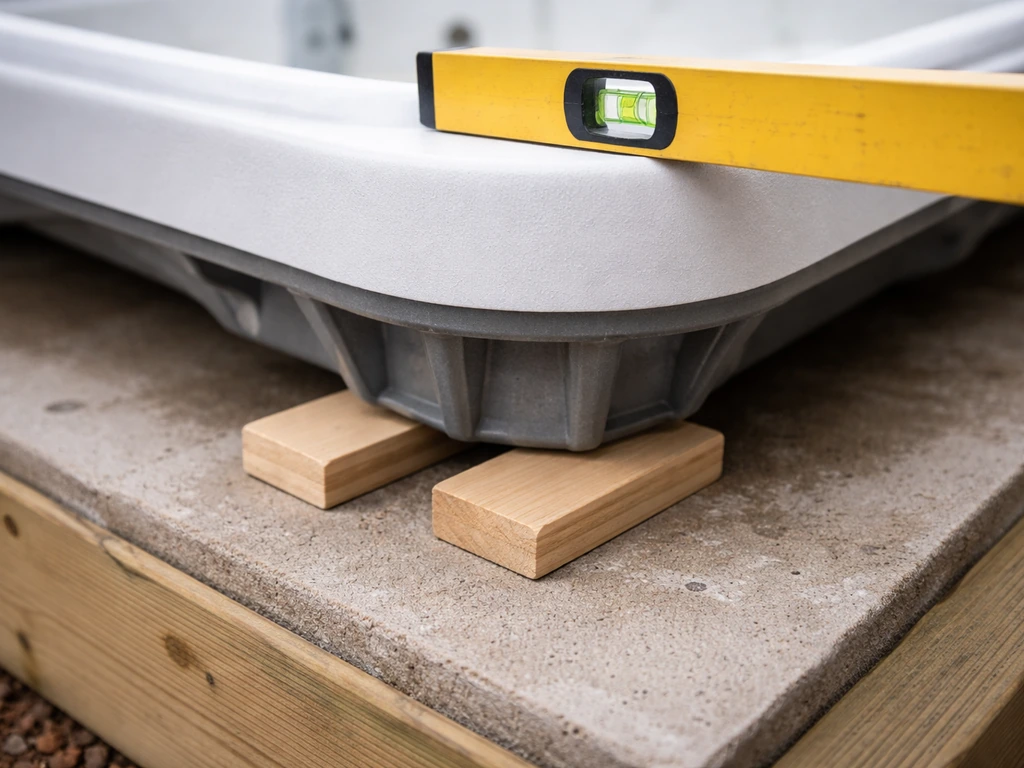
blank" rel="noopener noreferrer">Level matters more than most people realize. A hot tub that's slightly off level puts uneven stress on the shell, can affect jet performance, and causes water to slosh against one side of the cover. The target is within 1/8 to 1/4 inch across the entire base. Check level at all four corners and across both diagonals using a long spirit level or a laser level.
When shimming, place shims directly under the structural gussets of the tub's base frame, not just anywhere under the shell. Most manufacturers specify this explicitly. Use plastic or composite shims, not wood, and not just folded cardboard. Once the tub is level and shimmed, fill it about halfway with water and re-check level. The load can reveal settling you didn't see when it was empty.
If your patio has a built-in drainage slope and the tub can't be shimmed level because of it, you have two options: pour a level concrete pad on top of the sloped surface (with a form to create a flat top), or use adjustable leveling feet if your tub model supports them. A slope of 1/8 inch per foot in the surrounding drainage area is fine, but the tub's actual base must be level.
For anyone dealing with a significantly sloped patio situation, there's a full companion guide on how to level a hot tub on a sloped patio that goes deeper into the specific techniques. For specific techniques, spacing, and leveling options, see our full guide on how to level a hot tub on a sloped patio.
Base type comparison at a glance
| Base Type | Load Capacity | Level Difficulty | Best For | Key Caution |
|---|---|---|---|---|
| Reinforced concrete slab (new pour) | High, 4,000–6,000+ lbs if properly built | Easy once poured correctly | New installations, any size tub | Must cure fully before loading (28 days ideal) |
| Existing concrete patio | Medium to high depending on age/reinforcement | Easy if slab is flat | Most homeowners with newer patios | Inspect for cracks/settling before use |
| Paver patio with sub-pad | Medium if properly supported underneath | Moderate, pavers can shift | Homeowners who want to keep the paver look | Individual pavers may need removal to pour sub-pad |
| Reinforced wood/composite deck | High only after engineer-designed reinforcement | Moderate, decking can flex | Elevated settings, aesthetics-focused builds | Requires structural engineer sign-off, no exceptions |
| Prefab composite spa pad | Medium, distributes load but relies on base | Easy | Small to mid-size tubs on solid bases | Not a substitute for a weak or soft base layer |
Permits, inspections, and what to expect
In most US jurisdictions you'll need at minimum an electrical permit for the dedicated circuit. Many areas also require a separate building or zoning permit for the hot tub itself, covering setbacks, barriers, and structural adequacy. If the installation involves any new plumbing, a plumbing permit is typically required too. The IAPMO Uniform Swimming Pool, Spa and Hot Tub Code is the model standard many jurisdictions adopt for the mechanical and plumbing side, so that's the framework your inspector may be working from.
Pull the permits before work starts, not after. Retroactive permitting is a headache, and if an inspector fails an unpermitted install, you may have to tear out finished work. Call your city or county building department and describe exactly what you're doing: a portable/self-contained hot tub on an existing patio with a new dedicated 240V circuit. They'll tell you what's required in your jurisdiction in one phone call.
Inspections typically happen after the electrical rough-in (before the junction box is covered) and again after the final connection. Your electrician should handle scheduling the electrical inspection. If a structural review was required, that inspection happens before the tub is placed.
Startup checks and the first fill
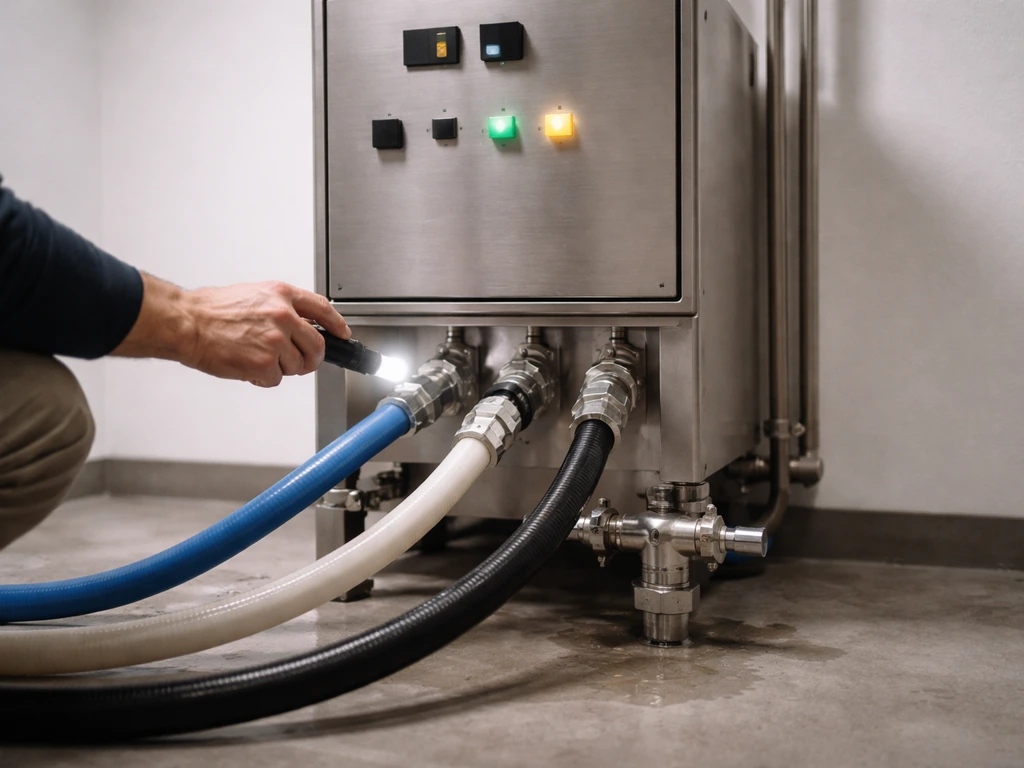
Before you flip the breaker for the first time, do a visual walkthrough: all panels are secured, the GFCI disconnect is properly mounted, all plumbing connections are hand-tight or better, and there are no tools or debris around or inside the tub. Then fill the tub using a garden hose through the filter compartment (called 'bottom-up filling' in most manuals) to purge air from the lines.
Once filled, power it on, run through the control panel startup sequence per your manual, and check every jet for flow. Open the equipment access panel and look for any drips around plumbing connections. Let the water heat fully (this can take 8 to 24 hours depending on starting water temperature and tub size) and then balance the chemistry before anyone gets in.
For water chemistry, target a pH of 7.2 to 7.8 (many operators aim for 7.4 to 7.6 as the tighter sweet spot), with sanitizer levels per your sanitizer type and manufacturer guidelines. Test and adjust before first use and then on a regular weekly schedule thereafter.
Maintenance: what you're committing to long-term
A hot tub isn't install-and-forget. Here's the realistic maintenance commitment you're taking on, so there are no surprises three months in.
- Water chemistry testing 2 to 3 times per week, pH and sanitizer at minimum
- Filter rinse every 1 to 2 weeks, deep clean with filter cleaner every 4 to 6 weeks
- Full water drain and refill every 3 to 4 months (exact schedule depends on bather load and sanitizer type)
- Cover cleaning and conditioning monthly to prevent UV cracking and waterlogging
- Inspect all jet faces, plumbing access panels, and the equipment compartment quarterly for leaks or debris
- Annual inspection of the GFCI disconnect and bonding connections (have your electrician do this if you're not comfortable)
- Check that the tub's base level hasn't shifted, especially after the first winter freeze-thaw cycle if you're in a cold climate
The base is worth monitoring specifically. Even a properly installed concrete pad can shift slightly over the first year or two as soil settles, and paver bases are more prone to this. If you notice water sitting uneven or hear unusual stress sounds from the shell, re-check level immediately and re-shim if needed before any damage compounds.
Your installation checklist
- Calculate total filled weight using your model's specs (empty weight + gallons × 8.34 + occupant weight)
- Assess your existing patio surface type and confirm or upgrade load capacity
- Choose final placement considering clearances, cover lift, service access, and electrical routing
- Check local permit and zoning requirements before any work starts
- Prepare the base: level, drain-sloped, compacted, and reinforced as needed
- Hire a licensed electrician to run the dedicated 240V/50A GFCI circuit and disconnect box
- Coordinate delivery to confirmed route and final placement
- Shim under gussets, verify level at all corners before and after partial fill
- Complete electrical and plumbing connections per your manual
- Pull required permits and schedule inspections
- First fill, chemistry balance, and full operational test before first use
- Set up your recurring maintenance schedule
FAQ
Can I install a hot tub directly on existing concrete without pouring a new pad?
Often yes, but only if the slab is thick enough, reinforced, and not cracked or spalling. Check that the tub can be shimmed to level, and if the patio slopes or drains toward the house you may still need a small, dedicated leveling pad or regraded area so water never pools around the base.
How do I determine whether my patio can handle the load if I cannot find the model’s exact filled weight?
Use a conservative estimate based on the tub’s listed water capacity and typical occupant count, then add a buffer for bathers and accessories. If you only know approximate gallons, keep the engineering discussion general but do not proceed on “it feels solid” assumptions, have a contractor or engineer verify the structural capacity for your specific patio and soil conditions.
What clearance do I need around the tub for servicing and cover operation?
Do not rely only on delivery access. Plan for cover lift swing or track space, space to open the equipment compartment for filter changes, and room for a safety barrier if your area requires one. As a rule of thumb, treat at least the control panel side and the equipment side as “no obstructions” zones.
Is it safe to place the hot tub near a house foundation or stairs if I plan to regrade for drainage?
It can be safe, but you must also consider setbacks for permits, erosion around the pad, and how water will flow during heavy rain. If regrading is limited, install a proper drainage channel or consult an installer before placing the pad close to foundation walls.
Do I need hard plumbing for an outdoor patio hot tub?
Many portable hot tubs are self-contained, using a hose to fill and a drain valve to empty into an approved receptor. However, if your tub requires a dedicated fill and drain line in the manual, follow it, and install any optional floor drain before the tub is set because retrofitting beneath a loaded shell is difficult.
Where should the drain line or hose empty line go if I use a garden hose drain setup?
Route it to an approved waste receptor such as a laundry drain, floor drain, or utility sink, and make sure it will not create surface flooding or erosion. Avoid draining onto landscaping where it can damage plants or undermine compacted base material.
Can I use a GFCI outlet instead of hardwiring a 240V circuit?
For full-size spas and most permanent patio installs, you should not plan on a regular outlet. Most manufacturers specify a dedicated 240V circuit with a disconnect and correct breaker protection, and inspectors typically expect code-compliant wiring for a high-amperage, water-exposed appliance.
What’s the biggest electrical mistake people make when installing on a patio?
Using the wrong circuit configuration, insufficient wire size, or improper bonding. Another common issue is locating metal parts and the disconnect without meeting required distances and sight-line placement, which can fail inspection even if the tub powers on.
How far from the tub should the exterior disconnect be mounted?
Follow NEC Article 680 practices and the manufacturer’s instructions, but plan for it to be outdoors, mounted within the inspector-acceptable range, in line of sight, and with bonding of nearby metal surfaces. If your mounting location does not meet those constraints, change the tub placement or reroute early rather than after finishing.
What leveling tools should I use and how should I measure?
Use a long spirit level or laser level. Check level at all four corners and across both diagonals, then repeat after shimming. Measuring only one direction or at only corners can miss twist, which can stress the shell and reduce jet performance.
Where should shims be placed to prevent the base from settling?
Set shims directly under the tub’s structural gussets (per the manufacturer), not under random shell points. Use plastic or composite shims, then fill the tub about halfway and re-check level because settling under load can reveal problems that were invisible when empty.
If my patio slopes, can I just use thick shims to make the tub level?
Sometimes adjustable leveling feet can help if your model supports them, but thick or improvised shimming over an uneven base can lead to instability. In most significant-slope cases, a level concrete pad with forms is the more dependable solution.
Do I need a barrier around the hot tub even if I have an adult-only household?
Many jurisdictions require a lockable barrier, and requirements often consider access risk regardless of household intent. Even where a locking cover counts as a barrier, not all codes treat it the same, so confirm local rules before you finalize placement.
What should I test or watch for during the first 24 hours after startup?
Confirm each jet provides consistent flow, check for any drips around plumbing connections once access panels are open, and monitor heat-up time. After it reaches temperature, run through the control sequence and verify stable operation before adjusting chemistry.
How often should I recheck level after installation?
Re-check shortly after the first fill and again during the first year, especially if the base is pavers or if the soil settles. If you notice uneven water pooling, unusual shell stress sounds, or cover sloshing, re-level promptly to prevent compounding damage.
Next Article
How to Build a Patio for a Hot Tub: DIY Guide
Step-by-step DIY patio for a hot tub: planning, leveling, drainage, reinforced base, surface choices, and avoid costly m