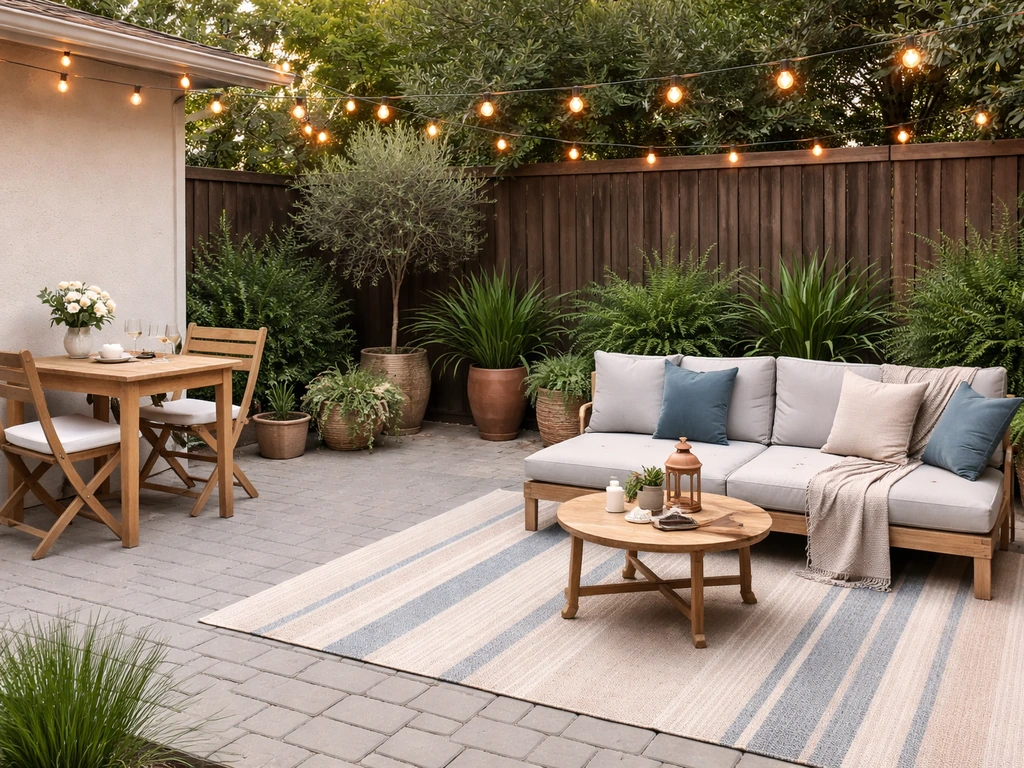
The best way to cover an ugly patio depends entirely on what's making it ugly in the first place. Cracked concrete, stained slabs, heaving pavers, missing grout, and just plain dated surfaces all have different fixes. The good news: most ugly patios are totally DIY-able, and you don't have to rip everything out to get a result you're proud of. Clean and prep the surface properly, pick the cover method that matches your condition and budget, and you can go from embarrassing to genuinely nice in a weekend or two.
How to Cover an Ugly Patio: DIY Fixes That Last

Nolan Lennox
22 May 2026
Quick diagnosis: why does your patio actually look bad?
Before you buy anything, spend ten minutes figuring out what category your patio falls into. The fix for a stained slab is completely different from the fix for a slab that's cracked and heaving. Get this wrong and your new cover will fail just like the old surface did.
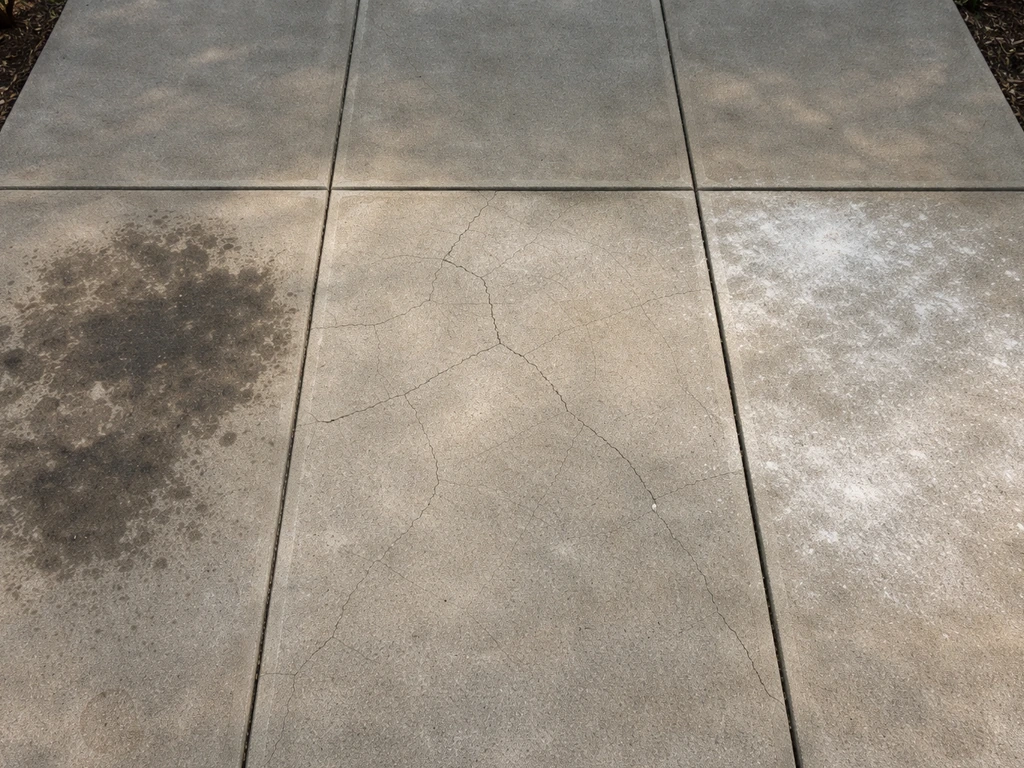
- Surface stains only: oil, rust, algae, or efflorescence that's discolored the slab but left it structurally sound. This is the easiest category. A deep clean often transforms the look on its own.
- Hairline or dormant cracks: cracks that haven't moved in years and aren't getting wider. These can be filled and covered. Active cracks (still widening, or following a heave pattern) are a different story.
- Active or structural cracks: if the crack has one side higher than the other, or keeps growing, there's a base problem underneath. Covering it without fixing the base will just crack your new surface too.
- Uneven or settled slabs: one section has dropped or tilted. Mild unevenness (under about 1 inch) can be handled with leveling overlays or pedestal tile systems. More than that usually means the base needs attention.
- Old or ugly pavers: mortar missing from joints, pavers rocking underfoot, color faded or mismatched. Often fixable with re-sanding, resetting loose pavers, and sealing.
- Drainage sitting wrong: water pools on the surface or drains toward the house. This is a safety and durability issue that needs to be corrected before any new cover goes down.
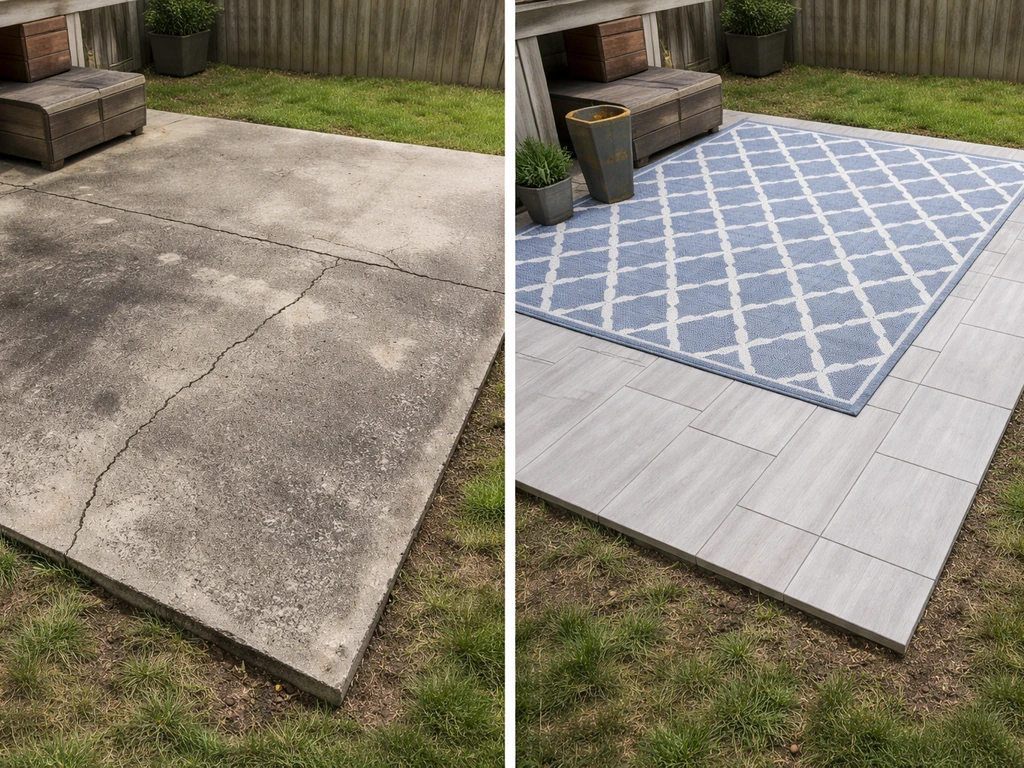
- Just outdated: surface is technically fine but looks tired and boring. This is where cosmetic resurfacing, deck tiles, or even just a great outdoor rug can do a lot of heavy lifting.
Once you know which category (or combination) you're dealing with, the rest of the decisions get a lot easier. If you're in the structural crack or serious drainage camp, skip ahead to the section on when to hire help before committing to a DIY approach.
Clean up, repair, and prep before anything else
This is the step most people want to skip, and it's also why a lot of DIY patio makeovers fail within a season. Whatever you put on top of a dirty, cracked, or weak surface will reflect those flaws right back through it. Do the prep work and the cover will last years. Skip it and you'll be doing this all over again.
Cleaning the surface
Start with a pressure wash. For most concrete slabs and pavers, you want at least 3,000 to 3,500 psi to actually clean down to a sound substrate, not just move the dirt around. Scrub stubborn stains (oil, algae, rust) with a concrete degreaser or a purpose-made concrete cleaner before you pressure wash. Let the surface dry completely, which usually means 24 to 48 hours in warm weather. If you're planning to apply any kind of overlay or resurfacer, mechanical profiling (grinding or scarifying the surface) is the right approach to get proper adhesion. Acid etching sounds tempting because it's easier, but it's generally not recommended for cementitious overlays and microtoppings since it doesn't create consistent surface profile.
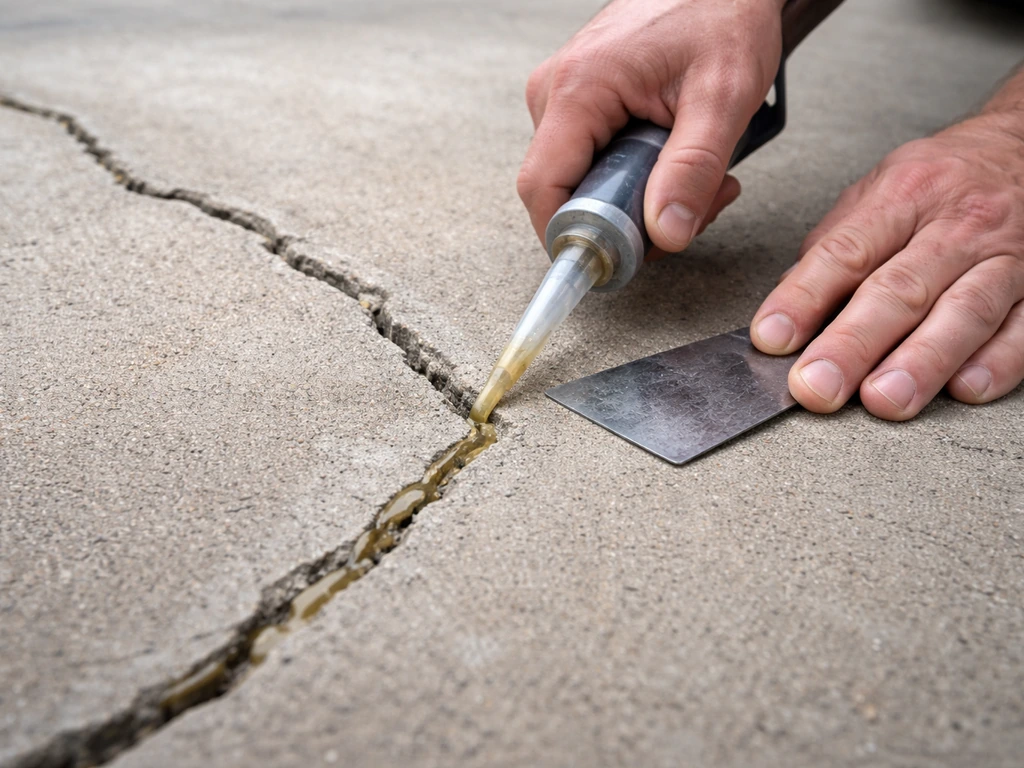
Filling cracks and patching holes
For dormant cracks (not actively moving), epoxy injection is the strongest repair option because it can restore near full tensile and compressive strength across the crack. ACI 224R-01 (Control of Cracking in Concrete Structures) discusses cracking mechanisms and crack-control principles that support choosing repair methods based on whether cracks are active or dormant blank" rel="noopener noreferrer">American Concrete Institute. It uses injection ports and paste applied over the crack to channel the epoxy in. For cracks that are still moving or active, you need a flexible polyurethane filler instead, not a rigid epoxy, or the repair will just crack again at the same spot. For surface voids, spalls, and pitting, a polymer-modified patching compound like Sika SikaLevel-025 Patch works well. It fills cracks, holes, and voids before you install a floor covering, dries in 30 to 60 minutes depending on temperature and thickness, and bonds cleanly to existing concrete.
Checking slope and drainage before you cover anything
Pour a bucket of water on the slab and watch where it goes. It should drain away from the house at roughly a 1 to 2 percent slope (about 1/8 inch per foot). If water is pooling in the middle or running toward the foundation, flag that now. Any cover you install over a bad-draining surface will trap moisture underneath and shorten its life significantly, especially through freeze-thaw cycles.
Choose your cover strategy
There are four main ways to cover an ugly patio, and the right one depends on how bad the underlying surface is, how permanent you want the fix to be, and what your budget looks like. Here's how they stack up.
| Strategy | Best For | Permanence | Typical DIY Cost (per sq ft) | Skill Level |
|---|---|---|---|---|
| Outdoor rugs + covers | Stains, dated look, renters | Temporary (seasonal) | $1–$5 | Beginner |
| Interlocking / deck tiles | Mild unevenness, stains, cracks | Semi-permanent | $3–$12 | Beginner–Intermediate |
| Concrete resurfacing overlay | Sound slab with surface flaws | Permanent | $2–$8 | Intermediate |
| Thin brick/stone veneer | Outdated look, sound slab | Permanent | $5–$15 | Intermediate |
| New pavers over existing slab | Cracked/stained concrete | Permanent | $8–$20 | Intermediate–Advanced |
| Pergola + composite decking | Full makeover, elevated look | Permanent | $15–$40+ | Advanced |
If you want the clearest recommendation: for a basically sound concrete slab that just looks bad, a concrete resurfacer or interlocking deck tiles give you the most transformation per dollar. For old pavers that are faded and gapped, re-sanding with polymeric sand and sealing is often all you need. For something truly beaten up with uneven sections or active cracking, deck tiles on adjustable pedestals are your best DIY option because they float above the problems rather than bonding to them.
DIY patio resurfacing: concrete, stone, and brick fixes
Concrete resurfacer (the quickest concrete fix)
Products like Quikrete Concrete Resurfacer are polymer-modified Portland cement formulas designed specifically to restore the appearance of existing concrete in a thin layer. You mix it to a pourable or squeegee-able consistency, pour it onto the wetted (not puddled) slab, and spread it with a long-handled squeegee or broom. The result looks like fresh concrete. You can broom-finish it for texture and slip resistance. The key prep step is mechanical grinding or scarifying the surface first so the overlay bonds properly. Minimum thickness is thin by design (typically around 1/16 to 1/8 inch for appearance work), which means it's cosmetic, not structural. Don't try to use it to build up a half-inch depression. For that, use a patching compound first.
Cementitious microtoppings (for a refined finish)
A microtopping is a step up from basic resurfacer. Products like Deco-Crete Micro-Topping give you a very smooth, thin cementitious layer you trowel on in passes to build up an almost concrete-tile look. They're applied with trowel texture techniques, typically in thin coats. After application, most manufacturers (including Deco-Crete) recommend waiting at least 2 to 5 days before sealing. Moisture vapor in the slab is a real concern here: if your slab has moisture issues, a thin topping can blister or delaminate. Test with a plastic sheet taped to the slab overnight before you start. If there's condensation under the plastic in the morning, deal with the moisture first. Thickness matters too because the ability to hold back moisture vapor is proportional to how thick you go.
Thin brick and stone veneer
Products like PortStone thin brick panels or Z-Brick veneer units can be bonded directly to a clean, sound concrete slab using ceramic tile mastic or exterior-rated thinset mortar, applied with a 1/4-inch V-notched trowel. This gives you a genuine masonry look without the weight or depth of full pavers. The surface needs to be flat, clean, and structurally sound. This approach works on both horizontal and vertical surfaces, so you can extend the treatment up a patio knee wall for a cohesive finish. TCNA guidance emphasizes getting better than 95 percent mortar contact between the tile or veneer unit and the substrate, and using thinset rated for exterior use. If you're in a freeze-thaw climate, this matters a lot.
Pavers over existing concrete
Laying new pavers directly over an existing concrete slab is a legitimate technique when you're specifically overlaying (rather than starting from scratch). The slab acts as the base. You set the pavers in a thin bed of sand or use exterior thinset, then fill joints with polymeric sand, which locks the pavers in place and blocks weeds. Belgard's installation guidance specifically calls out this as the overlay scenario where you don't need to excavate first, unlike a ground-up installation. The big constraint is added height at thresholds: adding even 2 to 3 inches of paver plus setting bed will affect where your door sits relative to the patio surface, so measure and think through your threshold clearance before you commit.
Budget-friendly cover ideas for uneven or worn patios
If your patio has significant unevenness, active cracks, or drainage issues you're not ready to fully address, there are some genuinely smart budget options that work around the problems rather than through them.
Interlocking deck tiles
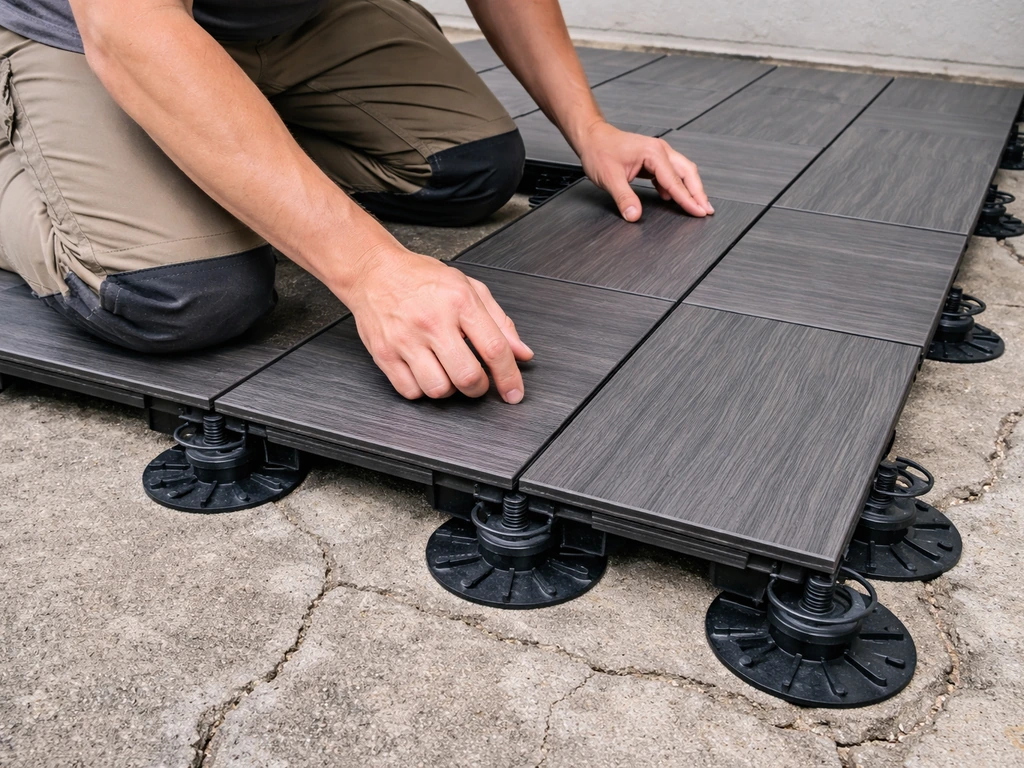
Snap-together wood, composite, or porcelain deck tiles are one of the best budget moves for an ugly patio. They sit on top of the existing surface, don't require adhesive, and are removable if you rent. The tiles are typically 12x12 or 24x24 inches and snap together on a plastic grid base that allows water to drain underneath. They handle mild unevenness well because each tile adjusts slightly to the surface. On more seriously uneven ground, pair them with adjustable pedestals.
Adjustable pedestal systems
For surfaces with real unevenness (up to a few inches of variation), adjustable pedestals like the LATICRETE NXT Pedestal Max or the DeckWise Altitudes Pedestal system let you create a level floating surface above whatever mess is underneath. The pedestals support up to 2,000 psi, so they're genuinely load-bearing. The key planning steps: use a hand level or laser level to transpose site measurements and set your target finished height, mark that height at nearby walls and thresholds, and make sure the installation fits tight inside any retaining walls or edging. One constraint worth knowing: if you have a floor drain near a grid intersection, it may interfere with pedestal placement, so plan your grid layout around the drain location. Heavy items like large planters or outdoor furniture need extra pedestals underneath to distribute the load.
Outdoor rugs and modular coverings
Don't underestimate a quality outdoor rug for purely cosmetic ugliness. A large rug over a stained or faded slab transforms the space for a fraction of any other option. For full surface coverage, outdoor-rated vinyl or rubber modular tiles can cover the whole area. Just make sure anything you use outdoors is UV-stabilized and rated for exterior exposure. Standard indoor vinyl is not built for fully exposed outdoor installation. Look for products specifically marketed for outdoor use that include UV-stable materials, textured non-slip surfaces, and drainage channels in the design.
Drainage, slip resistance, and durability: don't skip these
These three things determine whether your patio cover still looks good in three years or whether you're back out here doing this all over again.
Drainage
Proper installation and correct slope to drain are what determine how much moisture saturates your patio system over time. In freeze-thaw climates, trapped moisture is what destroys overlays, tiles, and pavers from underneath. Whatever cover you install needs to either maintain the existing drainage slope or improve on it. Pedestal systems are naturally drainage-friendly because water flows freely under the tiles. Bonded overlays and thinset-set tiles need the slab slope to be correct before you start. LATICRETE’s exterior installation technical bulletin also notes there are no provisions for bonding tile or stone directly to exterior roofs or decks over occupied space and points to TCNA and manufacturer guidelines for exterior installations Bonded overlays and thinset-set tiles need the slab slope to be correct before you start.. If your slab drains toward the house and you're applying a bonded overlay, you need to address the slope or you're just covering the problem.
Slip resistance
Wet patios are where people get hurt. For resurfaced concrete, a broom finish or added texture creates slip resistance that's built into the surface rather than depending on a coating that wears off. Applied anti-slip coatings do work initially but degrade with UV exposure and foot traffic. For tiles and deck boards, look for products with manufactured-in texture, which outperforms coatings over time. This is especially important on north-facing patios that stay damp, or anywhere near a pool or outdoor shower.
Long-term durability
For any bonded system (overlay, thinset tile, veneer), use exterior-rated setting materials. Products not rated for exterior use will fail faster in temperature cycling, UV exposure, and wet conditions. For crack isolation over existing cracks, use a crack isolation membrane between the slab and your new surface covering. LATICRETE notes that crack isolation and higher-quality setting materials measurably increase system performance for exterior tile work. For paver joints, polymeric sand is a meaningful upgrade over regular sand: it locks pavers in place when it cures, reduces joint erosion, and significantly slows weed infiltration.
How to install it: steps and tools checklist
The general workflow applies across most cover methods, with some variations depending on what you choose.
General installation steps
- Measure the patio and calculate square footage. Add 10 percent for waste on tiles and pavers, 5 percent for overlays.
- Clear and clean the surface. Pressure wash at 3,000+ psi, degrease stains, let dry 24 to 48 hours.
- Repair cracks and spalls. Use epoxy injection for dormant cracks, flexible polyurethane for active cracks, and a patching compound like SikaLevel-025 Patch for surface voids.
- Check slope and drainage. Confirm the surface drains away from the house. Mark problem areas.
- Profile the surface (for overlays). Grind or scarify mechanically for proper overlay adhesion. Do not rely on acid etching alone.
- Set your finished height. Use a hand level or laser level to mark your target finished surface height at walls, thresholds, and door frames. This is critical for pedestal and paver systems.
- Install edging or containment if needed. For pedestal and interlocking tile systems, the installation area should be contained so tiles don't shift outward.
- Lay your cover material per product instructions. For overlays: wet slab, apply and spread. For tiles/pavers: set from a corner, maintain spacing, check level frequently. For pedestal systems: adjust each pedestal to match target height before placing tiles.
- Fill joints. Use polymeric sand for paver joints, compacting it in and activating with water per the manufacturer's instructions.
- Apply sealer if appropriate. Wait the manufacturer's specified cure time before sealing. For most overlays and microtoppings, that's 2 to 5 days minimum.
Tools checklist
- Pressure washer (minimum 3,000 psi)
- Concrete grinder or scarifier (rentable) for overlay prep
- Angle grinder with crack-chasing blade for crack prep
- Epoxy injection kit or flexible polyurethane crack filler
- Polymer-modified patching compound (like SikaLevel-025 Patch)
- Hand level and/or laser level
- Long-handled squeegee or rubber float (for resurfacer)
- Margin trowel and notched trowel (1/4-inch V-notch for veneer/tile)
- Rubber mallet
- Tape measure
- Chalk line
- Polymeric sand and broom for paver joints
- Garden hose or watering can for activating polymeric sand
- Sealer and roller or pump sprayer
- Knee pads (trust me)
Cost, timeline, and when to call in help
Realistic cost breakdown
| Method | Materials Cost (200 sq ft patio) | Rental/Tool Cost | DIY Time |
|---|---|---|---|
| Outdoor rug / modular vinyl tiles | $100–$400 | None | 1–2 hours |
| Concrete resurfacer (Quikrete-style) | $80–$200 | $50–$100 (grinder rental) | 1 day |
| Interlocking deck tiles | $300–$800 | None | 4–8 hours |
| Pedestal + porcelain tile system | $600–$1,500 | $50–$100 | 1–2 days |
| Thin brick/stone veneer (thinset-bonded) | $500–$1,200 | $50–$100 | 1–2 days |
| Pavers over existing concrete | $800–$2,000+ | $100–$150 | 2–3 days |
Labor time estimates assume a reasonably capable DIYer working alone or with one helper. Add one extra day if you're doing serious crack repair or if your surface needs heavy grinding before an overlay. Material costs vary significantly by region and product quality, so treat these as starting ranges.
When to hire a pro instead of doing it yourself
Most ugly patio fixes are genuinely DIY-able. But there are a few situations where calling a contractor is the smarter move. If the slab has multiple active cracks with vertical displacement (one side is higher than the other), the base underneath has failed and no surface cover will solve it. You need the slab lifted or replaced. If water is draining toward the house foundation, you may have a grading problem that goes beyond the patio itself. If the patio has more than about 2 inches of variation in level across its surface and it's not just settled at the edges, the base has likely eroded or shifted significantly. And if you're adding a full composite deck or pergola structure over the patio area, any structural footings need to be properly located and sized, which usually benefits from at least a consultation with a pro even if you do the finish work yourself.
The cosmetic and semi-structural fixes described here are exactly the kind of thing a DIYer can handle confidently over a weekend. The honest boundary is this: if the problem is underneath the concrete rather than on top of it, no surface cover is a long-term fix. Get the structural stuff right and then the fun part of choosing your new look becomes straightforward. If you want to go further than just covering and actually want to improve the overall look and feel of the space once the surface is sorted, thinking through the styling side of things is a natural next step. If you're wondering how to improve a patio beyond just hiding damage, start by diagnosing what’s causing the problem and then choose a cover strategy that fits your goals and budget. Once your surface work is sorted, you can focus on how to style a patio with the right layout, furniture, and accessories. Once your surface repairs and coverage are sorted, you can focus on how to make a patio look nice with the right textures, colors, and finishing touches.
FAQ
Can I cover an ugly patio without grinding or deep prep?
Yes, but only in specific cases. If the slab or pavers are otherwise stable and you are using an overlay system that requires bonding, you need to reach a sound surface through grinding or scarifying. If there are active structural issues, failed drainage, or vertical displacement, covering alone will not stop the movement or moisture and the new finish will fail early.
How do I know when the concrete is dry enough to apply a resurfacer or overlay?
For resurfacer and microtopping, avoid pouring on standing water. The surface should be damp enough to help the cement bind, not puddled. After pressure washing, let the slab dry until there is no visible wet sheen, then confirm again right before application.
What if my patio seems damp, can I still add a bonded overlay?
Do a quick moisture-vapor check before a bonded thin overlay or microtopping. Tape down a plastic sheet overnight, if you see condensation or darkening under the plastic in the morning, moisture is coming through and you should address drainage or moisture mitigation first rather than sealing over it.
Will covering my patio raise the height enough to affect doors or steps?
Plan for height changes early. Resurfacing is thin, but deck tiles on pedestals and paver overlays add thickness that can alter door clearance, step-down heights, and transitions to flooring. Measure the finished patio height relative to thresholds, then choose a system that keeps you within code-friendly step riser ranges and prevents tripping.
When should I choose pedestal deck tiles instead of a bonded overlay?
Use adjustable pedestals when the patio varies by more than a little, typically when you have noticeable hump-and-dip unevenness you cannot level out with prep alone. A floating tile system reduces the need to chase every low spot, and it tolerates minor slab irregularities better than bonded systems.
What’s different about covering an ugly patio in a freeze-thaw climate?
If you are in freeze-thaw conditions, prioritize systems that do not trap water, and do not rely on a coating to solve drainage or movement. Floating tiles with airflow underneath and correct slope are usually more forgiving. Bonded overlays and thinset tile systems require correct slope, exterior-rated materials, and crack isolation.
How do I tell whether my patio cracks are active or dormant?
Don’t treat all cracks the same. Dormant cracks can often be repaired with epoxy injection before covering, while active cracks usually need a flexible crack filler or isolation approach. If a crack keeps re-opening, any rigid material above it is likely to telegraph the failure through.
Is acid etching ever a good substitute for grinding before applying resurfacer or microtopping?
Typically avoid acid etching for cementitious overlays or microtoppings when consistent bonding profile matters. Instead, use mechanical profiling like grinding or scarifying because it produces a predictable surface texture. Acid may also increase residue risk and can complicate adhesion depending on the product system.
Can I put snap-together tiles or an outdoor rug over an uneven or slightly sloped patio?
If you go with snap-together outdoor tiles on top of the patio, choose tiles designed for exterior use with UV stability and non-slip texture. Also check that your base or grid supports drainage, so water can move under the installation rather than pooling.
Can I cover a patio wall or knee wall with thin brick veneer panels?
Yes, but you need exterior-compatible materials and the right adhesion method. For thin brick or veneer over concrete, use exterior-rated thinset or mastic, apply with the correct trowel notch, and aim for high mortar contact. Also verify that the substrate is flat enough, because veneer systems can highlight voids and low spots.
Will stains bleed through resurfacer or microtopping?
For porous stains like rust or deep organic staining, aggressive cleaning is the first step, and sometimes patching alone will not hide it. If you are using a bonded cement overlay, fully remove stain sources and let the slab dry before application so discoloration does not bleed through.
What’s the fastest way to figure out if my patio cover will fail early?
Your most common mistake is skipping drainage checks. Do a bucket test and verify the surface slopes away from the house. If water pools or runs toward the foundation, you may need grading improvements or a floating system that prevents moisture trapping, otherwise most covers shorten their lifespan.
When is it time to hire help instead of just covering the patio?
If there are multiple active cracks with vertical displacement, grading problems that drain toward the foundation, or large level variations (around more than 2 inches) that indicate base movement, it’s usually beyond a cosmetic cover fix. Get the underlying base and drainage evaluated, because no surface product will correct structural or settlement issues.
Next Article
How to Style a Patio Step by Step for a Finished Look
Step-by-step how to style a patio with zones, furniture, rugs, lighting, planters, colors, DIY tips, and budgeting.