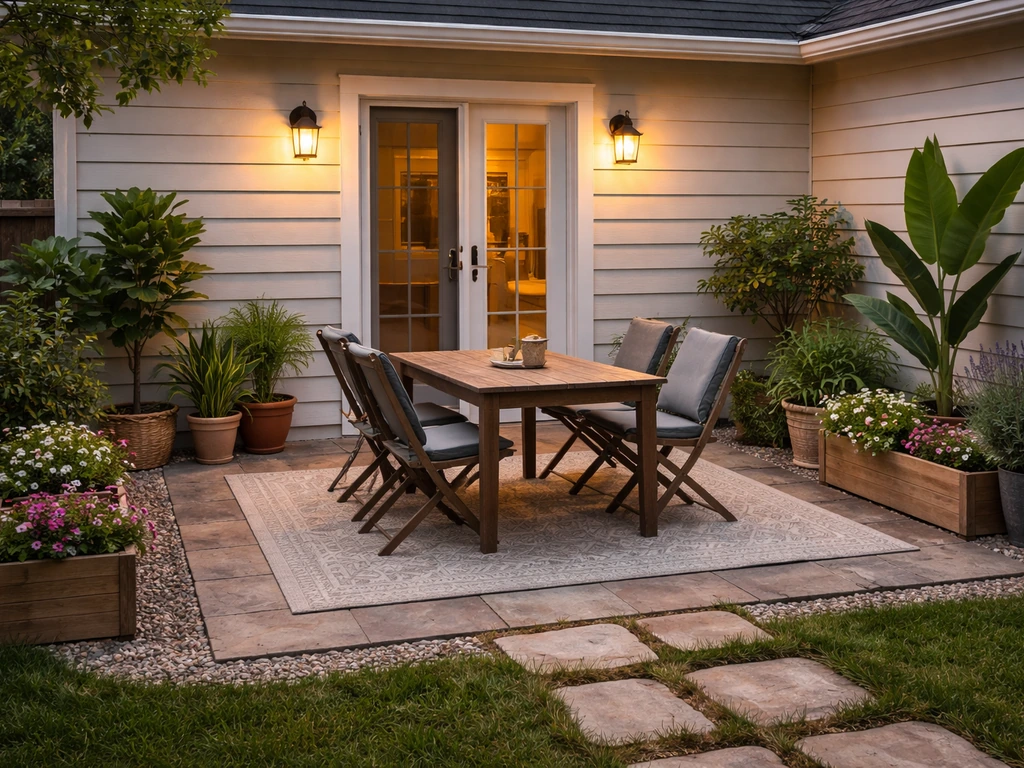
Building a patio in Minecraft comes down to five things: level ground, a solid block palette, a clean layout, a defined border, and good lighting. Get those right and your patio will look intentional instead of slapped together. Whether you want a small cozy stone slab terrace off your house or a big entertaining courtyard with furniture and torches, the process is the same, you just scale it up.
How to Make a Patio in Minecraft: Step-by-Step Build

Nolan Lennox
20 May 2026
Pick a patio spot and clear/level the ground
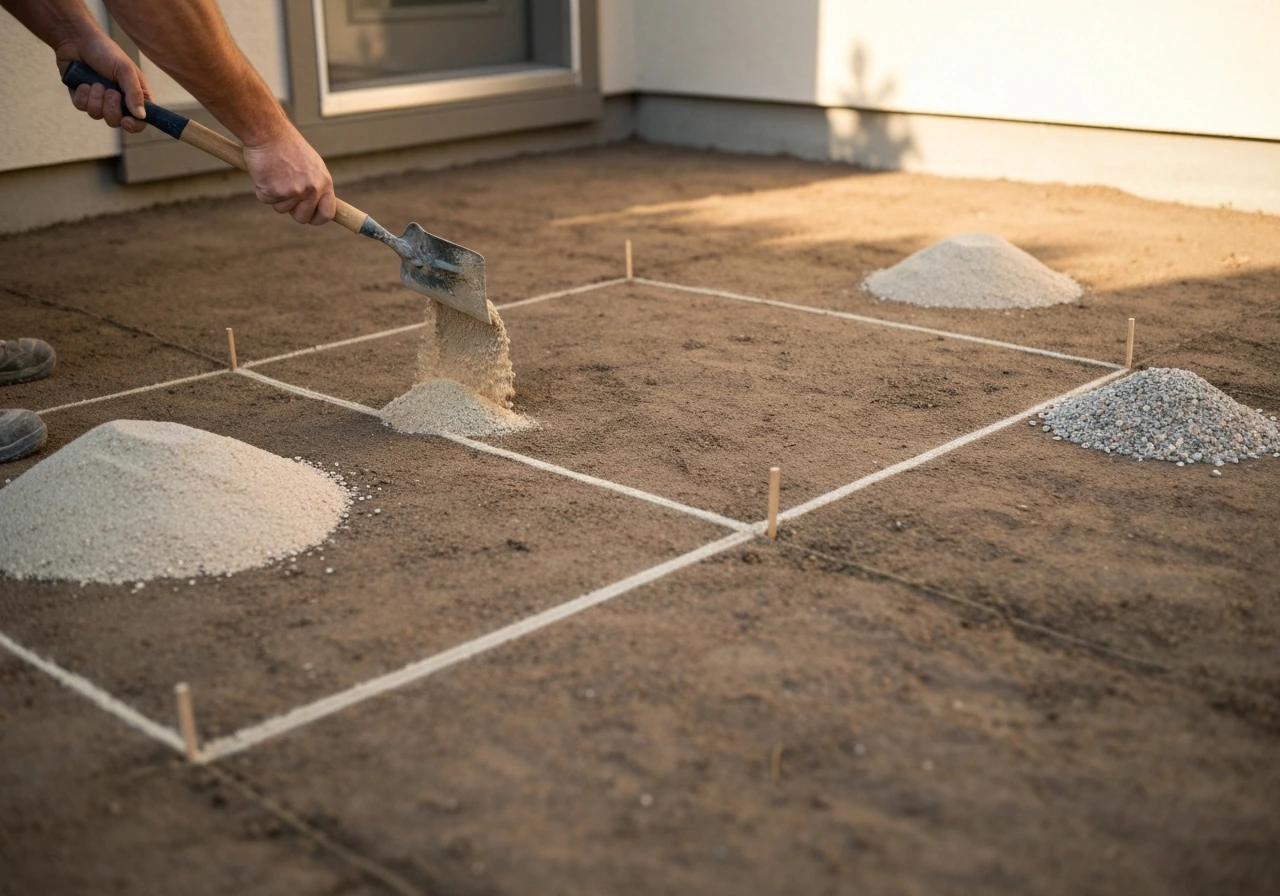
Start right outside your house entrance and work outward. The spot should be flat or close to flat, well-lit enough to keep mobs away, and positioned so it naturally connects to your front door or side entrance. If the terrain slopes, you have two choices: cut into the hillside and create a flat terrace, or build up the low side so both ends meet at the same height. Either way, you need a perfectly flat surface before you lay a single patio block.
If you are working in survival, use a shovel for dirt/gravel and a pickaxe for stone. In creative mode or with operator access, the /fill command is your best friend. The syntax fill x1 y1 z1 x2 y2 z2 air hollows out a region, and fill x1 y1 z1 x2 y2 z2 stone replace fills the base layer. If you want even faster work, WorldEdit's //flatten and //set commands let you level and fill large areas in seconds with proper block selections.
Deal with water and lava before you start paving. Stray water on your patio surface waterloggs slabs and stairs (which is a real Minecraft mechanic), turning your clean build into a mess of blue blocks. Use WorldEdit's water-replacement commands to drain a radius, or manually place solid blocks over any springs. Once the ground is flat and dry, mark the corners with temporary blocks like dirt or gravel so you know your working boundary before anything permanent goes down.
Choose a patio style and block palette
This is where most builds go wrong. People grab whatever block is in their inventory and end up with a chaotic mess. Pick a palette first and stick to it. Minecraft's stone family is the most versatile for patios because it reads like real paving material. The game's own 'Making Nice Floors' tutorial recommends mixing polished granite, polished andesite, and polished diorite for a tile-like look, and that advice holds up. Andesite in particular sits visually between smooth stone and cobblestone, so it bridges gaps between textures without looking jarring.
Match your palette to your house. If your home is oak wood with stone brick accents, lean on stone bricks and andesite slabs for the patio. If it is a dark oak and blackstone build, try blackstone slabs, polished blackstone, and chiseled blackstone for a moody courtyard feel. For a warm cottage patio, oak planks with stone brick borders work beautifully. Here are the main patio styles and the palettes that nail each look:
| Patio Style | Primary Blocks | Border/Accent Blocks | Best For |
|---|---|---|---|
| Classic Stone | Stone bricks, polished andesite | Andesite slabs, stone brick stairs | Medieval or survival houses |
| Rustic Cottage | Oak planks, smooth stone slabs | Cobblestone stairs, mossy stone bricks | Forest or village builds |
| Modern/Clean | Smooth quartz, white concrete | Quartz slabs, gray concrete stairs | Contemporary or flat-roof builds |
| Earthy Natural | Polished granite, gravel | Polished diorite, dirt path blocks | Nature or jungle builds |
| Dark Courtyard | Polished blackstone | Blackstone stairs, chiseled blackstone | Dark oak or nether builds |
Keep it to two or three block types maximum per patio. One primary surface block, one accent or trim block for a pattern break, and one border block. More than that gets visually noisy. If you want a tile grid pattern, use your primary block for the field and your accent block every three or four blocks in a grid, it reads exactly like real stone tile with grout lines.
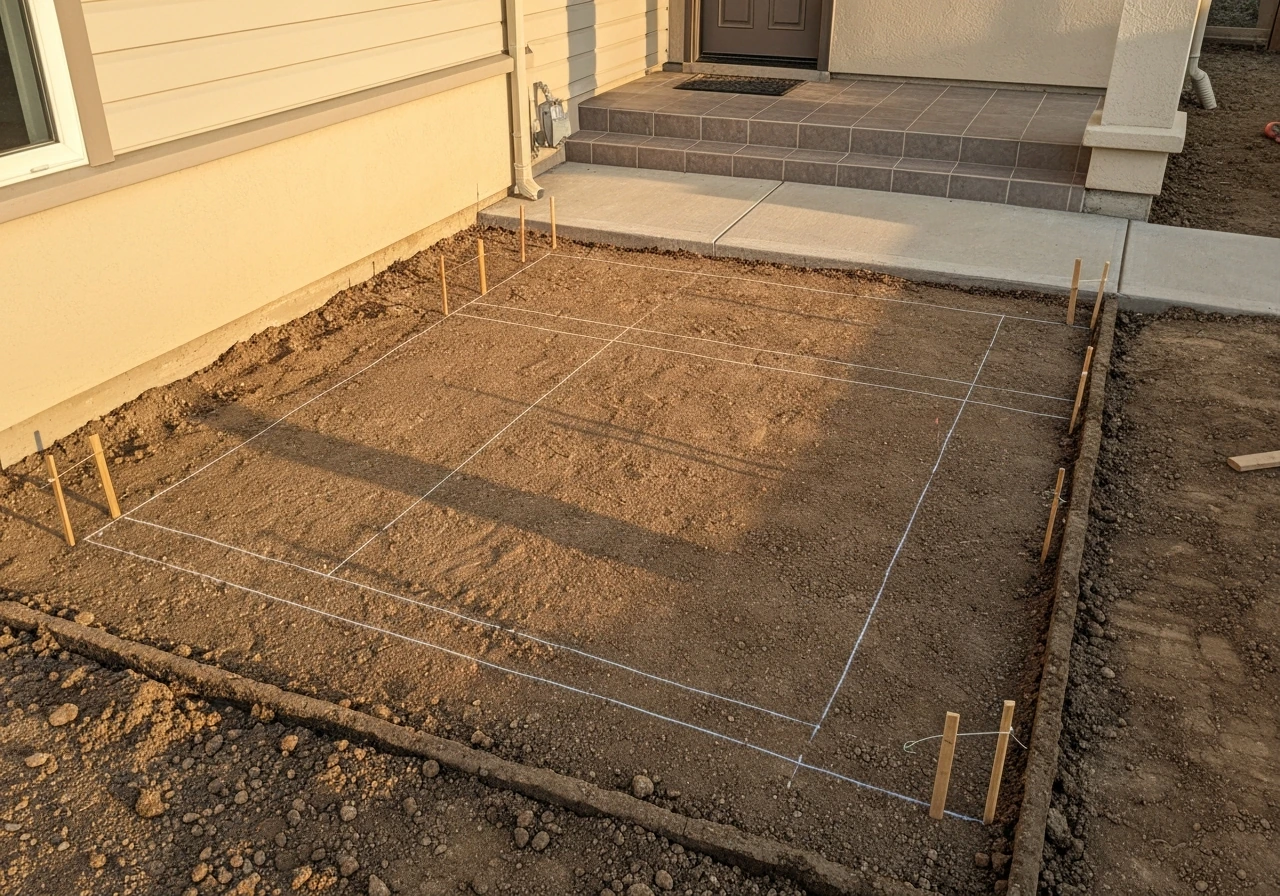
Layout and dimensions: mark the shape cleanly
The size of your patio should feel proportional to your house. A rough guideline that works well in practice: make the patio at least as wide as your house entrance and extend it out at least four to six blocks from the door. For a modest survival house that is around nine to twelve blocks wide, a patio of nine blocks wide by six blocks deep is a comfortable size. Larger houses or entertainment builds can go twelve by ten or even bigger.
Before placing any final blocks, mark your corners with sand or gravel as placeholders. Then mark the full perimeter edge. Use F3 (debug mode) to check your coordinates so your measurements are exact, sloppy layouts that are one block off-center bother you every time you look at them later. If you want a rectangular patio with an inset border, mark the outer rectangle first, then count inward by one block on each side to define the interior field.
For non-rectangular shapes, like an L-shape to wrap around a building corner or a curved front edge, plan each section as its own sub-rectangle. Minecraft does not do true curves, but a stepped diagonal using two-block then one-block shifts mimics a curve well enough at standard viewing distance. Mark those diagonal steps with temporary blocks before committing.
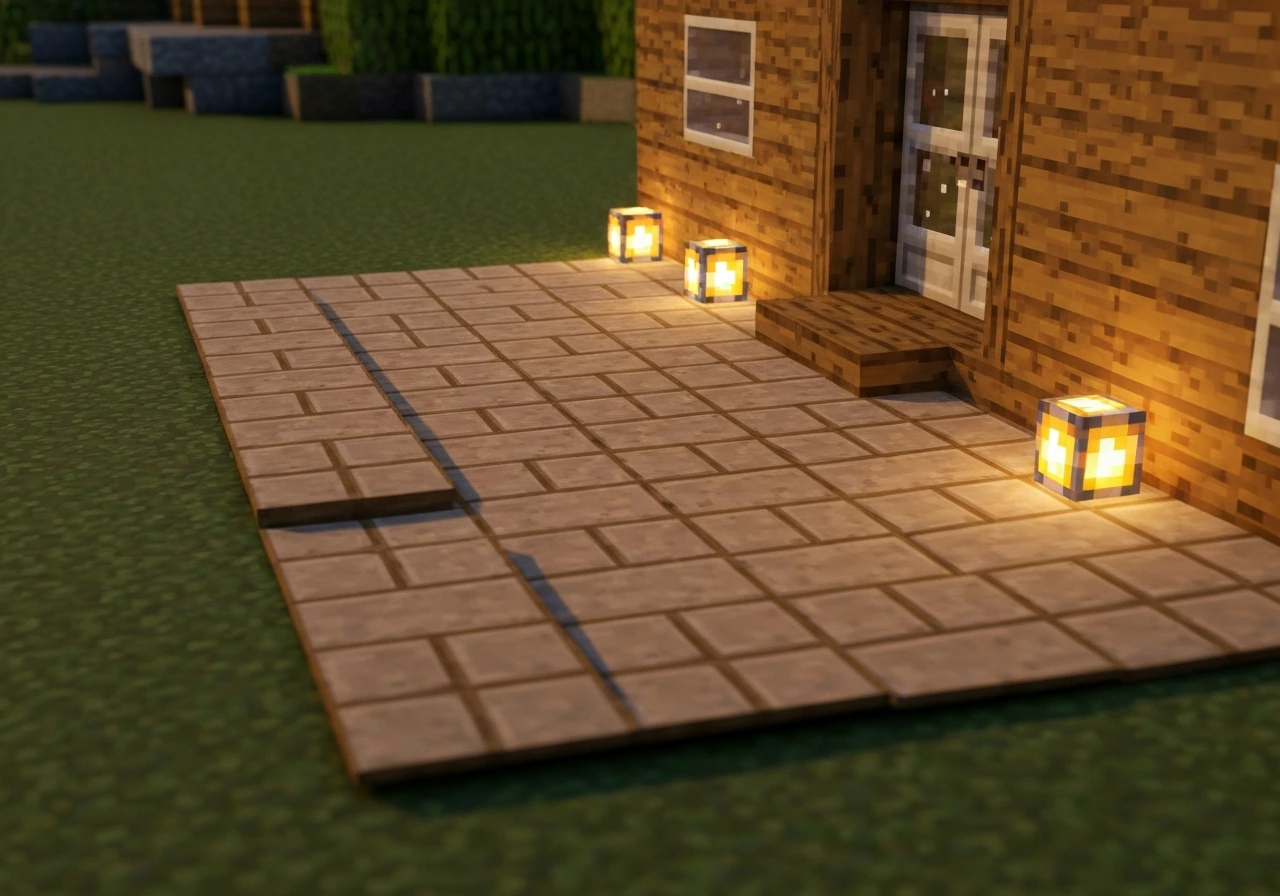
Build the patio base and surface (patterns and borders)
Once your layout is marked, fill the base layer first. In survival, place your primary surface block across the entire field. In creative or with commands, use /fill x1 y z1 x2 y z2 stone_bricks (swap in your chosen block) to do it instantly. Make sure everything sits at the same Y level, that one-block bump in the middle ruins the whole look.
Now add your surface pattern. A few that work consistently well:
- Grid tile: Place your primary block across the whole field, then replace every fourth block in both X and Z directions with your accent block. It reads as large pavers with seam lines.
- Checker: Alternate two blocks in a simple checkerboard, best with blocks that are similar in tone (polished andesite and smooth stone, for example) so it does not look like a chess board.
- Plank run: For wood patios, lay planks all running the same direction (all east-west or all north-south) like real deck boards. Switching between oak and stripped oak planks adds subtle grain variation.
- Slab surface: Use top-half slabs for your whole patio surface. This drops the visual height by half a block, giving a sunken or inset terrace look compared to surrounding ground, and slabs under half-block height are also spawn-proof in dark areas.
- Mixed stone: Combine polished granite, polished diorite, and polished andesite in a semi-random pattern across the field for a cobblestone-courtyard look that still feels intentional.
After the field is done, add the border. The border is what makes a patio look finished versus unfinished. Use stairs or a contrasting block for the outer perimeter. Stone brick stairs placed along the edge with the step facing outward creates a raised curb that defines the space cleanly. Alternatively, a single-block row of a contrasting full block (like polished andesite around a granite field) does the job more simply. The border does not need to be tall, one block high or even just a different surface block at the perimeter is enough.
Add edges, steps, and transitions to your home and paths
The transition from your house door down to the patio level is critical. Most house floors sit one block above outdoor ground level, which means you need at least one step. Use stairs matching your patio palette, stone brick stairs for a stone patio, oak stairs for a wood deck. If you are building something similar in The Sims 4, follow a dedicated guide for patio stairs so the height and layout match your house level patio stairs in The Sims 4. Place them right-side up by clicking the top half of the block below your door threshold. If the height difference is two blocks, use two stair steps and possibly a landing slab between them so it does not feel like a steep drop.
Keep in mind that Minecraft's step-up height is 0.6 of a block, which means a single slab (half a block tall) is walkable without jumping. If you want a smooth roll from house to patio, slabs as transitional steps feel more natural than full stairs for low height differences. For taller drops (two or more blocks), proper stair blocks are the better choice.
Connect the patio to any nearby paths. A dirt path block or gravel path leading from your patio edge to a gate, garden, or farm creates visual flow and tells the eye where to go. Use path blocks (the slightly lowered dirt path block made with a shovel) or gravel for a casual feel, or polished andesite slabs for a more formal walkway that matches a stone patio. At the junction between patio and path, place a transitional block or step so it does not look like the path just crashes into the patio edge.
Customization and finishing touches (lighting, furniture, and landscaping)
Lighting is where patios go from functional to actually good-looking. You have several strong options in Minecraft, and the best builds layer more than one. Lanterns hung on fences or placed on posts are the most visually natural for outdoor patios. Sea lanterns (light level 15) are great near water features or for a magical garden vibe. Redstone lamps (also light level 15 when powered) are perfect if you want controllable lighting you can switch on and off with a lever. A clever trick: place a glowstone or sea lantern under a carpet tile, the carpet hides the light source but still lets all the light through, giving your patio floor a subtle glow without visible light blocks.
For furniture, Minecraft does not have actual furniture blocks, but the community has standardized workarounds that look great. A few that read immediately as patio furniture:
- Chairs: Place two stairs facing each other with a sign or slab between them, or use a single stair with a trapdoor open beside it as an armrest.
- Tables: A fence post or wall block topped with a pressure plate (stone or wooden) makes a clean low table.
- Benches: A row of stairs facing the same direction with slabs beside them for a side table or armrest reads clearly as a bench.
- Firepit: A campfire block centered on the patio (or slightly off-center) is both functional and visually warm.
- Planter boxes: Flower pots on the corners of your patio, or a full block surrounded by trapdoors (open, facing inward) filled with dirt and a plant makes a convincing raised planter.
Landscaping around the patio ties the whole outdoor area together. Flower beds along the border edges using tall grass, flowers, or ferns in a consistent color family look much better than random scattered plants. Small shrubs made from leaf blocks in the corners add greenery without cluttering the walkable surface. If your patio is against a wall, a climbing vine effect using vines or hanging leaf blocks softens the hard junction between the patio and your house exterior. Keep landscaping outside the patio border, not inside, so the usable space stays clean.
If you enjoy game-style builds beyond Minecraft, the same design principles apply whether you are working in Bloxburg, Sims 4, or Sims Freeplay, the logic of base material, border, and lighting translates directly, even though the tools are completely different in each game. The same layout and finishing ideas also work for a second-floor patio in The Sims Freeplay. In Sims Freeplay, you can remove a patio by selecting it and using the delete or demolition tool from the build options Sims Freeplay patio. If you are building in Bloxburg, the same step-by-step approach can help you plan and place your patio layout and materials how to make a patio in bloxburg. Once you have the basic patio layout in your head, you can adapt the same ideas to Sims 4 by choosing a patio area in Build Mode and snapping walls, floors, and landscaping to match your space.
Troubleshooting and common mistakes for a better build
Even experienced Minecraft builders run into the same issues on patio builds. Here are the ones that come up most often and how to fix them:
- Uneven ground under the surface: If you did not level properly before paving, you end up with lumps where blocks sit at different Y levels. The fix is removing everything, re-leveling with fill commands or by hand, and relaying the surface. Do not try to patch around it — it always shows.
- Inconsistent block palette: Using too many unrelated block types (oak planks next to quartz next to cobblestone) kills the visual coherence. Strip it back to two or three blocks and make sure they share a color family or texture language.
- No border or trim: A patio without a defined edge looks like you just paved a random patch of ground. Even a single row of a contrasting block around the perimeter fixes this instantly.
- Forgetting lighting: Dark patios spawn hostile mobs at night and just look abandoned. Add at least one light source per four-block square of patio area. Light level needs to be above 7 on the surface to prevent mob spawning.
- No step or transition from the door: Walking off a one-block drop from your house door onto the patio looks sloppy. Always add at least one stair or slab step at the threshold.
- Waterlogged slabs from nearby water: If water is creeping in and waterlogging your slab surface, place solid full blocks under or around the water source to contain it, or use WorldEdit's water-cleanup commands to clear flowing water in the area before building.
- Patio not aligned to the house: If your patio is off-center relative to your door or house facade, it reads as an afterthought. Use F3 coordinates to center the layout on the midpoint of your entrance before marking the full shape.
- Mobs spawning on dark patio details: If you use decorative slab layers in corners that end up in shadow, mobs can spawn there. Slabs at half-block height are naturally spawn-proof, but full blocks in dark spots are not — either light those corners properly or use partial-height blocks throughout.
From here, the next natural step is extending your outdoor area: build a garden path connecting the patio to a farm or gate, add a small pond or fountain adjacent to the patio edge, or start on a pergola-style roof structure using fence posts and slabs above the seating area. If you are playing Sims Freeplay, the same idea of planning the space first helps you figure out how to build a patio in Sims Freeplay without ending up with a layout that feels cramped or awkward. Each of those additions builds directly on the foundation you already have, so you are never starting from scratch again.
FAQ
How can I make sure my patio height and door transition feel smooth when I play?
After you’ve leveled and marked the layout, do a quick “walk test” by placing temporary blocks at the door threshold and along the border height you plan to use. This helps you confirm that you will not end up with a 1-block ledge where you step onto the patio, which often looks fine in the build menu but feels awkward when you walk it in survival.
What’s the best way to handle water features if I still want a clean patio surface?
Avoid placing water sources directly on or inside your patio footprint. If you need a water feature nearby, keep it outside the patio field and connect visually with plants or a short decorative edge. If water must be within the footprint, plan for full covering with solid blocks and then re-check lighting, because waterlogged slabs and stairs change both appearance and consistency.
How do I prevent accidentally using the wrong blocks while building in survival?
In survival, craft a “block kit” before you start paving: one stack each for your primary surface, border, and transition blocks (stairs or slabs), plus a few extra for mistakes. Then only remove items from your hotbar for the specific step you’re on (base layer first, then pattern, then border). This prevents the common mistake of mixing materials accidentally mid-build.
Can I make a patio with a rounded or curved front edge in Minecraft?
Yes. You can do a curved-looking patio by combining stepped diagonals with a hard outer border. The key is to keep the border line straight in one-block increments, then vary the inside field with the stepped diagonal. This avoids a wobbly outline where the curb looks curved but the walkway feels uneven.
How do I confirm my patio is level and not off by one block before I place the final surface?
Don’t skip the perimeter check, even if you use commands or WorldEdit. Make sure your outer border and interior field sit on the exact same Y level, and verify there are no stray replaced blocks from earlier fills. A fast way is to temporarily place a different “debug” border material around the edges, then remove it once you confirm alignment.
What’s a practical spacing strategy for patio lighting to reduce mob spawns?
For lighting, cover the rule-of-thumb first: use at least one light source roughly every 8 to 12 blocks if you want mobs to stay away consistently during night. If you’re using lanterns or sea lanterns, consider adding a second light layer near seating or entrances rather than trying to rely on a single row everywhere.
How do I make the patio pattern look intentional instead of too busy or inconsistent?
If your base materials include polished stones, add variation with border-only contrast (for example, polished tile inside, darker or rougher trim on the edges). Also keep pattern repeats predictable, such as accent placements every 3 or 4 blocks, so the eye reads it as flooring rather than random patchwork.
Should I cut into a hill or build up to level my patio, and how do I choose?
If the ground is sloped, cutting into the hillside can create a natural retaining look, but you must support the cut face with a consistent material band (like stone bricks) at the transition point. If you instead build up the low side, remember to extend the border and transition blocks outward so the “top platform” reads as one cohesive patio, not an overlay.
When should I use slabs versus full stairs for moving from the house to the patio?
For walkable transitions, slabs can help for small height differences, but stairs give clearer alignment and movement direction. A good decision aid: if you can step between house floor and patio without jumping, slabs or a slab landing usually work; if you need to climb more than a minor step, use stairs and consider a small landing to prevent a steep feel.
How can I align my patio visually with the front door so it doesn’t look off-center?
If you want the patio to feel connected to the entrance, match the direction of the first border line to the centerline of your door. Then place your first border block and first transition step so the walk from the door lands on the main surface field, not directly on the curb. This removes the common “off-center stepping” problem that’s hard to notice until you walk it.
How do I add landscaping without making the patio feel cluttered or reducing walkable space?
Place landscaping outside the border, but you can still include vertical elements at the edge as long as they do not intrude into the walking space. A simple rule is to keep any leaves, flowers, or vine blocks one block away from the interior field boundary, then use a distinct corner placement so the greenery frames the patio rather than clutters it.
Next Article
How to Make a Patio in Bloxburg Step by Step
Step-by-step guide to build a Bloxburg patio, with no-gamepass workarounds, layout tips, materials, and troubleshooting.