Yes, you can build a real, durable patio without digging up your entire yard. The trick is understanding what 'no-dig' actually means in practice: you're not avoiding all ground prep, you're avoiding full excavation. Instead of renting a mini-excavator and hauling off 6 inches of soil across your whole project area, you're clearing vegetation, lightly grading the surface, laying a compacted base, and building up from there. For most residential patios in reasonably flat yards with decent drainage, this approach works great and saves a full weekend of brutal labor.
How to Make a Patio Without Digging: Step by Step

Nolan Lennox
23 May 2026
What 'no-dig' actually means (and what it doesn't)
When most homeowners say they want to build a patio without digging, they mean they don't want to rent excavation equipment, haul away truckloads of dirt, or spend days breaking ground. That's totally reasonable. But I want to be upfront: even the most minimal no-dig systems require some subgrade preparation. Products marketed as 'no-dig' or 'minimal excavation' still specify a compacted base underneath them, and that base has to sit on stable, relatively flat ground. What you're skipping is deep trenching and major soil removal, not all surface prep.
For example, Brock's PaverBase panel system is specifically designed to reduce how much gravel base you need, replacing some of that traditional depth with engineered plastic panels. But even those panels need to go on a compacted, leveled surface. Similarly, grass-paver products like Turfstone specify 'minimum excavation required' as a formal section in their installation guides, because some subgrade work is unavoidable. The honest version of no-dig is: minimal digging, smart base design, and the right materials for your conditions.
When a no-dig patio works vs. when you actually need to excavate
A no-dig approach is realistic in more situations than you might think, but it has real limits. In permeable pavement designs, Techo-Bloc explains that a geotextile is combined with clean stone/base layers, and geogrid can be used to reduce or optimize base thickness in certain cases blank" rel="noopener noreferrer">A no-dig approach is realistic in more situations than you might think, but it has real limits.. Here's how to honestly assess your yard before committing to either path. After you confirm the ground prep and base depth you need, you can move into the actual digging-lite steps like clearing, grading, and edging for a no-dig patio assess your yard before committing.
No-dig works well when...
- Your yard is reasonably flat or has only a gentle slope (less than about 1 inch of drop per foot across the patio area)
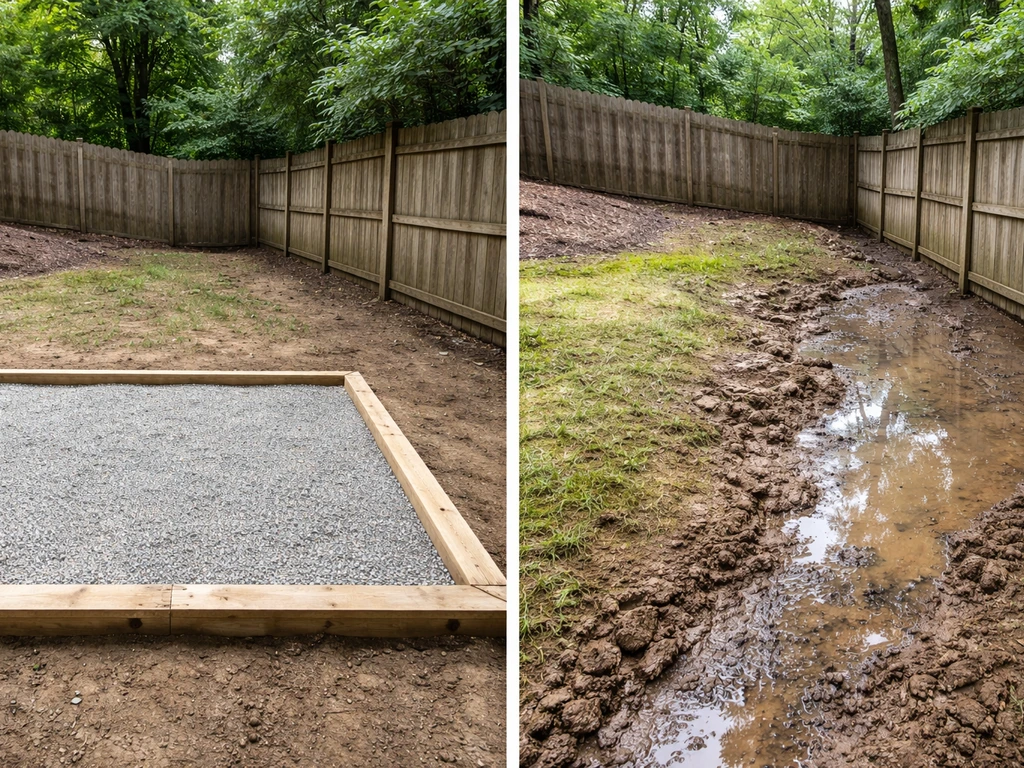
- The existing soil is firm, not waterlogged, and drains reasonably well after rain
- You're building a patio at ground level, not needing a raised or elevated structure
- You're using gravel, decomposed granite, wood, composite deck panels, or pavers on a panel-style base
- The patio is for pedestrian use only (no vehicles, no heavy loads beyond patio furniture)
- You're okay with a surface that sits slightly higher than the surrounding yard (typically 2 to 4 inches above grade)
When you'll probably need to excavate
- Your yard has significant slope across the patio footprint, requiring grading that removes meaningful soil volume
- The soil is clay-heavy and pools water for hours or days after rain (drainage problems that need subsurface fixes)
- You want the patio surface to be flush with the surrounding lawn, not elevated above it
- You're planning a concrete slab, which needs a proper compacted gravel sub-base installed after excavation
- The area has existing tree roots, large rocks, or buried debris that need to come out anyway
If you're on the fence because of a slight slope or moderate drainage concerns, the no-dig approach can still work with some extra attention to drainage grading during base prep. But if water sits on your future patio site for more than a couple of hours after a normal rain, fix that drainage problem first, because no surface material will save you from a soggy, heaving base.
Pick the right no-dig patio style and materials for your yard
The material you choose shapes every other decision, including how much base prep you need, your total cost, and how the finished patio will look and age. Here's a practical comparison of the most popular no-dig-friendly options.
| Material | Best For | Approximate Cost (materials) | Digging Required | Durability | DIY Difficulty |
|---|---|---|---|---|---|
| Compacted gravel or decomposed granite | Casual, rustic patios; excellent drainage | $1–$3 per sq ft | Minimal (surface clearing + light grading) | Good with edging; needs periodic topping | Beginner |
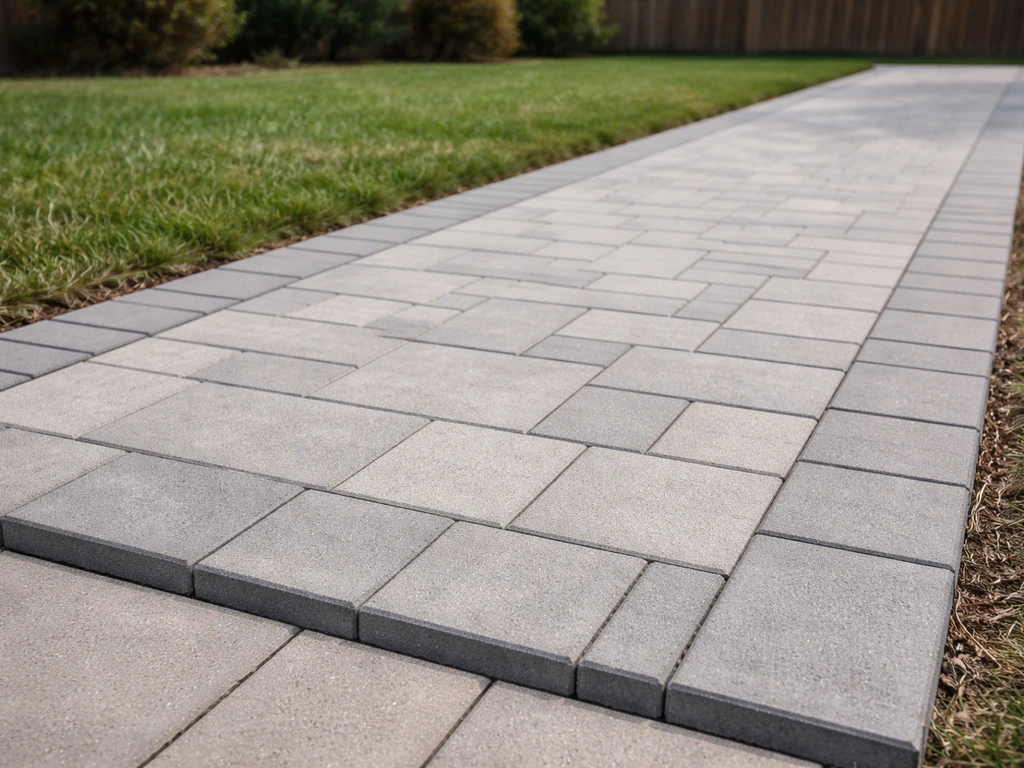
| Sand-set pavers on PaverBase panels | Clean look; good for flat yards | $4–$10 per sq ft | Very minimal (just surface prep) | Excellent if properly set | Intermediate |
| Sand-set concrete or brick pavers on gravel base | Classic look; very durable | $3–$8 per sq ft | Minimal (2–4 inches for base) | Excellent | Intermediate |
| Wood decking tiles / composite snap-together panels | Renters; quick installs; rooftops and decks | $5–$15 per sq ft | None (lay over existing surface) | Moderate (wood needs maintenance) | Beginner |
| Permeable grass pavers (Turfstone style) | Blended lawn/patio look; drainage-first yards | $3–$7 per sq ft | Minimal (base layer only) | Good for light use | Intermediate |
My personal recommendation for most first-time DIYers doing a no-dig patio: go with sand-set pavers over a compacted gravel base, or use a PaverBase panel system if you want to minimize how much gravel you're hauling. If you later decide you want a cement-free finish, choose pavers on a compacted gravel base with polymeric sand in the joints instead of concrete no-dig patio. Gravel/decomposed granite is the easiest install but requires edging to stay neat. If you want to go lighter on gravel, there are no-dig patio styles that use alternatives like sand-set pavers or panel systems instead of a deep gravel base. Snap-together composite or wood tiles are the fastest of all, but they work best on an already-hard, flat surface like concrete or an existing deck.
Site prep without excavation: clearing, leveling, drainage, and weed control
This is the step most DIYers underestimate, and it's where a no-dig patio either holds up for a decade or starts rocking and sinking within a year. Take your time here.
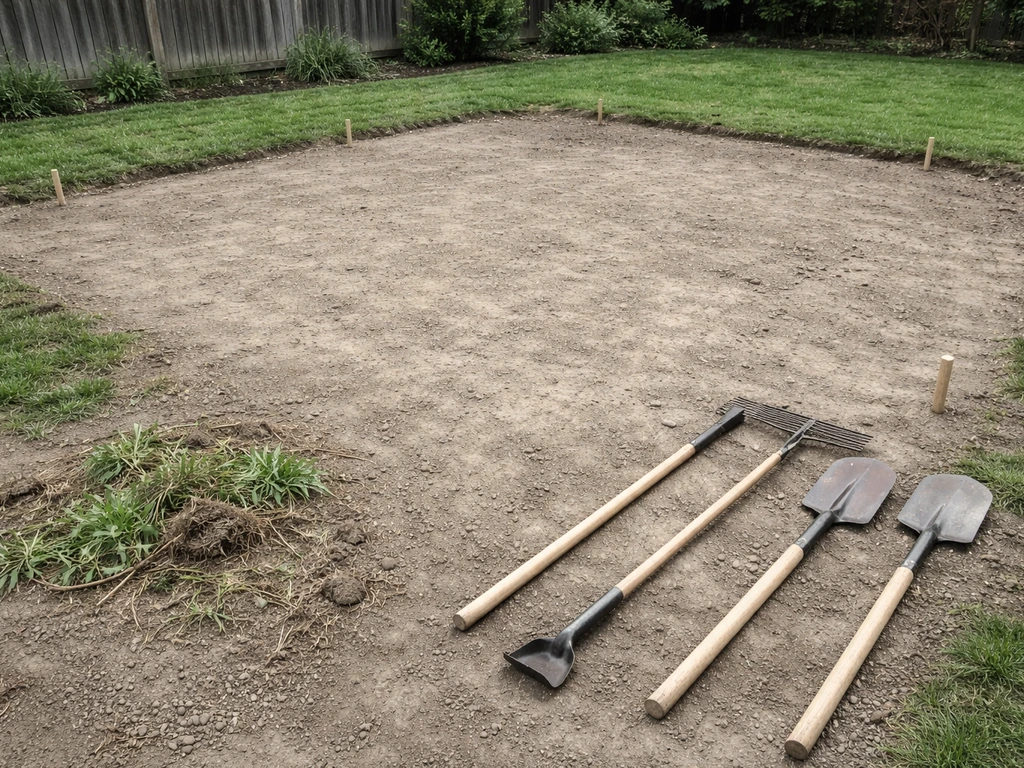
Step 1: Mark your area and call 811
Before you touch a shovel, even for light grading, call 811 (the national Call Before You Dig line). This is required by law in most states before any excavation on your property, including shallow work. Mark your project area with spray paint or flags first so utility locators know exactly where to check. Most utilities respond within a few business days. It's free, quick, and could save your life.
Step 2: Remove vegetation and sod
You don't need to dig up 6 inches of soil, but you do need to remove all grass, weeds, and organic material from the patio footprint. If you do need to go deeper than a no-dig setup, follow a dedicated guide on how to excavate for a patio dig up 6 inches of soil. Living plant matter under a base will decompose and create soft spots. Use a flat spade or sod cutter to slice off just the top layer of vegetation, typically 1 to 2 inches deep. For a small patio, a manual sod cutter works fine. Rent a power sod cutter for anything over about 200 square feet.
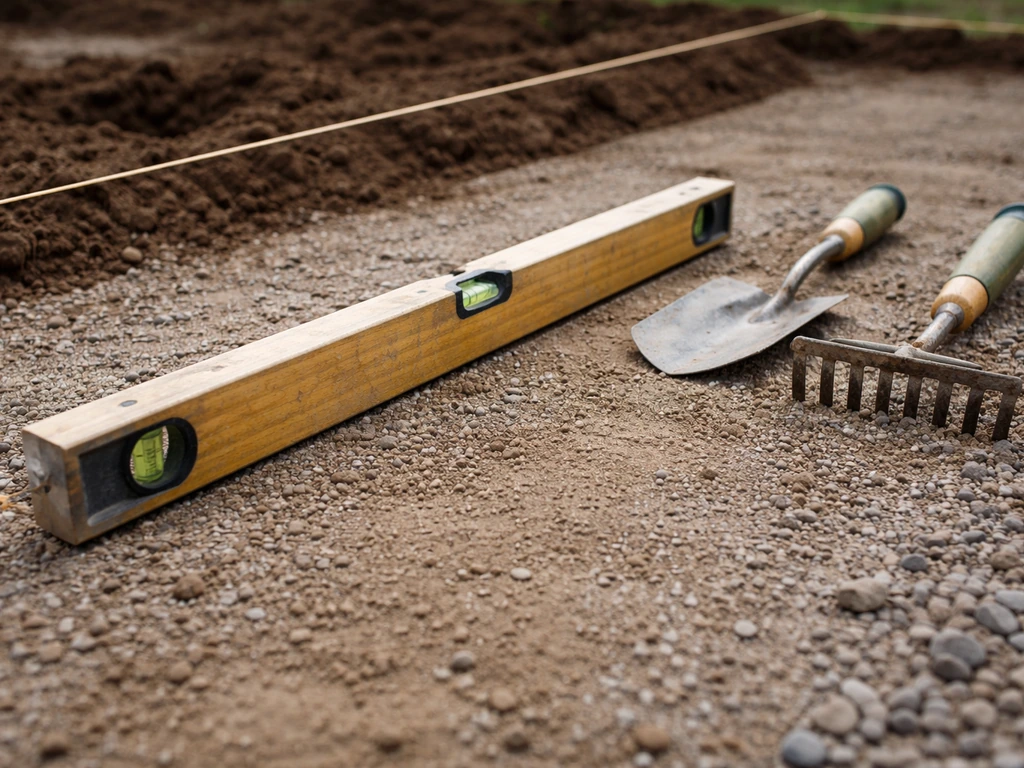
Step 3: Level and grade for drainage
Once vegetation is cleared, check your surface with a long level or a string line. Your finished patio needs to slope away from your house at about 1/4 inch per foot of run. That's enough to drain rain water without being noticeably tilted. For no-dig installs, you achieve this slope by adjusting the depth of your base material rather than cutting into the ground. Add a little more base rock on the house side to build the right pitch. Use a long 2x4 and a level to check your grade as you go.
Step 4: Lay your weed barrier
A geotextile landscape fabric serves two purposes here: it slows weed growth coming up from below, and it separates your base material from the native soil underneath so the two don't mix over time. Lay the fabric across your entire cleared area with at least 4 to 6 inches of overlap at any seams. Note that geotextile alone won't permanently stop weeds, especially from seeds blowing in from the top, but it dramatically reduces upward growth. Polymeric sand in paver joints handles the top-down weed problem later.
Build a stable base layer and containment edge
The base is the foundation of everything. A soft or poorly contained base will let your patio shift, settle, and tip no matter how nicely you lay the surface. Don't cut corners here.
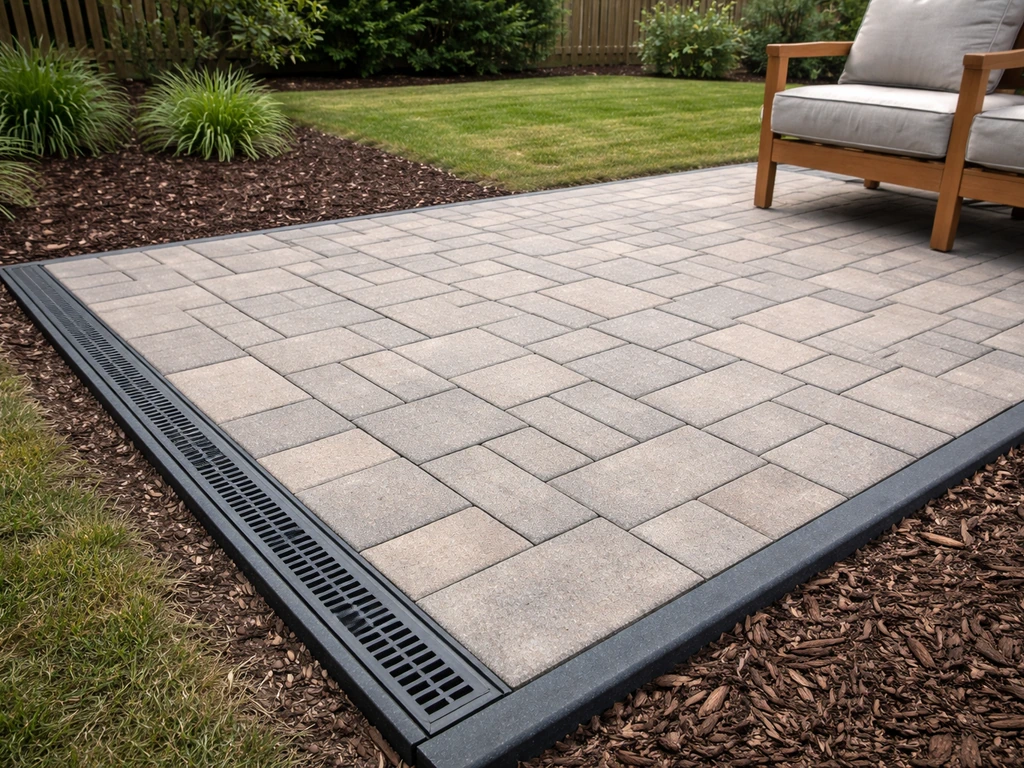
Install your edge restraints first
Edge restraints (also called paver edging) hold everything in place and prevent your base and surface from creeping outward over time. Plastic paver edging spiked into the ground is the most common DIY choice. Install it along the full perimeter of your patio before you fill in the base, because it's much harder to deal with after the fact. Space the spikes about every 12 inches, and use longer spikes (at least 10 inches) at corners and curves where lateral pressure is highest.
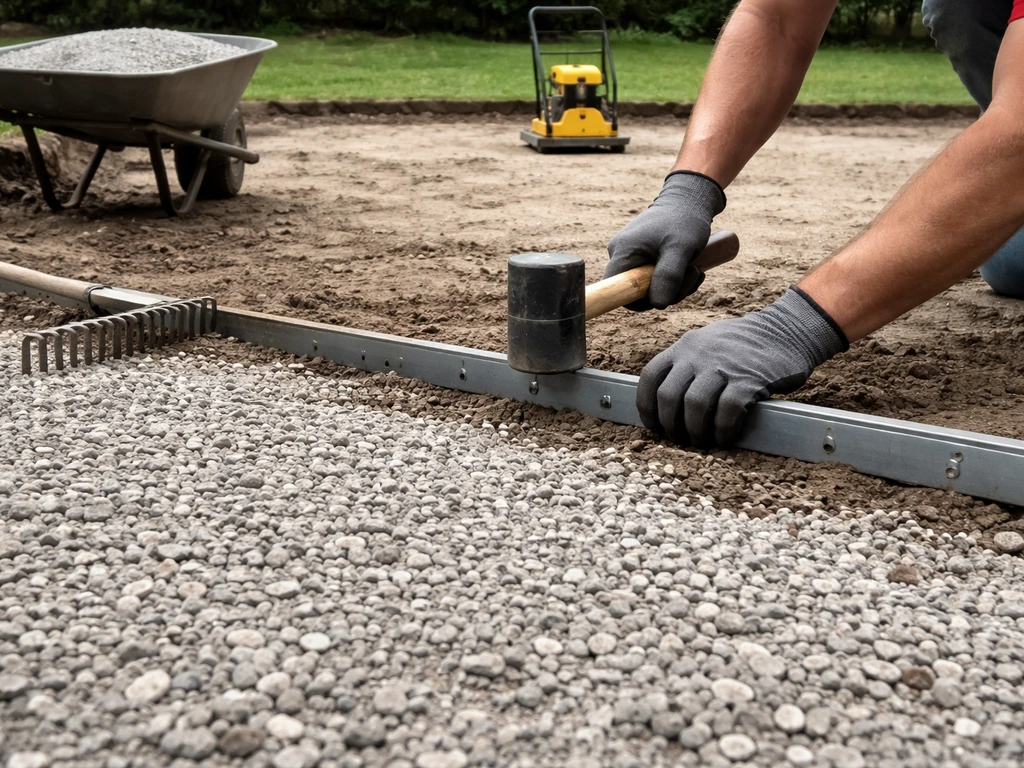
Spread and compact the base material
For a standard no-dig paver patio with pedestrian use, you want 2 to 4 inches of compactable gravel base (crushed stone, road base, or Class II aggregate). Spread it in 2-inch layers and compact each layer before adding the next. A plate compactor is the right tool here and well worth renting for a full day. If you're using a PaverBase panel system, you still need the surface to be firm and level, but the panels themselves replace some of that gravel depth. Follow the panel manufacturer's specs exactly on how flat the base needs to be, because panels bridge gaps differently than compacted gravel does.
If you're building a gravel or decomposed granite patio, this compacted base layer IS your surface layer, so get the grade and compaction right before moving on. Any base irregularities should be corrected with additional base rock, not by adding extra sand on top of a lumpy base. Sand is a bedding layer, not a leveling compound.
Install the patio surface: step-by-step for three common no-dig approaches
Option A: Sand-set pavers on a compacted gravel base
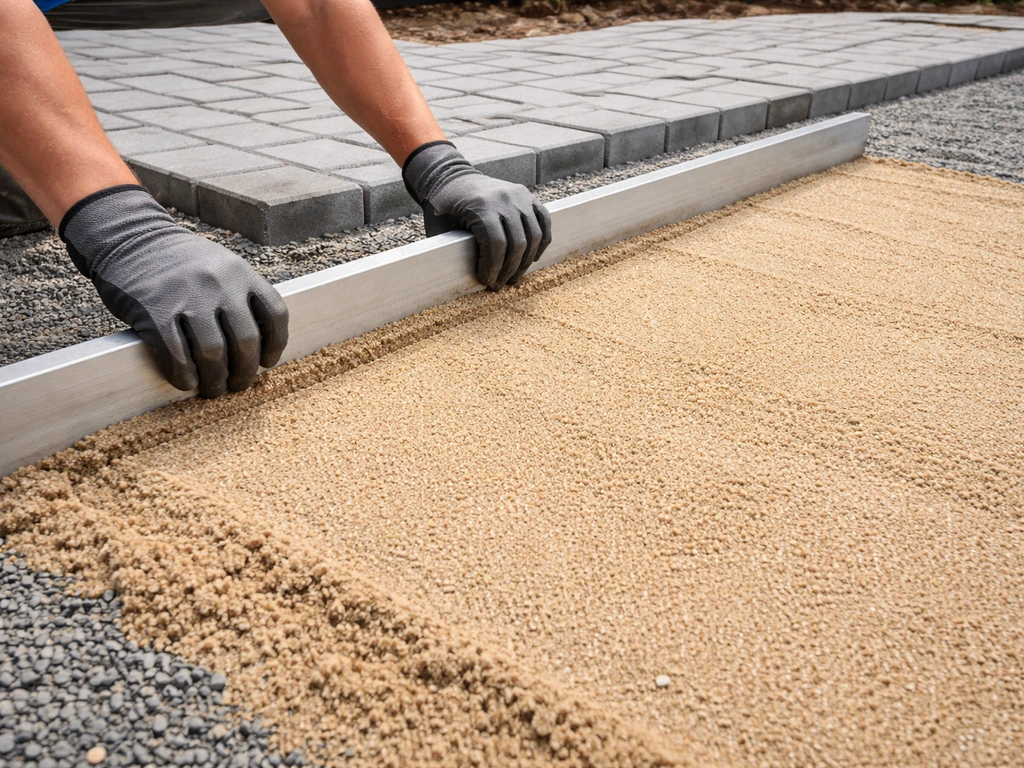
- After your compacted gravel base is flat and graded, spread a 1-inch layer of coarse bedding sand (concrete sand, not play sand) across the surface.
- Screed the sand smooth using a long straight 2x4 dragged across two screed rails set at your target depth. The rails come out as you go, and you fill the voids they leave.
- Lay pavers from one corner, working outward in a consistent pattern. Keep joints tight and consistent, typically 1/16 to 3/8 inch depending on the paver style.
- Check for level and pattern alignment every few rows. Tap each paver gently with a rubber mallet to set it into the sand.
- Once all pavers are laid, run a plate compactor over the entire surface (put a rubber pad or piece of carpet under the plate to protect the paver faces). This seats everything firmly into the sand bed.
- Sweep polymeric sand into all the joints, working it in with a push broom. Make multiple passes until joints are full.
- Blow off any excess polymeric sand from the paver surfaces with a leaf blower before it sets.
- Lightly mist the entire surface with water to activate the polymeric sand. Follow the specific product instructions for timing and water amounts, as over-watering can leave a haze.
Option B: Gravel or decomposed granite patio
- Install edge restraints around the full perimeter before adding any surface material.
- Spread your compacted gravel or decomposed granite base (3 to 4 inches deep) and compact it thoroughly with a plate compactor.
- For decomposed granite: add a final 1-inch topping layer of loose DG and compact lightly for a smooth finish.
- For decorative gravel: spread your top layer gravel (pea gravel, crushed granite, or river rock) about 2 to 3 inches deep. Rake level.
- Add stepping stones or pavers as needed for walking paths through the gravel area.
Option C: Snap-together composite or wood deck tiles
- This option works best over an existing hard, flat surface like concrete, an old patio slab, or a very firm, compacted base.
- Clean and dry the existing surface completely.
- Start laying tiles from one corner, clicking or interlocking each tile to the next per the manufacturer's system.
- Cut edge tiles to fit using a circular saw or miter saw fitted with the appropriate blade for the material.
- No adhesive is needed for most tile systems, but confirm your product's spec, especially for sloped or roof-deck applications.
- Check that drainage gaps between tiles are clear of debris after installation.
Finishing touches, safety checks, and fixing problems before they get worse
After installation: the checks that matter
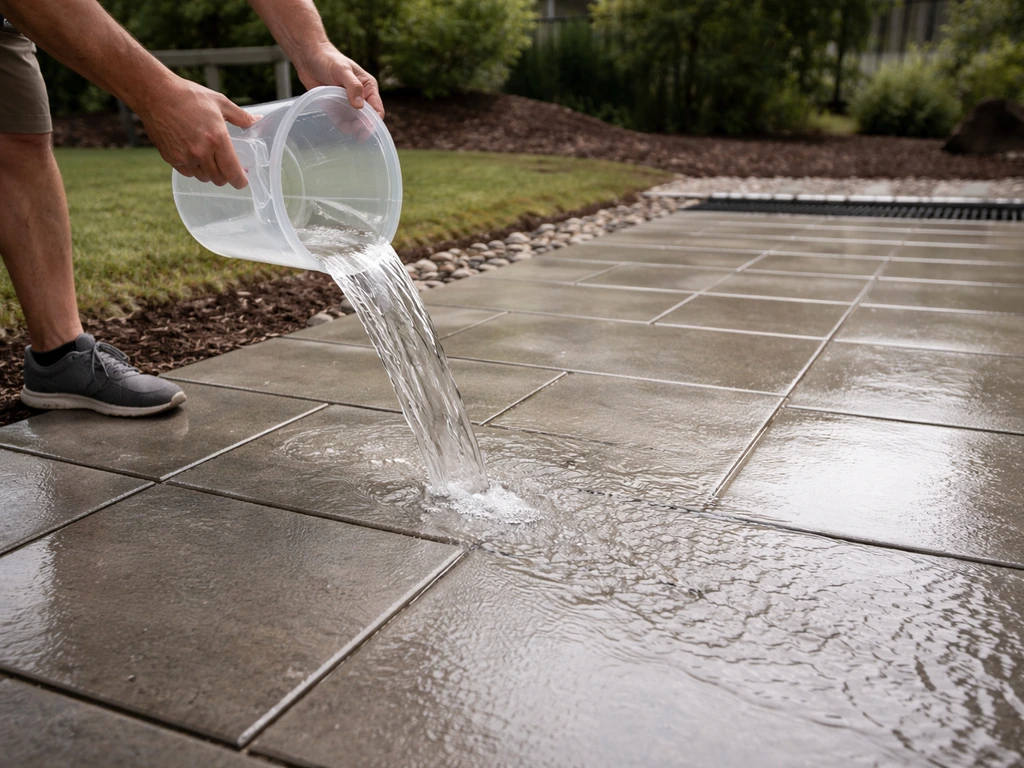
- Verify your drainage slope is correct by pouring a bucket of water in the center of the patio and watching where it flows. It should move steadily away from the house, not pool anywhere.
- Walk the entire surface and press on each paver or panel section. Any rocking means the bedding sand isn't fully seated. Lift that paver, add a little more sand, reset, and re-compact.
- Check that edge restraints are fully spiked and flush. Any proud sections or gaps let the border creep outward under foot traffic.
- If you used polymeric sand, check for haze on the paver faces. A mild haze usually washes off with water and a stiff brush. A heavier haze may need a polymeric sand remover product.
Troubleshooting the most common no-dig patio problems
Settling and uneven spots: If individual pavers sink or tip within the first season, it's almost always a base compaction issue. Lift the affected pavers, add base material, recompact if possible, relay the sand bedding layer, and reset the pavers. Don't just add more sand and hope for the best; fix the base.
Weed growth: Weeds growing up through joints usually mean the geotextile had gaps or the polymeric sand wasn't properly installed. For an existing patio, apply a brush killer or white vinegar directly to the joints, then re-sweep fresh polymeric sand once weeds are dead and cleared. Polymeric sand with anti-microbial additives helps going forward.
Water pooling: Persistent puddles usually mean the drainage slope is off or the base isn't draining well. If only a small area pools, you can sometimes fix it by carefully lifting those pavers, adjusting the bedding sand depth to change the pitch slightly, and relaying. If the pooling is widespread, the base itself may need to be regraded, which means pulling up a section and starting that portion over.
White staining (efflorescence): That chalky white film that sometimes appears on concrete pavers is mineral salt rising to the surface. It's cosmetic and not a product defect. It typically weathers off on its own within a season or two. You can speed it up with an efflorescence cleaner and a stiff brush.
Ongoing maintenance to keep it looking good
- Sweep polymeric sand back into joints once a year, or any time joints look depleted after heavy rain or snowplowing
- Pull or treat any weeds that push through before they get established and start spreading roots under the pavers
- Check and re-spike any edge restraints that have shifted or lifted, especially after freeze-thaw cycles
- Top up gravel or decomposed granite surfaces annually to replace material that migrates or compacts down over time
- Rinse composite and wood deck tiles seasonally and check for any fastener loosening or cracked sections
One last note: if your project is on the larger or more complex end, it's worth checking whether your municipality requires a permit even for a ground-level patio. Rules vary widely by area, and some places have specific thresholds based on square footage or proximity to property lines. Getting that sorted before you build is much easier than dealing with it after the fact. If you are still wondering how deep to dig patio materials should sit, the key is matching your base thickness and drainage slope to your patio style and conditions.
FAQ
Do I really need to remove grass and topsoil even if I’m not digging deep for a no-dig patio?
Yes. You should remove all vegetation, roots, and loose organic material from the footprint (typically 1 to 2 inches with a sod cutter or flat spade). Leaving organic matter under the base can decompose and create soft spots, which then causes pavers to sink or rock even if you used a “minimal excavation” system.
What’s the minimum slope I should aim for, and how do I check it without cutting into the ground?
Aim for about 1/4 inch of drop per foot of run away from the house. You check it with a long level or string line, then achieve it by adjusting the thickness of your base rock (adding a bit more on the house side). If you can’t measure a consistent pitch, stop and rework the base depth before laying sand-set pavers.
Can I use geotextile fabric by itself instead of compacting a gravel base?
No. Geotextile mainly helps separate layers and reduce weed growth, it does not create a stable foundation. You still need a compacted gravel base in the recommended thickness and you must compact in layers, otherwise the patio will settle unevenly.
How do I prevent the base from mixing into the native soil over time?
Use geotextile with full coverage and proper overlap at seams (commonly 4 to 6 inches). Also avoid adding sand to “level” a lumpy base, fix irregularities by correcting the gravel base first, then apply a consistent bedding sand layer for pavers.
Should I compact the gravel base in one pass or multiple lifts?
Multiple lifts. Spread your compactable base in about 2-inch layers, compact each layer thoroughly, then add the next. Skipping lift-by-lift compaction often leaves a soft zone that shows up later as tilted pavers.
What’s the most common no-dig mistake that causes pavers to rock or sink?
Inadequate base compaction or adding extra sand to compensate for an uneven base. If a section settles, lift the affected pavers, add or correct base material, recompact, then reset with fresh bedding sand. Simply topping up sand usually creates a different unevenness pattern.
How thick should the base be for a paver patio that people walk on regularly?
For typical pedestrian use, plan for roughly 2 to 4 inches of compactable gravel base. Exact requirements can vary by product and local conditions, but if you use less than the spec and your yard drains poorly, expect more movement over time.
My patio edges keep creeping outward, what should I do?
Make sure you installed edge restraints before the base went in, and that spikes are spaced closely (commonly about every 12 inches, with longer spikes at corners and curves). If edging is missing or loose, the fix usually requires lifting and resetting the perimeter rather than trying to “patch” from the top.
What if I get weeds coming up through the joints, does that mean my geotextile failed?
It often means one of two things: seams or openings in geotextile let weeds through, or polymeric sand was not installed to the right amount and condition (too little, not fully activated, or disturbed joints). For spot issues, remove loose sand, kill weeds, then reinstall and properly set polymeric sand to refill joints fully.
How can I tell if weeds are coming from beneath or from seeds blowing in from the top?
Weeds appearing across the whole patio footprint can indicate gaps or thin coverage below, while weeds concentrated at joints and along edges often relate to joint sand performance. Geotextile reduces upward growth, but it does not stop seeds from settling on top, so good joint filling and activation matters.
What should I do about water pooling after rain?
First verify the drainage slope. If pooling is limited, you can sometimes lift a small area, adjust bedding depth to slightly change pitch, then relay. If puddling is widespread or the base isn’t draining, plan for regrading that portion by pulling up sections and correcting the base slope, since surface materials alone won’t solve poor drainage.
Will white chalky spots (efflorescence) mean my pavers are defective?
Usually no. White mineral film is typically salts migrating through the paver materials (cosmetic). It often weathers off within a season or two, and you can speed it up with a dedicated efflorescence cleaner and a stiff brush if you want it gone faster.
Is polymeric sand required for a no-dig paver patio?
Not always, but it can be a big help for weed control and locking pavers in place. If you use polymeric sand, follow the activation method specified by the manufacturer. If joints are washed out later or you over-sweep too aggressively before it cures, weed problems often return.
Do I need a permit for a ground-level patio if I’m not excavating deeply?
Many areas still require a permit depending on size, location relative to property lines, and whether the patio changes drainage or involves certain materials. Even without deep digging, confirm local requirements and setback rules before building to avoid removal orders or inspections you cannot pass later.
When should I choose a sand-set paver approach versus a panel system like PaverBase?
If you want a straightforward DIY process with readily available materials, sand-set pavers over a properly compacted gravel base are often a good first choice. If hauling gravel is the main pain point and your yard is fairly flat with good drainage, a panel system can reduce the total gravel thickness you need, but you must follow the manufacturer’s flatness tolerances exactly.
Next Article
Can You Build a Patio Without Gravel? DIY Guide
Yes. Learn how to build a gravel-free patio with correct base prep, drainage, and method options like pavers, concrete,