The fastest DIY patio you can build in a weekend is a compacted gravel patio with or without pavers laid on top. A 200 sq ft gravel patio can realistically be done in one solid day. Add pavers over a compacted base and you're looking at 3 to 5 days total, depending on your fitness level and how much prep your yard needs. Snap-together deck tiles over a flat, firm surface? A few hours. The speed mostly comes down to two things: how much excavation your yard requires and which surface material you choose.
How to Make a Quick Patio: Fast DIY Steps and Plan

Nolan Lennox
1 Jul 2026
Pick the fastest patio style for your yard
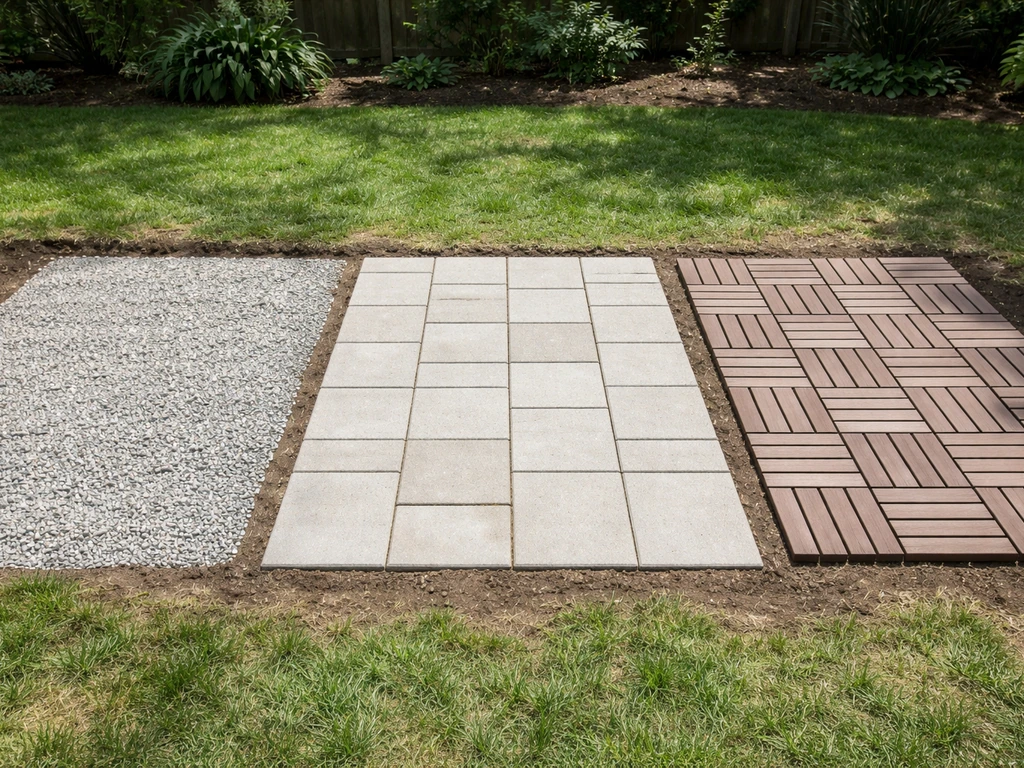
Not every fast patio style works in every yard. The right choice depends on your ground conditions, budget, and how permanent you want the result to be. If you want to keep costs down, focus on cheaper materials and rentals, and buy bulk supplies instead of small bags budget. Here's an honest breakdown of the main options and how fast each one actually builds out.
| Style | Typical DIY Time (200 sq ft) | Best For | Skill Level |
|---|---|---|---|
| Compacted gravel | 1 day | Budget builds, good drainage, informal look | Beginner |
| Concrete pavers on compacted base | 3–5 days | Durable, clean finish, most popular DIY choice | Beginner–Intermediate |
| Flagstone on sand/gravel | 2–4 days | Natural look, irregular shapes okay | Intermediate |
| Snap-together deck tiles | Half-day to 1 day | Flat existing concrete or firm surface | Beginner |
| Pedestal-mounted tiles/pavers | 1–2 days | Sloped surfaces, rooftop decks, quick leveling | Intermediate |
| Brick on sand | 3–5 days | Classic look, reusable material | Intermediate |
| Wood or composite decking style | 3–7 days | Elevated or sloped yards, more structural work | Intermediate–Advanced |
My top recommendation for most homeowners who want speed without sacrificing durability: concrete pavers on a compacted gravel base. It's forgiving, the materials are widely available at big-box stores, and if you make a mistake you can pull up a paver and fix it without demolishing the whole thing. If you already have a solid concrete slab, snap-together deck tiles are your fastest possible path since you skip almost all the prep work. If your budget is very tight and you're okay with a more casual look, a gravel patio edged with steel or plastic restraints is hard to beat for pure speed.
Planning: size, layout, drainage, and what you need to check
Don't skip planning just because you want to move fast. Twenty minutes of planning saves you two days of rework. The most common reason a quick patio turns into a long patio is running into surprises mid-dig: buried utility lines, unexpected slope, or an HOA restriction nobody checked. Handle these before you touch a shovel.
Size and shape
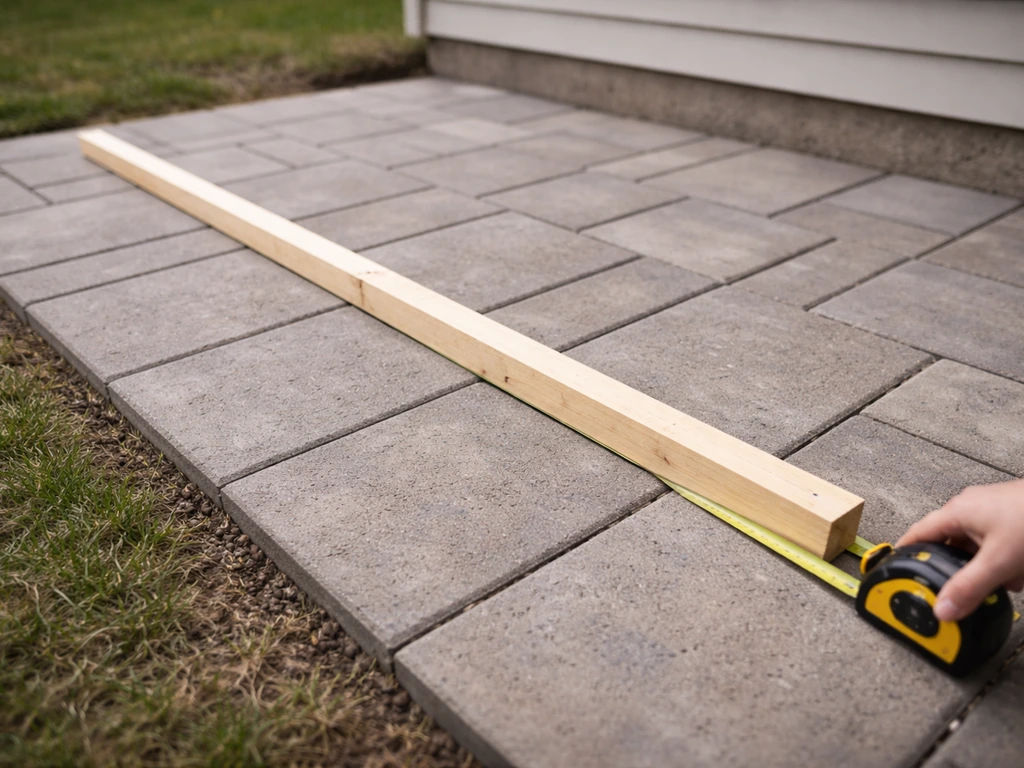
A good starting point for a functional patio is 10 x 12 feet (120 sq ft) for two people with basic furniture, or 12 x 16 feet (192 sq ft) if you want a dining table and chairs. Rectangular or square shapes are always faster than curves because you do less cutting. If you're using 12x12 pavers, design your dimensions in multiples of 12 inches to minimize cuts entirely.
Drainage slope
This is non-negotiable. Your finished patio surface must slope away from your house at 1/4 inch per foot. On a 10-foot-deep patio, that means the far edge sits 2.5 inches lower than the edge against your house. Ignore this and you'll be dealing with water pooling against your foundation, which can mean re-lifting your entire base and starting over. Set your slope from the very first string line and maintain it through every layer.
Permits and HOA
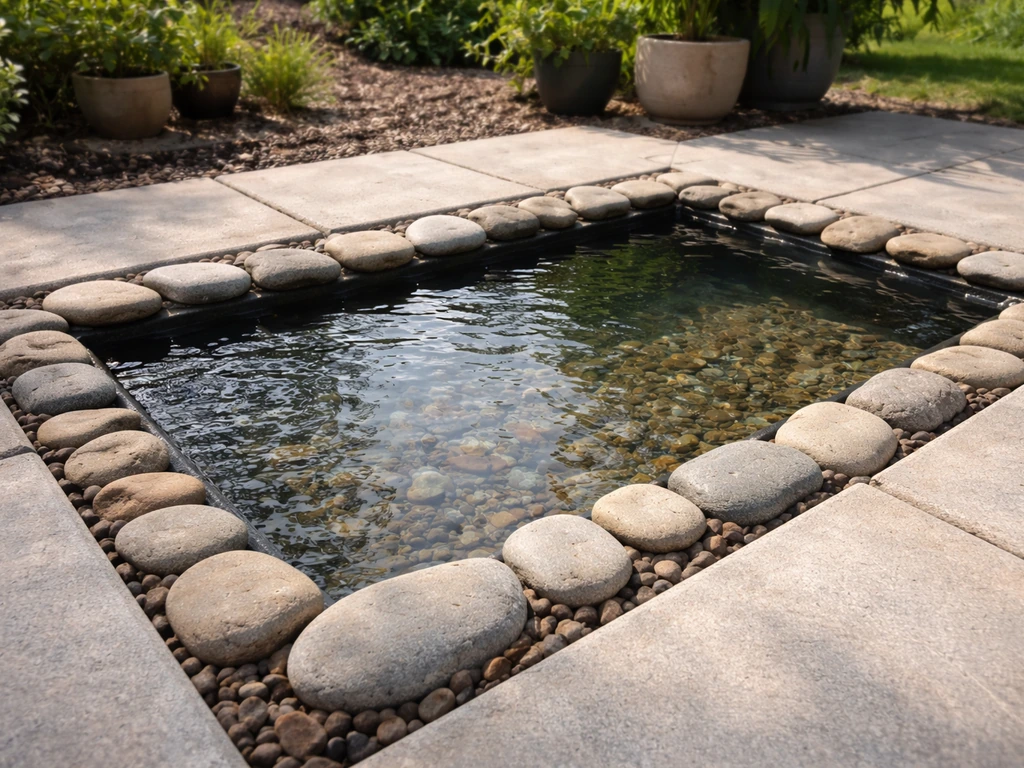
Most municipalities don't require a permit for a ground-level patio under a certain square footage (often 200 sq ft), but this varies widely. Call your local building department or check online before you start. If you specifically want to make a patio pond cheap, you can use the same cost-smart approach with gravel, pre-formed liners, and careful planning to avoid rework how to make a patio pond cheap. HOAs are separate and often have rules about materials, colors, and setbacks from property lines. A five-minute phone call now prevents a cease-and-desist letter later.
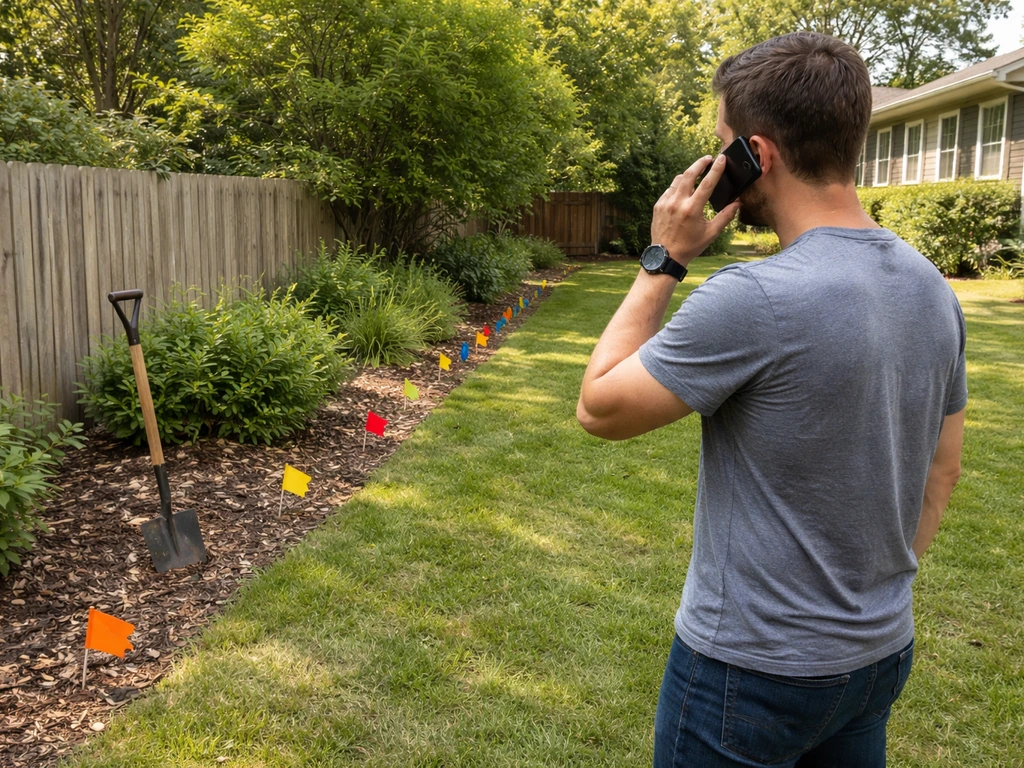
Utilities and site check
Call 811 (the national dig-safe line in the US) at least three business days before you dig. It's free, it's required by law in most states, and it prevents you from hitting a gas or electrical line. Also look at your yard drainage: does water currently pool anywhere near your patio site? If so, you may need a French drain or swale before you build, which adds time but is far better than discovering the problem after you've laid everything.
Tools, materials, and a time-saving shopping checklist
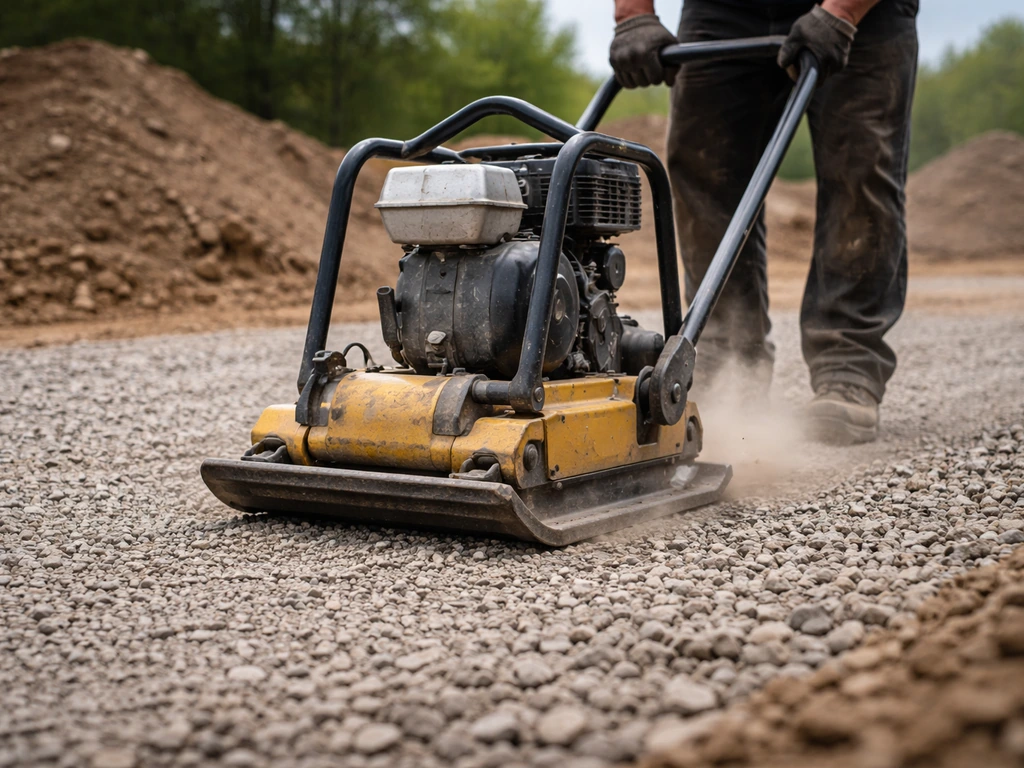
Rent what you don't own. A plate compactor rental runs about $60–$100 per day at most tool rental places and it's the single biggest time-saver in the whole build. Trying to compact base gravel by hand or with a hand tamper on anything over 50 sq ft is exhausting and produces an inferior result. Other rentals worth considering: a sod cutter (saves hours vs. digging by hand) and a wet-cut paver saw if you have more than a handful of cuts to make.
Tools list
- Plate compactor (rent)
- Sod cutter (rent for anything over 100 sq ft)
- Paver/wet saw with diamond blade (rent if doing more than 20 cuts)
- Wheelbarrow (have two if possible)
- Shovel and square spade
- Hand tamper (for edges the plate compactor can't reach)
- Rubber mallet
- Long screed board or 2x4 (8–10 feet long)
- Two 1-inch diameter metal pipes for screeding sand
- Line level and string lines
- Tape measure
- Stakes
- Push broom
- Garden hose with spray nozzle
Materials checklist for a standard paver patio (200 sq ft)
- Pavers or surface material (add 10% overage for cuts and breakage)
- Crushed stone base (3/4" minus compactible gravel): enough for a 4–6 inch compacted layer
- Coarse bedding sand (concrete sand or coarse sharp sand): enough for a 1-inch layer
- Geotextile landscape fabric: roll sized for your patio area plus 1 ft overlap on all sides
- Plastic or steel edge restraints: measured to your full perimeter
- Spikes or stakes for edge restraints
- Polymeric sand (jointing sand): check coverage on the bag for your joint width and paver size
- String line
- Marking paint or chalk
One shopping tip that saves real time: order your crushed stone and sand for delivery rather than hauling bags from the store. For 200 sq ft with a 4-inch base you need roughly 2.5 cubic yards of compactible gravel and about 0.5 cubic yards of bedding sand. That's a lot of 50-lb bags. Bulk delivery from a landscape supply yard is cheaper and faster.
Site prep: clearing, grading, excavation, and weed control
Site prep is where most DIYers either do the work right and build a patio that lasts 20 years, or cut corners and build one that sinks and shifts within two seasons. The good news is that if you follow the steps in order, it moves faster than it sounds.
Step 1: Mark your layout
Use stakes and string lines to mark the exact perimeter of your patio. Check for square by measuring both diagonals: they should be equal. Spray marking paint on the ground along the string lines so you have a visible guide once the string comes down.
Step 2: Strip sod and clear the area
Use a sod cutter to slice off the grass and root layer (usually 2–3 inches deep). This is worth renting for any patio larger than about 80 sq ft. Without it, you're digging and chopping by hand, which adds hours. Haul the stripped sod away or use it to fill bare patches elsewhere in your yard.
Step 3: Excavate to depth
Your total excavation depth equals your base thickness plus your bedding sand layer plus your paver thickness. For a standard patio paver setup: 4 to 6 inches of compacted gravel base, plus 1 inch of bedding sand, plus the paver thickness (usually 2.375 inches for standard concrete pavers). That typically means excavating 7.5 to 9.5 inches from your finished surface height. Measure down from a reference string and dig the entire area to a consistent depth, maintaining your 1/4 inch per foot drainage slope from the start.
Step 4: Weed control and geotextile
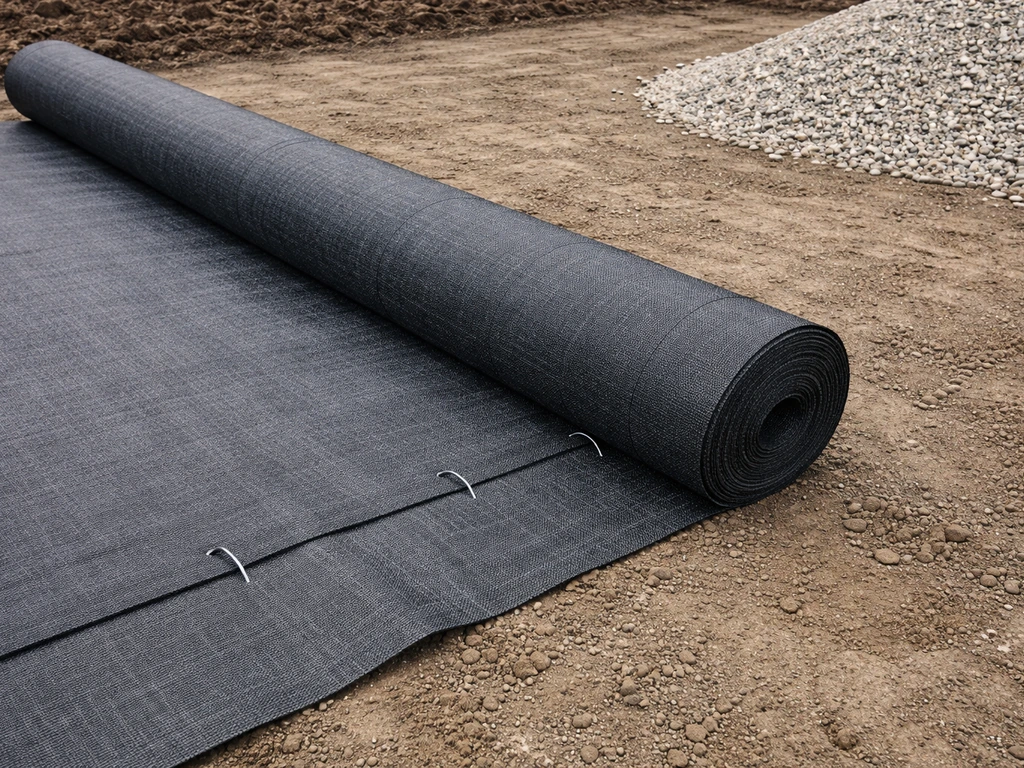
Once you've excavated, lay geotextile fabric directly on the compacted subgrade before adding your base material. This is a separation layer, not a weed blocker in the traditional sense. It prevents fine soil particles from migrating upward into your gravel base over time, which is what causes settling and soft spots. Use a non-woven geotextile, overlap seams by at least 12 inches, and fold it up the sides of the excavation slightly. Don't skip this on clay or silty soils.
Fast base and sub-base: compacting layers for a stable patio
The base is the most important part of the entire build, and it's completely invisible when you're done. Use 3/4 inch minus compactible gravel (also called road base or crusher run), not round river rock or clean crushed stone. Round aggregate won't compact and interlock the way angular material does, and your patio will shift. This is one of those details that experienced DIYers argue about online, but angular compactible gravel is the consensus right answer for patio bases.
- Spread your first lift of base gravel to about 3 inches loose depth. One compacted lift should be no more than 3–4 inches, so for a 6-inch finished base you'll do two passes.
- Run the plate compactor over the entire area in overlapping rows. Make at least two passes in perpendicular directions. The gravel surface should look tight and not shift under your feet when you're done.
- Check your slope with a level and string. Adjust before adding the next lift.
- Add a second lift if needed and compact again the same way.
- Use a hand tamper to compact the edges and corners where the plate compactor can't reach.
- Check the depth consistently across the whole area using a tape measure from your reference string. You want the top of your compacted base to be exactly 1 inch plus your paver thickness below finished grade.
Once the base is fully compacted and level (with your drainage slope maintained), spread your 1-inch layer of coarse bedding sand. Use two metal pipes of the same diameter laid parallel as screeding guides, spread the sand between them, and drag a long straight board across to create a perfectly flat 1-inch layer. Pull the pipes out as you go and fill those lines with sand. Do not walk on or disturb this screeded sand layer before you start laying pavers.
Install the surface (pavers, brick, gravel, or quick deck-tile options)
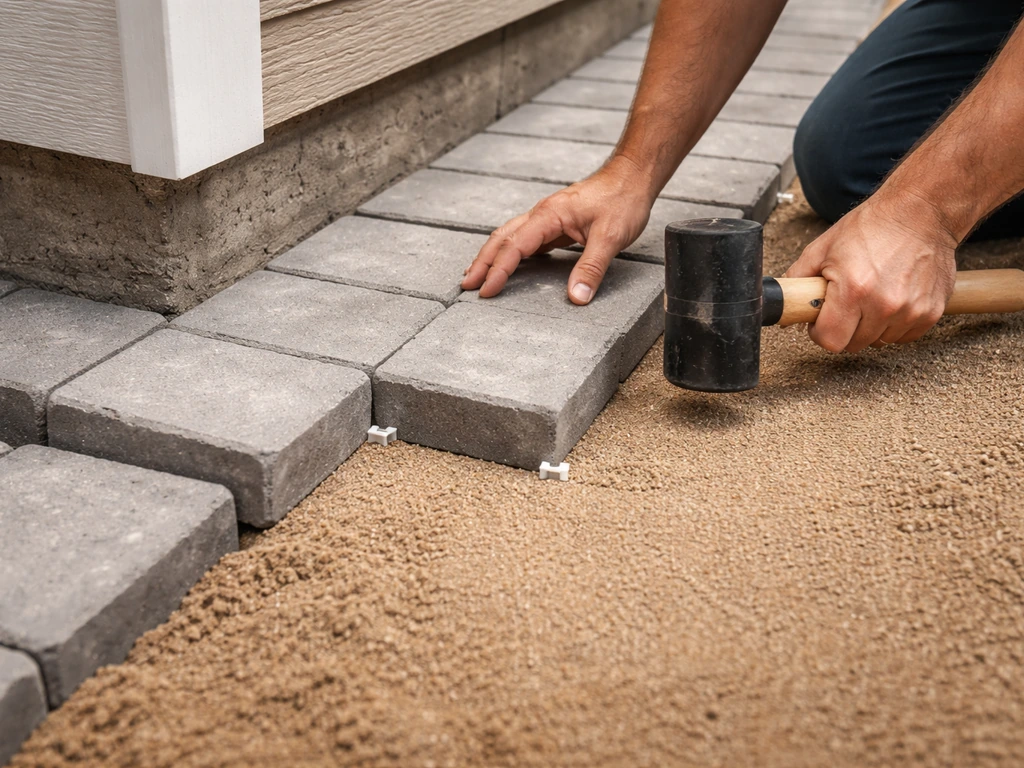
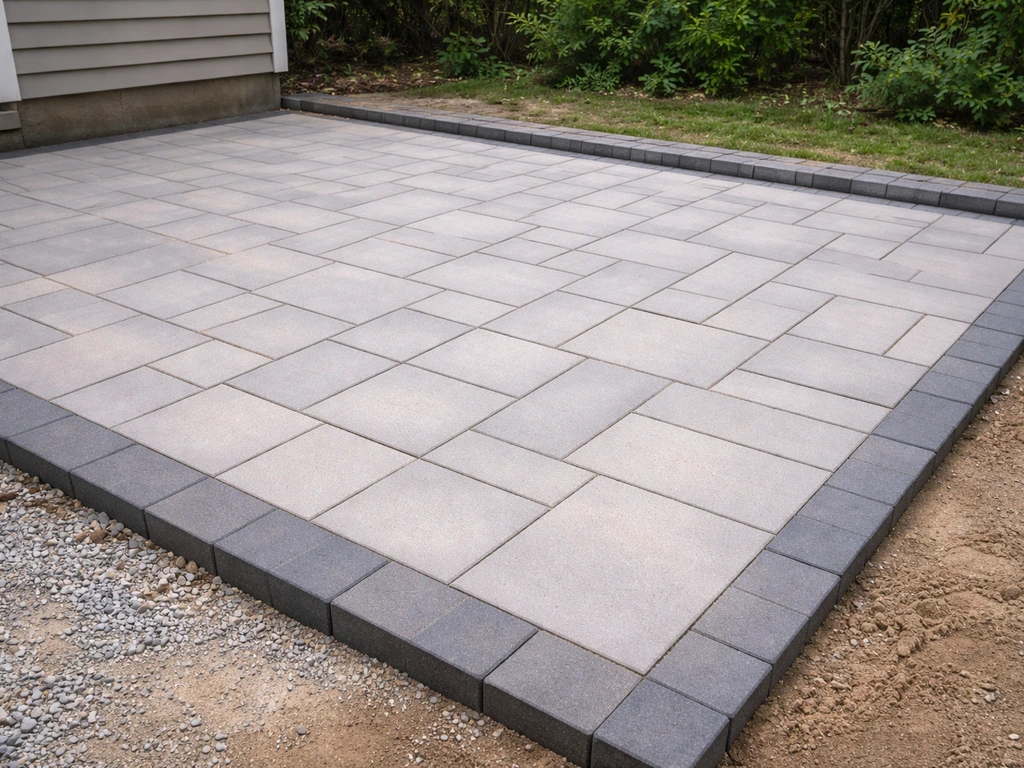
Concrete pavers or brick on sand
Start laying pavers from a corner at your house, working outward and across. This lets you maintain the drainage slope correctly as you go. Set each paver by pressing it firmly down into the sand, not sliding it (sliding disturbs the screeded surface). Use a rubber mallet to tap pavers flush. Keep a consistent joint gap as you go (typically 1/8 to 3/16 inch for standard pavers). Use the string lines as a guide to keep rows straight.
When you get to the edges and need to cut, batch all your cuts together at the end of a row rather than stopping to cut every single piece. Dry-fit a whole section, mark all your cuts, then make them all at once. A diamond blade wet saw makes clean cuts and produces far less dust than a dry-cut angle grinder. Wet cutting is faster on your blades too.
Once all pavers are placed, install your edge restraints along the perimeter. Drive the spikes through the restraint into the base below. Then run the plate compactor over the entire surface (use a rubber pad protector if your pavers have a textured or polished finish to avoid scratching). This final compaction seats all the pavers into the sand and levels out any minor high spots.
Gravel-only patio
After your compacted gravel base, add a layer of decorative gravel (pea gravel, washed river rock, or crushed granite) to a depth of about 2–3 inches. Install edge restraints first to contain the gravel. This is by far the fastest surface option and works well for casual seating areas, fire pit surrounds, or side-yard paths. The tradeoff is that gravel can shift under heavy furniture, so it works better with flat-bottomed furniture than with narrow legs.
Snap-together deck tiles
If you're working over an existing concrete slab or a very firm, flat surface, snap-together tiles are genuinely fast. Clear and clean the surface, lay down weed mat if working on compacted gravel/road base, and start snapping tiles together from one corner. Most systems lock with a click-together mechanism that requires no tools and no adhesive. Make sure your substrate has adequate drainage built in, since water needs to move under these tiles.
For slightly uneven concrete, you can use pedestal risers under the tiles to level the surface, adjusting each pedestal height with a hand level or laser level as you go. For pavers and rooftop deck systems, Matrix publishes a pedestal spacing chart to help you plan the support spacing and layout pedestal spacing chart for pavers and rooftop deck systems.
Flagstone on sand or gravel
Flagstone takes longer than pavers because each piece is irregular and requires individual fitting and leveling. Dry-laying flagstone on a sand or gravel base (without mortar) is faster than mortared flagstone and still produces a great-looking result. Lay out all your pieces first without setting them to plan your puzzle, then set them one by one, adding or removing sand beneath each piece until they're stable and flush with adjacent pieces. Fill the joints with polymeric sand or decomposed granite.
Finishing touches: edging, joints, cleanup, and common DIY mistakes
Polymeric sand joints
Polymeric sand is the right choice for paver joints. It activates with water and hardens into a firm, weed-resistant joint. The key rules: your paver surface must be completely dry before you apply it, and no rain can fall for at least 24 hours after you activate it. Sweep the dry sand across the surface with a push broom, filling all joints.
Then blow or sweep off any residual sand from the paver faces (a leaf blower works great here). Mist the surface with water in sections to activate the binders. Don't saturate it. Getting polymeric sand wet before it's fully swept off the faces causes a haze that's hard to remove, so dry conditions and patience at this step really matter.
Edging and integration with your house
Where the patio meets your house foundation or a concrete step, leave a small gap (about 1/4 to 1/2 inch) rather than butting the pavers directly against the structure. This allows for expansion and prevents heaving. Fill the gap with a flexible polymeric joint material or leave it as a drainage channel. Make sure the finished patio surface is at least 6 inches below your home's siding or any wood framing. Water that splashes back up from a patio surface against wood siding causes rot.
Common DIY mistakes to avoid
- Skipping the geotextile fabric: fine soil migrates into your base over time and causes sinking
- Not compacting in lifts: dumping all the base gravel in at once and compacting once gives you a soft, unstable base
- Using round aggregate like river rock for the base: it won't compact and interlock properly
- Forgetting the drainage slope: 1/4 inch per foot away from the house is mandatory, not optional
- Walking on screeded sand before laying pavers: you'll disturb the level surface you worked hard to achieve
- Cutting all edge pieces as you go instead of batching them: this kills your momentum and extends the job by hours
- Applying polymeric sand on a damp surface or right before rain: results in permanent haze on your pavers
- Running the plate compactor over delicate paver finishes without a protective rubber pad
- Placing edge restraints after final compaction instead of before: the perimeter pavers won't be properly supported
Your realistic timeline for a quick build
For a 200 sq ft concrete paver patio, here's a realistic day-by-day plan for one person working with basic tool rentals. If you’re wondering how to redo a patio for cheap, this same approach works for resurfacing or rebuilding in phases while keeping materials and prep costs low. Two people working together can knock roughly a day off this schedule.
| Day | Tasks | Estimated Time |
|---|---|---|
| Day 1 | Mark layout, call 811, rent tools, order/pick up materials, strip sod, excavate | 6–8 hours |
| Day 2 | Lay geotextile, add and compact gravel base (two lifts), check slope throughout | 4–6 hours |
| Day 3 | Screed bedding sand, begin laying pavers from house outward | 4–6 hours |
| Day 4 | Finish laying pavers, batch and make all edge cuts, install edge restraints, plate compact | 4–6 hours |
| Day 5 | Apply polymeric sand (dry conditions only), cleanup, final inspection | 2–3 hours |
If you're building a simpler gravel patio or using snap-together tiles over an existing slab, compress that timeline to one or two days. The excavation and base compaction steps are what consume most of the time on a full paver build. If you're also thinking about adding a water feature or pond to your finished patio, those are separate projects best planned after the main patio surface is complete and settled. If you want to include a water feature, plan its location, plumbing needs, and drainage requirements before you finalize landscaping so the finished patio stays functional how to make a patio water feature.
Your next steps today
- Measure your space and decide on your patio size and shape
- Check your local permit requirements and HOA rules (call or check online, takes 10 minutes)
- Call 811 to schedule utility marking before you dig
- Decide on your surface material using the table above and your budget
- Calculate your material quantities and order or schedule bulk delivery
- Reserve your tool rentals (plate compactor and sod cutter) for your start date
- Set your start date and block out the days on your calendar
A quick patio is genuinely doable in a single weekend if you show up prepared. The work is physical but not complicated. The planning takes less than an hour. The most satisfying part is the moment you set your last paver, sweep in the jointing sand, and step back to look at something you built yourself.
FAQ
Can I make a quick patio without renting a plate compactor?
You can, but the results are usually less stable. If you skip a plate compactor, keep the patio smaller, compact base in thin lifts (about 2 inches at a time), and expect more settling risk, especially on clay or silty subgrades. Renting is also safer because it reduces uneven “high spots” that later telegraph through pavers.
How do I choose the best quick patio option for my yard drainage?
Do a 24 to 48 hour water check before you decide. After a normal rain, see where water collects and whether it stays there. If pooling happens at the patio footprint, plan a drainage solution first (like a swale or French drain) because you cannot “fix it later” once pavers or tiles are installed without lifting the surface.
What’s the fastest patio layout to reduce cutting and mistakes?
Use a straight-edged rectangle or square and size it so your paver pattern lines up. A practical rule is to lay out your dimensions in multiples of your paver size plus the intended joint gaps, then plan a smaller “cut row” at one end rather than splitting cuts across multiple sides.
Do I need geotextile fabric under a compacted gravel base?
If you have clay, silt, or anything that moves fine particles, geotextile is strongly recommended. It acts as a separation layer, meaning it helps keep gravel from slowly getting “contaminated” by soil fines from below, which is a common cause of soft spots and uneven settling later.
Can I put pavers directly on sand to save time?
Not if you want a stable, quick patio. Pavers need a compacted, angular base plus bedding sand on top, otherwise you get rocking and rapid shifting. The speed loss comes from rebuilding after the joints open and uneven areas form, which is much more work than doing the base correctly upfront.
What should I do if my ground is not level but still has the right slope?
Maintain the required drainage slope, then achieve level within that plane by adjusting excavation depth across the area. After digging, check the surface at multiple points with a level, and only then start base and bedding. Don’t try to correct large low spots by adding extra sand, sand is for fine bedding, not structural fill.
How long should I wait before driving on or moving heavy furniture on polymeric-sand joints?
Let the jointing product fully activate and cure before heavy loads. Practically, avoid moving heavy items for at least 24 hours after misting, and keep foot traffic light in the first day. Also avoid rain exposure during the activation window since water timing affects how well the joint hardens.
What’s the easiest way to get clean paver cuts without slowing down?
Batch cuts for the entire row or entire edge, then cut in one session. Use a wet-cut diamond saw when possible for less dust and cleaner edges. If you must use an angle grinder, plan for extra cleanup time and expect more variability that may require minor joint widening to keep rows straight.
How do I prevent weed growth on a “fast” patio?
For pavers, the best weed control is preventing soil migration through a geotextile separation layer plus a properly compacted base. For snap-together tiles, ensure the substrate is firm and that water can move underneath, then use weed mat only as the system allows. The key is not relying on weed mat as the only barrier if your base is not separated properly.
Is a gravel patio really stable enough for outdoor furniture?
It can be, but use wider feet or flat-bottom seating. Gravel shifts under narrow legs and can create uneven footing over time. If you want to sit with heavy chairs or a dining table, consider paver or compacted base under furniture “zones,” or plan a sturdier edge restraint system to reduce drift.
Do I need an expansion gap where the patio meets the house?
Yes. Leave a small gap so the patio can move with temperature changes without pushing against the foundation or steps. Filling that gap with flexible joint material (or maintaining a drainage channel) reduces heaving, and keeping the patio surface safely below siding or wood framing helps prevent rot from splashback.
Next Article
How to Make a Patio Pond Cheap: DIY Budget Guide
Step-by-step DIY plan to make a patio pond cheap: budget design, liners, simple filtration, leak fixes, and low-cost mai