You can build a stable temporary patio on grass in a single afternoon using interlocking modular tiles, snap-together deck panels, or ground-protection grass mats laid directly over your turf. If you want more detail on the exact steps, see our guide on how to make a patio on grass, from prep to anchoring. The key is choosing a system that spreads the load wide enough to prevent sinking, connecting pieces so nothing shifts under foot traffic, and containing the perimeter so the whole thing stays put. Done right, you can pull it up weeks or months later and your lawn comes back just fine.
How to Make a Temporary Patio on Grass: DIY Steps

Nolan Lennox
21 May 2026

Decide your temporary patio type first
Before you buy anything, pick the system that matches your situation. There are three main options that actually work on grass without requiring excavation or a permanent commitment.
| System | Best for | Installation speed | Lawn damage | Rough cost (100 sq ft) |
|---|---|---|---|---|
| Interlocking PVC/modular tiles (e.g., StayLock style) | Firm, reasonably level ground; events and seasonal use | 2–4 hours | Low if removed within a season | $150–$350 |
| Snap-together outdoor deck panels | Slightly uneven ground; backyard hangout spaces | 3–5 hours | Low to moderate | $200–$500 |
| Ground-protection grass mats (open-cell) | High-traffic events, soft/wet soil, lawn protection focus | 1–3 hours | Very low; designed for turf | $100–$250 |
| Gravel/pea stone pad (contained) | Longer-term temporary use, good drainage needed | Half day to full day | Moderate; harder to fully restore | $80–$200 plus edging |
For most homeowners who want something up fast and removable, interlocking modular tiles or open-cell grass mats are the sweet spot. Snap-together deck panels are great if you want a wood or composite look and your ground has a little roll to it. Gravel is the cheapest but the hardest to fully remove and restore. If you want the truly cheapest option, you can also use this approach to figure out how to make a cheap patio on grass with gravel and proper base preparation. If you are leaning toward something more permanent down the road, a simple gravel pad with landscape fabric is also a decent bridge option while you plan a real build.
Tools and materials checklist

Keep it simple. You do not need heavy equipment for a temporary install, but a few basic tools make a real difference in getting everything flat and tight.
- Measuring tape and marking paint or stakes and string to outline your area
- Garden rake and flat spade for leveling and clearing
- Rubber mallet for tapping modular tiles into place
- Long carpenter's level or a 2x4 with a level resting on top
- Utility knife with extra blades (for cutting modular tiles or mats to fit edges)
- Zip ties or cable ties (for grass mat systems, roughly one every 5th connecting hole)
- Landscape fabric pins or long landscaping spikes (for anchoring perimeter edging)
- Tamper or hand compactor (optional but helpful for leveling soft spots)
- Modular tiles, grass mats, or deck panels to cover your target square footage plus 10% overage
- Plastic or metal edge restraints if using a gravel pad
- Sand or paver leveling sand (only needed for gravel or paver-based installs)
- Weed barrier fabric (optional for gravel installs)
Prep the grass before you lay anything
This is the step most people skip and then regret. Spending 30 minutes on prep saves hours of re-leveling later. Start by mowing the area as short as your mower allows, then rake out any debris, sticks, and thatch. The OSU Extension Service recommends mowing by cutting only one-third of the grass height at each mowing and mowing higher during periods of stress, which can help minimize stress before and around temporary coverage mowing the area as short as your mower allows. You do not want lumps under your surface layer creating high spots or weak points. If you have any obvious low spots, fill them with a little topsoil and tamp down. For soft or waterlogged areas, give the ground a couple of days to firm up if you can, or plan to lay a sheet of plywood under the tiles as a load-spreader.
Check your drainage while you are out there. Because a leach field is a soil-based wastewater system, you generally should avoid building directly over it and instead plan for load distribution and required setbacks with your local installer Check your drainage while you are out there.. Water should run away from the house, and the general rule for any patio surface is roughly a 1-inch drop for every 8 feet of run. If your yard pools badly in one spot, either avoid that spot or build in a slight slope by raking the soil base before you lay anything. Standing water under a temporary surface kills grass faster than anything else, so drainage matters even for a short-term install. Standing water under a temporary surface kills grass faster than anything else, so drainage matters even for a short-term install, and that is a key part of how to patio over grass.
For grass mats specifically, the installation guides recommend raking the area smooth and lightly compacting it before you start. For GeoGrid cellular paving systems intended for grass infill, the installation guide specifies removing existing turf or soil to a depth of at least 75 mm (2.95 in), then leveling and lightly consolidating the formation layer removing existing turf/soil to a depth of at least 75 mm (2.95 in). For modular tile systems on grass, the ground prep is more forgiving since the tiles have some flex, but you still want to knock down any obvious bumps or divots. If the area is badly uneven, lay a sheet of 3/4-inch plywood under the tiles first. It sounds like overkill but it makes the whole surface feel solid and prevents tiles from rocking.
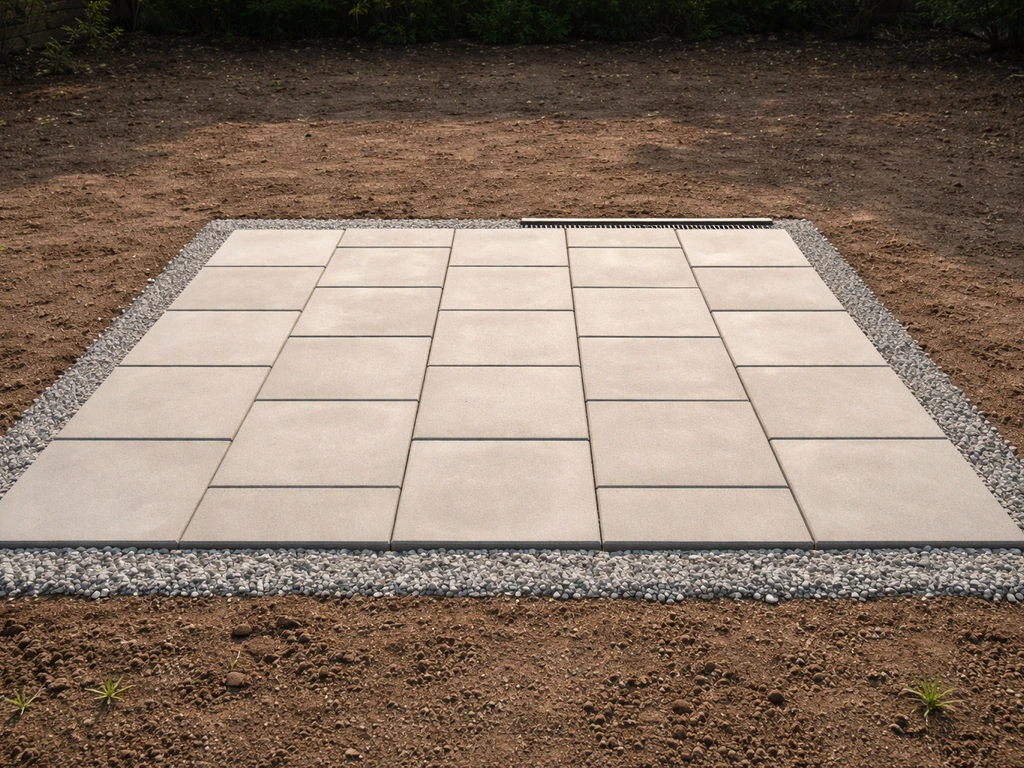
Build the base: stopping sinking and shifting before it starts
For most modular tile and grass mat systems, the 'base' is simply your prepared grass surface. But if you are going with a gravel pad (the budget option for longer temporary installs), you need a real base. Excavate 3 to 4 inches of sod and soil from the area, clear out any roots or large stones (they cause uneven settling over time), and add a layer of 3/4-inch minus crushed aggregate about 2 to 4 inches deep. Compact it thoroughly with a tamper or plate compactor, working in layers if your total depth is more than 2 inches. This packed base is what keeps everything from shifting.
For tile and mat systems, the key to preventing sinking is load distribution. Open-cell grass mats spread foot traffic across a wide area. Modular PVC tiles do the same. Neither system requires excavation, which is why they are so useful for temporary setups. If your soil is especially soft or you are expecting heavy furniture, adding a sheet of woven landscape fabric under the mats acts as a separation layer and keeps the mats from gradually pressing into soft ground. Some installers also put a half-inch of leveling sand under the tiles for a firmer, more even surface.
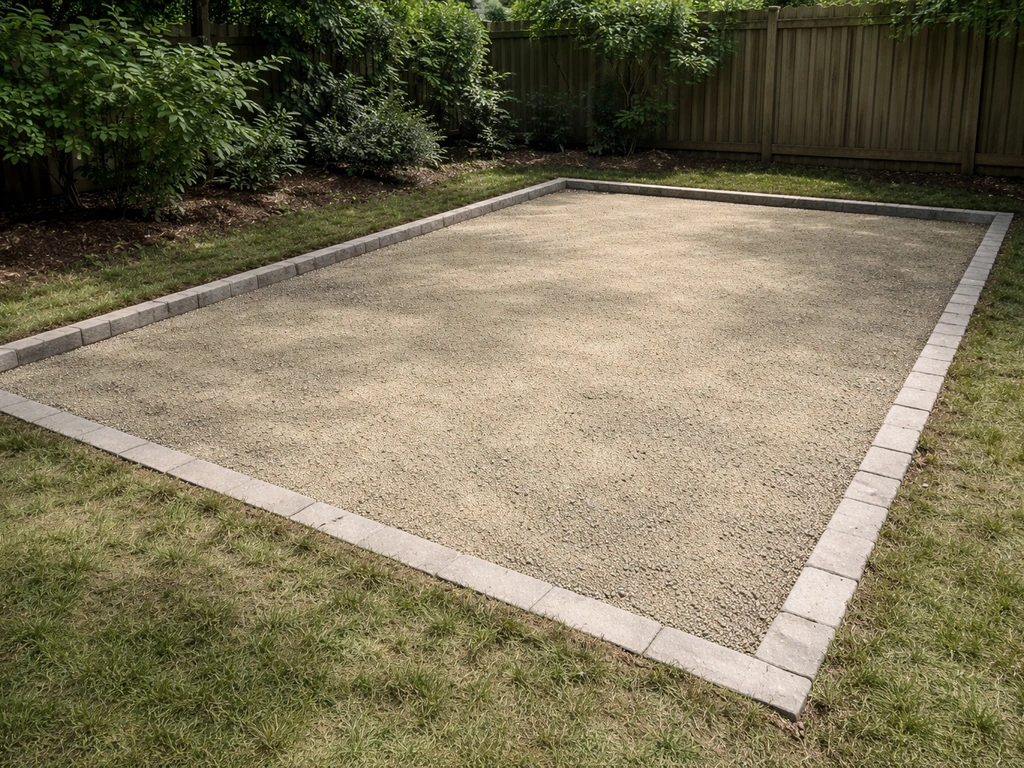
If you go the gravel route
Lay landscape fabric over your compacted aggregate base before adding any surface gravel. This keeps the layers from mixing over time and makes cleanup dramatically easier when you remove everything. Add 1 to 2 inches of pea gravel or decorative stone on top, rake level, and you have a functional surface. It is not as elegant as tiles but it drains brilliantly and costs very little.
Set the surface layer
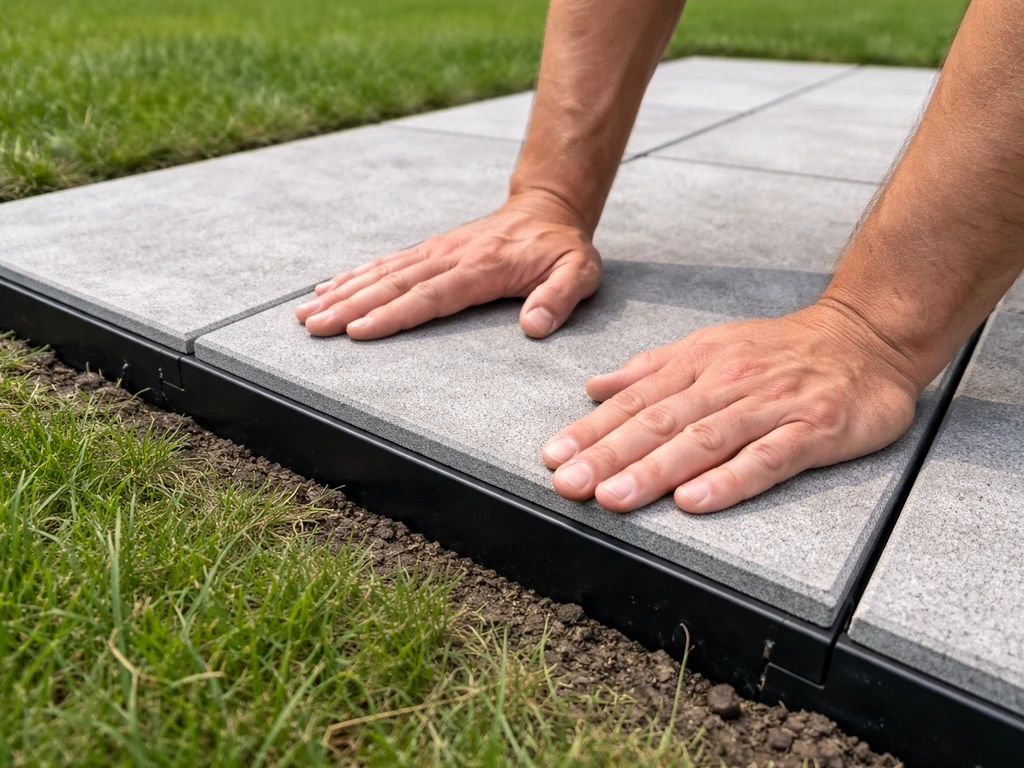
Modular interlocking tiles
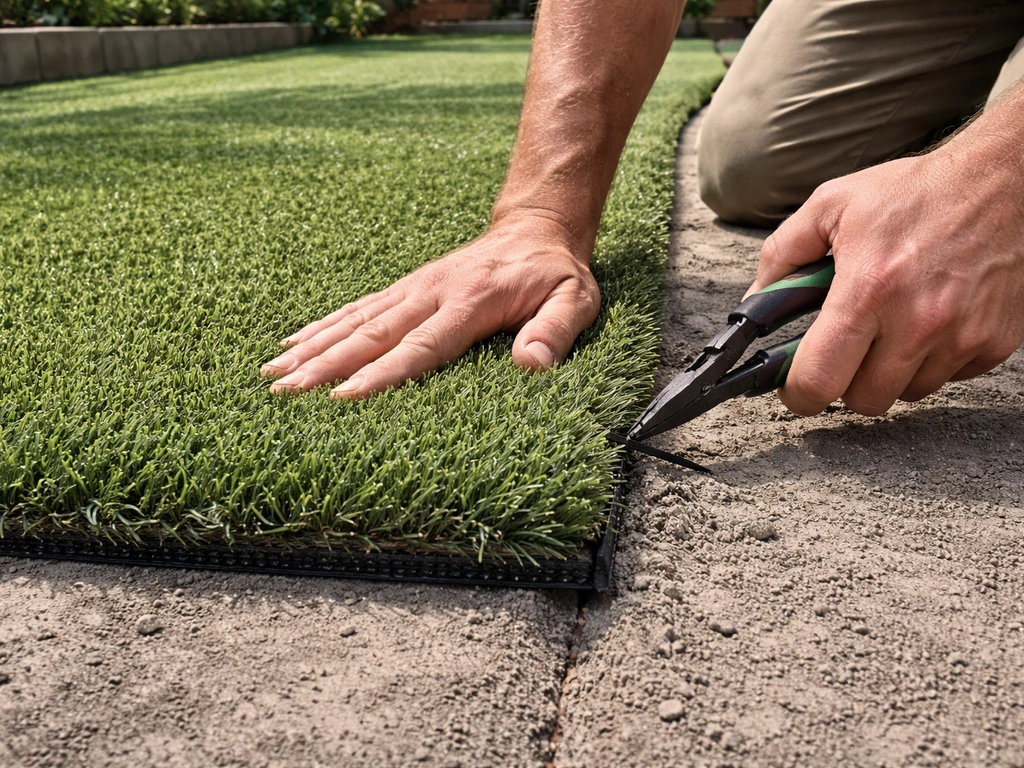
Start from one corner and work out in two directions, snapping tiles together as you go. On snap/tab systems like StayLock-style tiles, you place the tabs of the new tile over the loops of the already-laid tile and push down until you hear or feel them pop into place. Work evenly in both directions rather than running one full row at a time. This keeps the whole field square and makes it easier to cut edge pieces to fit. When you reach a wall, edge, or irregular border, measure the gap, mark a cut line on the tile, and score through with a sharp utility knife in multiple shallow passes. It takes a few passes but cuts cleanly. Plan for border strips along the exposed edges if your system offers them.
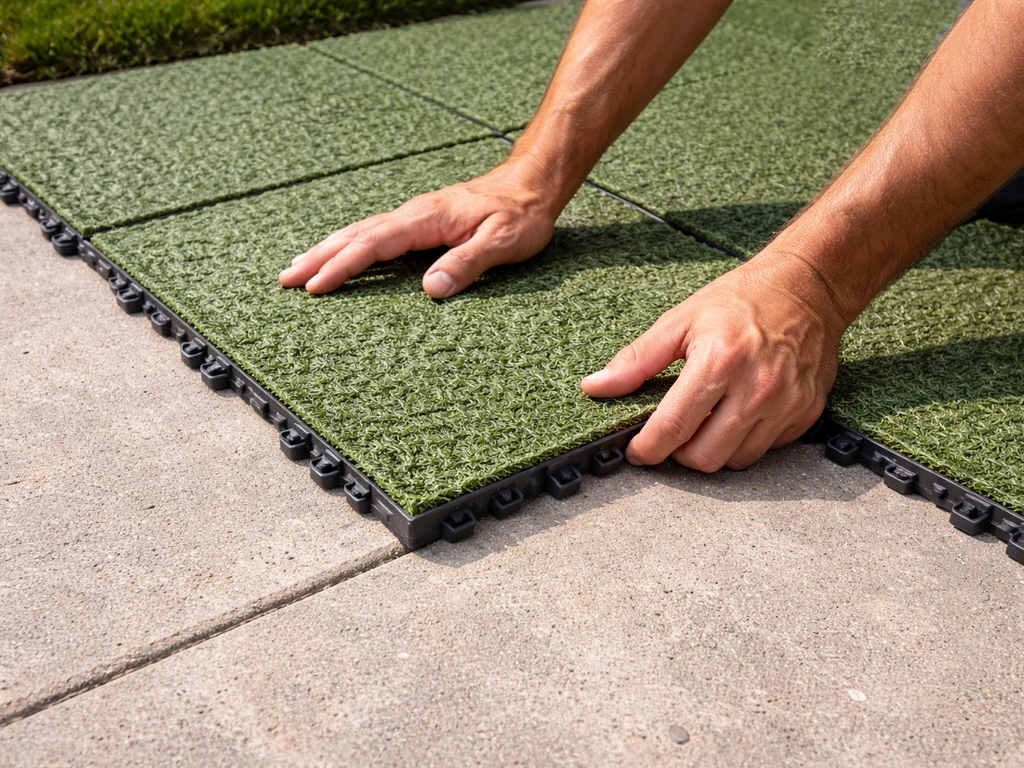
Grass mats
Lay mats flush row by row, keeping edges tight. As you go, zip-tie adjoining edges together using one tie roughly every fifth connecting hole. This is the guideline the manufacturers use and it genuinely keeps mats from shifting under foot traffic. At the perimeter, fold back the edges, dig a shallow wedge-shaped channel about 4 inches deep around the border, pin the mat corners into the sloped side of the channel with landscaping pins, then backfill the channel. This brings the mat edge level with the surrounding grade and removes the trip hazard from a raised edge.
Snap-together deck panels
Snap-together composite or wood deck panels typically sit on small pedestal feet, which means they can bridge minor dips in the ground without you needing a perfectly flat surface. Lay them out dry first to confirm your layout before snapping anything together. Check every few panels with a level. If one foot is sitting in a low spot, a small piece of composite shim under the foot fixes it. These panels look great but they do create a raised surface, so make sure the transition from grass to patio is not a trip hazard by itself. A snap-together deck panel patio can work over grass too, as long as you prep for drainage and level support before you install the panels snap-together deck panels. A slight ramp piece or a clear visual boundary helps.
Stabilize, anchor, and make it safe to walk on
Anchoring the perimeter is what separates a patio that stays put from one that slowly migrates across your lawn. For modular tiles, add border strips around the exposed edges if your system includes them, or push landscaping spikes through the outermost tiles into the ground at corners and every few feet along the sides. For grass mats, the perimeter channel method described above is the most effective containment strategy. For gravel, install plastic or metal edge restraints around the full perimeter and pin them into the ground with 12-inch landscaping spikes every 12 to 18 inches. Without restraints, gravel migrates and tiles spread outward over time.
On the safety side, run your hand and foot across the entire surface before you use it. Feel for any tile or mat that rocks, any raised edge between panels, or any spot where the surface flexes more than it should. Those are the spots people catch their feet on. Tap down any raised tiles with a rubber mallet. If a section keeps rocking, pull it up and fix the ground underneath before re-laying it. For wet weather use, check that your tile material has a textured or grip surface. Smooth tiles on wet grass can get slippery fast.
Timeline, costs, and how to remove everything cleanly
How long does this take to build?
A 10x10 foot modular tile or grass mat install takes most people 2 to 4 hours from start to finish, including prep. A 12x16 foot area with snapping deck panels takes about half a day. A gravel pad with excavation, fabric, base, and edging takes a full day solo or a few hours with a helper. Budget your time generously the first time you do it.
What should this cost?
For a 150 square foot space, expect to spend roughly $150 to $350 for a modular tile system, $100 to $250 for grass mats, $200 to $500 for snap-together deck panels, or $100 to $200 for a contained gravel pad. These are material-only numbers. Most of the tools you probably already own, and there is no labor cost when you do it yourself. If budget is your biggest constraint, the gravel option is the cheapest by a wide margin, though it comes with more effort at removal time.
How to remove it and get your lawn back
The faster you remove a temporary surface, the better your lawn recovers. Grass under solid coverage starts yellowing within a few weeks from lack of light. Open-cell systems like grass mats are more forgiving since they let some light and air through, but even those should come up within a season. When you are ready to remove everything, work in reverse order: pull edge pins, unfasten zip ties or border strips, and stack panels or mats as you go. Modular tiles and mats stack flat and store compactly.
After removal, rake the area, loosen any compacted soil with a fork or aerator, water thoroughly, and overseed any bare or damaged patches. Most lawns bounce back within 2 to 4 weeks with regular watering, especially if you remove the surface during a mild growing season. For gravel pads, rake up as much stone as possible, roll up the landscape fabric, and then till or aerate the underlying soil before reseeding. It takes a bit more effort but it is very doable.
One practical note: if you are only building this temporary patio because a permanent one is in your future, it is worth thinking through what that permanent install will look like now. Some temporary prep work (like leveling the grade or improving drainage) carries directly over and saves you work later. Related projects like building a raised patio on grass or patching over problem areas have similar site prep requirements, so the work you do today is rarely wasted.
FAQ
How long can you leave a temporary patio on grass without damaging the lawn?
Most lawns start to yellow under full-coverage systems within a few weeks because light is blocked. Open-cell options like grass mats are more forgiving, but you should plan to remove the surface within a season, especially if the area stays wet. If you need it longer, prioritize drainage and consider a more breathable system.
Do I need to remove all grass (sod) before installing modular tiles or grass mats?
Usually no. Modular tile and open-cell mat systems can go directly over raked, leveled grass as long as the ground is firm and you contain the perimeter. The “remove sod” step is mainly for gravel pads, where you’re building a packed base.
What’s the best way to handle dips or muddy spots that keep getting wet?
If you can, delay the install until the soil firms up, and check for pooling during a different part of the day. If it’s only localized, you can fill shallow low areas before laying tiles, or place a sheet of plywood temporarily as a load spreader during setup. For ongoing wet areas, adjust the base to create a gentle slope away from the house rather than building flat over a sump.
Can I place heavy furniture or a grill on a temporary patio on grass?
Yes, but treat it like a load test. Open-cell mats and modular tiles spread weight, yet heavy items can still sink if the base is soft or uncontained. If you’re planning heavy loads, compact the ground, consider a separation layer like landscape fabric, and ensure the perimeter is anchored so the whole field doesn’t migrate.
Will a temporary patio make my lawn come back right after removal?
Often, but not instantly. Plan to rake, loosen compacted soil (fork or aerator), water thoroughly, and overseed damaged areas. Grass under solid coverage may take longer to recover, so removing during a mild growing season improves results.
How do I prevent tiles or mats from shifting when people walk on them?
Containment and edge control matter most. For mats, use the perimeter channel method and pin the edge into the sloped channel. For modular tiles, use system border strips if available and add landscaping spikes at corners and along the sides. Also keep zip-ties or connectors consistent at the recommended spacing.
What should I do if my temporary patio surface feels bouncy or rocks underfoot?
Don’t “live with it.” Walk and test every section, then tap down raised pieces. If a section continues to rock, pull it up, fix the underlying high or low spots, and reinstall. Rocking usually means the base has an uneven lump or a spot that wasn’t compacted.
Are snap-together deck panels safe on grass if the ground is not perfectly level?
They bridge minor dips better because they sit on pedestal feet, but they can still create a raised edge between panels or between the patio and grass. Dry-layout first, check frequently with a level, use small shims where needed, and plan a transition (ramp piece or clear visual boundary) so it’s not a trip hazard.
How do I cut modular tiles or trim edges neatly without ruining the fit?
Measure the gap at the wall or irregular border, then score in multiple shallow passes with a sharp utility knife rather than trying to cut through in one go. Plan for edge/border strips if your system includes them, since a proper edge component often looks better and improves containment.
Can I build a temporary patio over or near a septic leach field?
Avoid building directly over leach fields. Because setbacks and rules depend on your local system, you should coordinate with your local installer or authority first. If you’re unsure where it runs, find the layout before choosing a location or digging any base layers.
What’s the safest way to clean up after removal, especially for grass mats and tiles?
Work in reverse order: remove edge anchors, unfasten ties or border strips, and lift/stack panels or mats as you go. Afterward, rake the area and remove debris, then loosen compaction and reseed. Rolling up fabric-based layers promptly helps prevent pieces of grass or soil from getting mixed into the remaining ground.
How do I reduce slipperiness if the patio gets wet?
In wet weather, use a surface with a textured or grip finish, not smooth tiles. Also check that seams and transitions do not create raised ridges that become slippery when damp. If you notice any slick spots, re-check edge leveling and grout or surface condition before use.
What tools make the biggest difference, and what should I avoid?
A rake for true leveling, a tamper or plate compactor for any packed base, and a level for checking alignment are the highest impact tools. Avoid skipping the perimeter containment step, and avoid laying on overly soft ground, since that leads to sinking and shifting even if the tiles look fine initially.
If I’m using gravel, how can I make cleanup and lawn restoration easier?
Use landscape fabric under the gravel and install perimeter edge restraints so the stone doesn’t migrate into the lawn. After removal, rake up as much stone as possible, roll up the fabric, then till or aerate the underlying soil before reseeding. This sequence reduces how much gravel remains mixed into the top layer.
Next Article
How to Make a Patio on Grass: DIY Step-by-Step Guide
Step-by-step DIY to build a patio on grass with proper grass removal, weed control, drainage layers, and pavers or grave