You can put in a patio yourself over a long weekend if you stick to a clear sequence: choose your material, plan and measure the space, dig out and compact a solid base, install your surface, and finish with edging and jointing. If you are wondering how to do patio step by step, the rest of this guide breaks down each phase so you can follow the process with confidence clear sequence. The work is physical but very learnable, and getting the base right matters far more than any fancy technique for laying the top surface.
How to Put in a Patio: Step-by-Step DIY Guide

Nolan Lennox
2 May 2026
Choosing the right patio type and layout
Before you rent a plate compactor or buy a single bag of sand, spend an hour thinking about what you actually want underfoot and how much work you are signing up for. The material choice drives almost every other decision: how deep you dig, what base you need, how long it takes, and what it costs.
| Material | Typical DIY Cost (per sq ft) | Difficulty | Drainage | Maintenance |
|---|---|---|---|---|
| Concrete slab | $6–$10 | Hard (needs forms, mixing or truck) | Poor without slope | Low, but cracks are permanent |
| Brick or clay pavers | $8–$20 | Moderate | Good (permeable joints) | Medium (joint weeding) |
| Concrete pavers | $5–$15 | Moderate | Good (permeable joints) | Low to medium |
| Natural stone | $12–$25+ | Moderate to hard | Good | Low (occasional re-setting) |
| Gravel/crushed stone | $2–$6 | Easy | Excellent | Low (occasional topping off) |
| Wood or composite decking on grade | $10–$25 | Moderate to hard (framing required) | Good (open boards) | Medium to low depending on material |
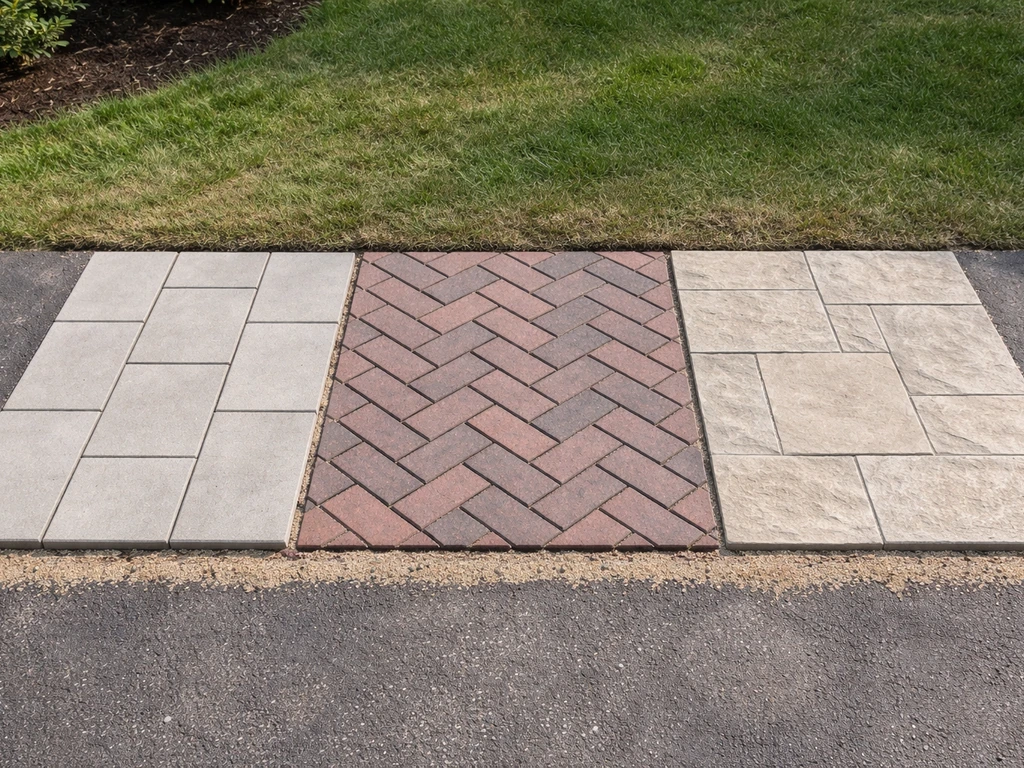
For most first-time DIYers, concrete pavers or brick are the sweet spot. They are forgiving, you can pull and reset individual units if something goes wrong, and the build process is manageable solo or with one helper. Gravel is the easiest and cheapest to install but shifts underfoot over time. A poured concrete slab is durable and low maintenance long-term, but it is unforgiving if you get the slope wrong, and cracks are a real headache down the road. Wood or composite on a grade-level frame looks great but adds the complexity of framing and joist spacing, which is a different skill set than masonry work.
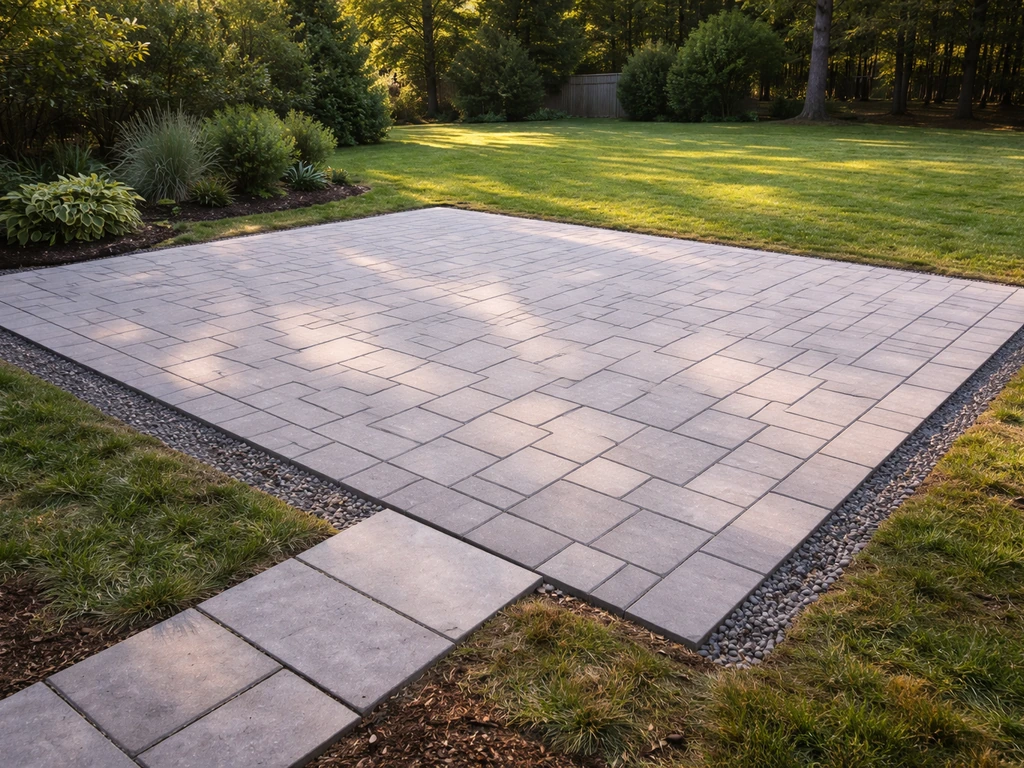
For layout, start with how you actually use the space. A dining table for four needs at least a 12 by 12 foot footprint, ideally 14 by 14 feet. A sitting area with a small fire pit works fine at 10 by 10 feet. Sketch it on graph paper with furniture to scale before you stake anything in the ground. Think about traffic flow from the house, any existing doors or windows that affect where you want to sit, and whether shade or sun matters at the times of day you use it most.
Planning basics: measurements, permits, and site prep
Measure twice, dig once. Use stakes and mason's line to outline the exact perimeter of your patio on the ground. A simple way to check for square corners is the 3-4-5 triangle method: measure 3 feet along one edge, 4 feet along the adjacent edge, and the diagonal between those two points should be exactly 5 feet if you have a true 90-degree corner. Scale this up (6-8-10 or 9-12-15) for larger patios.
Permits are worth a quick phone call to your local building or zoning office before you start. Most ground-level patios under a certain square footage are exempt, but setback rules from property lines and easements still apply in most municipalities. Patios attached to the house, elevated more than a few inches, or covering large areas sometimes trigger permit requirements. Getting caught without one can mean tearing it out, so spend five minutes checking.
Two things to sort before you dig: utilities and elevation targets. Call 811 (the national dig-safe line) at least a few days before you break ground so underground lines can be marked. Then figure out where the finished surface needs to sit. The patio surface should be an inch or two below any door threshold if it abuts the house, and it needs to slope away from the structure at a minimum pitch of 1 inch per 8 feet (about 1. A common ICPI-referenced range for paver patio drainage pitch is about 1/8 inch to 1/4 inch per foot for proper drainage minimum pitch of 1 inch per 8 feet. 5 percent grade). That slope is not optional. It is what keeps water from pooling against your foundation or sitting on the patio surface.
Subgrade and drainage: leveling, compaction, and base layers
This section is where most DIY patios succeed or fail. A beautiful surface on a bad base will shift, sink, crack, and drain poorly within a couple of seasons. If you want a step-by-step walkthrough, use this patio installation how to guide to plan your materials and sequence the work. Do not skimp here.
Excavation depth
Calculate your total dig depth by adding up your base layers plus your surface thickness. For a paver or brick patio, that typically means 4 inches of compacted gravel base, plus 1 inch of bedding sand, plus the paver thickness (usually 2.375 to 3.5 inches depending on the paver). You are digging about 7 to 9 inches down from finished grade in most cases. For a gravel patio, plan on 4 to 6 inches of compacted base material topped with 2 to 3 inches of decorative finishing gravel, so you are excavating 6 to 9 inches total. Mark your target dig depth on your stakes with a marker so you have a consistent reference.
Clearing and grading
Strip all grass and vegetation from the area, then remove the topsoil down to your target depth. Topsoil is organic and compressible, which means it will settle and shift under load. You want to get down into stable subsoil. Once the area is cleared, use a long level or a laser level to check for high and low spots, and rake or shovel to roughly grade the subgrade toward your desired drainage slope before compacting.
Compaction and base layers
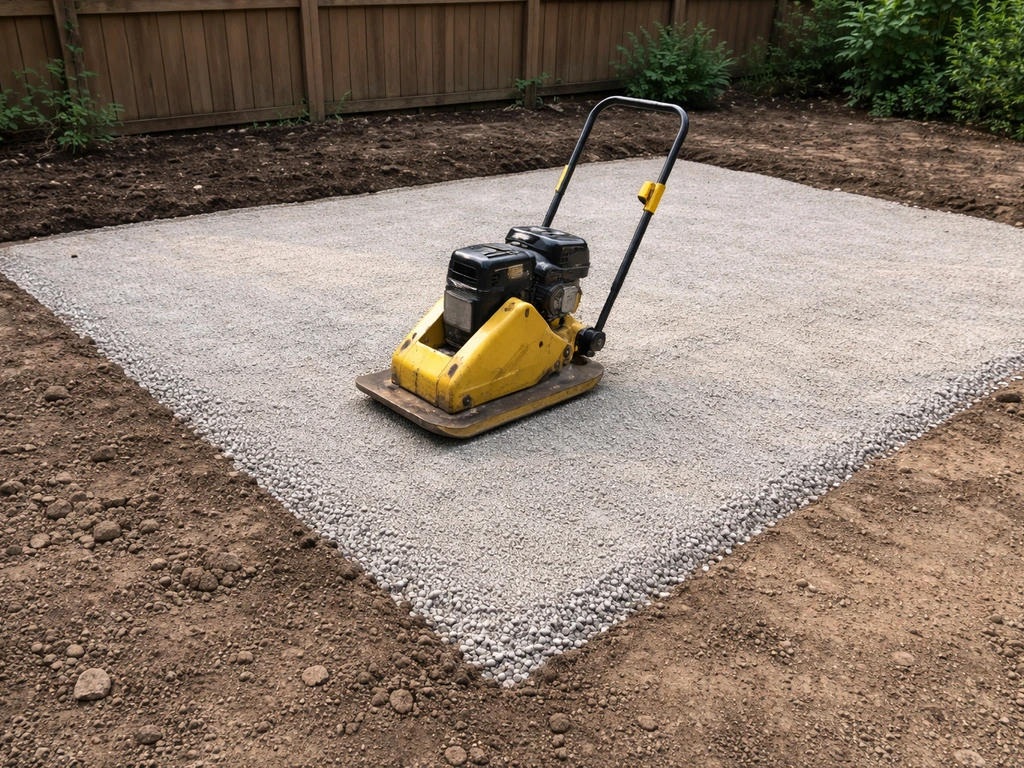
Rent a plate compactor for the day. This is non-negotiable for any patio larger than a few square feet. Compact the native subgrade first, then bring in your gravel base material in 2-inch lifts, compacting each lift thoroughly before adding the next. Use crushed angular gravel (often called Class II road base, crusher run, or processed gravel) rather than round pea gravel, because angular particles lock together and compact solid. After compaction, your gravel base should be firm underfoot with almost no give. For pavers and brick, add about 1 inch of coarse bedding sand (also called concrete sand or all-purpose sand) on top of the compacted gravel as the final layer before placing your surface material.
Lay landscape fabric between the subgrade and the base gravel if you want weed suppression, especially for gravel patios. For paver patios, some builders skip it on the theory that it can cause sand migration issues over time, but in most residential situations it is a reasonable call and saves a lot of weeding later.
Installing patio materials (pavers, brick, concrete, gravel, wood/composite)
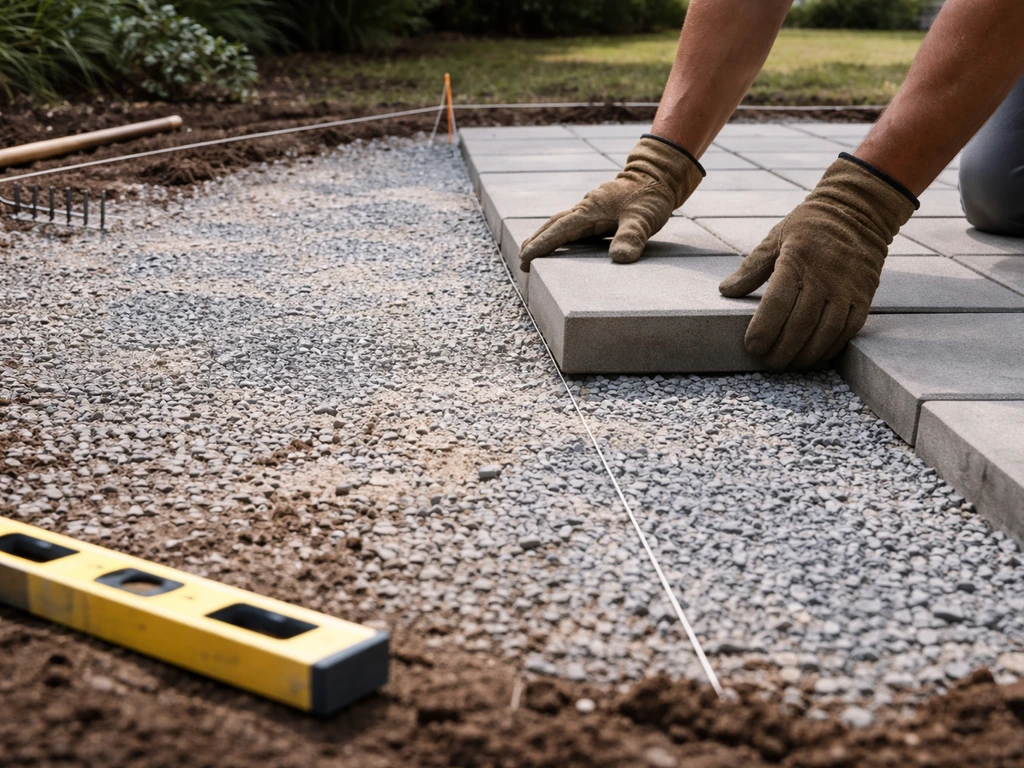
Pavers and brick
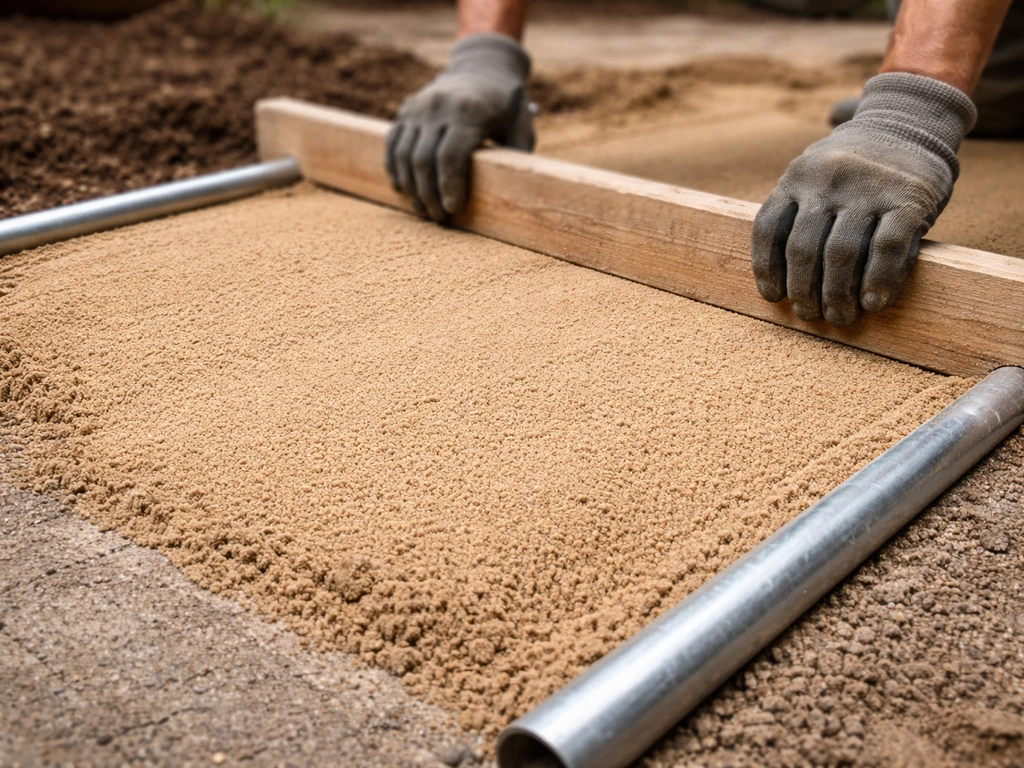
Screed your bedding sand to a consistent 1-inch depth using two screed pipes or rails set at the correct elevation, then drag a straight board across them to level the sand. Do not walk on the screeded sand after this. Start laying pavers from one corner or from a straight reference edge, working outward. Set each paver down gently without sliding it, and use a rubber mallet to tap it flush. Check your level and slope reference frequently as you go. Save all the cuts for the perimeter pieces at the end, using a wet saw or a paver splitter to fit them around edges and obstacles.
Concrete slab
For a small slab you can mix bags yourself, but for anything over about 50 square feet or 4 inches thick, ordering ready-mix is worth it. Build your form boards out of 2x4s (or 2x6s for a thicker slab) staked firmly in place at your finished height. The slab needs to slope at that same 1 inch per 8 feet drainage grade. Pour the concrete into the form, screed it level with a strike-off board, and then float and finish the surface. Standard broom finish provides slip resistance. Cure the slab by keeping it damp for at least 3 to 7 days, covered with plastic or burlap.
Gravel
After your compacted base is in place, install your edging to contain the gravel, then spread your top layer of decorative stone. Pea gravel, river rock, and crushed granite are all popular choices. Rake it level and check that your drainage slope is maintained through the top layer. Gravel patios are the fastest to build but need occasional raking and may need a light topping off every couple of years as material migrates or settles.
Wood and composite decking on grade
A ground-level wood or composite patio on framing sits on concrete footings or concrete deck blocks rather than directly in soil. You build a pressure-treated frame (rim joists and interior joists) and then fasten your decking boards across it. Joist spacing should not exceed 16 inches on center for standard deck boards, though some composite products rated for it allow up to 24 inches on center. Check your specific board's specs. Composite decking costs more upfront than wood but skips annual staining and resists rot and insects far better, which matters a lot for a structure sitting close to grade where moisture is constant. Leave a small gap between boards (typically 1/8 to 1/4 inch) for drainage and expansion.
Finishing details: edging, leveling adjustments, jointing, and cleanup
Once your field pavers or bricks are down, install plastic paver edging or steel edging around the perimeter before you do anything else. Spike it into the ground through the pre-drilled holes every 12 inches or so. This edging is what keeps your surface from spreading outward over time, which is the main reason older DIY paver patios start looking wobbly and gap-filled. For gravel patios, edging is equally important and can be landscape timbers, aluminum strip, or bender board.
With pavers or brick, the next step is polymeric sand jointing. Sweep dry polymeric sand across the entire surface and work it into all the joints with a push broom, making multiple passes. Compact the surface one more time with the plate compactor (put a rubber pad or piece of carpet under the plate to avoid scratching the pavers). Sweep more sand into any low joints and repeat until joints are filled to within about 1/8 inch of the surface. Then mist the surface with water according to the manufacturer's instructions to activate the binding agent. Polymeric sand sets firm, which dramatically reduces weeds and ant intrusion compared to plain jointing sand.
Do a final level and slope check with a long level before you call it done. If any pavers are high or low, pull them up, add or remove a bit of sand underneath, and reset. Now is the time to address it, not two years from now. Clean the surface of any sand haze or residue, and if your pavers or natural stone are porous and you want stain protection, apply a penetrating sealer after the polymeric sand has cured fully (usually 24 hours).
Common DIY mistakes and troubleshooting
Most patio problems trace back to a handful of consistent errors. Here are the ones I see most often, and what to do if you are dealing with them.
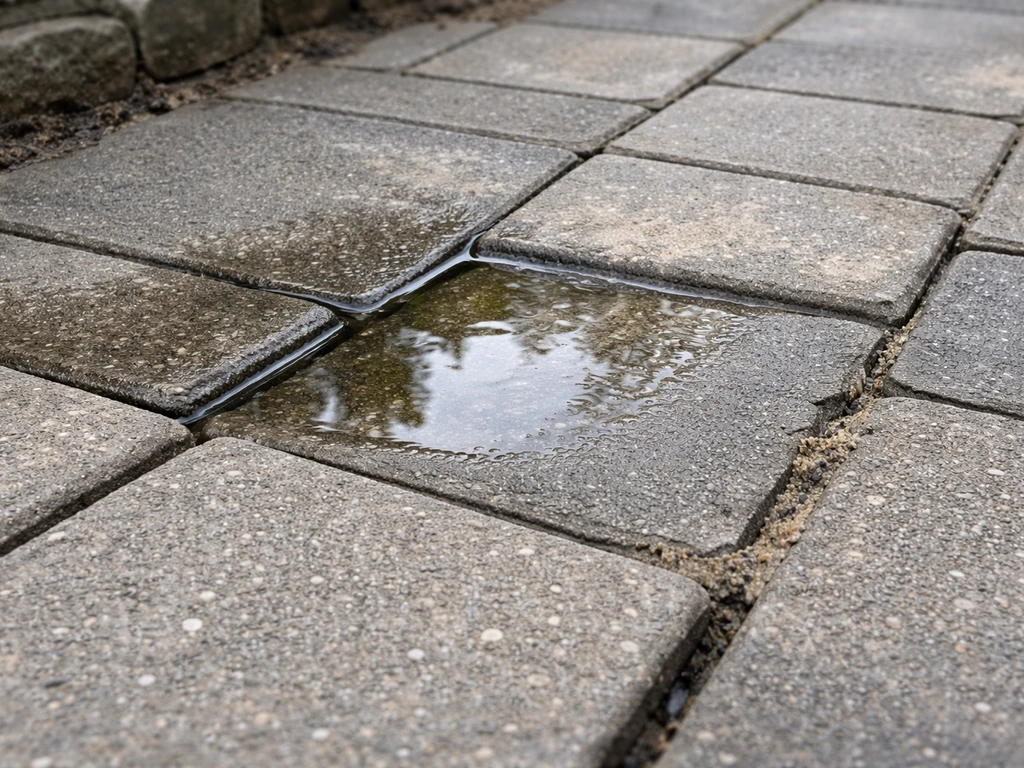
- Wrong slope or no slope: Flat patios pool water and eventually heave or stain. If your finished patio has low spots, pull the affected pavers, add or adjust the sand bed underneath, and re-check with a level before relaying. For concrete, you may need to grind high spots or apply a resurfacer to build up low ones.
- Poor or insufficient compaction: This causes settling, sinking pavers, and shifting. If sections of your patio drop noticeably within the first year, the base was not compacted properly. The fix is to pull the surface in the affected area, add base material, compact it thoroughly in layers, re-screed your sand, and relay.
- Base too thin: Four inches of compacted gravel is the minimum for a pedestrian patio on good stable soil. Sandy or clay-heavy soils may need 6 inches or more. Skimping here is false economy.
- Misaligned pattern or cumulative errors: Pavers can drift off alignment if you do not check your reference lines every few rows. String lines stretched across the surface in both directions every few feet help catch this early. Pull and reset before the polymeric sand goes in.
- Inadequate edging or edging installed too late: If you forget edging or install it after the jointing sand, the border units will migrate outward over time and joints will open up. The fix is to remove the border row, install edging properly, and relay.
- Weeds or grass coming through: This usually means either the topsoil was not fully excavated, the landscape fabric was skipped or has gaps, or standard sand was used instead of polymeric sand. For an existing patio, apply a weed-killing treatment and then sweep in fresh polymeric sand.
- Deck or composite patio rot and sagging near grade: Low clearance between framing and soil traps moisture. Keep at least 6 inches of clearance between the bottom of joists and grade, use pressure-treated lumber rated for ground contact, and make sure drainage moves water away from the frame.
If you are just getting started and want to go deeper on any specific phase, related areas worth exploring include how to pitch a patio correctly for drainage, the full breakdown of patio installation steps for each material type, and patio construction fundamentals for more complex site conditions. For a practical walkthrough of patio construction from planning to finished surface, follow this guide on patio construction how to patio construction fundamentals. Each of those topics builds on what is covered here and can fill in detail for your specific project situation.
The biggest thing I would tell any first-timer: resist the urge to rush the base work. The actual surface installation is satisfying and goes relatively quickly once the ground is prepped correctly. The hours you spend on compaction and grading are what determine whether your patio looks as good in ten years as it does on day one.
FAQ
Can I install a patio directly over existing concrete, pavers, or soil to save time?
Yes, but only if you can still achieve the required drainage grade and a stable base. If the existing soil is firm and you can compact it properly, you may be able to remove only loose topsoil and then build up your gravel and bedding layers to the target depth. If the area is soft, muddy, or full of roots, you will get settlement and uneven pavers, so plan on full excavation to subsoil.
What sand should I use for a paver or brick patio, and what’s wrong with using cheap sand?
For pavers and brick, you generally should not use standard play sand as the bedding. Use coarse bedding sand (often called concrete/all-purpose sand) and keep it to about the stated bedding depth, then screed it. Using the wrong sand can cause joints to wash out or pavers to rock, especially after the first freeze-thaw season.
What should I do if my patio starts to pool water after installation?
If you realize your slope is off after laying pavers, don’t try to fix it by adding more sand on top. The correct fix is to lift the affected pavers, adjust the bedding and possibly the base, then re-screed and reset. For small localized low spots, you may remove and reset a section, but major drainage problems mean base correction.
How do I know if polymeric sand has been activated correctly, and what if it rains?
Polymeric sand needs moisture to activate, and overwatering during the misting step can cause it to clump or stain. Follow the manufacturer’s watering instructions exactly, mist lightly, and allow it to cure fully before driving on it. If it rains heavily before it cures, expect weaker binding and be prepared to re-sand the joints.
Is edging required for both paver and gravel patios, and what type works best?
Edges should match the patio type. For pavers, perimeter edging prevents outward spread and wobble, and it works best when spiked into stable ground at regular intervals. For gravel, you need containment that matches height and curving needs (timbers, metal strip, or bender board) so stone does not migrate onto the lawn and the grade stays consistent.
How much space should I leave at the patio edges or next to a house, posts, or steps?
You should plan for cuts at the perimeter and around obstacles, but also consider an expansion gap at transitions where movement is expected. For example, leave a small gap between the patio and hard edges like steps or fixed walls, then fill with a flexible material if your conditions allow. Tight, gap-free contacts can lead to buckling or joint failure over time.
Should I compact the bedding sand after I screed it for pavers?
Do not compact the bedding sand under pavers. Compact the native subgrade and the gravel base in lifts, then screed bedding to thickness and lay pavers without stepping on the screeded sand. If you compact the bedding layer, you can create thin spots that cause pavers to sink or “hump” during use.
What if there are tree roots near where I want to put the patio?
If you have tree roots nearby, treat them as a risk to both your base and your surface. Keep excavation down to subsoil, avoid leaving root fragments that will keep growing, and consider installing root barrier material where appropriate. For major roots, it may be safer to redesign the patio layout to reduce future lifting and cracking.
Are there common concrete-slab mistakes that cause cracking or uneven drainage?
For concrete slabs, you can get into trouble if the slab is too thin for your loading or if you pour without reinforcement where it’s needed. Use proper thickness and follow a drainage slope plan, then cure correctly by keeping it damp and protected for the specified window. If you’re unsure about thickness or reinforcement for your area, consult local requirements before pouring.
How long should I wait before using the patio after jointing or concrete curing?
After jointing, you should avoid heavy traffic until the polymeric sand has cured, and you should keep the surface protected from wash-off. A practical rule is to limit foot traffic immediately, avoid moving heavy items for at least a day (longer if your manufacturer’s directions say so), and re-check the slope after the first few days as minor base settling can show up quickly.
Next Article
Patio Installation How To: DIY Step-by-Step Guide
DIY patio installation step-by-step: layout, drainage slope, base prep, pavers concrete options, finishing and maintenan