You can absolutely install a patio yourself. The full process goes like this: assess your site, plan your layout with a 1/4-inch-per-foot slope for drainage, excavate and compact a solid base, choose your material (gravel, pavers, concrete, or wood/composite), lay everything according to that material's specific steps, then seal and maintain it. Done right, a DIY patio lasts decades. Done wrong, usually because the base was rushed, it shifts, pools water, and becomes a headache within a few seasons. This guide walks you through the entire thing, start to finish. This guide should also help you figure out how to do patio planning, site prep, and base work step by step.
Patio Installation How To: DIY Step-by-Step Guide

Nolan Lennox
2 May 2026
DIY vs. hiring: be honest about what you can tackle today
Most patio projects are genuinely DIY-friendly. how to pitch a patio. A gravel patio or a sand-set paver patio on flat ground? That's a solid weekend project for a first-timer.
A poured concrete slab requires more precision and ideally a helper or two. A multilevel patio with retaining walls starts to get complicated fast, especially if those walls exceed 4 feet, that threshold triggers a building permit requirement in most jurisdictions (cities like Bend, OR, and Walnut Creek, CA, both require permits for retaining walls over 4 feet high).
Even a flat patio can trigger permitting: Naperville, IL, for example, requires a permit when total paved area exceeds 500 square feet, while Portland, OR, skips the permit for patio covers under 200 square feet attached to an exterior wall. Check your city's rules before you dig, a quick call to your local building department takes ten minutes and can save you from having to tear out finished work.
The honest answer on when to hire: call a pro if your yard has significant grade changes requiring engineered retaining walls, if you want a large poured concrete slab and have no concrete experience, or if underground utilities are in play (always call 811 before digging). Everything else, pavers, gravel, flagstone, even modular wood or composite tiles, is within reach if you're willing to do the physical work and follow the steps carefully.
Planning basics: size, layout, drainage, and reading your site
Start by deciding how big your patio actually needs to be. A common mistake is building too small. A dining table with chairs needs at least 12x12 feet just to function comfortably; add seating around a fire pit and you're looking at 16x20 or more. Sketch it out on paper with rough dimensions before you commit to anything on the ground.
Drainage is the single most important thing you'll plan. Every patio needs to slope away from your house at a rate of 1/8 to 1/4 inch per foot, that's roughly a 1% to 2% slope. Home Depot’s paver patio guide also recommends installing pavers with a slope away from the home so water drains properly [slope away from your house for drainage](https://www. homedepot.
com/hdus/enUS/DTCCOMNEW/fetch/GlobalAssets/PDFs/How-To-Install-a-paver-patio-FINAL. pdf). On a 10-foot-wide patio, that means the outer edge sits about 1. 5 to 2.
5 inches lower than the edge nearest your house. This isn't optional. Without it, water pools against your foundation and you'll be dealing with water intrusion problems that dwarf the cost of a patio build. For concrete specifically, 1/4 inch per foot is the widely accepted minimum standard.
Walk your site before you do anything else. Look for: low spots where water already collects after rain, tree roots that will fight you during excavation, downspout locations (you may need to reroute them), and existing hardscape or structures that affect your layout. Check that your soil drains reasonably well, clay-heavy soil needs extra attention during base preparation. Probe the ground with a screwdriver or rebar; if it hits solid resistance within a few inches, you may have compacted fill or rock that changes your excavation plan.
Base prep: the step that actually determines whether your patio lasts
I'll be blunt: every patio failure I've ever seen came from a bad base. Cracked concrete, sunken pavers, wobbly flagstone, it all traces back to inadequate excavation, poor compaction, or skipping the gravel layer. Get the base right and the top surface almost takes care of itself.
Excavation and grading
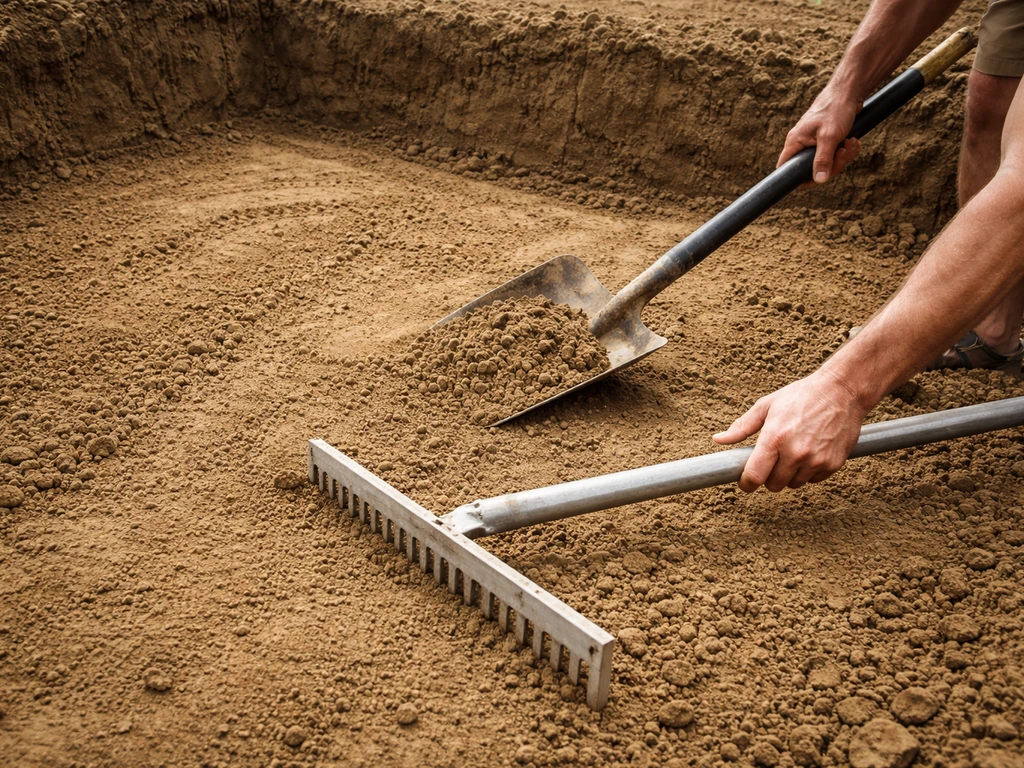
Excavate to a depth that accounts for your base layers plus your paving material. For a paver patio, that typically means removing 8 to 12 inches of soil: 6 to 8 inches of compacted gravel base, 1 to 1.5 inches of bedding sand, and the paver thickness on top (usually about 2.375 to 3.125 inches). For concrete, plan on 4 inches of slab plus 4 inches of compacted gravel base, so excavate about 8 inches. Strip away all sod, topsoil, and organic material, organic matter compresses and causes settling.
Subgrade compaction
Once you're at the right depth, compact the native soil (your subgrade) before adding anything on top. The target is 95% Standard Proctor Density, in plain terms, that means you're running a plate compactor over the soil until it stops giving. For permeable paver systems, building standards explicitly call out this 95% compaction target. A rented plate compactor with at least 5,000 lbs. of compaction force is what Belgard and other major paver manufacturers specify, a hand tamper can work for small areas but it's genuinely inferior for anything over about 50 square feet.
Adding the gravel base

Spread your crushed road base (also called compactible gravel or Class II base) in layers, or lifts, of no more than 6 inches at a time. Compact each lift thoroughly before adding the next, at least four passes with the plate compactor, with each pass overlapping the previous by 4 to 6 inches so you don't leave uncompacted strips. Your target for the finished gravel base is also that 95% compaction density. Laying a geotextile fabric at the bottom of your excavation (between native soil and gravel) helps prevent soil migration up into your base over time and is especially useful in areas with sandy or clay-heavy soils.
Bedding layer for pavers
For sand-set pavers, spread a 1 to 1.5-inch layer of coarse washed concrete sand (not play sand, which is too fine) uniformly over the compacted base. Screed it flat with a straight board riding on temporary guides set to your finished height. Don't walk on screeded sand before laying pavers, footprints will mess up your level surface. Belgard specifies a minimum 1-inch bedding layer, and PaverSupply puts the upper limit at 1.5 inches; thicker than that and you lose stability.
Which material is right for your patio?
Each material has a genuinely different build process, cost, and long-term maintenance story. Here's how they stack up honestly.
| Material | DIY Difficulty | Installed Cost (per sq ft) | Durability | Best For |
|---|---|---|---|---|
| Gravel/crushed stone | Easiest | $1–$4 | Moderate (needs annual top-up) | Budget builds, casual patios, good drainage areas |
| Brick/concrete pavers | Moderate | $4–$35 | Excellent (50+ years with good base) | Most DIYers — best value for effort |
| Poured concrete | Hard | $6–$20 | Very good (20–30 years) | Clean look, low ongoing maintenance |
| Composite/wood tiles | Easy to Moderate | $8–$25+ | Good (15–25 years composite, less for wood) | Rental-friendly, decks, sloped or uneven ground |
Gravel and crushed stone
The fastest and cheapest option. You excavate 4 to 6 inches, compact the subgrade, optionally lay fabric, and spread 3 to 4 inches of pea gravel or crushed stone. No special tools, no curing time. The downsides: gravel migrates over time (good edging restraints slow this significantly), it's not great for furniture legs or heels, and you'll add material every year or two. In climates with heavy rain, it drains beautifully. In windy areas, lightweight gravel goes everywhere.
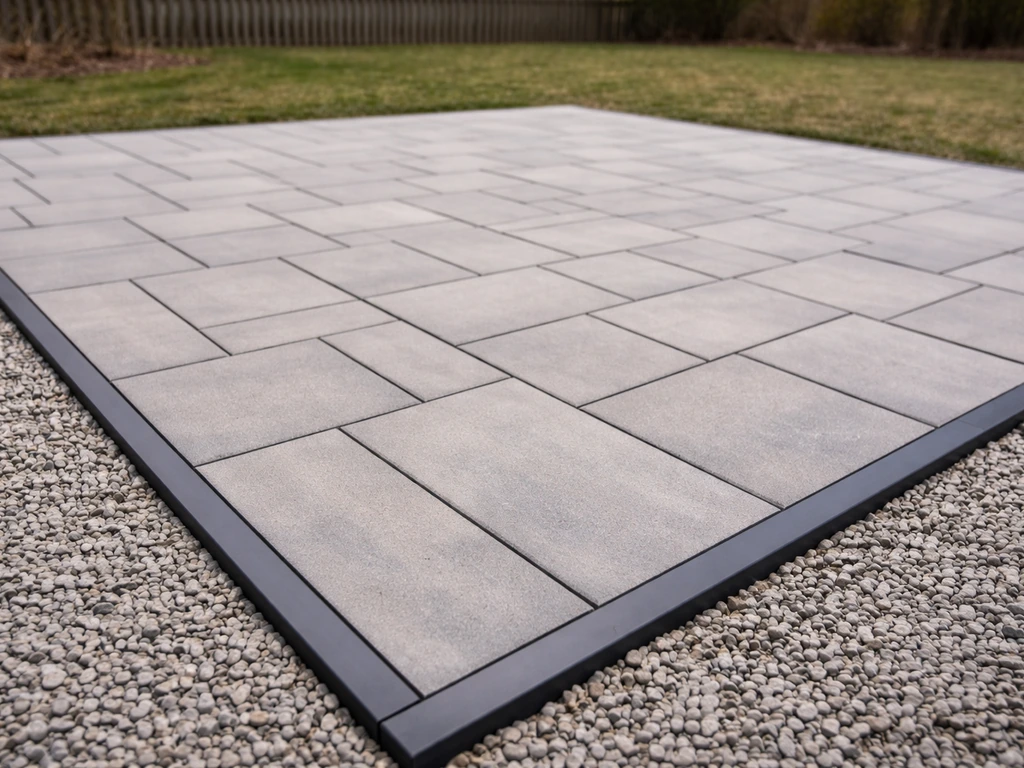
Brick and concrete pavers
This is my honest recommendation for most DIYers. Pavers are forgiving, if one sinks or cracks, you pull it out and fix just that spot. A poured concrete slab that cracks means a much bigger repair job. The base prep is significant work, but it's straightforward physical labor. Concrete pavers meeting ASTM C936 standards are extremely durable. Cost ranges from about $4 to $35 per square foot installed depending on material and pattern complexity. Budget around $10 to $15 per square foot for a solid mid-range paver patio done yourself.
Poured concrete
Concrete gives you a clean, seamless surface that's easy to clean and works beautifully with outdoor furniture. It costs $6 to $20 per square foot installed depending on finish (plain broom finish vs. stamped or colored). A 3.5 to 4-inch thick slab is standard for patios, often quoted around $10 per square foot by contractors. The DIY challenge is that once you pour, you're committed, you need to work fast, and you need enough hands to screed and finish before it sets. Concrete also needs 28 full days to cure before you apply sealer. In climates with hard freeze-thaw cycles, it will eventually crack; control joints help manage where.
Composite and wood
Composite deck tiles or interlocking wood tiles sit on top of an existing hard surface or a prepared gravel/concrete base. They're excellent for renters, for uneven or sloped situations where excavation isn't practical, and for anyone who wants a warm, natural look. Composite lasts 15 to 25 years with minimal maintenance; natural wood (like teak or ipe) requires annual oiling but can last just as long. These materials don't integrate with the same base-prep workflow as pavers, they're more of a surface layer on top of something already solid or leveled.
Tools, supplies, and what it'll actually cost you
Here's a realistic tool and supply list for a paver patio build. Rent what you don't own, the plate compactor in particular is not worth buying for a one-time project.
- Plate compactor (rent — minimum 5,000 lbs. compaction force; plan for a full weekend rental)
- 4- to 6-foot level plus a line level or laser level
- Mason's string and stakes (for layout and slope reference lines)
- Screed board or straight 2x4 for leveling bedding sand
- Hand tamper (for edges and tight spots the plate compactor can't reach)
- Rubber mallet and paver splitter or wet saw (for cutting pavers to fit edges)
- Wheelbarrow and square-blade shovel
- Tape measure and marking paint or chalk
- Edging restraints (plastic or aluminum paver edging with spikes)
- Polymeric jointing sand
- Crushed road base aggregate (6 to 8 inches worth for your square footage)
- Coarse washed concrete sand (1 to 1.5 inches worth)
- Geotextile landscape fabric (optional but recommended)
- Garden hose with mist nozzle (for activating polymeric sand)
For a typical 200-square-foot paver patio done yourself, expect to spend roughly $800 to $2,500 on materials depending on paver quality, plus $150 to $300 for equipment rentals. Gravel alone for the same space might run $200 to $400 total. Concrete materials for a DIY slab run $500 to $1,200 for 200 square feet, but you'll also need to rent or borrow concrete finishing tools and either mix it yourself (hard for anything over 100 sq ft) or order a ready-mix truck. Hiring out the full project instead runs $1,500 to $6,000+ for that same 200-square-foot patio depending on material and region.
Step-by-step patio installation workflow
This workflow is written for a sand-set paver patio, which is the most practical choice for most DIYers. If you want step-by-step patio construction how to guidance, start with site planning, then move through base prep, drainage, and final finishing. If you're still figuring out how to put in a patio step by step, the next sections break down planning, base prep, and installation details. If you still need the full start-to-finish installation steps, follow this guide on how to install patio surfaces from planning through finishing. Adjust the base depth and final-layer steps for other materials as described in the material section above.
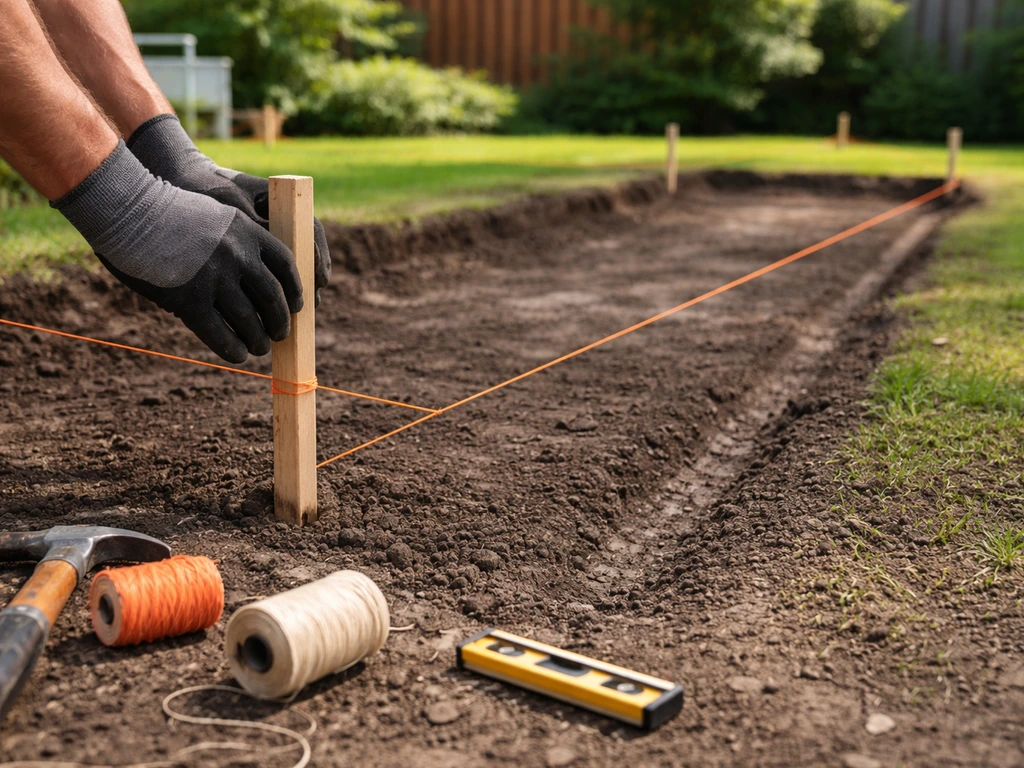
- Mark your layout: Use stakes and mason's string to define the patio perimeter. Check for square by measuring diagonals — they should be equal. Use marking paint to transfer the outline to the ground.
- Call 811: Before you break ground, call 811 (or your country's equivalent) to have underground utilities marked. It's free, it's required in most states, and it prevents serious accidents.
- Excavate: Dig out the entire area to your target depth (typically 8 to 12 inches for pavers, 8 inches for concrete). Keep the bottom of your excavation sloped at 1/4 inch per foot away from the house — this carries your drainage slope through every layer.
- Lay geotextile fabric: Roll fabric across the excavated area, overlapping seams by 12 inches. Trim edges and fold up the sides slightly. This prevents soil from migrating into your gravel base.
- Add and compact road base: Spread crushed road base in lifts no deeper than 6 inches. Compact each lift with the plate compactor — minimum four passes, overlapping each pass by 4 to 6 inches. Add more base and repeat until you've reached your target thickness.
- Install edge restraints: Before screeding sand, stake your plastic or aluminum paver edging around the perimeter at your finished height. This is what holds the whole system together and prevents lateral movement over time.
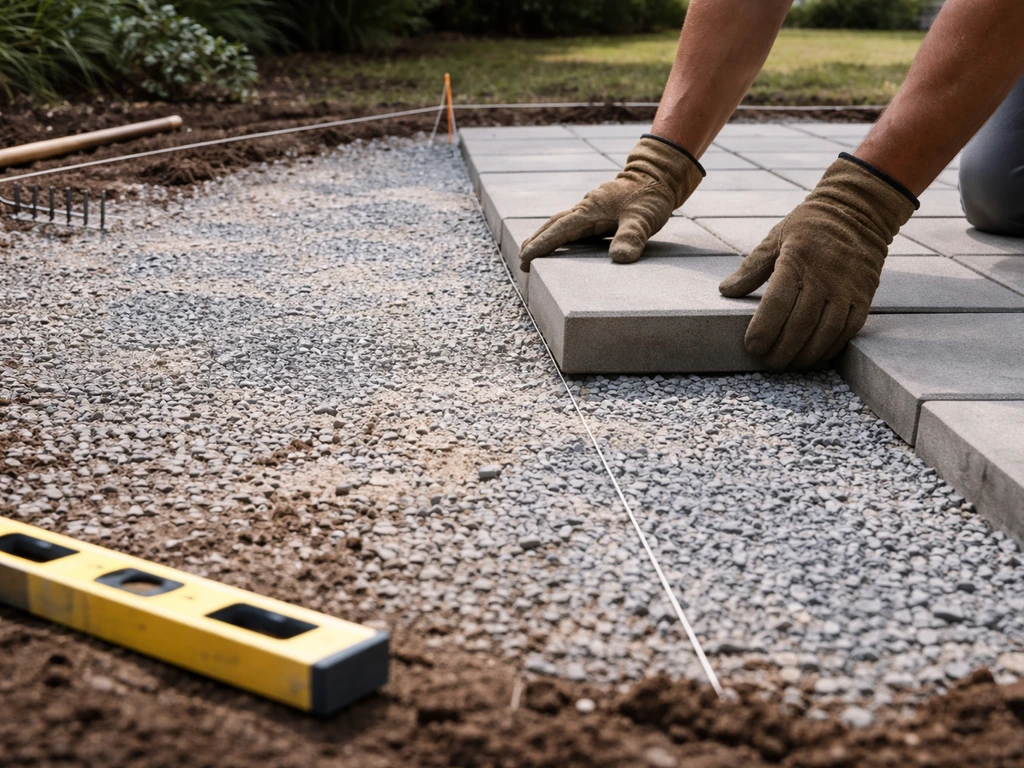
- Screed bedding sand: Set temporary screed guides (pipes or boards) at your finished-sand height. Spread 1 to 1.5 inches of coarse concrete sand and drag your screed board across to create a flat, even surface. Remove guides and fill the channels with sand, tamped gently.
- Lay pavers: Start from a straight reference edge (usually the house or a fixed border) and work outward. Place pavers gently — don't slide them into position, which disturbs the sand bed. Maintain consistent joint spacing (typically 1/8 to 3/16 inch). Cut edge pieces with a wet saw or paver splitter.
- Compact the paver surface: Run the plate compactor over the finished paver surface to seat pavers into the bedding sand. Use a rubber pad attachment to protect paver faces. Make multiple passes.
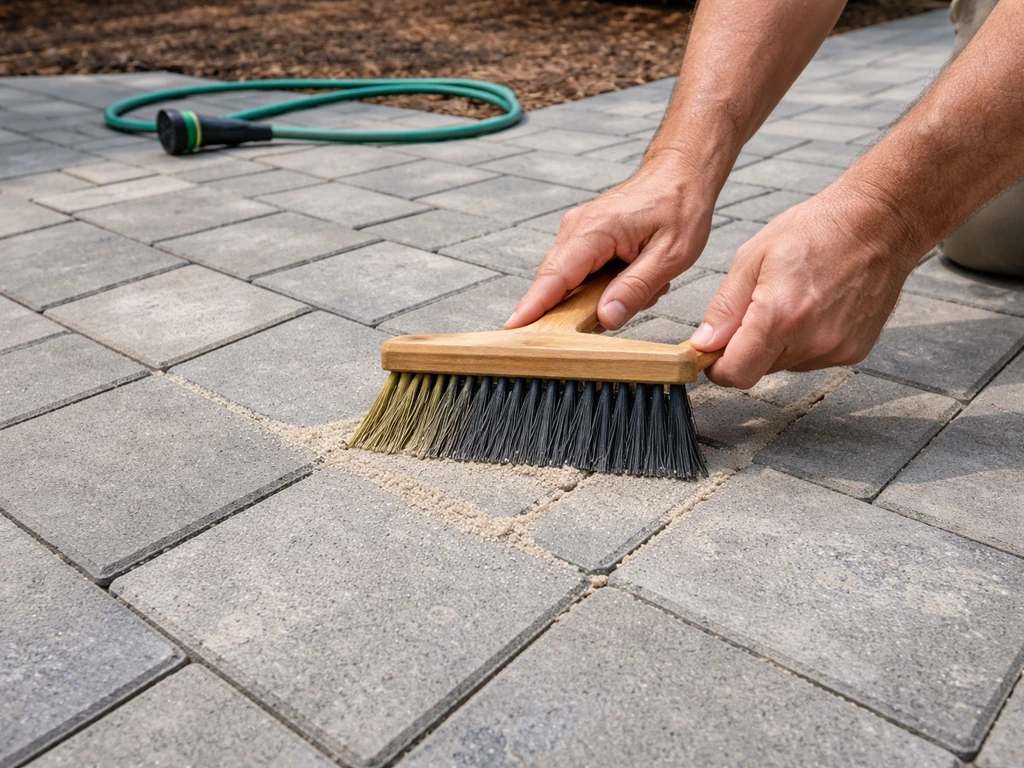
- Sweep in polymeric sand: Spread polymeric jointing sand across the surface and sweep it into all joints until filled to just below the paver surface (never flush to the top — leaving a slight recess is correct). Blow off all excess sand from paver faces before activating.
- Activate polymeric sand: Mist the surface gently and evenly with a garden hose — don't flood it, which erodes the sand out of joints. Don't allow standing water in joints for more than 30 minutes. Allow to cure per the product instructions (usually 24 hours) before use.
Finishing, sealing, and keeping your patio in great shape long-term
Once your patio is installed, a little routine care goes a long way. Here's what actually matters for long-term durability.
Sealing pavers and concrete
For concrete, wait the full 28 days before applying sealer, this is the widely accepted standard and skipping it means sealer won't bond correctly. Apply a penetrating or film-forming sealer appropriate for exterior concrete, and reapply every 2 to 3 years. For pavers, a sealer is optional but helps lock polymeric sand in place, enhance color, and make cleaning easier. Apply paver sealer after the polymeric sand has fully cured, typically 24 to 72 hours after activation. Avoid sealing in hot direct sun or when rain is expected within 24 hours.
Weed prevention
Polymeric sand is your best defense against weeds in paver joints, it hardens and leaves little room for seeds to germinate. Geotextile fabric under the base slows weeds from below. If weeds do appear in joints, pull them early before roots anchor deep. Don't use a pressure washer aggressively on polymeric-sand joints, it washes the sand out and you'll need to resand the affected areas.
Preventing shifting and settling
The most common cause of shifting pavers is edge restraint failure or base erosion. Walk your patio every spring and look for any pavers that rock or have sunk. Fixing a sunken paver is easy: pop it out, add a little sand, tamp it, and reset the paver. Catching it early means a 10-minute fix instead of a half-day project. Check that your edge restraints are still solidly staked, over winter, freeze-thaw cycles can loosen the spikes. Hammer them back down if needed.
Annual maintenance checklist
- Spring: inspect for sunken, cracked, or rocking pavers and reset as needed
- Spring: check edge restraints and re-spike any loose sections
- Spring: resand any joints where polymeric sand has eroded over winter
- Summer: rinse paver or concrete surface to remove dirt buildup (low-pressure rinse only for polymeric sand joints)
- Fall: clear leaves promptly — decomposing organic matter stains concrete and accelerates weed growth in joints
- Every 2 to 3 years: reapply sealer to concrete; reapply paver sealer if surface looks faded or water no longer beads
The work you put into the base is what makes all of this maintenance genuinely light. A properly prepared, well-compacted, correctly sloped patio doesn't shift, doesn't pool water, and doesn't give you headaches. It just sits there looking good, and that's exactly what you're going for.
FAQ
How much space should I leave between my patio and my house or existing structures?
Plan for at least a 1-inch gap at door thresholds and between the patio edge and any fixed wall or column. Fill that gap with a flexible exterior filler (or keep it open and covered with flashing detail where applicable) so small settlement or thermal movement doesn't crack paving or push water toward the structure.
I planned a slope, but how do I confirm the pitch before I lay pavers?
Use the slope math you already designed, then verify it on-site with a string line and a long level, measuring both ends of the patio before installing the paver edge. If the base is already excavated, correcting slope after bedding sand is harder and often requires re-screeding, so do a final grade check right before sand placement.
What should I do if a paver patio starts rocking or sinking?
If pavers rock, it is almost always base or restraint related, not the paver itself. Pop the affected paver(s), remove and replace the bedding sand where it became thin or uneven, then tamp the gravel base. Finally, reinstall and recheck several neighboring pavers because a small sunken spot can indicate a localized base void.
When is the right time to install polymeric sand, and how long should I wait before walking on it?
For sand-set pavers, install polymeric sand only after the pavers are fully seated and you have edge restraint in place, then sweep it into joints and activate per the product label. Don’t top off joints after activation unless the product instructions say it is allowed, and avoid heavy foot traffic for at least 24 to 48 hours so the joints harden properly.
What if my yard has clay soil or water pools after heavy rain?
Wet clay or very poor drainage soils can turn a patio into a seasonal mud problem. The practical fix is to improve drainage at the site level, sometimes by adding a thicker compacted base and ensuring the patio slope carries runoff away from the property. If you see standing water after rain or you’re unsure about soil drainage, it is worth pausing and getting a simple site assessment before you excavate extensively.
Can I seal or protect the patio right away, even if it might rain soon?
Do it by material timing, not by calendar. Concrete must cure for the full sealer window, and paver sealing should wait until polymeric sand is fully cured, typically after activation. If rain is forecast sooner than the recommended window, delay sealing because trapped moisture can interfere with bonding and increase efflorescence or haze on concrete.
What are the biggest money mistakes DIYers make during patio installation?
If you have a tight budget, prioritize compaction and edge restraint over perfect paver looks. A common cost trap is skipping geotextile where soil migration is likely, or using the wrong bedding sand, which can lead to movement. Buying a proper plate compactor rental for a paver project usually saves more money than upgrading paver color or fancy patterns.
How do I avoid uneven surfaces when leveling bedding sand?
For a sand-set paver patio, crushed road base and bedding sand depth matter more than the exact paver pattern. Keep bedding sand within the stated thickness range and avoid walking directly on screeded sand. If you need to move tools during installation, place plywood sheets temporarily so you don't create low/high footprints that turn into visible surface variations.
Do I really need to call 811 for a small DIY patio excavation?
When underground utilities are possible, stop digging immediately and call 811 (even if you are 'just going a little' or you have old records). Also re-check once lines are marked because paint can be faded, and hand-dig near marks to reduce the chance of hitting a conduit or cable.
When should I hire a pro versus doing the patio installation myself?
Yes, but the decision should be based on expected loads and access. If your plan involves multi-level steps, major grade changes, or retaining walls near your patio, a pro can prevent expensive rework. If it is a simple single-level patio with standard base prep and manageable drainage, DIY is usually reasonable with proper compaction tools.
Next Article
How to Install a Patio: Step-by-Step DIY Guide
Step-by-step guide to install a patio: sizing, drainage, base prep, pavers or gravel, edging, jointing, tools and mistak