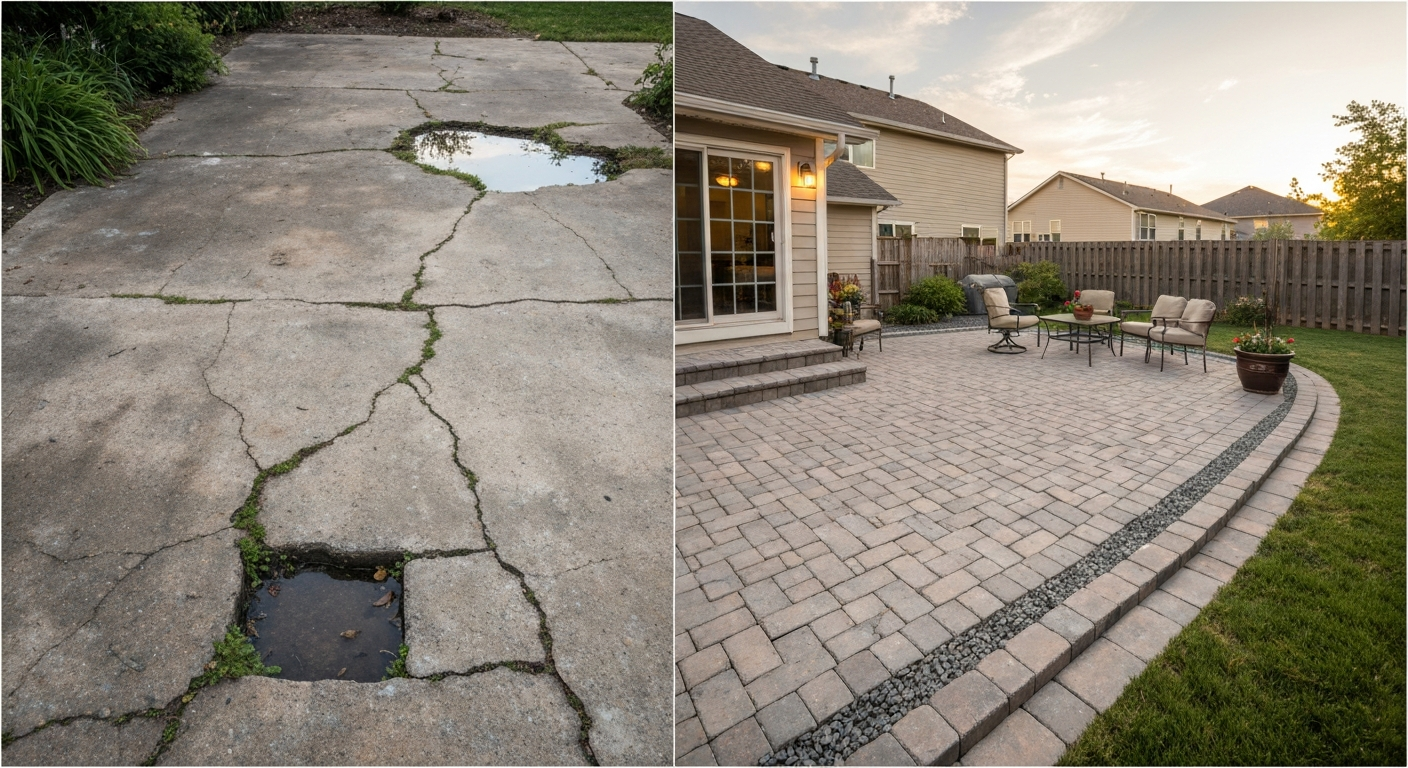
The right patio steps design comes down to three things working together: your yard's grade change, where the door sits, and how you actually use the space. For most single-story door thresholds (typically 18 to 36 inches above grade), you're looking at two to five steps, each with a 7-inch riser and a 12-inch-deep tread minimum, arranged in a straight, curved, or landing-based layout depending on your site. Get those proportions right, anchor the base properly, and you can build steps that look intentional, hold up through freeze-thaw cycles, and pass a basic safety check, all on a budget that fits a real DIY project.
Patio Steps Design: DIY Layout Ideas, Measurements, and Builds

Nolan Lennox
28 Apr 2026
Design Goals and How to Match Steps to Your Site
Before you sketch anything, walk your yard and honestly assess what you're solving for. Steps aren't just access, they define how the patio feels and how traffic flows through the space. A poorly placed staircase can eat up half your usable patio, funnel water toward the foundation, or create a pinch point that makes the whole area frustrating to use. Getting clear on your goals first saves a lot of rework.
Ask yourself a few questions up front. Where does foot traffic actually want to go, straight to the lawn, off to one side, or down a slope to a lower level? Is this the primary entry from the back door, or a secondary access point from a side gate? Do you entertain in groups (wider steps and landings matter more) or is it mostly just your family moving in and out? And critically: how much grade change are you working with, and where does the slope run?
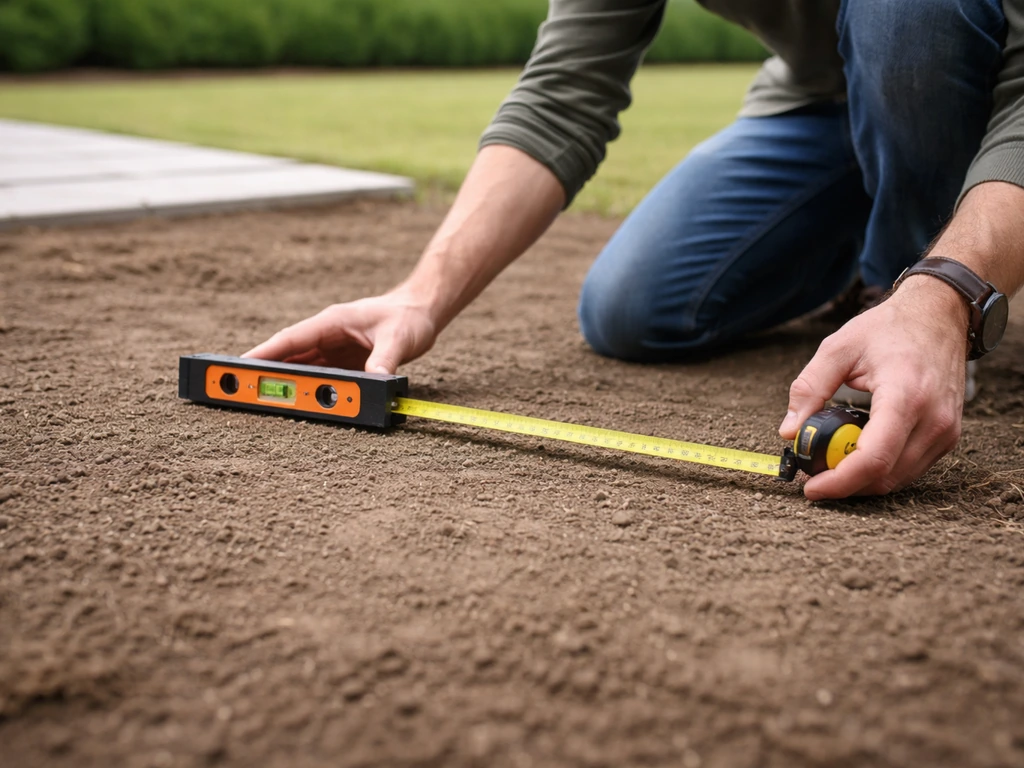
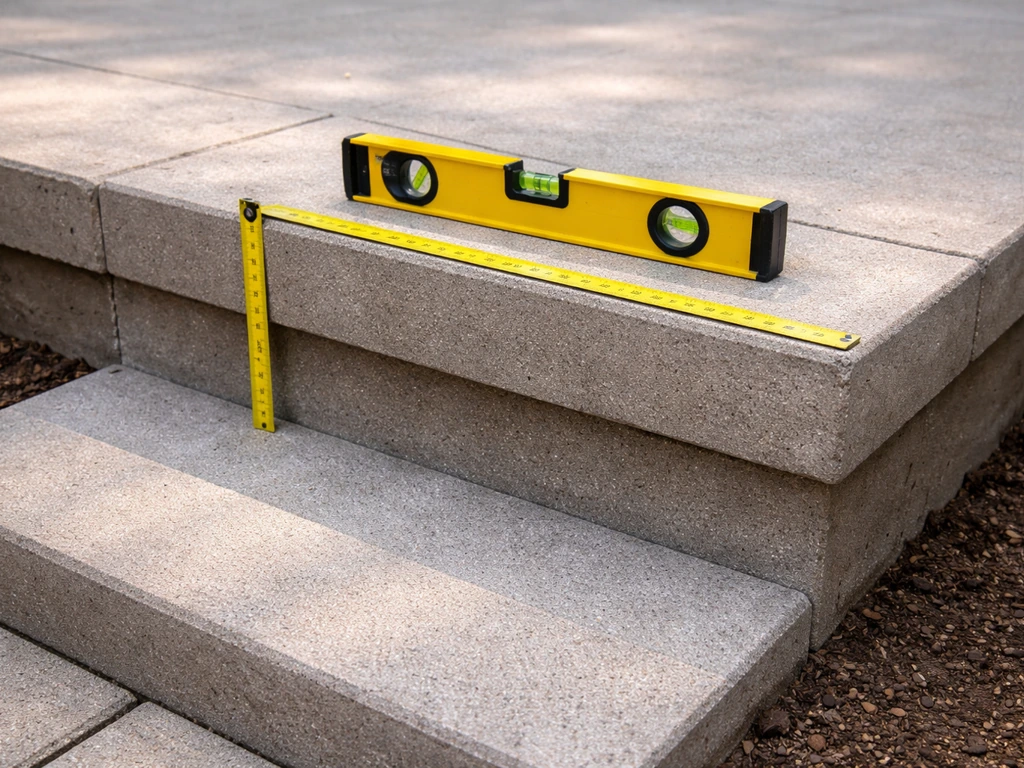
Your site's grade is the non-negotiable starting point. Measure the total vertical drop from door threshold to finished grade at the patio edge, this tells you exactly how many steps you need. A 14-inch drop calls for two steps at 7 inches each. A 28-inch drop needs four. That math drives everything else: step count, total horizontal footprint, whether you need a landing, and how much excavation is involved. Don't guess at this number. Stake a level string line and measure the drop precisely before you design anything.
Drainage direction matters just as much as grade. Steps that sit at the low point of a slope will collect water unless you actively route it away. Ideally, your patio and steps should pitch away from the house at about 1/4 inch per foot (roughly 2% slope). If your site drains toward the house or toward the steps, plan drainage solutions into the design from the start, not as an afterthought.
Layout Options: Straight, Curved, Terraced, and Landing-Based Designs
There's no single right shape for patio steps. The layout you choose depends on your grade, your available horizontal space, and the look you're going for. Here's how to think through the main options.
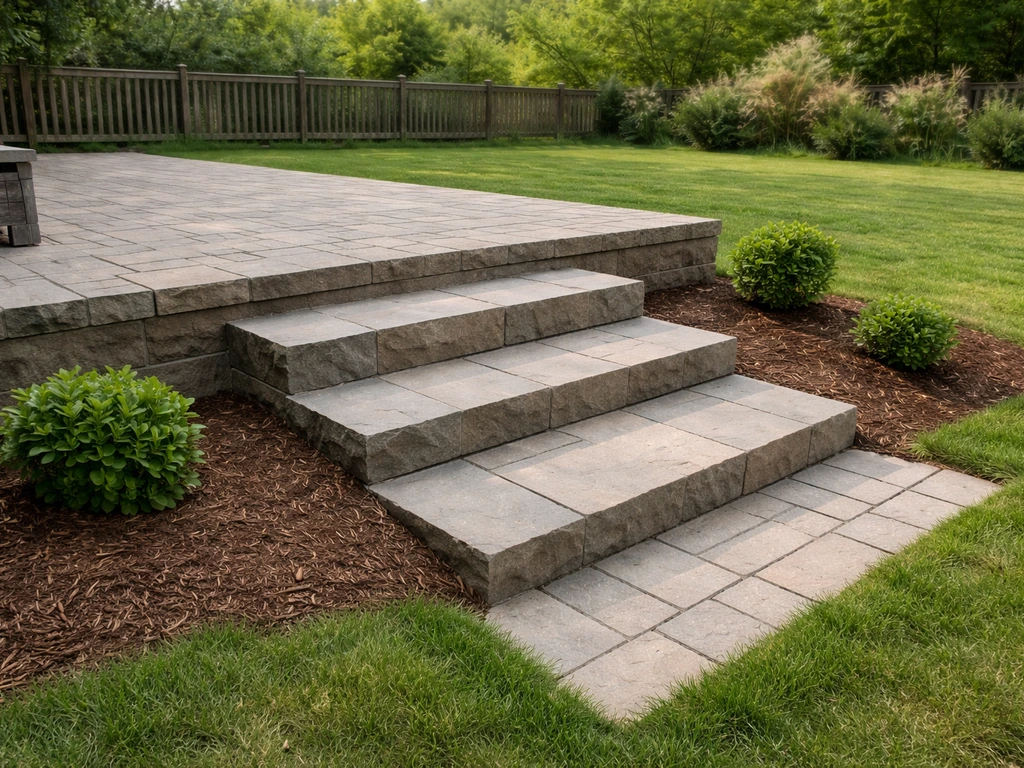
Straight Steps
Straight steps run perpendicular or parallel to the house and are the most straightforward to build and the easiest to get right on a first DIY attempt. For a fast, beginner-friendly approach to diy patio steps, straight layouts are often the most straightforward to build and get right on the first try. They work well for moderate grade changes of two to five steps and look clean against a rectangular patio. The trade-off is that they require a clear, unobstructed run of horizontal space equal to your step count times tread depth, so four steps at 12 inches each need 4 feet of run just for the treads, plus whatever landing or patio edge they meet.
Curved or Sweeping Steps
Curved steps feel more welcoming and give a patio a finished, designed look. They're especially effective when the patio edge is rounded or when you want to make a wide, gradual descent. Curved designs typically fan outward so each step is wider at the front than the back, this creates a natural visual flow and makes the steps feel less steep even at the same riser height. The challenge is material selection: curved steps work best with small-format pavers, brick, or irregular flagstone since cutting large slabs to a curve is time-consuming. Poured concrete is another good match for curves.
Stepped Terraces
When you have a long, gradual slope rather than a sharp drop, stepped terraces are often a better solution than a single staircase. A terrace design breaks the grade into multiple level platforms connected by one or two steps each. Each platform becomes usable space, a planting bed, a seating area, a firepit zone. This is one of the most satisfying designs to build because it transforms a problem slope into a series of functional outdoor rooms. The complexity goes up compared to straight steps, but the results are worth it on the right site.
Landing-Based Designs
A landing mid-flight serves two purposes: it breaks up a long stair run to make it safer and more comfortable, and it lets you change direction if the layout requires it. The IBC 2021 Means of Egress chapter includes landing-related provisions for stairs used as part of required egress, including exceptions for landing length in the direction of travel for certain occupancy types and groups blank" rel="noopener noreferrer">IBC 2021 includes landing-related provisions for stairs used as required egress. The IRC requires that stairs with more than a certain vertical rise have an intermediate landing, but even where code doesn't require it, a landing at the halfway point of a tall stair flight is a good design choice. Landings also create a natural place to set a potted plant, rest for a second, or change the stair direction from straight to angled. blank" rel="noopener noreferrer">Minimum landing depth should match the stair width (at least 36 inches in most cases).
Sizing and Layout Basics: Risers, Treads, Step Count, and Overall Dimensions
This is where DIYers most often go wrong, and it's where getting it right pays the biggest dividends. Uncomfortable steps are either too steep (short tread, tall riser) or too shallow (long tread, barely-there riser). Both feel awkward and can be dangerous.
The IRC sets the ceiling for riser height at 7 3/4 inches (196 mm) and the floor for tread depth at 10 inches (254 mm). Those are code minimums and maximums, not targets. For exterior patio steps where comfort matters more than saving space, aim for a 6 to 7 inch riser paired with a 12 to 14 inch tread depth. This combination gives you a comfortable, natural stride on outdoor stairs. The old rule of thumb is that two risers plus one tread should equal about 26 inches, so if your riser is 6.5 inches, your tread should be around 13 inches.
Step count is simple math: divide your total vertical rise by your target riser height, round to a whole number, then recalculate the exact riser height for consistency. If your door threshold is 21 inches above the patio, three steps at exactly 7 inches each works perfectly. If it's 22 inches, you'd use three steps at 7 1/3 inches, which is within code and barely noticeable. What you can't do is mix riser heights dramatically within the same flight. The IRC limits variation between adjacent risers in a flight, and uneven steps are a trip hazard.
Width is a dimension most people undersize. Code minimum for residential exterior stairs is 36 inches clear width, but 48 inches feels much more comfortable for two people passing or carrying something outdoors. If this is your primary entry from a back door, consider going 48 to 60 inches wide. Wider steps also just look better proportionally on a larger patio.
| Parameter | Code Minimum/Maximum | Comfortable Target for Patio Steps |
|---|---|---|
| Riser height | Max 7 3/4 in (196 mm) | 6 to 7 in |
| Tread depth | Min 10 in (254 mm) | 12 to 14 in |
| Step width | Min 36 in clear | 48 to 60 in for primary entry |
| Nosing projection | 3/4 in to 1 1/4 in (solid risers) | Match material thickness |
| Headroom (enclosed stair) | Min 6 ft 8 in (2032 mm) | N/A for open exterior steps |
| Landing depth | At least equal to stair width | 36 in minimum, 48 in preferred |
If you're building open-air exterior steps (not enclosed or covered), headroom isn't usually a concern. But if the steps pass under a deck or overhang, the IRC's 6-foot-8-inch headroom minimum applies, measured from the nosing line.
Material and Style Choices for Step-and-Patio Builds
Your step material should match or complement the patio surface, nothing looks worse than a concrete block staircase leading onto a flagstone patio. Beyond aesthetics, material choice affects cost, durability, DIY difficulty, and long-term maintenance. Here's a practical breakdown of the main options.
| Material | Best For | Approx. Cost (DIY) | Durability | DIY Difficulty |
|---|---|---|---|---|
| Concrete pavers | Most patio styles, budget builds | $8–$18/sq ft installed | Excellent, repairable | Moderate |
| Natural stone / flagstone | Rustic, organic looks | $15–$35/sq ft installed | Very high | Moderate to hard |
| Brick | Traditional, classic style | $10–$25/sq ft installed | Excellent | Moderate |
| Poured concrete | Clean lines, curved shapes | $8–$20/sq ft installed | Excellent (can crack) | Hard (forming required) |
| Composite / Trex | Deck-adjacent patios | $20–$40/sq ft installed | High, low maintenance | Moderate (framing needed) |
| Pressure-treated wood | Budget deck-style steps | $10–$20/sq ft installed | Good with maintenance | Easy to moderate |
| Segmental retaining blocks | Terraced / slope situations | $8–$15/sq ft installed | Very high | Moderate |
Concrete pavers are the workhorse option for DIY patio steps. They're forgiving to install, easy to cut, available in dozens of styles, and fully repairable if one unit cracks or settles. Brick steps have a timeless look and are similarly forgiving. Natural stone flagging looks stunning but requires more skill to set level. If your patio connects to a deck, composite materials like Trex make sense for continuity, though they require framing with stringers and corrosion-resistant hardware, and composite decking manufacturers have specific stringer spacing requirements you need to follow for warranty compliance.
Poured concrete is cost-competitive but demands proper forming and finishing skills, mistakes are permanent rather than fixable. For terraced or retaining-wall-style steps on steeper slopes, segmental retaining wall blocks are purpose-built for the job and stack without mortar. Wood steps (pressure-treated or composite) connect naturally to deck-adjacent patios and are some of the easiest to build for beginners, though they require corrosion-resistant fasteners and connectors appropriate for exterior use.
Base, Grading, and Drainage: Building Steps That Don't Shift
Here's the honest truth about patio steps that fail: almost every case of shifting, heaving, or cracking traces back to an inadequate base, not bad materials on top. You can lay perfect pavers on a bad base and watch them rock within two seasons. Get the base right and almost any material on top will perform well.
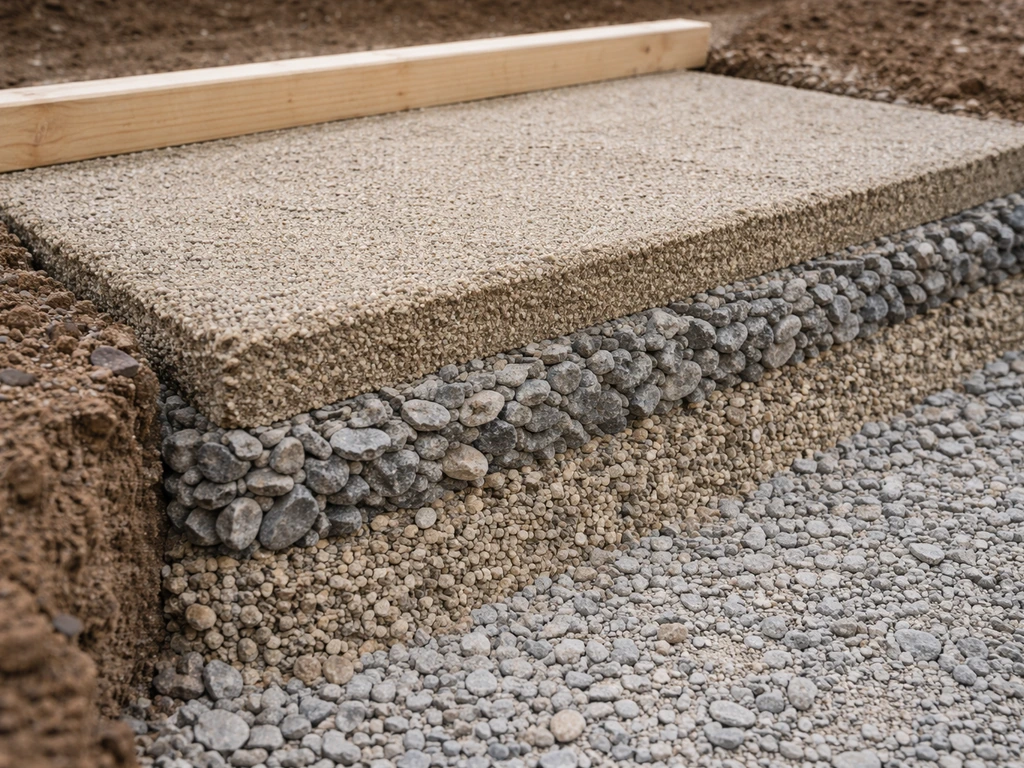
The standard base build-up for paver steps involves three layers. First, excavate to remove any organic topsoil, you don't want anything compressible under a step. Then compact native subgrade. Lay a geotextile fabric over the subgrade (this separates the granular base from the soil below, preventing intermixing over time without blocking drainage). On top of that, place and compact 4 to 6 inches of crushed stone base material, use 3/4-inch angular crushed stone, not pea gravel, because angular stone compacts and interlocks. Finish with a 1-inch bedding layer of coarse, clean sand for setting the surface material.
For step assemblies specifically, the base needs to extend a few inches beyond the step edges in every direction. Edge restraints on paver steps keep the bedding sand from migrating outward under load, use plastic or aluminum spike-down restraints. Without them, pavers spread laterally over time regardless of how well they're set initially.
Drainage is where a lot of DIY step designs underperform. Pitch every horizontal surface, patio and step treads, at about 1/4 inch per foot away from the house. Make sure the grade around the steps doesn't funnel water toward the foundation. If your site naturally drains toward the house or steps tend to sit in standing water, plan a French drain (perforated pipe in a gravel trench) or a catch basin routed to a dry well before you build. Adding drainage after the fact is messy and expensive.
In freeze-thaw climates, depth of frost is the other key variable. Your crushed stone base needs to sit below or account for frost depth in your region. A base that stops too shallow will heave the steps every winter. This is one reason a proper 6-inch compacted base (or deeper in northern climates) is worth the extra excavation effort.
DIY Build Walkthrough: From Marking Layout to Installing Patio Steps
This is the part where planning becomes action. Follow these steps in order and you'll avoid the most common DIY mistakes. If you're planning diy patio steps, use these section-by-section guidelines to nail layout, dimensions, drainage, and materials.
- Measure your total rise: Use a level string line or a long level and measuring tape to find the exact vertical distance from your door threshold (or deck edge) to finished grade at the patio surface. Write this number down—it drives everything else.
- Calculate your step count and riser height: Divide total rise by your target riser height (try 7 inches first). Round to the nearest whole number, then divide total rise by that number to get your exact riser height. Confirm it's 7 3/4 inches or less.
- Determine total run: Multiply step count by your chosen tread depth (12 inches is a solid target). Add 12 inches for a landing pad at the bottom if needed. This tells you how far the steps will project away from the house.
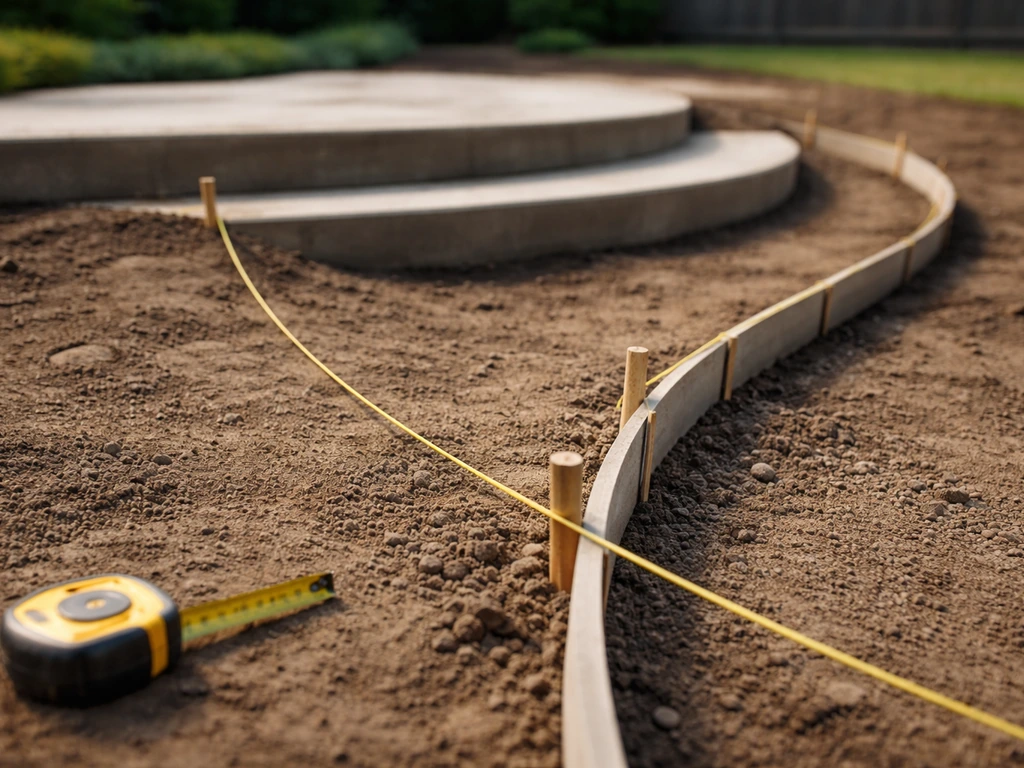
- Mark the layout on the ground: Use stakes and string lines to mark the outer edge of each step tread and the sides of the staircase. Spray paint the outline on the ground. Step back and look at it—adjust position or width now before any digging.
- Excavate and grade: Dig out the step footprint to the depth needed for your base (typically 7 to 9 inches below finished tread height for a paver build). Remove all topsoil and organic material. Compact the subgrade with a plate compactor.
- Install geotextile fabric: Roll out the fabric over the excavated area. Overlap seams by at least 12 inches. The fabric goes on the native subgrade before any gravel.
- Place and compact crushed stone base: Add 3/4-inch angular crushed stone in 2- to 3-inch lifts, compacting each lift. Build up to the correct height for each step, creating the rough stair shape in compacted gravel.
- Check your heights: Before adding bedding sand, set a level across each step platform and measure the height of each tread surface. Adjust gravel as needed so every riser will be consistent once surface material is added.
- Spread 1-inch bedding sand: Screed a 1-inch layer of coarse bedding sand over each tread platform. Don't compact the sand—it's a setting bed, not structural. Keep it as even as possible.
- Set your surface material: Place pavers, stone, or brick starting from the bottom step up, keeping consistent overhangs and joints. For solid-riser steps, maintain a 3/4-inch to 1 1/4-inch nosing projection at each tread edge.
- Install edge restraints: Spike restraints along the sides and front edges of each step, flush with the top of the base material. Don't skip this—lateral movement starts at the edges.
- Fill joints with polymeric sand: Sweep polymeric sand into all joints. Compact lightly with a plate compactor (use a rubber pad to protect pavers). Blow off excess, then activate with water per the product instructions. Allow it to cure fully before use—typically 24 hours dry weather minimum.
- Check pitch and drainage: Lay a level on each tread and confirm the 1/4-inch-per-foot pitch away from the house. Verify water runs off the steps, not toward them.
If you're building wood or composite steps rather than masonry, the process shifts to framing with stringers. Cut your stringer notches to match your calculated riser and tread dimensions, space stringers no more than 16 inches on center for most composite decking (some products require tighter spacing, always check manufacturer specs), and use corrosion-resistant hardware throughout. Composite decking manufacturers like Trex have specific installation instructions for stair applications that differ from standard deck applications, so read those before cutting anything.
Budgeting, Permits, and Safety Checks Before You Start
Permits are the part most DIYers want to skip, but it's worth a five-minute call to your local building department before you start. If you need a short-term plan, temporary steps for patio access can bridge the height change until your permanent stair layout and base are ready. In most jurisdictions, patio steps attached to a house or that exceed a certain height require a permit. It varies wildly by location, some areas permit anything under two steps or under a certain square footage, others require permits for any exterior stair. Getting caught without a permit on a work that affects resale or insurance isn't worth the risk. If a permit is required, you'll typically need to submit a simple plan showing dimensions and materials.
Safety checks are non-negotiable regardless of permit status. Before you finalize your design, confirm these items:
- Riser height is 7 3/4 inches or less, consistent within a single flight
- Tread depth is 10 inches or greater (12+ inches recommended for exterior comfort)
- Step width is at least 36 inches clear
- If you have four or more risers, handrails are typically required by code—plan for posts and rails in your design and budget
- Headroom is at least 6 feet 8 inches if steps pass under any overhead structure
- The bottom step meets the patio or grade without a trip hazard at the transition
- All surfaces have adequate drainage pitch and no standing water accumulates
On budget: material costs for a basic three-step paver staircase on a standard back-door threshold can run $200 to $600 in materials for a DIY build, depending on paver style and width. A wider or more elaborate design using natural stone, or one that requires significant grading and drainage work, can push past $1,000 in materials. Wood or composite step builds can fall anywhere in that range depending on whether you're matching an existing deck system. The biggest cost multiplier is base material and excavation, if you need to bring in gravel and rent a plate compactor, factor that in early.
Once you've settled on a layout and material direction, the next decisions are about the specifics of what you're building. If wood is the direction, a simple set of pressure-treated steps is one of the most approachable DIY builds there is. If you are planning wooden steps for patio access, choose the right riser and tread dimensions and use exterior-rated framing hardware. Follow the same basic riser-and-tread math when you plan trex steps to patio access, then frame and fasten everything to outdoor-rated specs. Composite options like Trex give you longevity without painting or sealing. If you plan to use Trex as your stair material, follow the manufacturer’s stair installation guidance for risers, treads, and stringer spacing. Composite patio steps work well when you want a long-lasting, low-maintenance stair system that connects neatly to deck surfaces Composite options like Trex. Brick steps offer a classic look with good DIY accessibility. And if you want the cleanest design with the most flexibility, a paver step build with a proper compacted base is hard to beat for long-term performance and repairability. The layout you've designed here is the foundation, the material choice is what makes it yours. If you want a faster, less labor-intensive option, premade patio steps can be a practical alternative, especially when your layout matches standard dimensions.
FAQ
Can I build patio steps directly on top of existing concrete or pavers?
You can, but only if the existing surface is stable and properly sloped, otherwise the new steps can settle and crack at the interface. If the old surface is soft, uneven, or has any rocking spots, plan to excavate back to solid subgrade and rebuild the base, then match the finished step height to the door threshold.
How do I handle a door threshold that isn’t a clean, known height above grade?
Use the threshold nosing point, measure to finished grade at the patio edge (not at the middle of the yard), then remeasure after you decide on the tread thickness and bedding/surface material. If your patio will be raised with pavers, add that thickness into your rise math so the final top tread lands at the correct height.
What tread depth should I use if I have limited horizontal space?
If you cannot reach a 12-inch tread, consider reducing the step count by using a landing or a terrace approach so each tread can stay within a safe, walkable range. Avoid making “one very narrow tread” just to fit, that usually creates an awkward step length and increases trip risk.
Are curved or angled patio steps harder to build than straight steps?
Curved steps are often more difficult mainly because of layout and edge restraints. They work best with smaller units like brick or small pavers, and you will still need a solid compacted base with restraints, otherwise the curved bedding sand can migrate and the curve will lose definition over time.
How much should steps be wider than the door or the walking path?
A practical target is to make the clear width at least equal to the width you expect to carry items through (often 36 inches minimum code clear width, 48 inches more comfortable). Also ensure the outside landing or top tread area is wide enough to turn a foot placement without overstepping onto landscaping.
Do patio steps need handrails and lighting even if they are short?
If the steps are a primary entry, treat lighting and hand support as functional safety features, even when permitting rules do not require them. Add low, non-glare path lighting and consider a rail when the flight is more than a couple of risers or when the doorway is frequently used in rain or at night.
What is the best way to set the base so pavers do not heave in winter?
Your base must be below frost depth or designed to account for it, plus you need a properly thick, well-compacted crushed-stone layer. Also keep water from pooling on the step surface by maintaining the outward pitch and routing drainage away from the house so the base stays drier between freeze-thaw cycles.
How do I prevent water from getting trapped behind or under the steps?
Plan a continuous drainage path, pitch horizontal surfaces away from the house, and add edge details that keep fines from migrating upward. If the site drains toward the steps, use a French drain or a catch basin routed to a dry well, and confirm the discharge point is not reintroducing water near the foundation.
Should I use geotextile fabric under patio step bases in all cases?
Geotextile is strongly recommended when your subgrade has mixed soils or any risk of soil intermixing with your crushed stone. It is less critical over very clean, uniform granular soil, but for most DIY patio situations it helps preserve the base structure without blocking drainage.
How do I choose between a landing and just adding more steps?
Choose a landing when the rise is tall enough that people want a pause, when you need a direction change, or when you are tight on usable horizontal space and can “buy” comfort with a platform. Landings also help with group traffic and can reduce the chance of uneven foot timing on longer flights.
What’s a common mistake with riser height calculations?
Mixing riser heights within a flight, or forgetting to include the surface thickness and bedding sand, so the actual finished riser ends up taller or shorter than planned. Do your math using the total finished height, then lock the entire run to one riser height and verify at the top landing condition.
Do I need edge restraints for paver steps, even if the steps are short?
Yes. Even a short set can shift laterally under repeated foot traffic, especially on angled or curved layouts. Spike-down plastic or aluminum restraints help hold the bedding sand in place and keep the step geometry consistent as the base settles.
When should I consider premade patio steps instead of building from scratch?
Premade steps can be a good option when your grade change matches standard dimensions and you want a faster install with fewer layout variables. If your threshold height is unusual, you have a complex slope, or you need custom drainage, a site-built design usually ends up safer and easier to fine-tune.
Next Article
How to Update Patio: Complete DIY Guide to Repair or Rebuild
How to update patio: DIY guide to assess, choose materials, and follow step-by-step repairs or full rebuilds with costs.