Wooden patio steps are one of the most satisfying weekend builds you can tackle yourself. With pressure-treated lumber, a set of stair stringers, and a solid plan for rise and run, you can go from a bare drop-off at your patio edge to a safe, good-looking set of steps in a single weekend. The key is getting your measurements right before you cut anything, choosing lumber rated for ground contact where it counts, and protecting the finished steps against the rot and warping that kill most DIY stair projects within a few years. If you want a faster route, premade patio steps can also be matched to your rise and tread depth with the right hardware and support.
Wooden Steps for Patio: DIY Design and Build Guide

Nolan Lennox
28 Apr 2026
Where wooden steps fit into your patio design
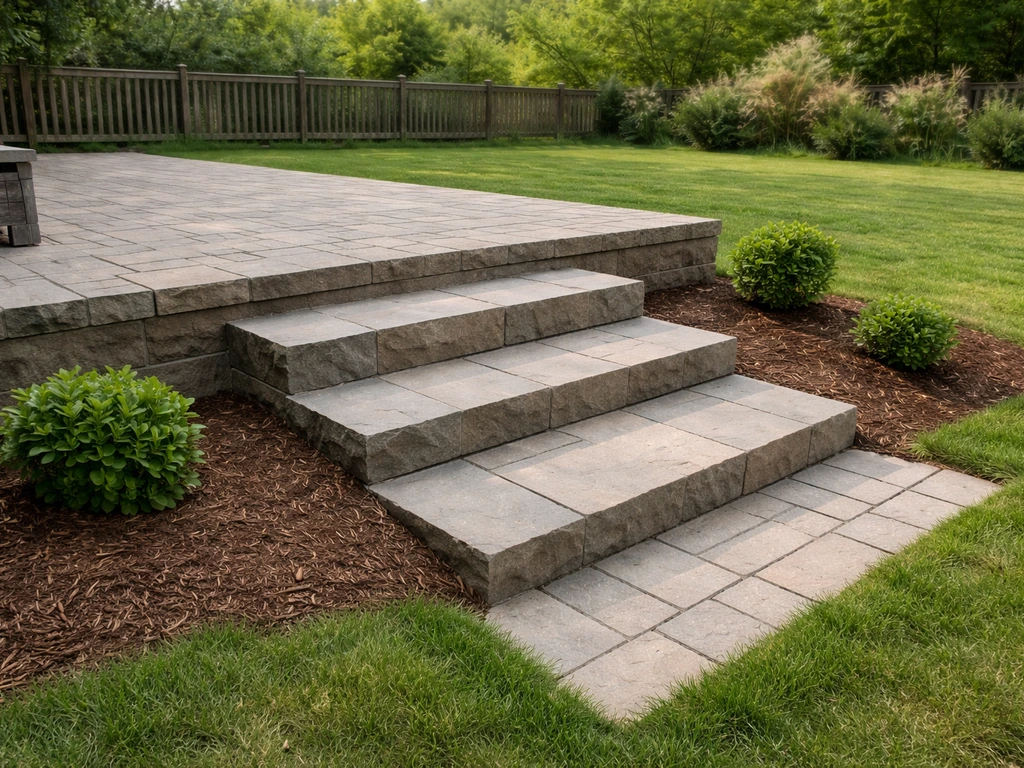
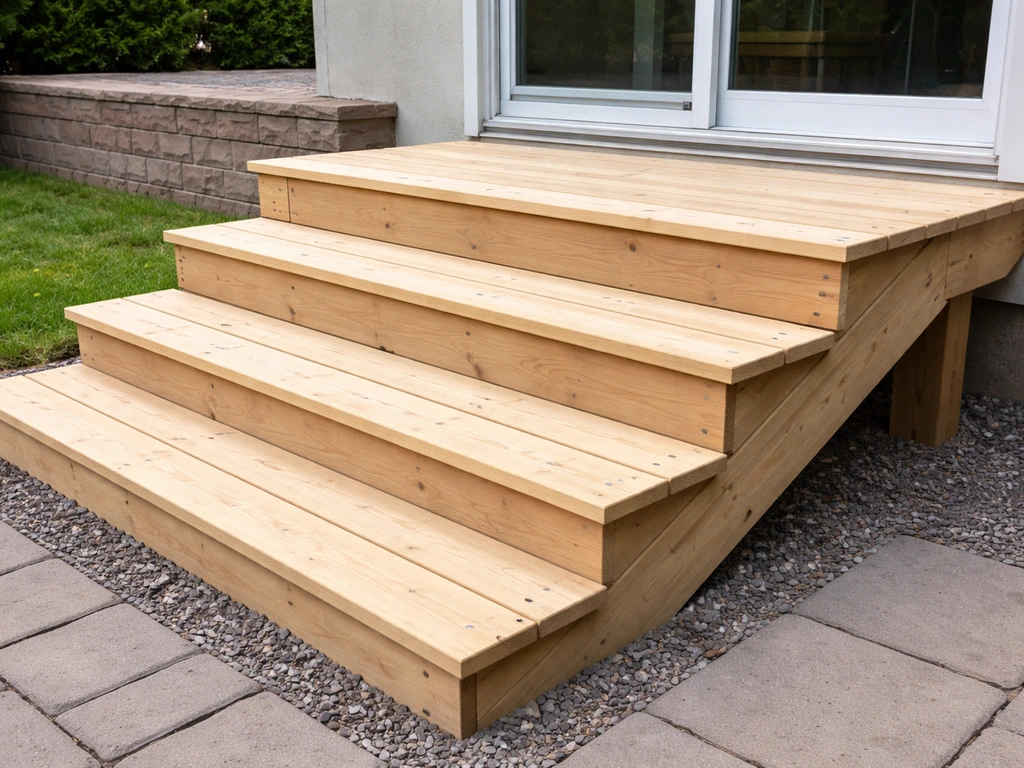
Wooden steps work best when your patio sits elevated above grade, typically anywhere from one step (about 7 inches) to four or five steps (around 30 to 36 inches) above the surrounding yard. They're a natural fit for wood or composite decks, but they also look great transitioning from a concrete patio or brick patio to the lawn below. If your yard has brick patios or brick patio steps nearby, plan the transitions carefully so the height and drainage line up well concrete patio or brick patio. The warm, natural look blends with most backyard styles and, unlike brick or stone steps, you can cut and adjust wood on-site with basic tools.
Common layouts include a straight run down from a door threshold or deck edge, a wider platform-style entry with two side-by-side stringers spread wide for a grand entrance feel, and an L-shaped or wraparound configuration that follows the patio corner. If your patio is only one step off the ground, a simple single-tread block step works fine. For two or more steps, you'll want full framed stringers. Where you want a more polished or low-maintenance look, composite steps or Trex-style systems are worth considering as a comparison, but pressure-treated wood stays the most budget-friendly and easiest to work with for most DIYers.
Planning your rise, run, and number of steps
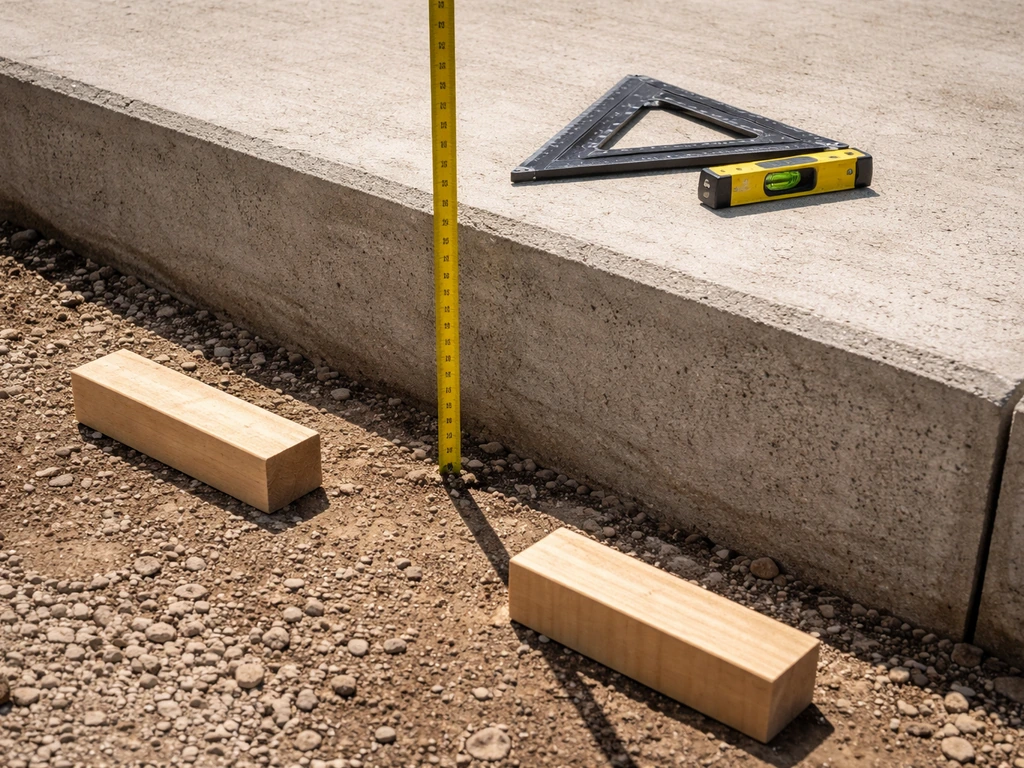
Start by measuring the total rise, which is the vertical distance from the patio surface (or door threshold) down to the ground or landing where the bottom of the steps will sit. Measure this carefully with a level and a tape measure. That number drives everything else. A patio steps design that matches your rise, tread depth, and layout will feel safer and look more intentional.
Residential stair code sets a maximum riser height of 7-3/4 inches and a minimum tread depth (run) of 10 inches, with no more than 3/8 inch of variation between any two risers or treads in the same flight. A comfortable, commonly used target for outdoor deck stairs is a 7-1/2 inch rise and an 11-inch run. These proportions feel natural underfoot and stay well within code. To find your number of steps, divide your total rise by your target riser height and round to the nearest whole number, then recalculate the actual riser height by dividing total rise by that number.
For example, if your patio sits 22.5 inches above grade, dividing by 7.5 gives you exactly 3 risers. Dividing by 3 confirms each riser is 7.5 inches. If total rise were 24 inches, 3 risers at 8 inches each would exceed code, so you'd use 4 risers at 6 inches each instead. Always do this math before touching a saw. Also note that handrails are required when a stair has 4 or more risers, so factor that into your design and budget early. blank" rel="noopener noreferrer">Handrails are required by IRC provisions when a stair has four or more risers, per IRC R311.7.6 and related stair and landing requirements blank" rel="noopener noreferrer">handrails are required when a stair has 4 or more risers.
| Total Rise | Number of Risers | Actual Riser Height | Total Run Needed (11 in treads) |
|---|---|---|---|
| 7–8 in | 1 | 7–8 in | 11 in |
| 14–15 in | 2 | 7–7.5 in | 22 in |
| 21–22.5 in | 3 | 7–7.5 in | 33 in |
| 28–30 in | 4 | 7–7.5 in | 44 in |
| 35–37.5 in | 5 | 7–7.5 in | 55 in |
Choosing your materials and build system
Wood species and pressure-treatment rating
For outdoor patio steps, pressure-treated (PT) lumber is the standard choice. Not all PT lumber is equal though. Stringers and any parts close to or touching soil need to be rated UC4A or UC4B (ground-contact use category). Lumber stamped "above ground only" will rot out within a few years if it stays damp near soil. For treads that are off the ground and can dry out between rains, above-ground-rated PT works fine, and it's often less expensive. Common sizes: 2x12 for stringers (gives enough meat to notch the rise/run cuts), 2x6 or 5/4x6 decking boards for treads, and 2x8 or 2x6 for risers if you're adding them.
Stringers, treads, and risers
Stringers are the angled side supports that carry all the weight. For most patio steps up to about 48 inches wide, two stringers (one on each side) are enough. For wider steps, add a third stringer in the middle. Cut the rise/run notches with a circular saw and a framing square, then finish the corners with a jigsaw to avoid overcutting (overcutting weakens the stringer). Each tread can be built from two side-by-side 2x6 boards, which gives you roughly 11 inches of depth with a small gap for drainage, right at the code-compliant target. If you prefer a solid look, a single 2x12 tread or a piece of 5/4 decking cut to width works too. Risers (the vertical face boards) aren't structurally required but make the steps look finished and keep debris from collecting underneath. Use 1x8 or 2x8 PT boards for risers.
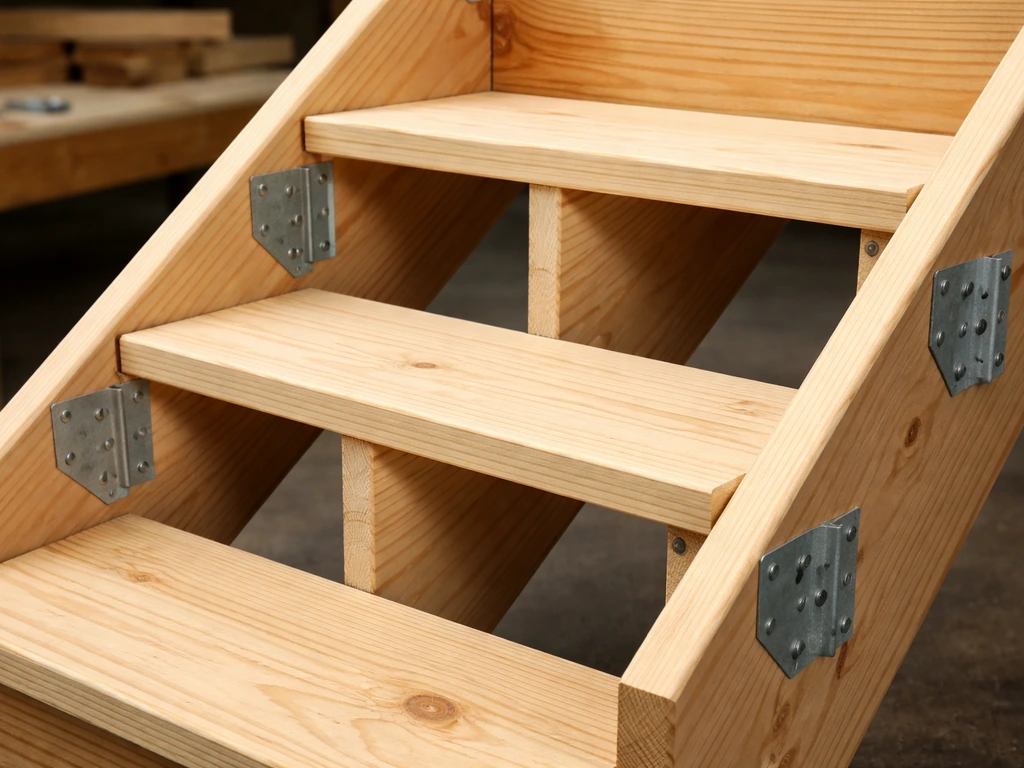
Fasteners and connectors
Use hot-dipped galvanized or stainless steel fasteners throughout. Standard zinc-plated screws and nails react with the preservatives in PT lumber and corrode quickly, which is a structural failure waiting to happen. For stringer-to-patio or stringer-to-ledger connections, use code-rated joist hanger hardware or stair stringer connectors, not just toe-nailed screws. This connection point is one of the most common failure spots in DIY stair builds. Pre-drill tread boards near the ends to prevent splitting, and use 3-inch deck screws driven at a slight angle for a tight pull-down.
Wood vs. composite: a quick comparison
| Factor | Pressure-Treated Wood | Composite (e.g., Trex) |
|---|---|---|
| Upfront cost | Lowest | Higher (2–3x more) |
| Rot/decay resistance | Good with proper treatment | Excellent |
| Maintenance | Seal/stain every 1–2 years | Minimal (occasional cleaning) |
| DIY difficulty | Easy to cut and work with | Easy to cut, heavier |
| Appearance over time | Can gray, check, or warp | Holds color well |
| Lifespan (maintained) | 15–25 years | 25–30+ years |
For most DIYers on a budget, pressure-treated wood is the right call. If you already have a Trex or composite deck, matching the steps in composite makes sense for a unified look, but that's a separate build process worth exploring on its own. If you decide to switch to Trex steps for your patio, the process is similar but the material choice changes the details and fastening method Trex steps to patio. If you want a trex patio, pay attention to the fastening method and start from the same rise and run measurements used for wood steps Trex steps for your patio.
Site prep and getting your foundation right
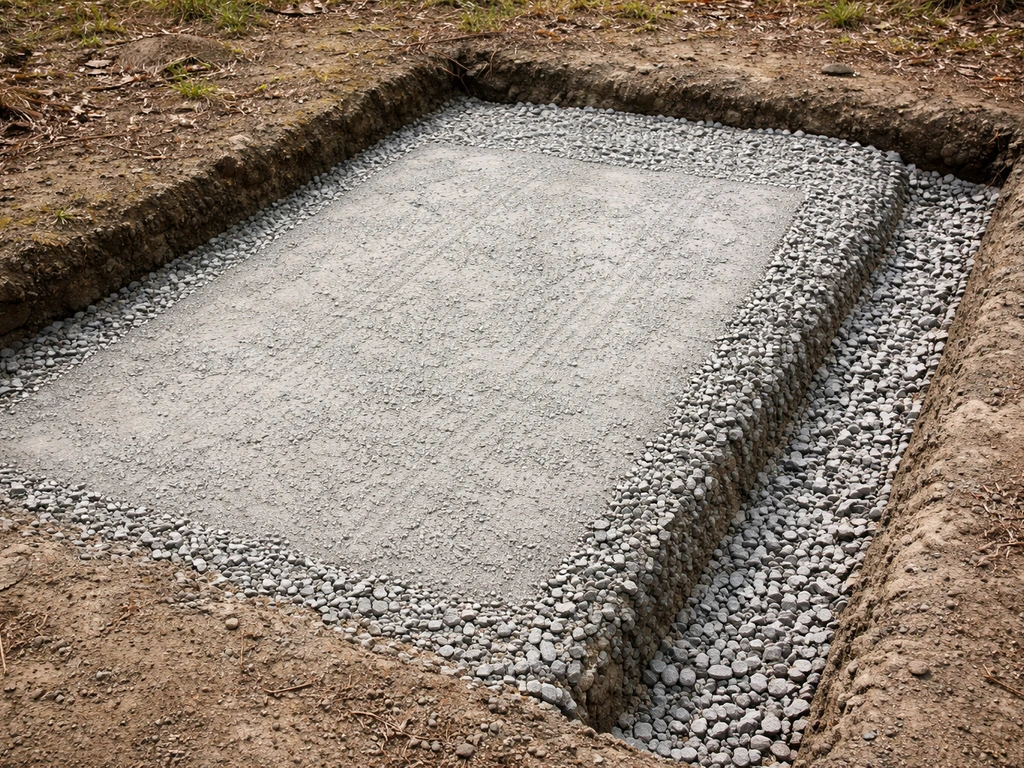
This is the step most beginners skip, and it's why their steps shift, settle unevenly, or rot from the bottom up. Before you build anything, prepare the ground where the base of your stringers will land. If you need a quick way to stabilize things while you plan the final build, use temporary steps for patio so you can stay safe during the transition.
If the steps land on an existing concrete patio, you're in good shape. Use a concrete anchor bolt or a post base connector to secure the stringer feet directly to the slab, keeping the wood slightly elevated so water doesn't pool under it. If the steps land on soil or grass, don't let the stringer ends sit directly in the dirt. Dig out about 6 inches of soil, fill with compacted gravel, and set a solid paver block or small concrete pad under each stringer foot. This promotes drainage, prevents frost heave from rocking the steps, and keeps the end-grain wood out of moisture. For taller stairs with significant load, poured concrete footings or precast concrete pier blocks are worth the extra step.
While you're prepping the ground, think about drainage away from the house. The bottom landing area should slope away from your foundation at roughly 1/8 inch per foot. Water pooling under the steps is the number one cause of premature rot, even with PT lumber.
How to build wooden patio steps: from framing to fastening
- Sketch your design and confirm measurements. Write down total rise, number of risers, riser height, tread depth, and overall run. Double-check that your stringer layout fits the available space between the patio edge and the yard below.
- Mark and cut your stringers. On a 2x12 board, use a framing square to mark each rise and run. Mark all steps before cutting. Cut notches with a circular saw, stopping just short of the corner, then finish with a hand saw or jigsaw to avoid overcutting the wood fibers.
- Prepare the stringer attachment at the top. If attaching to a wood ledger or deck frame, use stair stringer connector hardware rated for the load. If attaching to a concrete patio edge, use a ledger board anchored with concrete screws, then attach stringers to the ledger.
- Set and level the bottom of the stringers. Place your paver blocks or concrete pads, set the stringers in position, and check that the top of each stringer aligns flush with the patio surface. Adjust base height as needed to get everything plumb and level.
- Install a temporary brace across the stringers to hold spacing while you work. Standard spacing for a 36-inch-wide stair is two outer stringers at 33 inches on center with a middle stringer if the width exceeds 36 inches.
- Attach stringer feet to the base. Use post base hardware or concrete anchors at the bottom and your stringer connectors at the top. This is the most critical structural connection, take your time here.
- Install risers first if you're using them. Fasten 1x8 or 2x8 riser boards to the stringer faces with 2-inch exterior screws, flush with the top of each notch.
- Install treads. Lay two 2x6 boards across each step with a 1/4 inch gap between them for drainage. Let the front board overhang the riser face by about 1 inch to form a nosing. Pre-drill near ends and fasten with 3-inch exterior deck screws, two per board per stringer.
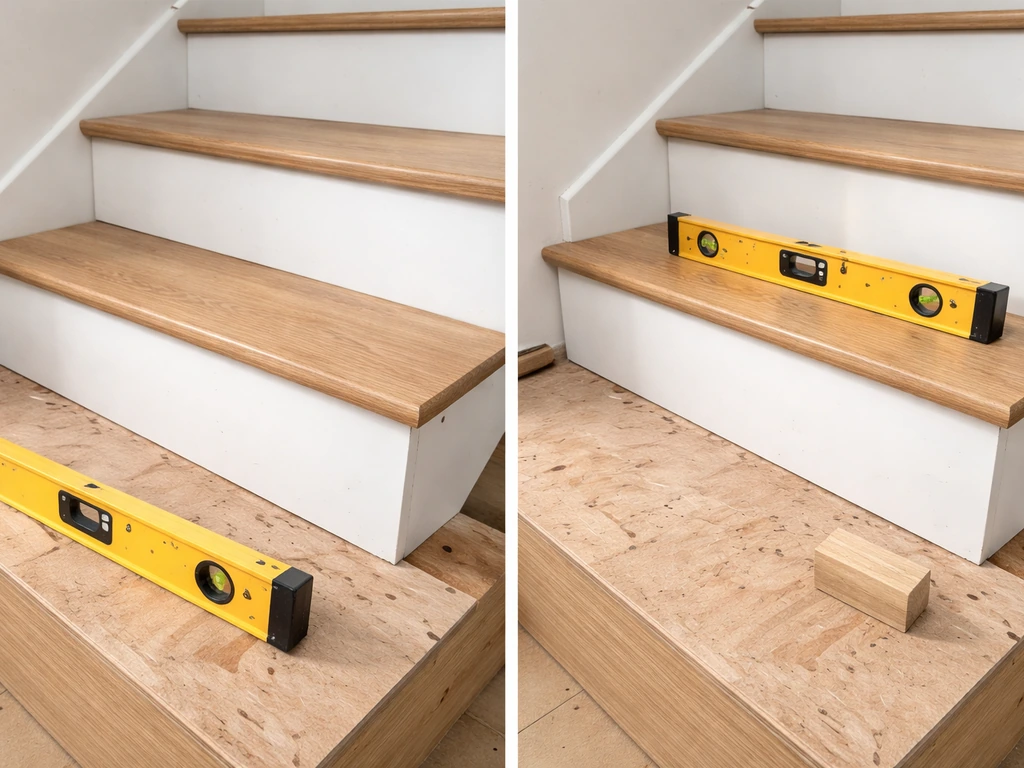
- Check each tread as you go. Set a level on each tread surface and confirm it's level side to side and has a slight forward pitch (about 1/8 inch per foot) for water runoff. Shim under stringers at the base if needed before the last tread goes in.
- Install handrails if you have 4 or more risers. Post bases or through-bolted 4x4 posts at the sides of the stringers, with a graspable rail at 34 to 38 inches above the tread nosings, are both code-required and genuinely useful for safety.
Finishing your steps so they actually last
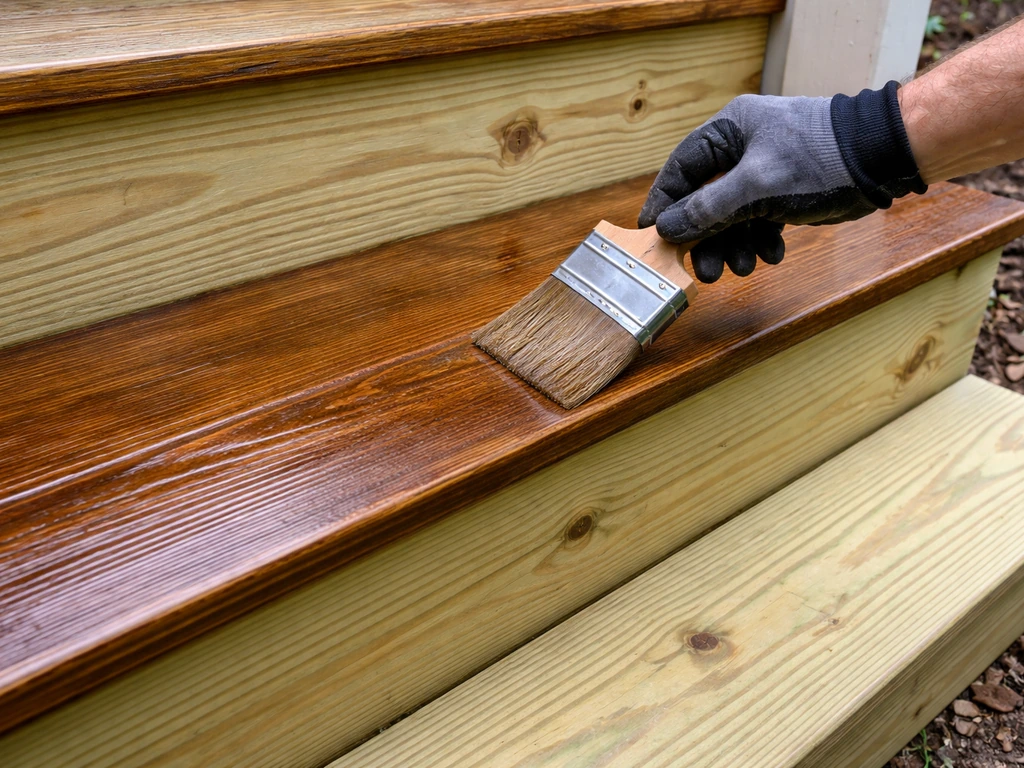
New PT lumber needs to dry out before you apply any finish. Fresh PT wood is often still wet from the treatment process and won't absorb stain or sealer properly. Wait at least 60 to 90 days after installation, or do a simple water-droplet test: if a water droplet beads on the surface, the wood isn't ready. Once it absorbs water readily, you're good to finish.
For sealing and staining, use a penetrating exterior wood stain with UV inhibitors and water repellents, not a film-forming paint, which will peel on horizontal surfaces exposed to foot traffic and weather. Apply two coats to end grain especially, which soaks up moisture fastest and is where rot starts. Semi-transparent stains show the wood grain and typically last longer on horizontal surfaces than solid colors. Plan to reapply every one to two years depending on your climate and sun exposure.
For slip resistance, add an anti-skid aggregate to your stain or finish on the tread surfaces. Products like HOMAX TREAD TEX or similar anti-skid additives mix directly into paint or deck stain and add a gritty texture that dramatically reduces the slipping risk on wet wood. This is especially important on the nosing (the front edge of each tread), which is where most slips happen. You can also apply anti-slip strips as a low-tech alternative.
On the rot-prevention side: keep the end-grain cuts on your stringers well sealed, make sure water can drain freely from under treads (those gaps between 2x6 boards do real work), and don't let leaves or debris pile up in the corners where stringers meet risers. Those corners stay damp and are the first place rot shows up, usually within two to three years on neglected steps.
Budget, tools, and the mistakes that'll cost you a weekend
Rough budget for a typical 3-step, 36-inch-wide build
| Item | Approximate Cost |
|---|---|
| Two 2x12x10 PT stringers | $30–$50 |
| Tread lumber (six 2x6x4 PT boards) | $25–$40 |
| Riser boards (three 1x8x4 PT boards) | $15–$25 |
| Hardware (connectors, screws, anchors) | $20–$40 |
| Gravel/paver blocks for base | $10–$20 |
| Stain/sealer + anti-skid additive | $25–$50 |
| Total (materials only) | $125–$225 |
Add handrails and posts and you're looking at another $50 to $100 in hardware and lumber. Hiring out the labor for a simple stair like this typically runs $300 to $600, so the DIY savings are real.
Tools you'll need
- Tape measure and pencil
- Framing square (essential for laying out stringers)
- Circular saw
- Jigsaw or hand saw (for finishing stringer notch corners)
- Drill/driver with bits
- Level (2-foot and 4-foot)
- Speed square
- Hammer
- Safety glasses and hearing protection
Common mistakes and how to avoid them
- Miscalculating rise/run: Always verify your math with a stair calculator before cutting. A small error on one riser makes the whole staircase feel off and can exceed code tolerances.
- Overcutting stringer notches: Circular saw cuts that go past the corner line weaken the stringer significantly. Use a jigsaw or hand saw to complete the corner cut cleanly.
- Skipping the ground prep: Stringers sitting directly on soil will rot and shift. Even a simple compacted gravel bed makes a big difference.
- Using the wrong PT rating: 'Above ground only' lumber at or near soil is a rot guarantee. Buy ground-contact rated (UC4A/UC4B) lumber for stringers.
- Using the wrong fasteners: Standard zinc screws react with PT preservatives and fail. Use hot-dipped galvanized or stainless steel throughout.
- Weak stringer-to-patio connection: Toe-nailing alone isn't enough at the top connection. Use rated stringer connector hardware here.
- Finishing too soon: Staining wet PT lumber wastes your time and money. Wait until the wood passes the water-droplet test.
- Forgetting the forward pitch: Flat treads pool water and stay wet. A slight forward slope sheds water and extends the life of the steps.
If your steps feel uneven after installation, the most likely culprits are a base that settled unevenly or stringers that weren't cut to identical geometry. Check each riser height with a tape measure and compare. If one stringer settled, you can often shim the base or add blocking underneath before it becomes a bigger problem. Catching this early, before all the treads are installed, is the reason the step-by-step verification approach matters so much.
Once you've got the steps built and finished, take a photo of the construction details before the ground grows back around the base. When it's time to reseal in a year or two, you'll thank yourself for knowing exactly what's under there. A well-built set of wooden patio steps, done right from the ground up, should give you 15 to 25 years of use without any major work.
FAQ
Can I build wooden steps for a patio if the landing is on uneven ground or a sloped yard?
Yes, but avoid forcing the stair geometry to match a tilted base. Take measurements at the intended landing points for each stringer, keep riser heights consistent, and level the stringer feet by using separate gravel pads or shims at the base pads. If the slope is more than a gentle grade change, consider an adjustable landing or a different layout (for example, an L-shape) so the steps do not “twist” while staying level across.
What tread spacing should I use between boards for drainage and still feel stable?
A small gap, roughly 1/4 to 3/8 inch between adjacent tread boards, usually balances drainage and comfort. Keep the top edges in the same plane, pre-drill near board ends to prevent splitting, and make sure the gap pattern is consistent across every tread so the feel does not change from step to step.
Do I need risers if I want the lowest-cost, simplest build?
You can skip risers structurally, but leaving the face open usually increases debris accumulation and makes rot-prone corners more likely. If you do omit them, add extra attention to sealing end grain, keep the underside dry with real drainage gaps, and plan more frequent cleanout after leaf drop or heavy storms.
How do I handle a patio step build when the bottom lands on pavers or a raised concrete edge instead of bare soil?
Do not rely on screwing into pavers. Instead, set each stringer foot on a small, solid bearing point (for example, a paver block on compacted gravel or a narrow concrete pad) and secure the stringer with the appropriate post base connector or concrete anchor if you have actual concrete beneath. The goal is a solid, immovable base that can resist frost movement and lateral load.
Is it safe to use deck screws and pocket-hole joints for the stair frame?
Avoid structural pocket-hole joints for stringer-to-frame connections. For stair builds, focus on through fasteners and connector hardware rated for stair or joist-type connections at load paths. Deck screws can be fine for attaching treads, but at connection points that carry weight, use connector hardware and follow pre-drilling guidance to reduce splitting.
What’s the best way to prevent end-grain from rotting early on wooden patio steps?
End grain takes in water fastest, so seal it thoroughly before final assembly when possible. When you cut stringer notches and riser/tread ends, apply penetrating stain or end-grain sealer to fresh cuts and reapply after installation to any areas exposed during trimming. Also, avoid leaving end-grain directly in contact with gravel, mulch, or damp soil by elevating the bottom off the ground.
How can I improve slip resistance if my steps get algae or are shaded most of the day?
If algae forms in shade, prioritize a textured tread finish plus an anti-skid product, and make sure the nosing edge has the most grit or texture where feet land. Consider using a semi-transparent stain with anti-skid aggregate and reapplying on a shorter schedule in humid climates, because slickness usually returns as the surface wears smooth.
My stairs creak or feel springy after building, what should I check first?
Most “springy” feel comes from inadequate support width, undersized or too few stringers, or treads that flex between stringers. Verify stringer spacing, ensure you have the recommended number of stringers for your width, add blocking if needed, and confirm tread boards are fully seated and fastened near both ends. Also check that the base pads are equally compacted so the stringers are not rocking.
What’s the correct approach for handrails on outdoor patio steps with 4 or more risers?
If you have 4 or more risers, plan rail hardware before you close in the stairs, because adding posts later can require rework. Set post bases on solid bearing pads or concrete connectors, keep posts plumb, and make sure the rail height and end details do not interfere with the first and last step landing.
How long should I wait to stain or seal new pressure-treated wood, and what if I can’t wait 60 to 90 days?
The safest approach is waiting 60 to 90 days and confirming readiness with a water-droplet test. If you must shorten the timeline, expect reduced absorption and faster wear, so you may need earlier reapplication or a more breathable penetrating sealer designed for wetter wood. Do not apply film-forming coatings early, they can trap moisture and peel on tread surfaces.
Should I build wooden patio steps out of one continuous board length or multiple pieces?
Multiple boards are typically normal for treads, but keep tread lengths and fastener locations consistent so the top surface stays uniform. Avoid butt-joining tread boards in the middle of a tread if it creates a weak seam, instead cut boards to fit and fasten so each tread is adequately supported across its width and ends.
How can I tell if the stringers were cut to identical geometry even if the steps aren’t installed yet?
After cutting, dry-fit the stringers and measure from the reference line of each notch to verify riser and run dimensions match. Check the spacing and depth of each notch using a square and tape, then confirm the two stringers share the same overall run and rise before attaching any treads. If one stringer differs, shimming later usually cannot fully fix uneven riser heights.
What maintenance should I do annually to keep wooden steps for a patio from failing sooner than expected?
Once or twice per year, remove debris, check the sealed end-grain areas and tread gaps for water-darkened spots, and inspect fasteners and stringer contact points for movement. After heavy storms, look for standing water under the steps, and if water pools again, correct the drainage slope before it accelerates rot.
Next Article
Patio Steps Design: DIY Layout Ideas, Measurements, and Builds
DIY patio steps design guide with layout options, key measurements, riser tread targets, landings, and build-ready mater