In the UK, patio drainage isn't just a nice-to-have, it's wrapped into building regulations through Approved Document H, which covers surface water drainage for buildings and their surrounding areas. The practical upshot for a DIYer is this: your patio must direct water away from the house, it must not increase flood risk to neighbouring properties, and surface water must not be discharged into a foul sewer. Get those three things right, a proper fall away from the house, a clear outlet route (soakaway, channel drain, or watercourse), and permeable or directed drainage that doesn't pond, and you'll be building compliantly and avoiding the damp and waterproofing nightmares that come with getting it wrong.
Building regulations patio drainage: DIY compliant guide

Nolan Lennox
5 Jul 2026
Why patio drainage matters more than most people think
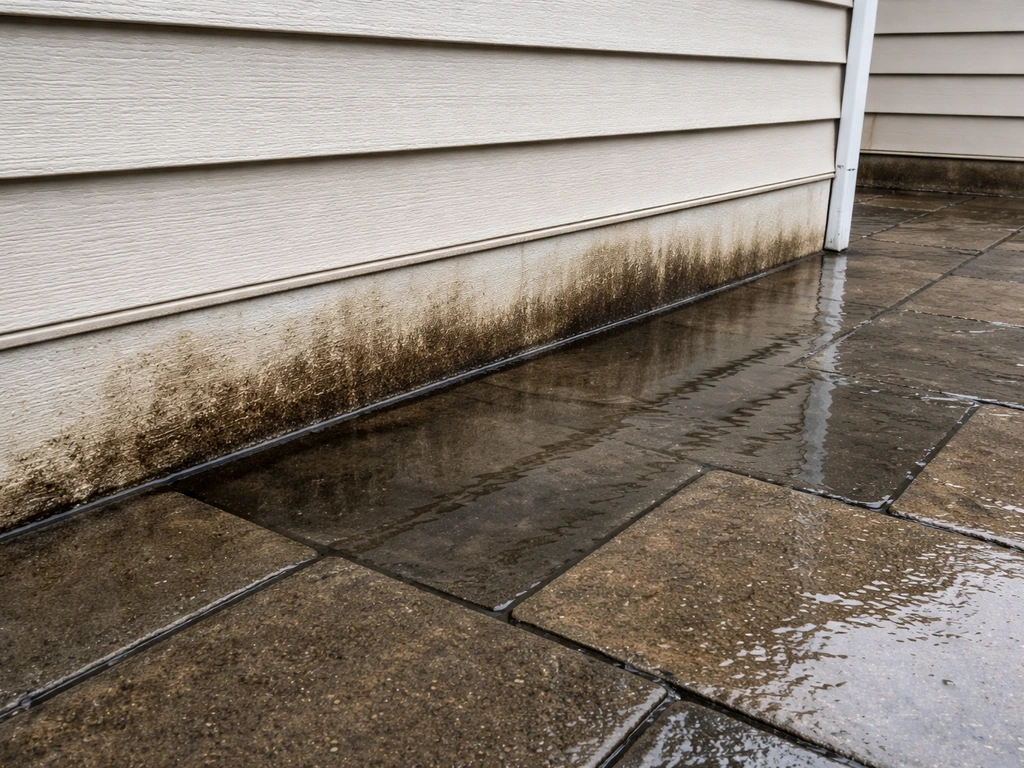
Water always finds the lowest point. On a badly drained patio, that lowest point is usually right where the patio meets your house wall. That's where you get damp penetrating the wall, bridging the damp-proof course (DPC), and eventually causing rot, mould, and costly repairs inside. I've seen homeowners spend thousands fixing internal damp that could have been prevented with a couple of extra bags of sharp sand and a spirit level at the start of the build. The other issue is what happens to all that water once it leaves your patio. It has to go somewhere, ideally back into the ground rather than your neighbour's garden or the combined sewer system.
Physically, water moves across a hard surface by gravity. If the surface slopes toward the house, water pools against the wall. If it's perfectly level (as many patios end up after a DIY build without careful measurement), water just sits on it after rain and slowly evaporates, or finds a low spot and puddles there indefinitely. You need a consistent, deliberate fall across the whole surface, and a clear path for that water to travel once it reaches the edge.
What UK building regulations actually say about patio drainage
Approved Document H (Requirement H3) is the main reference point for surface water drainage in England and Wales. Scotland has equivalent provisions in its Building Standards Technical Handbook. The core principle is consistent across both: surface water must be removed safely, without causing damage to the building, without creating danger to people, and without posing environmental risks like flooding or pollution. For a patio specifically, that means you can't just dump runoff into a foul drain, surface water and foul water must stay separate.
Approved Document H also sets out a drainage hierarchy, which is sometimes called the 'discharge hierarchy.' The idea is you should aim to manage surface water as high up the priority list as possible: infiltration into the ground (soakaway) first, then discharge to a watercourse, then to a surface water sewer, and only as a last resort to a combined sewer. This is reinforced by national SuDS standards, which require that where water is discharged to a sewer or piped system, the runoff rate must be controlled so your development doesn't increase flood risk downstream. For most garden patios, a well-designed soakaway or permeable surface is the simplest and most compliant route.
The NHBC Standards (Part 10, External Works) add a practical benchmark that's widely used in UK construction: finished patio surfaces should have a minimum fall of 1:80. That works out to roughly 12. 5mm of drop for every metre of surface. It doesn't sound like much, but it's enough to move water reliably if the surface is consistent.
If you're still unsure about the exact slope, see how to set a fall on a patio before you lock in your levels. NHBC guidance also emphasises providing adequate falls and cross-falls so water drains away from the home and doesn't pond.
NHBC Standards (Part 10, External Works) also include siting constraints such as keeping soakaways not within 2 metres of the property, alongside the guidance on adequate falls and cross-falls so surface water drains away from the home not within 2m of a soakaway. In terms of soakaways, BRE Digest 365 is the standard design method referenced by Approved Document H and local authority guidance alike.
For most domestic patio builds, you won't need to submit a formal building regulations application just for the drainage, but that doesn't mean the regulations don't apply. If your patio drains directly into a sewer, causes flooding, or bridges your DPC, you're exposed to enforcement action and, more practically, expensive remedial work. It's worth checking with your local authority if you're planning a large impermeable surface area, since permitted development rules and drainage obligations can vary by location.
Designing a drainage layout that actually works
Before you lay a single slab, sketch out where water is going to go. That sounds obvious, but I've started builds without doing it properly and regretted it. The key decisions are: which direction will the fall run, where will the water exit the patio, and what happens to it after that?
Setting the fall
The 1:80 minimum fall (12.5mm per metre) is your baseline. In practice, I aim for 1:60 to 1:50 (around 17-20mm per metre) for most slabbed or paved patios, because slight settling and mortar variations over time can eat into a 1:80 fall and leave you with flat spots. A single-direction fall running away from the house toward the garden is the simplest layout. If your patio wraps around the house or is particularly wide, a cross-fall or 'butterfly' fall (draining to the centre or to one side) may be needed. Always fall away from walls and foundations, never toward them.
Choosing your outlet: soakaway, channel drain, or watercourse
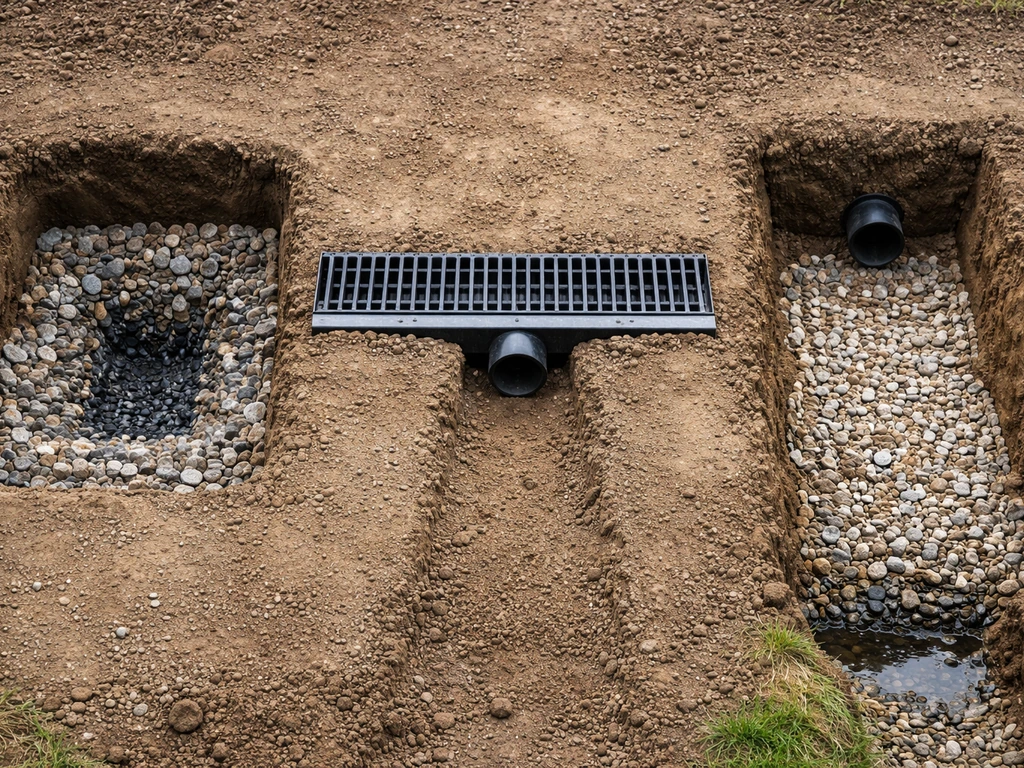
Following the drainage hierarchy, your first choice should be infiltration, letting water drain back into the ground. A simple soakaway (a pit filled with coarse aggregate or a purpose-made plastic crate unit) positioned at the low end of your patio handles this well for most gardens. BRE Digest 365 provides the sizing method: you'll need to do a simple percolation test to check your soil's infiltration rate, then calculate the soakaway volume based on your patio's surface area and local rainfall intensity. Soakaways must be sited at least 5 metres from building foundations and not within areas of unstable ground. NHBC guidance also reinforces keeping soakaways a safe distance from the home.
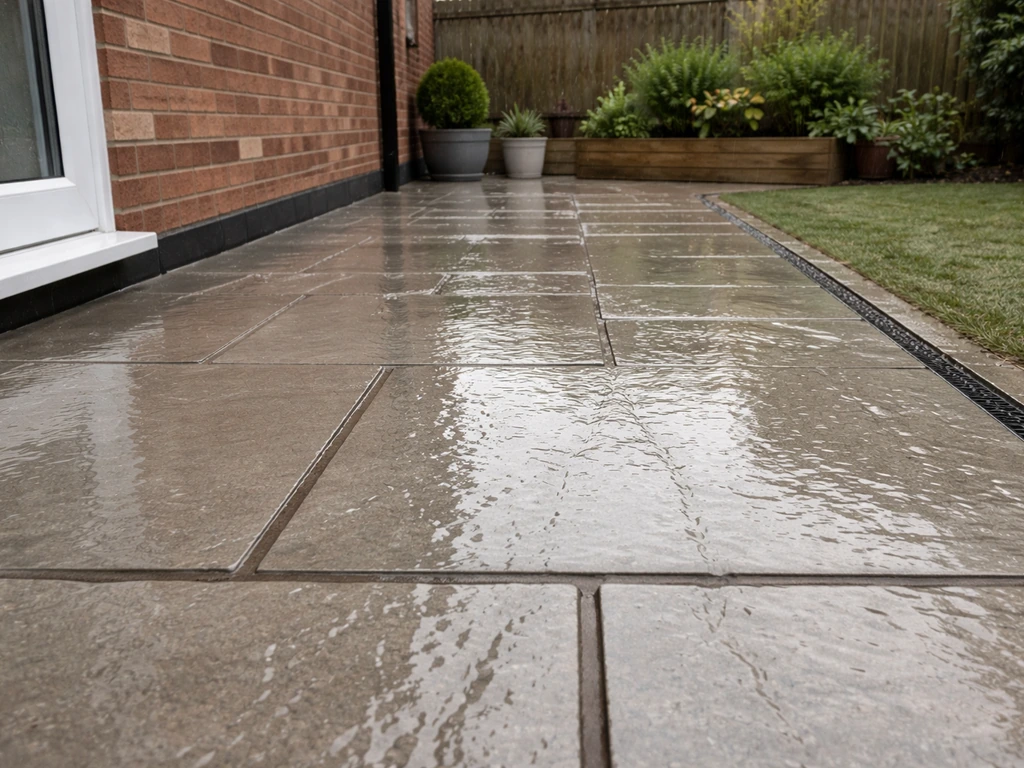
If ground conditions are poor (clay-heavy soil that barely drains, high water table, or a very small garden), a soakaway won't work. In that case, a channel drain (linear drain) along the low edge of the patio, connected to a surface water drain or watercourse, is the practical alternative.
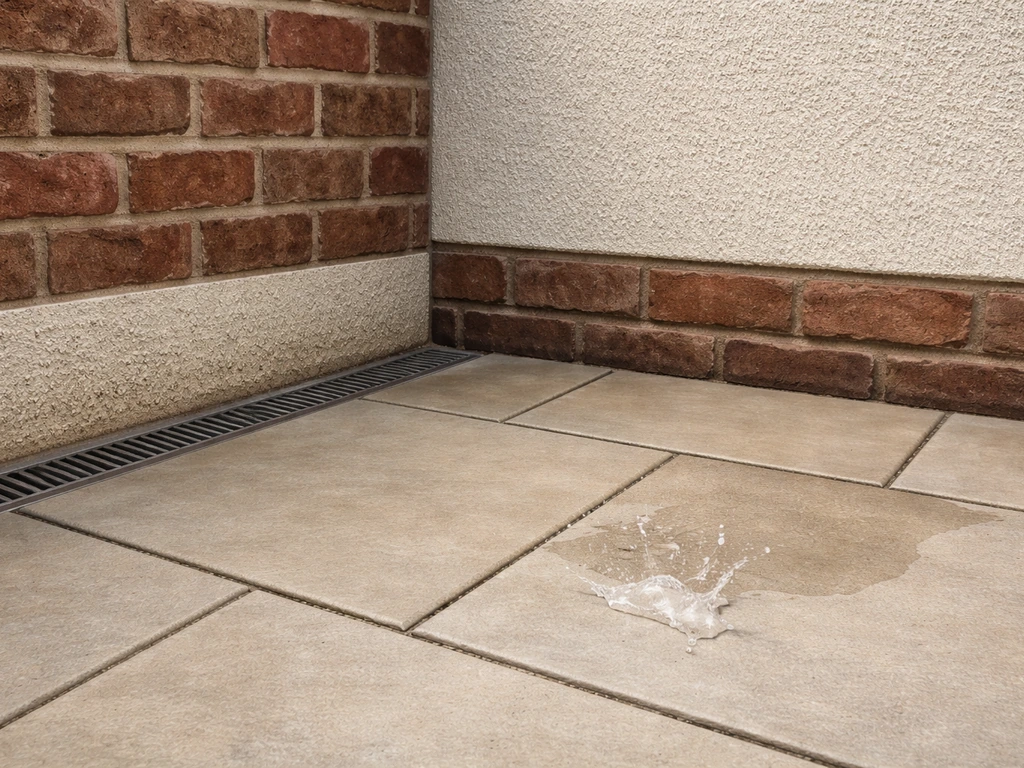
Channel drains are particularly useful on patios that run right up to a wall, since they collect water at the wall edge and redirect it sideways before it can pool against the brickwork. If you're connecting to any drain, confirm it's a surface water drain, not foul, connecting surface water to foul drainage is a building regulations breach under Approved Document H.
If you want a practical walkthrough, this guide on how to make a patio drain covers the layout, fall, and outlet options step by step drainage hierarchy.
For larger patio areas or where soil infiltration is genuinely limited, permeable paving or gravel surfaces can manage water at source, removing the need for a separate outlet system. This is the most SuDS-friendly approach and aligns well with the drainage hierarchy.
How surface type changes your drainage approach
Not all patio surfaces handle water the same way. Your drainage strategy needs to match the surface you're building.
| Surface Type | Water Behaviour | Drainage Strategy |
|---|---|---|
| Concrete slabs / porcelain tiles | Impermeable — all water runs off the surface | Needs a deliberate fall + outlet (soakaway, channel drain, or permeable edge) |
| Brick / block paving | Mostly impermeable unless laid with open joints | Fall + outlet; consider permeable jointing compound to reduce runoff volume |
| Permeable / porous paving | Water infiltrates through joints or surface into sub-base | Engineered sub-base required; percolation test recommended; no separate outlet needed if sub-base drains |
| Gravel / loose aggregate | High permeability — water soaks through freely | Minimal drainage design needed; membrane beneath prevents migration to sub-soil; edging contains surface |
| Timber decking / composite | Gaps between boards allow water through; boards themselves are impermeable | Sub-frame must allow water to pass beneath; never trap water against foundations; ensure airflow under deck |
For slabs and tiles, the fall is everything, there's no forgiveness in the surface itself. For permeable paving, the fall matters less, but the sub-base design matters enormously: you need an open-graded aggregate layer (typically 150mm of clean angular gravel or purpose-made permeable sub-base material) beneath the surface to store and slowly release water into the ground. A standard compacted Type 1 MOT sub-base is too fine and dense for proper infiltration, so check the spec before ordering materials.
Timber and composite decking introduces a different concern. Because the boards span a gap above the ground, there's a tendency to assume drainage takes care of itself. It largely does for the surface, but you need to make sure water isn't being directed into a confined void between the deck and the house wall, that's exactly where rot and damp originate. The gap between a deck and any wall should allow airflow and water escape, and the ground beneath should drain freely or be graded away from the building. Raising the deck on posts also helps by keeping the subframe out of standing water.
Ground conditions and how they change what you build
What's under your patio matters as much as what's on top. Two gardens that look identical on the surface can behave completely differently after heavy rain, purely because of what's beneath.
Clay soils
Clay drains slowly, sometimes barely at all after prolonged rain. A soakaway in heavy clay is often ineffective and can actually waterlog, turning into a pond. If you're on clay, opt for a channel drain connected to a surface water drain or, if your garden has a natural low point away from the house, a swale (a shallow grassed channel) that disperses water slowly across a larger area. A percolation test is essential before committing to any infiltration-based system: dig a 300mm cube test pit, fill it with water, let it drain, refill, then time how long 75% of the water takes to drain away. If it takes more than an hour, a soakaway is unlikely to work.
Sandy or free-draining soils
Sandy soils drain quickly, which makes soakaways highly effective and simple to size. The risk here is that water can also drain down through your sub-base too fast, washing fine material away over time and causing settlement. A geotextile membrane beneath the sub-base prevents this, stabilising the structure while still allowing water to pass through.
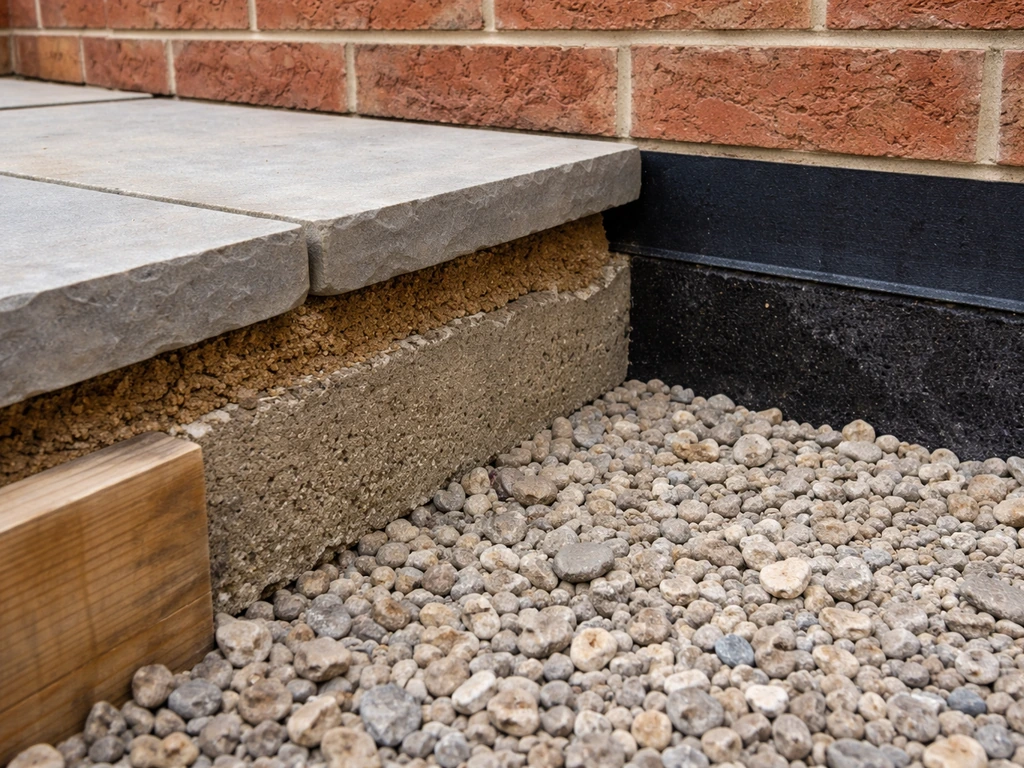
Proximity to the house
The closer your patio is to the house (and almost all patios are directly adjacent), the more critical it is to get the fall right and to maintain the 150mm gap between the finished patio surface and the damp-proof course in the wall. Bridging the DPC, even with a single rogue slab or a mortar bed that sits too high, creates a direct pathway for moisture to travel into the wall cavity. Check DPC height before setting any levels, and use that as your upper limit. The finished surface should always sit at least 150mm below the DPC, with the fall running away from the wall from that point.
Existing drains and services
Before you dig, check for existing drainage runs, inspection chambers, and utility services. Cover any existing drain covers with removable paving (never permanently tile over an inspection chamber) and make sure your new sub-base doesn't obstruct existing drainage channels. If you're raising ground levels significantly, you may also need to raise existing drain covers, a topic covered in more detail when considering how to raise a drain for a patio build.
DIY build steps that keep drainage doing its job
Good drainage doesn't happen by accident. These are the build-stage checks I follow on every patio project to make sure the finished result actually drains properly.
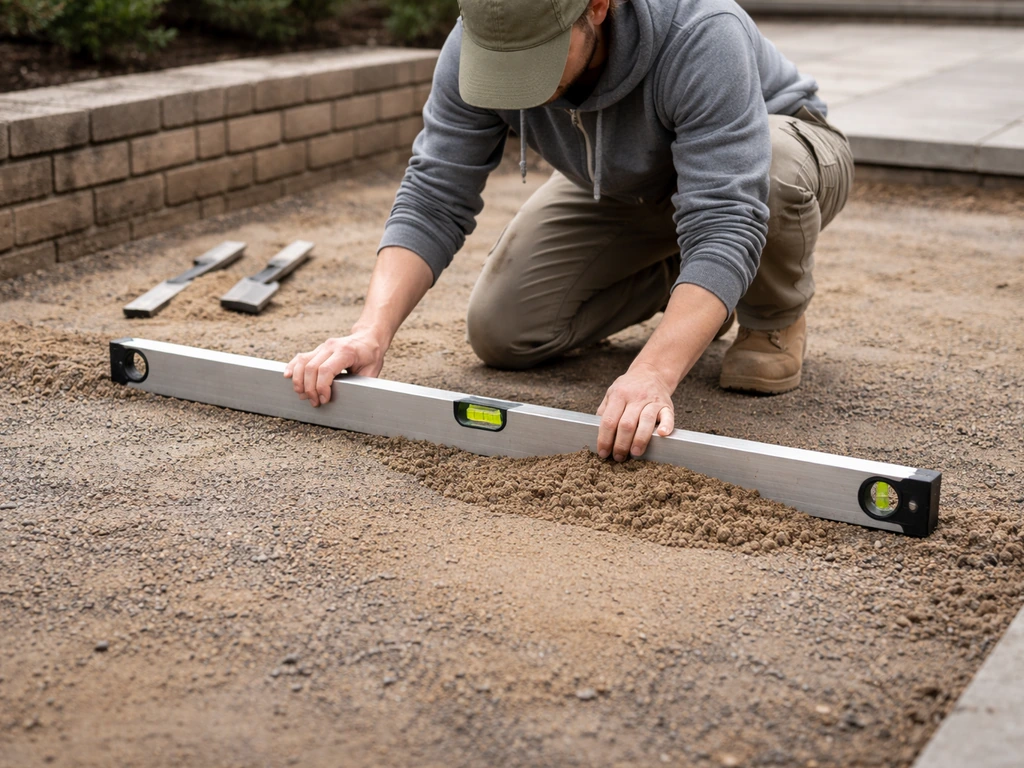
- Survey and mark levels before excavating. Use a long spirit level or a water level to find your reference datum (usually the DPC height on the house wall). Mark the target finished surface height and calculate the fall across the full width and depth of the patio. Do this on paper or on stakes before a single spade goes in.
- Excavate to the correct depth. For a typical slabbed patio on reasonable ground, that's 150-200mm below finished surface level: roughly 100-150mm for the sub-base, plus 50mm for the bedding layer. Adjust if you're using a deeper permeable sub-base.
- Lay geotextile membrane on the excavated ground. This prevents sub-base aggregate from mixing with the soil below, maintains drainage capacity, and reduces settlement. Overlap joins by at least 300mm.
- Compact the sub-base in layers. For impermeable surfaces, use compacted Type 1 MOT sub-base. For permeable surfaces, use an open-graded aggregate. Compact in 75mm layers using a wacker plate. Check levels at every layer using a straightedge — the fall should be present in the sub-base, not corrected later in the bedding layer.
- Install edge restraints before laying the surface. Edge restraints (haunched concrete kerbs, metal edging, or brick soldier courses) hold the surface in place and prevent lateral spread. They also define where water exits the patio — make sure the low end of the fall has a gap, gravel strip, or channel drain to allow water out.
- Lay the surface with consistent fall. Use string lines set to the calculated fall as a guide for every row of slabs or blocks. Check each slab individually with a spirit level to catch any that are sitting too high or have a back-fall toward the house. Tap down high spots before the mortar or bedding sets.
- Leave drainage joints where needed. For slabbed patios, open joints filled with gravel or sharp sand alongside a channel drain can significantly reduce runoff. For block paving, kiln-dried jointing sand or permeable jointing compound improves infiltration. Avoid fully grouting all joints with rigid mortar if you want any surface drainage benefit.
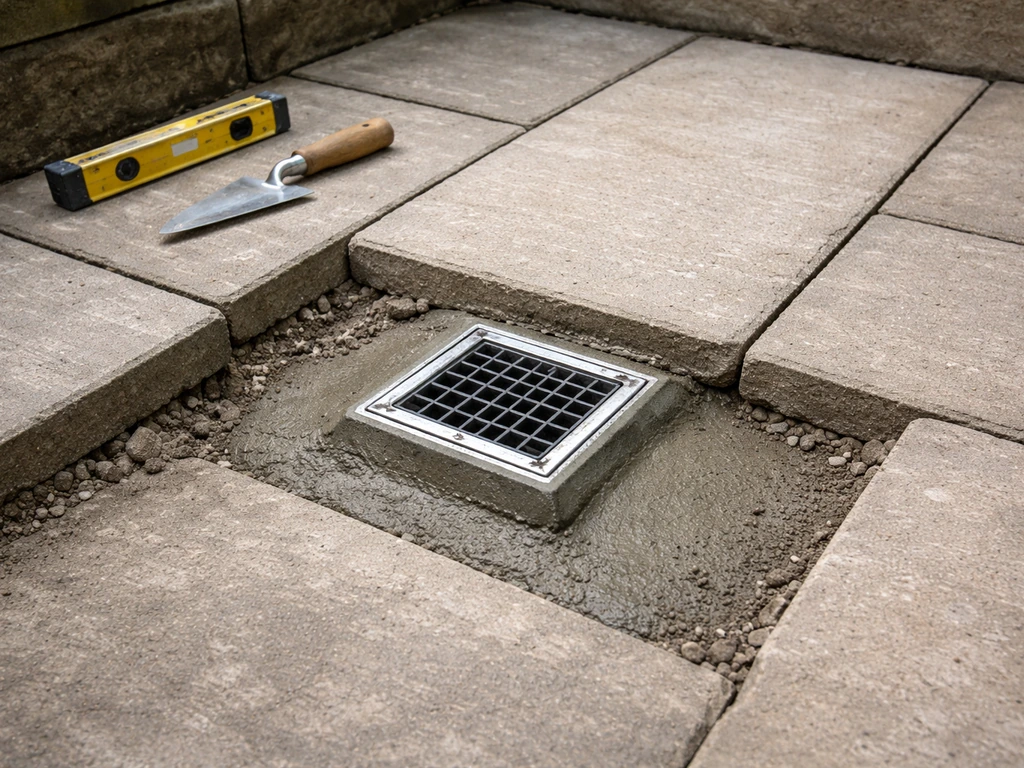
- Install and test the outlet before finishing. Whether it's a soakaway, channel drain, or connection to a surface water drain, get the outlet in place and test it with a hose before the last course of paving is laid. It's far easier to adjust the outlet level now than to lift slabs later.
- Document your drainage layout. Take photos of the sub-base, membrane, soakaway or drain connections, and any pipework before they're covered up. If you ever sell the house or need to carry out repairs, this documentation is genuinely valuable — and it demonstrates you built compliantly.
Common mistakes and how to fix them
Most drainage problems I see on existing patios come down to a handful of repeated mistakes. Some are easy to fix; others require partial or full rebuilds. Here's what to look for and what you can do about each one.
Reversed fall (water draining toward the house)
This is the most common and most damaging mistake. You'll notice it as persistent dampness at the base of the house wall, or water visibly sitting against the wall after rain. The only real fix is to re-lay the affected slabs with a corrected fall. If it's a small area, you can sometimes lift the slabs closest to the house, add bedding material to raise those courses, and re-lay with the correct fall. For a large section, it's often a full strip-out job. Prevention: always double-check your fall with a long spirit level before the mortar sets, not after.
Blocked or absent outlets
If water reaches the low edge of the patio but has nowhere to go, it ponds and eventually finds its way under the surface. Check channel drains for debris (leaf litter blocks them faster than you'd think), and make sure any connecting pipe runs to an unobstructed outlet. If there's no outlet at all, just a patio that ends against a fence or border, you'll need to install one.
In many cases, the solution is to install a properly positioned drain or channel so water from the patio can flow away without ponding install one. A simple soakaway at the low corner, or a channel drain connected to a surface water pipe, are the most practical retrofits. Diverting water away from the patio using a planted gravel strip or swale is another option worth considering.
Inadequate sub-base causing settlement and ponding
A sub-base that was too shallow, poorly compacted, or the wrong material will settle unevenly over time, creating dips and puddles. You'll see cracked or rocking slabs and low spots that hold water. The fix is to lift the affected slabs, remove and replace the sub-base material (properly compacted this time), and re-lay. It's worth doing the job properly rather than just re-bedding the slabs on the existing poor base, the problem will return within a season otherwise.
DPC bridging
If your finished patio surface sits within 150mm of the DPC, or worse above it, you've created a moisture bridge. Signs include damp patches on internal walls adjacent to the patio, particularly at low level. The fix depends on how much height is involved: sometimes lifting one course of paving and re-laying it lower is enough. If the sub-base itself is too high, you'll need to excavate more deeply and rebuild from scratch. It's worth getting a damp specialist to assess any internal damp before assuming the cause, there can be multiple factors.
Soakaway placed too close to the house
A soakaway within 5 metres of the foundations is a risk to the structural integrity of the building, it saturates the ground close to the footings. If you discover an existing soakaway is too close, it needs to be decommissioned (fill the crate or pit with compacted aggregate) and relocated further away. Your drainage outlet will need to be re-routed accordingly.
Impermeable buried layers blocking drainage
Sometimes an old patio or previous landscaping left a buried layer of concrete, compacted clay, or solid mortar that now blocks infiltration. Water sits on top of this layer even though the surface above drains well. The solution is either to break up the impermeable layer during excavation, or, if it can't be removed, to install a channel drain at the point where water accumulates and pipe it to an appropriate outlet.
Poor edging that traps or redirects water incorrectly
Edge restraints or raised borders that are higher than the patio surface on the low-side edge turn your patio into a bathtub. Make sure the low-side edge is either open (with a gravel strip or channel drain), or that any edging is set below the finished patio level to allow water to flow over and away. If you're adding decorative edging after the fact, check it won't dam the outlet route before you concrete it in.
Putting it all together: your drainage checklist
Before you call a patio done, whether you're building new or fixing an existing one, run through these checks. If you can tick every box, you're in good shape both practically and from a building regulations standpoint.
- Finished surface is at least 150mm below the DPC on the house wall
- Consistent fall of at least 1: 80 (ideally 1:60) running away from the house across the full surface
- A clear, unobstructed outlet route: soakaway (at least 5m from foundations), channel drain, or surface water connection — not a foul drain
- Sub-base properly compacted and at the correct depth for the surface type
- Geotextile membrane laid under the sub-base on the excavated ground
- No impermeable layers buried beneath permeable surfaces
- Inspection chambers left accessible (not permanently covered)
- Edge restraints on the low side allow water to exit, not trap it
- Drainage layout documented with photos before covering
Drainage is one of those things that's invisible when it works and catastrophically obvious when it doesn't. Getting the levels right at the start, choosing the right outlet for your ground conditions, and following the Approved Document H drainage hierarchy will keep your patio functional, your house dry, and your build on the right side of UK building standards. It's not complicated, it just needs doing deliberately, with a spirit level in hand and a clear plan before the first slab goes down.
FAQ
Does building regulations patio drainage mean I must submit a formal application for every patio I build in the UK?
Not usually. For typical domestic patios, there is generally no separate drainage application just for the surface water design. However, if your patio is large, unusually impermeable, or you need an outfall into an existing drainage network, you may need to notify or get agreement from your local authority or sewerage company to confirm the connection and discharge point.
What if my patio is already built and the fall is only slightly off, do I still need to rebuild?
Often you can correct minor ponding without a full strip-out. The practical test is to locate low spots, lift only the affected slab area, re-bed and re-set to restore the slope, then check again with a long level. If the patio is within 150mm of the DPC at the low edge, small changes can still create a moisture bridge, so it may be worth reassessing the DPC clearance before doing partial repairs.
Can I connect patio drainage to a soakaway if my garden has clay soil?
Usually not, or only with careful investigation. Clay can stay saturated, turning a soakaway into a pond. If percolation testing shows poor infiltration, use an alternative strategy such as a channel drain to a surface water outlet, a swale to disperse water across a wider area, or permeable paving that manages water at source with an appropriate open-graded sub-base.
Is it acceptable to route water from my patio through a garden gulley or ground soak area, then it soaks away under the lawn?
It can be acceptable in principle, as long as the final discharge does not increase risk to your building or neighbours, and it stays separate from foul drainage. The key practical check is that the route does not direct water back toward foundations, and that any infiltration point is not within about 5 metres of the building. If you are unsure about the exact outlet behaviour, map the flow path after heavy rain.
How do I avoid accidentally blocking drainage by adding decorative edging or a gravel border later?
Treat edging like a drainage component. Ensure the low-side edge is not sealed off, if you add a gravel strip keep it level with the intended outlet path and do not create a raised “dam” over the discharge route. If you concrete in borders, set them below the finished patio level where water needs to exit, and check that the outlet line remains open after the final landscaping layer is installed.
What is the difference between directing surface water to a soakaway versus using permeable paving?
A soakaway is an explicit infiltration point at the outlet location, you calculate its sizing based on soil infiltration and rainfall loads. Permeable paving manages water at source by letting it pass into an open-graded sub-base storage layer, then slowly releases it into the ground. Permeable paving still depends on soil permeability, and it can fail if the sub-base is too fine or if blockages accumulate over time.
Do I need a geotextile membrane under permeable paving or gravel to meet building regulations patio drainage expectations?
It is not a universal legal requirement, but it is a common practical safeguard, especially on sandy soils. Without filtration, fine particles can migrate into the open-graded layer, reducing infiltration and causing settlement. If you are using permeable sub-base, follow the specification for gradings and include a separation layer where the system design calls for it.
What should I do if my patio drains correctly on the day I build it, but ponds after a few months?
Look for progressive blockage or settling. Blockage can come from debris in channel drains, silt in gravel outlets, or mortar residue left at edges. Settling usually means the sub-base was too shallow, uneven, or insufficiently compacted, so water finds new low points. Either way, fix the root cause early by checking falls with a straight edge and clearing or reconfiguring the outlet before the ponding becomes a chronic moisture problem.
Is it ever safe to discharge patio surface water into a foul sewer or a soak well that also serves foul drains?
No. Surface water must not be discharged to foul drainage systems. Mixing clean surface runoff with foul drainage can breach building regulation requirements and create operational issues. If you are tying into an existing system, confirm it is a surface water connection, and if you cannot identify it confidently, ask a drainage professional or your local authority before connecting.
If my deck is on posts next to the house, do I still need to worry about building regulations patio drainage principles?
Yes, but the risk shifts. The surface boards may drain, yet water can be directed into a confined void between the deck and the wall, creating the same damp and rot pathways as a poorly drained patio edge. Keep airflow and drainage paths to prevent pooling in the void, and ensure the ground beneath the deck slopes away from the building and is not trapping water against the wall.
Next Article
How to Raise a Drain for a Patio: Step-by-Step DIY Guide
DIY steps to raise a patio drain by regrading or rebuilding, set proper slope, avoid pooling, and prevent settling