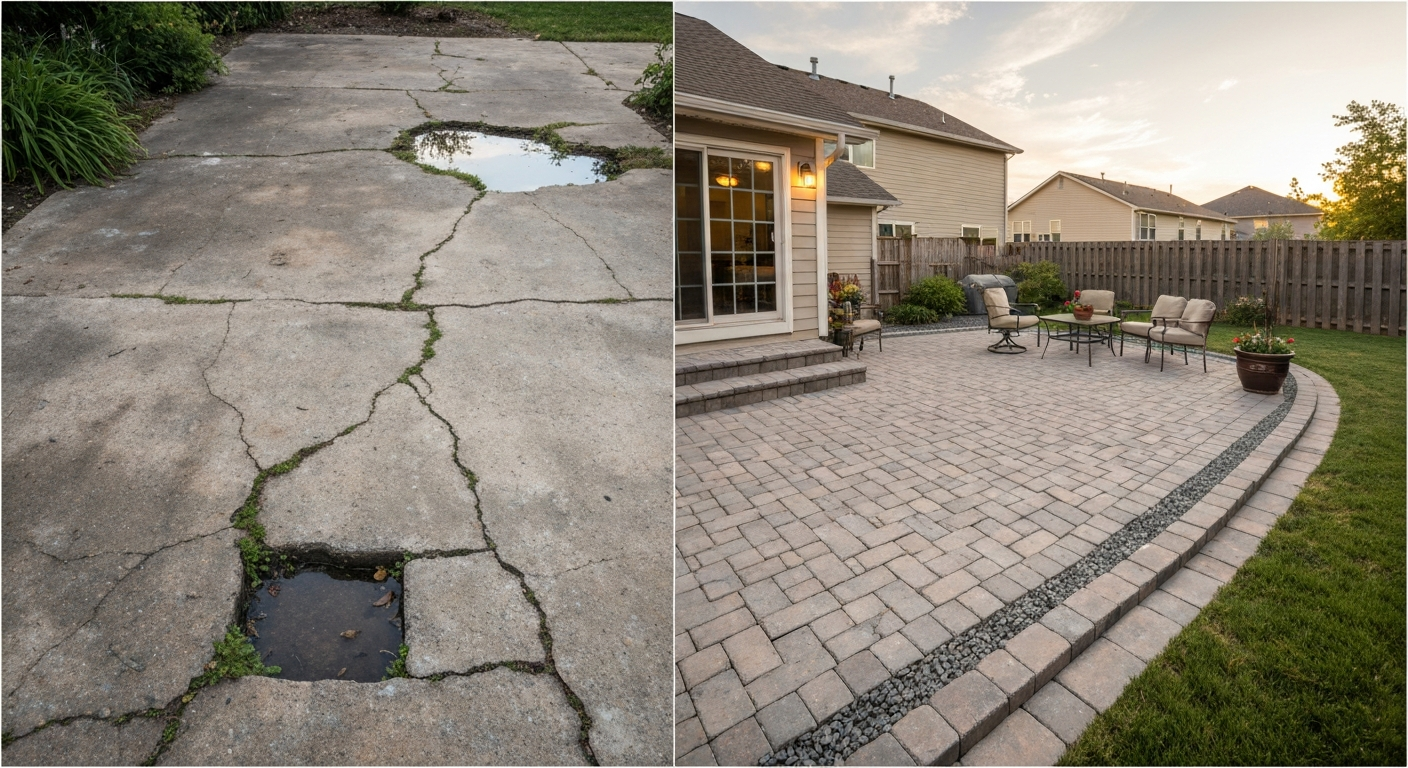
To divert water away from a patio, you need to do two things: stop the water from arriving where it shouldn't, and give it a clear path to go somewhere better. In most cases that means correcting the slope of the patio surface (a minimum of 1/4 inch per foot, or roughly 2%, sloping away from the house), managing downspouts and roof runoff, and adding a French drain, trench drain, or dry well when regrading alone isn't enough. You can do a few things today to reduce the problem, but the permanent fix almost always involves getting back into the ground and resetting the grade. A practical way to make a patio drain work reliably is to install the right downspout routing, add or upgrade the drainage outlet, and correct the slope where needed how to make a patio drain.
How to Divert Water Away From a Patio: DIY Fixes

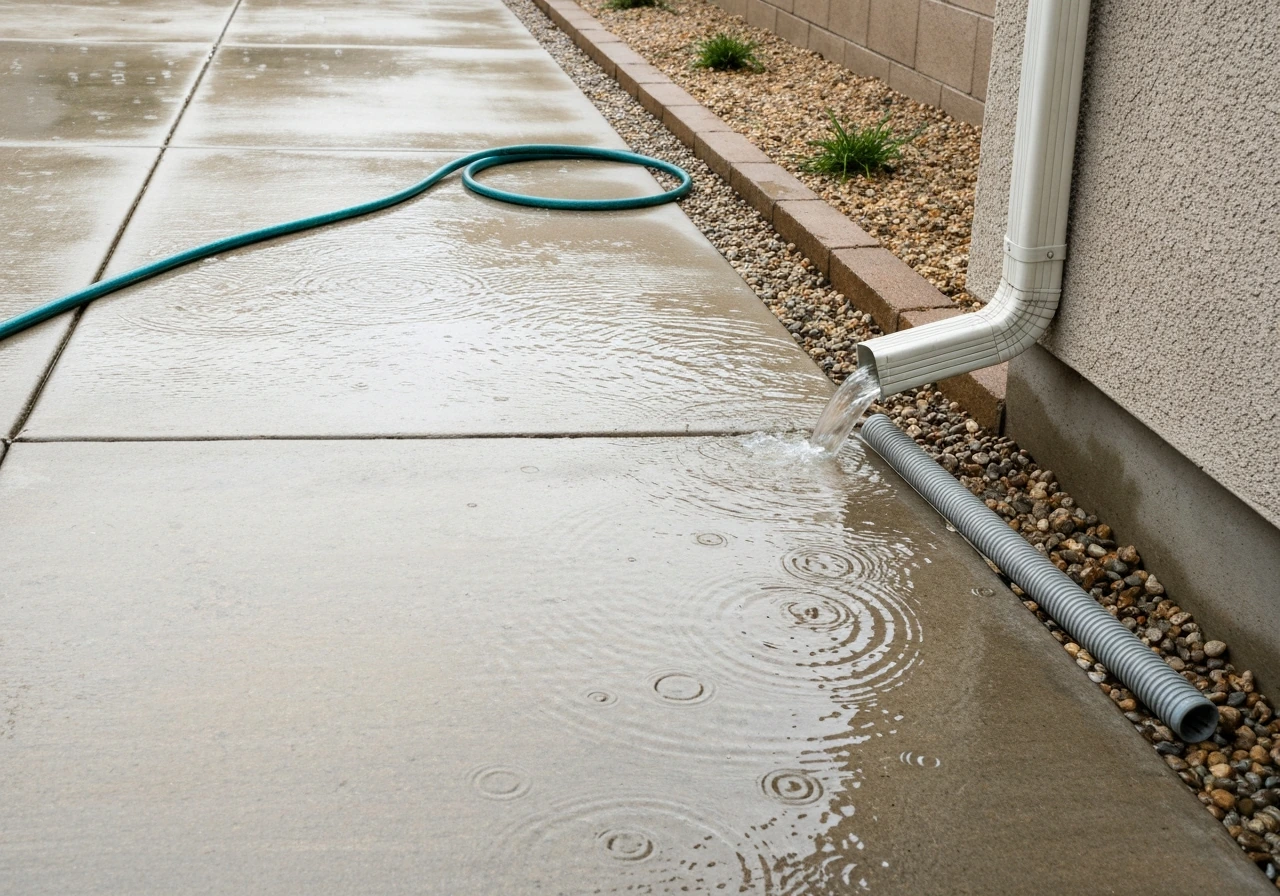
Figure Out Why Water Is Pooling in the First Place
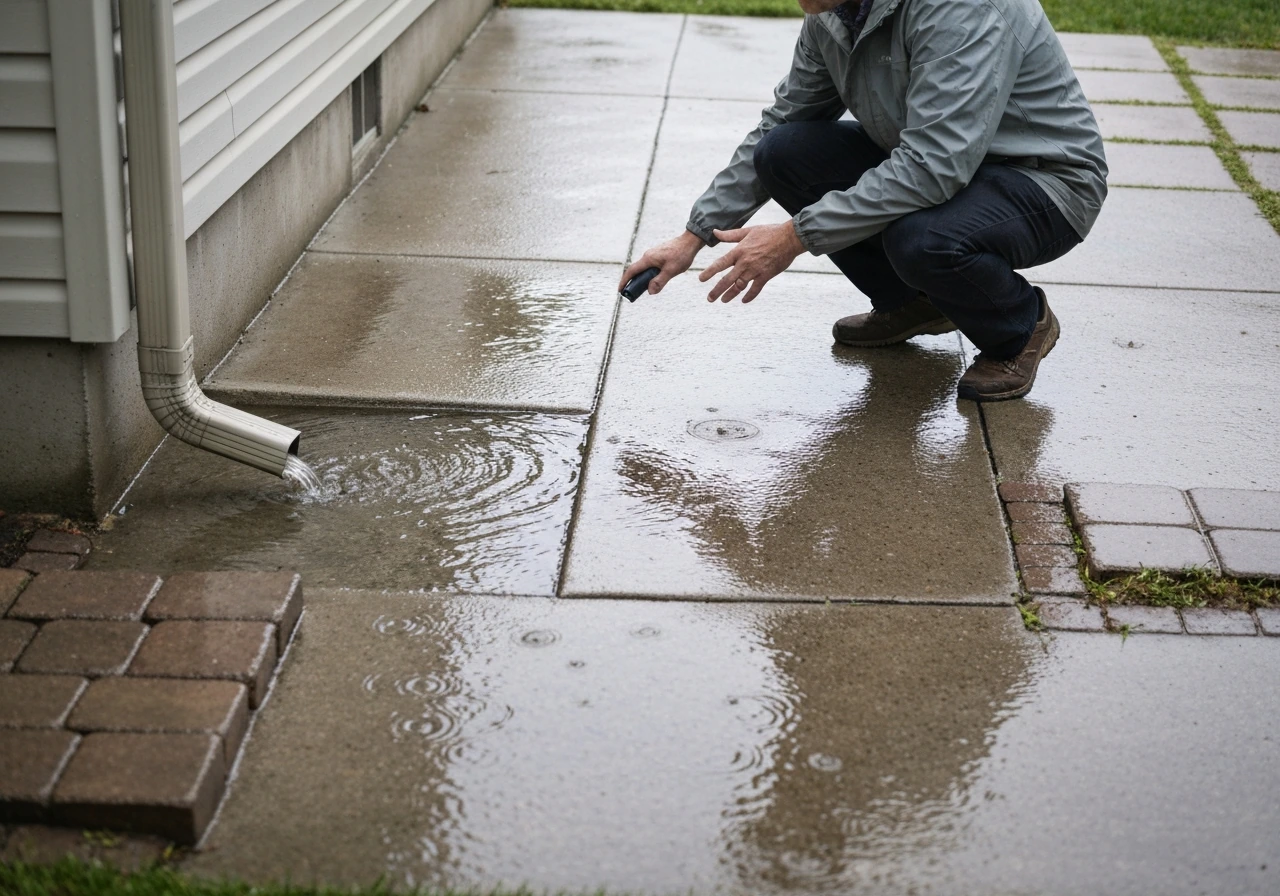
Before you move a single shovel of dirt or buy any pipe, stand outside during or right after a heavy rain and just watch where the water goes. This sounds obvious but most people skip it, and they end up fixing the wrong thing. What you're looking for is the source of the water, the direction it moves, and where it stops moving.
There are six common causes of patio drainage problems, and they often overlap. The first is a patio that's flat or pitched the wrong way, sloping toward the house instead of away from it. The second is downspouts dumping water right at the edge or corner of the patio, overwhelming any slope you do have. The third is clogged gutters that cause water to overflow and sheet down the wall onto the patio surface.
The fourth is surface runoff from a lawn or garden bed that flows onto the patio from the side. The fifth is a compromised subbase, where water gets under the patio surface and saturates the compacted base, causing settling and ponding. The sixth is clay-heavy soil that simply can't absorb water fast enough, so it backs up to the lowest point, which often happens to be your patio.
A simple way to check your slope: lay a long level on the patio surface and slip a wedge or coins under one end until it reads level. Measure the gap at the low end, then divide by the length. If you're getting less than 1/4 inch of drop per foot over the first 10 feet away from the house, the grade is part of your problem. The IRC and Building America Solution Center both specify that impervious surfaces within 10 feet of the foundation need at least a 2% slope (that 1/4 inch per foot) to protect the foundation.
- Patio slopes toward the house or is completely flat
- Downspout discharge point is within 4 to 6 feet of the patio edge
- Gutters are clogged and overflowing near the patio
- Lawn or garden bed sits higher than the patio surface, funneling runoff onto it
- Pavers or slabs have settled unevenly, creating low spots that hold water
- Soil around and under the patio is compacted clay with nowhere for water to drain
Quick Fixes You Can Do Today
These won't solve a structural drainage problem permanently, but they can meaningfully reduce water damage and slippery surfaces while you plan the real fix. If you want to prevent pooling and trip hazards, a properly planned patio drainage plan is key to creating a safe patio surface slippery surfaces. I always recommend doing these first because some of them are free and occasionally turn out to be enough on their own.
Start with the gutters and downspouts. Clean your gutters if they haven't been cleared recently. A blocked gutter can dump several gallons per minute onto a small area right next to your patio. Once the gutters are clear, look at where the downspout terminates. If it's pointing toward the patio or emptying within a few feet of it, attach a downspout extender or a flexible corrugated extension pipe and redirect the flow at least 6 to 10 feet away from the patio edge and away from the house foundation. These extensions cost about $10 to $20 at any hardware store and take five minutes to install.
Next, clear any debris from the patio surface and from any existing drain grates or channel drains. Leaves, dirt, and sand compact over time and can completely block a drain that was working fine a season ago. Use a stiff brush and a garden hose to flush out drain inlets.
If water is sheeting onto the patio from a lawn or garden bed, a temporary berm of sandbags or a few bags of gravel can redirect that flow around the patio edge rather than across it. You can also dig a shallow swale, basically a gentle curved trench 4 to 6 inches deep, just uphill of the patio to intercept runoff and channel it to the side. This is a legitimate long-term technique done at proper scale, but even a quick hand-dug version can buy you time.
If you have a concrete slab patio with a low spot or a hairline crack that's collecting water, hydraulic cement or concrete patching compound can fill the void temporarily and reduce the amount of water getting under the slab. This is a patch, not a fix, but it stops the immediate damage while you plan a more complete solution.
Permanent Grading and Slope Corrections
If your patio drains incorrectly, at some point you're going to have to either rebuild the base or add drainage infrastructure. There's no shortcut around this for a permanent fix. The good news is that for a paver or gravel patio, regrading is much more realistic as a DIY project than it would be for a poured concrete slab.
Regrading a paver or brick patio
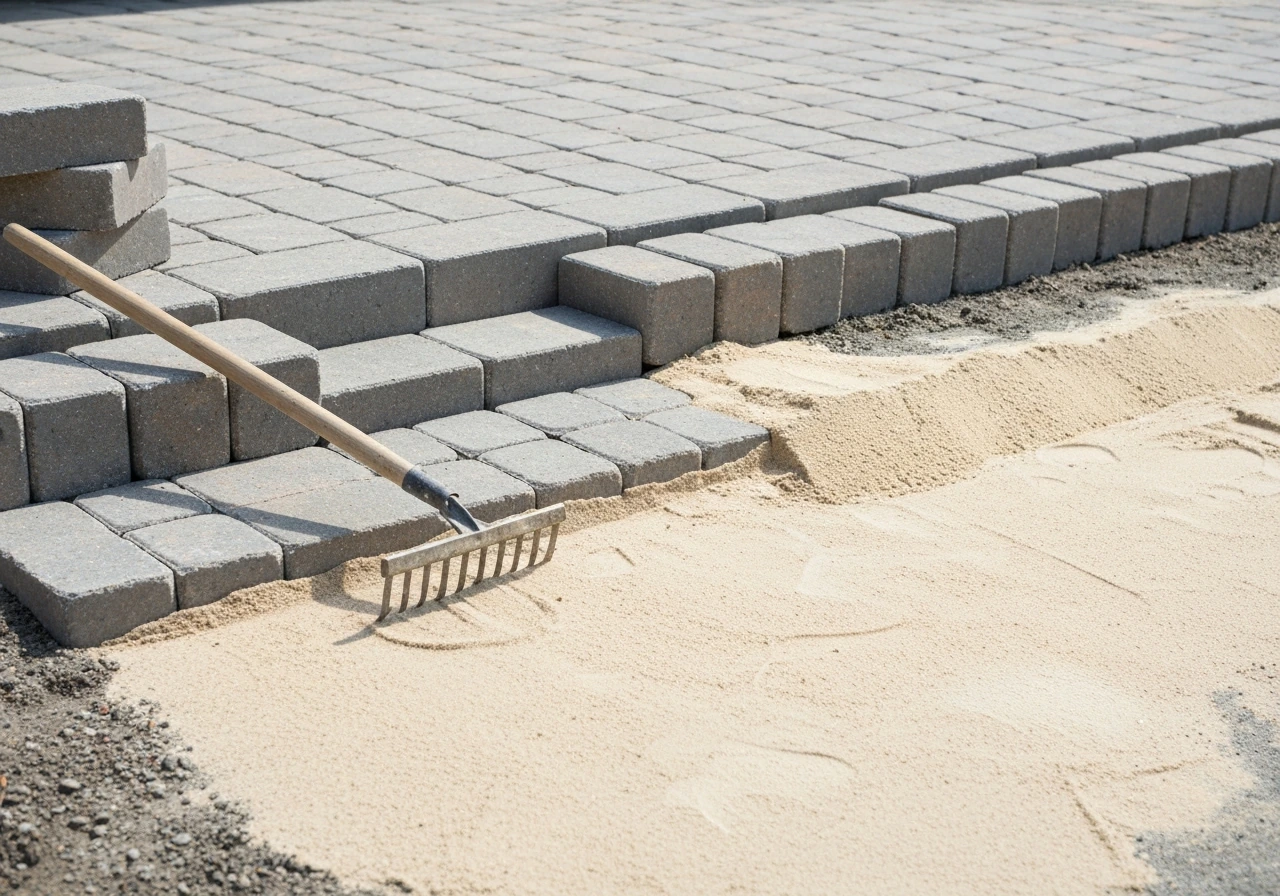
For a paver patio, the fix often means pulling up a section of pavers, raking and adjusting the bedding sand layer, and resetting the pavers with the correct slope. You're targeting at least 1/4 inch of drop per foot, measured with a level and tape measure. Ideal’s published installation guidance specifies a minimum paver patio slope of 1/4 inch per foot [at least 1/4 inch of drop per foot](https://www. stonewoodproducts.
com/wp-content/uploads/2016/06/Ideal-paver-installation-guide. pdf? srsltid=AfmBOoogrcSRz6M6rRyvkul3amdicOQEHg8vG2icGm54bGTPQTOKf7T2). Before you relay the pavers, check that the compacted gravel subbase itself is sloped correctly.
If the base layer is flat or pitched wrong, you'll need to add or remove base material and re-compact it. Skipping the subbase correction and just shimming the sand layer is a common mistake that leads to the problem recurring within a season or two.
The standard construction sequence for a properly draining paver patio runs from bottom to top: native soil (graded correctly), 4 to 6 inches of compacted crushed stone subbase, 1 inch of bedding sand, then the pavers themselves. Each layer needs to carry the slope, not just the surface. If you're installing new, set your slope string lines before you bring in base material and check your grade at every layer.
Regrading a concrete slab
A concrete slab pitched the wrong way is genuinely difficult to fix without demolition. Your options are: break out and repour a section (expensive and disruptive), apply a self-leveling concrete overlay to build up a low area and redirect flow (moderate cost, works if the slope reversal is subtle), or cut a channel drain into the slab surface and run it to a discharge point (often the most practical fix for an existing slab). Full repours are typically beyond DIY scope for large patios, but a small section or a concrete cap overlay to correct a shallow slope issue is achievable with rental equipment and some patience.
Correcting the soil grade around the patio
Even if the patio surface drains correctly, water running off it needs somewhere to go. The surrounding soil grade should slope away from both the patio and the house at roughly the same 2% minimum. If your lawn is flat or bowls inward, you may need to bring in topsoil to build up the grade and redirect flow toward a low point, a swale, or an existing drainage easement.
Check with your local municipality about where you're allowed to direct water, since routing it onto a neighbor's property or into a storm drain in ways that violate local ordinances can create legal problems. This ties directly into building regulations around patio drainage, which vary by location. Building regulations patio drainage rules can affect where you can send runoff and whether you need permits or specific drainage measures.
Surface and Drainage Upgrades: Choosing the Right Material
The patio surface material itself has a big impact on drainage. Impervious surfaces like poured concrete and solid pavers shed water, which is manageable if the slope is correct but creates runoff volume problems if it isn't. Permeable or semi-permeable surfaces can absorb some of that water into the subbase and surrounding soil, reducing the amount you need to divert mechanically.
| Material | Drainage Behavior | DIY Friendliness | Relative Cost | Best For |
|---|---|---|---|---|
| Poured concrete | Fully impervious, all runoff must be sloped off | Low (requires forms, mixing, curing) | $ | Permanent low-maintenance slab, needs correct grade from the start |
| Standard concrete pavers | Mostly impervious, minor seepage at joints | High (removable for regrading) | $$ | DIYers who want flexibility to adjust slope later |
| Permeable pavers | High infiltration through open joints filled with gravel | High | $$$ | Lots of rainfall, clay soil, areas near foundation |
| Gravel / crushed stone | Fully permeable, water drains through | Very high | $ | Budget builds, informal patios, areas with very poor drainage |
| Composite decking / wood | Water passes through deck boards into substructure | Medium | $$$ | Elevated patios, sloped ground where drainage is handled below |
| Brick (mortared) | Fully impervious, relies on slope | Medium | $$ | Traditional aesthetic, works well if grade is set correctly at install |
If you're rebuilding or starting fresh and drainage is a recurring headache, permeable pavers or a gravel patio are genuinely the easiest way to reduce the problem at the surface level. Water that infiltrates through the joints is distributed across the subbase rather than concentrated as runoff at the patio edge. That said, permeable systems still need a properly installed subbase that can handle the infiltration volume, and in areas with heavy clay soil you'll still need a drainage outlet for excess water.
Build or Repair Drainage Features That Actually Remove the Water
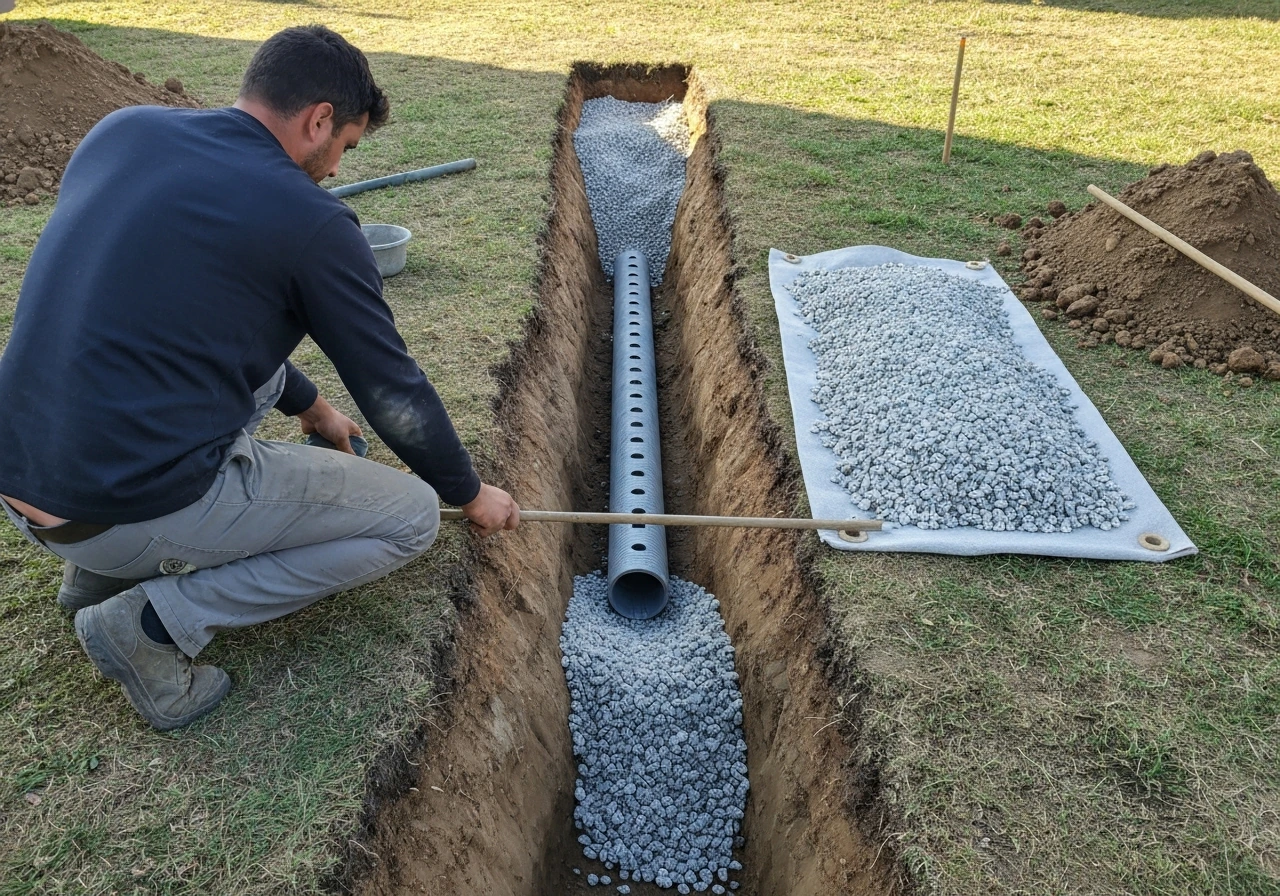
When regrading isn't enough, or when the volume of water is just too much for a slope alone to handle, you need to actively collect and remove water. The three main tools for this are French drains, trench drains, and dry wells. If you need to cover a patio drain after installing it, the right grate and edging help keep debris out while still letting water flow safely how to cover drain on patio. Each one solves a slightly different version of the problem.
French drains
A French drain is a gravel-filled trench with a perforated pipe that collects subsurface and surface water and carries it downhill to a discharge point. It's the right tool when water is saturating the soil around or under the patio, when the ground stays wet long after rain stops, or when you need to intercept runoff from uphill before it reaches the patio.
For a patio application, you'd typically run a French drain along the uphill edge of the patio or around its perimeter. Dig the trench at least 12 inches deep and 6 to 12 inches wide, line it with landscape fabric to keep soil out of the gravel, lay 2 to 3 inches of washed gravel, place 4-inch perforated pipe (holes facing down), cover with more gravel, wrap the fabric over the top, and backfill.
The pipe needs to slope at least 1% (1/8 inch per foot) toward the outlet.
Trench drains (channel drains)
A trench drain sits at surface level and collects water running across a hard surface. Think of it as a long narrow grate set flush with the patio surface that captures sheet flow before it can pool. It's the right solution for a concrete or paver patio where resloping isn't feasible, or for catching water at the edge of a patio before it runs toward the house. Trench drains connect to solid pipe that exits to a discharge point or a dry well. You can cut trench drain channels into an existing concrete slab with an angle grinder or circular saw with a diamond blade, which makes it a realistic retrofit for an existing problem.
Dry wells
A dry well is an underground chamber (usually a perforated plastic barrel or a gravel-filled pit) that receives collected water and releases it slowly into the surrounding soil. It's most useful when you have no practical outlet to route water off your property, or when you want to handle downspout discharge without running pipe across the yard.
A typical residential dry well for a patio or downspout application is 3 to 4 feet deep and 2 to 3 feet in diameter, lined with landscape fabric, filled around a perforated barrel or just with large clean gravel. They work best in soils with decent permeability. In clay-heavy soil, they fill up and stop working during heavy rain, so pair them with an overflow outlet if you can.
Managing Downspouts, Sealing, and Channeling Around the Patio
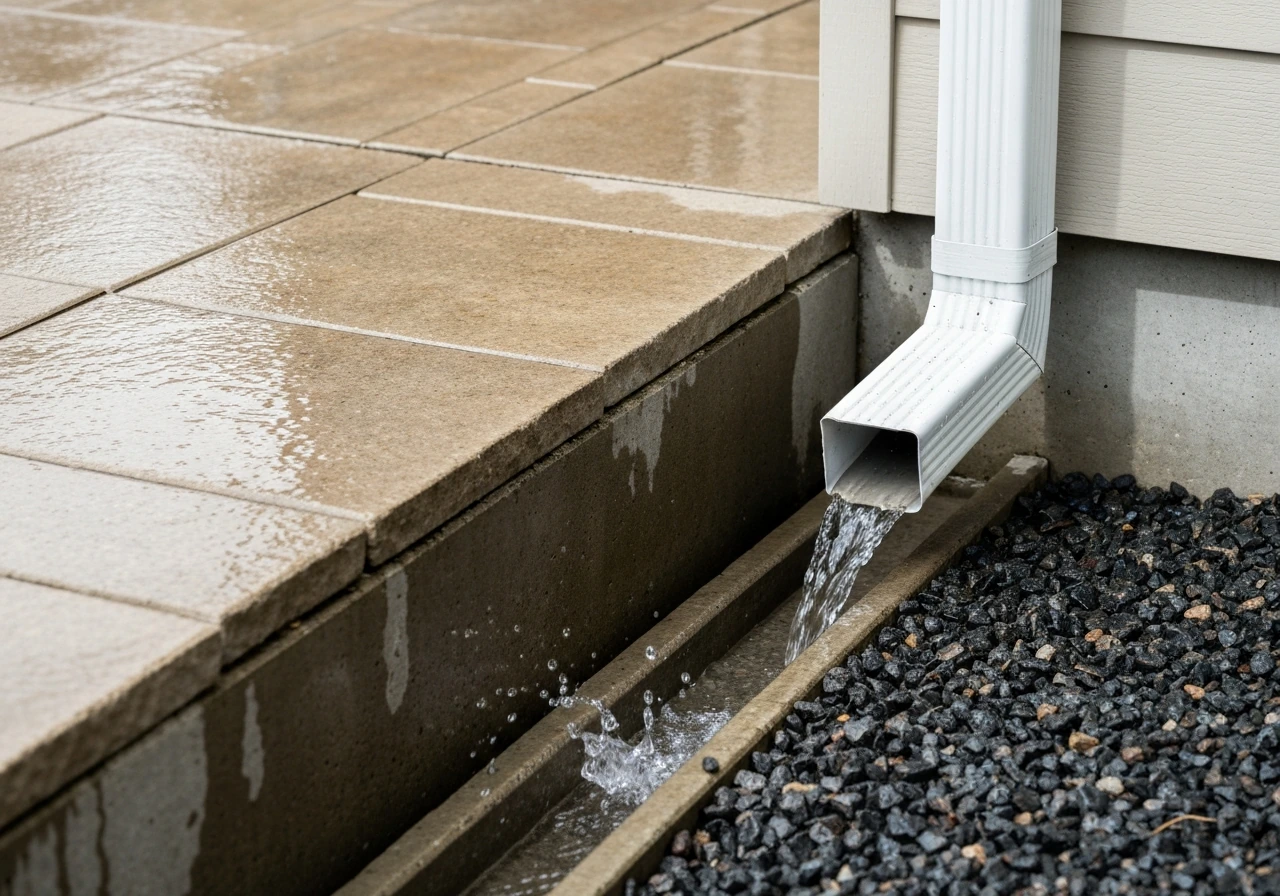
Roof runoff is one of the most underestimated contributors to patio drainage problems. A single downspout during a moderate rainstorm can discharge 12 to 20 gallons per minute depending on your roof area. Dumping that volume right next to a patio is like pointing a hose at your foundation. Extend downspouts at least 6 feet from the patio edge using corrugated flex pipe or solid PVC routed underground. If you bury the extension, use solid PVC (not perforated) inside the first several feet so the water gets moved away before it has a chance to soak in near the house.
Rain barrels and cisterns are another option if you want to capture and reuse downspout water rather than just redirect it. A 50 to 100 gallon rain barrel costs $50 to $150 and keeps a meaningful chunk of roof runoff out of the drainage equation during smaller rain events. Just make sure the barrel has an overflow outlet that routes water away from the patio when it fills.
Sealing a concrete patio or concrete pavers can reduce the amount of water that soaks into cracks and the subbase, which protects the base layer from saturation and freeze-thaw damage. But sealing does not improve drainage and shouldn't be mistaken for a drainage fix. A sealed patio with a flat or reverse slope will still pool water, just on the surface instead of in the base. Seal after you've corrected the slope and drainage, not as a substitute for it. For joints between pavers, polymeric sand locks the joints to prevent erosion while still allowing minor movement of water through the joint plane.
If the patio meets the house wall, make sure there's a clear gap or a properly sealed expansion joint. Water that pools against the house wall will work its way through over time. A bead of polyurethane or silicone caulk in that joint, renewed every few years, keeps water from tracking along the foundation. This is especially important if you've corrected the slope but the patio still sits tight against the siding or brick.
Step-by-Step DIY Workflow and Mistakes to Avoid
Here's how I'd approach this from start to finish if I were tackling it myself. Work through each step before moving to the next rather than jumping straight to the most dramatic intervention.
- Diagnose first. Watch the water during rain. Identify sources (downspouts, lawn runoff, surface slope) and low points. Check your patio slope with a level.
- Handle the easy wins immediately. Extend downspouts, clear gutters and drain grates, add temporary diversion berms if water is sheeting in from the lawn.
- Decide whether you need a surface fix, a base fix, or a drainage system. A patio that's just slightly low on slope needs regrading. A patio that's correct but surrounded by heavy clay that won't drain needs a French drain or dry well. A concrete slab you can't regrade needs a trench drain.
- Pull up pavers or plan your trench. For paver patios, remove the affected section. Check and correct the subbase slope first, then the bedding sand, then relay the pavers with string lines confirming 1/4 inch per foot pitch away from the house.
- Install drainage infrastructure if needed. Run French drain pipe at a consistent slope to your outlet. Connect channel drains to solid pipe. Make sure every run of pipe has a confirmed discharge point that won't create a problem elsewhere on the property.
- Regrade surrounding soil. Make sure the lawn and garden areas adjacent to the patio slope away from both the patio and the house at a 2% minimum. Bring in topsoil if needed.
- Manage downspouts permanently. Bury downspout extensions in solid PVC to a point well away from the patio or to a dry well with overflow.
- Seal and finish. Apply polymeric sand to paver joints, seal concrete if desired, caulk the patio-to-house joint, and verify all grates and drain inlets are clear.
- Test it. Run a hose at full volume for 10 to 15 minutes and watch where water goes. Check again after the next real rain.
Mistakes that cause the problem to come back
- Correcting only the surface slope without fixing the subbase slope, so water still gets under the patio and causes settling
- Using perforated pipe where solid pipe is needed (near the house, in the first section of a downspout extension), which releases water right where you don't want it
- Installing a dry well in dense clay soil without an overflow outlet, so it saturates and stops working in the first heavy storm
- Skipping landscape fabric when installing French drains, which lets soil migrate into the gravel over time and clogs the system within a few years
- Directing water onto a neighbor's property, into an easement, or toward the street in ways that violate local ordinances (check before you dig)
- Sealing the patio before correcting slope, which traps water on the surface instead of letting it find a path off
- Not accounting for deformation tolerance: even a correctly sloped patio can hold water if individual pavers vary by more than 1/4 inch across a 10-foot span, so check flatness as well as slope when resetting pavers
- Forgetting to create a proper fall on the patio surface from the start of a new build, which is far harder to correct after the fact than to get right during installation
One thing worth keeping in mind: if your patio drains correctly onto the surrounding grade and that grade drains correctly away from the house, most drainage problems resolve themselves without any drainage infrastructure at all. The infrastructure becomes necessary when the site geometry makes gravity-only solutions impossible. So solve the slope problem first, assess what's left, and then add drains only for the water you genuinely can't move with grade alone. That approach saves money and avoids over-engineering a problem that's often simpler than it looks.
FAQ
Can I just seal the patio to stop water from pooling?
Yes, but only as a finishing step. If you apply a sealant before correcting slope or fixing outlets, pooled water will still collect on top and can increase freeze-thaw damage beneath the surface. Use sealing after you’ve verified drainage direction and that water is leaving the patio area.
How do I know where the diverted water should go?
Do not assume “water runs away” means “it runs safely.” After you redirect, confirm the discharge point is higher than your patio and routes to a lawful outlet (storm system, swale, or drainage easement) without dumping onto a neighbor’s property or onto foundation areas.
What if cleaning the gutters doesn’t stop the patio from getting soaked?
If your gutter overflow is caused by clogged downspouts or undersized downspouts, cleaning alone may not be enough. Check the downspout opening for blockages and confirm the discharge location is still at least 6 to 10 feet from the patio edge, then verify gutters keep up during a heavy rain.
What’s the best way to troubleshoot before I dig?
Run water to the patio edge on purpose (using a hose) only for testing, not as a permanent fix. Look for hidden sheet flow from the house wall, clogged channel drains, or a low spot caused by settled base. If you see flow going underneath or into cracks, you likely need base correction or an under-slab drainage method.
Why does my patio still pool water after I adjusted the pavers?
A level test can mislead if you measure only the surface and ignore the base. Always reassess the grade at each layer for pavers (native soil, subbase, bedding sand) and make sure the subbase itself carries the slope, not just the top surface.
What causes trench drains to fail even when the grate is installed correctly?
For trench drains, the outlet and downstream path matter as much as the grate. If the connected pipe empties into a low or saturated area, the drain will back up. Ensure the drain discharges to a place that can accept the volume, or to a dry well sized for your soil conditions.
When should I avoid using a dry well?
In clay-heavy soil, dry wells can fill and stop taking water. If you use one, plan for an overflow route (for example, to a trench drain or to daylighted discharge) so that during extreme rain the system doesn’t just become a temporary pond.
Can I bury the downspout extension, and does pipe type matter?
If you redirect roof runoff and bury the extension, use solid PVC for the section nearest the house so water is moved away before it can soak into shallow ground near the foundation. Then consider transitioning to the correct pipe type once you’re past the foundation zone.
How should I measure slope on a patio with an uneven shape?
A slope of about 2% away from the house is a good target, but measure in the direction the water actually flows. If your patio has an irregular shape, take multiple measurements (for example, at corners and along the longest flow path) so you don’t correct one line while another still directs water toward the home.
Is it ever worth adding more drainage than the problem seems to require?
Yes, but it’s not as simple as “bigger is better.” Overbuilding drains can increase cost and may push water somewhere worse. A practical approach is to match the solution to the cause you observed (downspout discharge, sheet flow, under-slab saturation, or runoff from a bed) and size the drain/outlet to that remaining problem.
How long will hydraulic cement or concrete patching last for patio drainage issues?
Hairline cracks and low spots can hide a deeper issue like base settlement. Patch products may reduce the immediate seepage, but if water keeps finding the same pocket after cleanup and slope checks, plan on addressing the subbase or adding a channel drain.
Does polymeric sand fix drainage if my paver joints wash out?
For pavers, poly sand helps lock joints against erosion, but it can’t compensate for incorrect base slope. If joints remain full but the patio still ponds, the failure point is usually the subbase grade, compaction, or an outlet that doesn’t control where runoff ends.
What should I check at the house-wall edge after I correct the patio slope?
Yes. When the patio meets the house wall, even a small bypass channel can move water into the foundation area. Verify the expansion joint is properly filled and maintained, and ensure the patio edge and wall drainage details do not create a hidden low channel that guides water along the foundation.
How to Update Patio: Complete DIY Guide to Repair or Rebuild
How to update patio: DIY guide to assess, choose materials, and follow step-by-step repairs or full rebuilds with costs.