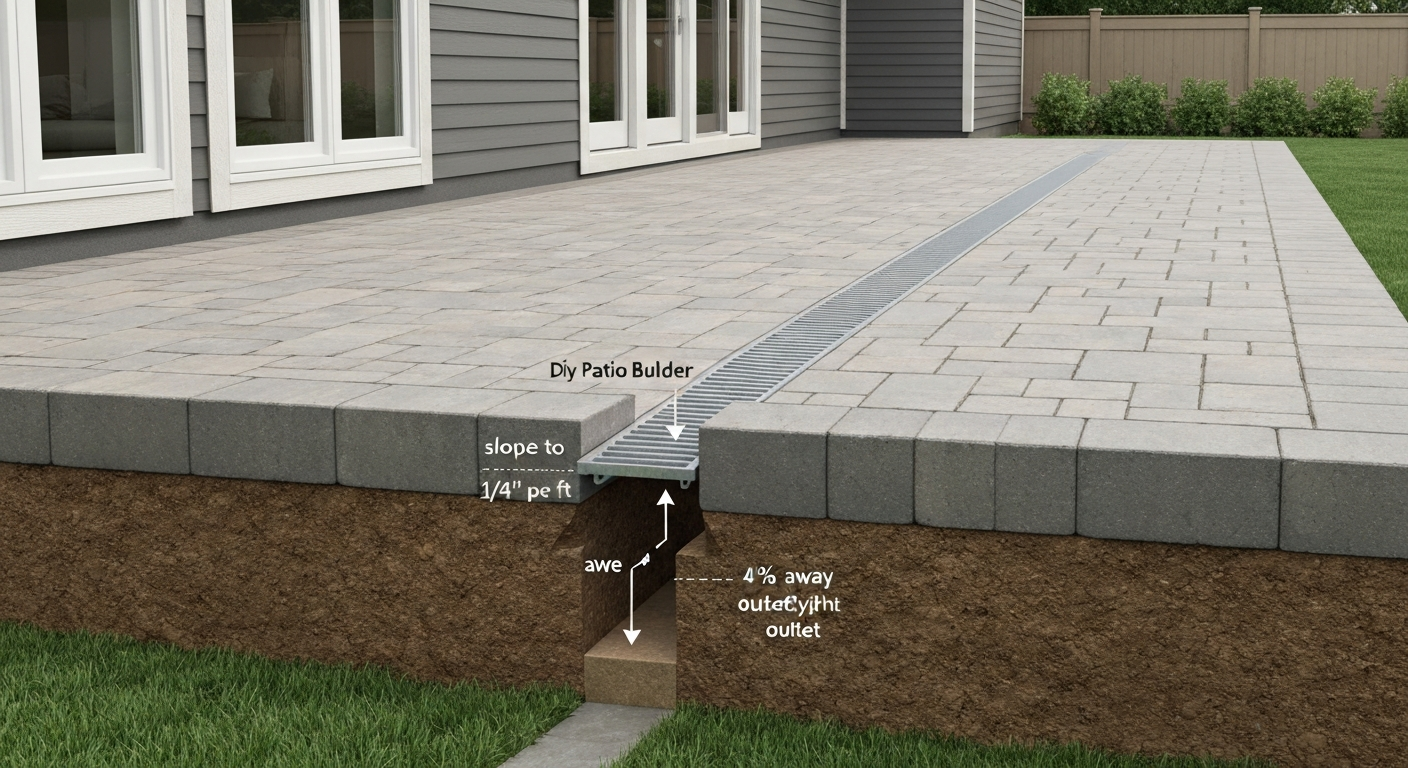
A 'fall' on a patio is a deliberate, gentle slope built into the surface so rainwater runs toward a drain, lawn edge, or soakaway rather than pooling near your house. For most residential patios, you need a minimum fall of around 1:80 (12.5 mm per metre) for natural stone or concrete slabs, and 1:60 (about 16.7 mm per metre) for smoother porcelain surfaces. Get that gradient right from the start and you will avoid standing water, protect your foundations, and save yourself a costly relay job later.
How to Create a Fall on a Patio: DIY Guide to Proper Drainage

Nolan Lennox
15 Jul 2026
What a 'fall' actually is and why it matters
In hard landscaping, a fall (sometimes called gradient or slope) is the planned vertical drop of a paved surface per unit of horizontal distance. It is entirely intentional: you are engineering the surface to move water in a specific direction rather than letting it find its own way, which is usually toward your back door or underneath your foundations. The fall is what separates a properly drained patio from one that turns into a paddling pool every time it rains.
From a building-protection standpoint, surface water sitting against a house wall can eventually find its way past a damp-proof course (DPC) and into the fabric of the building. Sustainable Drainage Systems (SuDS) guidance is explicit that correctly designed falls are a primary tool for managing surface water at source, controlling where runoff goes rather than just hoping it disappears. The International Residential Code (IRC) in the US requires finished ground to fall a minimum of 6 inches (152 mm) within the first 10 horizontal feet from a foundation (approximately 5% over that first 10 ft), or you must provide drains or swales to compensate. In the UK, BS 7533 paving guidance sets typical minimum transverse (cross) falls at around 1:40 (2.5%) for some surfaces, with longitudinal minima commonly 1:80 (1.25%) for paved areas. These are not arbitrary numbers, they are the minimum gradients that reliably clear water before it has time to pool.
The other reason fall matters is that you almost never notice a correctly built one. A 1:80 gradient across a 4-metre patio is a 50 mm total drop, barely visible to the eye and completely comfortable to walk on. A patio that was poured flat, by contrast, will announce itself every time it rains.
Recommended gradients: ratios, percentages, and mm per metre
Gradient can be expressed three ways, and it is worth knowing all three because product datasheets, building regs, and survey equipment each tend to use a different one. The conversion is straightforward: 1% equals 10 mm per metre, and for a ratio of 1:X the mm-per-metre figure is simply 1000 divided by X. So 1:80 = 12.5 mm/m = 1.25%, and 1:60 = 16.67 mm/m = approximately 1.67%.
| Gradient ratio | % slope | mm per metre | Best suited to |
|---|---|---|---|
| 1:40 | 2.5% | 25 mm/m | Impermeable/bituminous surfaces, fast runoff areas, public pavements |
| 1:60 | 1.67% | 16.7 mm/m | Porcelain paving, smooth concrete, glazed surfaces |
| 1:80 | 1.25% | 12.5 mm/m | Natural stone, textured concrete slabs, most residential patios |
| 1:100 | 1.0% | 10 mm/m | Absolute minimum — only where aesthetics demand; not recommended for impermeable finishes |
For most DIY patios, 1:60 for porcelain and 1:80 for natural stone or concrete pavers is the sweet spot recommended by major manufacturers including Bradstone. These falls are shallow enough to look level and steep enough to drain reliably. Aim above that range (steeper) if your patio is large and impermeable, if it sits in a heavy-rainfall region, or if you have no convenient drain at the low end and are relying on water dispersing into a lawn or border.
Site assessment before you lift a single slab
I have skipped the site assessment on smaller jobs and regretted it every time. Spending 20 minutes checking these points before you start will prevent you redesigning your fall mid-project because you discovered a utility cable or a neighbour's boundary drain. Work through this checklist methodically.
- Call your utility locator service (811 in the US, or use a cable avoidance tool in the UK) before any excavation — gas, electric, and water lines can all be shallower than expected under patios.
- Record the existing fall and runoff paths: where does water currently go when it rains? Is it toward the house, a neighbour's garden, a public drain, or a soakaway?
- Locate your DPC (damp-proof course) on the house wall — your finished patio surface must sit at least 150 mm below the DPC in UK practice, and never above it. In the US, finish grade must be at least 6 inches (152 mm) below any wood framing at the foundation.
- Identify available drainage outlets: existing gullies, channel drains, soakaway positions, lawn edges, or watercourses — your fall must lead somewhere legal and effective.
- Check soil infiltration potential if you plan a soakaway: clay-heavy soil will not absorb water fast enough for a soakaway to work, and you will need an alternative outlet.
- Note trees and roots within 3 metres — root systems complicate excavation and can cause long-term heave under a patio.
- Check any easements, boundary setbacks, or local authority requirements that affect where you can direct runoff — discharging onto a neighbour's land or into a foul sewer without consent is illegal in most jurisdictions.
- Measure the full area including any steps, walls, or level changes that will affect how the fall runs across the finished surface.
Quick planning checklist for budget DIY projects
Before buying materials or hiring equipment, run through this checklist to avoid the most common (and most expensive) planning mistakes.
- Decide your fall direction and target gradient (1: 60 or 1:80 for most patios) and confirm you have a legal, functional drainage outlet at the low end.
- Calculate total vertical drop needed: multiply the patio length in metres by your mm/m figure (e.g., 4 m × 12.5 mm/m = 50 mm total drop for 1:80).
- Confirm your finished surface level relative to the DPC — mark the DPC height on the house wall before excavating.
- Sketch a simple drainage plan showing fall direction, drain locations, and where water exits the site.
- Check whether planning permission or building regulations apply in your area — in the UK, paving over 5 m² in front gardens using impermeable materials requires planning permission; rear patios are generally permitted development but drainage work connecting to existing drain runs may need building control sign-off.
- Price materials before committing — subbase, bedding sand, slabs, mortar, edging restraints, and any drainage channel add up quickly on larger areas.
- Set a realistic time budget: a straightforward 20 m² paved patio with correct falls is typically a 2–3 day project for a competent DIYer working alone.
Tools and materials you will need
Core tools for any patio type
- Tape measure (5 m minimum) and steel rule
- String line and line pins or timber stakes
- Spirit level (1.2 m or longer) — longer is more accurate for patio work
- Straight edge (aluminium or timber, 2–3 m) for spanning between datum points
- Builder's square or 3-4-5 rope triangle for squaring up
- Pegs and marker paint for setting out datum points
- Rubber mallet and cold chisel
- Plate compactor (hire recommended for any area over 5 m²)
- Wheelbarrow, spade, and rake
Optional but genuinely useful
- Laser or rotary level: saves time on large areas and gives consistent accuracy; many models report in mm/m and %, which maps directly onto your target gradient. Typical handheld line lasers offer ±1–3 mm/m accuracy, which is adequate for patio work.
- Digital inclinometer or slope gauge: clips onto your spirit level and reads gradient directly in % or mm/m — very useful when setting screed or bedding to a specific fall.
- Dumpy level or water level tube: a budget alternative to laser levels for large sites.
- Angle grinder with diamond blade: needed for cutting porcelain or hard stone to fit around drains and edges.
- Bull float or Fresno trowel: for concrete screeding over large areas.
- Vibrating compactor plate: essential for compacting MOT Type 1 subbase correctly.
Materials by patio type
| Patio type | Subbase | Bedding/intermediate layer | Surface | Drainage extras |
|---|---|---|---|---|
| Concrete slab | MOT Type 1 (100–150 mm compacted) | Optional blinding sand (25 mm) | Ready-mix or site-batched concrete (100 mm min) | Formed channel rebates, drainage outlets cast in |
| Paved/block | MOT Type 1 (100–150 mm compacted) | Sharp sand or semi-dry mortar bedding (40–50 mm) | Flags, porcelain, or block pavers | Linear channel drain, point gully, edge restraint |
| Gravel/permeable | MOT Type 3 or clean angular gravel (100–150 mm) | Geotextile membrane | Decorative gravel (50–75 mm depth) | Infiltration trench or soakaway |
| Timber/composite deck | Concrete pad footings or adjustable pedestals | Treated timber joists or adjustable pads | Decking boards (leave 5–8 mm gaps between boards) | Gutter channel at low end, edge flashing |
How to measure and set out a fall correctly
Setting out the fall accurately before you lay a single slab is the most important step in the whole project. For a step‑by‑step practical guide on how to set a fall on a patio, see our dedicated how to set a fall on a patio resource for measurements, tools, and worked examples. I have watched plenty of well-intentioned patios end up with high spots and puddles because the fall was eyeballed or checked only occasionally. The measurement process itself is not difficult, it just requires patience and a willingness to re-check after each phase of compaction, because subbase compression will shift your levels.
String line and line level method
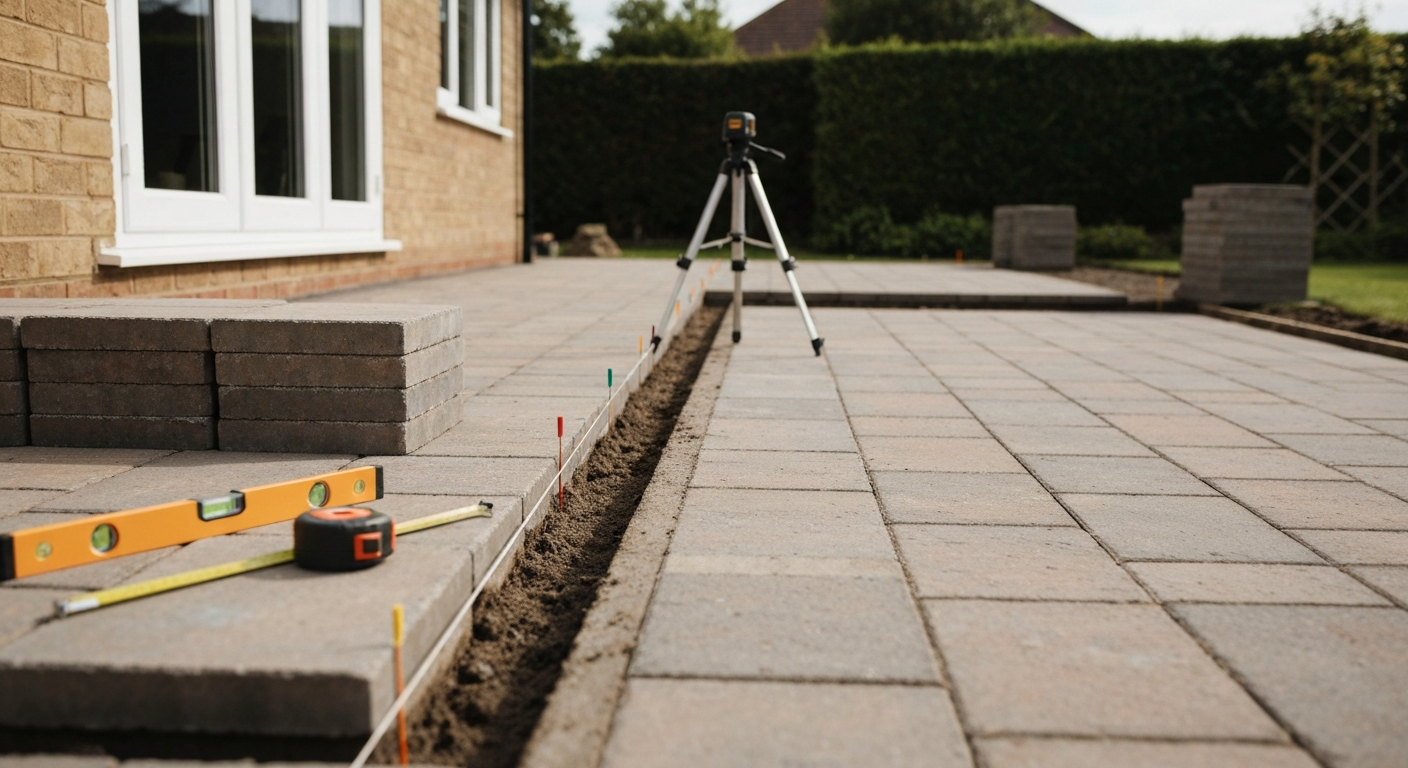
Set your datum peg at the house wall at the correct finished paving height (below the DPC). Drive a second peg at the far edge of the patio. Calculate the total required drop for your chosen gradient, for example, a 1:80 fall over 4 metres requires a 50 mm total drop at the far peg. Set the string line level at the datum peg, then drop the far end by exactly your calculated figure. A line level clipped to the string will confirm the string itself is true. Stretch string lines across the width at 1-metre intervals and use the same drop measurement at each metre point, this gives you a grid of height references across the entire patio that you can check bedding and surface levels against during the lay.
Spirit level and straight edge method
Place a 2-metre straight edge along the fall direction and slip a packing shim under the low end equal to your required drop over that distance, 25 mm for 1:80 over 2 metres. Tape the shimmed straight edge and use the spirit level bubble to confirm the straight edge is now reading level at your target gradient. This improvised slope gauge gives you a physical reference you can carry around the site and check each slab against. It costs nothing extra and I use it constantly even when I also have a laser level on site.
Laser and line level method
Set up a rotating laser or self-levelling line laser on a tripod above the datum point. If your laser has a slope/grade setting, dial in your target percentage directly. If not, set the laser level and use a staff or measuring rod at each point, reading off the difference from your datum calculation. Laser levels shine on this kind of work over large areas, a 6 m patio with a 1:80 fall gives only a 75 mm total drop, and maintaining consistency across that kind of shallow gradient over a wide width is much harder to do by eye with a spirit level. See Bosch measuring training/materials, laser/inclinometer units, mm/m/% displays and accuracy guidance for manufacturer guidance on device displays and typical accuracies Bosch measuring training/materials — laser/inclinometer units, mm/m/% displays and accuracy guidance.
Worked measurement examples
| Patio length | Gradient 1:80 (12.5 mm/m) | Gradient 1:60 (16.7 mm/m) | Gradient 1:40 (25 mm/m) |
|---|---|---|---|
| 2 m | 25 mm total drop | 33 mm total drop | 50 mm total drop |
| 4 m | 50 mm total drop | 67 mm total drop | 100 mm total drop |
| 6 m | 75 mm total drop | 100 mm total drop | 150 mm total drop |
| 8 m | 100 mm total drop | 133 mm total drop | 200 mm total drop |
Use these figures to set your string lines, check your screed or bedding depth at the far edge versus the house end, and confirm your drain or channel invert is at or below the calculated low point. Always re-measure after compacting the subbase, I routinely find 5–10 mm of additional settlement after plate compaction, so I check and adjust string lines before starting the bedding layer.
General methods that apply to all patio surfaces
Regardless of whether you are laying concrete, stone flags, gravel, or decking, the fall is established in layers from the bottom up. Getting each layer right means the surface above has a solid, consistently graded platform to sit on.
- Excavate to the correct depth, accounting for subbase, bedding, and surface thickness, plus the total vertical drop from high end to low end. Mark your fall on the trench walls using pegs at the high and low corners.
- Compact the formation (sub-grade soil) thoroughly before placing subbase. Soft spots must be dug out and filled with compacted Type 1 aggregate — never leave them for the subbase to bridge.
- Lay and compact the subbase in 100 mm layers using a plate compactor or roller. Set the top of the subbase to your fall gradient. Re-check levels after compaction because the material will settle by 5–10 mm or more.
- Set out screed or bedding rails/pegs at the target fall before placing any bedding material — this is the last chance to correct any level issues before the surface goes down.
- Lay the bedding course to the correct gradient, working from the high end to the low end and checking surface levels against your string lines at every slab or every metre of screeded concrete.
- Check finished surface levels before grouting, jointing, or adding edge restraints — small errors are much easier to correct at this point than after the job is set.
Step-by-step: concrete patio falls
Concrete patios are arguably the most unforgiving surface for fall work because once the concrete sets, your only correction options are grinding down high spots or adding a repair overlay, both of which add cost and time. Get the fall set in the formwork before the pour and you will not need to revisit it.
- Set your timber forms (shuttering) to the correct fall using your string lines and calculated total drop. Drive form pegs firmly, check with a spirit level and shim, and screw forms to pegs at the correct height on both sides.
- Compact and blind your subbase. Set screed rails or use the forms themselves as screed guides, confirming the fall runs correctly from house end to drain end.
- Pour and screed the concrete in bays if the area is larger than about 15 m², using a straight screed board dragged along the forms to strike off to the correct level. Bull float the surface to close it up.
- For drain cut-outs and channel rebates, form these before pouring by fixing a box-out in the correct position. The drain invert must sit at or below the lowest calculated surface point. Allow at least 5 mm of paving surface above the drain top to maintain positive flow.
- Cure the concrete for at least 3–5 days before walking on it and a minimum of 28 days before applying heavy loads.
- For repair overlays on an existing flat or poorly-drained concrete patio: use a self-levelling or self-smoothing repair screed applied in a tapered coat from zero at the high end to the required total drop at the low end. Minimum overlay thickness is typically 10–15 mm for polymer-modified screeds — check the manufacturer's datasheet. Clean and prime the existing surface thoroughly before applying.
Step-by-step: paved and block patio falls
Paved and block patios are the most common DIY project, and the fall is set in the bedding course, so you have much more flexibility than with concrete because you can lift and re-bed individual slabs if something is off. That said, the bedding layer has to be consistent in depth and gradient or slabs will rock, bedding will wash out, and joints will crack.
- After compacting your subbase to the correct fall, set your edge restraints (concrete haunching or proprietary edging) at the low end and sides before laying begins. These lock the perimeter and prevent lateral creep. The top of the edge restraint should match your target finished level at that point.
- Mix a semi-dry mortar bedding (5 parts sharp sand to 1 part cement by volume) to a consistency that holds its shape when squeezed but does not slump. Spread and screed the bedding to your fall, checking against string lines at every course.
- Lay slabs or blocks from the house end downward (high to low), tapping each one down with a rubber mallet and checking for level and consistent joint width. Cross-check every 3–4 slabs with a long straight edge to catch any creeping high or low spots.
- Around point drains and channel drain positions: lay the surrounding slabs first, cut to fit, and ensure the drain top sits 5 mm or more below the finished slab surface on all sides.
- Once laid, check the whole surface with a long straight edge and your slope gauge before grouting. Any hollow or high slab is lifted and re-bedded now.
- Grout joints with a brush-in polymeric jointing compound or a semi-dry mortar, working from the high end to low. Keep joints tight around drain inlets to prevent bedding washout.
- Re-laying an existing paved patio: lift all slabs (mark their position and orientation to re-lay in the same pattern), re-grade and re-compact the subbase if needed, set new bedding at the correct fall, and re-lay. This is genuinely a half-day job on a small patio and far cheaper than a full relay with new materials.
Step-by-step: gravel and permeable patio slopes
Gravel and permeable patios handle drainage differently from hard surfaces because water infiltrates down through the material rather than running across the top. You still need a fall, partly to direct any surface water that does not immediately infiltrate, and partly to slope the underlying subbase toward a drainage point in case the permeability becomes blocked over time. Think of the fall as your backup when the primary infiltration is overwhelmed.
- Excavate to 200–250 mm depth (more for heavy clay ground). Compact the formation soil and check that it has at least some infiltration capacity — pour water on it and time how fast it absorbs. If it pools for more than 30 minutes, plan a subbase outlet drain rather than relying solely on infiltration.
- Lay a non-woven geotextile membrane over the compacted formation, overlapping joins by at least 300 mm and folding it up the edges. This separates the subbase from the soil and prevents fine particles migrating upward and blocking the gravel.
- Install MOT Type 3 (open-graded, low-fines) or clean angular gravel as your subbase, 100–150 mm deep, compacted to a fall of 1:80 minimum toward your drainage outlet or the most permeable area of the site.
- Lay a second layer of geotextile if using a fine decorative gravel over the subbase, to prevent the surface material falling into the subbase layer over time.
- Apply decorative gravel to a depth of 50–75 mm. Gravel settles over time, so top up annually.
- For larger areas or areas adjacent to buildings: install a perforated pipe drain at the base of the subbase at the low end, running to a soakaway or a legal outlet, as a failsafe. Gravel confinement systems (plastic honeycomb grids) help maintain a consistent surface depth and give pedestrian stability while keeping infiltration rates high.
Step-by-step: timber and composite deck falls
Decks drain by gravity through the gaps between boards, so the primary drainage mechanism is different from solid paving. But the frame still needs a fall to prevent water pooling on the surface and sitting in board joints, which accelerates rot in timber and can stain composite boards. Aim for a 1:100 to 1:80 fall along the board run direction (water should run off the end of the boards, not sit in the channels between them).
- Set your ledger board (the joist fixed to the house wall) first. This is your datum. Mark the finished deck height on the wall — it must be at least 150 mm below any door threshold and well below the DPC.
- Calculate the required drop from the ledger to the outermost beam. For a 4 m deck at 1:80, you need a 50 mm drop at the far end, meaning the outer beam sits 50 mm lower than the ledger.
- Use adjustable deck pedestals or set concrete pad footings at the calculated heights to achieve the fall. Adjustable pedestals are far easier for a DIYer because you can fine-tune height during installation rather than relying on precisely cast concrete.
- For raising joists to create fall on an existing flat deck: use tapered hardwood or composite sleepers (shims) under joists. These are available cut to specific gradients, or you can cut your own from treated timber. Fit them under each joist at each support point, progressively increasing the taper from the high end to the low end.
- Lay decking boards perpendicular to the joists (i.e., the boards run in the direction of the fall) and leave a 5–8 mm gap between boards to allow water to drain through. Do not over-tighten fixings, which can cause boards to cup and trap water.
- At the low end, fit a gutter channel or angled edge flashing to catch water draining off the deck and direct it away from the building. Never allow deck run-off to discharge directly against a wall or into an unmanaged void under the deck frame.
- Ensure under-deck ventilation is maintained — a damp, unventilated void beneath a timber deck is where rot starts. Keep the ground below clear of debris and consider a gravel or permeable surface under the deck rather than bare soil.
Drain solutions: point drains, channel drains, and grate details
The fall gets water to a low point, the drain is what takes it away from there. On most residential patios you will use one of three drain types: a point gully (a single square or round inlet), a linear channel drain (a slot or grated channel running across the patio), or a combination of both. Each has a best use case.
Point gullies work well on smaller patios where a single low corner handles all the runoff. Position the gully at the lowest point, bed it on concrete haunching so the top grate sits 5–10 mm below the surrounding finished paving, and connect the outlet to your drainage run. The outlet must have a continuous fall of at least 1:80 to its final destination, never leave a flat or uphill section in a drain run, as this creates a silt trap and eventual blockage.
Linear channel drains are better suited to larger patios, driveways, or any area where you want to divide a wide impermeable surface into manageable drainage panels. Install the channel on a concrete bed with the invert set at a continuous fall toward the outlet end. The finished paving on both sides must sit at least 5 mm above the channel top to ensure positive flow into the channel. Manufacturer installation datasheets for proprietary channel drains (such as ACO or Hauraton products) specify haunch dimensions, invert levels, and bedding mixes, follow these rather than guessing. Connect the channel outlet to a gulley, soakaway, or legal discharge point.
Grate selection matters more than most people expect. Cast iron grates handle heavier loads and are less prone to theft in urban gardens, while polymer composite grates are lighter and rust-free. For patios adjacent to planting, choose a slot or heelproof grate that does not trap leaf litter on top but still passes debris through to a silt trap below. Fit a debris basket inside the gulley and clean it at least twice a year, autumn and spring.
Soakaways, dry wells, and infiltration solutions
A soakaway is an underground pit filled with coarse aggregate (or proprietary crate units) that receives surface water and releases it slowly into the surrounding soil. In the UK, BRE Digest 365 (BRE DG365) and CIRIA SuDS guidance set the standard for soakaway sizing and testing, most local authorities and the NHBC require percolation test logs as evidence that a soakaway will work before approving drainage plans. In the US, dry wells function on the same principle and are subject to local code requirements.
Before building a soakaway, you must test your soil's infiltration rate. Dig a trial pit of at least 300 mm square and 300 mm deep in the proposed soakaway location. Fill it with water three times in succession and time how long the third fill takes to empty. If it takes longer than 30 minutes to drop 75 mm, your soil infiltration rate is too low and you should plan an alternative outlet. Clay soils typically fail this test and need either a connection to a surface water drain or a managed discharge to a watercourse.
- Position soakaways a minimum of 5 metres from any building foundation and at least 2.5 metres from a boundary — NHBC standards and most local authorities specify this minimum offset.
- Size the soakaway based on your patio area and the local design rainfall event (typically the 1-in-10-year, 1-hour storm) using BRE DG365 or CIRIA SuDS tables.
- Use proprietary plastic soakaway crates rather than rubble-filled pits where budget allows — they provide more void space per cubic metre and are easier to size and install.
- Surround the crate or aggregate fill with a geotextile wrap to prevent fine soil particles migrating in and reducing void space over time.
- Label the soakaway access point (if accessible) and note its location in your drainage plan for future reference.
How to raise, adapt, or cover an existing drain without blocking flow
This comes up constantly when retrofitting a fall onto an existing patio: your new finished levels are different from where the old drain sits, and the drain inlet is now either too high (the paving has been lowered around it) or has been buried by a new overlay. Blocking a drain inlet is not an option, but adjusting one is usually straightforward.
If the drain is too low after re-laying or overlaying, you can raise the gully top by fitting a gully raising piece or adjustment ring (available from drainage suppliers to match standard gully sizes, typically 100 mm, 150 mm, or 200 mm diameter). Bed the raising piece in mortar, re-fit the grate, and re-bed the surrounding paving to the correct level. If the grate needs to sit at a specific height to achieve the 5 mm below-finished-surface rule, raise pieces are available in 25–50 mm increments. For a step-by-step guide on how to raise a drain for a patio, see the detailed procedure on how to raise a drain for patio (internal reference).
If you need to cover an existing drain that is in the wrong position but still functional, the correct approach is to fit a sealed access cover with a concealed hinge rather than paving over it permanently. For step‑by‑step guidance on matching recessed covers to finished paving and keeping drains accessible, see how to cover drain on patio. Building regulations and drainage codes in most jurisdictions prohibit permanently sealing access to a drainage run. Proprietary recessed cover frames allow you to fill the cover with matching paving material so it is nearly invisible, while keeping the drain accessible for rodding.
How to divert water when a direct outlet is not available
Not every patio has a convenient drain at the low end. If your site assessment reveals no legal outlet for the patio's runoff, you have four practical options depending on your budget, soil type, and available space. For detailed methods on how to divert water away from a patio, see our guide covering practical diversion options and step-by-step installation.
- Channel routing to an existing drain: install a surface water channel drain running from the patio to a nearby gully, gulley, or inspection chamber. The channel must fall continuously at 1:80 minimum and connect to a surface water drain — never to a foul sewer without consent.
- Swales: a shallow grass-lined depression that routes water slowly across the garden to a suitable outlet point. Swales are an effective and very low-cost solution for suburban gardens with enough space — even a 300 mm wide, 150 mm deep grass swale can manage residential patio runoff in most rainfall conditions.
- Rain gardens: shallow planted depressions filled with free-draining soil and planted with moisture-tolerant species. Rain gardens can absorb and filter runoff from patios up to about 30–40 m² in a typical suburban garden, depending on soil infiltration rates and plant density. They double as a garden feature and are increasingly favoured by planning authorities as a SuDS measure.
- Pumped solutions: for very constrained sites with no gravity outlet, a submersible sump pump in a collection chamber can pump water to a legal outlet. This is a last resort given the cost and maintenance, but it works reliably where nothing else is viable. Budget for a float-switch pump, a 100–150 mm collection pit, and a rising main to the outlet.
Troubleshooting and maintenance tips
Ponding water
Persistent ponding almost always means the fall is insufficient or there is a localised high spot stopping water reaching the drain. Use a long straight edge and spirit level across the wet area to identify the high point. On a paved patio, the fix is to lift the affected slabs, adjust the bedding depth, and re-lay. On concrete, a tapered repair overlay or grinding down the high spot are the realistic options. Check drain inlets are clear before assuming the fall is the problem, a blocked gully basket will cause ponding regardless of how well-graded the surface is.
Blocked channels and gullies
Clear debris baskets and channel screens at least twice a year. Jet-wash channel drain bodies annually, silt accumulates in the base even with debris baskets in place and will eventually restrict flow. If a gulley is persistently blocking, check the drain run for a partial blockage or low-gradient section downstream, not just the inlet.
Bedding washout
Slabs that rock or become uneven over time are almost always caused by fine bedding sand washing out through open joints or under edge restraints. The fix is to refill joints with a polymeric jointing compound that resists water infiltration, check that edge restraints are intact, and re-bed any settled slabs. Using a semi-dry mortar bedding rather than pure dry sand reduces washout risk significantly on patios close to drains or in high-rainfall areas.
Winter movement and frost heave
Frost heave under paving occurs when water in the bedding or subbase freezes and expands. A correctly compacted MOT Type 1 subbase with properly graded joints reduces the amount of water that can accumulate and freeze. If a particular area repeatedly heaves in winter, excavate it, check for a drainage problem at subbase level, and re-compact before re-laying. In persistently wet ground, deepening the subbase to 150–200 mm and including a perforated pipe drain at the base is a long-term fix.
Typical cost ranges and time estimates
| Project type | DIY material cost (approx.) | DIY time estimate | When a pro adds cost |
|---|---|---|---|
| Re-bedding existing slabs to correct fall (10–15 m²) | £50–£150 / $60–$180 (sand, mortar, jointing compound) | 1 day | Structural issues, subbase failure, or access problems |
| New paved patio with fall and point drain (20 m²) | £600–£1,400 / $700–$1,700 (subbase, slabs, bedding, drain) | 2–3 days | Connecting drain to an existing run, navigating utilities |
| Concrete patio with formed channel drain (20 m²) | £400–£900 / $480–$1,100 (concrete, forming, channel unit) | 2 days + cure time | Structural slabs, permits, connection to foul/surface water main |
| Gravel/permeable area with soakaway (15 m²) | £200–£500 / $240–$600 (aggregate, geotextile, soakaway crate) | 1–2 days | Percolation testing, building control approval, poor soil requiring extra depth |
| Tapered repair overlay on existing flat concrete (10 m²) | £80–£200 / $95–$240 (polymer screed, primer, drain adjust ring) | Half to 1 day | Structural concrete defects underneath |
| Composite deck with adjustable pedestals and fall (20 m²) | £1,200–£2,500 / $1,450–$3,000 (frame, decking, pedestals, fixings) | 2–4 days | Structural attachment to building, building regulations approval |
These are material cost estimates only, based on mid-range product pricing as of mid-2026 in the UK and US respectively. Hired equipment (plate compactor, laser level) adds £80–£150 / $95–$180 per day. If you need to connect a new drain run to an existing gulley or chamber, the groundwork cost of opening up a drain run and making a connection typically adds £300–£600 / $360–$720 to a professional quote, which is a common reason to hire a groundworker for just that one task even on an otherwise DIY project.
Safety reminders, permits, and building regulation considerations
Patio drainage work sits at the boundary of permitted development and controlled work in many jurisdictions, and it is worth checking your position before you start rather than after building control pays a visit. Check local building regulations for patio drainage to confirm permitted discharge points, access requirements, and whether you need building control approval; see guidance on building regulations for patio drainage.
- In England and Wales, paving over more than 5 m² in a front garden using impermeable materials requires planning permission unless the water is managed on site (e.g., permeable paving or a soakaway). Rear patios are generally permitted development but connecting to a public sewer requires consent from the water authority.
- In Scotland and Northern Ireland, rules on impermeable front garden paving differ slightly — check with your local planning authority.
- In the US, IRC R401.3 sets the grading requirements noted earlier, and many municipalities require permits for any patio work that involves connecting to a drainage system or altering site drainage. Always check local code before starting.
- Always call 811 (US) or use a Cable Avoidance Tool (UK) before any excavation — gas, water, and electric services can all be under or near a patio area.
- Drainage from a patio must not discharge onto a highway, a neighbour's property, or into a foul sewer without consent. Discharging into a watercourse may also require an Environmental Agency permit or local authority consent depending on the volume.
- Working near a DPC: any disturbance to the house wall, flashings, or DPC during patio construction should be inspected and made good before covering. Bridging a DPC — even accidentally with accumulated debris — can lead to damp ingress and is a common, expensive mistake.
- Patio work that forms part of a new dwelling extension or is structurally attached to the building may fall under the Building Regulations Part H (drainage) and Part C (site preparation) in the UK, requiring building control notification.
When to hire a professional
Most patio fall and drainage work is genuinely achievable for a competent DIYer. I would encourage anyone comfortable with basic groundwork to tackle it. That said, there are specific triggers that shift the risk-reward ratio toward calling in a professional.
- Connecting a new drain run to a public surface water or foul sewer: this requires a proper connection and usually building control or water authority sign-off. A groundworker with relevant experience does this routinely and carries the liability if something goes wrong.
- Poor soil conditions: expanding clay, made ground, or fill material under a patio needs a structural assessment before you commit to any paving. A drainage or groundwork professional can advise on subbase specification and whether a structural concrete slab is needed.
- Large areas with complex falls (dual-fall, valley, or hip drainage patterns): calculating and setting consistent falls across a large patio with multiple drainage directions is genuinely difficult without survey equipment and experience.
- Any work that requires planning permission or building control approval: a professional can produce the documentation (drainage plans, percolation test logs, method statements) that building control requires, which speeds up approval and protects you if you sell the property.
- Existing drainage problems that are getting worse: recurring flooding, subsidence, or persistent damp near a building indicates a systemic drainage problem that needs a proper survey rather than a surface fix.
When hiring a contractor, ask for a written method statement covering how they will set and verify falls, where drainage will discharge, how they will protect the DPC, and whether any permits or notifications are required. Request a drainage plan drawing as part of the handover documentation, this is invaluable for future maintenance or if you make changes to the patio later.
Quick-reference checklists and measurement cheat sheet
Before you start: site and planning checks
- Utility locate completed (call 811 / use CAT tool)
- DPC level marked on house wall
- Target fall direction and gradient decided (1: 60 porcelain / 1:80 stone or concrete as default)
- Total drop calculated for full patio length and confirmed achievable relative to DPC
- Drainage outlet identified and confirmed as legal
- Soil infiltration tested if soakaway is proposed
- Permits or building control requirements checked
- Materials and hired equipment ordered
During the build: level checks
- String lines set to correct fall before any subbase placed
- Subbase levels re-checked after compaction
- Bedding level and fall confirmed before any slabs or concrete placed
- Drain/channel invert set at or below lowest calculated surface point
- Finished surface checked with straight edge and slope gauge before grouting or joint filling
- 5 mm minimum clearance confirmed between finished paving and drain grate top
Gradient quick-reference
| Ratio | % / mm per metre | Drop over 2 m | Drop over 4 m | Drop over 6 m |
|---|---|---|---|---|
| 1:40 | 2.5% / 25 mm/m | 50 mm | 100 mm | 150 mm |
| 1:60 | 1.67% / 16.7 mm/m | 33 mm | 67 mm | 100 mm |
| 1:80 | 1.25% / 12.5 mm/m | 25 mm | 50 mm | 75 mm |
| 1:100 | 1.0% / 10 mm/m | 20 mm | 40 mm | 60 mm |
To use the table: find your chosen gradient row, then read across to your patio length column. That figure is the exact vertical drop your far edge or drain should sit below your datum at the house wall. Set this drop on your string line, mark it on your form pegs or screed rails, and check it at every stage of the build. The rest of the drainage system, the drain type, soakaway design, and diversion route, all connects back to getting this number right from the start.
FAQ
What is a ‘fall’ (slope/gradient) on a patio and why does it matter?
Definition: the planned vertical drop of the patio surface per unit horizontal distance used to move surface water away from buildings into drains/soakaways. Why it matters: prevents ponding, reduces risk of water ingress to buildings, controls runoff routing, and is a primary component of surface-water management (SuDS). Use authoritative guidance (CIRIA SuDS Manual, building codes) when linking fall to performance and regulations.
What numeric gradients are recommended for residential patios (with measurement examples)?
Common practical ranges used by contractors: 1:60–1:80 for typical residential patios (shallow, nearly invisible fall); 1:40 for impermeable surfaces or areas needing faster runoff. Conversions/examples: 1:80 = 12.5 mm drop per 1 m (=> 2 m = 25 mm, 5 m = 62.5 mm). 1:60 ≈ 16.7 mm/m (3 m ≈ 50 mm). 1:40 = 25 mm/m (5 m = 125 mm). Express gradients as ratio (1:X), percent or mm/m (1% = 10 mm/m).
What must be included in a site‑assessment checklist before adjusting or creating a fall?
Checklist: call utility-locators/811 before excavation; record existing ground levels and run-off paths; note nearby building DPCs/threshold heights and the minimum finished-grade rule (e.g., IRC: fall 152 mm in first 3048 mm from foundation where applicable); check soil type and drainage/infiltration (trial pits/percolation test if proposing soakaway); identify trees/roots, easements or covenants; check local planning or building-control requirements and required offsets for soakaways; confirm access and materials/storage areas.
Which tools and measuring methods are practical and accurate for DIYers?
Essential tools: tape measure, mason’s line/string, line level or spirit level, carpentry/5m level, adjustable string stakes, measuring rod, builder’s level or laser/rotary level for larger/precise jobs, inclinometer or digital level for mm/m readings, marker spray, shovel, tamper/plate compactor (rented), wheelbarrow. Methods: set a datum at door/DPC/threshold, run a staked string line to target outlet, use a line-level or laser to measure fall; re-check after compaction. Example calculation: for a 3 m run at 1:60 → vertical drop ≈ 50 mm (3×16.67 mm).
What materials are needed for common patio types when building fall into the construction?
Concrete: sub-base aggregate (Type 1/CR), compactable hardcore, damp-proof membrane if required, concrete mix, steel mesh or reinforcement, screed guides, formwork. Paved/block: sub-base aggregate, sand/bedding layer (or mortar for bonded systems), edge restraints, pavers/blocks, jointing sand/polymeric sand. Gravel/permeable: geotextile, compacted engineered sub-base (permeable), graded aggregate topping, edging restraints. Timber/composite decking: adjustable pedestals or joists set on packers to create fall, bearers/joists, decking boards, joist hangers, fixings. Drainage components: point gullies, channel/linear drains, pipework, soakaway crate units or stone, inspection chamber. Small tools and safety kit as above.
Step‑by‑step procedure for creating fall on a new concrete patio (DIY, budget-conscious)
1) Survey and set datum at door threshold/DPC and mark desired outlet location. 2) Calculate required drop (use 1:60–1:80 as target) and mark levels on stakes. 3) Excavate to required depth for sub-base + concrete thickness + fall. 4) Lay and compact sub-base in layers, checking levels and fall frequently. 5) Install formwork and level guides to the calculated fall. 6) Place membrane/mesh if needed and pour concrete, strike off using the fall guides and straight edge. 7) Finish surface (broom finish/float) keeping fall, cure as manufacturer recommends. 8) Connect outlet to channel or soakaway as planned. Re‑measure after curing and address any low spots.
Next Article
How to Make a Patio Drain: DIY Guide to Slope, Types & Install
How to make a patio drain: step-by-step DIY guide for planning, slope, drain types, installation, and maintenance.