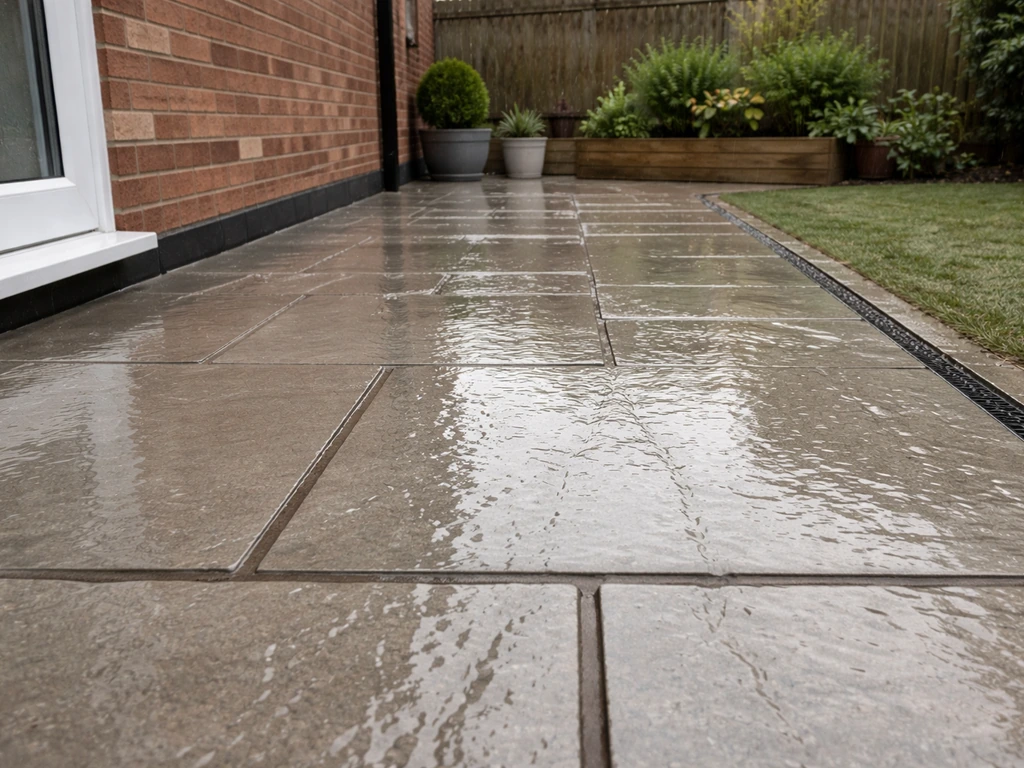
The most reliable way to make a patio drain is to combine two things: a surface slope of at least 1/4 inch per foot (2%) away from your house, and a drainage outlet that actually goes somewhere useful, whether that is a channel drain feeding a downslope outlet, a French drain trench absorbing water into the ground, or a simple point drain connected to a buried pipe. Get both of those right and standing water on your patio becomes a non-issue. Get either one wrong and you will be chasing puddles every time it rains.
How to Make a Patio Drain: DIY Guide to Slope, Types & Install

Nolan Lennox
12 Jul 2026
What this guide covers and who it is for
This is a hands-on walkthrough for homeowners who want to sort out patio drainage themselves, from scratch or as a fix to an existing problem. Whether you are laying pavers over compacted gravel, pouring a concrete slab, building a gravel patio, or putting down a wood or composite deck adjacent to a paved area, drainage works the same way at a basic level: slope the surface, capture the runoff, and route it somewhere safe. I will cover site assessment, choosing the right drain type for your patio material, calculating and setting your slope, step-by-step installation, covering and finishing drains, permits, maintenance, and when the job honestly exceeds DIY territory. If you are working out how to divert water away from the house more broadly, or trying to figure out building regulation requirements for your drainage setup, those are related topics worth reading alongside this one.
Planning and site assessment before you dig anything
Before buying a single fitting, spend an hour walking your site after a heavy rain, or run a garden hose on the patio surface for ten minutes. Where does the water sit? Where does it move? Does it pool against the house wall, collect at a low spot in the middle, or run off into a neighbor's garden? These observations tell you more than any diagram. Mark the wet spots with spray paint or stakes so you remember them when it is dry.
Measure the area and identify your outlet point
Sketch a rough plan of the patio with dimensions. Note the position of the house wall, any existing downpipes or gullies, and the direction the land naturally falls. Your drainage system needs an outlet: a storm drain, a soakaway, a French drain trench in your lawn, or a daylight point where water can exit onto a slope. Without a clear outlet in mind, you are just moving the problem.
Check your soil, utilities, and water table
- Dig a test hole 18–24 inches deep and fill it with water. If it drains completely in under an hour, your soil has reasonable infiltration and a French drain or soakaway is viable. If it still holds water after 12 hours, you are in heavy clay and you will need to pipe water away rather than rely on the ground absorbing it.
- Call 811 (the national One-Call number) before any digging. State 811 centers typically need at least two business days notice. Utility locates are free and non-negotiable. Striking a gas line or electrical conduit is not a DIY setback, it is a life-safety emergency.
- Check your local water table. If you notice water seeping into that test hole from below, you may have high groundwater seasonally, which means sub-surface and perimeter drainage becomes important, not just surface fall.
- Note any existing underground drainage. Look for cleanout caps, inspection chambers, or gully pots near the patio. These can sometimes be adapted rather than replaced.
Regulations and permits: check before you build
The 2021 International Residential Code (IRC), section R401.3, requires finished grades to drain away from foundation walls, with the grade falling at least 6 inches within the first 10 feet, and impervious surfaces within that 10-foot zone sloped not less than 2%. Many local codes adopt this directly, but some jurisdictions add their own requirements, especially around connecting to storm systems or installing soakaways. A quick call to your local building department before you start can save you from having to redo work. If your patio is near a property boundary, runs to a public storm drain, or exceeds a certain area, a permit may be required. The related topic of building regulations for patio drainage covers this in more detail and is worth checking if you are in any doubt.
Which drain type should you use? A quick decision guide
The right drain type depends heavily on your patio material, since that affects how water moves across the surface, how much excavation is practical, and how the drain integrates visually. Here is a straightforward breakdown:
| Patio material | Best primary drain type | Secondary option | Key reason |
|---|---|---|---|
| Concrete slab | Channel drain (linear) at low edge or center | Point drain / catch basin | Impervious surface needs a defined collection point; slope directs water to it |
| Segmental pavers (sand-set) | Channel drain at perimeter or low edge | French drain in sub-base | Can re-grade sub-base during install; channel drain handles surface runoff cleanly |
| Gravel patio | French drain or perforated trench below gravel | Perimeter channel drain | Water percolates through gravel naturally; sub-surface trench intercepts it before saturation |
| Wood or composite decking | French drain or perimeter channel drain below/beside deck | Gravel perimeter drain | Decking is permeable between boards; drainage is mostly sub-surface and perimeter |
| Any patio near a foundation | Perimeter / sub-surface drain + positive surface slope | Channel drain at house side | Foundation protection is the priority; surface slope alone is rarely enough |
Channel drains (linear drains): the workhorse for most patios
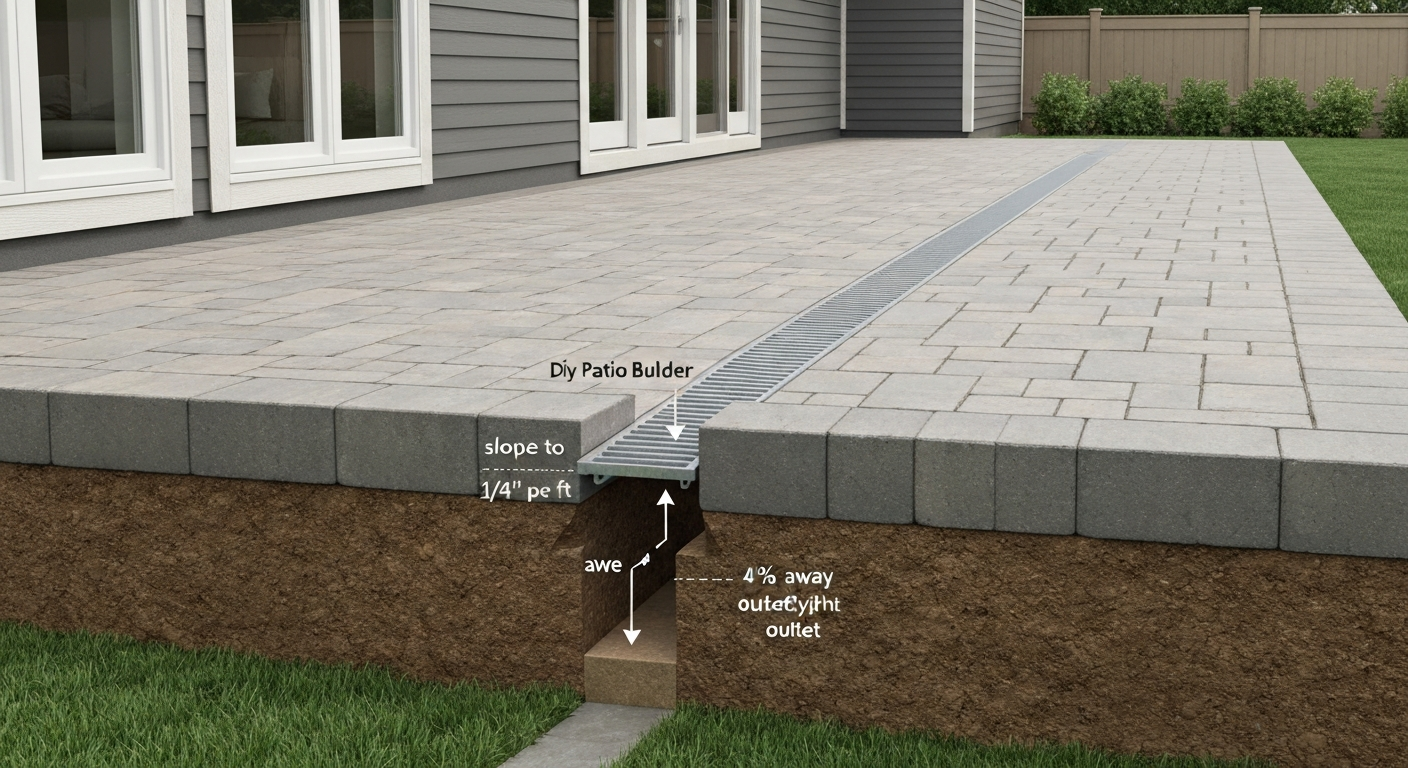
A channel drain, sometimes called a linear or trench drain, is a long narrow slot in the patio surface that collects runoff along its entire length and routes it through a single outlet pipe. The drain body is typically a polymer, fiberglass, or pre-cast concrete channel, and it is covered with a grate that can be decorative, slotted, or perforated depending on the setting. I have used these on concrete slabs and paver patios and they are genuinely the tidiest solution when you want to catch water across a wide area without making the whole patio look like it has a drain in the middle.
How they work and where to put them
The entire patio slopes toward the channel, which sits at the lowest point. A single outlet (usually 4 inches, though 3-inch outlets exist for lighter-duty residential channels) exits through the channel body at one or both ends, connecting to a buried pipe that leads to your outlet point. The key is that the channel body itself also has a slight internal fall, usually 0.3–0.5%, built in or achieved by stepping the body units. When you are installing at the edge of a patio against a house wall, put the channel along the house side and slope everything away from the house, then the channel intercepts any water that runs toward the wall. When the patio is open on all sides, a central channel with the patio sloping in from both sides (a dual-plane or saddle slope) is a cleaner approach.
Concrete encasement and grate selection
For a residential patio, polymer channel drains do not usually need full concrete encasement, but if you are installing in a concrete slab you will pour concrete around the channel body anyway as part of the slab. Manufacturers like NDS specify minimum concrete surround thicknesses tied to load class: roughly 4 inches for pedestrian loads (class A/B), 6 inches for class C, and 8 inches or more for vehicle loads. On a DIY patio that will only see foot traffic, a 4-inch surround is fine. For grates, select by load class. EN 124 is the relevant standard: A15 (15 kN) covers pedestrian use, B125 (125 kN) covers light vehicles like cars. A standard home patio needs A15 at minimum; if cars will ever park on the edge, specify B125. Cast iron grates handle heavy use; stainless steel looks sharper; composite/polymer grates are cheaper and lighter but can flex under repeated loading.
Pros and cons of channel drains
| Pros | Cons |
|---|---|
| Intercepts water across the full patio width | Requires accurate setting during slab pour or paver installation |
| One outlet pipe to connect and maintain | Grates need regular cleaning to prevent leaf and debris blockages |
| Works with concrete, pavers, and porcelain tiles | Costs more upfront than a simple point drain |
| Can be covered with matching grates or decorative slots | Trench must be dug before or during the patio build |
Point drains and catch basins: simple and effective in the right spot
A point drain (also called a floor drain or yard drain) is a single circular or square inlet in the patio surface, connected below to a pipe that leads to your outlet. A catch basin is a larger version with a sump below the outlet pipe so sediment settles out before entering the drainage line. Point drains work well when the patio has a clear central low point, like a concave or valley-sloped surface where two planes meet at a centerline or corner. They are the go-to for a small concrete courtyard or enclosed patio where a perimeter channel drain would look odd or be hard to connect.
Placement strategy
The drain inlet must sit at the lowest point of the finished surface. For a concrete slab, you typically set the drain body before the pour and work your float slopes toward it. For pavers, a point drain can be set in a bedding layer of mortar and the surrounding pavers cut to fit. The inlet grate should sit flush with or 1/8 inch below the finished patio surface. If you place it even slightly high, water will pond around it rather than entering it. I learned this the hard way on a courtyard project where I set the drain just a hair too high and ended up re-bedding it after the first rain.
Limitations of point drains
- They require the whole patio surface to slope toward a single point, which means more complex forming on large areas.
- A single 4-inch outlet can handle typical residential rainfall on patios up to around 400–600 sq ft, but larger areas in high-rainfall regions may need multiple inlets or a larger pipe.
- Catch basins need their sumps cleaned out annually or they become a sediment plug.
- Point drains in paver patios are harder to re-level if the surrounding pavers settle.
French drains and perforated trenches: the right tool for gravel patios and sub-surface water
A French drain is a gravel-filled trench containing a perforated pipe that collects water from the surrounding soil or sub-base and routes it away. For a gravel patio, this is often the primary drainage solution because water percolates through the gravel surface anyway and the French drain simply intercepts it before it saturates the sub-base. For other patio types, a French drain is typically used at the perimeter or upslope edge to intercept groundwater before it gets under the patio.
Standard French drain assembly
- Dig a trench 6–12 inches wide and 12–24 inches deep for a standard curtain or surface-interception drain. Deeper (to the footing depth) for foundation perimeter drains.
- Line the trench with non-woven (needle-punched) geotextile fabric, leaving enough overlap on the sides to fold back over the top after filling.
- Add 2–3 inches of clean washed stone (AASHTO No.57, approximately 3/4-inch crushed stone, is the standard specification) as a bedding layer.
- Lay 4-inch perforated PVC or corrugated HDPE pipe on the bedding, perforations facing down (a common mistake is putting them face-up, which fills the pipe with sediment).
- Fill the trench with the same clean stone to within 3–4 inches of the surface.
- Fold the geotextile over the top of the stone and overlap the edges by at least 12 inches.
- Backfill the remaining 3–4 inches with native soil or match the surrounding surface.
A warning about clay soils
In heavy plastic clay, a geotextile fabric placed directly against undisturbed clay can clog through smearing, which cuts off infiltration and defeats the purpose. If your soil is dense clay and the test hole barely drains, a French drain alone may not solve your problem. In these situations, either pipe the water fully to a daylight outlet rather than relying on infiltration, or add a sand transition layer between the clay and the geotextile before filling with stone. Doing a proper percolation test first (filling the test hole twice and measuring the drop over 30 minutes) will tell you whether infiltration is realistic. Stormwater BMP Design Guidance, infiltration testing (EPA / guidance document) recommends presoak and repeated‑fill infiltration testing following local BMP protocols and notes minimum field infiltration rates for infiltration trenches before reliance on infiltration practices Stormwater BMP Design Guidance — infiltration testing (EPA / guidance document). Many stormwater design guidelines require a minimum field infiltration rate of around 0.52 inches per hour for infiltration trenches to function as designed.
When to prefer a French drain over a channel drain
- Gravel patio where a surface drain would look out of place or collect gravel debris.
- Upslope water interception, where groundwater or surface runoff from a higher part of the yard is flowing toward the patio.
- Wood or composite deck situations where sub-surface drainage is the main need.
- Situations where you want to avoid breaking up an existing patio surface.
Sub-surface and perimeter drainage: protecting your foundation
If your patio sits within 10 feet of the house, drainage is not just about keeping the patio dry, it is about protecting your foundation. The IRC is explicit: impervious surfaces within 10 feet must slope at a minimum of 2% away from the house. But slope alone does not protect you if groundwater is moving laterally through the soil toward the footing. A perimeter drain, installed alongside or just outside the footing, intercepts that groundwater before it can cause problems.
Perimeter drain installation basics
A perimeter drain follows the same principle as a French drain but is positioned at the base of the foundation wall, with the pipe invert typically at or slightly below the footing elevation. The trench is excavated alongside the footing, a geotextile is laid, clean stone is placed, the perforated pipe is laid (again, perforations down), stone is brought up to near grade, and the fabric is folded over. The pipe then exits to daylight at a lower grade or connects to a sump if there is no natural fall. This is a significant excavation project and, depending on depth, triggers OSHA trenching rules: any trench 5 feet or deeper requires a protective system (sloping the sides back, shoring, or a trench shield) unless a competent person determines there is no cave-in hazard. If you are digging next to a footing, treat that depth threshold seriously.
Managing high groundwater
If your test hole fills with water from below, you are dealing with a seasonal high water table rather than just surface drainage. The practical solutions for a DIY patio in this situation are: raise the patio grade on a thick free-draining sub-base (6–12 inches of AASHTO No.57 stone works well), install a perimeter drain around the patio footprint, and accept that some materials (like standard pavers on a sand-set base) will move more than usual in saturated conditions. Poured concrete handles high water tables better than sand-set systems, but waterproofing the underside of slabs adds cost and complexity.
Calculating and setting fall (slope): the numbers made simple
Slope is the most important number in patio drainage and it is simpler to calculate than most people expect. The standard recommendation for residential patios is 1/4 inch of fall per foot of horizontal run, which equals 2%. This matches the IRC minimum for impervious surfaces near foundations and is the figure industry guidance (ICPI/CMHA for segmental pavers) treats as reliable for shedding water. Some references mention 1/8-inch per foot (1%) as acceptable for concrete, but in practice 2% gives much better results in real-world conditions with slight surface irregularities.
The rise/run formula
Rise (total drop) = Run (length in feet) multiplied by the slope rate. At 2% slope (1/4 inch per foot): a 10-foot patio drops 2.5 inches from high end to low end. A 15-foot patio drops 3.75 inches. A 20-foot patio drops 5 inches. These numbers also tell you where your drain or low edge needs to sit relative to your high edge. If you are setting a channel drain at the low end of a 12-foot patio with a 2% slope, the drain body sits exactly 3 inches lower than the patio surface at the house wall.
| Patio length (ft) | Slope (1/4"/ft = 2%) | Total drop (inches) | Total drop (mm) |
|---|---|---|---|
| 8 | 2% | 2.0" | 51 mm |
| 10 | 2% | 2.5" | 64 mm |
| 12 | 2% | 3.0" | 76 mm |
| 15 | 2% | 3.75" | 95 mm |
| 20 | 2% | 5.0" | 127 mm |
| 25 | 2% | 6.25" | 159 mm |
Checking slope on site
The easiest on-site method is a long spirit level and a tape measure or a level board with a known shim. Place a 4-foot level on the patio surface along the direction of intended fall. One end should be elevated by your calculated drop. For a 2% slope over 4 feet, you need 1 inch of rise (4 x 0.25"). Slip a 1-inch block or stack of washers under the uphill end of the level, and the bubble should read dead center when your slope is correct. A digital level or a laser level on a tripod is more accurate over longer runs and worth renting for a day if you are setting a concrete form or doing a large paver area. The related topic of how to set a fall on a patio goes into even more detail on this if you want to double-check your setup. See the related guide on how to set a fall on a patio (d2aff341-ffa4-4c1b-8b39-7207ee5cd8a0) for step-by-step setup and measuring tips. For a step-by-step guide on creating the correct fall on your patio, see how to create a fall on a patio.
ADA slope limits for accessible patios
If your patio must meet ADA accessibility standards (for example, at a rental property or when required by local code), the running slope of any accessible route cannot exceed 1:20 (5%) and the cross slope cannot exceed 1:48 (approximately 2. See ADA Accessibility Standards, Chapter 4: Accessible Routes (Access Board) for the official running-slope and cross-slope limits and guidance on accessible routes ADA Accessibility Standards — Chapter 4: Accessible Routes (Access Board). 08%). A 2% drainage slope running in one direction is fine. A 2% cross slope is right at the ADA limit, so if you are sloping toward a drain in two directions simultaneously, keep at least one direction at or under 2%.
When you need to raise an existing drain
Sometimes the patio surface has been raised (new overlay, added pavers on top of existing concrete) and the existing drain grate is now sitting too low or is buried. This is a very common issue on renovation projects. Raising a drain means either using riser rings on the drain body, replacing the drain top with an adjustable height version, or building up the immediate area around the drain with a mortar bed or paver adjustment. The related topic on how to raise a drain for a patio covers the specific techniques and parts for this fix.
Step-by-step: installing a channel drain in a new patio
This walkthrough covers a channel drain set into a concrete slab or a paver patio, which is the most common DIY installation. The process is similar for both, with small differences noted.
Tools and materials
- Channel drain body with outlet and end caps (size your length to match patio width)
- Grate to match load class (A15 for pedestrian patio)
- 4-inch solid PVC outlet pipe and fittings to reach your drainage outlet
- Non-shrink grout or concrete mix for encasement (concrete slab installs)
- Tape measure, string line, and line level or laser level
- Spirit level (4-foot minimum)
- Angle grinder or circular saw with diamond blade for cutting pavers or existing concrete
- Shovel, hand tamper, and wheelbarrow
- Safety glasses, gloves, and hearing protection
Installation steps
- Mark the drain location using a string line at the intended low edge or center of the patio. Confirm this is downslope from the house wall.
- Excavate a trench for the drain body. The trench should be wide enough for at least 4 inches of concrete or compacted material on each side of the drain body (or per manufacturer spec).
- Dig and run your outlet pipe trench from the drain location to your outlet point. Use a minimum slope of 1/8 inch per foot on the outlet pipe (most plumbing codes require this as a minimum for 4-inch horizontal drains).
- Set the drain body in the trench at the correct height. The top of the grate channel should sit flush with your planned finished surface (or 1/8 inch below it). Use temporary wooden wedges or temporary shims to hold the body at the right elevation while you pour or set material around it.
- For a concrete slab: pour concrete around the drain body, making sure the surround is at least 4 inches on each side. Do not pour concrete into the drain channel. Let it cure before loading.
- For a paver patio: bed the drain body on a mortar or concrete pad at the correct level, then lay pavers on each side, cutting the edge pavers to fit tightly against the drain frame.
- Connect the outlet pipe from the drain body to your buried outlet pipe run, confirming slope and connections are watertight.
- Install the grate and flush the system with a hose, confirming water flows in, through, and out without backing up.
Covering drains and grate options
The grate or cover you choose affects both function and appearance significantly. For a patio you are proud of, the drain cover should not look like an afterthought. On paver patios, you can get channel drain grates that are designed to hold a cut paver insert, making the drain almost invisible, just a thin slot at patio level. On concrete patios, slotted stainless steel grates look clean and contemporary. Cast iron traditional-style grates work well on older brick or stone patios. If the goal is to minimize visual impact, the related topic on how to cover a drain on a patio is worth reading for the full range of options including decorative, infill, and hidden grate styles.
Diverting water away from the patio and house
Collecting water at the drain is only half the job. You also need that water to go somewhere that does not create a new problem. Options include piping it to daylight at a lower point on the property (best solution if the grade allows it), connecting to an existing storm drain (check local regulations first, some municipalities prohibit this or require a permit), running it to a soakaway pit or dry well filled with clean stone, or directing it to a rain garden or planted area designed to absorb runoff. Do not direct drainage toward a neighbor's property or a public footway. If you are on a tight lot with limited options, the related topic on how to divert water away from a patio covers creative routing and outlet strategies in more detail.
Costs: what to budget for a DIY patio drain
| Drain type | DIY materials cost (approx.) | Hired-out labor estimate | Notes |
|---|---|---|---|
| Channel drain (3–6 ft section) | $50–$150 | $300–$700 installed | Price rises with length and grate quality |
| Point drain / catch basin | $20–$60 | $150–$400 installed | Lower cost but limited to smaller areas |
| French drain (per 10 linear ft) | $40–$100 | $300–$600 per 10 ft | Stone, pipe, and fabric; varies with depth |
| Perimeter / sub-surface drain | $80–$200+ for materials | $800–$2,500+ | Depth and access drive labor costs significantly |
| Outlet pipe run (per 10 linear ft) | $15–$40 | $100–$250 per 10 ft | PVC solid pipe, fittings, and trench |
These are ballpark ranges and vary by region, soil conditions, and material quality. DIY saves roughly 50–70% of a hired-out job on straightforward installations, but the savings shrink when deep excavation, concrete cutting, or tricky site access is involved.
Routine maintenance: keeping the system working
- Clear grates and channel drain bodies of leaves and debris at least twice a year, more often if you have overhanging trees. A blocked grate is the most common reason a working drain suddenly backs up.
- Flush the outlet pipe annually with a garden hose or pressure washer attachment. Run water in from the drain and confirm it exits cleanly at the outlet end.
- Check catch basin sumps every spring and scoop out any accumulated sediment before it reaches the pipe outlet level.
- Inspect the patio surface slope annually. Pavers can settle over time and change your fall direction. Releveling a few pavers early prevents a bigger job later.
- After any major storm, walk the patio and look for new pooling. Early detection of a drainage problem is much cheaper to fix than a later one with erosion or foundation involvement.
Troubleshooting common drainage problems
| Problem | Likely cause | Fix |
|---|---|---|
| Water pooling at house wall | Slope runs toward house or is too flat | Re-grade sub-base or adjust paver fall; add channel drain at house side |
| Water pooling in middle of patio | No slope or inverted slope (dish shape) | Re-set pavers to correct fall; add point drain at low spot |
| Drain fills with water but doesn't clear | Outlet pipe blocked or insufficient slope on pipe | Rod/flush the outlet pipe; check and correct pipe slope |
| French drain not working after 2–3 years | Geotextile or stone clogged with fines | Excavate and replace fabric and stone; consider piping to daylight instead |
| Water coming up through patio surface | High water table or saturated sub-base | Add perimeter drain at patio edge; improve sub-base drainage with deeper stone layer |
| Drain grate sits below patio level after resurfacing | Patio surface raised without raising drain | Install riser rings on drain body or replace with adjustable-height top |
When to call a professional
Most patio drainage work is genuinely manageable as a DIY project if you are comfortable with basic excavation, some concrete or mortar work, and pipe connections. But there are situations where I would not hesitate to bring in a pro. If you are digging next to a foundation deeper than 5 feet, get a professional involved as OSHA trenching rules exist for very good reason. If water is already entering a basement or crawl space, that is a waterproofing problem that goes beyond a patio drain fix. If your outlet options all require connecting to a municipal storm system, a licensed plumber or civil contractor may be required by your local authority. And if your drainage problem involves a shared property boundary or surface water flowing from a neighbor's lot, that can have legal dimensions that a contractor or civil engineer is better positioned to navigate.
FAQ
What site-assessment information is essential before designing a patio drain?
Record patio dimensions, surface type (pavers, concrete, gravel, wood/composite), grade relative to house, existing drainage paths, soil type (sand, loam, clay), high-water or slope areas, location of existing utilities (call 811), nearby structures and property lines, and intended outlet (storm sewer, swale, dry well, daylight). Conduct simple infiltration/percolation tests if planning infiltration solutions. Photograph and sketch the site with elevations and flow arrows.
Which drain types should I consider for different patio materials and situations?
Channel (linear) drains: best for pavers, concrete, or transitions capturing surface runoff along edges or thresholds. Point drains: used where runoff concentrates to a single low spot on concrete slabs. French drains (perforated pipe in stone envelope): ideal for sub-surface curtain drainage, under gravel patios, behind retaining walls, or where dispersal into soil is acceptable and permeability is adequate. Sub-surface sealed drains (pipe to storm sewer): when tying to municipal system or daylighting to a stable outfall is needed. Deck/wood composite: use surface slope and perimeter collectors; consider routed channels or catch basins with flexible pipe. Choose by load, aesthetics, maintenance access, and outlet availability.
What slope (fall) should I design for patio drainage? How do I calculate it?
Target 1%–2% slope for patios (≈1/8"–1/4" per foot). Use 2% (1/4"/ft) for reliable shedding; 1.5% is often acceptable for pavers. For ADA-accessible routes, adhere to maximum running slope 5% and cross slope ≤2.08%. Calculation: slope (%) = (vertical drop ÷ horizontal run)×100. Example: for 10 ft run and 2% slope: drop = 0.02×10 ft = 0.2 ft = 2.4". Measure high point and set drain invert accordingly; if drain is above desired invert, you can ‘raise the drain’ by building up bedding/base or using a grated channel with manufactured risers to achieve required fall.
What are typical drain dimensions and pipe sizes for DIY patio drains?
Linear channel drains: width 3–6" common for residential; choose channel rated for expected loads and provide concrete encasement per manufacturer (often 4"–8" surround). Point drains: 4"–6" diameter sump chambers with 3–4" outlet pipe. French drains: 4" perforated pipe (PVC or corrugated HDPE) inside 6–12" wide trench, depth 12–24" depending on interception depth; envelope with AASHTO No.57 (3/4" clean stone) wrapped in non-woven geotextile. For pipe to municipal systems, follow local minimum pipe sizes and slopes (plumbing codes often require minimum 1/8"/ft for 4" lines). Use Manning’s equation or design tables for larger systems.
What materials and tools are commonly required for patio drain installation?
Materials: perforated pipe (4" PVC or corrugated HDPE), catch basins/channel drains with grates (appropriate load class), AASHTO No.57 clean stone, non-woven geotextile fabric, concrete for encasement (per manufacturer specs), pipe fittings, inlet adapters, drainage outlet connections, pipe adhesive/sealant, gravel bedding, landscape fabric, backfill soil, and surface repair materials (sand for pavers, concrete mix, or replacement boards). Tools: tape measure, level/laser level or transit, string line, shovel/trench shovel, wheelbarrow, tamper/plate compactor, saw/cutter for pipe, concrete tools (float, trowel), safety gear (gloves, eye protection), and utility locator confirmation.
Step-by-step: How do I install a basic linear channel drain on a concrete or paver patio?
1) Plan drain path and outlet; obtain permits if tying to public storm system. 2) Mark trench width; call 811. 3) Excavate trench to allow channel invert at designed slope and provide concrete surround depth per manufacturer. 4) Compact sub-base and set a concrete haunch/screed bed with specified thickness. 5) Set channel sections on the bed, maintaining slope with a laser/level; connect outlet to pipe. 6) Backfill and encase channels with concrete to required surround thickness and finish surface to match patio. 7) Reinstall pavers or finish concrete edges; ensure grate is seated and level. 8) Test with water for proper flow and leaks.
Next Article
Building regulations patio drainage: DIY compliant guide
Step-by-step UK DIY guide to patio drainage falls, materials and options, keeping within building regulations and preven