Yes, you can build a deck over an existing patio in most cases, but whether you should depends on what that patio is made of, how it's draining, and what condition it's in right now. IRC Chapter 5, which includes the deck provisions such as IRC R507, is where the residential code sections governing decks and their structural requirements are found. A solid concrete slab in good shape is the easiest base to work with. Pavers and brick are trickier because they shift. The big concerns are moisture trapped under the deck, whether your framing or posts have something structurally sound to bear on, and whether your local code requires permits or inspections for the added height. Get those three things right and you have a project that saves real money compared to tearing everything out and starting fresh.
Can You Build a Deck Over an Existing Patio? DIY Guide

Feasibility Checklist Before You Start
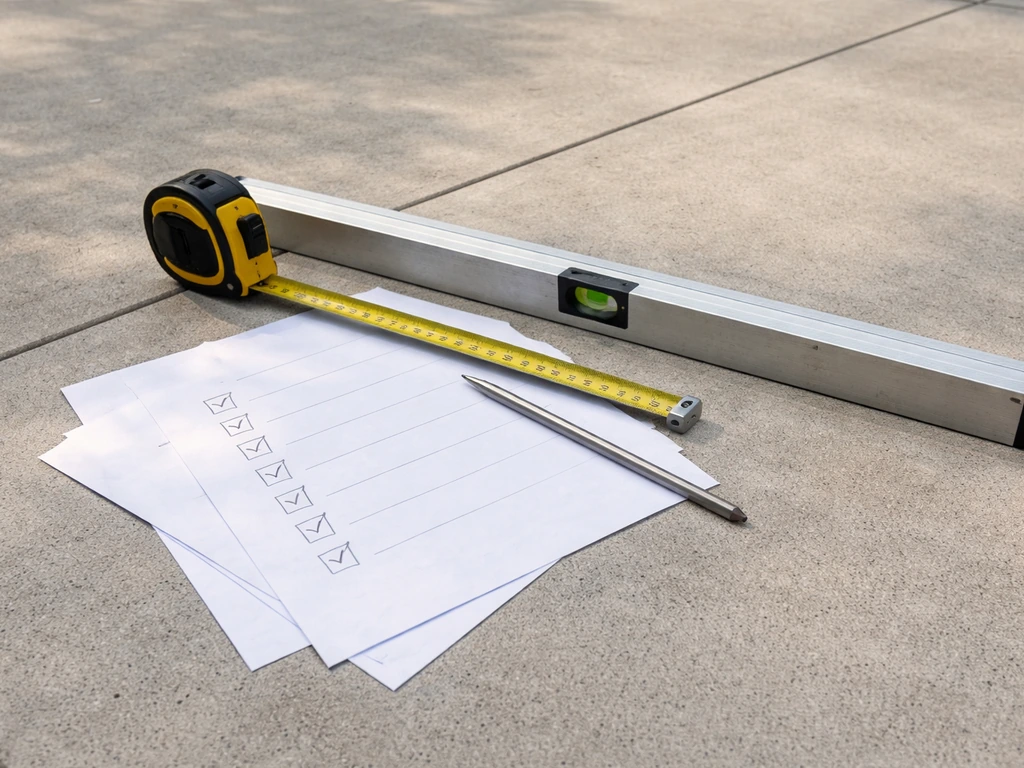
Before you commit to decking over your existing patio, run through this checklist. If you are looking for a quick overview of how the process works, the steps below will walk you through building decking on top of a patio decking over your existing patio. It takes maybe an hour and it will tell you whether you have a straightforward project, a manageable-but-complicated one, or a situation where tearing out first actually makes more sense.
- Patio surface type: Is it a poured concrete slab, concrete pavers, brick, or flagstone? Concrete slabs are the most deck-friendly. Pavers and brick need extra scrutiny.
- Slab or base thickness: A concrete slab should be at least 3.5 to 4 inches thick to reliably anchor post bases and distribute loads. Thinner slabs crack under point loads.
- Surface condition: Walk every inch. Note cracks wider than 1/4 inch, any areas that feel hollow underfoot, spalling, or significant heaving. Minor surface cracks are fine; structural cracking is not.
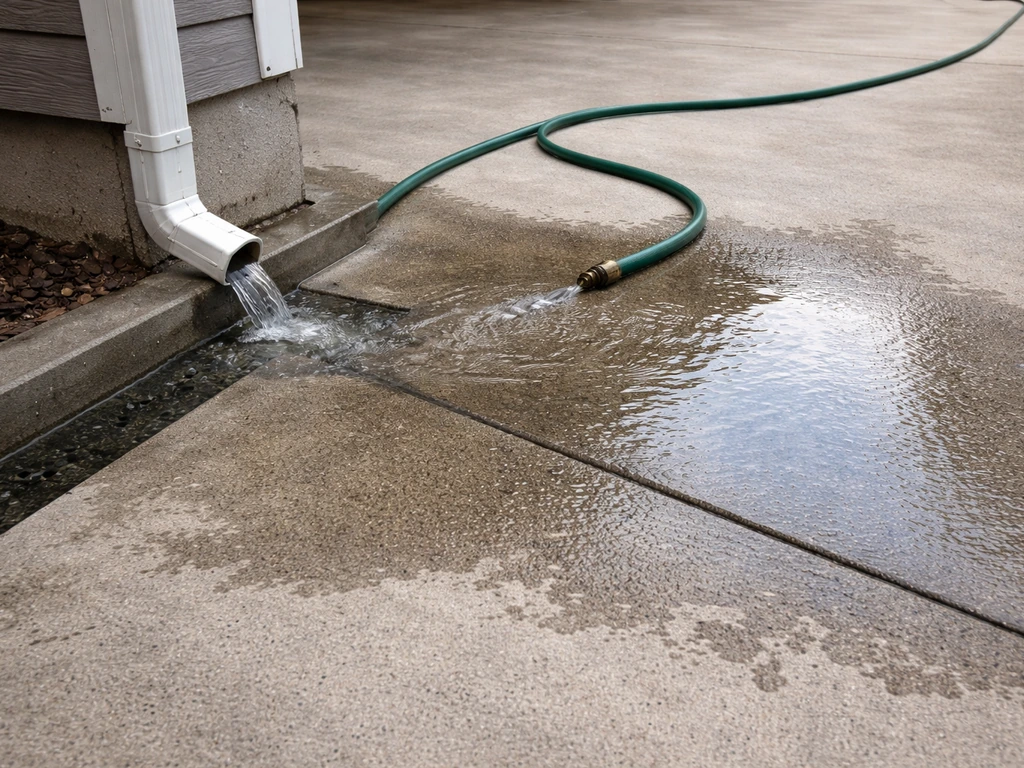
- Drainage slope: The patio should slope away from the house at least 1/8 inch per foot. If water pools anywhere on the surface, it will pool under your deck too.
- Settled or uneven spots: More than 1 inch of variation across the patio means your framing will need shimming or your deck will visibly slope.
- Clearance at doors: Measure from the top of the patio to the bottom of any door threshold that opens onto it. You need to know how much height you can add before a door hits the deck.
- Distance from house: If attaching a ledger, you need access to the band joist or rim joist behind the siding. Confirm there is one and that it is not rotted.
- Local permit requirements: Many jurisdictions require a permit for any deck over 200 square feet or over 30 inches above grade. Check before you build anything.
- Frost line depth: If you need new footings (common with pavers or partial concrete), they must go below the local frost line, which means drilling or digging through or around the existing patio.
Inspect the Existing Surface First
The existing patio is going to be the foundation of your project, so spend real time assessing it instead of just glancing at it and moving on. The type of material tells you a lot right away.
Concrete Slabs
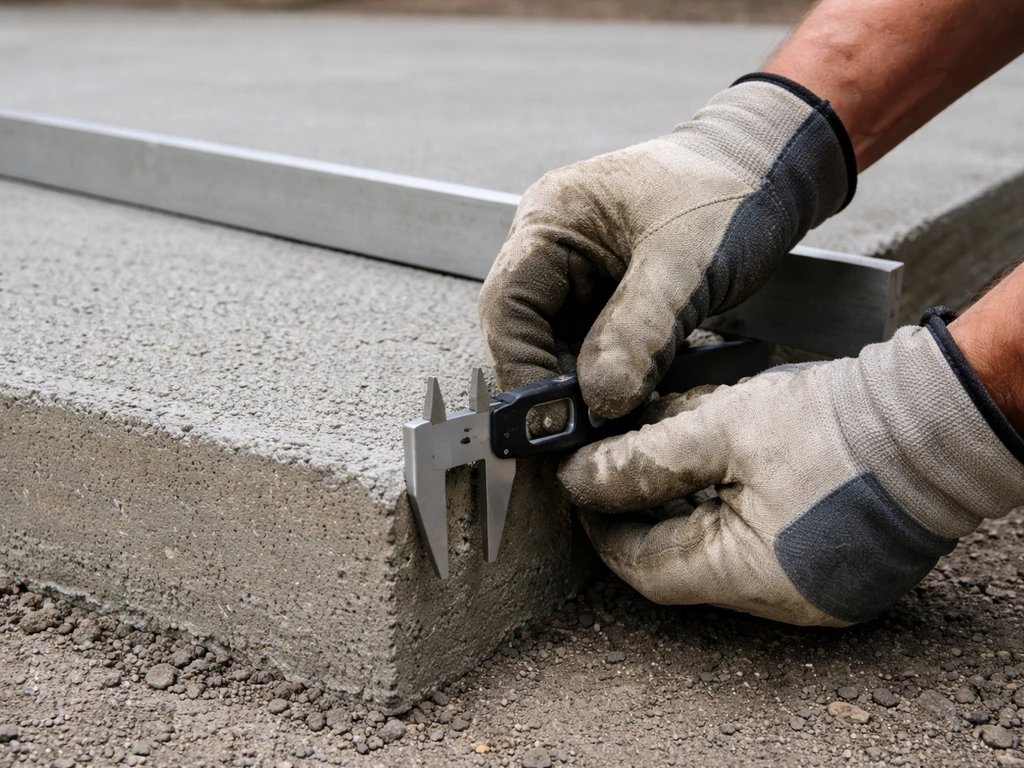
A poured concrete slab is the best-case scenario for decking over. The main things to check are thickness, flatness, and whether it has any structural cracks. Tap the surface with a hammer in a grid pattern. A dull thud means there is delamination or a void underneath. A solid ring means the concrete is sound. For thickness, if you do not have the original drawings, you can rent a core drill and pull a 2-inch diameter sample from a corner or edge. Measure the core. If you are hiring this out, a structural engineer can do this professionally. You want at least 3.5 inches for post bases anchored with epoxy or mechanical anchors, and ideally 4 inches or more for heavier loads.
Pavers and Brick
Pavers and brick are more complicated. The paver itself sits on a sand bedding layer (typically about 1 inch) over a compacted crushed stone sub-base. That system is designed to flex slightly, which is fine for a patio but problematic under a rigid deck structure. If any pavers are rocking, cracked, or sunken, the sub-base has already shifted. That movement will transfer right up into your deck framing over time. The realistic options here are: remove the pavers in the footprint where posts or sleepers will sit and pour concrete pads that go down to the frost line, or pour a full concrete overlay over the existing pavers. Simply setting post bases on pavers is a community-wide cautionary tale that ends in a wobbly deck in year two or three.
Flagstone and Natural Stone
Flagstone patios vary wildly. If it is set in mortar over a concrete slab, treat it like a concrete slab. If it is dry-set in sand or soil, treat it like pavers and plan accordingly. Check for loose stones and grout failure before anything else.
Moisture, Drainage, Ventilation, and Code Constraints
This is the section most DIYers underestimate, and it is where deck-over projects fail years down the line. When you put a deck over an existing patio, you are creating a covered space that traps moisture, reduces airflow, and can turn a perfectly fine patio into a swampy base that rots your framing from below.
Drainage and Slope
If the patio has any low spots or pools water after rain, fix the drainage before you deck over it. Once the deck is on top, you cannot easily re-grade underneath. Fill low spots with self-leveling concrete or hydraulic cement. Make sure the overall surface still drains away from the house at a minimum slope of 1/8 inch per foot, ideally 1/4 inch. Do not count on deck board gaps to handle all the runoff. Water will still sit under the framing.
Ventilation Under the Deck
Airflow under the deck is not optional. A deck built tight to a solid patio with no air movement underneath creates exactly the warm, moist, dark environment that accelerates rot and mold even on pressure-treated lumber. When you frame the deck, orient your joists so air can travel across the full width of the under-deck space from one side to the other. Keep the minimum clearance between the bottom of your joists and the patio surface at around 1.5 to 2 inches at the low points. If the deck is close to ground level, consider leaving at least one or two open sides rather than skirting all the way around, at least initially.
Permits and Code
Pull a permit if your jurisdiction requires one. Most do for decks over a certain size or height. The IRC requires guards (railings) with a top rail at least 36 inches above the deck surface for any deck more than 30 inches above grade. Adding a deck over a patio can push you over that 30-inch threshold, so measure carefully. Code also governs load capacity: the IRC design assumption for residential decks is 40 psf live load plus 10 psf dead load for a total of 50 psf. Any framing plan you build to should meet that standard. If you are attaching a ledger to the house, a permit is almost always required because the inspector needs to verify that connection is safe. Unpermitted decks create real problems when you sell the house.
Design and Layout: Measurements, Clearances, and Height
Height is the detail that surprises people most. Adding a deck over a patio adds height, and that affects door clearances, egress, step configurations, and whether you need railings at all. Adding a deck over a patio adds height, and that affects door clearances, egress, step configurations, and whether you need railings at all, so if you are aiming for how to build a patio deck off the ground you should verify these clearance and height details early. Measure all of this before you finalize your design.
- Measure the existing patio height at every door threshold that opens onto it. Write down the gap between the top of the patio surface and the bottom of the door threshold.
- Add up your planned deck assembly height: sleeper or joist depth plus decking thickness. A typical low-profile deck over concrete adds 2.5 to 4 inches depending on whether you use sleepers only or full joist framing.
- Compare that total to your door clearance. Most door thresholds allow 1.5 to 2 inches of added height before the door starts dragging. If you are adding 3.5 inches, you may need to raise the door threshold or switch to an outswing door.
- Measure the total finished deck height above grade at the perimeter. If it will be 30 inches or more above the lowest grade point, plan for guardrails.
- Lay out the deck footprint on the patio with chalk or tape. Confirm you have the minimum setbacks required by your local zoning (often 5 to 10 feet from property lines).
- Mark where posts or sleepers will land and check that every location is over solid, structurally sound material.
- If attaching a ledger, locate the band joist or rim joist on the house framing. Measure from the top of the ledger position to confirm your deck surface elevation matches your interior floor level or is intentionally set slightly below it (typically 1 to 2 inches below the door threshold).
Deck Support Strategy Options
How you support the deck is the biggest structural decision you will make, and it depends directly on what the existing patio is made of and how close to grade the finished deck will sit.
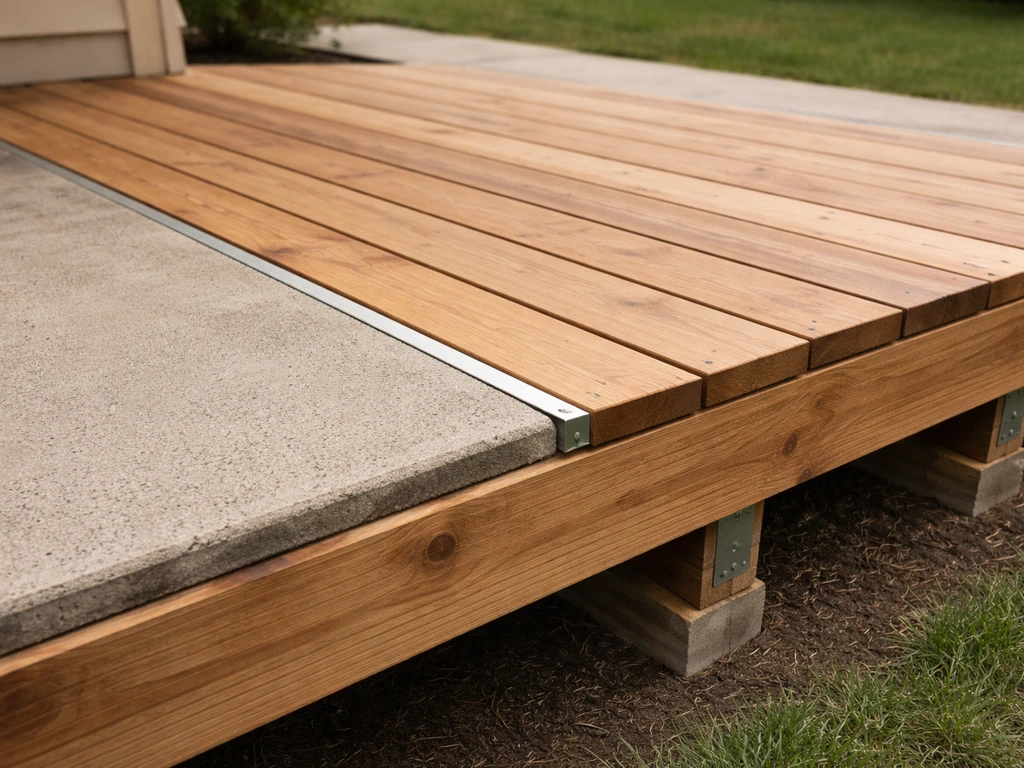
Sleepers Directly on Concrete
For a low-profile deck over a solid, flat concrete slab, pressure-treated sleepers laid directly on the slab is the simplest approach. Sleepers are 2x4 or 2x6 lumber laid flat, fastened to the concrete with concrete screws or powder-actuated fasteners, and decking goes on top. This adds roughly 2 to 3 inches of total height. The limitation is that sleepers trap moisture against the concrete, so use a vented composite decking or leave a small gap at the edges. Sleepers work well when the slab is level and in good condition, the deck is close to grade, and the span is short enough that 2x6 framing on 12 or 16-inch centers handles the load.
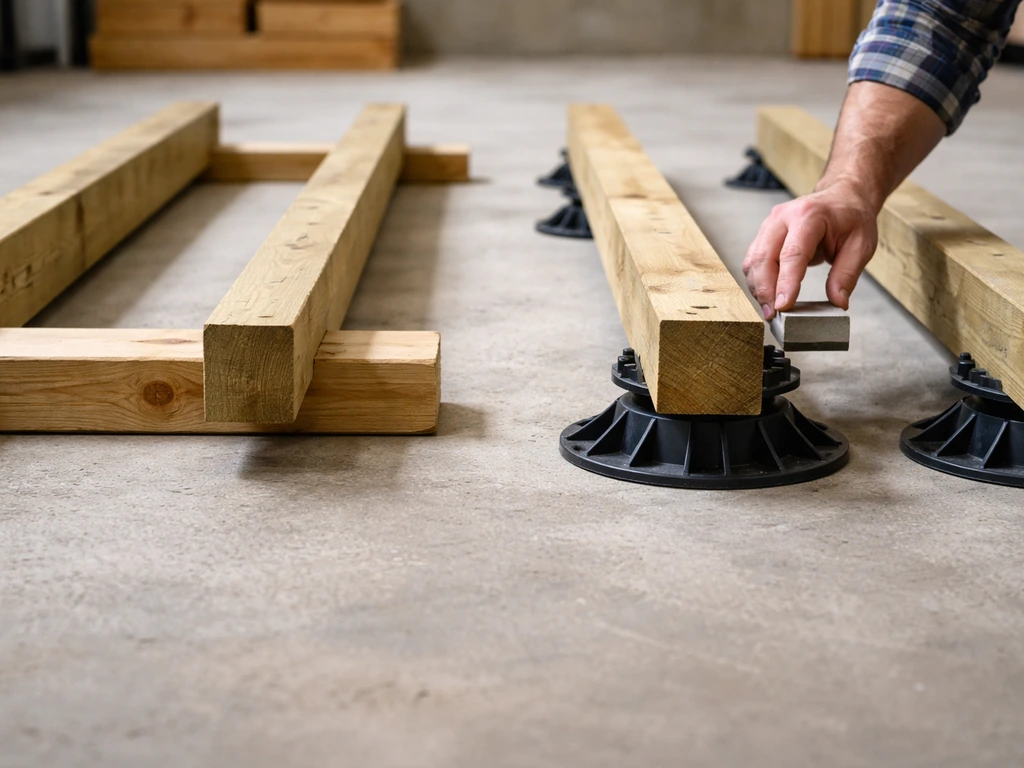
Pedestal or Adjustable Post System
Pedestal systems use adjustable plastic or composite feet that sit on the slab surface and support deck tiles or framing. They are popular for roof decks and raised patios, and they work well over concrete because the load is distributed across many small footprints. They also allow excellent drainage and airflow. The tradeoff is cost and the fact that they are not ideal for decks more than a few inches above the slab because they are not engineered for high lateral loads.
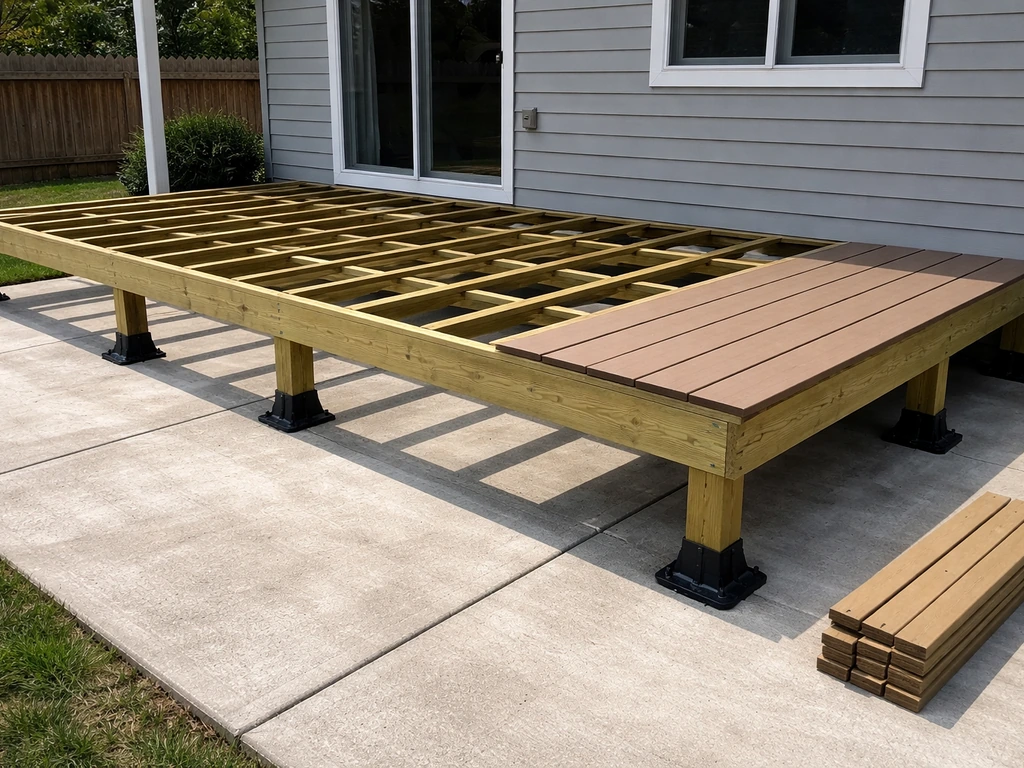
Full Joist Framing with Post Bases
For a deck that will be 6 or more inches above the patio, or one covering a large area, you want full joist framing on post bases. On a concrete slab, drill and epoxy-set post base hardware into the slab, making sure the concrete is thick enough. On pavers, remove pavers at each post location, dig down to or below the frost line, and pour individual concrete footings. Drop post bases into the wet concrete before it sets. This is the most structurally sound approach and the one inspectors will be most comfortable with. Joists span between the posts, headers or beams carry the loads, and decking runs on top.
Ledger vs. Freestanding
If the deck will abut the house, you have a choice between attaching a ledger to the house framing or building the deck completely freestanding with a double beam or header running parallel to the house instead. A ledger attachment is structurally efficient and uses fewer posts, but it requires a permit, proper flashing, and access to the house's band joist. A freestanding deck avoids attaching to the house, which is simpler and avoids moisture intrusion risk at the connection point. Freestanding decks need a post-and-beam running within about 18 to 24 inches of the house wall instead. If you have any doubt about the condition of the house framing behind the ledger location, go freestanding.
Step-by-Step DIY Build Workflow
Here is how a typical deck-over-patio build comes together once you have confirmed feasibility and finalized your design. For a complete overview, see how to deck over a patio from start to finish. This assumes a concrete slab base with full joist framing and a ledger attachment.
- Pull your permit and have your framing plan ready, including span tables or engineer-stamped drawings if required by your jurisdiction.
- Clean and prep the slab: remove any loose material, fill large cracks with hydraulic cement or epoxy crack filler, and confirm the drainage slope is correct.
- Locate the band joist on the house. Strip siding back far enough to expose the framing or the sheathing right where the ledger will sit. Do not attach a ledger through siding.
- Install ledger flashing before the ledger board goes up. Use a Z-flashing approach: the flashing runs up behind the house water-resistive barrier (WRB) or house wrap, folds over the top of the ledger position, and sheds water outward. The flashing must be integrated with the WRB so water cannot work its way behind it and into the wall assembly. This is where most deck moisture failures start, so do not rush it.
- Bolt the ledger board to the band joist with structural lag screws or through-bolts in a staggered pattern per code requirements. Use hot-dipped galvanized or stainless hardware throughout.
- Mark and drill post base locations on the slab. Use a masonry bit to drill anchor holes sized for your post base hardware. Set epoxy anchors per the manufacturer's cure time before applying load.
- Set posts and install beam or header spanning between the post tops. Keep posts plumb and use temporary bracing.
- Install joist hangers on the ledger and hang joists at your planned spacing (12 or 16 inches on center). Blocking at mid-span stiffens the framing and is required by many codes.
- Install a secondary drip edge or flashing at the ledger-to-joist connection to direct any water that gets behind the ledger away from the structure and out over the slab rather than into the wall.
- Install decking starting from the house side, working outward. Leave consistent board gaps of at least 1/8 inch (most composite manufacturers specify their own gap requirements). Use hidden fasteners or face screws per the product spec.
- Install stairs, railings, and any post caps. Confirm railing height is at least 36 inches above the walking surface if the deck is more than 30 inches above grade.
- Schedule your inspections at the stages required by your permit, typically framing before decking and final after completion.
Waterproofing and Flashing Details
The ledger connection is the most water-vulnerable point in the whole build. Water that finds its way behind a ledger and sits against the house framing causes rot that can go undetected for years. Use self-adhering flashing membrane on the sill area before the ledger goes up, then install the Z-flashing so its top leg runs behind the WRB and its bottom leg extends out over the decking surface or drips free. Seal all fastener penetrations through the ledger with butyl tape or compatible sealant. If the deck will be partially or fully covered above, treat the entire under-deck assembly as a waterproofed system with continuous membrane rather than relying on flashing alone.
Choosing Your Decking Material
Material choice matters more in a deck-over-patio situation than in a standard ground-level build, because moisture is harder to manage and the space under the deck will always be damper than open ground. Here is how the main options compare.
| Material | Moisture Resistance | Weight | Cost (installed, 2026) | Maintenance | Best For |
|---|---|---|---|---|---|
| Pressure-Treated Wood | Moderate (needs sealing) | Medium | $15–$30/sq ft | Annual sealing/staining | Budget builds, easy to cut/fasten on site |
| Cedar or Redwood | Good (natural oils) | Light-Medium | $20–$40/sq ft | Periodic oiling/sealing | Appearance-focused builds with good airflow |
| Composite (mid-grade) | Excellent | Medium-Heavy | $35–$55/sq ft | Minimal (occasional cleaning) | Low-maintenance priority, close-to-slab installs |
| Composite (premium) | Excellent | Medium-Heavy | $55–$70/sq ft | Minimal | High-traffic, long-term, warranty-backed builds |
| Hardwood (IPE, Ipe) | Excellent (dense grain) | Heavy | $30–$60/sq ft | Annual oiling | Durability-focused, experienced builders |
For a deck-over-patio situation, composite is genuinely the easiest choice because it does not absorb moisture, does not rot when airflow is limited, and does not need annual maintenance. The higher upfront cost is real, but on a project where the under-deck environment is inherently damp, composite earns its price. If you are going with pressure-treated wood, use ground-contact rated lumber for all framing and sleepers that are close to the slab surface, and apply a good penetrating sealer to the decking boards before installation and again every 12 to 18 months.
Cost Comparison: Deck Over Patio vs. Tear Out and Rebuild
This is usually the deciding factor, and the deck-over approach wins on cost when the existing patio is in decent shape. Tearing out a concrete patio adds $3 to $8 per square foot just for demolition and disposal before you have spent a dollar on the new build. For a 400-square-foot patio, that is $1,200 to $3,200 in pure demolition cost. A new deck installed from scratch typically runs between $4,000 and $16,000 for a standard residential build depending on size, material, and features. The composite installed cost range of $35 to $70 per square foot gives you a sense of the premium end. Decking over an existing slab saves the demolition cost and can also save on new footing excavation if the slab is solid enough to anchor into directly. Realistically, a 300 to 400-square-foot deck over an existing concrete patio using composite decking and full joist framing will run $8,000 to $15,000 hired out, or $3,500 to $6,000 in materials for a capable DIYer. Compare that to tear-out plus full rebuild at $12,000 to $22,000 hired out and the math for decking over a solid existing patio is usually clear.
When Tear-Out Actually Makes More Sense
Tearing out first is worth it if the existing patio has severe drainage problems that cannot be fixed from the surface, if there is significant heaving from tree roots or frost that will continue to move, if the slab is too thin or structurally compromised to anchor into reliably, or if adding deck height would require door threshold modifications or other costly changes that offset the demolition savings. Pavers with a failed sub-base often fall into this category. Sometimes it is genuinely faster to start fresh.
Realistic Timeline and DIY Skill Breakdown
For a motivated DIYer working on weekends, a 200 to 400-square-foot deck over a concrete patio typically takes 4 to 8 weekends from permit application to final board. Permit approval alone can take 2 to 6 weeks depending on your municipality, so apply early. The actual physical build on a slab with sleepers or a simple joist system can happen over 3 to 5 solid days of work with a helper.
| Task | Skill Level | DIY or Hire? |
|---|---|---|
| Patio assessment and drainage check | Beginner | DIY |
| Permit application and plan drawing | Beginner-Intermediate | DIY (or hire a designer for complex layouts) |
| Ledger flashing and WRB integration | Intermediate | DIY if comfortable, hire if unsure |
| Concrete drilling and anchor setting | Intermediate | DIY with rented hammer drill |
| Joist framing and beam installation | Intermediate | DIY with a helper |
| Decking installation | Beginner-Intermediate | DIY |
| Railing installation | Intermediate | DIY |
| Paver sub-base excavation and concrete footings | Intermediate-Advanced | Hire if footing depth exceeds 18 inches or soil is unstable |
The ledger flashing step is the one place I would tell a first-timer to either study hard before touching it or pay a carpenter for a day to do it right. Every other part of this project is learnable on the job. That one step, done wrong, causes structural damage that takes years to show up and thousands to fix. Get it right and the rest of the build is very manageable for a handy homeowner.
A Few Things Worth Knowing Before You Start
If you are planning to build something more elevated rather than just a few inches above the slab, the design considerations shift significantly toward post-and-beam framing and become more similar to building a deck off the ground from scratch. Likewise, if your vision is to fully replace the patio feel with decking at or near grade, the material selection and drainage management approaches overlap with some of the decisions covered in guides focused specifically on building decking on top of a patio surface at low profile. If you are trying to fully replace the patio feel with a deck at or near grade, start by focusing on drainage, surface prep, and how you will support the structure fully replace the patio feel with decking at or near grade. Either way, the foundation assessment and moisture management principles stay the same regardless of how high the finished deck ends up.
Start with the checklist, spend real time on the patio inspection, fix drainage before you frame, and nail the ledger flashing. Do those four things well and the rest of the project comes together much more smoothly than most people expect. A deck-over-patio project follows the same core steps: assess the existing surface, plan for moisture control, and then build the deck support and finish accordingly deck over a patio.
FAQ
Can you build a deck over an existing patio if the slab or pavers have cracks or small uneven areas?
You can sometimes, but you need to treat it as a foundation problem first. Hairline surface cracks in a concrete slab may be acceptable, but you should avoid building over cracks that suggest movement, widening, or hollow-sounding areas. For pavers or brick, any rocking or sunken units under where posts or sleepers will sit is a red flag, because the deck will “inherit” that movement over time.
Do I need waterproofing or extra membranes under the deck, even if I flash the ledger?
If the deck is partially or fully covered or the area under it will be consistently damp, plan the under-deck framing as a managed moisture system, not just “flashing and hope.” Use continuous, compatible waterproofing membranes at vulnerable junctions and seal penetrations, especially around the ledger, to reduce the chance that moisture bypasses flashing.
Can I just screw framing into the existing patio instead of using post bases or sleepers?
Usually no, because attachment method and structural capacity depend on the patio material thickness and condition. Concrete slabs can sometimes take certain fasteners, but pavers and brick are designed to move and do not provide reliable anchorage for deck loads. When in doubt, use the engineered support approach described in the article, such as epoxy-set post bases on solid concrete or footings down to frost line where required.
How much slope should the patio have, and can I rely on deck gaps to drain water?
Aim for the same overall drainage direction away from the house as a standalone patio, with at least 1/8 inch per foot and ideally 1/4 inch per foot. Do not rely on board spacing to handle runoff, because water can still sit under the framing and soak it. Fix low spots before you build, using self-leveling or hydraulic cement where appropriate.
What is the minimum air gap I should leave between the deck framing and the existing patio?
Keep clearance at about 1.5 to 2 inches at the low points so air can move under the deck. Also consider leaving one or two open sides rather than fully skirting the perimeter if the deck is near grade, because trapped airflow is a major driver of rot and mold.
Is composite decking required for a deck-over-patio, or can I use pressure-treated wood?
Pressure-treated can work, but the under-deck environment is typically damper, so you need extra protection. Use ground-contact rated framing where it is close to the slab, and apply a penetrating sealer to the decking boards before installation and again every 12 to 18 months. Composite is often the easier long-term option because it is more forgiving in limited-airflow conditions.
How do I know if my local rules will require a permit for a deck over a patio?
Many jurisdictions require permits based on deck size and height, and adding a deck over a patio can push the finished height above common thresholds. Measure from finished grade to the deck surface early, and expect that ledger attachments to the house often trigger permit requirements because inspectors need to verify the connection.
If my deck ends up more than 30 inches above grade, do I definitely need railings?
Common code triggers railings when the deck surface is more than 30 inches above grade, using a guard height requirement of 36 inches in many residential rulesets. Because “over an existing patio” can change the height quickly, re-check your measurements after you finalize the support method and final board height.
How do I handle door clearance and steps if the deck over the patio raises the walking surface?
Treat it as a design constraint, not an afterthought. Verify door threshold heights, egress paths, and how many risers you will have before you lock framing height in. If you need threshold changes or the step layout becomes noncompliant or awkward, it can erase the savings of decking over the patio.
What if the patio drainage problem is caused by plumbing or a slope issue that is hidden?
If you cannot correct the drainage source from the surface, decking over it will trap moisture underneath and can cause rot years later. In that case, tearing out and addressing the underlying drainage or base condition first is often the safer decision, even if it costs more upfront.
Are pedestal systems a good option for decks over patios?
They can be a good option when the design can distribute loads across many small feet and you want strong drainage and airflow. However, they are usually not ideal for decks that are significantly elevated or for designs with higher lateral loads, because the system may not be engineered for those conditions.
When should I consider hiring a structural engineer for a deck-over-patio project?
If you see signs the patio is delaminating or has likely voids, if you are unsure about slab thickness for post base anchors, if the deck footprint is large, or if your plan involves a ledger attachment with unknown house framing condition. A professional can also help validate core samples and load capacity to avoid unsafe assumptions.
What’s the most common mistake when building a deck over a patio?
Most failures trace back to moisture control, especially at the ledger connection and the under-deck airflow. Another frequent issue is assuming pavers or brick provide stable support for post bases without fixing shifting sub-base areas, leading to wobble and structural movement over a few seasons.
How to Deck Over a Patio Step by Step DIY Guide
Step-by-step DIY to deck over a patio: feasibility checks, leveling, framing, joists, flashing, drainage, and finishing.