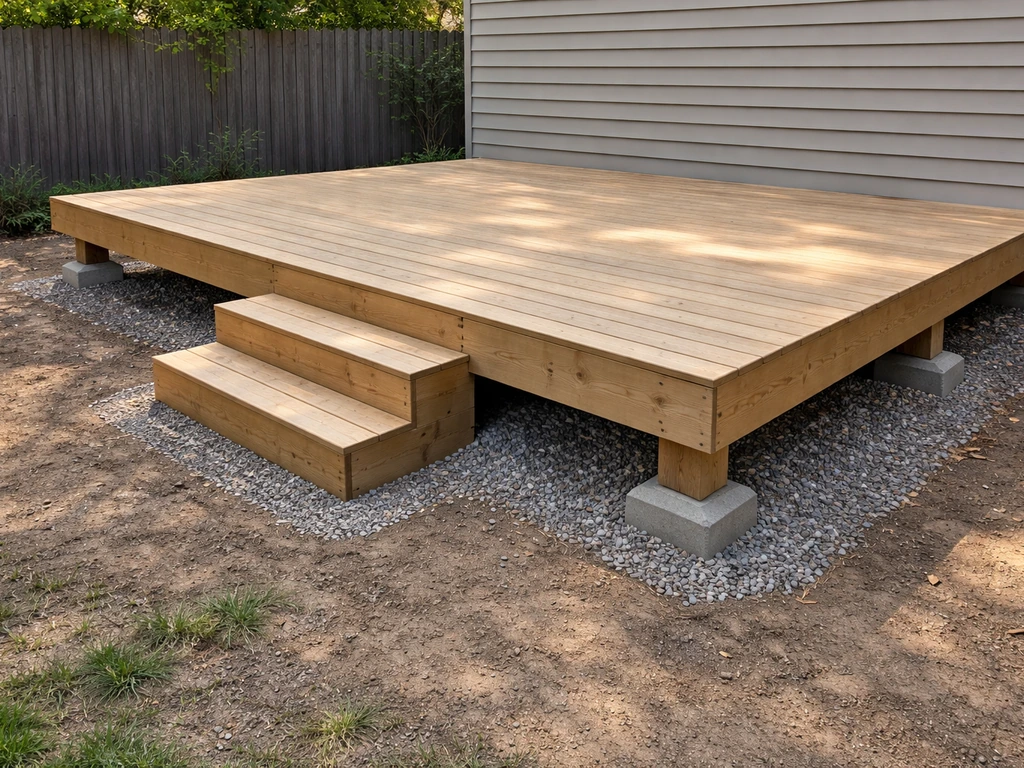
You can turn an existing deck into a patio by removing the decking boards, modifying or removing the framing depending on how close it sits to grade, building up a proper compacted base, and installing your chosen surface, pavers, brick, concrete, or tile. If you're wondering how to deck over a patio, the key is preparing the base and surface so the new material sits level and stays stable over time. The whole project is very doable as a DIY build over a weekend or two, but the outcome depends almost entirely on the prep work you do before you ever set a single paver.
How to Turn a Deck Into a Patio: DIY Steps

Nolan Lennox
26 May 2026
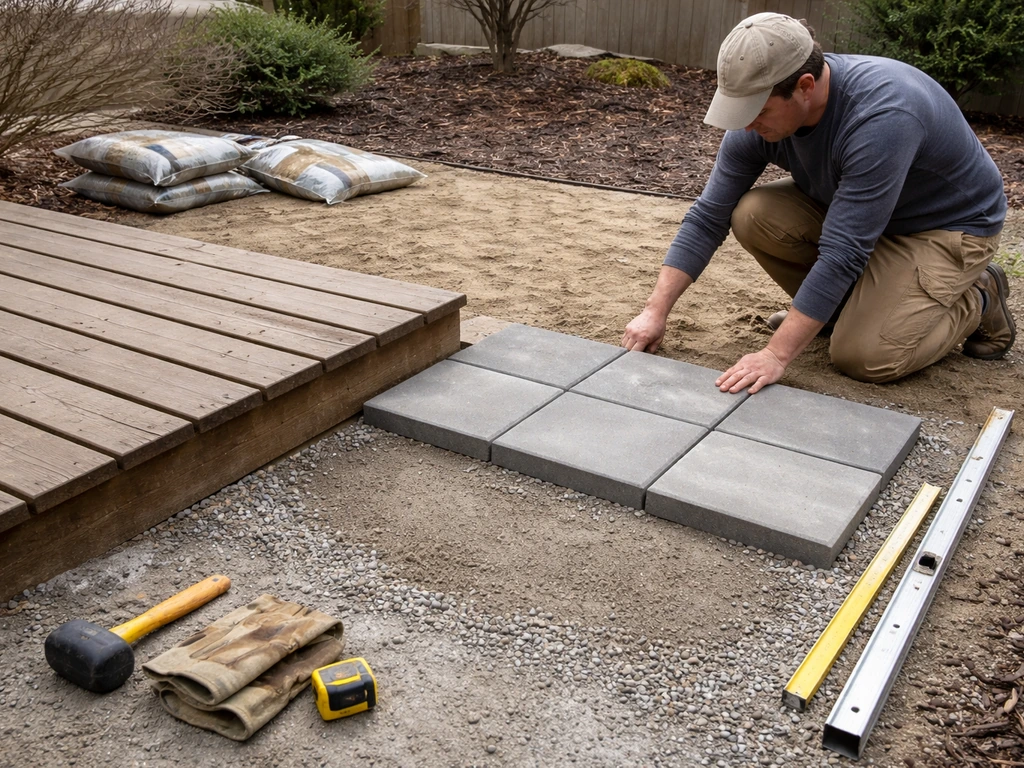
Assess your deck first and figure out your patio layout
Before you pull out a single fastener, walk every inch of your deck and be honest about what you're dealing with. You need to know three things: how high the deck surface sits above grade, what condition the framing is in, and whether there's a ledger board attached to your house. Each of these affects how much structural work you're in for.
If your deck sits less than a foot above grade, you're in great shape. The joists and beams may sit close enough to the ground that you can use the existing framing as a starting reference point, or remove it with minimal effort. If the deck is 18 to 30 inches off grade, you'll need to think more seriously about whether to cut the posts down and reframe at a lower level, or remove everything and start with fresh footings or a compacted gravel base. Decks higher than 30 inches above grade are typically in full-removal territory for a true ground-level patio conversion, trying to in-fill that much height with base material gets expensive fast.
Check the framing for rot, especially around post bases, the ledger connection, and any joists near the perimeter. Probe the wood with a screwdriver, if it sinks in without much resistance, that section is compromised. Rotted framing needs to come out regardless of your plans. While you're at it, look at the stair stringers if you have stairs. Stringers are load-bearing and their most vulnerable spots are often hidden where they contact the ground or sit against the rim board. A 2x12 stringer with more than about 6 feet of unsupported span is already pushing the limit structurally, and a rotted or undersized one is a hazard to remove, not a foundation to build around.
For layout, sketch out the footprint you want. In many cases people follow the exact deck footprint, which keeps things simple because the area is already cleared and you have a defined edge. But this is also a good time to ask whether you want to expand the patio slightly into the yard, add a step transition, or angle a corner. Draw it out with stakes and string before committing, you'll catch problems before they cost you materials.
Permits, safety, and what the code actually cares about
Here's the part most DIYers want to skip, and I get it. But permit rules for this type of conversion vary quite a bit by municipality, and getting this wrong can create real headaches, especially if you ever try to sell the house. The permit framework that most local jurisdictions follow is rooted in the IRC (International Residential Code), specifically the R105 process, but every city and county applies its own thresholds.
As a general rule: if you're replacing structural components like beams, joists, or stairs, most jurisdictions want a permit. If your new patio design includes a permanent built-in fire pit, outdoor kitchen, electrical outlets, or gas lines, plan on pulling permits for those elements too. A ground-level patio that sits below 30 inches of grade change and involves no structural attachments or utilities often falls into a category that doesn't require a permit, but don't assume.
Portland, Oregon, for example, specifically requires permits for decks more than 30 inches above grade, and Naperville, Illinois requires them for replacement of structural deck components including stairs and railings. Some cities (like Bend, Oregon) treat ground-level passive-use areas differently from elevated structures. Call your local building department and describe exactly what you're doing. A five-minute call can save you a real mess later.
On the safety side: if any part of your converted patio or the transition structure sits more than 30 inches above grade, you're required by residential building code to have a guard rail at least 36 inches high. That guard cannot have openings large enough to pass a 4-inch diameter sphere through, this is the standard test inspectors use. On stairs, there's a slightly more generous 6-inch allowance for the triangular opening near the tread. If you're modifying existing railings as part the conversion, check them against this standard before you button everything up.
One more thing worth flagging: if you have a ledger board attached to your house, the way it's flashed and fastened matters a lot. Ledger connections that aren't properly flashed into the wall's drainage plane are one of the most common water intrusion failures in residential construction. If you're removing the ledger as part of this conversion, inspect the wall behind it carefully for moisture damage before you close it up. If you're keeping it, make sure the flashing is directing water out and away, not trapping it behind siding.
Plan for drainage, levelness, and pick your surface
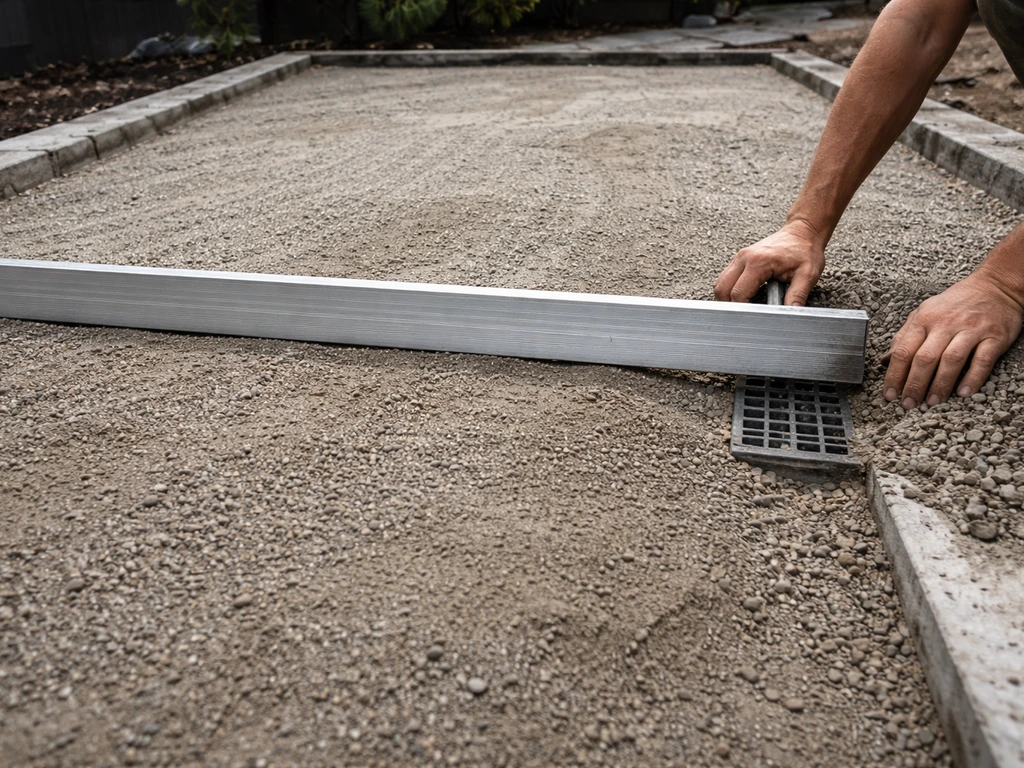
Drainage is the issue that bites most DIY patio builders, and it's almost always caused by not planning the slope before the base goes in. The target for most hardscape surfaces is a fall of 1/4 inch per foot away from the house. That's enough to move water off the surface without being noticeable when you're sitting on it. For concrete specifically, the minimum acceptable slope is about 1/8 inch per foot, but 1/4 inch per foot is the better target if you want to avoid any standing water situation. Set your slope in the base layer, trying to correct it in the surface material later is a lot harder.
Levelness matters too, but it's a different concern from slope. The finished surface of an interlocking concrete paver installation, for example, should land within plus or minus 1/4 inch of the specified grade across the surface. That's the quality control standard you're working toward. Stake your grade, run strings, and check them before you compact the base. It's much easier to fix a high spot in gravel than to lift and relay pavers after the fact.
Your surface choice drives most of the base construction decisions, so nail this down before you start digging. Here's a practical comparison:
| Surface Material | Base Required | DIY Difficulty | Relative Cost | Best For |
|---|---|---|---|---|
| Concrete pavers / brick | 4 in. compacted gravel + 1 in. bedding sand | Moderate | Mid-range | Most DIYers — forgiving and repairable |
| Poured concrete | 4–6 in. compacted gravel base + forms | Harder | Mid to high | Permanent, low-maintenance finish |
| Natural stone / flagstone | 4 in. compacted gravel + sand or dry mortar | Moderate | Higher | Irregular, natural look |
| Porcelain / ceramic tile | Concrete slab or solid mortar bed | Hardest | Higher | Polished finish, requires solid substrate |
| Composite/wood deck boards | Existing or new framing OR sleepers on slab | Easier | Variable | Keeping a wood look with low maintenance |
For most homeowners doing this for the first time, concrete pavers or brick are the best choice. They're forgiving, if you set one wrong, you pick it up and relay it. They handle seasonal frost movement better than a rigid slab. And the base construction method is well-documented and beginner-friendly. If you want something more polished or permanent, poured concrete is a solid second choice, but requires more skill (or a subcontractor for the pour itself).
Remove deck boards and prep the substructure safely
Gear up before you start demo. Safety glasses, work gloves, and sturdy boots are non-negotiable when pulling old deck boards, especially if you're dealing with older pressure-treated wood that may contain legacy preservatives. A pry bar and a circular saw are your main tools. Set the saw blade just deep enough to cut through the decking without hitting the joists beneath.
- Remove all furniture, planters, and railings first. Store or dispose of railings only after confirming no part of the remaining structure requires them for safety.
- Pull deck boards starting from the outer edge and working toward the house. Use a flat pry bar to pop screws or nails, and a cat's paw for stubborn fasteners.
- Cut boards into manageable lengths (6–8 feet) before trying to move them — full-length boards on an old deck are heavy and awkward.
- Once boards are off, inspect every joist and beam closely. Mark any rotted or cracked framing with spray paint so you don't miss it during removal.
- If you're removing the framing entirely, cut the posts at grade level or slightly below and treat the cuts with end-grain wood preservative if any stubs remain. Better yet, pull the post and footing if you can.
- If you're keeping the framing as a support structure (for a sleeper-based composite deck conversion, for example), sister any damaged joists with fresh lumber and re-secure any connections that have loosened.
- Remove or cut down the stair stringers. Remember these are structural — brace the stringer before cutting the top connection so it doesn't drop on you.
- If a ledger remains and you're attaching a new surface to the house, verify the flashing is intact. If you're removing the ledger, use a reciprocating saw to cut fasteners and patch the wall before moisture gets in.
Once framing is cleared, you'll likely find compacted soil and possibly old post footings below. Concrete piers can stay if they're below your final finish grade, they won't cause problems. If they protrude, rent a jackhammer and break them down, or cut them below grade with an angle grinder and masonry blade. Grade the soil so it slopes away from the house at your target pitch (1/4 inch per foot) before any base material goes in.
Build the patio base right, this is where most projects succeed or fail
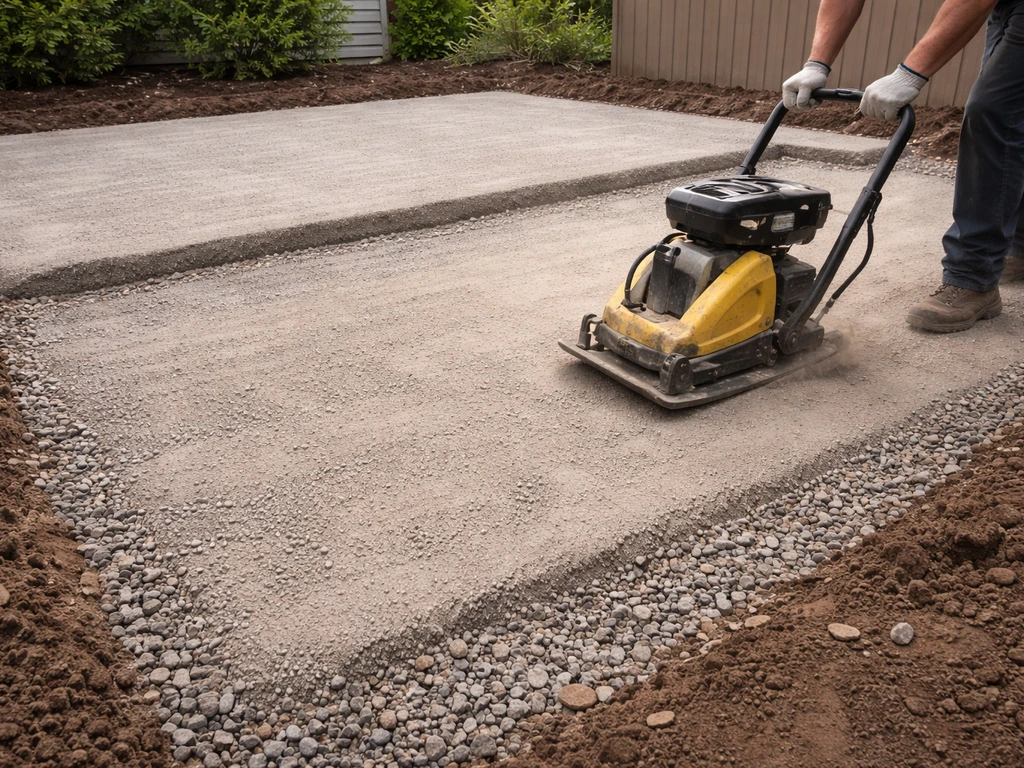
I'll be direct: a weak base is the number one reason DIY patios look bad within two or three years. Pavers sink, joints open up, and the whole thing looks tired. Do not cut corners here.
For a standard paver patio, you need 4 inches of compacted gravel base (crushed stone, not pea gravel) plus about 1 inch of coarse bedding sand. That 4-inch depth is for pedestrian use. If you're in a climate with significant frost cycles, go 6 inches on the gravel base to reduce heave. Dig down enough to hit undisturbed soil, then compact in 2-inch lifts using a plate compactor, don't try to compact 4 inches all at once. Rent the plate compactor; a hand tamper won't get you the density you need.
blank" rel="noopener noreferrer">Lay geotextile landscape fabric directly on the compacted soil before your gravel goes in. This prevents sand and fine particles from migrating up into your base over time, which is what causes long-term settlement. It doesn't replace proper compaction, it supplements it.
Once the gravel base is compacted and graded, spread your bedding sand (also called coarse concrete sand, not play sand or mason's sand) and screed it to a consistent 1-inch depth. The easiest way to screed is to set two 1-inch diameter steel pipes or conduit runs on top of the gravel, parallel to each other about 6 feet apart, and drag a straight 2x4 across them. The pipes sit as spacers and give you a dead-flat 1-inch sand layer. Pull the pipes out after screeding a section and fill the channels with sand by hand.
One critical rule: do not compact or walk on the screeded sand before setting pavers. If you disturb it, re-screed that section. The bedding sand stays loose so the pavers seat fully during the final compaction pass.
Choose your materials and finishes
Let's go a little deeper on the main surface options since the material choice affects everything downstream, base depth, edge restraint type, and how forgiving the install is.
Concrete pavers and brick
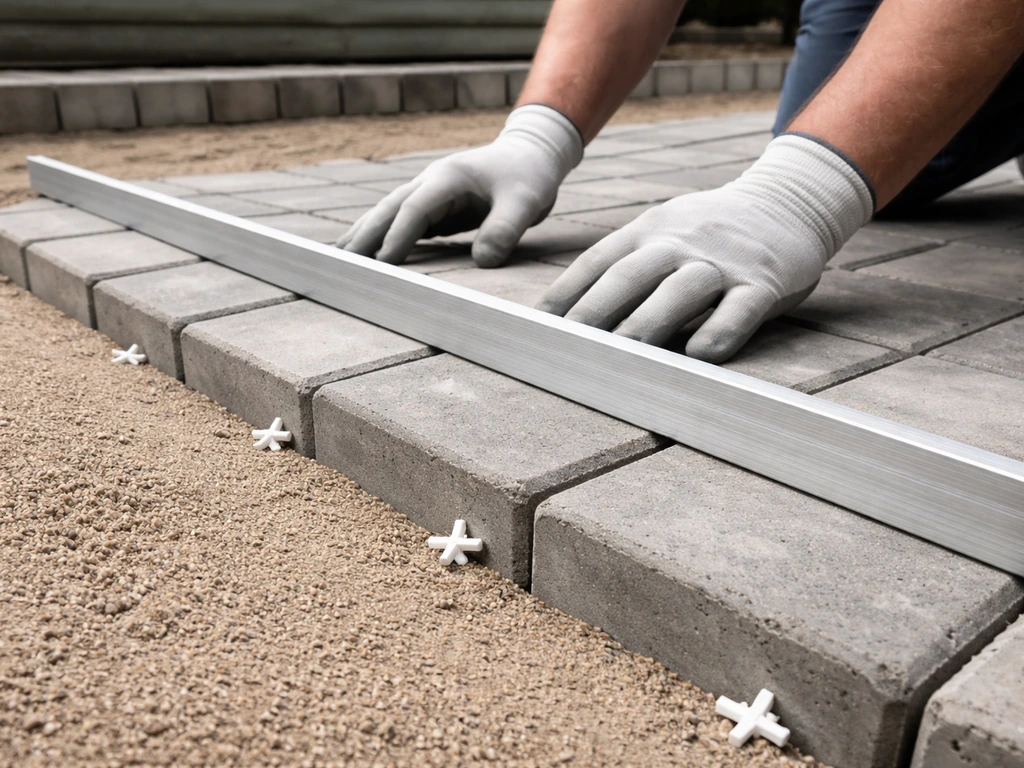
Concrete pavers are the most beginner-friendly option by a wide margin. They come in consistent thicknesses (usually 2 3/8 inches for standard pedestrian pavers), so laying them over screeded sand is straightforward. Brick is similar but tends to have more dimensional variation, so you may need to adjust individual pieces more. Both materials handle frost well because the joints allow for minor movement. Edge restraints (plastic or aluminum snap-down edging staked into the base) are required to hold the field together and prevent the edges from spreading over time.
Poured concrete
A poured concrete patio is permanent and low-maintenance once it's down. The prep is similar, compacted gravel base, forms at grade, but the pour itself requires more experience to get right, especially for finishes and control joints. If you've never worked concrete before, seriously consider hiring a concrete sub for the pour and doing the rest yourself. A bad pour is very expensive to fix.
Natural stone and flagstone
Flagstone over a compacted sand-set base looks great and adds real character. The challenge is that irregular shapes take time to fit and the varying thickness of natural stone means more fussing during install. Budget extra time and expect to cut pieces with an angle grinder and diamond blade. It's worth it if the look is what you're after.
Porcelain and tile
Outdoor-rated porcelain pavers are becoming popular and they look sharp, but they need a very solid substrate, either a poured concrete slab or a thick mortar bed. They're more brittle than concrete pavers and require wet-saw cutting. This is not a beginner's first project, but it's very doable if you're comfortable with tile work.
Composite or wood look
If you like the warmth of wood but want lower maintenance, composite decking over a sleeper grid is a legitimate option for this conversion. If you want to keep the patio level while using decking, focus on the sleeper grid and proper support before you install boards decking over a sleeper grid. You can set pressure-treated 2x4 sleepers on a concrete slab or directly on compacted gravel (with a moisture barrier between), then run composite boards across them.
This keeps the look of a deck surface at essentially patio level. It's a good option if you're keeping any portion of the existing framing. This approach overlaps with topics like decking over an existing concrete surface, which is a slightly different workflow.
Step-by-step construction workflow and the pitfalls to avoid
Here's the full sequence from cleared site to finished patio, focused on a paver install since it's the most common DIY path: ICPI guidance references using a straight edge or string line across the paver surface during layout to maintain correct grade and reduce unevenness.
- Set your layout strings and check the slope. Run strings from the house out across the project area and use a line level or laser level to confirm 1/4 inch per foot drop away from the structure. Do this before you dig anything.
- Excavate to the right depth. For a 2 3/8-inch paver on 1 inch of sand over 4 inches of compacted gravel, you need about 7.5 inches below your finished grade. Add more base depth if you're in a frost-prone climate.
- Compact the subgrade soil. Use a plate compactor on the native soil before any base material goes down. If the soil is soft or wet, let it dry out first or you'll have settlement problems later.
- Lay geotextile fabric on the compacted subgrade. Overlap seams by at least 12 inches and run the fabric up the sides of the excavation slightly.
- Add and compact crushed gravel base in 2-inch lifts. Check grade after each lift. The top of your compacted gravel should be exactly 2 3/8 inches below finish grade (to account for 1 inch of sand plus the paver thickness).
- Install edge restraints on all sides before screeding sand. Stake them firmly into the base material. This is critical — edge restraints added after the pavers are down are far less effective.
- Screed the bedding sand to a consistent 1-inch depth using pipe guides and a straight board. Do not compact the sand. Pull the pipes and fill the channels gently.
- Set pavers from a corner, working outward. Use a string line across the surface every few rows to keep your lines straight and your grade consistent. Check with a straightedge frequently.
- Cut border and edge pieces with a diamond blade saw or angle grinder. Mark cuts with chalk or a marker first.
- Compact the finished surface with a plate compactor fitted with a rubber pad to avoid cracking pavers. Make two or three passes in different directions.
- Spread polymeric sand over the surface and sweep it into the joints. Compact again lightly to settle the sand. Blow off excess with a leaf blower, then mist with water to activate the binder.
- Check the surface with a straightedge one final time. The finished surface should be within plus or minus 1/4 inch of your target grade across the whole area.
Common DIY pitfalls that derail patio projects
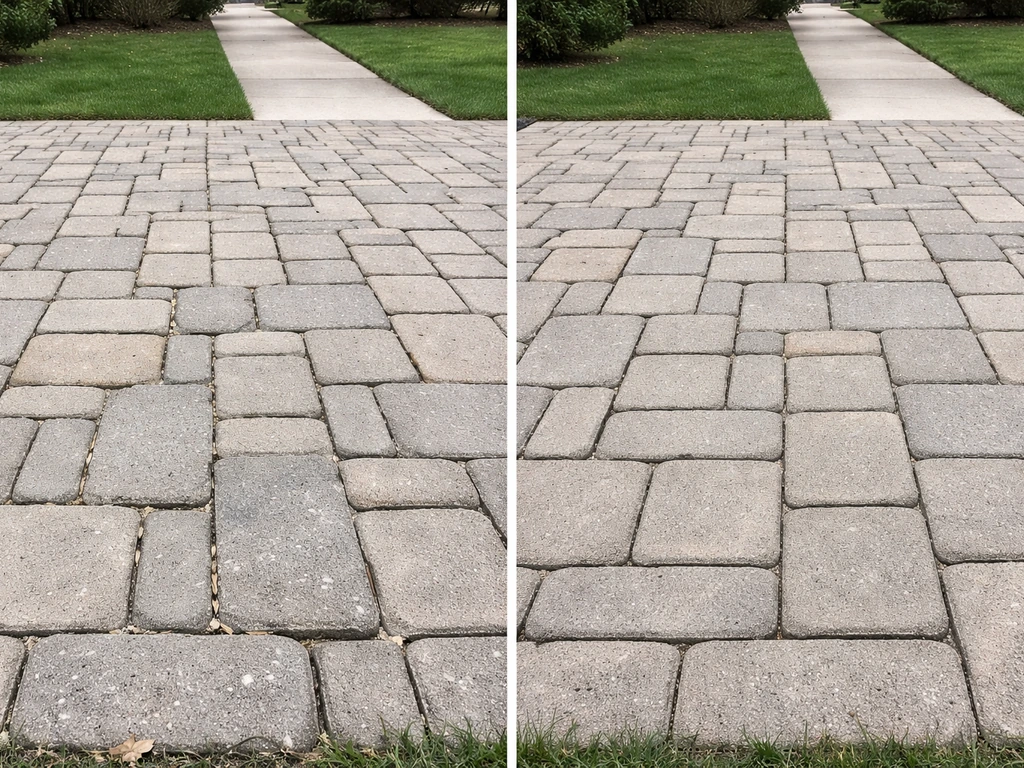
- Skipping the plate compactor and using a hand tamper instead — you won't get adequate base density, and the patio will settle unevenly within a season or two.
- Not installing edge restraints before setting pavers — without them, the field will slowly spread outward and joints will open up.
- Using the wrong sand — play sand or mason's sand in the bedding layer is too fine and will shift; use coarse concrete sand (also called ASTM C33 sand).
- Compacting the bedding sand before setting pavers — the sand needs to stay loose so pavers can seat during the final compaction pass.
- Ignoring slope or assuming the ground is already sloped correctly — always verify with a level and string line, not by eye.
- Setting the ledger area last and not accounting for the transition height — the point where the patio meets the house foundation or a remaining ledger board is the trickiest detail to get right, and rushing it causes water problems.
- Underestimating how much material you need — order 5 to 10 percent extra pavers and base material to account for cuts and waste.
- Forgetting to address the transition from patio to yard — a clean edge with a border course of pavers or a steel edging strip makes the finished project look intentional and prevents the lawn from encroaching.
One last honest note: if your existing deck is elevated enough that full removal leaves you with significant grade change to manage, you're looking at a more involved project than a straightforward conversion. If you're wondering whether you can build a deck over an existing patio, the basic logic is similar, but the support and surface build-up need extra attention.
In those cases, it might make more sense to fully replace the deck with a patio at grade, which involves different decisions about removing footings and regrading, rather than trying to in-fill. That said, if your deck is low to the ground and structurally reasonable, this conversion is one of the most satisfying weekend projects you can take on.
If your deck is low to the ground and structurally reasonable, this conversion is one of the most satisfying weekend projects you can take on, which is also the starting point for how to build a patio deck off the ground when you need to handle clearance above grade.
You end up with an outdoor living space that feels more connected to the yard, requires far less maintenance than a wood deck, and can look genuinely great with a well-chosen paver or stone surface.
FAQ
Can I keep the deck framing and just replace the decking boards to make it a patio?
Yes, but only if you treat it like an at-grade hardscape install: remove the boards and any decayed material, then verify the framing can be left in place without creating a future soft spot or blocking drainage. If the deck height is close to grade and the soil under the old deck is firm, you can often build a new base on top of undisturbed subgrade, but you should not rely on loose backfill or old footings that sit above the new finished grade.
How do I know if my deck height will work for an at-grade patio conversion?
Before demolition, measure from the lowest planned patio surface to the bottom of the deck (including how far you need to cut down posts if present). If the remaining height forces you to build an unusually thick base to reach grade, you may be better off removing more framing or adjusting the patio footprint. A simple rule of thumb is to plan your base thickness first (for pavers, typically 4 inches plus bedding sand), then see whether the resulting finished height makes sense relative to doors, thresholds, and yard slope.
What structural problems are easy to miss until after the deck boards are removed?
Check the stair stringers and any ledger area again after the decking comes off, and probe with a screwdriver for softness, not just surface rot. If a stringer is structurally compromised, do not “shim” it to support new patio base work, because the patio base needs uniform support. Plan on removing and replacing compromised members, then rebuild the transition and any guard-required sections to match current code height rules.
What’s the best way to lay out the patio so the slope works out, not just the square footage?
Use temporary shims or painter’s tape layout lines to mark the deck edges and then confirm the new patio perimeter on the ground with stakes and string. This helps you avoid a common mistake where the deck footprint looks right from above, but the yard grade or a corner expansion causes a slope problem once you excavate. Recheck that your target slope (about 1/4 inch per foot away from the house) still holds at every side, not just the front.
Can I add steps or a landing transition when converting a deck into a patio?
Yes, but it changes drainage and sometimes permit needs. If you add steps, you typically need a clear rise and run relationship and you must keep the slope philosophy intact so water still sheds away from the house. If you add a raised landing or modify rail height due to height above grade, guard requirements and stair rules can kick in, so verify those before you pour or set edging.
Do I need permits if I’m also adding a patio cover or shade structure?
Often, yes, but not always. If your patio cover is attached to the house or changes the load path in a significant way, you may need approvals and engineering depending on local requirements. Also consider how the roof runoff will reach the ground, because a roof that drains onto the patio can overwhelm your 1/4 inch-per-foot fall plan, creating puddling even with a well-built base.
What are common mistakes that lead to pavers sinking or rocking after installation?
If you’re placing pavers, compaction timing matters: you should compact the gravel in lifts, then grade it, then lay geotextile and bedding sand, and only compact after pavers are set. A common mistake is compacting the screeded sand or walking on it before installation, which prevents full seating and leads to rocking pavers later. After pavers are down, use a plate compactor fitted properly for pavers and add joint sand as the final pass.
Can I compact the patio base after screeding the bedding sand to save time?
You generally should not compact over the screeded bedding sand before setting the pavers, because the sand layer needs to remain loose so pavers can seat uniformly during final compaction. If you accidentally disturb it, remove and re-screed that section rather than trying to “patch” with thin extra sand, which can create height variation.
Why is crushed stone required for the base, and what goes wrong with pea gravel?
For paver patios, avoid using pea gravel or mixed gravel because the larger, rounded pieces do not interlock well and compact unevenly. Stick with crushed stone for the main base and use correct lift thickness (compacting in 2-inch layers is a safer target than trying to do it all at once). If you cannot reach the right density, the patio often settles unevenly, and edge joints open first.
When should I increase base thickness beyond the standard paver depth?
It depends on your soil and local frost conditions. If you have significant freeze-thaw or weak subgrade, thicker base and better drainage often matter more than you think. The article covers a typical frost adjustment (using a deeper gravel base), but you should also consider whether your yard has poor drainage upstream of the patio, because geotextile does not stop water accumulation, it mainly controls migration of fines.
What if the yard grading already slopes toward the house in that area?
Yes, and it can be a problem if the patio will receive continuous water from sprinklers or roof runoff. Check that your slope direction is correct away from the house and that there is a realistic path for water to leave the patio area, such as a yard swale or existing drainage that is not blocked. If the converted deck location sits in a “low bowl,” you may need underdrain considerations before installing pavers.
How important is edging, and what’s the usual way DIYers install it incorrectly?
Edge restraint is what keeps the field from drifting, especially after freeze-thaw cycles. Make sure edging is installed at the correct line and height relative to the finished paver elevation, and do not skip proper bedding or staking. A very common failure mode is leaving edges insufficiently restrained, then the first few pavers at the perimeter loosen and water infiltrates and erodes base material.
If I choose poured concrete, what’s different from a paver build in terms of durability issues?
If you’re converting to poured concrete, control joints and curing become the biggest long-term difference versus pavers. Plan your joint spacing and finishes before the pour, because incorrect or missing joints lead to cracking, and you cannot easily “re-level” a cured slab. For mixed DIY, a common approach is doing base and forming yourself, then hiring the pour so the critical concrete work is handled by someone experienced.
What’s the biggest installation challenge when using flagstone on a patio conversion?
For flagstone or irregular surfaces, you need a consistent bedding strategy because varying thickness can create height differences and tripping hazards. On top of a sand-set base, you often need to adjust each stone with targeted placement rather than relying on “average” sand depth. If you’re not experienced with cutting and fitting, the time and tile saw work can grow quickly, especially for tight borders against house walls.
Next Article
How to Build a Patio Deck Off the Ground DIY Guide
Step-by-step guide to build an off-the-ground or near-grade patio deck with footings, framing, drainage, and finishing.