You can edge a patio with wood by digging a trench about 6 inches deep and 2 inches wider than your boards, laying 2 to 3 inches of gravel for drainage, setting pressure-treated or cedar boards at the right height, staking them every 2 to 3 feet with 12-inch spikes, and backfilling to lock everything in place. Done right, wood edging looks sharp, holds the patio surface in check, and lasts 10 to 20-plus years depending on the material and how well you manage moisture. To learn the full process, including layout, trenching, drainage, and board height, follow this guide on how to edge a patio.
How to Edge a Patio With Wood: Step-by-Step DIY Guide

Nolan Lennox
2 Jul 2026
Plan the edge layout before you touch a shovel
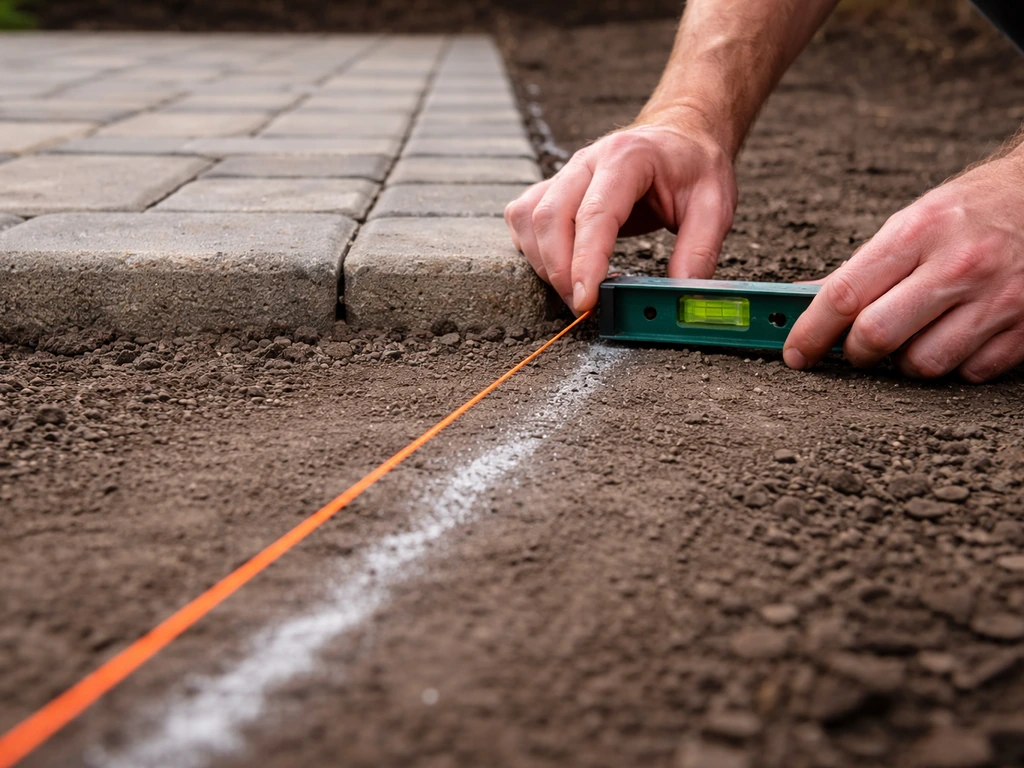
Good layout work takes maybe 30 minutes and saves hours of correction later. Start by walking the perimeter of your patio and marking where the edge will sit. Once you mark the perimeter, you can follow a step-by-step plan for how to build patio edging. Use wooden stakes and mason's line to establish a crisp reference line. For straight runs, pull the line tight between stakes placed a few feet beyond each corner so the string doesn't droop. For curved sections, use a garden hose or spray paint to mark a smooth arc, then follow it with your string or chalk.
While you have the line set, check your grade. The patio surface should slope away from the house at roughly 1/8 to 1/4 inch per foot for drainage. Your wood edge needs to sit at or just below the finished patio surface height on the interior side so water doesn't pool against the board. On the exterior (lawn or garden side), aim to have the top of the edging board no more than about half an inch above grade to avoid a trip hazard and to make mowing easier. Mark the target top-of-board height on each stake with a pencil so you have something to reference when you're down in the trench.
If your patio transitions to a lawn, driveway, or planting bed, each transition needs its own height decision. A patio that drops into a lower lawn may need the edging board to stand a couple of inches proud to retain gravel or sand base material. Sketch a quick cross-section drawing, even a rough one on a notepad, and it will make every step after this much clearer.
Picking the right wood and hardware
Material choice is the biggest decision you'll make on this project because it directly controls how long the edging lasts in ground contact. Here's how the main options stack up:
| Material | Rot Resistance | Typical Cost | Best For | Notes |
|---|---|---|---|---|
| Pressure-treated pine (UC4A ground contact) | Excellent (treated to ground-contact standard) | Low to moderate | Most patio edging situations | Must be UC4A rated, not UC3B above-ground only; use hot-dip galvanized or stainless fasteners |
| Western red cedar (heartwood) | Good to very good | Moderate | Visible edging where looks matter | Heartwood only; sapwood rots much faster; avoid boards with a lot of pale sapwood |
| Eastern white cedar | Good (decay class 2 of 5) | Moderate | Lighter-duty or above-grade edging | Performs well but less durable than western red cedar heartwood in direct soil contact |
| Landscape timbers (treated) | Good | Low | Rustic or heavy-duty borders | Bulkier profile; 4x4 or 4x6 common; pairs well with gravel patios |
| Composite lumber (e.g. Trex boards) | Excellent (rot and rust free) | High | Low-maintenance installs | Great option if you want zero rot concern; follow manufacturer fastener specs |
For most homeowners, pressure-treated lumber rated UC4A for ground contact is the practical winner. It's cheap, widely available, and when treated to the right standard it resists rot even when buried in moist soil. The key is making sure the tag on the lumber actually says UC4A or 'ground contact.' Boards rated only for above-ground use (UC3B) will deteriorate much faster once buried. If you want a more natural look and don't mind paying a bit more, western red cedar heartwood is a solid choice, just be picky at the lumber yard and avoid boards with wide bands of light-colored sapwood, which decays much more quickly.
Board thickness and dimensions
For standard patio edging, 2x4 or 2x6 pressure-treated boards work well for most applications. The 2x4 profile (1.5 inches thick, 3.5 inches wide) is easy to work with and bends slightly for gentle curves. The 2x6 gives you more retaining height if you're holding back a thick gravel or sand base. Landscape timbers (usually 4x4 or 4x6) create a chunkier, more rustic look and are extremely stable, but they're heavy and don't bend at all. For straight-line, clean-look edging, 2x6 pressure-treated is my go-to.
Hardware: stakes, screws, and spikes
Don't cheap out on fasteners. Any metal hardware going into the ground or exposed to constant moisture needs to be hot-dip galvanized, stainless steel, or specifically rated for exterior ground contact. Regular zinc-plated screws will rust out within a few seasons and leave you with a crumbling edge. For staking, use 12-inch galvanized landscape spikes or rebar stakes driven vertically behind the board every 24 to 36 inches. For splicing boards end-to-end or attaching corner pieces, use 3-inch stainless steel exterior screws. GRK RT Composite 305 stainless screws are a great pick if you want serious corrosion resistance, and many big-box stores carry comparable stainless trim screws with lifetime rust warranties.
Prep the site properly or pay for it later
This is the step most DIYers rush, and it's where almost every edging failure starts. Skipping proper excavation and base prep leads to boards that heave, tilt, or rot within a couple of years.
Excavation
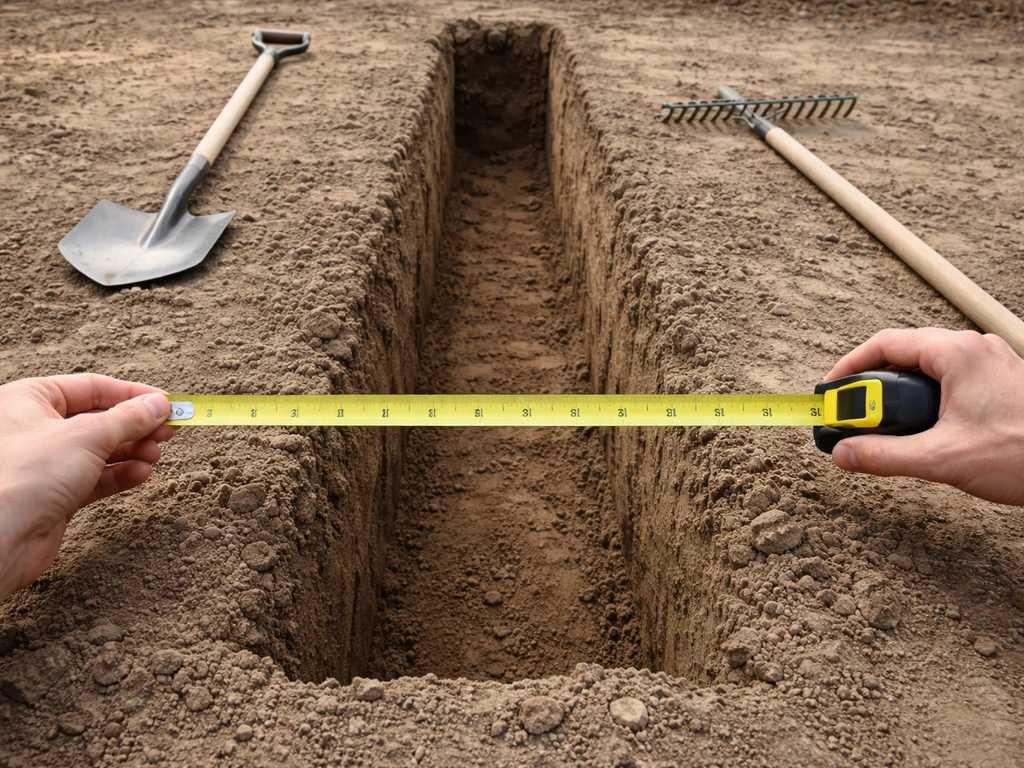
Dig a trench along your marked line about 6 inches deep and roughly 2 inches wider than the board you're installing. The extra width on the outside of the board gives you room to drive stakes and backfill around them. If you're in a climate with hard winters, keep in mind that frost heave can shift shallow edging. For most 2x lumber edging you can't really get below the frost line (which varies widely by region), but a solid gravel base and proper drainage dramatically reduce heave risk by keeping water from sitting under the board and freezing.
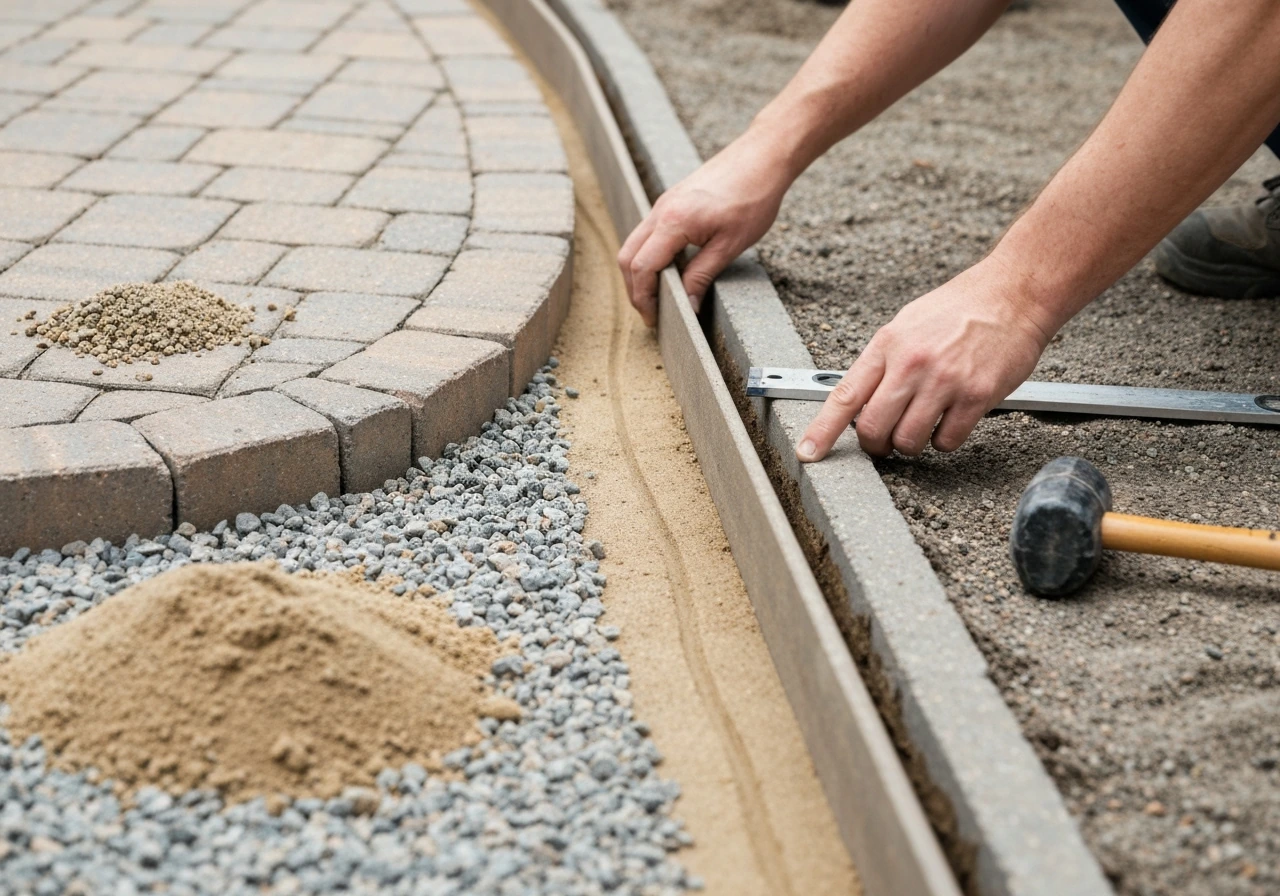
The drainage base
Once you've dug the trench, tamp the bottom flat and lay 2 to 3 inches of compacted gravel. blank" rel="noopener noreferrer">Crushed stone (3/4-inch with fines) works well because it compacts firmly and still drains. The gravel does two things: it lets water move away from the buried wood so the board dries out instead of staying wet, and it gives you a stable, level surface to set the board on. According to Lowe's landscape timber guidance, blank" rel="noopener noreferrer">the gravel layer should end up about 2 inches below the top of the timber once the board is placed, which means your gravel layer depth will depend on your board height. Tamp it thoroughly with a hand tamper before setting any boards.
Weed barrier: worth it or not?
There's a real debate about this in the DIY world. A weed barrier laid under and behind the edging board helps prevent grass and weeds from pushing through or under the board over time, which matters if your patio borders a lawn. The downside is that some landscape fabric can trap moisture against wood if it's wrapped tight around the board. My approach: use weed barrier on the garden or lawn side of the edging (laid flat over the excavated area before backfilling), but don't wrap it around the bottom of the board itself. Let the gravel base breathe freely.
How to install wood patio edging step by step
Before you start, gather everything you need so you're not stopping mid-trench to make a hardware run. If you are working on a raised patio, you can keep your edge straight by confirming the interior height before you set the boards raised patio edging.
- Pressure-treated 2x6 or landscape timbers (measure your perimeter and add 10% for waste)
- 12-inch galvanized landscape spikes or rebar stakes
- 3-inch stainless steel exterior screws
- Cordless drill or impact driver
- Maul or small sledgehammer for driving spikes
- 4-foot level and line level
- Tape measure and pencil
- Circular saw or handsaw for cutting boards
- Spade and flat-bottomed trenching spade
- Hand tamper
- 3/4-inch crushed gravel
- Wheelbarrow
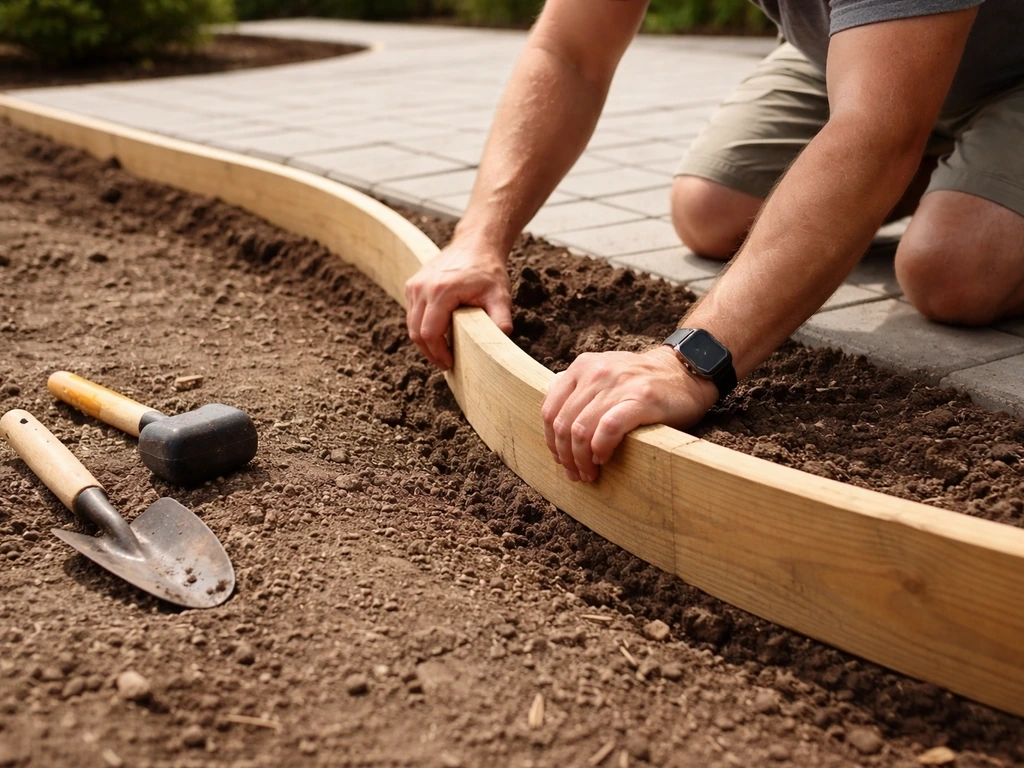
- Set your first board in the trench and check that the top sits at your target height. Use a level to confirm it's not tilting side to side. Adjust the gravel bed beneath it as needed, adding or scraping out material until the board sits right.
- Drive your first stake directly behind the board (on the outside, away from the patio) about 6 inches from one end. Use a maul and drive the spike at least 8 inches into the ground. The stake should be flush with or just below the top of the board.
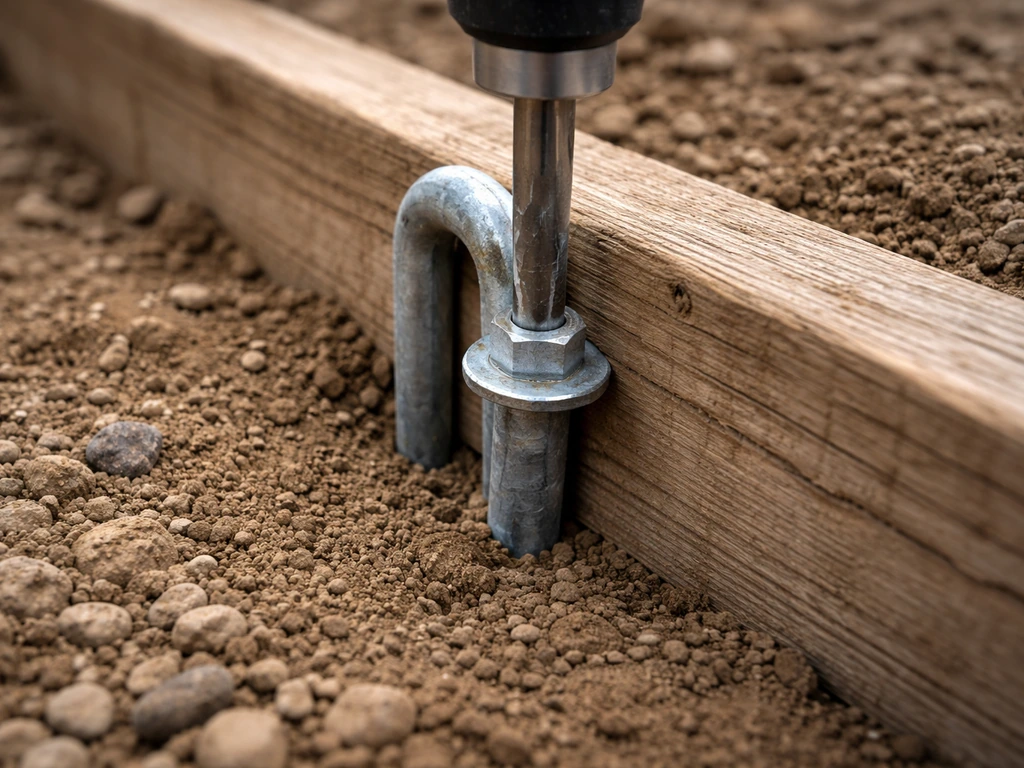
- Drill a pilot hole through the board and into the stake, then drive a 3-inch stainless screw to lock the board to the stake. This step keeps the stake from drifting away from the board over time.
- Move to the other end of the board and repeat with a second stake. Then add stakes every 24 to 36 inches along the run. For heavy-duty installs or boards retaining thick base material, go every 24 inches.
- Continuously check level as you go. Long runs have a way of drifting if you don't check every board. Stretch your mason's line above the boards as a reference height and keep the top of each board touching or just below the string.
- For corners, cut two boards at 45-degree miters for a cleaner look, or butt them square and drive a stake on both sides of the corner joint. The square butt joint is easier for beginners and just as sturdy with proper staking.
- For curves, use 2x4 lumber instead of 2x6 because the thinner board has slightly more flex. Make a series of closely spaced saw kerfs about 2/3 of the way through the back face of the board every 2 to 3 inches to help it bend more easily without snapping. Stake curves more frequently, every 18 to 24 inches.
- To splice boards end-to-end on a long run, stagger the joints so no two splices land in the same spot. Drive a stake directly behind the joint with the screw driven through both board ends into the stake. This is the most important splice detail: an unsupported joint will open up within one or two freeze-thaw cycles.
- Once all boards are staked and level, do a final walk-along with your level and a tape measure to confirm consistent height across the entire run before backfilling.
Finishing details that make the edge stay put
Backfilling and compacting
Once everything is staked and confirmed level, backfill the outside of the trench with the excavated soil, tamping it firmly in 2-inch layers. Don't dump the whole pile in at once and tamp once: loose backfill settles unevenly and the board can tilt outward over the winter. Tamp each layer before adding the next. Once you're near grade on the outside, tamp again firmly and then water the area lightly to help the soil consolidate further.
Locking the interior side
On the patio side of the edging board, make sure your patio base material (compacted gravel, sand, or whatever you used) is pushed firmly up against the board face and tamped well. The patio base pressing against the board from one side and the staked backfill pressing from the other essentially sandwiches the board in place and prevents outward kick. To finish a patio edge cleanly, keep the slope consistent, lock the patio base against the board, and then backfill and compact in layers. This is the most important structural detail for keeping edging straight over time. If you skip tamping the patio side, the edge will bow outward within a year.
Optional caps and trim
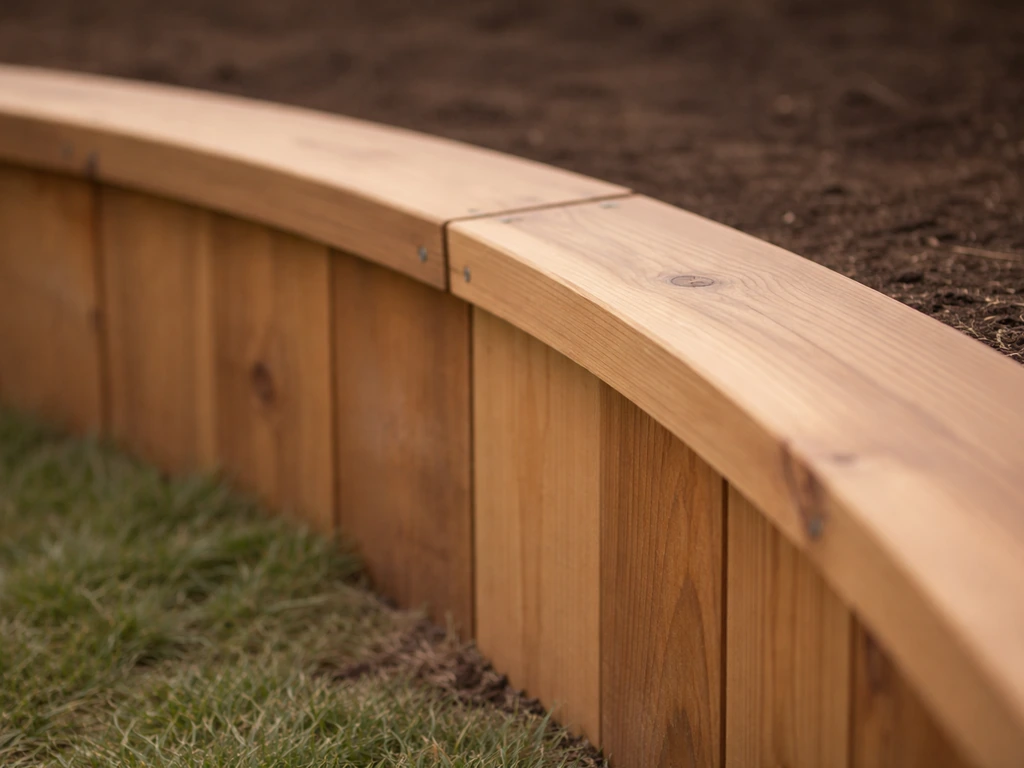
If you want a more finished look, a flat cap board (a 1x4 or 1x6 cedar or composite board) laid flat on top of the edging creates a clean top rail effect, especially on raised or multi-height patios. This also protects the top face of your buried boards from direct rain exposure. Fasten the cap board with stainless screws countersunk slightly so water doesn't pool in the screw hole. For live edge or decorative wood patio styles, the cap treatment becomes the visual centerpiece of the whole border. If you're specifically building a live edge wood patio, focus on selecting stable slabs, matching thickness to your base, and planning the cut lines and support so the natural edges sit securely.
Keeping wood edging alive for the long haul
Wood edging doesn't take much maintenance, but what little it does need is easy to skip, and that's how you end up replacing boards every five years instead of every fifteen.
Annual inspection
Once a year, ideally in spring after the ground has fully thawed, walk the entire edge and look for boards that have shifted, tilted, or started to show soft spots. Press firmly on the board face with your foot: it should feel solid. Any give or sponginess is early decay. Catch it early and you can pull just that section, dry it out, treat the remaining sound wood with an end-grain preservative, and replace only the bad piece. Ignore it and the rot spreads to neighboring boards and stakes within a season or two.
Sealing and re-staining
Pressure-treated wood has chemical preservative protection but doesn't seal out moisture on its own. If your edging boards are exposed above grade, applying a penetrating exterior wood sealant or semi-transparent stain every two to three years significantly extends their life. Let new pressure-treated lumber dry for at least a few weeks before sealing because it arrives from the lumber yard wet and sealers don't penetrate wet wood well. Cedar edging benefits from an oil-based penetrating sealer applied once a year in the first couple of years, then every two to three years after that.
When sections loosen or boards go bad
If a board starts to kick out, nine times out of ten the stake has loosened or rotted at the soil line. Pull the old stake, drive a new one 2 to 3 inches away from the old hole (the old hole won't hold grip well), and re-screw the board to it. For a board that has minor surface checking or weathering but is structurally sound, a light sand and a fresh coat of exterior stain will buy you several more years. For a board that has gone soft or punky, don't try to patch it: pull the section, check the gravel base beneath for drainage problems or root intrusion (both accelerate rot), correct the issue, and install a new board with a fresh stake.
One last note: if you live in a wet climate or have a shady patio where the wood never really dries out between rains, composite lumber edging is worth the higher upfront cost. It eliminates the rot variable entirely and carries the same clean look as wood without the maintenance calendar. If you're exploring other edging approaches, the decisions around how to border a patio, how to build patio edging, or how to finish a patio edge are all worth looking at depending on how elaborate your project becomes. If you still need ideas for the full outline, learning how to border a patio will help you choose the right layout and materials before you dig.
FAQ
Can I edge a patio with wood if my patio is already built and the base is in place?
Yes, but you’ll need to cut back or expose the patio edge to fit the board and gravel layer, otherwise the wood won’t sit at the correct height and will bow. Use a small blade or oscillating tool to remove base material to the trench depth, then install the board with the same drainage gravel and backfill in tamped layers.
What’s the best wood size, 2x4 or 2x6, if I want the edge to retain more gravel or sand?
Choose 2x6 when you need extra retaining height, especially if your patio base is thick or the exterior grade is lower. If you’re mostly creating a clean border and not holding much material back, 2x4 is easier to handle and still works well with proper gravel and compaction.
How do I keep the wood edging straight when I’m working alone?
Set intermediate stakes more frequently than every 2 to 3 feet for long runs, and use a string line at both the top reference height and a second lower reference (near where the board will sit). This double-check helps you correct a slight twist before the gravel and backfill lock it in.
Do I need to use gravel under the boards, or can I use sand or just soil?
Gravel is strongly recommended because it drains and compacts into a stable bed that helps wood dry. Sand can shift and doesn’t provide the same consistent drainage, while native soil usually stays too wet and increases rot risk, especially in shaded or wet areas.
Should I install a weed barrier, and where exactly should it go?
If you use it, lay the barrier flat on the garden or lawn side of the excavated area before backfilling. Avoid wrapping tightly around the bottom of the board, because trapping moisture against the wood can accelerate decay.
How do I handle edging along a slope or irregular yard grade?
Treat it as multiple height segments. Before installing boards, mark target top-of-board height at every stake based on your drainage goal and transition needs, then step the edge gradually rather than trying to force a single “flat” line across a changing slope.
What if the patio surface height changes across the border, for example near steps or a doorway?
Create separate “zones” with their own board height and transition details. For a consistent look, plan a cap board or splice strategy that matches each zone’s height, and ensure water still sheds away from the house with the same interior slope.
Can I use treated boards that are only rated for above-ground contact (like UC3B)?
It’s a common mistake. UC3B boards are more likely to deteriorate faster once buried or constantly damp, especially where they sit in a gravel bed that can stay wet. For long-term performance, use lumber labeled for ground contact (for example, UC4A where applicable).
How far apart should I place stakes to prevent the edge from bowing?
For most straight runs, stakes every 2 to 3 feet are typical, and closer spacing helps if you’re in freeze-thaw conditions or have longer spans between corners. After staking, verify the edge isn’t “springing” when you press along it, because outward bowing usually starts from under-supported sections.
What’s the best way to prevent water from pooling against the wood edge?
Keep the interior face low enough that water flows away from the patio edge rather than touching the board. Also compact the patio base firmly against the board face, since gaps let water collect at the interface.
Do I really need a cap board on top, or can I leave the wood exposed?
You can leave it exposed, but a cap board reduces direct rain exposure on the top ends and improves the finished look. If you choose a cap, countersink stainless screws slightly so water doesn’t pond in the holes.
What kind of screws or spikes should I use if parts will be buried?
Use corrosion-resistant hardware rated for exterior ground contact, such as hot-dip galvanized landscape spikes, stainless exterior screws, or similarly rated fasteners. Avoid regular zinc-plated screws, they tend to rust quickly in soil moisture and loosen the board.
Why does wood edging sometimes kick out after a winter?
Most kick-out failures come from weak compaction or poor backfill layering, especially on the outside grade. Re-check that both sides are tamped in lifts, and that the patio base is pressed firmly against the board face so the edge is “sandwiched” and locked.
When a section starts to fail, should I replace only that board or the whole run?
Replace only the failed section if the surrounding boards are solid. Pull the loose board, inspect the gravel base for drainage problems, and then reinstall with a fresh stake. Catching it early prevents rot from transferring to neighboring pieces through shared moisture paths.
How often should I inspect and re-treat the wood edging?
Inspect at least once a year after thaw for soft or spongy boards. For exposed pressure-treated boards, plan a penetrating sealant or semi-transparent stain every 2 to 3 years, and for cedar, an oil-based penetrating sealer about once a year for the first couple of years, then every 2 to 3 years afterward.
Next Article
How to Build Patio Edging: Step-by-Step DIY Guide
Step-by-step DIY patio edging: choose materials, plan curves, prep base, install securely, finish, and fix shifting or g