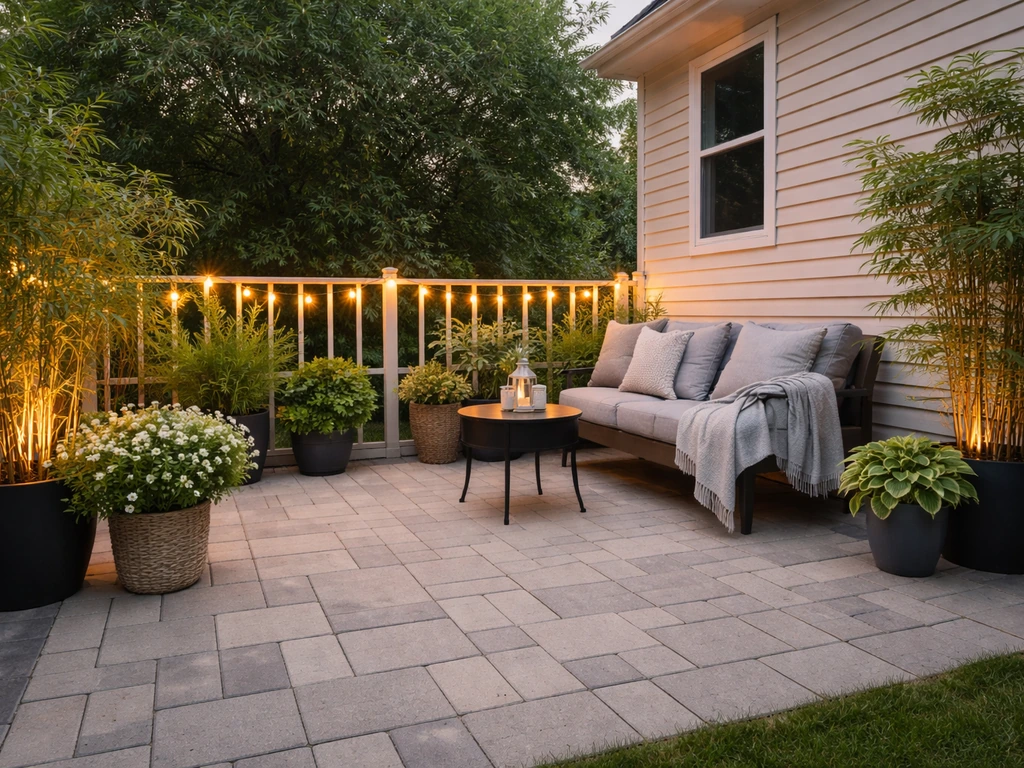
Most patios don't need to be replaced, they need to be diagnosed. Whether you're dealing with cracked concrete, sinking pavers, weeds pushing through every joint, or a surface that just looks rough and dated, there's a practical DIY fix for nearly all of it. The key is matching the repair to both the problem and the material, doing a little prep work first, and not skipping the steps that prevent the same issue from coming back in six months.
How to Fix Up Your Patio: DIY Repair and Upgrade Steps

Nolan Lennox
11 Jul 2026
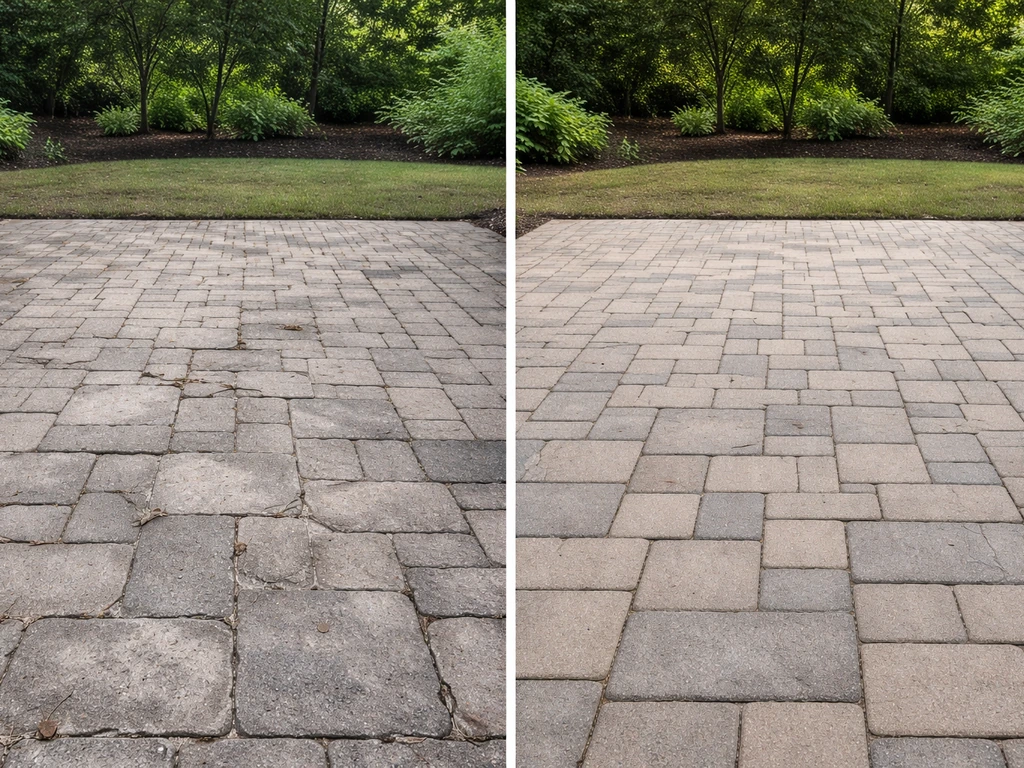
Start here: figure out what's actually wrong
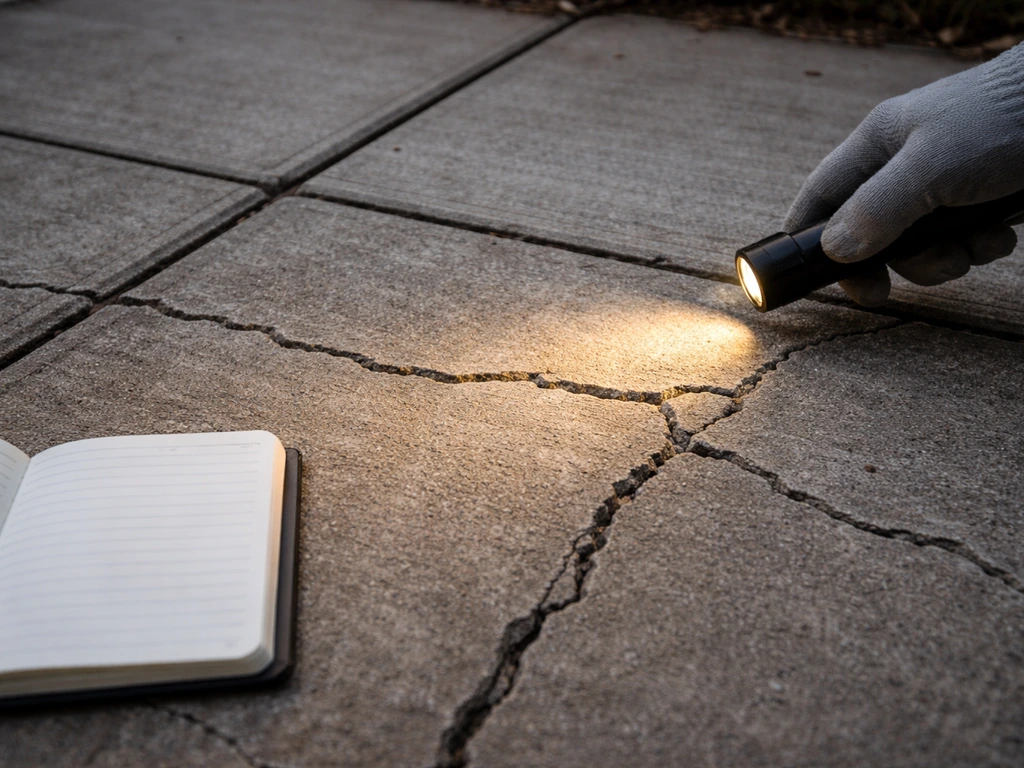
Before you buy anything or pick up a tool, spend 20 minutes walking your patio and taking notes. A lot of repairs fail because people treat the symptom without understanding the cause. Here's what to look for and what it usually means.
- Cracks running parallel to joints or edges on concrete: classic freeze-thaw damage, where water infiltrates, freezes, expands, and chips the surface apart. Common in climates with hard winters.
- A network of fine surface cracks (crazing): usually cosmetic, often from the slab drying too fast during the original pour or age-related shrinkage.
- A hollow sound when you tap the surface with a mallet: the concrete or patch below has delaminated and isn't bonded. This area will keep failing if you don't remove it and re-bond properly.
- Sunken or rocking pavers, brick, or stone: the base has eroded or washed out underneath, or joints have lost their sand.
- Standing water after rain: slope is wrong, drainage is blocked, or both. The standard for exterior flatwork is a 1/4-inch drop per foot (roughly 2% grade) away from the house.
- Weeds, moss, or grass pushing through joints: joint sand has broken down or was never stabilized; moss specifically signals a surface that stays damp too long.
- White chalky deposits (efflorescence): soluble salts migrating to the surface with moisture. It's mostly cosmetic but signals a moisture issue you should address so it doesn't return.
- Loose, chipped, or spalling surface on concrete: often thin-damage caused by freeze-thaw or de-icer chemicals, but could also mean the original mix was too wet or the surface wasn't cured properly.
- Wobbly or rotting boards on a wood or composite surface: individual board failure, fastener corrosion, or substructure damage.
Once you've identified the main problems, cross-check them against your patio material. The right repair for a concrete slab and the right repair for a loose brick paver are completely different processes, even if the visible symptom looks similar.
Match the fix to your patio material
Here's a quick-reference breakdown by surface type, with the most common problems and the general approach for each.
| Material | Common Problems | Go-To Fixes |
|---|---|---|
| Concrete slab | Cracks, spalling, freeze-thaw damage, efflorescence, poor drainage | Patch and re-bond with hydraulic or polymer-modified concrete mix; flexible polyurethane crack sealant for moving cracks; regrade or resurface if slope is wrong |
| Brick or concrete pavers | Rocking/sunken units, weed infiltration, joint sand loss, efflorescence | Re-level individual units, repack base, replace polymeric sand in joints, seal after stabilization |
| Natural stone | Cracking, efflorescence, joint failure, shifting | Re-bed loose stones, use permeable jointing mortar or polymeric sand, improve base drainage |
| Gravel | Spreading, thin spots, weed pressure, muddy edges | Top-dress with fresh angular gravel, add or replace edging, install or refresh landscape fabric |
| Wood decking/patio boards | Rot, splintering, loose fasteners, mold/mildew | Replace individual boards, re-fasten, sand and re-seal or re-stain; check substructure joists |
| Composite boards | Fading, mold/mildew staining, bowing, loose fasteners | Clean with composite-approved cleaner, re-fasten bowed boards, replace irreparably warped sections |
Tools, materials, and prep before you start
Getting the right supplies together before you start saves a frustrating mid-project hardware store run. What you need will vary by repair, but here's a solid core list for the most common patio fixes. Skip what doesn't apply to your situation.
Tools you'll likely need
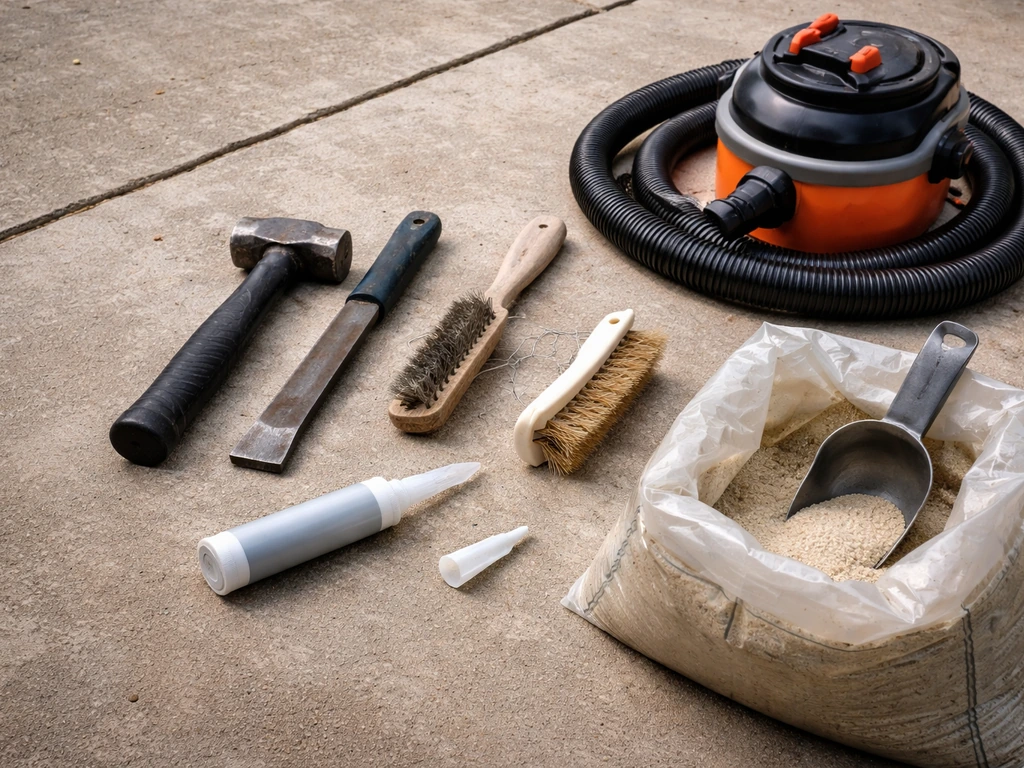
- Cold chisel and 3-lb hammer (for chipping out damaged concrete or repositioning pavers)
- Wire brush and stiff-bristled scrub brush
- Pressure washer or garden hose with spray nozzle
- Rubber mallet (for seating pavers and testing hollow spots)
- Level (2-foot and 4-foot)
- Tape measure and string line with line level or laser level
- Margin trowel and steel finishing trowel
- Plate compactor or hand tamper (for base work)
- Leaf blower (for cleaning polymeric sand off paver surfaces before wetting)
- Safety glasses, gloves, and knee pads
Materials to have on hand
- Concrete patching mix or hydraulic cement (for concrete repairs)
- Flexible polyurethane crack sealant (for cracks that may still move slightly)
- Polymeric sand (for paver joints; check that your joint width is at least 1/8 inch for proper penetration)
- Concrete or paver bonding agent (critical for getting patches to stick)
- Concrete or paver sealer appropriate to your surface
- Compactable gravel base (crushed stone, #57 or similar)
- Sand (for re-bedding pavers)
- Landscape fabric (for gravel patios with weed issues)
- Paver edge restraints if yours are missing, damaged, or absent
- Moss/algae remover or concrete cleaner
Prep that actually matters
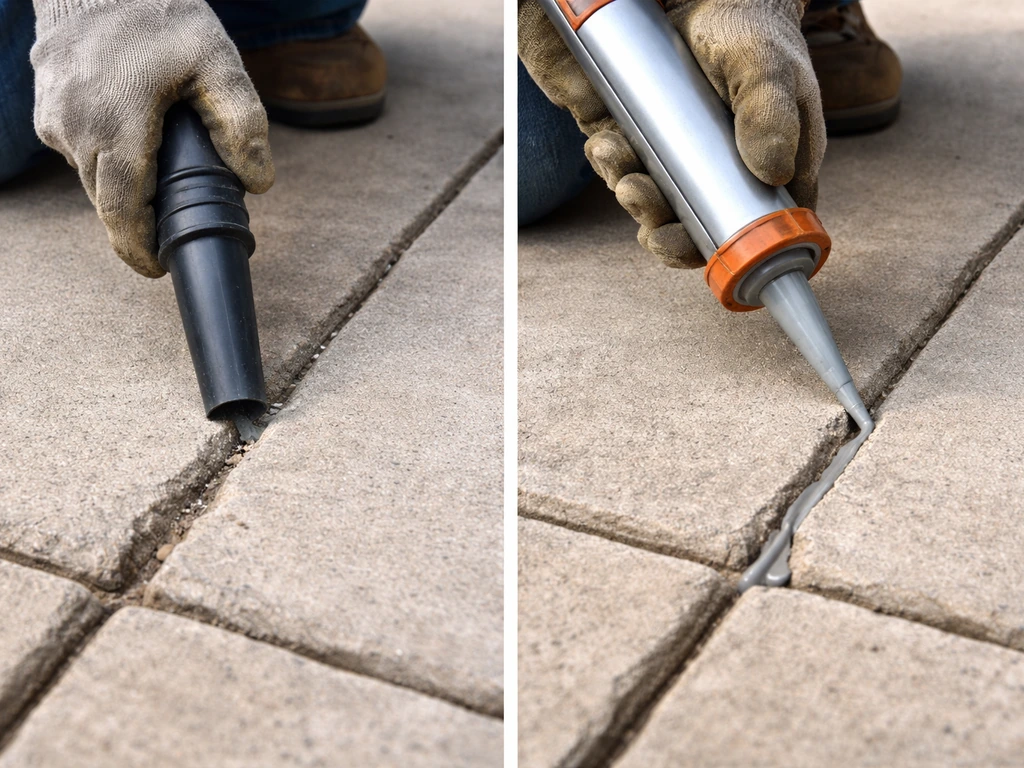
Clean the surface before you do anything else. Concrete patches won't bond to a dirty or wet slab. Polymeric sand won't set correctly if there's debris in the joints. Sealer will blister or turn milky if applied over moisture. Give the area a pressure wash, let it dry thoroughly (at least 24 hours after washing before sealing), and remove all loose material, weeds, and moss. For concrete repairs specifically, chip out any hollow or delaminated areas completely. If it sounds hollow when you tap it, it has to come out or your patch will fail in the same spot.
Step-by-step fixes for the most common patio problems
Fixing cracks in a concrete patio
- Use a cold chisel to slightly widen and undercut the crack (creates a mechanical key for the patch to grip). Vacuum out all loose material.
- For cracks that are still moving seasonally (common with freeze-thaw damage), use a flexible polyurethane crack sealant rather than rigid patching compound. Fill the crack, smooth flush with the surface, and allow it to cure fully.
- For stable cracks and chips, apply a concrete bonding agent to the repair area first. Let it get tacky, then press in a polymer-modified concrete patching mix with a margin trowel. Compact it down and screed it level with the surrounding surface using a steel trowel.
- Mist the repair lightly and cover with plastic sheeting for at least 24 hours to slow curing. Don't seal the repaired area for at least 28 days.
Re-leveling and resetting sunken or rocking pavers
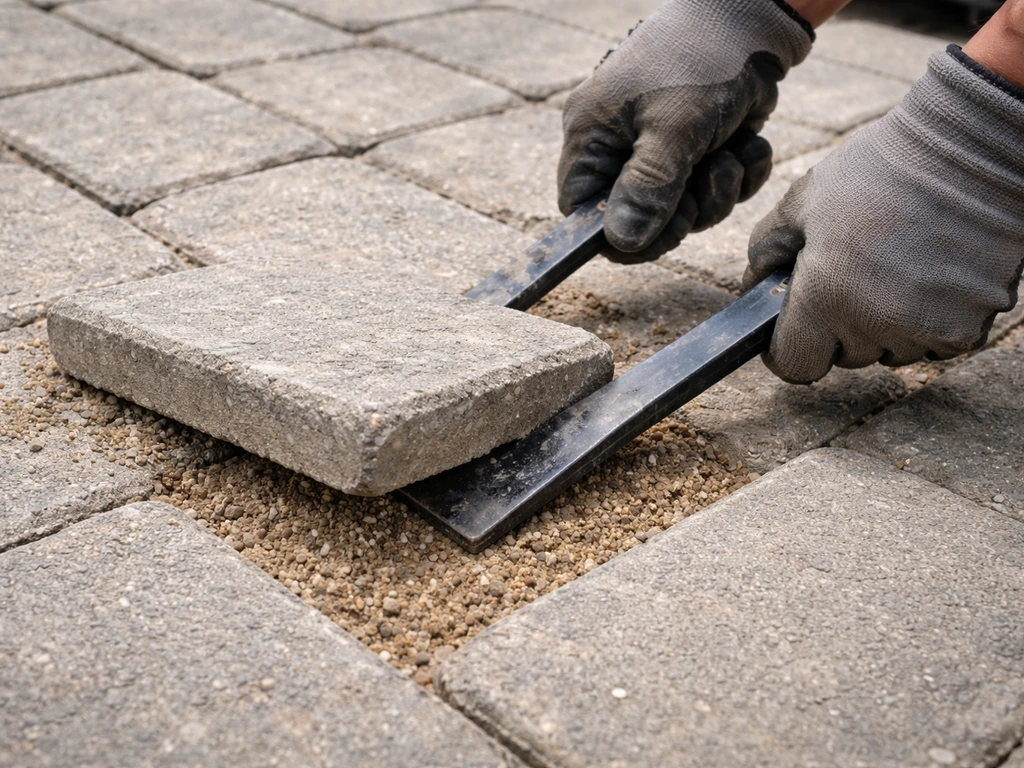
- Remove the rocking or sunken pavers by prying them up with a flat bar. Set them aside without stacking (to avoid chipping edges).
- Dig out the sand bed underneath. If the base gravel has shifted, eroded, or washed away, add compactable gravel and tamp it firmly before adding new bedding sand.
- Screed the bedding sand to 1 inch thick and level. Re-lay the pavers, tapping them into place with a rubber mallet. Check level frequently as you go.
- Once all pavers are re-seated, sweep polymeric sand into the joints. Make sure your joints are wide enough (at least 1/8 inch) for the sand to penetrate. Blow off any excess from the surface with a leaf blower before wetting.
- Mist the surface gently with water until the polymeric sand is saturated, then allow it to cure. Follow the manufacturer's timeline before heavy use. Polymeric sand, installed correctly, can last around 10 years.
Dealing with weeds and moss
- Pull or kill existing weeds manually or with a targeted weed killer, getting the roots. For pavers, replace joint sand after clearing weeds, since open joints invite regrowth.
- For moss on concrete or stone: apply a moss remover or diluted bleach solution, let it dwell for 15 to 30 minutes, then scrub and rinse thoroughly. Moss lives where surfaces stay damp, so improving drainage and sunlight access is the real long-term fix.
- After cleaning, re-fill paver joints with polymeric sand and consider sealing the surface. Sealed joints resist weed germination much better than bare sand joints.
- On gravel patios, install or replace landscape fabric under the gravel layer, then top-dress with fresh angular gravel. Angular gravel compacts better and resists weed pressure more than rounded pea gravel.
Repairing loose or broken pavers and brick
- Remove all broken or loose units. Inspect the surrounding units for hidden rocking, as damage tends to spread.
- If a paver is cracked but the base is solid, you can often replace just that unit. Bring the old paver to the hardware store to match size and thickness.
- Re-bed the replacement unit in fresh bedding sand, set level with neighbors, and compact lightly with a rubber mallet.
- Refill joints with polymeric sand and mist to cure.
Fixing wood or composite boards
- Walk the surface and press on each board. Soft, springy spots in wood indicate rot; replace those boards immediately before the substructure is affected.
- Remove the affected boards and inspect the joists underneath. If a joist is also soft, that's a structural fix (see the DIY vs. pro section below).
- Replace boards with matching material where possible. For composite, contact the manufacturer, as colors can fade and new boards may not match older sections.
- Re-fasten all loose boards with exterior-rated screws. Pre-drill composite material to avoid cracking.
- For mold and mildew on composite, use a cleaner formulated for composite decking. Standard bleach can degrade some composite surfaces.
Drainage and leveling: the stuff that prevents repeat problems
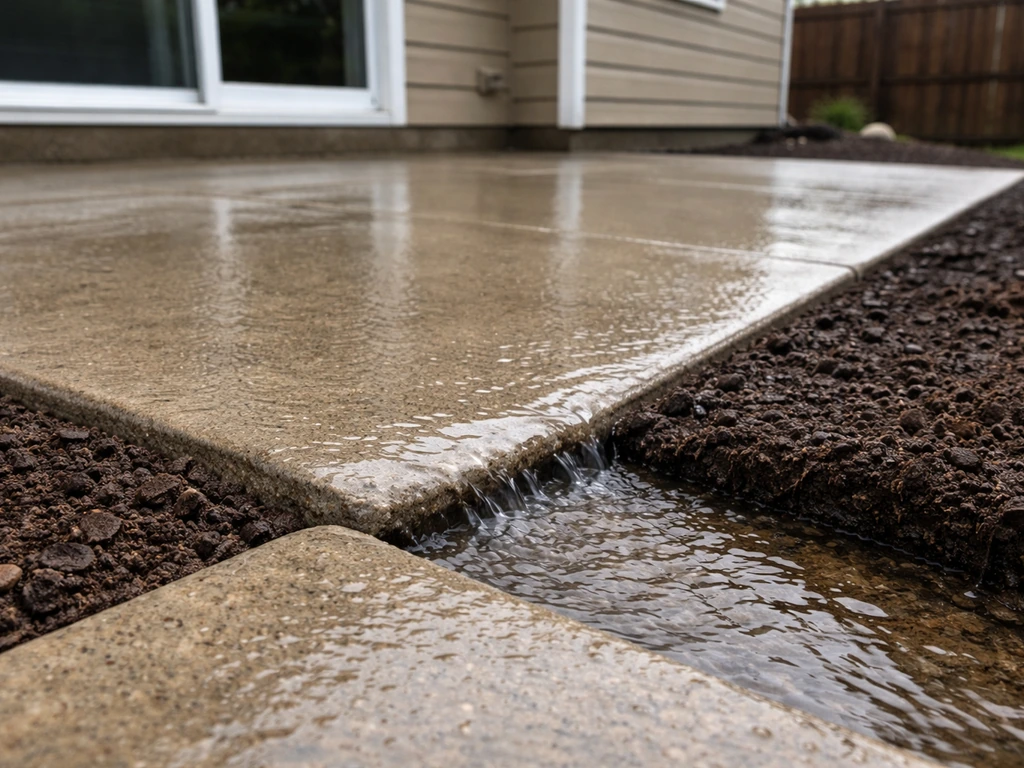
This is the section most people skip, and it's exactly why their repairs fail again in a year. Poor drainage is behind more patio problems than any other single cause: it's why bases wash out, why pavers keep sinking, why concrete keeps cracking in the same spots, and why moss keeps coming back no matter how many times you scrub it off.
The standard for any exterior flatwork is a slope of 1/4 inch per foot (about 2%) away from the house. You can check your current slope by laying a 4-foot level on the surface and measuring the gap at the low end. Quikrete also recommends checking patio slope before work by measuring it using stakes and string to determine whether grading is needed check your current slope by laying a 4-foot level on the surface. If water is pooling on the patio or running toward the foundation, that grade is wrong and needs to be corrected as part of any serious repair.
Also look up at your house. Downspouts that dump directly onto or near a patio are a major cause of base erosion, undermining, and chronic standing water. Extending or redirecting downspouts so they discharge well away from the patio area, ideally into a planted area or a dry well, fixes what a lot of patio repairs never address. The EPA specifically recommends disconnecting and redirecting downspouts to move roof runoff away from structures for exactly this reason.
For pavers and stone, the subgrade (the native soil below everything) should be compacted to at least 95% Proctor density before any base material is placed. Most DIYers can achieve this with a plate compactor rented for a day. Lay compactable gravel base in 4-inch lifts, compact each lift before adding the next, and finish with a 1-inch sand bedding layer. Skipping this is why patios sink. Geotextile fabric between the subgrade and base gravel is worth adding on sites where soil washes up into the base over time.
Refreshing how your patio looks and functions
Once the structural and drainage issues are addressed, there's a lot you can do to make a patio look dramatically better without a full rebuild. This is where a fix-up project starts to feel really satisfying.
Cleaning
A thorough pressure wash transforms most patios. For efflorescence (that white chalky film on concrete or pavers), scrub with a stiff wire brush or use a low-pressure wash first to remove loose material, then apply a dedicated efflorescence cleaner and rinse fully. The key step most people miss: fix the moisture source, or it will come back. A breathable sealer helps, but note that some non-breathable sealers can actually trap moisture and worsen efflorescence over time.
Sealing
Sealing concrete or pavers protects against staining, slows future joint deterioration, and gives the surface a fresh look. Timing matters: new concrete must cure for at least 28 days before sealing. After cleaning or pressure washing, wait at least 24 hours for the surface to fully dry before applying sealer. Most paver sealers also require the surface temperature to be at least 60 degrees Fahrenheit and the surface to be completely dry. Applying sealer to a damp surface causes a milky haze that's difficult to reverse. Don't confuse that haze with efflorescence, they look similar but have different causes and fixes.
Edging
Missing or failing edge restraints are one of the most overlooked patio problems. Without them, pavers and gravel slowly migrate outward over years, joints open up, and the whole surface destabilizes. Plastic or aluminum paver edging, spiked into the ground every 12 inches, is inexpensive and dramatically extends the life of any paver or gravel patio. If your edging is there but failing, pull it up, reset the perimeter, and re-spike.
Surface improvements
If your concrete slab is structurally sound but just looks tired or rough, a concrete resurfacer (a thin polymer-modified overlay) can transform it without a full pour. You can also apply a concrete stain or paint designed for exterior flatwork to change the color entirely. For gravel patios, a fresh top-dressing of angular gravel (2 to 3 inches) rejuvenates the look and improves drainage at the same time. If you want to go further with a new look or upgraded surface layer, the options around how to cover an existing patio, how to make a patio pretty, or how to spruce up a patio are all natural next steps once the underlying structure is sound.
When to stop DIYing and call a pro
I'm a big believer in doing as much as possible yourself, but there are specific situations where calling a pro isn't admitting defeat, it's just being practical. Here's an honest breakdown of where the line usually sits.
| Situation | DIY or Pro? | Why |
|---|---|---|
| Surface cracks, minor spalling, loose pavers | DIY | Standard repairs with readily available materials; skill level is beginner to intermediate |
| Re-leveling a section of sunken pavers with good base | DIY | Manageable with rented tools; results are very good when done carefully |
| Grading and slope correction on a small patio | DIY with care | Doable with string lines and a level, but needs patience and accuracy |
| Widespread slab heaving or settling across the whole surface | Pro | Usually means subgrade failure or major drainage issue requiring excavation |
| Rotted substructure joists under wood decking | Pro (structural) | Structural integrity of the frame is a safety issue; permits may be required |
| Drainage problems tied to foundation grading or downspout rerouting into pipes | Pro (depending on scope) | Minor downspout extensions are DIY; underground drainage work or regrading a yard is not |
| Large concrete pours or full resurfacing over 200+ sq ft | Consider pro | Quality and consistency are hard to maintain solo over large areas |
| Patio attached to the house with frost heaving separating it from the structure | Pro assessment first | Could indicate foundation movement; get a structural opinion before patching |
The rule I follow: if fixing the symptom correctly requires solving a problem that's underground, structural, or tied to the house's foundation, get a professional assessment before you invest money in surface-level repairs that will just fail again. Everything on top of a bad base is temporary. For concrete crack sealing, Quikrete recommends a flexible polyurethane crack sealant for cracks that may move, which helps limit seal failure from concrete movement.
FAQ
How do I tell whether I should patch or replace a concrete area on my patio?
Use a two-part test. First, tap the area with a hammer, if it sounds hollow or the surface crumbles, it needs to be removed and rebuilt because patches won’t bond to delaminated concrete. Second, check for repeating cracks or water staining patterns, if both show up in the same spots, the slab movement or drainage issue is likely ongoing, so you should address that before patching.
My patio gets wet and stays damp. Can I still seal it after cleaning?
Yes only if the moisture issue is actually solved and the slab or pavers are truly dry. After pressure washing, wait at least a full day, and if you can still feel cool dampness the next afternoon or see darkened areas that don’t lighten, extend the drying time. Sealing over trapped moisture can cause milky haze or worsen staining, even with “breathable” products.
What’s the easiest way to confirm the drainage slope is wrong?
Do the level test the way you’d measure a floor, use a 4-foot level and measure the gap at the low end, you’re aiming for about a 1/4 inch drop per foot away from the house. Then do a water check: after rain or a controlled hose test, watch for pooling, if water collects or runs toward the foundation, the grade needs correction, not just surface cleaning.
Efflorescence looks like white powder. How is that different from just dirt or algae?
Efflorescence typically appears as a chalky film that returns after you scrub it and rinse it, often linked to moisture rising through concrete or coming from joints. Dirt and algae usually wipe away and do not persist if moisture sources are controlled. If it’s efflorescence, you’ll usually need an efflorescence-specific cleaner, but you must also address the underlying moisture pathway.
Can I use polymeric sand on joints if weeds keep coming back?
Polymeric sand only helps if you remove what’s currently in the joints and stop the cause that’s creating open joints or recurring moisture. Pull weeds and remove loose debris, then refill and compact properly according to the product directions. If the base is shifting or drainage is poor, polymeric sand may fail because joints reopen and water moves under the surface.
How do I know whether pavers are sinking because of the base or because of edge problems?
Look at the pattern. If pavers drop or rock in the center but the perimeter edge holds steady, the base under the main field is often under-compacted or washed out. If the migration starts at the outer border and moves inward, failing edge restraints are likely involved. Either way, you usually need to correct the subgrade and drainage, not just reset a few pavers.
What soil compaction level do I actually need under pavers or stone, and what happens if I skip it?
Aim for at least 95% Proctor density under the subgrade before adding base materials. If you skip proper compaction, the base will settle over time, which shows up as uneven pavers, opened joints, and recurring weed growth because the surface is no longer stable.
Do I need geotextile fabric under paver base, or is gravel alone enough?
Gravel alone can work on stable, non-eroding sites, but geotextile is especially useful when native soil can migrate upward or wash into the base over time. If you’ve seen soil coming into the joints or the base seems to “blow” during rain, adding geotextile can help keep layers separated and reduce future sinking.
What’s the correct order of operations for a patio refresh, clean, repair, then cosmetic upgrades?
In most cases, do it in this sequence: diagnose and fix drainage or structural issues first, then clean and prep, then repair cracks or joints, then do surface-level improvements like sealing, staining, or resurfacing. If you apply cosmetic steps before you fix the underground cause, you’ll often see the same problem return quickly.
How long should I wait to seal after repairs like patching or resurfacer work?
For sealing new concrete, allow at least 28 days for cure before applying sealer. For general cleaning after pressure washing, wait at least 24 hours for the surface to fully dry. If you just patched, also follow the patch product’s cure window, because sealing too soon can trap moisture inside and create haze or patch discoloration.
What’s a common mistake when resurfacing or staining an existing concrete slab?
Sealing or coating over poor surface condition. If there are hollow or delaminated spots, or the surface still has dust or residue from previous cleaning, coatings can fail or look uneven. Make sure loose material is removed, and if there’s any doubt about moisture, address drainage and drying time before you apply stain or paint.
When should I stop DIY and get a pro to look at my patio?
If the fix requires anything underground or connected to the house foundation, like major grade correction, base failure that’s repeatedly washing out, or structural movement causing recurring cracking, get a professional assessment first. Surface fixes are usually temporary when the root cause is subsurface or foundation-related.
Next Article
How to Spruce Up a Patio: DIY Upgrades and Checklist
DIY checklist to spruce up your patio with budget upgrades, repairs, lighting, privacy, and comfort improvements.