The safest, cheapest way to pay for a patio is to use cash you already have and buy materials in phases as you build. If that's not realistic, a true 0% APR credit card (not deferred interest) is the next best option for smaller projects, while a HELOC or home equity loan makes more sense for larger builds where the interest rate matters. The rest of this guide walks you through exactly how to structure your budget, choose a funding option, and avoid the most common mistakes whether you're doing the work yourself or hiring a contractor.
How to Pay for a Patio: DIY Budget and Financing Guide

Nolan Lennox
3 Jul 2026

What 'paying for a patio' actually means for a DIYer
If you found this page, you're probably trying to figure out one of two things: how much money you actually need before you start, or how to cover a project that's bigger than your current bank balance. Both are valid questions, and they have different answers. A lot of patio finance guides assume you're hiring a contractor for everything, but if you're doing this yourself, your cost structure looks very different. You're eliminating labor (which is often 40–60% of a hired job), you're buying materials yourself, and you have the flexibility to phase the work across weeks or months.
The key distinction is this: a hired patio job is one big invoice you need to cover upfront or in scheduled payments. A DIY patio is a cash-flow problem, where you need money available at specific moments (excavation equipment rental, base materials delivery, paving materials delivery) but not all at once. Understanding which situation you're in shapes everything about how you should plan your budget and payments.
What you're actually paying for: the real cost breakdown
Before you pick a payment method, you need a clear picture of where the money goes. Most people underestimate patio costs because they only price the surface material and forget about everything underneath it. Here's how a typical patio budget actually breaks down.
| Cost Category | What's Included | Typical Share of Budget |
|---|---|---|
| Site prep and excavation | Digging to depth, hauling spoil, equipment rental or hire | 15–25% |
| Sub-base materials | Compacted gravel or MOT Type 1 hardcore (100–150mm depth typical) | 10–20% |
| Surface materials | Pavers, slabs, block paving, stone, or concrete | 30–45% |
| Sand/mortar bedding layer | Sharp sand, dry mix, or mortar for the setting bed | 5–10% |
| Edging and borders | Soldier courses, restraint edging, aluminum or plastic edge restraints | 5–10% |
| Permits and inspections | Varies by location; U.S. inspection fees often $75–$400 per visit | 2–8% |
| Tools and equipment | Plate compactor rental, cutting tools, levels, hand tools | 5–10% |
| Delivery and contingency | Materials delivery, unexpected extras (always budget 10–15% extra) | 10–15% |
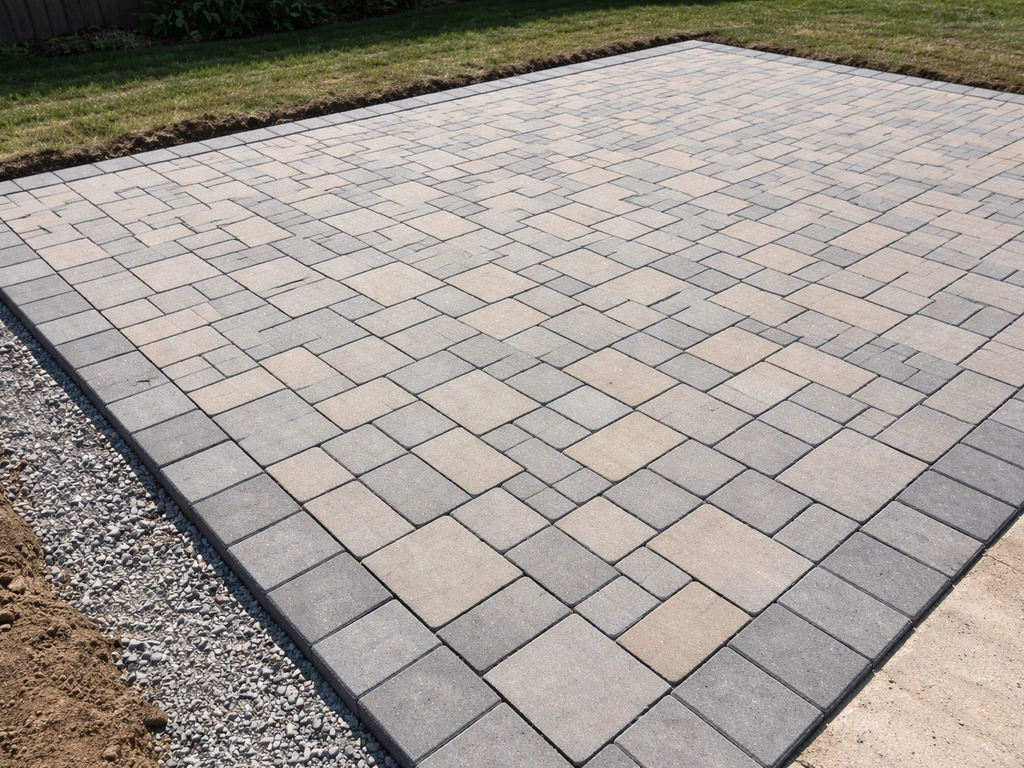
Installed paver patios in the U.S. typically run $8–$25 per square foot for standard work, with premium stone pushing $30 or more per square foot when you factor in materials and labor together. That means a 300 square foot patio can realistically cost anywhere from $2,400 on a lean DIY budget to $9,000 or more if you're hiring contractors and using higher-end materials. Base prep and excavation are the biggest surprise costs for first-timers. Don't skip them or underbudget them. A well-compacted sub-base is what keeps your patio from heaving and sinking within a few years.
Setting a realistic budget before you commit to anything
Start with a square footage estimate and work from there. Measure your intended patio area, add 10% for cuts and waste, then price out materials locally. Don't rely on national averages for surface materials: prices vary significantly by region and supplier. Get at least two material quotes before you lock in a budget number.
Once you have a rough materials total, add your sub-base cost (gravel or compacted aggregate at 4–6 inches deep is typical), equipment rental (a plate compactor usually runs $60–$120 per day), and delivery fees. The Block Paving guide PDF also gives examples of excavating to sub-grade and then placing and compacting MOT Type 1 aggregate to around 100, 150mm for domestic paving and paths compacted aggregate at 4–6 inches deep is typical. Then add 10–15% as a contingency. That final number is your real budget target, not the materials-only figure most people start with.
For payment timing, think in phases rather than one lump sum. A simple three-phase timeline works well for most DIY patios: phase one covers excavation and sub-base materials, phase two covers surface materials and bedding sand, and phase three covers edging, jointing compound, sealant, and finishing touches. Spreading purchases this way gives you time to recover cash between major spends and lets you adjust if something comes in over budget.
Your funding options compared

There are five realistic ways to fund a patio build. Each one has a different cost, risk profile, and best-fit situation. Here's an honest look at all of them.
Cash (paying as you go)
This is always the cheapest option because it costs nothing extra. If you can fund the project from savings or from your regular income across a few paydays, do it. The DIY phased approach makes this easier than most people expect. You don't need all the money on day one. Buy your base materials, compact them, let the project sit for a weekend, then buy your surface materials when you're ready. No interest, no risk, no payment schedule to manage.
Credit card with a true 0% intro APR
If you need a short gap between spending and having the cash, a credit card with a genuine 0% introductory APR period (typically 12–21 months) is a solid option for projects in the $1,500–$5,000 range. The critical thing here is understanding the difference between a true 0% APR and deferred interest. With a true 0% card, if you pay off the balance before the promo period ends, you owe zero interest, full stop.
With a deferred interest promotion (common on store financing offers), if you have any balance remaining when the promo ends, you get charged all the interest that accrued from day one, often at 26–29% APR. That can add hundreds of dollars to your project cost overnight. Always read the terms before you sign up.
Personal loan
A personal loan gives you a fixed amount at a fixed rate (typically 7–20% APR in 2026 depending on your credit score) with a set monthly payment. It's predictable and straightforward. It's a reasonable choice when your project is too large to realistically pay off on a 0% card before the promo period expires, and when you don't want to tap home equity. The downside is that you pay interest from day one, so shop rates carefully and compare the total repayment cost, not just the monthly payment.
HELOC or home equity loan
For larger patio projects (roughly $8,000 and above), borrowing against your home equity usually gives you the lowest interest rate available. A HELOC (home equity line of credit) lets you draw money as needed, which maps well to a phased build. A home equity loan gives you a lump sum with fixed payments.
Either way, the interest is typically lower than a personal loan, and interest may be tax-deductible if the funds are used for home improvement (check with a tax advisor). The trade-off is that your home is collateral, so this is a real risk if your finances are unstable. The process also takes longer to set up (2–6 weeks typically), so don't plan to start building next weekend if this is your funding path.
Contractor financing
Many patio contractors offer financing directly through third-party lenders. It can be convenient, but it's often the most expensive option. These offers frequently use deferred interest structures, carry higher APRs than what you'd qualify for independently, and are designed to make the monthly payment look attractive while hiding the total cost. If a contractor offers financing, get the full loan terms in writing (total repayment amount, APR, and what happens if you miss a payment) and compare it against what you'd pay with a personal loan or credit card before agreeing to anything.
| Funding Option | Best For | Typical Cost | Key Risk |
|---|---|---|---|
| Cash / pay as you go | Any project size, phased DIY builds | Free (no interest) | Requires available savings or income timing |
| True 0% APR credit card | Projects under ~$5,000 with 12–21 month payoff plan | Free if paid in full on time | Missing payoff deadline triggers high APR |
| Personal loan | Mid-size projects ($3,000–$15,000) without home equity | 7–20% APR fixed | Paying interest from day one |
| HELOC / home equity loan | Larger projects ($8,000+) with strong equity | Lowest rate, often 6–10% APR | Home is collateral; slower to set up |
| Contractor financing | Convenient but rarely cheapest | Often 15–30% APR (deferred interest common) | Deferred interest traps; limited comparison shopping |
If you're hiring a contractor: quotes, deposits, and payment schedules
Even on a mostly DIY project, you might hire out the heavy work: excavation, concrete, or specialty stonework. If any contractor is involved, here's what a normal and safe payment arrangement looks like. One example U.S. permitting guide cited by LatestCost notes that inspection fees often span about $75, $400 per visit, depending on the city and whether re-inspections are needed inspection fees often span about $75–$400 per visit.
Get at least three written quotes for any work you're hiring out. Each quote should itemize materials, labor, sub-base work, and any permits separately so you can actually compare them. A quote that just says '$4,500 for a 200 sq ft patio' tells you almost nothing. Ask specifically what sub-base depth they're using, what base material, and what the surface material spec is. These details drive cost differences between quotes and affect the quality of the finished job.
Deposits are normal and expected, but the amount matters. A legitimate contractor will typically ask for 10–30% upfront to cover material ordering. A request for 50% or more before any work starts is a red flag, especially from a contractor you haven't worked with before. A payment schedule tied to project milestones (for example: 25% at signing, 25% when excavation and base are complete, 25% when paving is laid, and 25% on final completion) protects both sides and is a sign of a professional operation.
Never pay the final installment until you've inspected the work and you're satisfied. Once full payment is made, your leverage to get corrections done drops significantly. Hold back at least 10–15% until any punch-list items are resolved. Get this in writing in the contract before work starts.
- Ask for a fully itemized quote (materials, labor, base prep, permits listed separately)
- Confirm the deposit percentage before signing anything (10–30% is normal, 50%+ is not)
- Get a written payment schedule tied to construction milestones
- Verify the contractor is licensed and insured before any money changes hands
- Hold the final payment until the work is inspected and complete
- Ask whether permit fees are included in the quote or billed separately
DIY cash-flow plan: buying materials at the right time
The biggest cash-flow mistake DIYers make is ordering everything at once. You don't need all your materials on site on day one, and storing large quantities of sand or aggregate before you're ready to use them creates problems (rain, contamination, getting in the way). Plan your purchases to match your build phases.
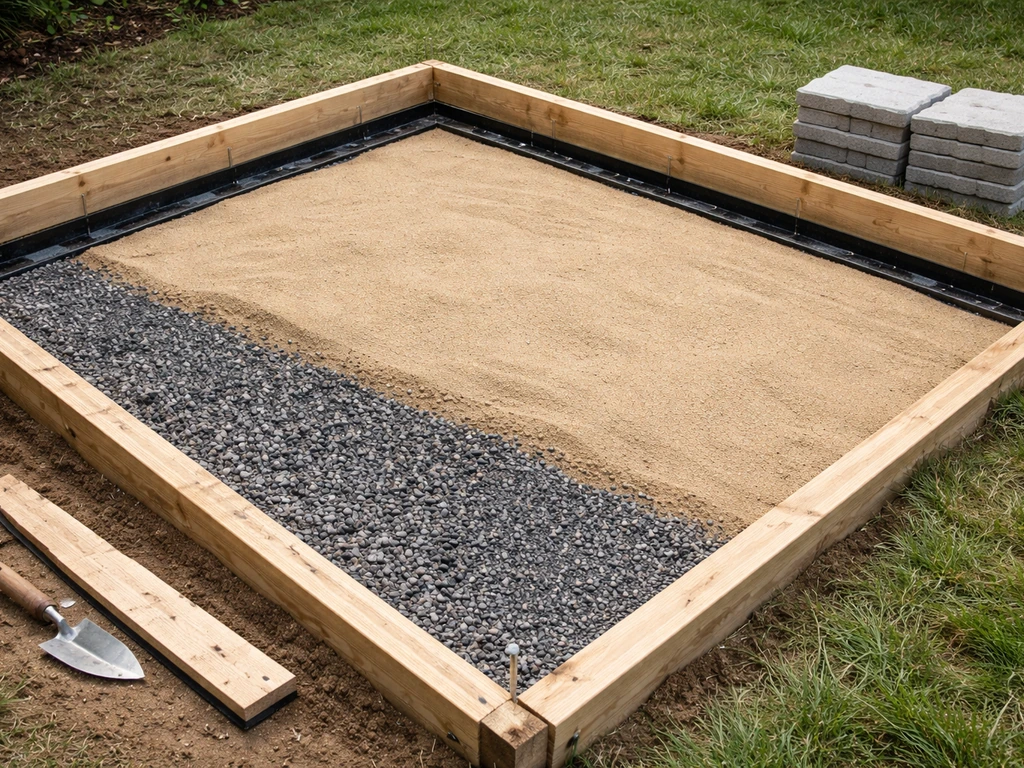
- Phase 1 (before you start): Buy or rent your excavation tools, order sub-base aggregate (MOT Type 1 or equivalent compacted gravel), and order any equipment you need for compaction. This is your biggest early spend.
- Phase 2 (once sub-base is compacted and ready): Order your bedding sand or dry-mix mortar and your surface pavers or slabs. Confirm delivery timing so they arrive when you're ready to lay, not a week before.
- Phase 3 (after paving is laid): Buy jointing sand or polymeric sand, edge restraints if needed, and sealant. These are relatively small costs but shouldn't be forgotten.
- Always order 10% extra on surface materials to account for cuts, breakage, and future repairs. Running out mid-project and finding a discontinued product is a common and avoidable headache.
If you're on a tight budget, Phase 1 materials (base prep) are the absolute worst place to cut corners. A thin or poorly compacted sub-base leads to sinking, shifting, and cracking within a few seasons. That costs far more to fix than it would have cost to do right the first time. If money is tight, use a cheaper surface material and invest in the base. Spend less on fancy pavers before you ever consider skimping on sub-base depth or compaction.
For timing: check lead times with your local suppliers before you commit to a build weekend. Popular paver styles can have 1–3 week lead times, especially in summer. Order surface materials as soon as you've confirmed your base is complete, not before. Delivery charges stack up quickly if you need split deliveries, so coordinate as much as you practically can into single drop-offs.
How to choose the right option for your situation
The decision framework here is simple: minimize interest cost while keeping your cash flow manageable and your risk low. Work through these questions in order.
- Can you cover the full project cost from savings or income within the next 2–3 months? If yes, use cash and phase the purchases. Done.
- Is the project under $5,000 and can you realistically pay it off within 12–15 months? If yes, a true 0% APR credit card is your cheapest borrowing option. Confirm it's not deferred interest before applying.
- Is the project $5,000–$15,000 and you don't have home equity to tap or don't want to use it? Get personal loan quotes from at least two lenders and compare the total repayment amount, not the monthly payment.
- Is the project over $8,000 and do you have significant home equity? A HELOC or home equity loan will almost certainly offer the lowest rate. Factor in setup time (2–6 weeks) in your project planning.
- Is a contractor offering you financing? Treat it as a starting point for comparison only. Get the full APR and total repayment figure, then compare to a personal loan or 0% card. Choose whichever is cheaper in total, not monthly payment.
One last thing worth saying: whatever funding route you choose, avoid stretching to build a patio that's bigger or more expensive than your budget genuinely supports. A well-built 150 square foot gravel or paver patio that you can actually afford beats an over-specified 400 square foot project that puts you under financial stress. Plenty of great DIY patio projects start smaller and expand later. Building in phases, both financially and physically, is a totally legitimate strategy and often results in better outcomes than trying to do everything at once. These patio installation tips also make it easier to spot cost and schedule issues early, before they turn into expensive rework.
If your project involves more complex work like a raised structure or interlocking paving systems, the same budgeting and payment principles apply, but your material costs and prep requirements will differ. Make sure your cost estimates reflect the actual scope of what you're building before you commit to any funding arrangement.
FAQ
How do I know whether I should use a 0% APR credit card or a personal loan for my patio?
Add your total budget and compare it to how quickly you can pay down the balance during the promo period. If you cannot realistically retire the balance by the promo end date, a personal loan may be safer because the interest is predictable, while credit cards can become expensive if you still owe money when the promo ends.
What should I do if my patio budget is tight, should I reduce square footage or switch payment methods?
If you are already cutting it close, reducing scope usually lowers risk more than switching financing. Financing can increase your monthly burden even when the project goes well, so consider scaling down and keeping base prep and drainage quality intact first.
Is it okay to delay base prep or delivery to spread payments out?
It can work for cash flow, but you need to protect the sub-base. If the base is exposed to heavy rain or stays unworked too long, you may need re-compaction or added material before paving, which can cancel out savings.
Do I need to include permits, design, or HOA fees in my patio budget before choosing how to pay?
Yes, because those costs often arrive early or as fixed fees that do not flex with DIY phases. If your area requires a permit, factor it into phase one or signing costs, and if you have an HOA, include approval timelines so you do not start work before you are authorized.
How much cash should I keep aside as working capital during the build?
Plan on more than just material contingency. Set aside funds for small re-buys like additional bedding sand, replacement edging pieces, extra jointing compound, and tool or rental extensions (plate compactor time is a common surprise), not just the initial contingency line.
What’s a safe deposit and milestone schedule if I hire excavation or masonry work?
A practical benchmark is 10% to 30% upfront for materials, then milestone payments tied to verifiable progress (for example, excavation completed to depth, base installed and compacted, then surface laid). Avoid vague milestones, require itemized invoices for each payment, and keep at least a final holdback until punch-list items are resolved.
Can I use a HELOC for a DIY patio if the project spans months?
Often yes, but confirm draw timing and how interest accrues between draws. Many HELOCs charge interest as you draw funds, so you should only request money when a phase is ready for payment rather than drawing the full amount at the start.
Are there circumstances where contractor financing is still worth considering?
It can be worth it only if the terms are truly clear and the total cost matches or beats your alternatives. Ask for the full repayment amount and the effective APR, check whether it is deferred interest, and compare totals, not the monthly payment.
What mistakes cause the biggest payment and budgeting problems for DIY patio builds?
The most common are ordering all materials up front, underestimating sub-base depth or compaction needs, and assuming delivery charges will be minor. Also watch for schedule friction, if your base is finished but your paving lead time stretches, you may need temporary stabilization or additional base upkeep.
How should I handle split deliveries and multiple orders to manage cash flow?
Coordinate deliveries around your phases and consolidate as much as possible. If you must split, verify the delivery fee for each drop, confirm dates with suppliers, and avoid ordering expensive surface materials before the base is fully complete unless storage conditions are controlled.
Should I get lawn drainage or grading assessed before financing the patio?
If water issues exist, treating drainage as optional is a common money pit. A quick assessment or simple grading plan can prevent patio settlement and allow you to budget for the correct base thickness and slope, reducing the chance you will pay twice for repairs.
What if my credit score is borderline and I cannot qualify for the best rates?
Before choosing, get a few rate quotes for a personal loan or a credit card pre-approval so you know your realistic APR range. If the promo rate or loan rate is not favorable enough, consider scaling the project, using phased savings, or reducing scope to keep borrowing costs down.
Next Article
How to Do an Interlock Patio: Step-by-Step DIY Guide
DIY guide to plan, excavate, build base, lay and level interlock pavers, compact, cut edges, and troubleshoot drainage i