Building a patio yourself is completely doable, even if you've never done it before. The basic process runs like this: pick your material, measure and stake out your space, dig down and prep a solid compacted base, install your surface layer correctly for that material, then lock everything in with edging and finishing details. After you install the surface, finishing details like edging and joint sand are what make your patio feel solid and finished how to put in a patio. Once you pick a patio type, follow a patio installation how-to workflow step by step for the best results. To complete your patio project, follow these steps in order, from planning and layout to site prep and installing the final surface how to install patio. If you follow this step-by-step approach, you will learn exactly how to do patio installation from planning through finishing details. Get those steps right and you'll have a patio that lasts decades. Rush or skip them and you'll be relaying pavers or patching concrete within a few years.
Patio Construction How To Plan, Build, and Finish

Pick the Right Patio Type and Materials First
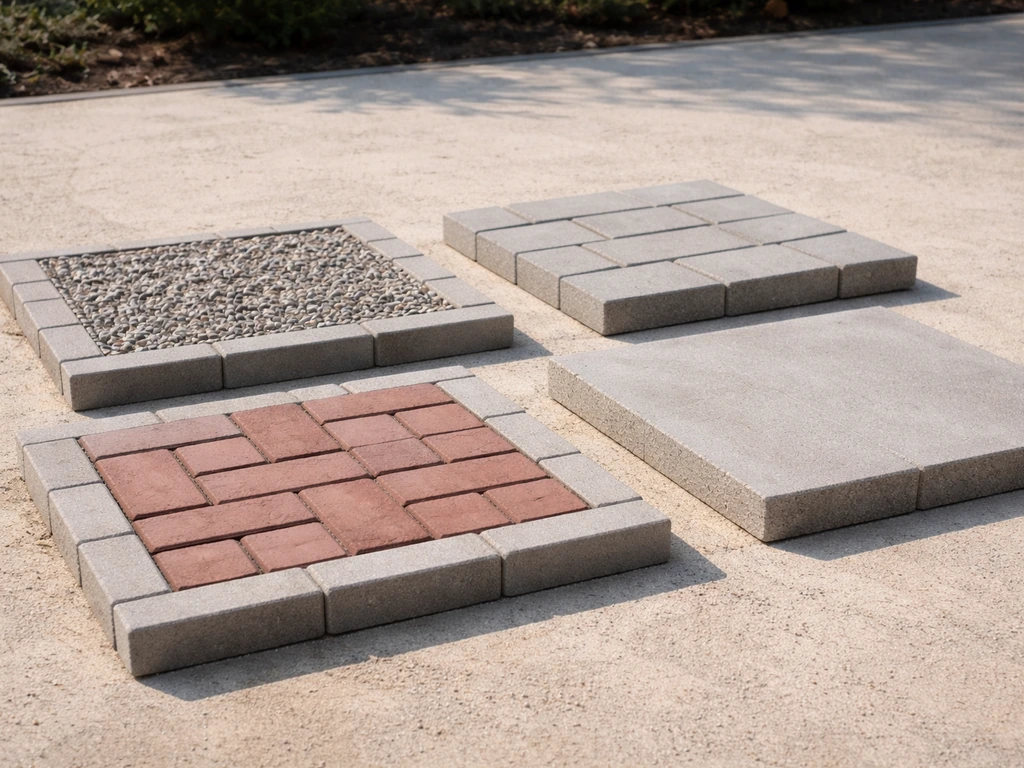
Your material choice drives every other decision, from how deep you dig to what tools you rent. There are four realistic DIY options for most homeowners: gravel, concrete pavers or brick, poured concrete, and wood or composite decking. Each has a different skill ceiling, cost range, and maintenance load.
| Material | Installed Cost (per sq ft) | DIY Difficulty | Durability | Maintenance |
|---|---|---|---|---|
| Gravel | $6–$14 | Beginner | Good (with edging) | Low (replenish occasionally) |
| Concrete Pavers / Brick | $10–$20+ | Beginner–Intermediate | Excellent | Low (re-sand joints every few years) |
| Poured Concrete | $4–$7 | Intermediate–Advanced | Excellent | Low–Medium (seal, watch for cracks) |
| Wood / Composite Decking | $15–$30+ | Intermediate | Good–Excellent | Medium (wood) / Low (composite) |
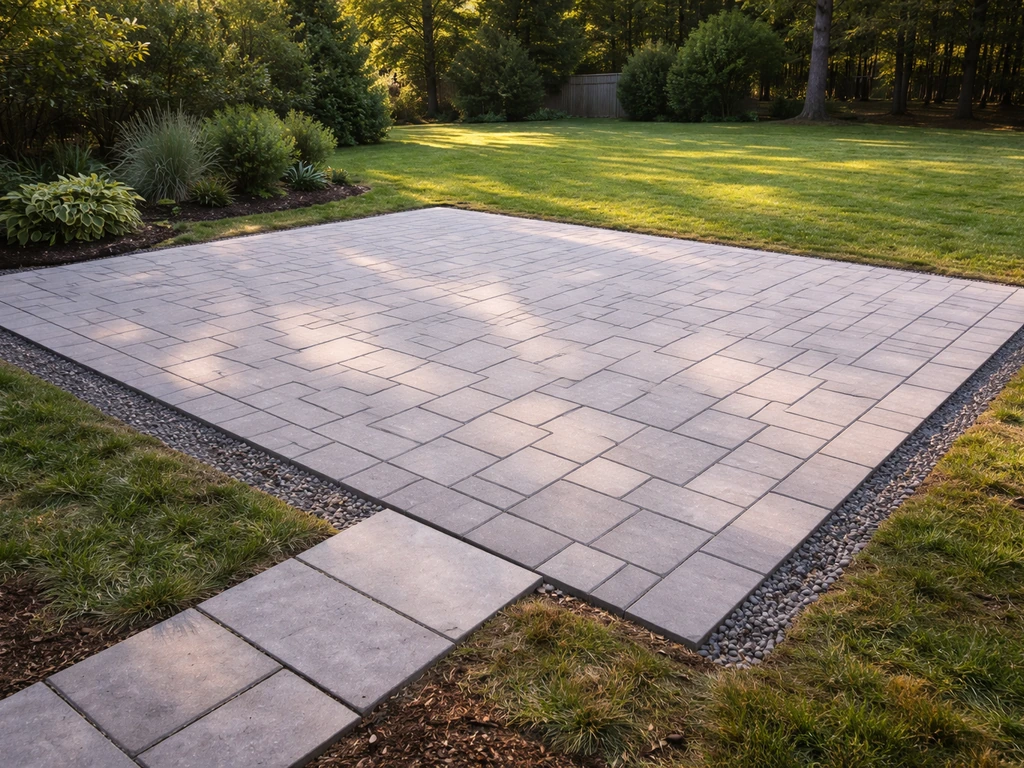
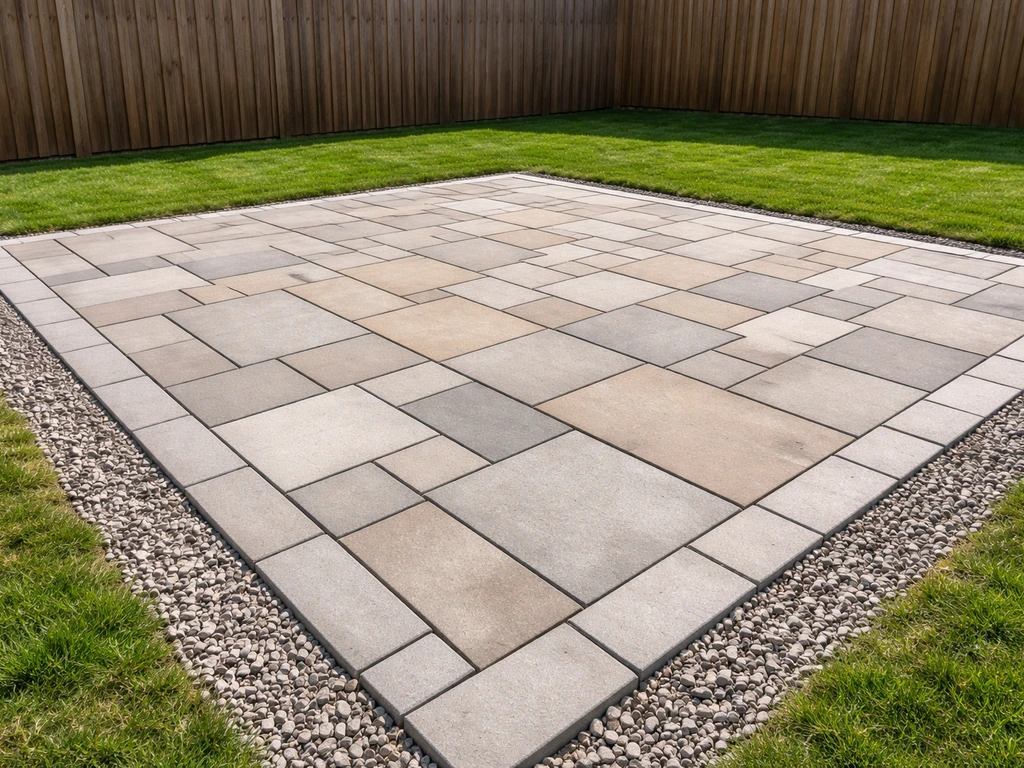
Gravel is the most forgiving starting point and the cheapest. Pavers are the sweet spot for most DIYers: they look great, forgive minor mistakes because individual units can be reset, and handle freeze-thaw cycles well. Poured concrete is cheap per square foot but demands fast, confident work once the truck arrives. Wood and composite decking are better fits for sloped lots or raised situations where digging a base isn't practical, but they require proper framing and the right fastener systems for your chosen product. Composite brands like MoistureShield specify compatible hidden fasteners and fascia screws explicitly, so don't improvise there.
If you're on a clay-heavy lot, pavers or gravel with a good drainage base tend to outperform poured concrete over time, because clay soil shifts and concrete slabs crack. If your ground is stable and well-drained, poured concrete is the most budget-friendly hard surface you can build.
Planning, Measuring, and Layout Setup
Spend real time here. A sloppy layout leads to wasted material, ugly cuts, and a patio that doesn't drain properly. If you're wondering how to pitch a patio, this is the key step: create a slope that directs water away from the house. Start with a rough size in mind: 12x12 feet handles a small seating area, 16x20 feet is a comfortable outdoor dining space, and anything larger starts feeling like a serious project weekend. Consider your door threshold height, existing landscaping, and where water naturally flows after rain.
Once you have a size, mark the corners with stakes and run mason's line between them. Use the 3-4-5 triangle method to confirm square corners: measure 3 feet along one string, 4 feet along the adjacent string, and the diagonal between those two points should be exactly 5 feet. Adjust until it is. For larger patios, a laser level speeds this up considerably and pays for itself in rental cost versus the time you'd spend checking and rechecking with a tape measure.
Build your slope into the layout now, not later. The target is a minimum 2% pitch away from the house, which works out to 1/4 inch of drop per linear foot. On a 12-foot-deep patio, that's 3 inches of total drop from house to outer edge. Mark that elevation difference on your stakes before you pick up a shovel. This slope is what keeps water from pooling against your foundation.
Site Prep: Excavation, Drainage, and Grading
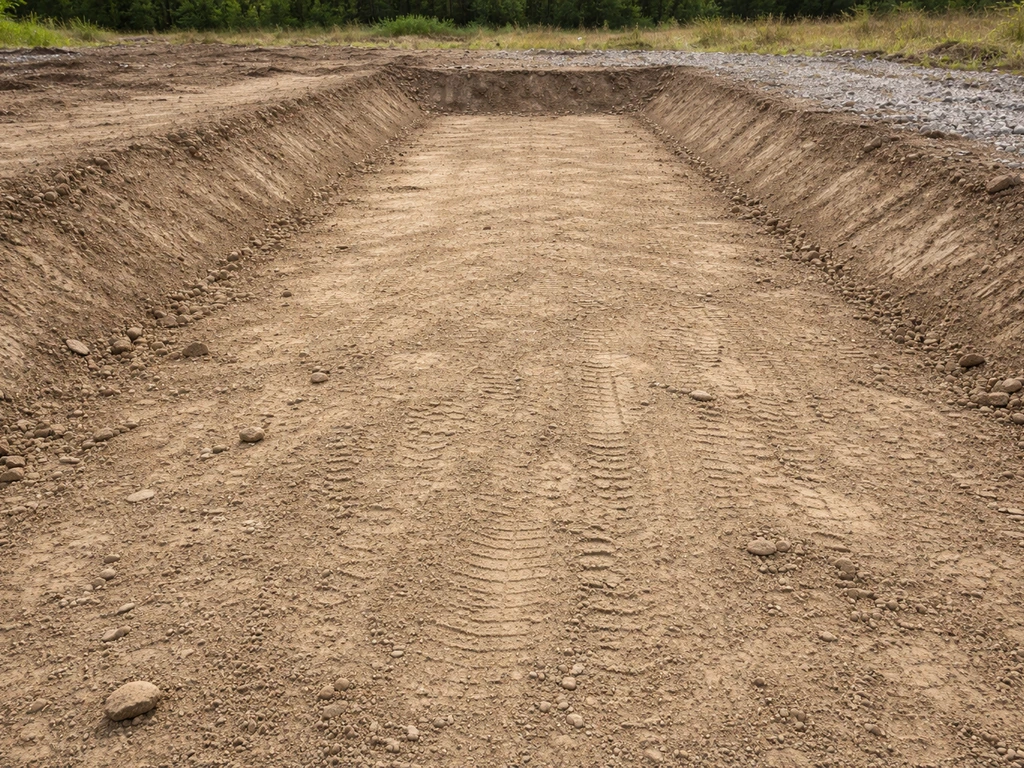
This is the part most DIYers underestimate. Dig out enough depth to accommodate your base, bedding layer, and surface material, plus 1 to 2 inches of buffer to fine-tune your grade. For a paver patio, that typically means digging 8 to 10 inches down. For a gravel patio, 4 to 6 inches is usually enough. For poured concrete, plan for 4 inches of slab plus whatever base your soil demands (usually 4 inches of compacted gravel in decent soil, more on soft ground).
After digging, check your subgrade. Soft, spongy, or obviously wet soil is a problem. If you're working in clay, the best fix is to remove the clay entirely and replace it with a blend of lime and crushed stone, then compact it. Laying a base directly over unstable clay almost guarantees settlement. A layer of geotextile fabric between the subgrade and your crushed-stone base also prevents those layers from mixing over time, especially important on clay or silty soil.
Grade the excavated floor to match your target slope before you add any base material. Use a long 2x4 and a level, or string lines from your stakes, to check the surface as you go. Getting this right now makes every subsequent layer easier to dial in.
Build the Base and Compacting Plan
The base is what your patio actually rests on, and it's what separates a patio that stays flat for 20 years from one that shifts after the first winter. Use compacted granular aggregate, typically crushed stone (sometimes called road base or crusher run). For pavers, this layer should be 4 to 6 inches deep. ICPI Tech Specs provide guidance on selecting and installing base and bedding materials for paver patios, including recommended layer depths pavers, this layer should be 4 to 6 inches deep. Add it in 2 to 3 inch lifts and compact each lift with a plate compactor before adding the next. Don't dump it all in and compact once.
Rent a plate compactor. Trying to compact by hand or with a hand tamper is not a realistic substitute for anything larger than a tiny accent area. Run the compactor in overlapping passes and check for any soft spots after each pass. If a spot keeps compressing, add more material and compact again. The finished base should feel completely firm underfoot, with no bounce or give.
For pavers and brick, after the compacted aggregate base comes the bedding sand layer. This goes on top of the compacted base and is screeded flat to your target grade. Keep it between 1 inch and 1.5 inches thick, no more. The temptation is to use a thick sand layer to compensate for an uneven base, but thick sand compresses unevenly and pavers will rock and settle. Get your base right and use the sand only for fine leveling.
Install Steps by Material
Pavers and Brick
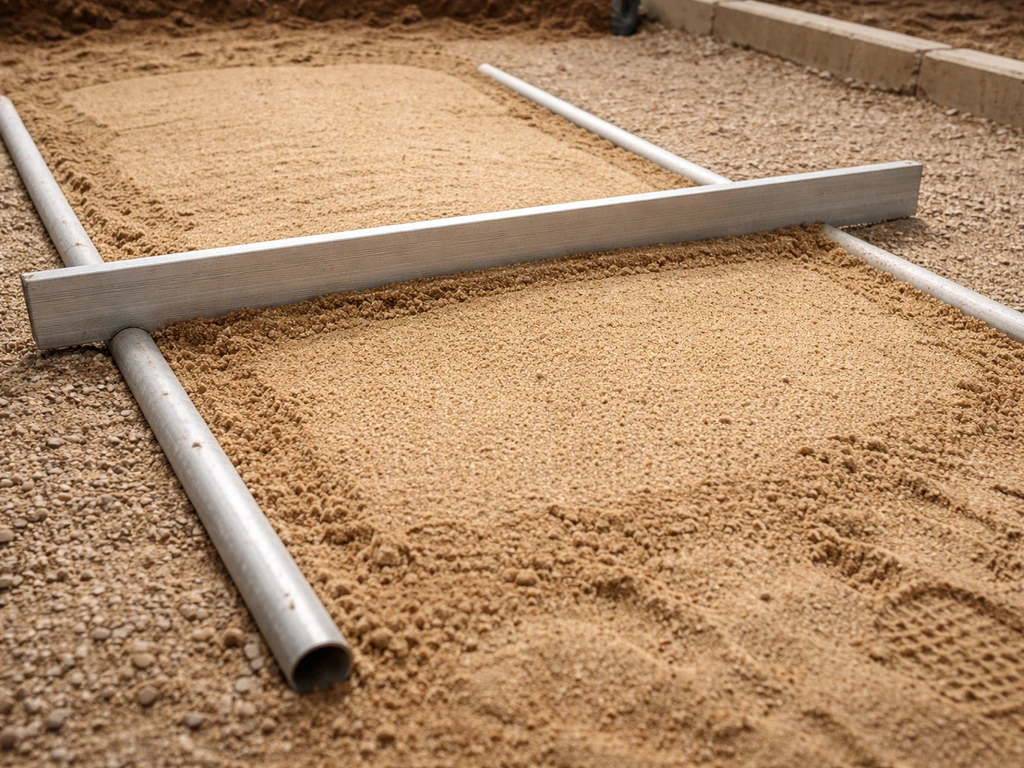
Screeding the sand bed is the critical skill here. Use two lengths of pipe or conduit set at your target height as screed guides, lay a 1-inch-deep sand bed, and drag a straight board across the pipes to create a perfectly smooth, sloped surface. Don't walk on it after you screed. Start laying pavers from a straight edge (usually the house wall or a chalk line), work outward, and keep consistent spacing for joints. Use spacers or a consistent visual gap of around 1/8 inch between units. Cut pavers for edges with a wet saw or angle grinder with a diamond blade. Tolerance matters: the finished surface should not vary more than 1/8 inch between adjacent units, and overall flatness should stay within 1/4 inch across any 10-foot span.
Poured Concrete
Form up your slab with 2x4 or 2x6 lumber screwed to stakes, confirming your slope is built into the form height. For a standard patio slab, aim for 4 inches of thickness. Order concrete with a minimum 3,000 psi mix for residential flatwork. When the truck arrives, move fast: screed the surface level with the forms, then float and finish before it sets. Control joints are non-negotiable to manage cracking. Cut or tool joints to a depth of at least one-quarter of the slab thickness (1 inch deep for a 4-inch slab), and space them no more than 2 to 3 times the slab thickness in feet, which means joints every 8 to 12 feet for a 4-inch slab. After finishing, cure the slab properly: keep it continuously moist for about 7 days using wet burlap, plastic sheeting, or a soaker hose. Don't let it dry out in the first week.
Gravel
Gravel is fast to install but needs solid containment. Set your edging first, compact the subbase, lay your geotextile fabric, then add and compact your gravel in layers to your target depth (usually 3 to 4 inches of finished gravel). Pea gravel and decomposed granite are popular choices. Pea gravel stays loose underfoot. Decomposed granite compacts into a firmer surface. Both need a well-secured edging system to keep the material from migrating into the yard.
Wood and Composite Decking
Wood and composite patios work differently from the other materials because they require a structural frame (joists and beams) rather than a compacted earthen base. This makes them the right call for sloped sites where excavating a flat base would be a massive job. Set your posts and beams at the correct height to hit your finished deck elevation, frame out your joists at the spacing your decking product requires (typically 12 to 16 inches on center), then install your boards. For composite products, follow the manufacturer's fastener specs precisely. MoistureShield, for example, specifies which hidden fastener systems and fascia screws are compatible, and using the wrong hardware voids performance guarantees and can cause board buckling.
Edging, Leveling, Joints, and Finishing Details
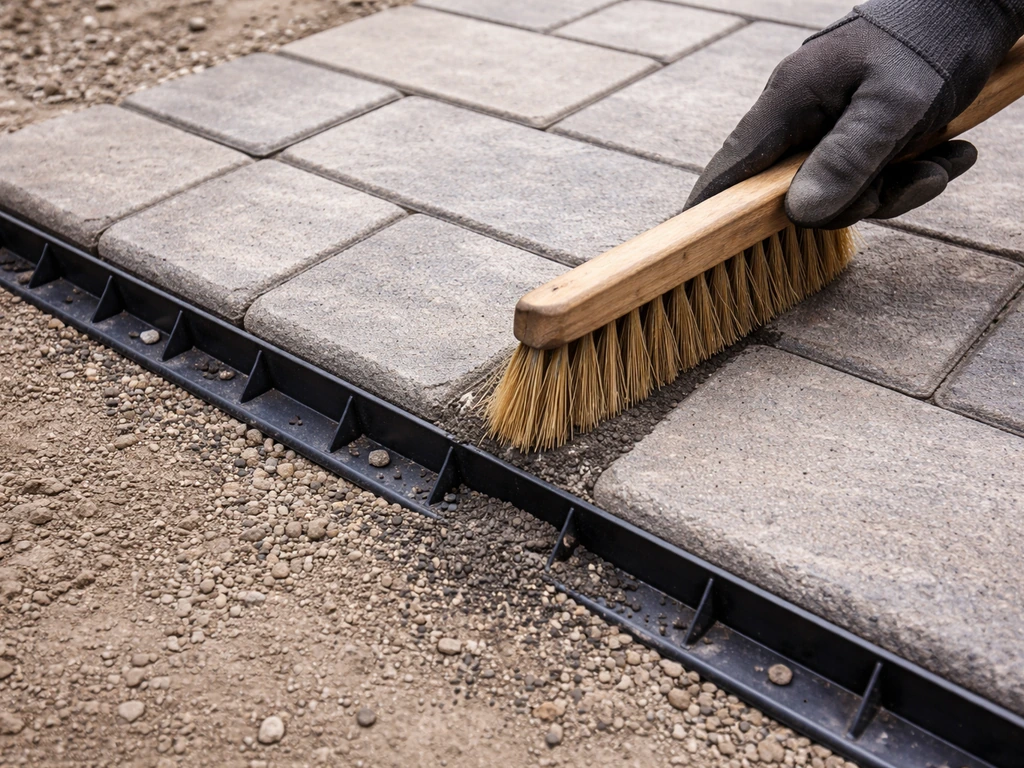
Edging does two jobs: it keeps your surface material contained and it locks the perimeter so pavers and gravel don't creep outward over time. For pavers, use rigid plastic paver edging secured with 10-inch spikes driven through the pre-punched holes. Spike spacing should be no more than 2 feet apart, and tighter (every 12 inches) on curves. Edging goes in after you've laid and leveled your surface, tight against the last paver course, before you do your final sand sweep.
For paver joints, use polymeric sand rather than plain mason's sand. Sweep it into the joints in multiple passes, mist with water to activate the binder, and let it cure. Polymeric sand resists ants, weed germination, and washout significantly better than regular sand. The joint sand layer and your bedding sand are separate things: bedding goes under the pavers, joint sand fills the gaps between them.
For poured concrete, seal the slab after it's fully cured (at least 28 days for full strength, though 7 days of moist curing is the minimum before traffic). A penetrating concrete sealer protects against staining and moisture intrusion and extends the life of the surface considerably.
Final leveling check: before you call the patio done, walk every square foot with a straight edge or level. Look for any high or low pavers. Tap high ones down with a rubber mallet, pull and re-bed low ones with a bit more sand underneath. Your tolerance target is no more than 1/8 inch of variation between adjacent paver units.
Common Mistakes, Budget Tips, Tools Checklist, and Maintenance
Mistakes That Ruin Patios
- Skipping or under-compacting the base: this is the number one cause of settled, uneven patios. Compact every layer.
- Using too much bedding sand to fix a rough base: thick sand compresses and causes rocking pavers. Fix the base, not the sand.
- Not building in slope from the start: water that pools on a patio will eventually find its way into your foundation.
- Forgetting control joints in concrete: concrete will crack; joints control where it cracks so it doesn't look like a disaster.
- Using the wrong fasteners on composite decking: always follow manufacturer specs or you risk voiding the product warranty.
- Laying pavers on wet or unstable subgrade without addressing it first: clay soil needs to be treated or replaced before you build on it.
Budget Tips
- Rent, don't buy, a plate compactor: one-day rental is typically $60–$100 and is essential for any paver or gravel project.
- Start with a simple rectangle: fewer cuts means less wasted material and faster installation.
- Price crushed stone locally before ordering: landscape supply yards almost always beat big-box store prices for base material in bulk.
- Poured concrete is the cheapest hard surface if you have stable soil and are comfortable working fast.
- Gravel patios can be built over a weekend for under $500 on a modest size, making them the lowest barrier-to-entry option.
Tools and Materials Checklist
- Stakes and mason's line (for layout and slope)
- Tape measure and carpenter's square
- Long 2x4 and 4-foot level (for grading and screeding)
- Plate compactor (rental)
- Shovel, mattock, and wheelbarrow
- Geotextile landscape fabric
- Crushed stone aggregate (base material)
- Bedding sand (for pavers) or concrete forms and ready-mix (for slab)
- Pavers, concrete, or gravel as chosen surface material
- Rubber mallet and paver pull bar
- Wet saw or angle grinder with diamond blade (for paver cuts)
- Plastic paver edging and 10-inch spikes
- Polymeric joint sand (for pavers)
- Straight edge or long level for final tolerance check
- Concrete sealer (if pouring slab)
Basic Maintenance by Material
Pavers need the least attention: sweep polymeric sand back into joints every 2 to 3 years as it erodes, and reset any settled units by pulling them up, adjusting the sand, and re-laying. Concrete needs periodic inspection for cracks at the control joints and a fresh seal every 3 to 5 years. Gravel patios need occasional replenishment of surface material and weed management if your fabric degrades. Wood decking needs annual cleaning and sealing or staining to prevent rot and UV damage. Composite decking mostly just needs a seasonal rinse, but check for any fastener movement annually.
Before you consider the project truly finished, confirm your slope is still correct after everything is compacted and set. Run a hose on the patio and watch where the water goes. If it flows away from the house and doesn't pool anywhere, you built it right. That's the test that matters most.
FAQ
How do I decide between pavers, poured concrete, and gravel if my yard gets wet or drains slowly?
If water tends to pond, prioritize a build that includes strong drainage control at the base. Pavers over a compacted granular base plus geotextile are often more forgiving than a slab, because small ground movement is absorbed by individual units. Gravel can work too, but only if the edging is tight and the base is well-drained, otherwise the material migrates and the surface becomes uneven.
Do I need geotextile fabric under every patio material?
It depends on the layers and soil. Geotextile is especially helpful between unstable subgrade (like clay or silty soil) and your crushed-stone base to prevent mixing over time. For pavers on stable, well-drained soil you may still use it, but do not use it as a substitute for proper base depth and compaction.
What happens if I dig too shallow or skip the extra 1 to 2 inches for grade adjustment?
You usually run out of adjustment room during bedding and final leveling, and you end up compensating by adding too much bedding sand. Thick sand layers compress unevenly, causing rocking pavers and early settlement. If you are short on depth, it is often better to re-excavate slightly than to “fix it” with extra sand.
Can I build a patio tight against the house foundation or should I leave a gap?
A tight, no-gap perimeter can trap water and make it harder to manage expansion or minor shifting. Even if your patio is pitched away, plan a practical edge treatment that allows water to move away from the structure, and keep the top elevation transitions consistent with your door thresholds and landscaping.
How do I maintain a consistent slope when laying pavers or brick?
Treat slope as a foundation requirement, not just a finish-layer detail. Build the pitch into your stakes, confirm the excavated subgrade is graded to that target before adding base, then screed the bedding layer to the same guides. Once pavers are set, do not “flatten” high spots by adding sand under everything, instead address grade control as you work.
What is the best way to check if my patio is square before I start digging?
Use the 3-4-5 triangle method at the string line stage, not after the base is already partially built. Re-check square at both corners and verify the diagonal distance is consistent, because cutting and joint spacing become noticeably harder to correct once you are deep into installation.
Is it okay to use plain sand in paver joints if polymeric sand is unavailable?
Plain sand will usually wash out faster, and it tends to leave openings that invite weed growth and ant activity. If polymeric sand is unavailable, you can reduce the problem by using better edging and ensuring your compaction and slope are correct, but joint stabilization will be weaker than with polymeric sand.
How much should I compact the base, and how do I know it is ready?
Compact in layers, typically 2 to 3 inches at a time, and run overlapping passes with a plate compactor. The base is ready when it feels firm with no bounce or give, and soft spots stop compressing when you re-compact. If a section keeps sinking, add more material and compact again rather than moving on.
How do I handle patio drainage testing if it rains after I’m done?
Do a quick hose test as a dry-run before full cleanup. After set and finishing, run water on the patio and observe flow patterns, watch for any pooling near the house and along low edges. If pooling shows up, that usually indicates slope or local base settlement, and you may need to re-level affected areas promptly.
Do I need control joints or saw cuts for every concrete patio?
Yes, control joints are critical for managing cracking, especially as slab size increases. Plan joint spacing based on slab thickness, and cut or tool joints to the required depth soon enough that you control where cracks develop. Skipping joints often leads to random cracking that is hard to cosmetically correct later.
How do I prevent pavers from rocking, and what causes it?
Rocking typically comes from an uneven or improperly compacted base, or bedding sand that is too thick in spots. The fix is usually re-bedding: pull the affected units, remove and correct sand thickness, and ensure the base underneath is firm and level on the target plane.
What maintenance should I expect beyond sweeping and occasional re-sanding?
Plan for material-specific upkeep. Pavers generally need periodic polymeric sand replenishment and occasional reset of settled units. Concrete needs inspection around joints and periodic sealing. Gravel requires occasional replenishment and weed control if geotextile performance declines. Wood or composite requires hardware and board checks over time, especially after freeze-thaw seasons.
How to Put in a Patio: Step-by-Step DIY Guide
Step-by-step DIY patio install from planning and permits to base compaction, pavers brick or concrete, drainage and fini