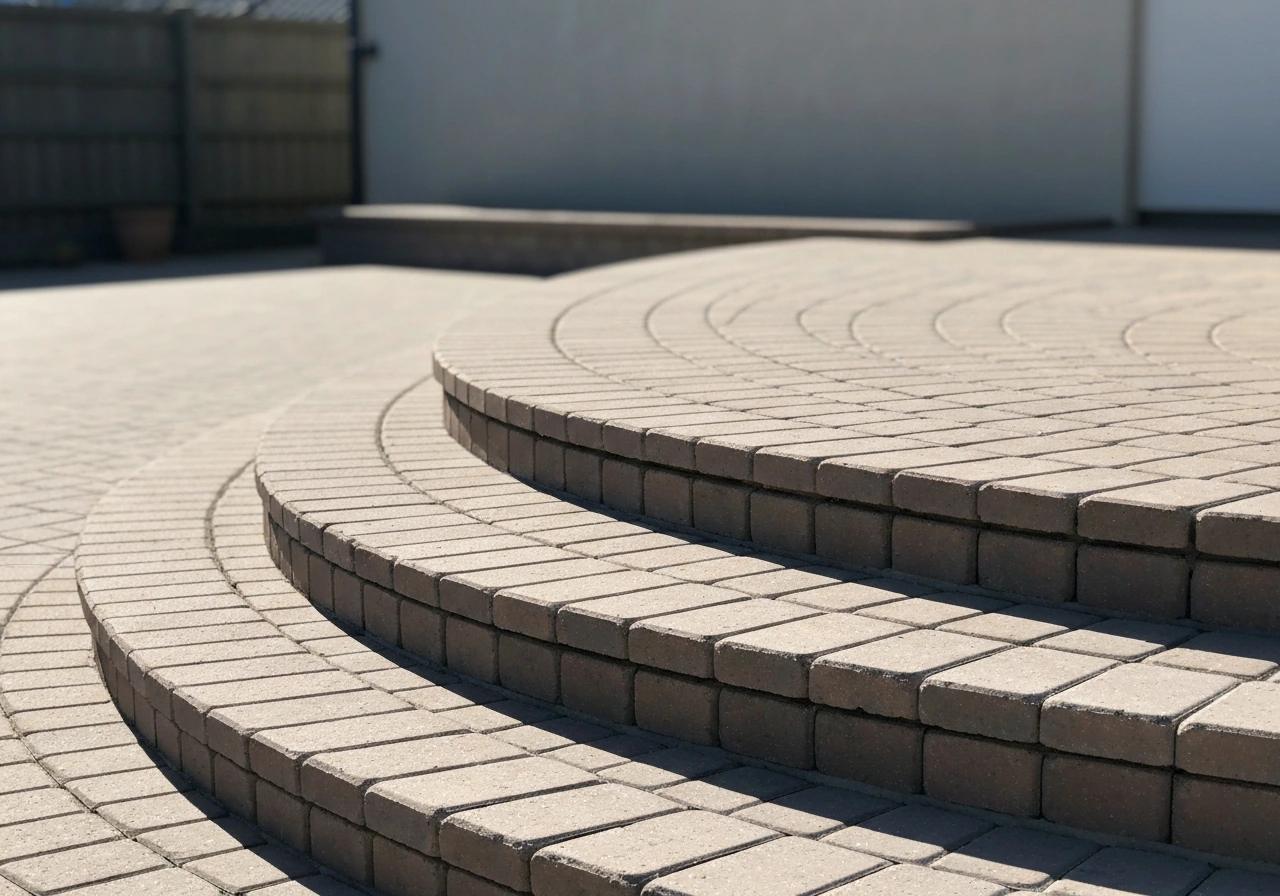
You can build semi-circular patio steps yourself with basic tools, a compacted gravel subbase, and the right edge restraint setup. The keys are getting your radius and riser math right before you touch a single paver or stone, keeping every riser within 3/8 inch of each other throughout the arc (that's the IRC tolerance that keeps steps safe), and using flexible edge restraint on the curved perimeter so nothing shifts over time. Do those three things well and the result looks professional, drains properly, and holds up through freeze-thaw cycles.
Semi Circle Patio Steps: DIY Layout, Build, and Fix Guide

Nolan Lennox
25 Jun 2026
First, figure out what you're actually building
Before you start digging, stop and honestly assess whether you're starting fresh or repairing what's already there. This decision changes everything: your budget, your timeline, and what tools you need.
If your existing steps are just showing surface wear, small chips, or hairline cracks in the face of the concrete, resurfacing is a real option. A bonding agent plus a quality resurfacing mix can buy you another several years on steps that are structurally sound. But if you're seeing any of these issues, plan on a full rebuild: Ottos Masonry notes that replacement is often the better choice when steps are sinking, separating, badly cracked, holding water, or becoming unsafe, especially in freeze-thaw conditions plan on a full rebuild.
- Steps are sinking, tilting, or heaving, which means the base has failed, not just the surface
- Cracks are wide, running through the full depth, or separating at the joints between steps
- Steps are holding standing water after rain rather than shedding it
- The edges are badly spalled or crumbling, with aggregate exposed and loose
- The whole structure feels soft or shifts when you stand on it
Thin overlays on structurally failed steps almost always crack and delaminate again within a season or two. The base is the real problem, and patching the surface doesn't fix it. If you're replacing, plan to go all the way down to undisturbed soil or a fresh compacted gravel base. Doing a half-measure over a bad base just sets you up for the same failure in 18 months. On the other hand, if the steps are structurally solid and you're just dealing with cosmetic wear, repair is completely reasonable and much cheaper than a full demo. Groundworks’ repair-versus-replacement guidance says replacement becomes more likely when the concrete slab or structure is no longer stable, even if surface spalling or other deterioration may be only a symptom replacement becomes more likely when the slab is no longer stable.
Measure and calculate the semi-circle before anything else
This is where most DIYers get tripped up, so take your time here. Getting the geometry right on paper first saves you from painful rework later.
Determine your total rise
Measure the total vertical height from your patio or landing surface down to the ground level where the steps will land. This is your total rise. Let's say it's 21 inches. That's your starting number for everything else.
Calculate number of steps and riser height
For outdoor patio steps, a comfortable riser height runs between 6 and 7.5 inches. Divide your total rise by a target riser height to get your number of steps. Using 21 inches total rise: 21 divided by 7 equals exactly 3 steps at 7 inches each. If it doesn't divide cleanly, adjust your riser height slightly so every step is identical. The IBC/IRC tolerance is clear: the tallest and shortest riser in a flight cannot differ by more than 3/8 inch. On a curved run, inconsistency across the arc is a genuine tripping hazard because your foot placement shifts as you move around the curve. DIY wood patio steps can also work well, but they still rely on careful measurements and solid site prep to prevent shifting and tripping.
Set your radius and width
The radius of your semi-circle is the horizontal distance from the center of the door threshold or patio edge to the outer edge of the bottom step. For a graceful, usable curve, most residential semi-circle step sets use a radius between 4 and 8 feet. Wider is more welcoming and gives you more tread depth, which matters for comfort and drainage. Your tread depth (the horizontal run of each step) should be at least 11 to 12 inches for outdoor use. Sketch this out: if you have 3 steps and each tread is 12 inches deep, your total horizontal run is 36 inches. Add that to the depth of your patio slab edge and you have your maximum radius from the pivot point. Write down your radius for the outer edge of each step as well: Step 1 (top) outer radius, Step 2 outer radius, and Step 3 (bottom) outer radius. Each one grows by one tread depth as you go down.
Numbers to gather before you start shopping
- Total rise in inches (from patio surface to ground landing)
- Number of steps and individual riser height (must be consistent to within 3/8 inch)
- Tread depth in inches (12 inches minimum recommended for outdoor use)
- Outer radius of bottom step in feet
- Width of the steps measured across the widest point of the semi-circle
- Direction of primary drainage (where water needs to go away from the house)
Site prep: the part that determines whether your steps last
I'll be direct here: more semi-circle step projects fail because of bad site prep than bad installation technique. A beautiful set of pavers on a poorly compacted base will shift, crack, and tilt within a couple of years, especially in climates with frost.
Excavate and establish your slope
Dig out your step area to a depth that accommodates your full subbase plus the thickness of your chosen material. For paver or brick steps, that typically means excavating 8 to 10 inches below your finished surface level: 4 to 6 inches for compacted gravel base, 1 inch for bedding sand, and the paver or stone thickness on top. Make sure the bottom of your excavation is sloped slightly away from the house. A cross-slope of about 1/4 inch per linear foot is a good working target for outdoor curved paver surfaces. That's roughly a 2% grade, which is enough to move water without feeling steep underfoot.
Drainage considerations on a curved run

Semi-circular steps naturally collect water at the bottom of the arc if you don't plan for it. Make sure your site slopes away from the house foundation and that the lowest point of the bottom step deposits water onto a permeable surface or a drainage channel, not back toward your foundation. If the surrounding grade is flat or slopes toward the house, you may need to cut a shallow channel or add a catch basin at the base of the steps before you build. Don't skip this: water pooling at the base of curved steps is one of the fastest ways to undermine your subbase, especially through repeated freeze-thaw cycles.
Compact the subbase properly
Use crushed angular gravel (commonly called 3/4-inch clean crush or road base) rather than rounded pea gravel. Angular gravel locks together when compacted; rounded stone doesn't. Lay it in 2-inch lifts, compacting each lift with a plate compactor before adding the next. For curved step edges with any structural load, this compaction step is non-negotiable. A hand tamper is fine for tiny areas but a rented plate compactor is worth it for anything over a few square feet.
Choosing your material: pavers, brick, stone, or concrete
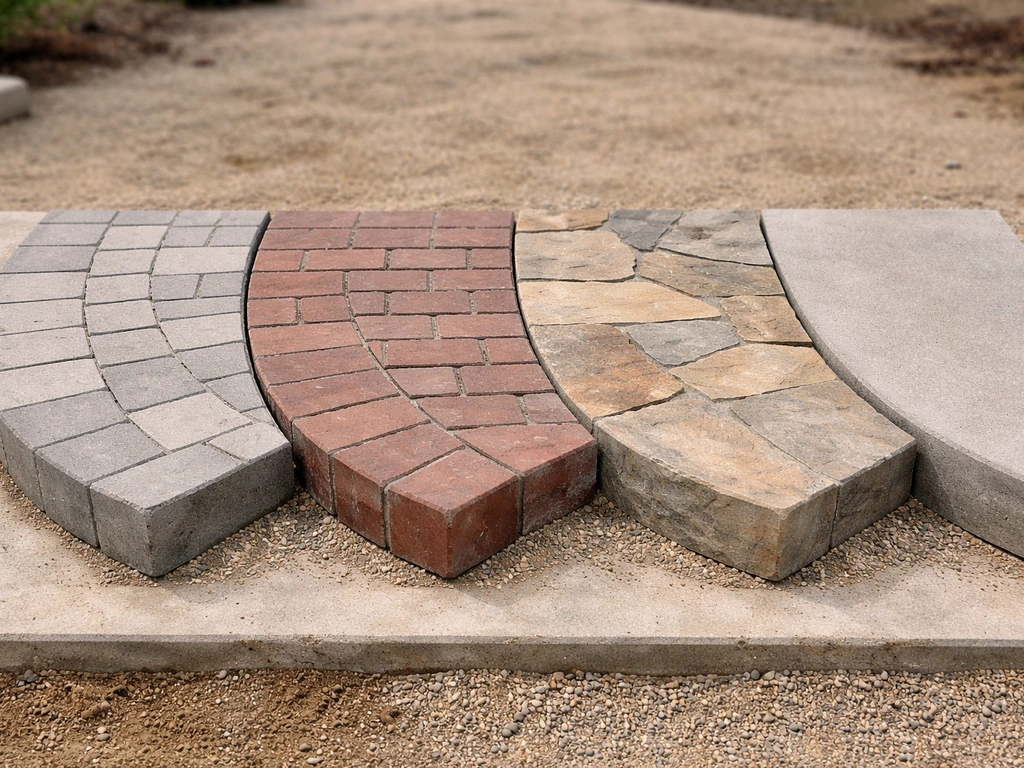
Each material has real trade-offs for a curved step project. Here's an honest comparison based on what actually matters for this specific build.
| Material | Curve Friendliness | Typical Cost (materials) | Durability | DIY Difficulty |
|---|---|---|---|---|
| Concrete pavers | Good: many shapes available, easy to cut with wet saw | Moderate: $3–8 per sq ft | Excellent if base is solid | Beginner–intermediate |
| Brick | Good: small units follow curves with tight joints or cuts | $4–9 per sq ft | Very good; vulnerable to spalling in harsh freeze-thaw | Beginner–intermediate |
| Natural stone (flagstone/bluestone) | Moderate: irregular shapes need fitting; cutting required for tight radii | $8–20+ per sq ft | Excellent if properly set | Intermediate–advanced |
| Poured concrete (formed) | Excellent: forms to any curve; no cutting | $6–12 per sq ft installed (DIY saves labor) | Excellent; cracks over time without reinforcement | Intermediate: formwork is the challenge |
| Concrete block/retaining wall block | Moderate: works well for risers; treads need separate material | $5–10 per sq ft | Very good | Intermediate |
For most DIYers tackling a semi-circle specifically, concrete pavers are the sweet spot. They're available in consistent thicknesses, they cut cleanly with a rented wet saw and diamond blade, and the modular size makes it easier to work around the curve without wasting material. Natural stone looks stunning but fitting irregular pieces to a clean arc takes significantly more time and skill. Poured concrete gives you the cleanest curve but formwork for a semi-circle is more involved than most beginners expect. Brick is a great middle ground if you love the look and are comfortable with a bit more cutting on the inner radius.
For the risers specifically: wall-style concrete block or soldier-course pavers set on edge work well structurally for the curved face. You can also pour concrete risers and set paver treads on top, which is a popular approach that gives you structural stability on the riser face with a clean tread surface.
Laying out the semi-circle accurately
The layout stage is where your measurements become physical marks on the ground. Do this before you move a single pound of material.
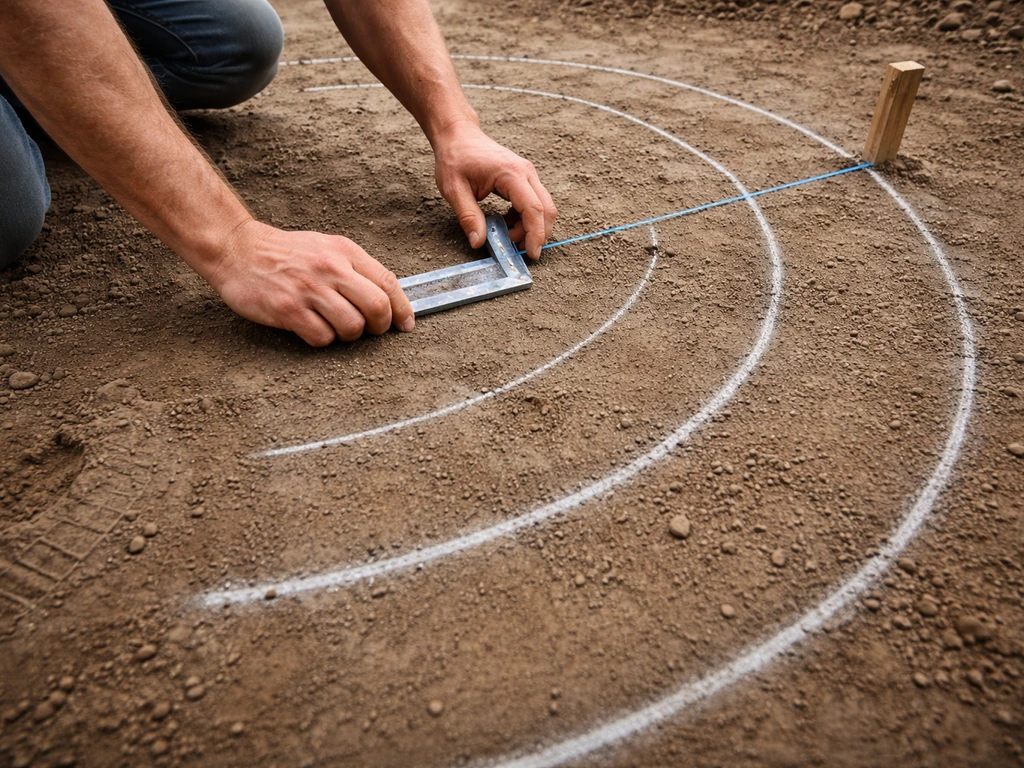
Find your center point and strike the arcs
Drive a stake at the center point of your semi-circle (typically the midpoint of the door threshold or patio edge where the steps originate). Tie a string or attach a measuring tape to this stake. Using the stake as your pivot, swing the string to your outer radius measurement for each step and mark the arc with marking paint, a garden hose, or a chalk line dragged along the ground. Do this for every step's outer edge. The result is a series of concentric arcs on your excavated area. Step back and look: does the layout look balanced? Adjust the center point slightly if the arcs look off relative to any wall or door.
Set your edge restraint along each arc
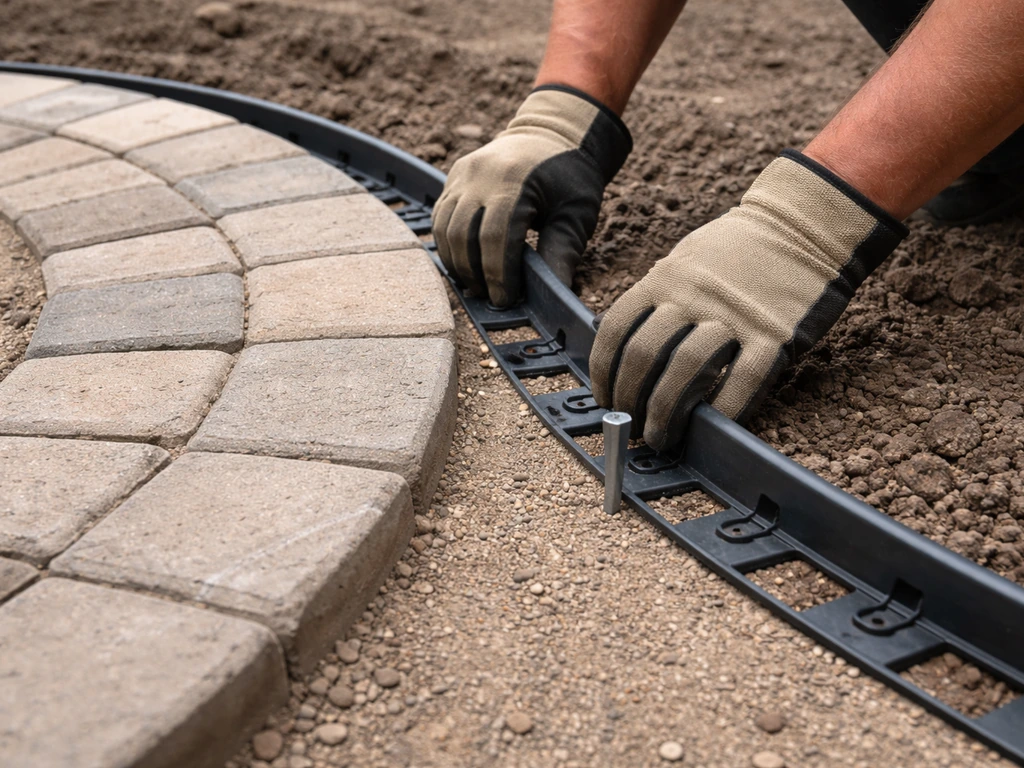
For sand-set paver systems, flexible plastic edge restraint is the right tool for curved edges. Rigid aluminum or straight plastic won't bend cleanly around a small-radius curve. The flexible type comes in long strips and bends to follow your arc without kinking. Stake it down every 12 inches along the curve, more frequently on tighter radii. For a more permanent installation, especially on the outer face of the bottom step that gets foot traffic from the sides, consider a poured-in-place concrete curb or a cut stone edging block set in mortar. This provides a stable perimeter that won't migrate over time. The edge restraint needs to be set at the correct finished height before you screed your bedding sand, because it acts as your guide for that sand layer.
Mark your tread and riser positions
Use spray paint or chalk to mark each riser face line across the full width of the semi-circle. These are your build lines. Check that the tread depth from one riser line to the next is consistent all the way around the arc, including at the inner radius where the arc is tighter. At tight inner radii, tread depth can shrink if you're not careful, which creates uneven treads and a tripping hazard. If your inner radius tread depth comes out less than 11 inches anywhere, either increase your overall radius or add a step to reduce the depth per step.
Building the steps: subbase, bedding, and setting materials
Now you're actually building. Work from the bottom step up, which is the opposite of how you'll eventually use them.
- Compact your subbase gravel to the correct depth for each step level. Each step will be at a different elevation, so your gravel depth changes as you move up. Compact thoroughly at each level before proceeding.
- Set the riser faces first. For paver or block risers, set them in a bed of mortar or compacted gravel at the correct height. Check that the top of each riser sits at the correct finished height for that tread. Use a level across the arc to confirm the riser top is consistent from one side to the other.
- Spread your bedding sand behind each riser, on top of the compacted gravel base. Nominal 1-inch depth is the standard for sand-set paver systems. Screed it smooth using a straight board referenced against your edge restraints or temporary screed rails. Do not pre-wet or compact the bedding sand at this stage.
- Set your treads starting from the center of the arc and working outward toward each side. Press each paver or stone firmly into the sand until it's flush and stable. Use a rubber mallet, not a metal hammer, to seat them without cracking.
- Cut the perimeter pieces to follow the curved outer edge. For pavers, score your cut line using your radius string or a cardboard template, then cut with a wet saw and diamond blade. Keep pavers flat on the saw table and make straight cuts to approximate the curve; small gaps at the outer edge are normal and will be filled by jointing sand or mortar.
- Check level and tread slope on each course as you go. Treads should slope very slightly toward the front (away from the house), roughly 1/8 inch per foot, so water drains off the tread rather than pooling.
- Compact the completed tread with a plate compactor (using a rubber pad or foam protector over pavers to avoid surface damage). This seats the pavers into the sand and locks them in position.
- Sweep polymeric sand into the joints for the tread surface. Polymeric sand resists washing out and suppresses weeds better than plain jointing sand. Compact lightly again, then sweep off excess and activate with a fine water mist per the manufacturer's instructions.
- Repeat from the bottom step up until all treads and risers are complete.
If you're working with natural stone, the process is similar but the bedding layer choices matter more. Dry-set on compacted aggregate with a sand setting layer handles drainage better than a full mortar bed, because mortar can trap moisture under the stone and lead to freeze-thaw cracking over time. If you use mortar for spot-bedding large flagstone pieces, keep the mortar thickness as consistent as possible across each piece so the bond is even. Inconsistent mortar thickness creates weak spots and rocking stones.
Finishing touches: caps, joints, leveling tolerances, and slip resistance
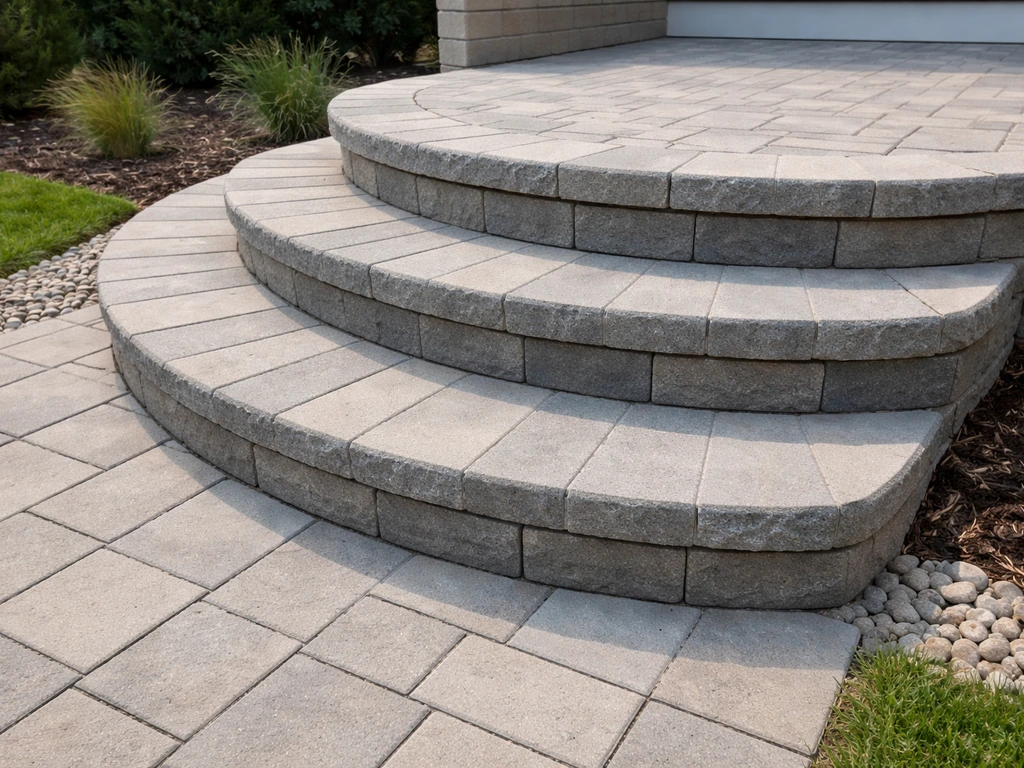
Cap the nose of each tread
The front edge (nose) of each tread takes the most wear and is the most visible. Use a bullnose paver, a cut stone edge with a slightly rounded front, or a purpose-made stair tread cap to finish this edge. Bullnose pieces are available for most concrete paver lines and make a big visual difference in the finished look. Set them in a thin mortar bed for extra stability on the tread nose, since the front edge of a step is always the piece most likely to shift.
Final level check and tolerance
Before you call the project done, measure every riser height around the full arc and every tread depth at several points across the width. To make sure your measurements translate into a clean, comfortable curve, follow a step-by-step curved patio steps layout and build approach. The variation between your tallest and shortest riser must stay within 3/8 inch (about 9.5 mm) across the entire flight. Same goes for tread depths. If anything is out of tolerance, add or remove bedding sand under individual pieces to correct it. Catching this now is far easier than tripping on it for years.
Slip resistance
Curved steps get wet, and wet steps can be dangerous. Choose materials or finishes with a textured surface rather than smooth or polished faces. Tumbled pavers, brushed concrete, and honed (not polished) natural stone all provide better grip. If you've used smooth pavers, you can add grip by applying a non-slip additive mixed into a sealer coat. Avoid applying standard clear sealers to steps without a grip additive, since many sealers actually reduce traction when wet.
Troubleshooting common problems
- Misaligned arc: If your curve looks bumpy or kinks at certain points, the edge restraint wasn't staked tightly enough. Pull the affected section, re-stake the restraint using your radius string as a guide, and reset those pavers.
- Uneven treads: Usually caused by inconsistent bedding sand depth. Add or remove sand under individual pieces rather than shimming with mortar, which can crack under load.
- Water pooling on treads: Your tread slope is insufficient. If caught early, you can remove and reset pieces with a corrected slope. If the whole section is wrong, the grade issue may be in the subbase and needs more work.
- Riser face shifting outward: Edge restraint failure on the outer curved face. Install or reinforce restraint immediately. For permanent fix, set the outer riser face in mortar or pour a concrete toe at the base of the riser.
- Cracking at tight inner radius: Material stress from forcing pieces to curve too tightly. The fix is to cut pieces to size rather than bending them, or use smaller unit pavers that can fan more naturally around a tighter arc.
Semi-circular steps sit at an interesting crossroads of curved geometry and stair construction, and getting both right takes patience. If you want to go deeper on specific parts of the process, general stair construction principles, reading patio step plans before you build, or curved step layout techniques all feed directly into this project. If you want an extra walkthrough, focus on building patio steps from layout to final leveling so your semi-circle stays consistent and safe. Building straight patio steps first, if you haven't done it before, is genuinely good practice before tackling the added complexity of a curved layout. The reward is worth the effort: a well-built semi-circle of steps is one of the most welcoming things you can add to a patio, and it holds up for decades when the base and geometry are done right.
FAQ
If my total rise does not divide neatly into equal risers, can I change the number of steps to make it work?
Yes, but only if you keep the riser-to-riser height variation within that same 3/8 inch maximum across the whole arc. When making a larger or smaller riser count, re-calculate both rise and tread for every step, then re-check the inner radius treads, since they tighten as the curve gets sharper and can drop below the 11 to 12 inch comfort range.
How do I account for an uneven patio or door threshold when laying out semi circle patio steps?
A true “landing” that is level and continuous matters. If your top landing slopes down toward the first step, you can end up with an uneven first riser or unexpected standing height when you step off the landing. Before layout, set a reference string line from the landing and confirm the top step face lands at the correct finished height.
What is the safest way to fix a tread depth or riser height that ends up slightly off during installation?
On paver or block tread faces, aim to keep the bedding sand thickness consistent and correct any out-of-spec measurements by adjusting sand under the units, not by trying to force geometry with thick mortar “patches.” Thick mortar spots can create voids or high points that rock when trafficked, which shows up as shifting at the tread nose first.
Is mortar under the treads a bad idea for semi circle patio steps in cold climates?
Avoid freezing water trapped in the assembly. If you use mortar under natural stone, keep it as thin and consistent as possible, and do not mortar large areas where water can be trapped. For drainage-prioritized builds, dry-set with a compacted aggregate plus bedding sand is typically more forgiving in freeze-thaw climates.
Can I skip edge restraint and rely on compaction alone for a semi circle patio steps project?
You can, but you need a perimeter plan that still prevents migration. If you omit edge restraint on curves, the outermost and innermost edges are the first to move, which also changes tread depth and riser consistency over time. Use flexible edge restraint on curved perimeters, and for extra stability consider upgrading the outer curb or bottom-face edging where foot traffic hits from the sides.
How can I tell if my gravel base is properly compacted before I set the pavers?
Use a compaction check at the right stage. After the gravel subbase is compacted in lifts, pour a small amount of water and watch whether it quickly ponds or sinks slowly, that helps identify under-compacted areas. Then, after bedding sand is placed, walk and verify there is no “bounce” or soft spots before setting the pavers.
What drainage problems should I watch for specifically at the bottom of semi circle patio steps?
With a semi-circle, the water pathway is often from the inside of the arc toward the lowest point of the bottom step. If the surrounding yard slopes toward the house, you may need a dedicated shallow channel, a small drain at the low point, or regrading of the adjacent soil before building. Otherwise, you can undermine the subbase even if the step surface looks fine initially.
When should I adjust the center point of the semi-circle if it looks off during layout?
Do it after full layout but before you remove more material. As long as the stake and pivot reference stay fixed, you can check radii and riser lines repeatedly, then take photos or measurements as a baseline. If you adjust the center point to make the arcs line up better, do it at the layout stage, not after excavation and bedding sand are installed.
Do I need special slip resistance considerations for semi circle patio steps beyond textured pavers?
Often, the riser face and tread nose need different surface treatments for safety. Choose textured or honed surfaces on the step face, and if you use a sealer, include a grip additive or use a product specifically intended for exterior traction. Standard clear sealers can reduce wet traction, which is especially risky on curved steps where foot placement shifts.
If only one step area is failing, can I do a partial rebuild instead of replacing everything?
Yes, and it changes how you should plan the materials. If you intend to replace a portion, you may still need to excavate down to undisturbed soil or a fresh compacted gravel base in the affected area, because overlaying onto failed base sections typically leads to cracking and delamination again. Spot repairs are best limited to cosmetic surface damage where the base is truly sound.
How do I handle trimming pavers on the inner radius without making the treads too narrow?
You may reduce waste, but never compromise the geometry reference. Always confirm that each step’s outer edge radius is correct, then allow for cuts that keep full tread width where it matters. If inner-radius tread widths fall below the 11 inch comfort target, the fix is usually adjusting overall radius or adding a step, not forcing smaller treads through cutting.
Next Article
How to Build Curved Patio Steps: DIY Guide and Tools
DIY curved patio steps plan, layout, and build methods for smooth arcs using pavers or brick, with tools and fixes.