Pointing a patio usually means one of two things: repointing the mortar or sand joints between your slabs, pavers, or bricks, or correcting the surface pitch so water actually runs away from your house instead of pooling. Both jobs matter, both have distinct methods, and mixing them up is where most DIYers waste a weekend. Get the diagnosis right first, then pick the right technique for your material and climate, and you will end up with a patio that looks sharp and drains cleanly for years.
Best Way to Point a Patio: Repointing, Jointing & Drainage

Nolan Lennox
26 Jul 2026
What 'Pointing a Patio' Actually Means
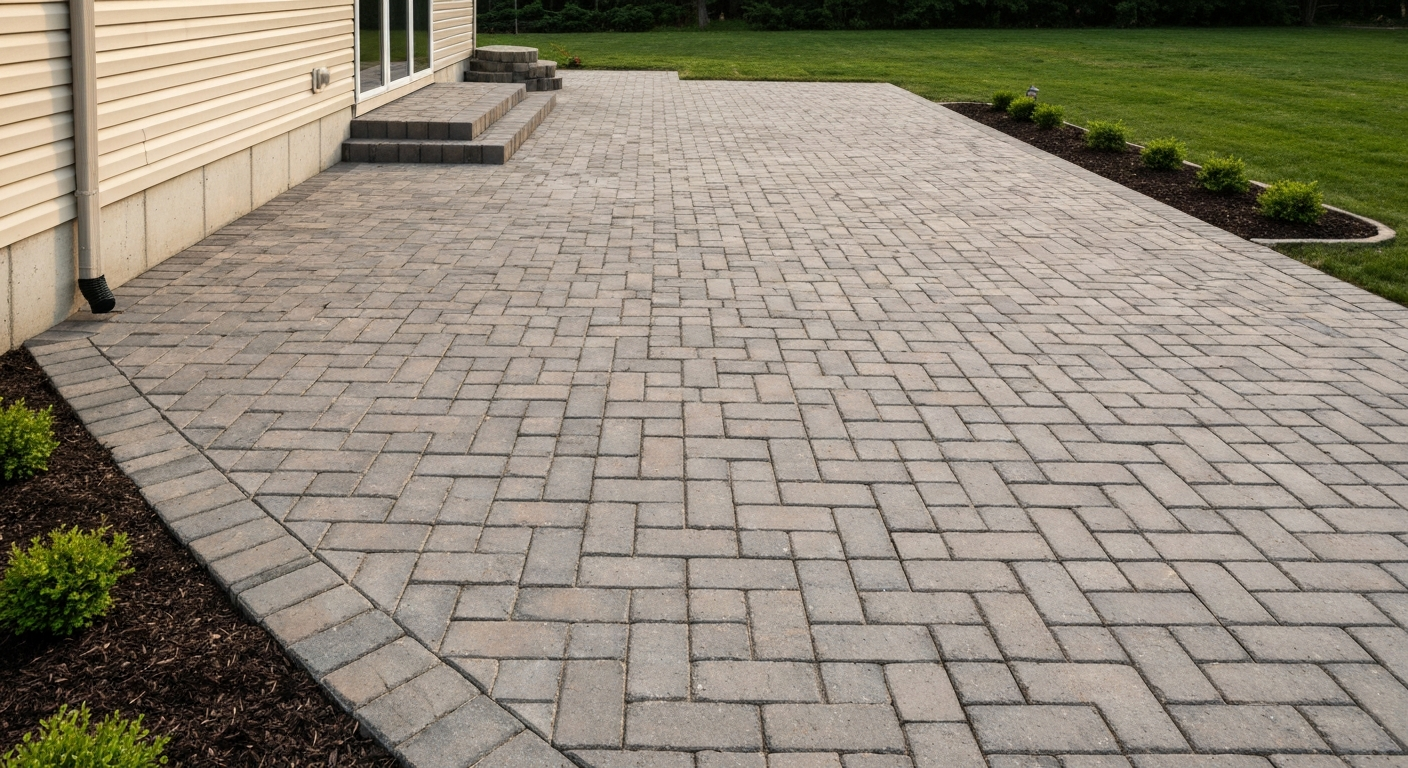
When homeowners type 'best way to point a patio' into a search bar, they are usually thinking about one of two problems. The first is failed joints: the mortar or sand between your slabs has crumbled, washed out, or cracked, weeds are pushing through, and the surface looks tired. Fixing that is repointing, and it means removing the old material and packing fresh mortar, polymeric sand, or a resin compound back in. The second meaning is about slope. Some people use 'pointing' or 'pitch' interchangeably to mean setting the surface angle so rainwater runs off the patio rather than pooling or running toward the house. Both problems are real, both are very fixable as a DIY project, but the tools and steps are completely different.
I have tackled both on the same patio in a single weekend, which taught me quickly that you need to sort out which problem you actually have before you buy anything. A freshly repointed patio that still pools water will just fail again in a season. And a regraded patio with crumbling open joints will let frost and roots undo your work within a year. Diagnose first.
Repointing Joints vs. Correcting Slope: Which Problem Do You Have?
Run through these two quick checks before you buy a single bag of material. Grab a garden hose and run water across the patio surface. If the water sheets off toward a lawn, planting bed, or drain, your drainage is working. If it sits in a flat pool or runs toward the house, you have a pitch problem and repointing alone will not solve it. Next, crouch down and look along the joints. If they are hollow, crumbling, missing in sections, packed with weeds, or clearly stained from moisture ingress, that is a jointing failure. You could have both issues at once, which means you need to fix the slope first and then repoint.
| Symptom | Root Cause | Right Fix |
|---|---|---|
| Weeds, hollow or missing joints, surface looks tired | Joint material has failed | Repoint with mortar, polymeric sand, or resin |
| Water pools on surface after rain | Insufficient slope (under 1%) | Regrade, relay, or lift and reset pavers to correct pitch |
| Water runs toward the house or foundation | Pitch sloping wrong way | Regrade away from structure — aim for 1/4" per foot minimum |
| Joints crumbling specifically at edges | Edge restraint failure plus joint loss | Reset edge restraint, recompact base, then repoint |
| Frost heave, cracked slabs or lifted pavers | Drainage + freeze-thaw damage | Fix drainage first, check base, then repoint with compatible mortar |
How Material, Condition and Climate Change Everything
The single biggest mistake I see DIYers make is grabbing a bag of ready-mixed cement mortar and pointing everything with it regardless of what the patio is made of. That works fine for some materials and causes serious damage to others. The material type, the condition of your existing joints, and the climate you live in all narrow down your options significantly.
Concrete Block Pavers and Brick
Segmental concrete pavers and clay bricks are the most forgiving surfaces to repoint because the joints are designed to move slightly with the base. The Interlocking Concrete Pavement Institute recommends a minimum 1 to 2 percent surface slope (roughly 1/8 to 1/4 inch per foot) for pedestrian patios, and that slope needs to be set in the base, not fixed with thicker mortar on top. For the joints themselves, polymeric sand is almost always the right call on block pavers. It is flexible, allows minor movement, resists weeds and ants, and is well within DIY range. Rigid mortar on a flexible interlock system will crack as the base settles and can actually crack the pavers themselves if used too stiffly.
Flagstone and Natural Stone
Flagstone set on a mortar bed with mortared joints is one situation where proper mortar repointing is genuinely the right approach. The key is matching the mortar to the stone. Soft, porous stones like sandstone or limestone need a lime-rich or Type N mortar rather than a hard Portland cement mix. This is not just a historic preservation point, it is practical. A mortar that is harder and less permeable than the stone will trap moisture inside the joint. In a freeze-thaw climate, that moisture expands and spalls the stone face rather than escaping through the joint. Historic England and the National Park Service both emphasize this compatibility principle, and it absolutely applies to residential patio work too.
Concrete Slabs
Cast concrete patios rarely have conventional pointing joints, but they do have expansion joints and control joints that can fail and let in water. Those are best filled with a flexible backer rod and an appropriate exterior sealant or flexible joint filler rather than rigid mortar. If the slab itself has tilted and is no longer draining, that is a lifting and regrading job, not a jointing fix. Common practice and local standard drawings typically require exterior concrete slabs to slope a minimum of 1/8 to 1/4 inch per foot away from the structure.
Climate Matters More Than Most People Think
If you are in a cold climate with hard freeze-thaw cycles, drainage is your top priority and mortar compatibility is critical. Any moisture trapped in a joint or under a slab will expand when it freezes, and that force is enormous. Standardized laboratory tests such as ASTM C666, Standard Test Method for Resistance of Concrete to Rapid Freezing and Thawing document how trapped moisture and freeze–thaw cycles damage masonry and concrete, supporting the need to avoid impermeable joint materials that hold water ASTM C666 — Standard Test Method for Resistance of Concrete to Rapid Freezing and Thawing. Use permeable, lime-compatible mortars on softer masonry, keep joint profiles slightly recessed rather than flush so they shed water, and make sure your base drains freely. In wet climates without hard freezes, polymeric sand and resin jointing compounds both perform well but wash-out from heavy rain during curing is your biggest installation risk. In hot, dry climates, rapid drying can cause mortar to cure too fast and crack, so keep freshly pointed joints damp and shaded during the first 48 hours of cure.
Decision Checklist: Pick the Right Method Before You Buy
Work through these six questions and you will land on the right method almost every time. Do not skip them to save five minutes, the wrong material choice can mean redoing the whole job in two years.
- Joint width and depth: Joints under about 3/8 inch wide suit polymeric sand or resin compounds. Wider, deeper joints (3/4 inch or more) suit mortar. Check the manufacturer's minimum joint depth — many polymeric sands need at least 1.5 inches of depth to bond correctly.
- Structural movement: Is the patio on a flexible interlock base, or is it fully mortar-bedded and rigid? Flexible bases need flexible jointing (polymeric sand, resin). Rigid mortar-bed patios suit mortar repointing.
- Permeability: Is your masonry soft and porous (old brick, sandstone, limestone)? If yes, avoid hard Portland cement mortars. Use lime or Type N mortar that is weaker and more permeable than the masonry unit itself.
- Expected traffic and use: Heavy traffic, furniture legs, and planters need tougher jointing. Resin/epoxy compounds offer the highest strength but require a completely stable, non-moving substrate. Polymeric sand handles normal residential foot traffic well.
- Budget: Polymeric sand is the most cost-effective option for large areas. Mortar is cheap per bag but labor-intensive. Resin jointing compounds carry a higher material cost per square foot but cure fast and last longer in high-use areas.
- Climate and longevity: Cold climates with freeze-thaw cycles favor permeable, lime-compatible mortars on soft masonry or polymeric sand on block pavers. Resin joints are rigid and must have a completely stable, settled base or they crack.
Tools and Materials by Method
Buy per your chosen method, not a grab-bag of everything. Here is what each approach actually requires.
| Method | Key Materials | Key Tools |
|---|---|---|
| Mortar repointing | Type S or N mortar mix (or lime mortar for historic/soft masonry); bonding agent optional; water | Angle grinder with diamond blade or oscillating multi-tool, cold chisel, pointing trowel, hawk, stiff brush, water sprayer, jointing iron |
| Polymeric sand jointing | Polymeric jointing sand (correct grade for joint width); water source | Plate compactor or hand tamper, stiff brush, leaf blower, garden hose with spray head |
| Resin/epoxy jointing compound | Resin paving jointing compound (two-part or single-part); activator if required | Mixing paddle and drill or mixing trough, pointing trowel or squeegee, rubber mallet, stiff brush, sponge and bucket |
| Regrading/correcting slope | Bedding sand or mortar (depending on patio type); compacted aggregate if base needs building up; edge restraint stakes | Line level and string lines, long straight edge or screed board, tape measure, shovel and wheelbarrow, plate compactor, rubber mallet |
Safety, Site Prep and Protecting What You Don't Want to Damage
I learned the hard way that mortar dust settles on everything within about 10 feet and leaves a white haze that is genuinely difficult to clean off glass, powder-coated furniture, and plants. A few minutes of prep saves hours of cleanup.
PPE You Actually Need
- Safety glasses or goggles: non-negotiable when grinding or chiseling old mortar — fragments travel fast
- P2/N95 dust mask or half-face respirator: mortar and cement dust is a silica hazard; do not skip this
- Heavy leather gloves: mortar is strongly alkaline and will irritate or burn skin with prolonged contact
- Knee pads: you will be kneeling on a hard surface for hours
- Hearing protection: angle grinders are loud enough to cause damage in under an hour
Protecting the Site
Cover any planting beds within splash distance with plastic sheeting before you mix or apply mortar or resin. Mortar is highly alkaline and will damage plant roots and foliage. Tape plastic sheeting over glass doors and windows if you are grinding near the house. Wet down the patio surface before you start cutting out old mortar to suppress dust, but make sure it is dry before you apply polymeric sand or resin. Apply masking tape along the base of any walls, steps, or raised planters you do not want stained, mortar and resin jointing compounds both stain masonry if left to dry on the surface.
Before you start any joint work, check your edge restraints are sound. Loose or missing edge restraints allow pavers to spread laterally, which opens joints back up regardless of what you fill them with. Reset any loose restraints before repointing and secure them with fresh spike pins driven into undisturbed base material.
Method 1: Mortar Repointing Step by Step
When to Use Mortar
Mortar repointing is right for: fully mortar-bedded slabs, flagstone, brick patios, and any surface where the original jointing was mortar. It is the correct choice when joints are wide (3/4 inch or more), deep, and the surrounding masonry is stable and non-moving. It is not right for flexible interlock block pavers or anywhere the base has not fully settled.
Choosing the Right Mortar Type
ASTM C270 classifies mortar into Types M, S, N, and O by strength and composition. For most above-grade exterior patio repointing, Type S (medium-high strength, good durability) or Type N (medium strength, flexible, better for softer masonry) are the appropriate choices. Type M is very strong but very rigid, avoid it for most domestic patio work. For soft historic bricks, sandstone, or limestone, use a lime-rich mortar or a pre-mixed lime-and-sand pointing mortar that is weaker and more permeable than the masonry itself. The rule to remember is: the mortar must never be stronger or less permeable than the unit it is pointing. If it is, moisture gets trapped in the masonry rather than escaping through the joint, and in a freeze-thaw climate that means the stone or brick face spalls off, not the mortar.
Step-by-Step Mortar Repointing Procedure
- Remove deteriorated mortar to sound depth: use an angle grinder with a narrow diamond blade or an oscillating multi-tool to cut along the joint to a depth of at least 3/4 inch (20 mm), ideally 1 inch. Finish with a cold chisel to clear loose bits. Never cut deeper than a third of the masonry unit's thickness. Blow or brush out all dust and debris.
- Diagnose and fix moisture sources before you repoint: if the patio is holding water, correct the drainage first. Repointing over a wet substrate is one of the most common causes of early failure.
- Pre-wet the joint: lightly dampen the joint edges with clean water — this stops dry masonry from pulling moisture out of the fresh mortar too fast and causing shrinkage cracks. Do not saturate; you want damp, not wet.
- Mix mortar to a firm but workable consistency: aim for a mix that holds its shape when squeezed but is not crumbly. For Type S or N, follow the bag ratio exactly. For lime mortars, mix to a smooth, buttery consistency.
- Load and pack the mortar: use a pointing trowel and hawk to press mortar firmly into the joint in layers no more than 3/8 inch deep. Pack each layer well before adding the next. Avoid air pockets. Work in manageable sections of 3 to 5 linear feet at a time.
- Tool the joint profile: once the mortar has started to stiffen (usually 30 to 60 minutes depending on temperature), use a jointing iron or the edge of the pointing trowel to compact and shape the joint face. A slightly recessed or weathered profile sheds water better than a flush or raised bead.
- Brush and clean: use a stiff-bristled brush to knock off any mortar smears before they fully cure. If mortar dries on the surface, remove it with a dilute masonry cleaning solution — not a strong acid, which can etch the patio surface.
- Cure and protect: keep freshly pointed joints damp (not wet) for at least 48 to 72 hours, especially in hot or windy conditions. Cover with damp hessian or lightly mist with a garden hose. Do not allow foot traffic for at least 24 hours and heavy use for 7 days.
Method 2: Sand and Polymeric Jointing Step by Step
When to Use Polymeric Sand
Polymeric sand is the go-to for concrete block pavers, tumbled brick pavers, and most segmental paving systems. It is water-activated: dry sand is swept into the joints, compacted, and then misted with water to activate a polymer binder that sets semi-rigidly. It resists weed germination, ant excavation, and joint washout far better than plain kiln-dried sand. It is flexible enough to handle minor base movement, unlike rigid mortar. For most suburban block paver patios, this is the right default choice.
Choosing the Right Polymeric Sand Product
Not all polymeric sands are the same grade. Products specify a usable joint width range, and you must match the product to your joints. Most standard products suit joints from about 1/4 inch to 1.5 inches wide. Narrow joint products are formulated for joints under 1/4 inch. Always check the manufacturer's minimum joint depth requirement, many products like Alliance Gator's range specify at least 1.5 inches (38 mm) of depth for proper polymer bonding. Application temperature also matters: most products require above 32°F (0°C) and a dry surface. Applying in cold or damp conditions is one of the most common causes of polymeric sand failure.
Surface Prep for Polymeric Sand
Clear all existing sand from the joints to a consistent depth. A stiff brush and a leaf blower make quick work of this. Remove any weeds completely, roots left in joints will push back through even polymer-hardened sand. Make sure pavers are completely dry before you start; moisture on the surface causes the polymer to activate prematurely and creates a white haze that is very hard to remove from paver surfaces.
Step-by-Step Polymeric Sand Installation
- Check and correct the surface slope before you fill joints: if water pools, this is the time to lift and reset affected pavers to achieve a minimum 1 to 2 percent slope (1/8 to 1/4 inch per foot) toward a drainage point. Polymeric sand will not fix a drainage problem.
- Ensure all edge restraints are secure: reset any loose restraints and drive in fresh stake pins before continuing.
- Pour the dry polymeric sand over the patio surface and spread it with a stiff push broom, working it into the joints in multiple passes. Bag coverage is usually marked on the product — a 50 lb bag typically covers around 30 to 50 square feet depending on joint width and depth.
- Compact the sand into the joints: run a plate compactor over the surface (with a rubber pad underneath to protect the paver face) two or three times in different directions. For a smaller patio or delicate pavers, a hand tamper works. This packs the sand and consolidates the base.
- Top up the joints: after compaction the sand level will drop. Sweep in a second application of dry sand and compact again. Repeat until joints are filled to within about 1/8 inch of the paver surface — do not overfill flush with the top.
- Blow off excess: use a leaf blower on a low setting to clear all loose sand from the paver surface. This step is critical — sand left on the surface when you wet it will bond there and leave a hazy residue.
- Activate with water: using a garden hose with a gentle spray setting (not a jet), mist the entire surface until the joints are saturated but not flooded. Allow water to soak in, then repeat two or three times over about 30 minutes following the manufacturer's timing. Avoid over-watering, which can wash the binder out of the joints before it sets.
- Allow to cure: keep foot traffic off for at least 24 hours. Full polymer hardening typically takes 24 to 48 hours depending on temperature. In cool conditions it can take longer. Avoid rain within the first 24 hours of installation — check the forecast before you start.
Dealing with Narrow Joints
Some paver styles, tumbled natural stone, tight-laid brick, close-cut flagstone, have joints that are too narrow for standard polymeric sand products. Use a fine-grade polymeric jointing sand specifically formulated for narrow gaps, or consider a resin-based jointing mortar applied as a slurry that is worked into the joints with a squeegee and cleaned off before it cures. The resin option needs a completely stable base, but it flows into tight joints well and sets hard. Always check the product's minimum joint width specification before you buy.
Cost and Time Estimates at a Glance
| Method | Typical Material Cost (100 sq ft) | DIY Time (100 sq ft) | Longevity |
|---|---|---|---|
| Mortar repointing | $15–$40 in materials | 4–8 hours including prep and cure monitoring | 10–20+ years if drainage is correct and mortar is compatible |
| Polymeric sand | $30–$60 in materials | 2–4 hours | 5–10 years before top-up typically needed |
| Resin/epoxy jointing compound | $80–$150+ in materials | 2–5 hours (fast pot life requires planning) | 10–15 years on a stable, settled base |
| Regrading/relaying for slope | $20–$80 in bedding materials | Half day to full day depending on area and access | Permanent if base is correctly compacted and drained |
Troubleshooting Common Problems
Even when you do everything right, a few issues crop up regularly. Here is what I have seen and how to fix them.
- White haze on pavers after polymeric sand: caused by excess sand or premature activation from damp surfaces. Scrub with a stiff brush and clean water while still fresh. If it has hardened, a diluted masonry cleaner or proprietary polymeric sand haze remover applied carefully is your best option.
- Mortar joints cracking within the first season: almost always caused by either a mortar that is too strong and rigid for the masonry, insufficient joint depth, or repointing over a base that has not finished settling.
- Polymeric sand washing out after rain: either the joints were not dry at application, the water activation step was rushed, or heavy rain hit within the first 24 hours. Clear the joints and redo — there is no shortcut fix.
- Weeds returning through polymeric sand within a year: the sand was not compacted properly or the joints were not filled to full depth. Top up with fresh sand, compact, and re-activate.
- Water still ponding after repointing: jointing does not fix slope. The surface needs to be relevelled — lift affected sections, adjust the bedding, and reset. This job connects closely with knowing how to relay a patio correctly.
- Frost damage to freshly pointed joints: mortar or jointing compound applied too late in the season. Fresh mortar must not be exposed to freezing temperatures for at least 7 days after application. Plan autumn repointing carefully.
When to Stop and Call a Pro
Most pointing and jointing jobs are well within DIY range, but a few situations warrant a professional. If your patio has significant structural movement, sunken sections, raised corners, or pavers that rock when walked on, that is a base failure, not a jointing problem. No amount of repointing will fix a failing subgrade. Similarly, if water is consistently running toward the house foundation and the patio slope is wrong, you may need to regrade not just the patio but the surrounding ground to meet the IRC's general guidance of achieving positive drainage away from the structure. For step-by-step guidance on relaying a patio, including grading, base preparation, and laying units, see how to relay patio. That kind of earthwork is a bigger job than a weekend repoint. If you have genuinely historic masonry where a mortar match matters for preservation reasons, a conservation specialist can run a mortar analysis to tell you the exact composition of the original mix, a worthwhile investment to avoid causing damage that costs far more to repair.
Keeping It in Good Shape Going Forward
Once you have repointed, the biggest thing you can do is stay on top of small repairs before they become big ones. Check joints every spring after the frost season and after any particularly wet winter. A few minutes refilling a small section of polymeric sand or pushing in a dab of fresh mortar on a loose spot takes a fraction of the time and money that a full repoint requires. Apply a breathable patio sealer on natural stone or brick if you are in a freeze-thaw climate, it reduces moisture absorption without trapping vapour, which is the balance you want. And keep plants back from joint edges: root pressure is slow but relentless, and it will open up even well-pointed joints given enough seasons.
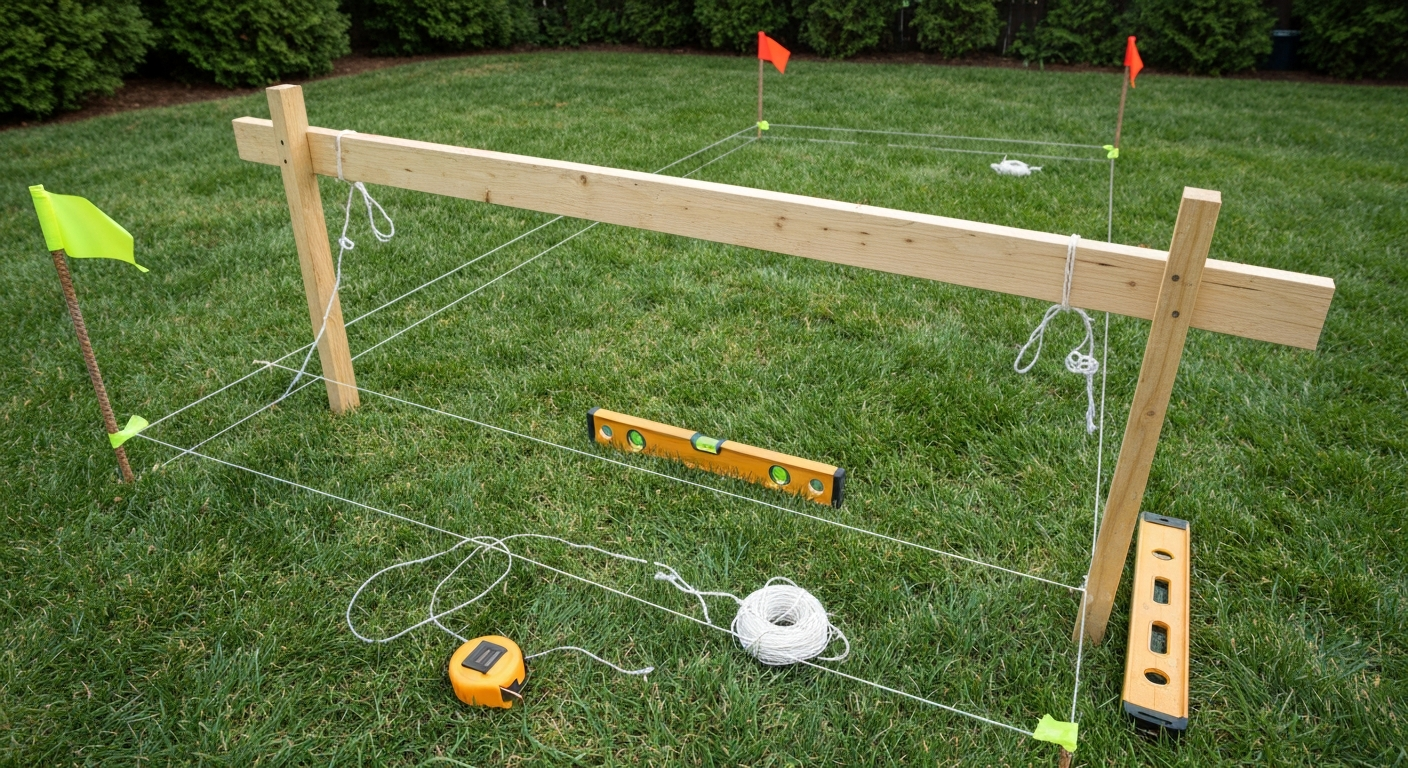
If your project involves more than just jointing, setting out a new patio area, working on access routes, or creating a dedicated pet-friendly section, thinking about the full picture of slope, layout, and materials early on will save you redoing work later. If you're planning to lay out a new patio, see our guide on how to stake out a patio for step-by-step advice on marking, leveling, and using string lines. If you're planning a pet-friendly area, see our guide on how to make a patio dog potty for layout and drainage tips. The pointing job is often the final step in a well-built patio, and it is satisfying to get it right. For decorative finishes and painted patterns, see a short guide on how to make a patio stencil.
FAQ
What precise definitions and distinctions should the article establish for “point a patio” to cover all reader interpretations?
Gather authoritative definitions and examples distinguishing (A) repointing mortar joints (removal of deteriorated mortar and replacement) and (B) jointing/grouting and setting surface pitch for drainage (polymeric sand, mortar, resin, dry sand; regrading/reprofiling for slope). Cite conservation sources (Historic England, NPS) and industry DIY guides to demonstrate common usage and to show overlap and different objectives (structural bond vs. water management).
What exact slope and grading measurements must be documented for reliable patio drainage?
Collect manufacturer and industry specs: typical pedestrian patio slope 1%–2% (1/8"–1/4" per ft) as minimum; many paver guides recommend 1.5–2%; code/local requirements for grading away from buildings (commonly 6" fall in first 10 ft ~5% or minimum 1/4"/ft depending on jurisdiction). Also record slab-specific details used by municipalities (examples: 1/8"–1/4"/ft or 2% preferred) and ADA max cross-slope (2%) and running slope limits to avoid conflicts with accessibility. Cite ICPI, manufacturer guides (Unilock, Belgard), and IRC/local code references.
Which technical standards and reference documents are essential for mortar selection and repointing procedures?
Gather ASTM standards (ASTM C270 mortar types), NPS Preservation Brief 02, Historic England repointing guidance, and mortar analysis/testing protocols. Collect guidance on matching mortar strength/permeability (avoid harder/impermeable cement mortars on soft historic masonry), recommended mortar types (lime, lime-rich, Type N,S,M) by application, and testing/analysis methods (plastic/chemical analysis or lab matching).
What product‑specific data are required for jointing materials (polymeric sand, resin/epoxy compounds, mortar mixes)?
Collect technical data sheets (TDS) and safety data sheets (SDS) from major manufacturers: polymeric sand (temperature ranges, minimum joint width/depth, surface moisture requirements, cure/activation procedure, failure modes), resin/epoxy joint compounds (pot life, working temperature, cure time, UV/weathering notes, rigidity/settlement limits), and mortar product TDS (mix ratios, additives, working time). Note manufacturer installation limits and troubleshooting tips.
What measurements and tests should a DIYer perform before repointing or regrading a patio?
List prework diagnostics: assess joint depth and mortar condition (measure remaining mortar depth), check for movement/settlement of pavers or flagstones, test permeability of original mortar (simple socket or lab), measure surface slope with a level or digital inclinometer across multiple transects (record % slope and direction), locate moisture sources (downspouts, infiltrating runoff), and identify underground utilities. Include guidance on how deep to remove mortar (to sound substrate per NPS/Historic England) and when to perform a soil/subgrade check (compaction/base thickness).
What step‑by‑step procedures and key measurements are required for repointing mortar joints?
Collect authoritative procedural steps: document mortar removal method (hand tools, grinders where appropriate—depth to sound mortar typically 2–3 times joint width or to sound substrate per NPS), cleaning and pre‑wetting rules, mortar mixing ratios (per ASTM or manufacturer), pointing technique (buttering, tooling profile), curing/aftercare (moist curing for lime mortars), and acceptable joint finishes. Capture exact removal depths, allowable tool settings/rotational speeds, recommended joint tooling profiles and cure times for different mortars.
Next Article
How to Stake Out a Patio for Homeowners: Step-by-Step Layout Guide
How to stake out a patio: step-by-step layout, tools, measurements, slope tips, templates and troubleshooting for DIYs