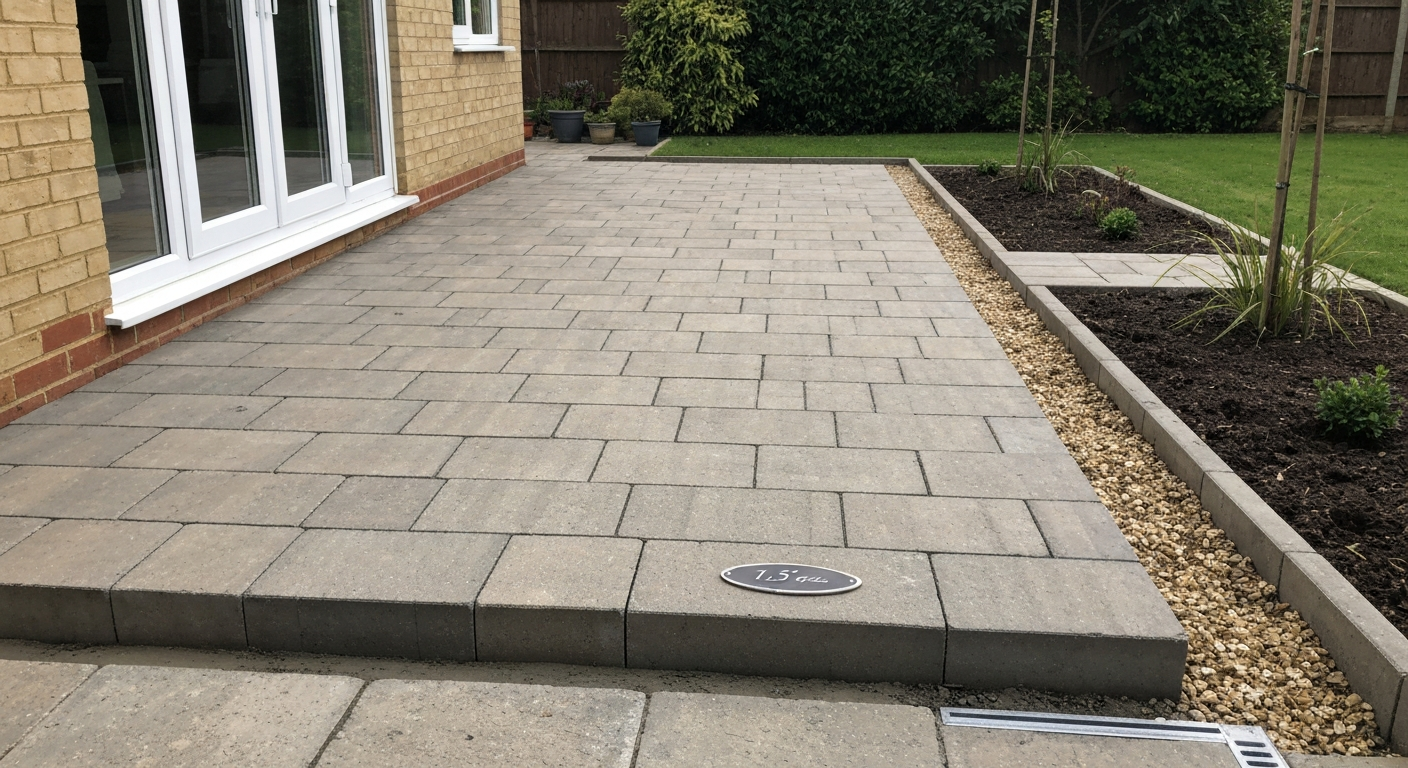
You can build a functional patio dog potty for as little as $30 for a portable tray setup or $150 to $600 for a permanent gravel-and-drain or paver installation. The basic idea is simple: designate a defined area on your patio or balcony, give it a surface your dog can use comfortably (synthetic turf, gravel, or pavers), and route the liquid waste somewhere it can drain safely without pooling or stinking. I've built a few of these now, including one permanent installation on a concrete patio and a couple of portable tray versions for apartment balconies, and the biggest thing I've learned is that drainage is everything. Get the drainage right and maintenance becomes a five-minute job. Skip it and you'll be scrubbing concrete every other day.
How to Make a Patio Dog Potty: DIY Designs, Build Tips & Maintenance

What a patio dog potty is and who actually needs one
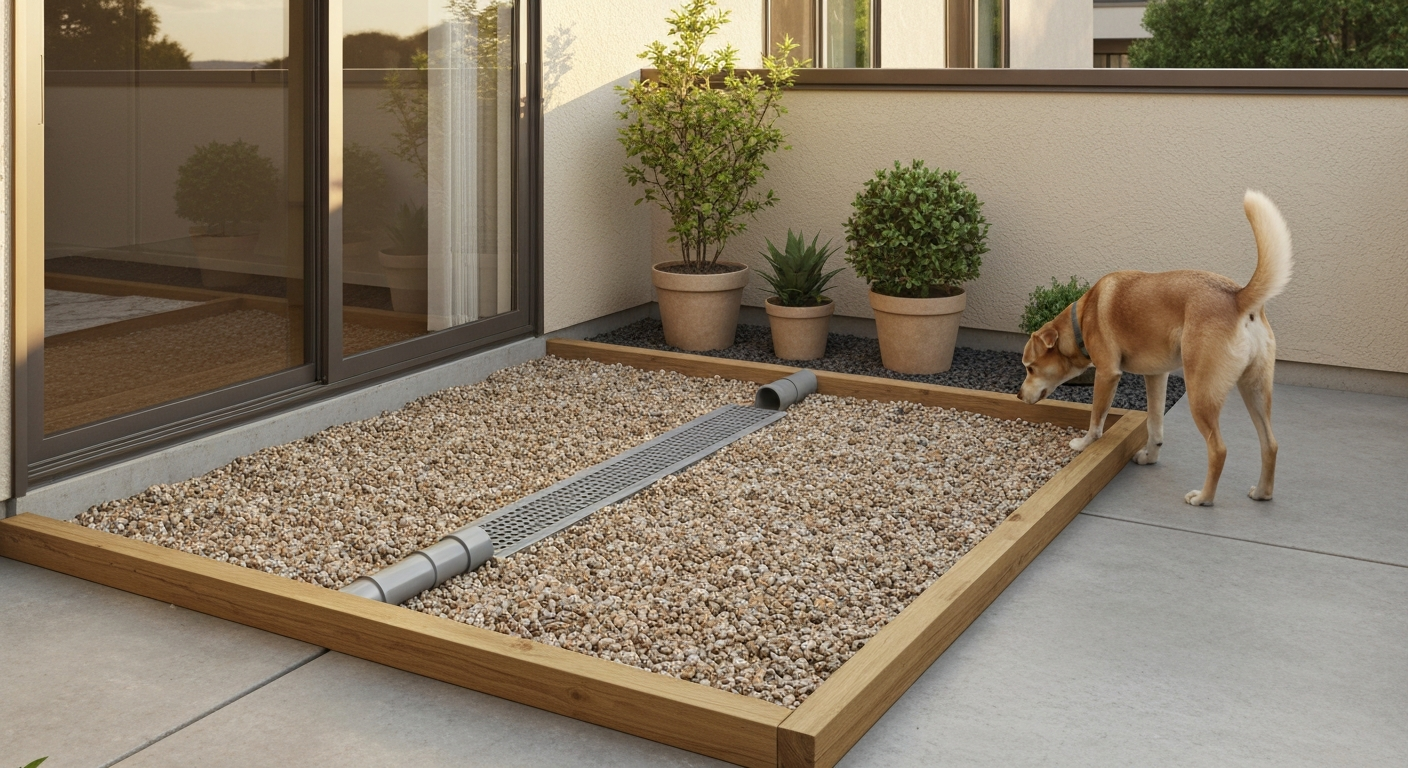
A patio dog potty is a designated relief zone installed on a patio, balcony, or deck that gives your dog a consistent, sanitary place to go without heading to the yard or down multiple flights of stairs. At its simplest, it's a tray of artificial turf sitting on a drain pan. At its most permanent, it's a properly graded, edged section of your patio filled with gravel or pavers over a subsurface drain. Most people build one because a yard trip isn't practical: they live in an apartment or condo, have a dog with mobility issues, work long hours, or have a balcony-dwelling senior dog that can't manage stairs comfortably.
These setups are also genuinely useful for people who have a dog that already picks a corner of the patio to go, whether you like it or not. Rather than fight that behavior, you can redirect it to a purpose-built spot that you can actually clean. If any of that sounds familiar, this guide is for you.
Is a patio dog potty actually right for your home?
Before you start measuring and buying materials, it's worth being honest about whether this will work for your specific situation. The benefits are real: convenience, cleaner patio surfaces overall (because waste stays in one spot), and a reliable option for bad-weather days or nighttime trips when you don't want to go outside. For small to medium dogs, a well-drained potty area keeps things very manageable.
The limits are real too. Large dogs produce a lot of urine, and if your drain can't move it fast enough or your surface area is too small, you'll get pooling and smell. For multiple dogs, multiply your sizing estimates and plan for more aggressive drainage and more frequent cleaning. Two medium dogs can overwhelm a small portable tray system in under a week if the turf isn't rinsed daily. I'd generally say a single portable tray works fine for dogs under 40 lbs, one permanent installation suits one or two dogs up to about 80 lbs, and anything above that calls for either a larger installation or a yard-access solution.
Check HOA rules, building codes, and local regs before you touch anything
This is the step most DIYers skip, and it's the one that can cost you the most. If you live in a community with a homeowners association, any visible exterior modification to your patio or balcony probably requires Architectural Review Committee (ARC) approval before work begins. California's Davis-Stirling Act (Civil Code section 4765) is a good example of how these rules work: the HOA must have a fair, objective review process, but you still need to apply and wait for approval. Most ARC application packets ask for a site plan, material samples, a visual rendering or photo mockup, scope description, and drainage or grading details. Submitting a quick sketch with a materials list is usually enough for a project this small, but you have to submit it.
On the building code side, if you're adding a permanent drain that ties into the building's plumbing or storm drainage system, that's plumbing work. The International Plumbing Code (IPC Chapter 11) prohibits routing stormwater runoff into sanitary sewer systems, which affects how you can legally connect a balcony potty drain. The U.S. EPA also classifies pet waste runoff as a pollutant of concern and specifically warns against letting it reach storm drains. The practical upshot: a gravity-drain or self-contained system is usually the simplest and code-friendliest approach. If you want a drain that ties into building plumbing, get a licensed plumber involved and pull the appropriate permit.
Planning your layout: size, placement, privacy, and sun/wind
The minimum usable size for a small dog is about 2 feet by 2 feet, but that's tight. I recommend 2 feet by 3 feet as a practical minimum for dogs under 30 lbs, and 3 feet by 4 feet for medium dogs (30 to 65 lbs). Large dogs need at least 4 feet by 4 feet and ideally more. For step-by-step guidance on grading, edge restraints, and proper joint pointing, see the guide on the best way to point a patio. If you have multiple dogs, add roughly 50% more area per additional dog.
Placement matters more than most people expect. Put the potty as close to your door as your layout allows so your dog doesn't have to navigate the whole patio. Avoid spots directly in full afternoon sun if you live somewhere hot: synthetic turf in direct summer sun can reach surface temperatures that are uncomfortable for paws. Shade, whether from a wall, pergola, or awning, makes a big difference. Also think about prevailing wind direction. If the drain is on the downwind side of your patio seating area, odor won't drift toward where you sit. A corner location is usually ideal: it's easy to screen with a planter or low fence for privacy, drainage can run toward an exterior wall, and it keeps the potty visually separate from your main living space.
Balcony and elevated patio checklist: weight and structural limits
If your patio is an elevated balcony or an above-grade deck, you need to think about structural load before adding anything permanent. The International Building Code (IBC Table 1607.1 and Section 1604) sets minimum live-load requirements for residential balconies, typically 60 psf (pounds per square foot), but your specific balcony may have a lower engineer-of-record design load if it's older or was built to a lower standard. A gravel-and-drain potty box adds meaningful weight. Gravel alone runs about 100 lbs per cubic foot, so a 3x4-foot box filled 4 inches deep with gravel is around 400 lbs sitting on a small footprint.
- For ground-level concrete patios: no structural concerns beyond the surface condition.
- For elevated wood decks: check your joist span, beam size, and ledger connection before adding any permanent, heavy installation.
- For apartment or condo balconies: contact your building manager or engineer before any permanent modification. Most condo buildings have documented load limits per balcony.
- Lightweight options (portable plastic tray with synthetic turf, no ballast) are the safe default for any balcony where load data is unknown.
- If you're adding a waterproofing membrane and linear drain on a balcony, the drain flange must maintain membrane continuity. Systems like Schluter Kerdi-Line/Kerdi-Drain are designed for this but require careful installation to meet code waterproofing requirements.
- Always locate the potty near a structural support point (joist or beam location) rather than at mid-span of a deck bay.
Site assessment: staking out, slope, utilities, and existing patio condition
Before you build anything permanent, spend 20 minutes actually reading your existing patio. Grab a 4-foot level and a tape measure. Check the slope of your current surface: standard guidance calls for a minimum 1% grade (about 1/8 inch per foot) sloping away from your house, with 1/4 inch per foot (2%) being the safer target. If your patio is flat or sloping the wrong direction, you'll need to account for that in your drain design. Mark out your potty footprint using stakes and string, the same way you'd stake out any patio section. This lets you visualize the space, check for conflicts with furniture or doors, and confirm that drainage will run the direction you intend.
Also check what's under the surface if you're cutting into or penetrating an existing patio. Call 811 (the U.S. dig-safe line) before any ground penetration, even shallow ones. Look for existing control joints, cracks, or heaved sections in the patio. A cracked or heaved existing patio is worth addressing before you install a potty unit, since you want a stable, level base. If your existing patio has loose or damaged pavers near the planned potty area, you'll need to relay those before integrating the unit. The condition of your existing patio surface directly affects how well the finished potty will drain and sit.
Drainage options: tie-in vs. self-contained systems
Drainage is the single most important design decision for a permanent potty. You have three main paths.
| Drainage type | How it works | Best for | Typical cost | Plumbing permit needed? |
|---|---|---|---|---|
| Self-contained tray/pan | Liquid drains into a removable tray or pan you empty manually | Balconies, rentals, portable setups | $30–$120 | No |
| Surface gravity drain (open discharge) | Surface is graded to carry liquid off the patio edge or to a planted area | Ground-level patios with space to daylight | $0–$50 (grading only) | Usually no |
| Trench/channel drain tied to downspout or yard drain | A NDS-style channel drain collects liquid and routes it to an approved outlet | Permanent ground-level installs | $80–$250 | Sometimes |
| Subsurface perforated pipe into gravel bed | Permeable base over perforated pipe; liquid infiltrates and drains away | Gravel-filled permanent boxes in-ground or at grade | $60–$200 | No, unless tied to sewer |
For most ground-level DIY patio potties, a channel drain (NDS Mini Channel or similar) with a 2-inch outlet routed to a planted area or collected and dumped is the cleanest permanent solution. These systems are available at home improvement stores, come with installation instructions specifying concrete encasement or paver-set options, and handle the flow from even a large dog easily. Manufacturer and retailer pages for NDS Mini/Slim channel drains provide installation guides detailing concrete encasement, minimum slope, outlet sizes (2"–4"), grate/load classes, and recommended set-in details for paver or concrete finishes (NDS Channel Drain product & installation resources) NDS Channel Drain product & installation resources (example retail/manufacturer product page). For balconies, a self-contained removable tray wins every time for simplicity and code safety. A perforated-pipe-in-gravel bed works beautifully for a semi-permanent box install at ground level, especially if you're building a raised planter-style potty.
Design options compared
There are four designs I'd recommend, each suited to different situations. Here's a practical comparison:
| Design | Surface material | Drainage method | Approximate DIY cost | Maintenance level | Best for |
|---|---|---|---|---|---|
| Synthetic turf on tray (portable) | PE/PP artificial grass over plastic tray | Removable liquid tray | $30–$120 | High (daily rinse) | Balconies, renters, small dogs |
| Gravel-and-drain box (permanent) | Pea gravel or decomposed granite over perforated pipe | Perforated pipe into subsurface or daylighted outlet | $150–$350 | Low-medium (weekly flush) | Ground-level patios, medium/large dogs |
| Paver-with-channel-drain (permanent) | Pavers or concrete set over graded base with trench drain | NDS channel drain to outlet | $250–$600 | Low (periodic enzyme flush) | Permanent, high-traffic, multi-dog |
| Planter/green-strip (semi-permanent) | Real sod or robust groundcover in a raised planter box | Perforated base, overflow to planted area | $100–$300 | Medium (watering, reseeding) | Dogs trained on grass, ground-level only |
Build it: portable synthetic turf tray (step by step)
This is the fastest, most affordable option and works on any patio or balcony. Commercial products like the PetSafe Pet Loo use a multi-layer tray system with synthetic grass on top, a drainage panel in the middle, and a liquid collection tray at the bottom (with optional enzyme pods for odor control). You can buy one of those ready-made, or build your own version for less. Here's how to build a DIY version:
- Cut a piece of 3/4-inch PVC-coated wire mesh or egg-crate light diffuser panel (from any hardware or lighting store) to your desired size. This is your drainage platform.
- Set the mesh platform inside a shallow plastic storage tote or concrete mixing pan — something with sides 3 to 4 inches tall that won't crack. The tote becomes your liquid collection tray.
- Elevate the mesh platform about 1 inch off the tote floor using rubber feet or PVC pipe couplings zip-tied to the corners. This air gap keeps the turf surface above pooled liquid.
- Cut a piece of artificial turf to fit on top of the mesh platform, grass-side up. Do not glue it — you want to remove it for cleaning.
- Place the entire assembly in your chosen spot. Check that the tote sits level or has a very slight tilt toward the drain end.
- To clean: remove the turf, rinse with a hose, spray the tray with an enzymatic cleaner, let it dwell 5 minutes, rinse again, and allow to air dry before reassembling.
Materials and tools for the portable build
- Shallow plastic storage tote or mortar mixing tray (18"x24" to 24"x36" depending on dog size): $10–$25
- Egg-crate light diffuser panel or PVC-coated wire mesh: $8–$15
- Artificial turf piece (polyethylene, non-infill type for easier cleaning): $15–$40 depending on size
- Rubber feet or short PVC couplings (4 pieces): $3–$6
- Zip ties: $2
- Enzymatic cleaner (enzyme-based, pet-safe): $8–$15 per bottle
- Tools needed: utility knife or scissors, tape measure, zip tie gun or hand
Build it: permanent gravel-and-drain patio potty (step by step)
This is the build I'd recommend for ground-level patios and homeowners who want something that blends into the patio and requires minimal daily effort. It takes about a weekend to complete.
- Stake out your potty footprint using stakes and string line. Check alignment with your patio's existing edge lines and confirm drainage direction. A 3x4-foot area is a good starting size for one medium dog.
- If you're carving this into an existing paver patio, carefully remove the pavers in that section, setting them aside for reuse or replacement. For a concrete patio, you're building a raised box on top of or adjacent to the surface.
- Install your edging. Metal or plastic landscape edging spiked into the ground, or a simple frame built from 2x6 treated lumber or composite lumber, contains the gravel and defines the potty boundary. Stake it securely.
- Dig down 4 to 6 inches inside the edged area if you're at grade, or build your frame up to that depth if you're building on top of a hard surface.
- Lay a perforated 4-inch drain pipe (wrapped in filter sock) along the low end of the base, sloping at 1/8 to 1/4 inch per foot toward your outlet point. Route the outlet pipe to daylight at a planted area, or cap it and plan to flush periodically.
- Cover the pipe with 3 to 4 inches of 3/4-inch clean crushed stone or pea gravel. Tamp lightly.
- Add a 1 to 2-inch top layer of pea gravel or decomposed granite as the surface dogs will stand on. This is your finish surface.
- If the potty adjoins an existing paver patio, replace and relay any disturbed pavers, re-setting them in a fresh sand bed and refilling joints with polymeric sand. Re-check the slope at the transition point to make sure drainage still runs away from the house.
Materials and tools for the permanent gravel-and-drain build
- Stakes and string line: $5–$10
- Metal or plastic paver edge restraint, or 2x6 pressure-treated/composite lumber for frame: $15–$40
- 4-inch perforated drain pipe with filter sock (10-foot section): $15–$25
- 3/4-inch clean crushed stone or pea gravel (0.5 to 0.75 cubic yards for a 3x4-foot box): $35–$75 depending on local pricing
- Pea gravel or decomposed granite for surface layer (1 bag / ~0.25 cubic yards): $10–$20
- Landscape fabric (optional, to reduce migration): $8–$15
- Polymeric sand for paver joints at transitions: $20–$30 per bag
- Tools: shovel, hand tamper, level, tape measure, utility knife, rubber mallet, saw (for lumber frame)
Preparing your existing patio to integrate the potty
If you're building the potty into or immediately adjacent to an existing paver or concrete patio, the condition of that surface matters a lot. Loose pavers, deteriorated joint sand, or cracked edging at the potty boundary will shift over time and break your drainage slope. Before you finalize the potty installation, do a quick assessment of the surrounding patio. Press down on each paver within a foot of the potty boundary: they should be firm with no rocking. If they're loose, lift them, re-level the sand bed, and re-lay them. This is exactly the kind of task covered in detail in patio relaying and re-pointing guides on this site.
For the joints around the potty perimeter, repoint with polymeric sand after everything is set. Polymeric sand locks in place when wet and prevents ant infiltration and joint erosion around the edge restraint. At the staking and layout stage, use a string line and a builder's level to confirm the slope is correct before you commit to the drain pipe location. Getting the slope wrong at this stage is the most common mistake I see, and fixing it after the gravel is in is a genuine pain. Related tasks like staking out a patio layout and proper edge-restraint installation follow the same principles you'd use on any patio section. If you prefer a reusable layout guide for marking the drain location and edge profiles, see our how to make a patio stencil for cutting precise lines and repeatable markings.
Choosing your surface material: what's safe for dogs
Synthetic turf is the most popular choice, but it's worth reading the material details before you buy. Turf fibers are typically made of polyethylene (PE), polypropylene (PP), or nylon. Infill materials vary and this is where you need to pay attention: crumb rubber (made from recycled tires) is a common cheap infill, but EPA field studies on tire crumb rubber document a range of chemical residuals including heavy metals and organic compounds. For a dog that will spend time sniffing and lying on the surface, I'd strongly recommend choosing either a no-infill turf (for a potty, you don't need infill for cushioning) or a silica sand or TPE infill product. Request the Safety Data Sheet (SDS) from the manufacturer for any turf system you're considering, including the adhesive if you're seaming pieces. Each component has its own hazard profile, and a phone call to the supplier asking for the SDS is a reasonable and free step.
Pea gravel and clean crushed stone have no significant pet safety concerns and are my preferred surface for permanent installations. Real sod or groundcover works too but requires maintenance (watering, reseeding) and can become a muddy mess in wet climates. Concrete pavers over a channel drain are the most durable and easiest to sanitize, though the upfront cost is higher.
Full cost breakdown
| Build type | Low-end DIY cost | Mid-range DIY cost | High-end/finished cost | Notes |
|---|---|---|---|---|
| Portable turf tray (DIY) | $30 | $60 | $120 | Buy ready-made (PetSafe Pet Loo) for ~$100–$160 |
| Gravel-and-drain box (permanent) | $150 | $250 | $350 | Higher cost if lumber framing used |
| Paver-with-channel-drain | $250 | $400 | $600 | Cost rises with paver material choice |
| Planter/green-strip (sod) | $100 | $200 | $300 | Ongoing cost for sod replacement |
| Pro installation premium | +$200 | +$400 | +$800+ | Add to any build if hiring drainage/paving help |
Maintenance and odor control
Enzymatic cleaners are the right tool for odor control, full stop. Animal welfare organizations including the ASPCA consistently recommend enzyme-based (bio-enzymatic) cleaners for pet urine because the enzymes actually break down uric acid and proteins rather than just masking the smell with fragrance. The ASPCA recommends enzymatic (bio‑enzymatic) cleaners to neutralize pet urine and accidents because enzymes break down uric acid and proteins rather than just masking odors ASPCA guidance — use enzymatic cleaners to neutralize pet urine/accidents. I use a diluted enzymatic cleaner in a garden sprayer once a week on my gravel potty, let it sit for 5 to 10 minutes, then flush with a hose. For synthetic turf, a daily rinse with a hose prevents urine from concentrating in the fibers, and a weekly enzymatic soak keeps things genuinely odor-free.
- Daily: remove solid waste immediately. For turf, hose down the surface. For gravel, rake if needed.
- Weekly: spray the entire potty surface with diluted enzymatic cleaner, allow 5–10 minute dwell time, flush with water.
- Monthly: for turf potties, inspect the drain tray and clean it thoroughly. For gravel builds, check that the drain outlet is clear and not blocked by debris.
- Annually: for permanent gravel builds, top up the surface layer of pea gravel. For paver builds, recheck joint sand and repoint if needed.
- Avoid bleach directly on synthetic turf — it degrades the fibers over time. Enzyme cleaners are more effective anyway.
Training your dog to use the potty
The build is only half the work. Most dogs don't automatically understand that a new gravel box or turf square is where they're supposed to go. The fastest training approach is the same one used for any spot training: lead your dog to the potty on a leash at the times they normally need to go (after waking up, after meals, before bed), use a consistent verbal cue like 'go potty' or 'go here,' and immediately reward with a treat when they go in the right spot. Consistency in the first two weeks matters more than anything else. Keep the area clean, because dogs avoid soiled spots.
If your dog was previously going on real grass, the transition to synthetic turf or gravel can take a week or two. Some people dab a little used turf or a paper towel with the dog's scent onto the new potty surface to help with the association. If your dog is resistant and consistently tries to go elsewhere on the patio, temporarily block access to those spots with a planter or furniture while training is ongoing.
Troubleshooting common problems
- Persistent odor despite cleaning: the drain outlet is likely blocked, or liquid is pooling under the surface. Check the slope and clear the outlet.
- Turf stays wet between uses: not enough drainage gap between turf and collection tray, or the tray isn't being emptied frequently enough. Raise the mesh platform or reduce the interval between cleanings.
- Gravel shifting out of the box: edge restraint is not staked deeply enough or landscape fabric is missing at the base. Add additional stakes and repack.
- Dog refuses to use the potty: surface material may be unfamiliar. Try adding a turf piece over gravel temporarily, or rub a small amount of the dog's used bedding on the surface to create a familiar scent.
- Water pooling on surrounding patio after flushing: the potty drain outlet is overwhelmed or blocked, and water is backing up onto the patio surface. Flush more slowly, or increase the outlet pipe diameter.
- Pavers shifting at the potty boundary: joint sand has eroded or the edge restraint has moved. Repoint the affected joints and re-stake the edge restraint.
When to call a professional
Most patio dog potty builds are firmly in DIY territory. But there are a few situations where I'd recommend bringing in a licensed professional. If you need to tie a drain into an existing plumbing stack or sanitary system, that's licensed plumbing work in virtually every jurisdiction. If your balcony or elevated deck has unknown or questionable structural history and you want to add a permanent, heavy installation, pay for a structural engineer's assessment before you commit. If your existing patio has significant drainage problems (water flowing toward the house, large heaved sections, or an unknown subbase) that you'd be building on top of, those underlying issues should be fixed first, sometimes with professional help, rather than covered over with a potty box.
For the vast majority of ground-level patio potty builds, a motivated DIYer with basic tools can get through the whole project in a weekend. The skills involved, staking out a layout, setting edging, running a drain pipe, and laying gravel, are the same foundation skills used in any patio project. If you've tackled other sections of your patio yourself, this is an approachable next step.
FAQ
What overarching categories of information and sources should I consult to plan, design, build, cost, maintain, and safely operate both permanent and portable patio dog potties?
Consult four high‑level source categories: (1) Building, plumbing, and local code/HOA rules (IBC, IPC, municipal codes, HOA/ARC procedures); (2) Stormwater, environmental and public‑health guidance (EPA stormwater, local MS4 rules about pet waste); (3) Hardscape, drainage and waterproofing technical guides (paver/ICPI manuals, permeable pavement/FHWA, trench‑drain and waterproofing manufacturer specs); (4) Product and material safety documentation and animal‑care guidance (synthetic‑turf & infill SDS, turf/crumb‑rubber studies, pet‑potty manufacturer guides, enzymatic cleaner guidance from animal welfare groups).
What specific planning and regulatory research questions must be answered before designing a patio dog potty?
Ask and document: Does the building code, local municipal code or HOA restrict exterior alterations to patios/balconies? What permit(s) or approvals are required and what application materials (site plan, materials samples, drainage details) will the HOA/ARC or city request? What load limits and structural constraints apply to balconies (use IBC live‑load tables and local ordinance)? Are there restrictions on tying new drains into sanitary or storm systems (consult IPC and local plumbing)? Are there stormwater rules or municipal MS4 prohibiting pet waste discharge into drains or storm system? What setback, visibility, or aesthetic rules will affect placement and materials?
What drainage, grading and base‑preparation research questions and sources are essential?
Determine required finished slope (minimum 1% recommended, 2% safer) and positive drainage direction (municipal guidance). Check subbase and bedding specs for pavers/permeable surfaces (ICPI/PacInterlock manuals). When to use open‑graded subbase or underdrain (PICP/FHWA guidance). Whether you can tie into existing rooftop/deck drains or must provide dedicated trench drains or trays (IPC and waterproofing drain manufacturer specs). Review trench/drain product installation instructions for flange, slope and outlet sizing (manufacturer guides).
What design options should I research and which source types validate them?
Research multiple proven patterns and validate with product/manufacturer and industry guidance: (A) Synthetic‑turf tray over a drainage/collection pan (consult synthetic turf product pages, tray manufacturers and SDS for materials); (B) Gravel‑and‑drain (permeable layer over drainage pipe; consult PICP and FHWA for subbase/drainage design); (C) Paver slab with integrated trench or channel drain (ICPI manuals + channel‑drain manufacturer specs); (D) Planter/green‑strip with hardy grasses or real turf tied to a drainage outlet (landscape and irrigation guides plus drainage manuals). Confirm suitability via manufacturer installation guides, SDS and local code constraints.
What material‑safety and pet‑safety research questions must be answered and where do I find answers?
Identify exact product SDS/MSDS for turf fibers, adhesives, seam glues and infill to check for PFAS, VOCs, heavy metals or other hazards (manufacturer and supplier SDS). Consult EPA reports/studies on crumb rubber and synthetic turf chemical characterization for context. Check animal‑care guidance and veterinary sources on exposure risks. For cleaners and odor products, consult ASPCA/shelter guidance recommending enzymatic cleaners. Always get the SDS for the exact SKU you plan to use before purchase/installation.
What construction and manufacturer specifications must I consult when designing permanent drainage or waterproofing ties on a balcony?
Consult: IBC/structural limits (for added dead/live loads), IPC rules on storm drainage tie‑ins, and the waterproofing/drain manufacturer instructions (Schluter, Kerdi‑Line, etc.) for flange integration, membrane continuity and overflow requirements. Also review trench‑drain product installation guides for concrete encasement, slope and outlet connection details. Obtain local plumbing/structural code rulings if connecting to building drain systems.
How to Relay Patio: Step-by-Step DIY Guide and Time Estimates
How to relay a patio: step-by-step DIY guide with tools, materials, measurements, costs, troubleshooting & safety tips.