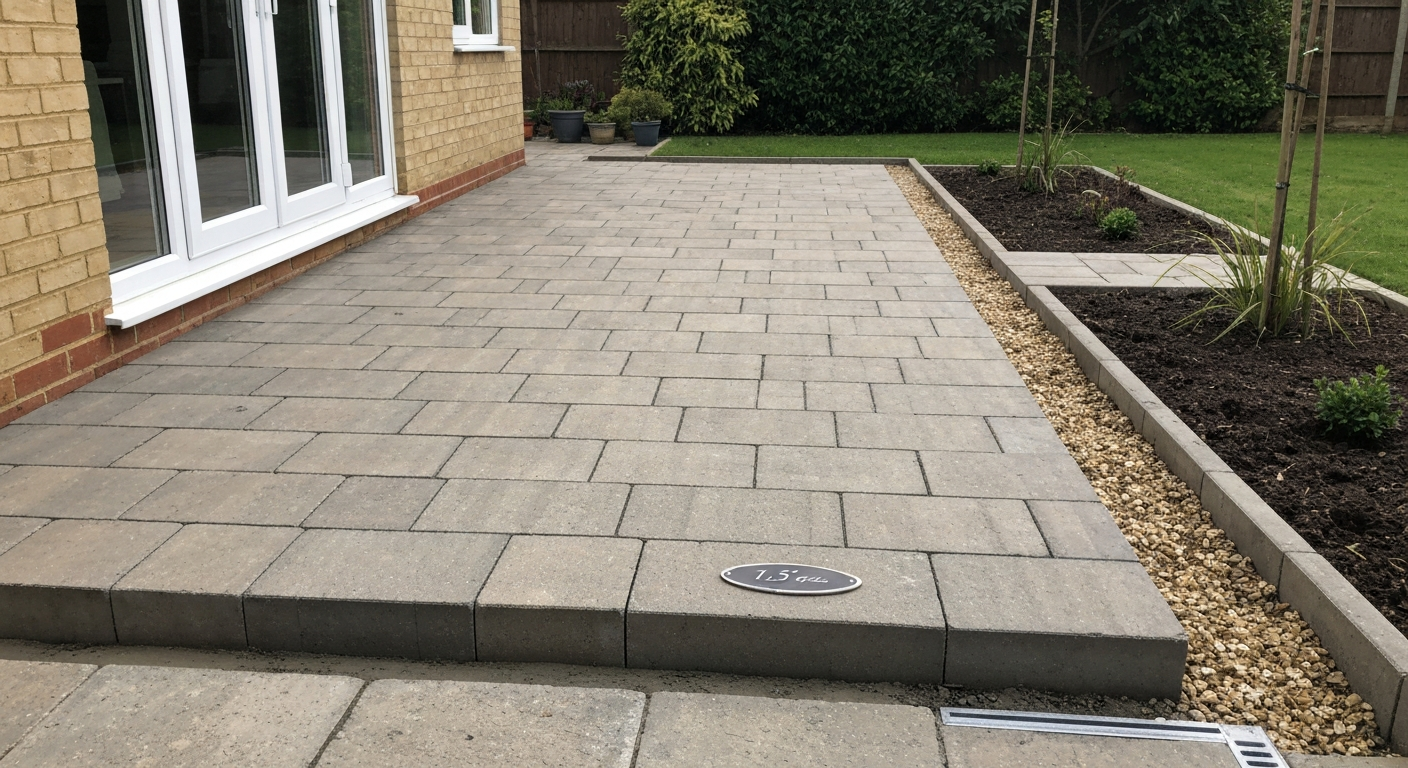
Relaying a patio means lifting the existing surface, fixing whatever went wrong underneath, and re-laying everything properly so it stays put. The job usually takes a weekend to three days depending on size and what you find under the old surface. Whether your slabs are rocking, your block pavers have sunk into a muddy mess, or your gravel has spread itself across the garden over five years, the process follows the same core sequence: lift, fix the base, relay, joint, and drain correctly. I've done this on three different patios now, and each time the biggest lesson was that the surface was never the real problem, the base was.
How to Relay Patio: Step-by-Step DIY Guide and Time Estimates

Nolan Lennox
22 Jul 2026
When relaying is the right call
Not every problem patio needs a full relay. Sometimes a handful of loose slabs or a patch of sunken pavers can be fixed without lifting everything. But there are situations where a partial repair is just delaying the inevitable, and it pays to be honest with yourself before you start.
The clearest sign you need a full relay is widespread settlement, not one or two slabs, but a general sagging or faulting across the area. Pavement engineers use a threshold of around 0.5 in (13 mm) of differential movement between adjacent slabs as a trigger for reconstruction rather than patching. If you see that kind of step-faulting in multiple places, or if slabs rock because the bedding has completely washed out, you're looking at a base failure. Patching on top of that will fail again within a season.
Other clear relay triggers include: water pooling on the surface because the fall has reversed or never existed; frost-heave cracking across more than roughly a third of the area; pavers that have spread laterally because the edge restraints failed; or gravel that has mixed down into the soil until it provides no drainage at all. If your problem is cosmetic, surface staining, faded colour, a few cracked individual units, you probably don't need a full relay. Fix the pointing, replace the broken units, and you're done.
- Widespread rocking slabs or pavers (more than 30% of the surface)
- Differential settlement exceeding about 0.5 in (13 mm) between adjacent units
- Water pooling across the patio surface, especially near the house
- Lateral spread of block pavers due to failed or missing edge restraints
- Visible subgrade failure: mud pumping up through joints or slabs cracking in a pattern
- Gravel patio that has sunk into the soil and no longer drains
- Decking boards that have rotted because joists were sitting in standing water
Plan the job before you lift a single slab
I skipped the planning phase on my first relay. I just started ripping up slabs on a Saturday morning. By Sunday afternoon I had a hole full of water, nowhere to put the rubble, and a utility cable I hadn't known about sitting about 4 inches below where I was digging. Don't be me.
Permissions and regulations
In most jurisdictions, relaying an existing patio on residential property doesn't require a building permit, because you're not changing the footprint. However, if you're relaying with an impermeable surface (concrete, clay pavers, dense-set flagstone) in a front garden or close to a watercourse, local stormwater or impervious-surface rules may apply. Check with your local authority or building department before you start. In the UK, front gardens over 5 sq m paved with non-permeable materials need permitted development approval unless drainage to a lawn or border is provided.
Utility checks
Always call your national utility-locating service before digging. In the US, call 811 at least three business days before you break ground. In the UK, use the LSBUD (now called Search Before You Dig) service. Cables and pipes sit at varying depths, and a patio that was originally poorly installed may have been laid right on top of them. Mark any known utilities with spray paint or flags before you start demolition.
Drainage survey
Look at where the water currently goes and where it should go. The finished surface needs a consistent fall of 1 to 2% away from the house (that's about 1/8 to 1/4 inch per foot, or 10–20 mm per metre). Use a long spirit level and a tape measure to check your existing fall before you lift anything, this tells you whether the original fall was wrong from the start or whether it's failed due to settlement. Note where any drainage channels, gullies, or soakaways connect, because you'll need to reinstate those properly when you relay.
Staking out the patio area
Staking out sounds simple but it's where a lot of people introduce errors that compound through the whole job. The goal is to mark the perimeter of your patio accurately, establish a datum height, and confirm your drainage fall before you dig anything. This is especially important if you're changing the patio shape or size as part of the relay.
- Drive a stake at each corner of the proposed patio, measuring from the house wall or a fixed reference point.
- Run builder's line (string line) between the stakes, pulled tight, to mark the perimeter.
- Use a line level or water level to establish a level reference, then mark your finished surface height on the stakes.
- From the finished surface height at the house wall, calculate your fall: for 1.5% slope, drop 15 mm for every 1 metre of patio depth.
- Mark this lower finished height on the far stakes and re-run the string lines to reflect the fall.
- Check squareness by measuring diagonals — they should be equal for a rectangular patio.
- Mark any drainage channels, utility locations, and the dig-out perimeter on the ground with spray paint.
For more detail on the squaring and levelling process, the staking-out method described here follows the same approach covered in dedicated guidance on how to stake out a patio, which goes deeper on setting profiles and managing slopes on uneven ground.
Staking-out checklist
- Corner stakes driven firmly at all four corners (and intermediate points for curved edges)
- String lines run and tensioned between all stakes
- Datum height marked on a fixed reference stake (e.g., against house wall)
- Finished surface fall calculated and marked (1–2%, 10–20 mm per metre)
- Diagonal measurements checked for squareness
- Utility locations marked on ground with spray paint
- Dig-out depth calculated and marked on stakes (base + bedding + paver thickness)
Tools and materials for every patio type
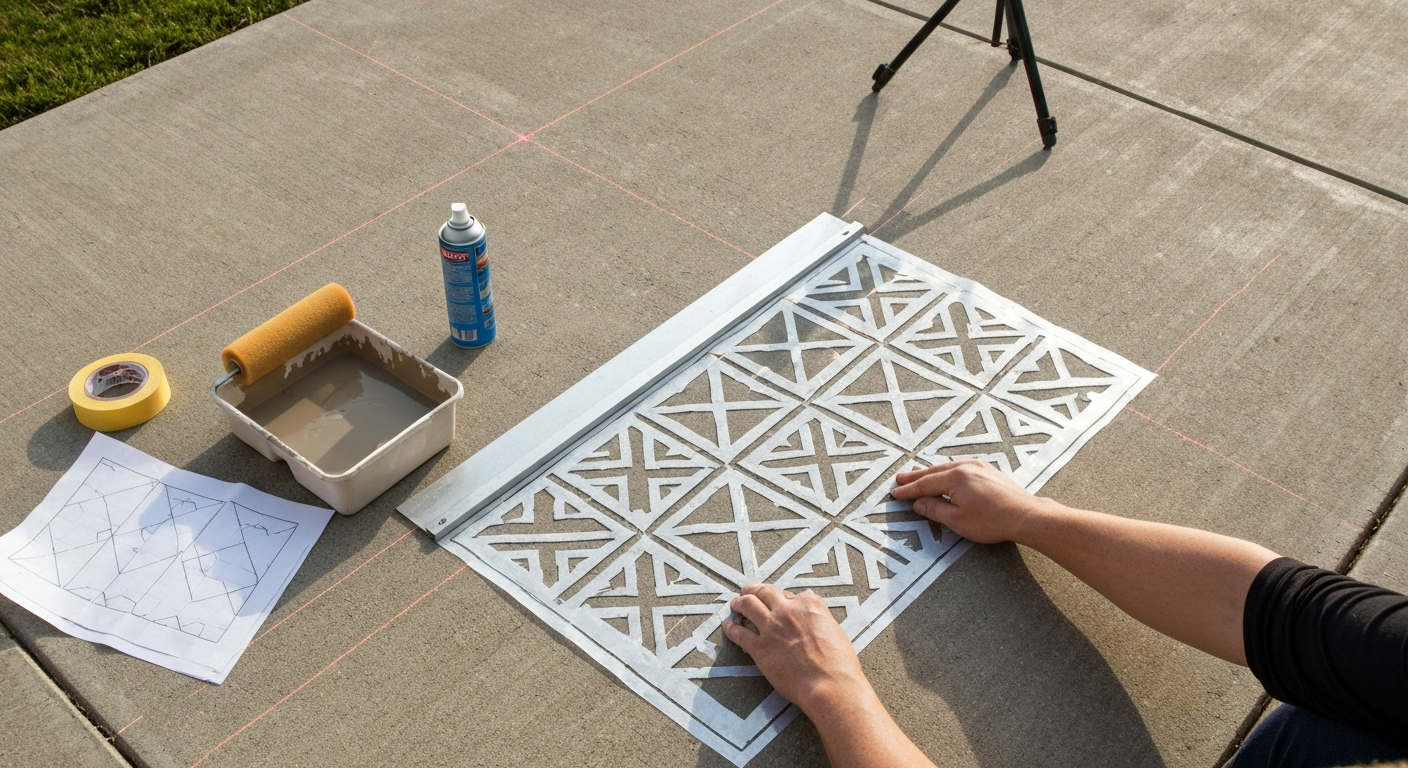
What you need depends heavily on what you're relaying. I've listed tools and materials separately for each main patio type below. Some tools (like a plate compactor and a spirit level) appear on every list, rent the plate compactor rather than buying one unless you plan to use it regularly. If you plan decorative finishes, see a short guide on how to make a patio stencil for painted patterns and motifs.
Concrete slab and mortar-set flagstone
- Tools: angle grinder with diamond blade, cold chisel and lump hammer, electric jackhammer or SDS hammer drill with chisel bit, pry bar, wheelbarrow, plate compactor, long straight-edge or screed rail, rubber mallet, spirit level (1.2 m minimum), line level, builder's trowel, pointing trowel, mixing paddle or cement mixer, buckets, safety glasses, hearing protection, heavy-duty gloves
- Materials: hardcore/crushed stone aggregate (4 in / 100 mm compacted depth minimum), sharp sand for bedding (30–40 mm mortar bed for flagstone; 4 in concrete slab uses ready-mix or site-batched concrete), Type S or Type N mortar (ASTM C270) for flagstone pointing, ready-mix or bagged concrete for slab (4 in / 100 mm minimum thickness), polythene sheet for curing concrete, concrete control-joint former or saw for joints at 8–12 ft (2.4–3.6 m) spacing on a 4 in slab
Sand-set block pavers (concrete or clay)
- Tools: plate compactor (with rubber pad protector for final compaction over pavers), paver splitter or angle grinder with diamond blade, rubber mallet, screed rails (metal or timber), long straight-edge, string lines and stakes, tape measure, broom, push brush, spirit level, knee pads
- Materials: compacted aggregate base (4 in / 100 mm minimum for patios over well-drained soil per ICPI Tech Spec 2), ASTM C33 coarse bedding sand (nominal 1 in / 25 mm screeded depth — never exceed 1.5 in / 40 mm), block pavers, edge restraints (aluminum, HDPE, or concrete haunch), galvanized spikes for plastic edge restraints, polymeric joint sand (follow product TDS for joint depth and width requirements)
Gravel patio
- Tools: plate compactor or hand tamper, rake, wheelbarrow, spade, string lines and stakes, spirit level, utility knife for membrane
- Materials: compacted sub-base hardcore (75–100 mm), weed-control membrane (permeable geotextile), edging restraints (timber, steel, or concrete), decorative gravel or angular crushed stone (20–40 mm depth typical for finish layer)
Timber or composite decking
- Tools: circular saw or mitre saw, cordless drill/driver, spirit level, line level, string lines, tape measure, post-hole digger or spade, rubber mallet, jigsaw for cut-outs
- Materials: deck posts or adjustable pedestals (for ground-level deck), decking joists (treated timber or aluminium), joist hangers and appropriate fixings (stainless steel or hot-dip galvanized), decking boards (pressure-treated timber, hardwood, or composite), hidden clip fasteners or stainless decking screws, post-base hardware and concrete for footings, end-grain sealant for cut timber
Measuring up and estimating materials
Getting quantities right before you order saves a return trip to the supplier and avoids the situation where you're one bag of sand short on a Sunday afternoon with the job half-done.
Start with the area: length (m) x width (m) = square metres. For irregular shapes, break the area into rectangles and add them. Add 10% to your paver, slab, or decking board quantity for cuts and breakage, this is one area where being generous upfront pays off, especially with natural stone where you'll get more awkward cuts.
| Material | How to calculate quantity | Typical depth/coverage |
|---|---|---|
| Aggregate sub-base | Area (m²) × depth (m) × 1.3 (compaction factor) | 100 mm (4 in) compacted minimum for patios |
| Bedding sand (sand-set pavers) | Area (m²) × 0.025 m (1 in) × 1.2 (loose factor) | Nominal 25 mm (1 in) compacted; never exceed 40 mm |
| Mortar bed (flagstone) | Area (m²) × 0.035 m average | 30–40 mm bed thickness |
| Concrete slab | Area (m²) × 0.1 m (4 in) × 1.05 waste factor | 100 mm (4 in) minimum residential |
| Block pavers / slabs | Area (m²) × 1.1 (10% extra for cuts) | As per unit specification |
| Polymeric sand | Manufacturer's coverage table by joint width/depth | Typically 80–100 lb covers 50–75 sq ft at standard joint width |
| Gravel (finish layer) | Area (m²) × 0.035 m × 1.3 (settlement factor) | 25–40 mm finish depth after settling |
| Decking boards | Linear metres of run ÷ board width × 1.1 (waste) | As per board specification |
For bedding sand, a useful mental shortcut: one tonne of coarse sand covers roughly 18–20 square metres at the nominal 25 mm (1 in) compacted depth. For aggregate base, one tonne of crushed stone covers about 8–10 square metres at 100 mm compacted depth. These are rough guides, always check with your supplier, as material density varies.
Safety and site prep before you start
Relaying a patio involves heavy lifting, concrete, sharp-edged materials, and power tools. It's not a particularly dangerous job if you respect the hazards, but I've seen people put their back out on the first day and spend the rest of the weekend watching the job half-done in the rain.
- PPE minimum: safety glasses (always when cutting or using a jackhammer), heavy-duty work gloves, steel-toecap boots, knee pads for extended slab work, hearing protection when using angle grinders or jackhammers
- Wear an FFP2/N95 dust mask or better when cutting concrete, stone, or pavers — silica dust is a serious lung hazard with cumulative effects
- Use a wet-cutting method with an angle grinder where possible to suppress silica dust
- Clear the work area: remove garden furniture, pots, and any loose items; tell other people in the household the site is active
- Stack removed slabs safely — don't lean large slabs against fences or walls without support; they can topple suddenly
- Protect utility locations you've marked: don't drive tools or equipment over marked lines
- Keep the dig-out area fenced off or clearly marked if children or pets have access to the garden
- Handle cement and mortar with gloves — prolonged skin contact causes chemical burns
- Plan your skip or waste disposal before demolition, not after — a 10 m² patio produces more rubble than most people expect
Removing the existing patio: step-by-step demolition
Demolition is satisfying but it's also where most injuries happen and where you generate a lot of material that needs to go somewhere. Work systematically and don't rush it.
Lifting sand-set block pavers or dry-laid slabs
- Start at one edge or corner — if you have plastic edge restraints, remove them first by pulling the spikes.
- Work a flat pry bar or wide bolster chisel into a joint and lever the first paver out. Once you have one out, the rest follow easily.
- Stack pavers on timber or pallets nearby — pavers that aren't cracked can almost always be re-used, so stack them carefully.
- Shovel out the existing bedding sand into a wheelbarrow and remove it completely. Don't re-use old bedding sand — it's contaminated with fines and will not compact or drain correctly.
- Rake out and inspect the sub-base. If the aggregate base is well-compacted, clean, and sitting at the right level, you may be able to re-use it. If it's mixed with sand, soil, or shows signs of pumping, dig it out too.
- Dispose of contaminated sand and base material. Clean aggregate can often be re-used as fill elsewhere; soiled material should go in a skip.
Breaking out a mortar-set slab or concrete patio
- Score around the perimeter of individual slabs with an angle grinder and diamond blade if they're bedded in mortar — this breaks the bond and reduces the effort needed to lift.
- Use an SDS hammer drill with a wide chisel bit or an electric jackhammer to break the bond between the slab and the bed. Work from the edge inward.
- Lever each slab up with a pry bar once the mortar bond is broken. Two people makes this much safer on large slabs — flagstone can easily weigh 50–100 kg.
- For a poured concrete slab, use the jackhammer to break it into manageable pieces (roughly 30–50 cm chunks). Work in rows across the slab.
- Expect concrete to break unevenly. Don't stand on pieces that are partially broken — they can shift and trap feet.
- Remove all the broken mortar bed and scrape the sub-base clean. Old mortar lumps left in the base will create high spots under the new layer.
- Hire a skip or arrange a heavy-debris collection. Concrete and natural stone are among the heaviest construction materials — a 15 m² concrete slab at 100 mm thickness weighs roughly 900–1,000 kg.
Removing a gravel patio
- Rake and shovel the gravel into a wheelbarrow and remove it. If it's clean, it can be re-used or used elsewhere in the garden.
- Lift and remove the old weed membrane. Cut it into manageable sections with a utility knife.
- Remove or cut back any edging that is damaged, badly positioned, or at the wrong height.
- Inspect the soil below. If gravel has mixed into the soil layer, you'll need to excavate the contaminated layer and start fresh with clean sub-base material.
Removing decking
- Unscrew or pry off the decking boards starting at one edge. Hidden clips can be released by running a flat bar along the joist.
- Label or photograph the joist layout before removing boards so you can identify which joists need replacing.
- Inspect every joist for rot before deciding what to keep. Probe with a screwdriver — soft spots indicate decay even if the surface looks okay.
- Remove rotten joists and posts. Cut them into sections for easier disposal.
- If posts sit in ground sockets or have footings, assess whether those can be re-used or need resetting. Leaning or cracked post bases should always be replaced.
Preparing the base: the stage most DIYers underdo
Every relay I've seen fail in the first few years failed here. The surface materials get the attention, but the base is where the job is won or lost. Getting the depth, compaction, and drainage right at this stage is what separates a patio that's still flat in ten years from one you'll be relaying again in three.
Sub-base for sand-set block pavers
- Excavate to a depth that allows for the compacted sub-base (minimum 4 in / 100 mm for patios on well-drained soil per ICPI Tech Spec 2), plus 1 in (25 mm) of bedding sand, plus the paver thickness. A typical 60 mm paver over a 100 mm base needs roughly 185 mm of total excavation below finished surface.
- If the native soil is soft, clay-heavy, or has poor drainage, increase your base to 6 in (150 mm) or more, and consider a geotextile separation layer between the soil and the aggregate.
- Place crushed stone aggregate base in layers no deeper than 4–6 in (100–150 mm) loose before compaction. Compact each lift with a plate compactor before adding the next. Never dump the full depth in and compact once — you won't achieve compaction at the bottom.
- Aim for a compacted density of at least 95% of standard Proctor maximum dry density on the subgrade and base. For a DIYer without a nuclear density gauge, the practical test is: after several passes with the plate compactor, the surface should not visibly deflect under foot and the compactor should not be leaving marks.
- Screed the bedding sand to a nominal 1 in (25 mm) compacted thickness using screed rails. Loose depth for screeding is about 1.2 in (30 mm). Do not compact the bedding sand before laying pavers — it's screeded, not compacted at this stage.
- Never exceed 1.5 in (40 mm) of bedding sand under block pavers. Excess bedding sand leads to settlement and rocking units.
- Use ASTM C33 coarse concrete sand or equivalent clean, angular bedding sand. Do not use stone dust, decomposed granite, or fine masonry sand — they don't drain or compact correctly under pavers.
Sub-base for mortar-set flagstone
- Excavate to allow for 4 in (100 mm) compacted hardcore or crushed stone base, plus a 30–40 mm full mortar bed, plus the flag thickness.
- Compact the sub-base in lifts as above. The mortar bed does not compensate for a poorly compacted base.
- For variable-thickness natural flags (which most natural stone is), a full mortar bed is required rather than a sand bed. Dry-laying variable-thickness flags on sand creates rocking units. Use a full mortar bed of Type S or similar mortar at 30–40 mm depth per BS 7533 guidance.
- Dampen the sub-base lightly before laying the mortar bed to prevent the base absorbing water from the mortar too quickly.
- Butter the back of each flag lightly with mortar for good adhesion, especially on large or thick flags.
Sub-base for poured concrete slab
- Excavate and compact the subgrade. Place a minimum 4 in (100 mm) compacted aggregate base.
- Lay a polythene vapour barrier (1000 gauge / 250 micron) over the base before pouring. Lap joins by at least 300 mm.
- Set timber formwork at the correct height, accounting for the 1–2% drainage fall. Check with a level across the formwork before pouring.
- For a residential patio, a minimum 4 in (100 mm) slab thickness is the industry standard per ACI guidance. For poor soils or if any vehicle loads are possible, increase to 5–6 in (125–150 mm).
- Place control joints at approximately 8–12 ft (2.4–3.6 m) intervals for a 4 in slab (roughly 2–3 times the slab thickness in feet). Joints should be cut to at least 1 in (25 mm) depth — one quarter of the slab thickness.
- If saw-cutting joints rather than using formed joints, cut within 4–18 hours of pour depending on conditions — sooner in hot or windy weather.
- Cure the concrete with wet burlap and polythene sheet or a curing compound for at least 7 days.
Sub-base for gravel patio
- Excavate 75–100 mm below the desired finished gravel surface.
- Compact the soil sub-base with a hand tamper or plate compactor.
- Install edge restraints first — timber, steel, or concrete edging at the correct height to contain the gravel.
- Lay a permeable geotextile weed-control membrane, overlapping joins by at least 200 mm and folding up behind edging.
- Add a 75 mm layer of compacted hardcore or MOT Type 1 sub-base if the area had drainage problems previously. Compact before adding gravel.
- Spread decorative gravel to 25–40 mm depth over the membrane. Angular gravel locks together better underfoot than rounded pea gravel.
Sub-base for decking
- Clear all vegetation and organic material from under the deck footprint.
- Lay weed-control membrane on the soil and cover with gravel to allow drainage and prevent weeds growing up through the deck.
- Set new post footings or adjustable pedestals at correct heights to achieve the finished deck level with the specified fall (1–2% away from the house).
- For posts in concrete footings, allow a minimum 28 days curing before loading. Use galvanized post-base hardware to keep the timber post above the concrete surface and prevent rot.
- Run joists with maximum spans per your decking board manufacturer's specification. Most 25 mm composite or timber decking boards need joist spacing of 400–600 mm centres.
Relaying the surface: material by material
Block pavers
- Install edge restraints before laying any pavers. Plastic or aluminium edge restraints go in at the correct finished height on all sides with galvanized spikes at 300 mm intervals. Concrete haunches can be poured and cured in advance.
- Start laying from a straight edge or corner, working across the screeded sand bed. Do not walk on the screeded sand — lay a board to kneel on.
- Lay each paver with a firm downward press — don't slide them sideways, which drags the sand. Use the rubber mallet to tap them level.
- Maintain consistent joint gaps (typically 2–5 mm for block pavers) using the paver's spacer nibs or by eye.
- Cut pavers to fit at edges using an angle grinder with a diamond blade or a paver splitter. Always wet-cut or use extraction for silica dust control.
- Once all pavers are laid, compact the whole surface with a plate compactor fitted with a rubber or neoprene pad to protect the paver faces. Make at least two to three passes in different directions.
- Sweep dry polymeric sand into the joints, making at least two or three passes with a broom. Blow off any excess from paver faces before wetting.
- Activate the polymeric sand by misting with water per the product TDS — typically two or three passes with a fine mist. Do not use full water pressure or flood the surface. Allow to cure per the manufacturer's instructions (usually 24 hours minimum before foot traffic, 48–72 hours before furniture).
- Note: polymeric sand requires paver surfaces and joints to be completely dry before application, ambient temperature above 32°F (0°C) and ideally above 41°F (5°C), and no rain forecast for the curing window. Check the product TDS — these details vary by brand.
Mortar-set flagstone
- Lay flags in a dry run first to plan the layout and check cuts before committing to mortar.
- Mix mortar to Type S proportions (approximately 1 part cement: 0.5 part lime : 4.5 parts sand by volume, or follow ASTM C270) to a firm but workable consistency.
- Lay a full mortar bed of 30–40 mm and bed each flag firmly with a rubber mallet, checking level and fall with a spirit level constantly.
- Leave gaps for joints at 8–15 mm depending on the style. Allow the bed to cure for 24 hours before walking on laid flags or pointing joints.
- Point the joints with a slightly stiffer mortar, pressing it firmly into joints with a pointing trowel and finishing to a slightly recessed or weathered joint profile.
- Keep mortar off flag faces — clean any smears with a damp cloth immediately. Dried mortar on natural stone can stain permanently.
Repointing existing flagstone
If you're relaying flagstone but the flags themselves are in good condition and well-bedded, you may only need to repoint the joints rather than fully relay. UK trade guidance and BS 7533 recommend full mortar‑bedding (typically ~30–40 mm) for many natural flagstones, see UK trade guidance / BS 7533 references for full mortar-bed flagstone installation for details. Rake out old mortar to a depth of at least 15–20 mm with an oscillating tool or grinder. Brush out dust, dampen the joints, and apply fresh mortar. This is closely related to the technique covered in best-way guidance for pointing a patio, which covers joint profiles and mortar mix options in more detail.
Edge restraints, haunching, and drainage corrections
Edge restraints are not optional for sand-set paving. Without them, the pavers will slowly creep outward, joints will open, and the surface will fail. ICPI Tech Spec 3 is clear: continuous restraint is required on all free edges of sand-set paving. For a patio, this usually means plastic or aluminium edging on any edge not contained by a wall, step, or other fixed structure.
If you're using a concrete haunch (a cast concrete curb or collar along the edge), form and pour it before you lay bedding sand. The haunch should be keyed into the base layer, not sitting on top of it, and should come to within 5–10 mm of the finished paver surface. ICPI Tech Spec 3 (Edge Restraints) shows poured concrete collars or curbing keyed into the base to provide lateral restraint and provides dimensioning and placement guidance relative to the base and finished paver elevation blank" rel="noopener noreferrer">ICPI Tech Spec 3 (Edge Restraints) – examples and details. Give concrete haunches at least 48 hours to cure before spreading bedding sand against them.
Drainage corrections during a relay are your best and often only opportunity to fix falls and redirect surface water properly. For pet owners, see our guide on how to make a patio dog potty for simple, drainage-friendly designs and placement tips. As you're preparing the base, check your string lines and levels repeatedly. The target fall of 1–2% (about 10–20 mm per metre) must be consistent across the whole surface. A patio that drains well from the centre but collects water near the house wall because the fall reversed is a common failure. If there's an existing drainage channel or gully at the low point of the patio, clear it out, check it drains freely, and make sure your finished surface directs water toward it.
Replacing broken or damaged individual units
Sometimes a relay is only partial, you're replacing a section of cracked slabs or a run of sunken pavers while the rest is sound. The method is the same as a full relay but contained to the problem area.
- Mark the area to be replaced with chalk or spray paint.
- For sand-set pavers, remove the units individually with a pry bar. For mortar-bedded slabs, break the mortar bond with an SDS chisel before levering.
- Dig out the base to the required depth and inspect. If the sub-base under the failed area is contaminated or settled, excavate and replace it. Don't just add new bedding sand on top of failed base.
- Compact any new base material in layers before screeding bedding sand.
- Re-lay the replacement units following the same method as a full relay, matching the level and fall of the surrounding surface.
- For block pavers, re-compact after laying and sweep in fresh polymeric or kiln-dried sand to refill joints.
Common problems and how to fix them
| Problem | Likely cause | Fix |
|---|---|---|
| Pavers rocking after relay | Excess bedding sand (over 40 mm) or uneven screeding | Lift the rocking units, re-screed to nominal 25 mm depth, re-lay and compact |
| Water pooling on surface | Insufficient or reversed fall in base/bedding | Lift affected area, re-screed with correct fall, re-lay |
| Joints opening up over time | Missing or failed edge restraints; no polymeric sand | Install or replace edge restraints, re-fill joints with polymeric sand |
| Slabs cracking after concrete relay | Control joints missing; slab too thin; base not compacted | Saw control joints into existing slab; for future, increase slab thickness and base compaction |
| Polymeric sand washes out | Applied to wet surface; wet weather during cure; incorrect activation | Remove and replace; ensure dry surface and dry forecast; follow product TDS exactly |
| Gravel migrating out of area | Edge restraints too low or absent | Install or raise edging; re-spread contained gravel |
| Decking boards cupping or twisting | Poor drainage under deck; boards installed with wrong face up | Improve drainage under deck; replace severely cupped boards; ensure boards are fixed with correct orientation |
| Settlement returning in same spot | Subgrade failure not fixed; organic material left in base | Excavate fully, remove all organic material, compact subgrade thoroughly, rebuild base correctly |
Realistic time and cost ranges
These ranges assume a 20–25 m² residential patio and one competent DIYer with occasional help. Actual costs vary significantly by region, material supplier, and what you find under the existing surface.
| Patio type | DIY time (20–25 m²) | Typical material cost (USD) | Main cost drivers |
|---|---|---|---|
| Sand-set block pavers | 2–3 days | $800–$2,500 | Paver cost, edge restraints, polymeric sand, skip hire |
| Mortar-set flagstone | 3–4 days | $1,200–$4,000+ | Natural stone cost, mortar, equipment hire |
| Poured concrete slab | 2 days + 7 days curing | $700–$1,800 | Ready-mix or bagged concrete, formwork, saw-cutting |
| Gravel patio | 1 day | $200–$600 | Gravel, membrane, edging |
| Timber/composite decking | 2–4 days | $1,500–$5,000+ | Board cost (composite costs 2–3x timber), hardware, footings |
Skip or dumpster hire for demolition waste adds $200–$400 in most areas for a patio-sized job. Plate compactor hire runs $80–$150 per day. If you discover the sub-base needs full replacement rather than just compaction, add the cost of 1–2 tonnes of crushed stone aggregate per 10 m².
When to call a contractor instead
Most relay jobs are solidly within DIY range if you're comfortable with physical work and basic tool use. The situations where I'd genuinely recommend calling a professional are: widespread subgrade failure requiring engineered fill or drainage works; patios over utilities where precise depth control is critical; any situation involving retaining walls or significant level changes; and poured concrete jobs where you want a pump truck or large ready-mix delivery, which moves fast and needs experienced hands. There's no shame in getting quotes for those parts of the job even if you tackle the rest yourself.
Keeping it right: maintenance after relaying
The point of doing a relay properly is that you shouldn't have to do it again for a long time. Block paver joints should be topped up with polymeric sand every two to three years or whenever joints drop below the paver surface. Check the perimeter edge restraints annually and re-spike any that have shifted. Repoint mortar-jointed flagstone or concrete slabs every five to ten years depending on exposure, for guidance on that process, the detail on best way to point a patio covers joint preparation and mortar options. Keep drainage clear: clear channels, check falls with a hose twice a year, and clear debris from any linear drains. For decking, apply a preservative or UV-stable oil annually on timber boards, and clear gaps between boards to prevent moisture retention.
FAQ
When is relaying a patio the right choice versus full replacement?
Relaying is appropriate when the surface units (pavers, flags, slabs) are sound but the bedding/base or jointing has failed, causing localized settlement, rocking, unevenness or lifting. Choose replacement when you have: widespread subgrade failure, pumping/undermining, rutting, settlement/faulting greater than about 1/2 in (13 mm) across multiple areas, extensive cracking in cast concrete slabs, or when the base thickness is insufficient for intended loads. Use relaying for sections, spot repairs, or when units can be reused intact.
What diagnostics and measurements should I take before starting?
Record patio footprint (length × width), average unit sizes, current surface slope, and maximum differential levels (use a 6–10 ft straightedge/spirit level). Measure unit thicknesses and joint widths. Probe subbase by removing one unit to check base depth and material; measure compacted base thickness. Note drainage: slope away from structure should be 1–2% (1/8–1/4 in/ft) minimum; locate any standing-water spots. Photograph areas and mark utilities. These data determine quantities of base, bedding sand, edge restraint, and time/cost.
What tools are required for relaying different patio types?
Common tools: shovel, pick mattock, rubber mallet, pry bar, mason’s hammer, utility knife, circular saw with diamond blade (for cutting concrete/flagstone), angle grinder, wheelbarrow, plate compactor (4–6 in plate) or vibratory plate, spirit level, 4–10 ft straightedge, string line and stakes, tape measure, broom, tamper, garden hose with spray nozzle. Concrete/flagstone-specific: mortar mixer, pointing tools, jointer, cold chisel. Block-pavers: brick joiner, polymeric-sand broom, compactor with neoprene pad. Gravel: rake, compactor, geotextile. Decking: circular saw, drill/driver, jigsaw, joist level, posthole digger. PPE: gloves, eye/ear protection, dust mask, kneepads, steel-toe boots.
What materials and specifications do I need for different patio types?
Block pavers: Compacted aggregate base typically 4 in (100 mm) minimum for pedestrian patios (increase to 6 in /150 mm for heavier loads or poor soils) placed in 4–6 in lifts; coarse ASTM C33 or ICPI-specified bedding sand screeded to a nominal 1 in (25 mm) compacted thickness (do not exceed 1.5 in /40 mm); edge restraints (concrete, metal, HDPE or haunched curb); polymeric joint sand or dry jointing sand. Concrete/flagstone: For cast concrete slabs, minimum 4 in (100 mm) slab with reinforcement per code; control joints spaced ~2–3× slab thickness in feet (8–12 ft for 4 in slab). For mortar-bedded flagstone use full mortar bed (30–40 mm) or follow manufacturer/BS 7533; mortar per ASTM C270 (select type N/S/M as required). Gravel: geotextile fabric, compacted aggregate base, angular drain gravel surface layer; provide edging. Decking: pressure-treated or rot-resistant joists, suitable decking boards, joist hangers, corrosion-resistant fasteners, footing/piers below frost line per local code. For all: ensure edge restraint and slope (1–2% away from structures). Follow ICPI Tech Spec 2 & 3 for pavers and edge details.
Step-by-step: how to remove patio units safely and efficiently
1) Clear furniture/plants and mark utilities. 2) Remove jointing (polymeric sand or mortar) with a chisel, grinder or joint raker; for polymeric sand, break bonds with a stiff broom then remove. 3) Start at an edge or corner; pry up units with a pry bar and tap with a mallet to loosen. 4) Stack removed units on pallets or boards to prevent damage and sort by type/size. 5) For concrete slabs or mortar-fixed flagstones, score/cut control joints or use saw to break large elements into manageable pieces—use proper PPE, dust control (wet cutting) and disposal plan.
Step-by-step: how to re‑build base and bedding for block pavers
1) Excavate to accommodate new base + bedding + pavers + edge restraint (typically base + bedding ≈ 4 in base + 1 in bedding + paver thickness). 2) Compact subgrade to ≥95% of Proctor (or to local spec) using plate compactor; remove soft spots and replace with compacted aggregate. 3) Place aggregate base in 4–6 in lifts; compact each lift to spec. 4) Screw on/lay geotextile if required. 5) Screed bedding sand to nominal 1 in (25 mm) compacted thickness using screed rails and strike board—do not over‑screed. 6) Lay pavers tightly, using string lines for alignment. 7) Install edge restraints and haunch them with concrete where required. 8) Compact pavers with a plate compactor fitted with a protective pad. 9) Joint with polymeric sand or dry sand per product TDS and clean/activate as instructed.
Next Article
How to Make a Patio Stencil: DIY Designs, Cutting & Use
Design, cut and use durable patio stencils for painting, staining, and precise paver layout and jointing.