Staking out a patio means driving stakes and running string lines to define exactly where your patio will sit, how level it will be, and how it will drain before you ever break ground. Get this step right and the rest of the build falls into place. Skip it or rush it and you end up relaying slabs on a low corner that floods, or pulling up a finished edge because it crept six inches into a flower bed. I've made both mistakes, and a solid stakeout is the single best hour you can spend before a patio project.
How to Stake Out a Patio for Homeowners: Step-by-Step Layout Guide

Nolan Lennox
24 Jul 2026
Why staking a patio actually matters
A stakeout does three things at once: it locks in your layout dimensions so your patio fits the space you planned, it lets you set the finished surface elevation and slope so water drains away from your house, and it gives you a removable reference you can come back to after you've dug out 6 inches of soil. Once your strings are up, every excavation depth, every base layer, every edge restraint position is measured from those lines. That's not optional precision for a professional finish: it's what separates a patio that lasts a decade from one you'll be relaying in three years.
Everything you need before you start
You don't need expensive gear for a DIY stakeout. Here's the practical kit I use on every patio layout, whether it's a simple 10x12 gravel pad or a larger paver terrace:
- Mason's string (braided, brightly colored) — at least 100 ft
- String line level (small bubble level that clips to the string) — fine for patios up to about 15 ft; use a rotary or laser level for longer runs
- Tape measure — 25 ft or longer
- Plumb bob — for dropping string intersections straight down to the ground
- Spray paint or chalk line — for marking the rough outline on grass/soil before batter boards go up
- Wooden stakes — 2x2 or 2x4, at least 18 inches long, for batter board posts
- 1x4 or 1x6 boards, cut to roughly 24 inches each — the horizontal crosspieces on batter boards
- Rebar or steel survey stakes (12–18 inch) — for final corner markers that stay in place through excavation
- Hammer or small sledge
- Nails or screws (16d nails work well for attaching crossboards)
- Pencil or marking knife — for scoring exact string positions on batter boards
- Calculator or phone — for slope math and diagonal checks
- Safety glasses and gloves
Optional but genuinely useful: a rotary laser level with a rod and receiver for patios over 15–20 feet, a 4-foot spirit level, and a speed square or framing square for checking corners before you commit to batter boards.
Planning, permits, and staying safe before a single stake goes in
Before you mark anything on the ground, two calls are non-negotiable. First, check with your local municipality about permits. Many areas require a permit for patios over a certain size, especially if you're building within a setback, adding footings, or connecting to a structure. It's a short conversation and skipping it can mean tearing up finished work later. Second, and more urgently: call 811 (in the US) at least three business days before you dig. This is the national "call before you dig" number that dispatches utility locators to mark buried gas, electric, water, and telecom lines. It's free. Hitting a gas line is not.
If there are mature trees near your planned patio, take them seriously. Tree roots typically extend well beyond the drip line, and driving rebar or excavating through a major root can damage or kill a large tree. As a rule, stay outside the drip line when you're placing stakes, and if excavation is needed close to a trunk, use a hand tool rather than a mechanical plate compactor or trencher in that zone. I once undermined a 40-year-old oak by over-excavating too close to the base; it dropped a major limb the following summer. Not worth it.
Measuring the site: get your dimensions right the first time
Start by measuring from the house (or whatever structure you're working off) out to the planned edge of your patio. Write these numbers down, not just in your head. A notepad or a quick photo of a sketch on paper is enough. Measure width across the house facade and depth out into the yard at both ends. If your house wall isn't perfectly straight, measure from the same reference point (usually a door threshold or corner) consistently.
Also measure any obstacles inside the footprint: downspouts, existing posts, air conditioner pads, raised beds you're working around. Note those locations relative to your reference corner. A rough sketch with dimensions doesn't need to be to scale, but it should capture every measurement you took. You'll refer back to it when you're setting batter boards and when you're computing excavation depths later.
Common patio sizes to keep in mind as reference: a comfortable seating patio starts at around 10x12 feet (120 sq ft), a dining patio with a table and chairs for four needs at least 12x14 feet, and a generous entertaining space is 16x20 feet or larger. Whatever your size, record both outside dimensions and check that they'll leave enough clearance from property lines.
Squaring the layout: the 3-4-5 method and diagonal check
A patio that's 3 inches out of square looks fine as empty dirt and terrible once you've laid 200 pavers. The simplest way to confirm a true 90-degree corner is the 3-4-5 right-triangle method. Run one string line along the house (or your first reference edge). At a corner point, run a second string line perpendicular to it. From that corner, measure 3 feet along one string and 4 feet along the other, and mark both points. The diagonal between those two marks should be exactly 5 feet. If it isn't, adjust the second string until it is. You can scale this up: 6-8-10 or 9-12-15 work the same way and give you more accuracy over longer runs.
The diagonal check is your verification: once all four corners are set, measure the diagonal from corner A to corner C, then from corner B to corner D. If those two measurements match, your layout is square. If they don't, shift one corner string along its batter board until both diagonals are equal. For a 12x16 patio, both diagonals should be 20 feet exactly (a 12-16-20 Pythagorean triple). Do this check before you touch a shovel.
Picking the right stakes and anchors
Not all stakes serve the same role in a patio layout, and using the wrong type in the wrong spot will cost you accuracy or lead to strings shifting mid-project.
| Stake Type | Best Use | Typical Size | Notes |
|---|---|---|---|
| 2x2 or 2x4 wooden stake | Batter board posts | 18–24 inches long | Drive at least 12 inches into soil; easy to adjust and pull later |
| Rebar (1/2 inch) | Permanent corner hub markers | 12–18 inches long | Resists accidental kicks and survives excavation; mark top with flagging tape |
| Steel survey pin | Corner and offset markers on hard ground | 12 inches long | More precise than rebar; good for rocky or compacted sites |
| Plastic landscape stake | Edge restraint anchoring after base is set | 8–10 inches long | Spaced ~12 inches on-center to lock paver edging in place |
For batter board posts, I prefer 2x4 over 2x2 because they're stiffer and less likely to flex when the string is tensioned. Drive them at least 12 inches into the soil at an angle slightly away from the layout, which helps resist the inward pull of a tight string line. For corner hubs, once you've confirmed your layout is square, drive a piece of rebar at each corner and mark the top with bright flagging tape so you can find it after excavation. Don't rely on wooden stakes for this: one boot catches them and your reference is gone.
Setting batter boards and spacing your stakes correctly
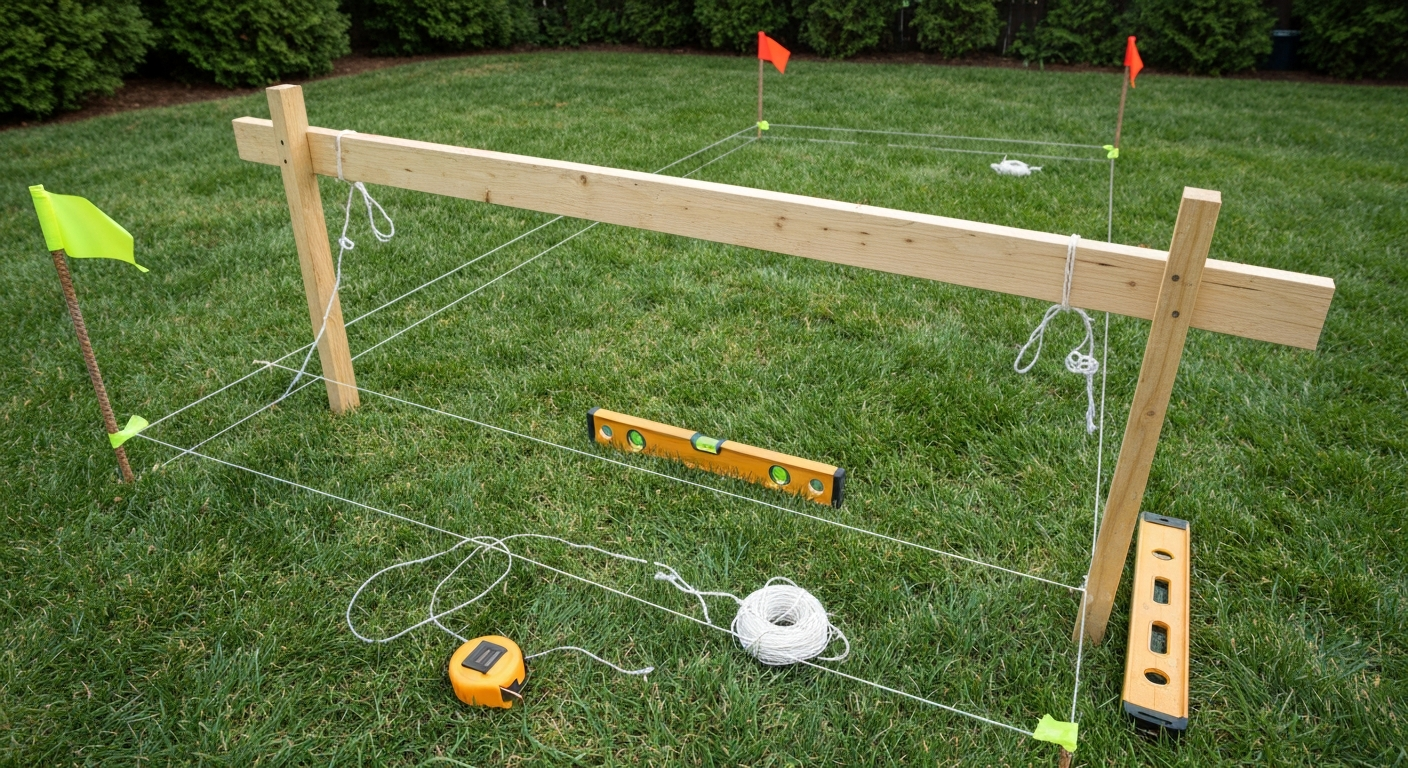
Batter boards are the workhorses of any patio layout. A batter board is simply a pair of wooden stakes driven into the ground with a horizontal board nailed across them, positioned outside and beyond each corner of your planned patio. InspectAPedia, Batter boards & string layout (layout/grade workflow) describes the standard step‑by‑step staking workflow contractors use, including installing batter boards 2–6 ft outside planned edges and running mason’s string to set lines, square, and grade InspectAPedia — Batter boards & string layout (layout/grade workflow). Your layout strings attach to these boards, not to the patio corners themselves, so you can remove strings while you dig and re-attach them in exactly the same position afterward.
Set each batter board 3 to 6 feet outside the planned patio edge. This clearance keeps them out of the excavation zone. For each corner of a rectangular patio, you'll have two batter boards forming an L-shape, one covering each edge that meets at that corner. That means a four-corner rectangle needs eight batter boards total. Use a 1x4 or 1x6 crossboard nailed between two 2x4 stakes. Make the crossboard level (check with a small spirit level) and at approximately the elevation of your finished surface or just above it. Score a pencil line or cut a small notch on the crossboard where each string sits, so you can re-tie to the exact same spot.
For longer patio edges (over 12–15 feet), a single string between two batter boards will sag slightly from its own weight and gravity. To prevent this, drive an intermediate support stake at the midpoint of any run longer than about 12 feet and prop the string up from below with a small block of scrap wood. This prevents a bowed string from giving you a false read on level or elevation.
Running string lines: tension, level, and marking your elevations
Tie your mason's string to a nail or screw on the first batter board crosspiece, run it across to the opposite batter board, and wrap it around a second nail. Pull it snug but don't over-tension to the point of bending the crossboard. A line level clipped to the midpoint of the string (not near either end) will give you a reasonably accurate read for runs up to about 15 feet. For anything longer, a rotary laser level is worth borrowing or renting: it'll transfer the same elevation consistently around all four sides of a larger patio without accumulating the small errors that a line level introduces over distance.
Your strings serve double duty: they mark both the finished surface elevation and, by calculation, the top-of-base elevation. For a sand-set paver patio, your base is typically 4–6 inches of compacted aggregate plus 1 inch of bedding sand. If your string represents the finished paver surface, you need to excavate to a depth equal to the paver thickness plus 1 inch of sand plus the compacted base depth. Mark this total excavation depth on a stake with a felt-tip pen so your crew (or your own memory three hours into digging) doesn't have to do the math in the hole.
Setting your slope in the string lines
For paver and concrete patios, the standard is a minimum slope of 1/4 inch per foot away from the house or any structure. That translates to a 2% grade. For a wood or composite deck surface, 1/8 inch per foot (about 1%) is the common minimum. To build this into your strings: measure the total run (depth of patio from house to outer edge), multiply by 1/4 inch, and set the outer batter board string that amount lower than the inner string at the house side.
| Patio Depth | Slope at 1/8" per ft (1%) | Slope at 1/4" per ft (2%) | Slope at 1/2" per ft (4%) |
|---|---|---|---|
| 8 ft | 1.0" | 2.0" | 4.0" |
| 12 ft | 1.5" | 3.0" | 6.0" |
| 16 ft | 2.0" | 4.0" | 8.0" |
| 20 ft | 2.5" | 5.0" | 10.0" |
Set your reference string at the house-side elevation first, then calculate the drop to the outer edge using the table above. Lower the outer batter board string by that amount and re-check level: it should read as an intentional off-level once your slope is built in. Tie a piece of colored flagging or wrap a bit of tape around the string at the low end to remind yourself this isn't an error; it's your drainage slope. You can also use a laser level to mark the required drop at the outer batter board rather than relying on string-level math.
Using a plumb bob to transfer corners to the ground
Once your strings are tensioned, squared, and sloped, hold a plumb bob directly beneath each string intersection (corner) and let it settle. Mark the spot on the ground with a nail, a small wooden stake, or a dot of spray paint. These are your actual corner points. Drive a piece of rebar at each mark and flag it. These stakes stay in the ground through excavation; your batter board strings can come down and go back up as many times as you need without losing your reference.
Laying out curves, irregular shapes, and obstacles
Not every patio is a rectangle. For a curved edge, run your string lines to establish the straight reference sides, then use a length of garden hose or rope to define the curve on the ground. Once you're happy with the shape, mark it with spray paint directly on the soil, then remove the hose. For a circular patio, drive a central stake and tie a string to it at the radius length. Walk around the stake keeping the string taut and spray paint as you go: you get a perfect circle every time.
For obstacles like downspouts, existing trees, or utility risers that fall inside your footprint, mark their positions on your sketch and decide whether you're working around them or accommodating them in the design. A small square cutout for a downspout base or a curved edge around a tree trunk are both manageable in the stakeout phase. The key is to mark them with spray paint now so you're not discovering conflicts at the excavation stage.
Troubleshooting uneven ground and sloped sites
A sloped yard makes the stakeout more involved but not more difficult once you understand what you're working with. On a site that falls away from the house, your outer edge strings will be lower than the inner strings by both the drainage slope and any additional ground drop. Use the laser level or water level to establish a consistent elevation around the perimeter before you start calculating excavation depths. On the low side, your base will be thicker to bring everything up to the finished surface plane; on the high side, you may need to cut down into the slope more aggressively.
On severely uneven ground, take spot measurements at several interior points inside the footprint (not just the corners) to understand the full range of cut and fill you're dealing with. I use a long straight 2x4 with a spirit level bridged between two interior hub stakes to check the rough grade across the middle of the site. This tells me where I need to excavate more and where I'm close to grade already. It's a simple trick that saves a lot of guessing once the excavation starts.
Common patio sizes and quick layout templates
Here are the diagonal measurements you need to check square for the most common DIY patio sizes. These numbers come straight from the Pythagorean theorem: if both diagonals of your rectangle match these values, your corners are exactly 90 degrees.
| Patio Size | Both Diagonals Should Measure | 3-4-5 Scale to Use |
|---|---|---|
| 10 x 12 ft | 15.62 ft (15' 7.5") | 6-8-10 works well |
| 12 x 14 ft | 18.44 ft (18' 5.3") | 6-8-10 works well |
| 12 x 16 ft | 20.00 ft (20' 0") | 12-16-20 exact triple |
| 14 x 20 ft | 24.41 ft (24' 5") | 9-12-15 recommended |
| 16 x 20 ft | 25.61 ft (25' 7.3") | 9-12-15 recommended |
Connecting your stakeout to the rest of the build
A clean, accurate stakeout is the foundation that every downstream step depends on. Once your strings are set and your corner hubs are in the ground, you move into excavation at the depths your strings tell you, compact and set your base layer, and install edge restraints at the perimeter defined by your layout. The string lines representing finished surface elevation guide your screed rails for the bedding sand, and the slope you built into those strings ensures your finished patio drains properly.
If you're planning to point or repoint mortar joints once the paving is laid, the accuracy of your surface plane from stakeout directly affects how consistent those joints will be. For the best way to point a patio, consult a concise step-by-step guide to pointing and repointing mortar joints. Uneven surfaces make pointing harder and the results less attractive. Equally, if you're relaying an existing patio that has settled or shifted, the stakeout phase is your chance to re-establish a correct level and slope before any slabs go back down. If you're relaying an existing patio, see our guide on how to relay a patio for step-by-step instructions and tips to avoid common mistakes.
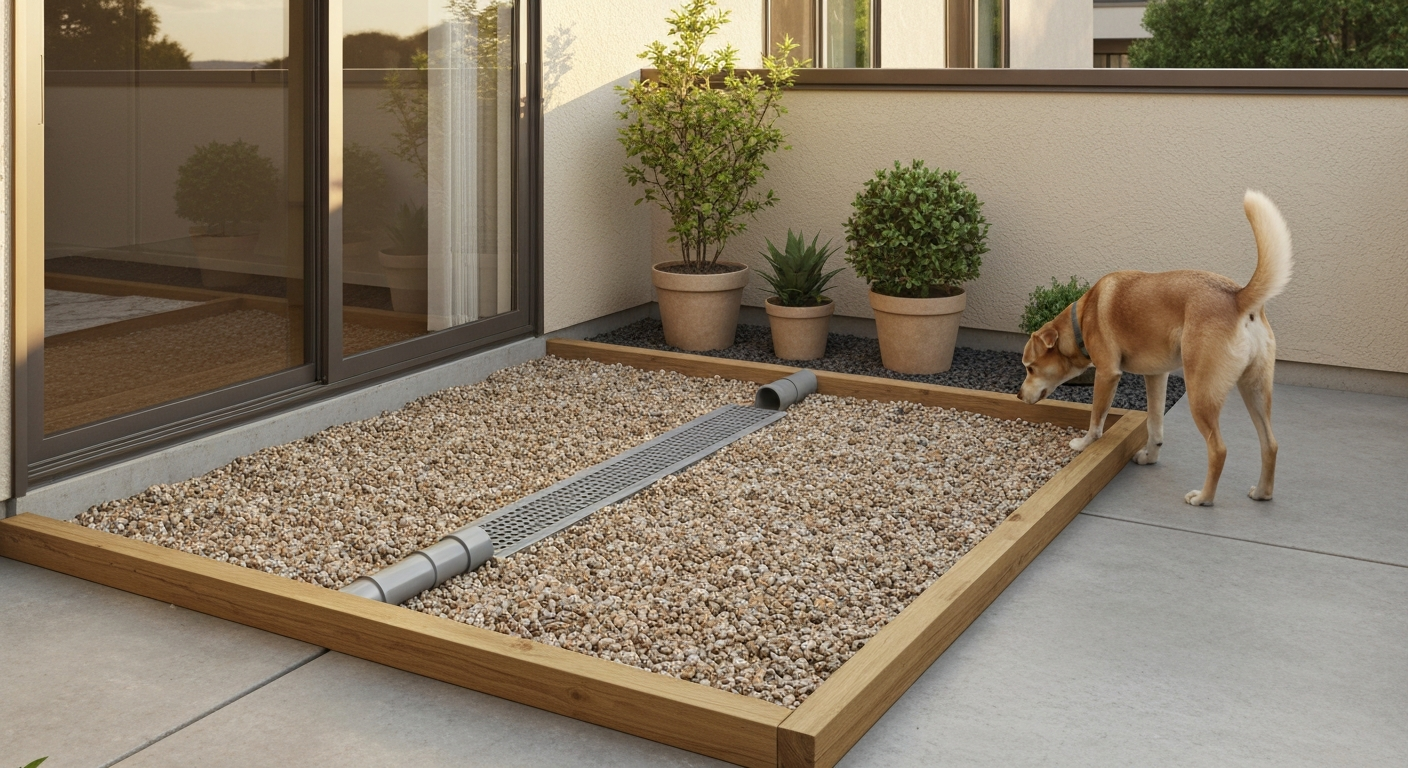
One thing worth thinking through during the layout phase: if you plan to incorporate a dedicated dog potty area or a decorative stencil section into the patio, mark those zones in the stakeout too. A dog potty corner benefits from slightly more aggressive drainage slope (the upper end of the 1/4–1/2 inch per foot range) and may need its own flush drain point, so knowing where it sits relative to your overall slope direction matters before you set any base. Similarly, if you're planning stenciled concrete sections, having consistent flatness across that zone is critical, and that flatness starts with a well-leveled string plane at the stakeout stage. For step-by-step instructions on creating decorative patterns, see our guide on how to make a patio stencil.
Quick troubleshooting before you break ground
- Strings keep slipping on batter boards: switch from tying to wrapping around a nail or screw driven into the top of the crossboard; nails give a fixed point strings can't slip past
- Diagonals won't match no matter how I adjust: check that all four strings are at the same height (elevation) relative to your slope reference; a string that sags or runs uphill throws diagonal measurements off
- Ground is too rocky to drive rebar: use a steel cold chisel and hammer to start the hole, or substitute a heavy-duty landscape spike; on very rocky ground a laser level is far easier than wrestling string levels
- Slope math puts the outer edge string underground: your site already slopes away more steeply than the 1/4" per foot minimum, which is fine; just keep the outer string at finished surface elevation and accept that the base depth at the inner (high) side will be shallower; verify you still have enough depth for your base layers
- Tree root network prevents driving stakes in planned corner location: move batter boards around the root zone and use a longer string run to bridge across; the corner hub can be a painted mark on the root itself if rebar won't drive in that spot
- Long string line sags noticeably in the middle: add a temporary support stake at the midpoint and rest the string on a small wood block; this is normal for any run over 12 feet
FAQ
Why is staking out a patio important before excavation and installation?
Staking defines exact patio shape, size, and finished elevations so you can excavate to the correct depth, set edge restraints, build a uniform base and ensure positive drainage away from structures. Proper staking prevents rework, keeps material quantities accurate, and lets you transfer grade and curve layouts to the finished surface.
What tools and materials do I need for staking a patio?
Concise checklist: 2×4 or 2×6 lumber for batter boards (1×4–1×6 crosspieces), 2×2 or 2×4 stakes, hammer, nails/screws, mason’s string, line level (small) and a tape measure (25–100 ft). Optional but recommended: rotary laser or rotating level with receiver, plumb bob, spray paint, steel rebar or survey pins for hub points, spray‑painted garden hose or flexible edging for curves, gloves, shovel and marking flags.
Step‑by‑step workflow to stake out a patio (overview)
1) Sketch the plan and mark rough footprint with spray paint. 2) Install batter boards: 2 boards per corner set 3–6 ft outside planned edges. 3) Tie mason’s string between batter boards to form perimeter lines. 4) Square the layout using 3‑4‑5 triangle or diagonal measurement and adjust strings. 5) Set finished grade on strings with a line level or laser (see slope rules). 6) Plumb string intersections to mark exact corner ground points and drive final corner stakes/rebar. 7) Mark curves/obstacles and note elevations; record string elevations so you can restore layout after excavation.
How do I square a rectangular patio accurately?
Use the 3‑4‑5 right‑triangle: measure 3 units along one side from a corner, 4 units along the adjacent side, then adjust until the diagonal between those points is 5 units. For larger scale, use 6‑8‑10. Alternatively measure diagonals across opposing corners and make them equal. Lock the batter boards/strings then re‑check diagonals after tensioning strings.
How do I set and check slope/grade for drainage? (rise/run examples)
Decide target slope depending on material: pavers/sand‑set—1.5%–2% (≈3/16"–1/4" per ft); concrete—1%–2% (≈1/8"–1/4" per ft); decks/composite—≈1% (≈1/8"/ft). Practical rise/run examples: across 8 ft: 1/8"/ft = 1.0" drop; 1/4"/ft = 2.0"; across 12 ft: 1/8" = 1.5"; 1/4" = 3.0". Use a rotary laser for long runs or a line level for short runs to set string elevations. Mark the string height on batter boards to preserve the reference.
Where should batter boards and strings be placed relative to the patio edge?
Place batter boards 3–6 ft (1–2 m) outside the planned edge and out of excavation area so they remain intact through site work. Strings attach to the crossboards. Final corner/hub stakes or rebar go at the exact planned edge—batter boards hold the reference so you can remove them and retie strings later to the same marks.
Next Article
How to Make a Patio Dog Potty: DIY Designs, Build Tips & Maintenance
Step-by-step plans to design and build a patio dog potty: sizes, drainage, DIY options, costs, maintenance, training.